6
LET’S GET STARTED WITH THE ASSEMBLY
The assembly of this structure is really easy and should not take too long.
Let’s start by putting the one side (A1) on your worksurface. The orientation as in the
diagram above should be achieved. Now glue in the nubs of the floor (B) and the ring
beam (C) into the slots of the side. Ensure that the engraving of the floor faces
upwards. The floor (B) fits into the lower slots and the ring beam (C) fits into the
higher slots. Before the glue sets you must glue in the lugs on the other side of the
floor (B) and beam (C) into the slots of the second side (A2). Apply some gentle
pressure to get a snug fit. Let the sub-assembled structure stand on your
worksurface and ensure that the structure is square and upright before the glue fully
sets. Allow the glue to fully sets before you proceed.
Next, we can assemble the column by gluing the nubs of the four sides (E 1-2) and
(F 1-2) into the slots of the base foundation (D). Turn your sub-assembled top
structure upside down on your worksurface. Proceed to glue the nubs on the other
end of the four sides in the slots on the underside of the floor (B). Apply some gentle
pressure to ensure a snug fit and that the structure is square and upright before the
glue fully sets. Leave the structure in the upside-down position till the glue is fully set.
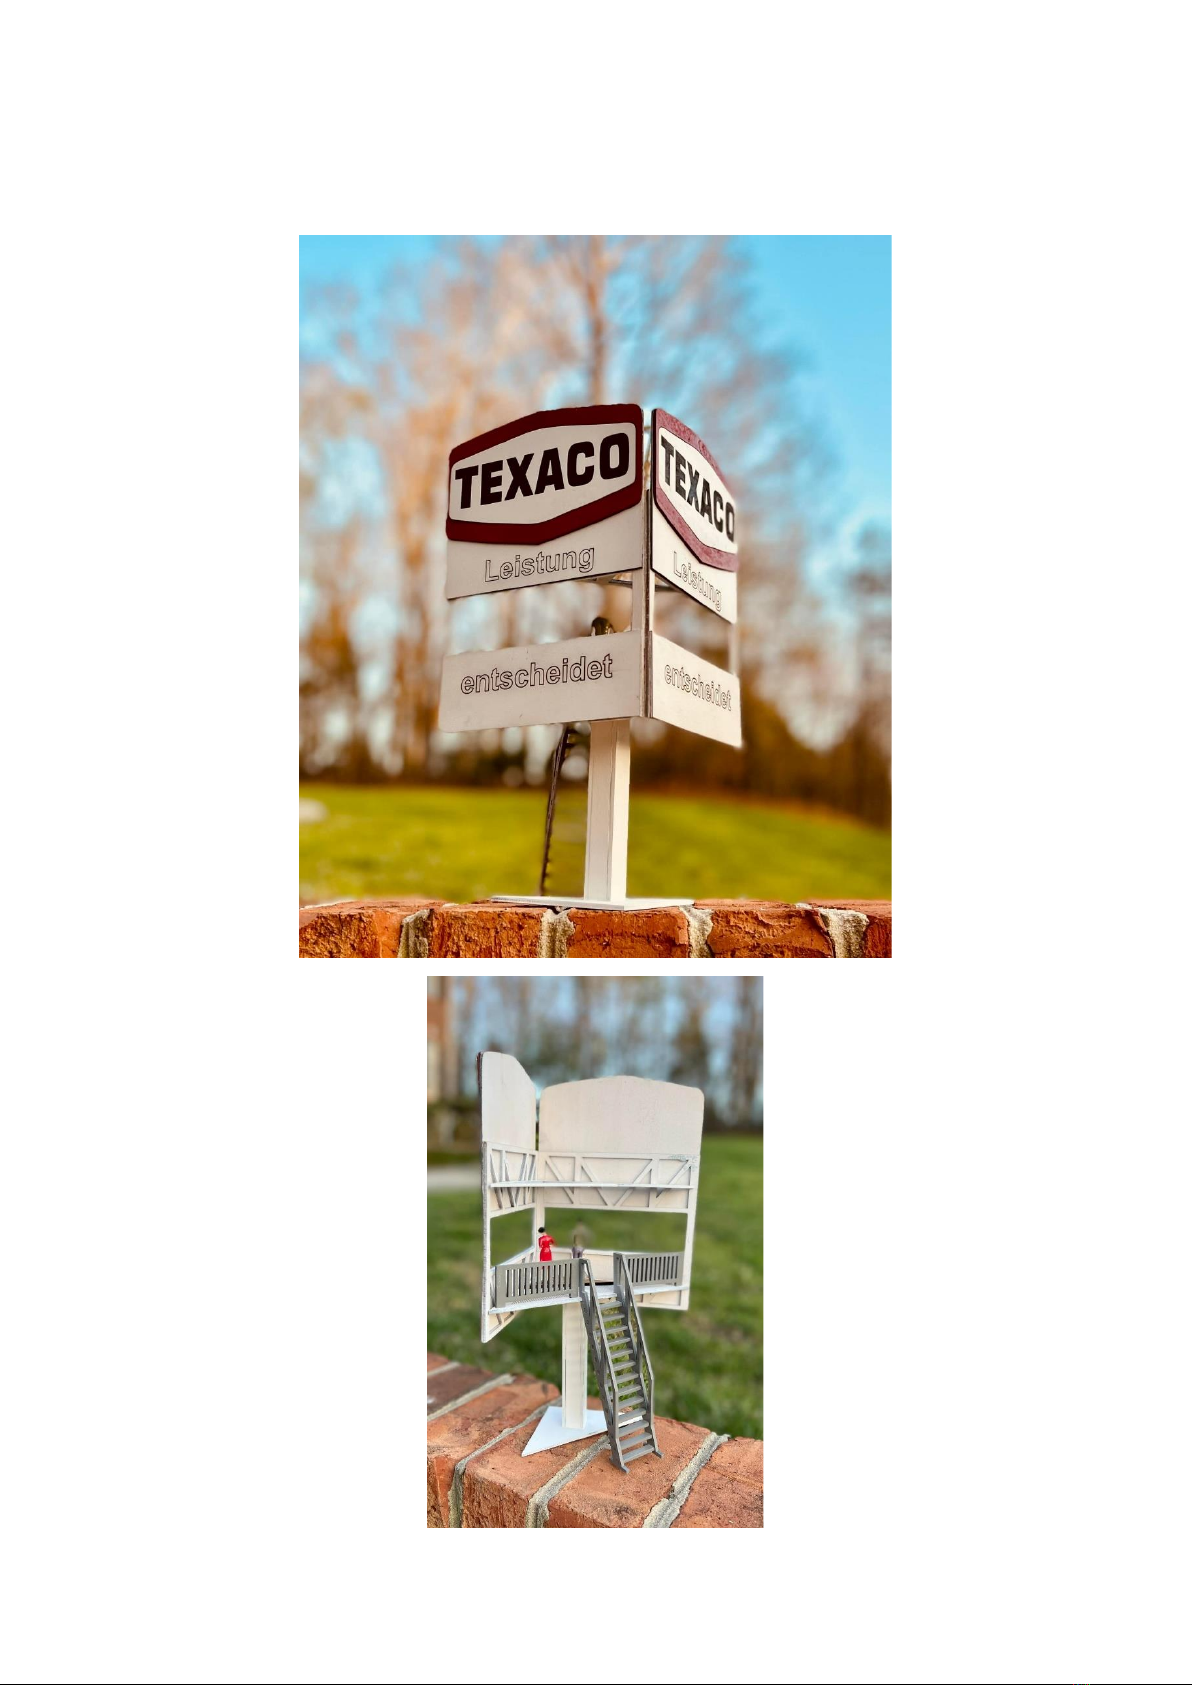
Next the lugs of the two safety railings (G 1-2) can be glued into the slots of the floor
(B). The four advertising boards (K 1-2) and (L 1-2) can be glued to the sides
(A 1-2). Have a look at the photo taken from the rear of the structure to get the
height of the boards correct. The artwork supplied will be glued to the higher boards
Lastly, we will assemble the ladder by gluing in the lugs of the ladder steps (J 1-13)
into the slots of the two legs (K 1-2). Put one side of the staircase (K1) on your work
surface and glue nubs on one side of the threads (J 1-18) into the slots in the side of
the staircase. Next, you can consider to fit all the lugs on the other end of the treads
loosely into the corresponding slots of the second side (K2) without applying any
glue. It should now be easy to remove one after the other nub, glue it and replace it
and then move on to the next one. It is advised to start from one end and work your
way to the other end by matching lugs and slots one by one, almost like closing a
zipper tooth by tooth. Once all the lugs are snugly into their matching slots, it is time
to apply some gentle pressure on the top side to ensure a snug fit. The ladder will fit
into the two recesses in the floor (B). It is recommended to glued in the ladder
because it will give your structure more stability.
Congratulations, you have successfully assembled the TEXACO Fan Platform.
FINISHING & BRANDING
We leave the finishing to your imagination and your taste. Do whatever you think will
transform this into a structure that will compliment your race track diorama. We have
included some pre-cut branding that can be used to finish your structure. We
recommend that you protect the branding with a clear spray.