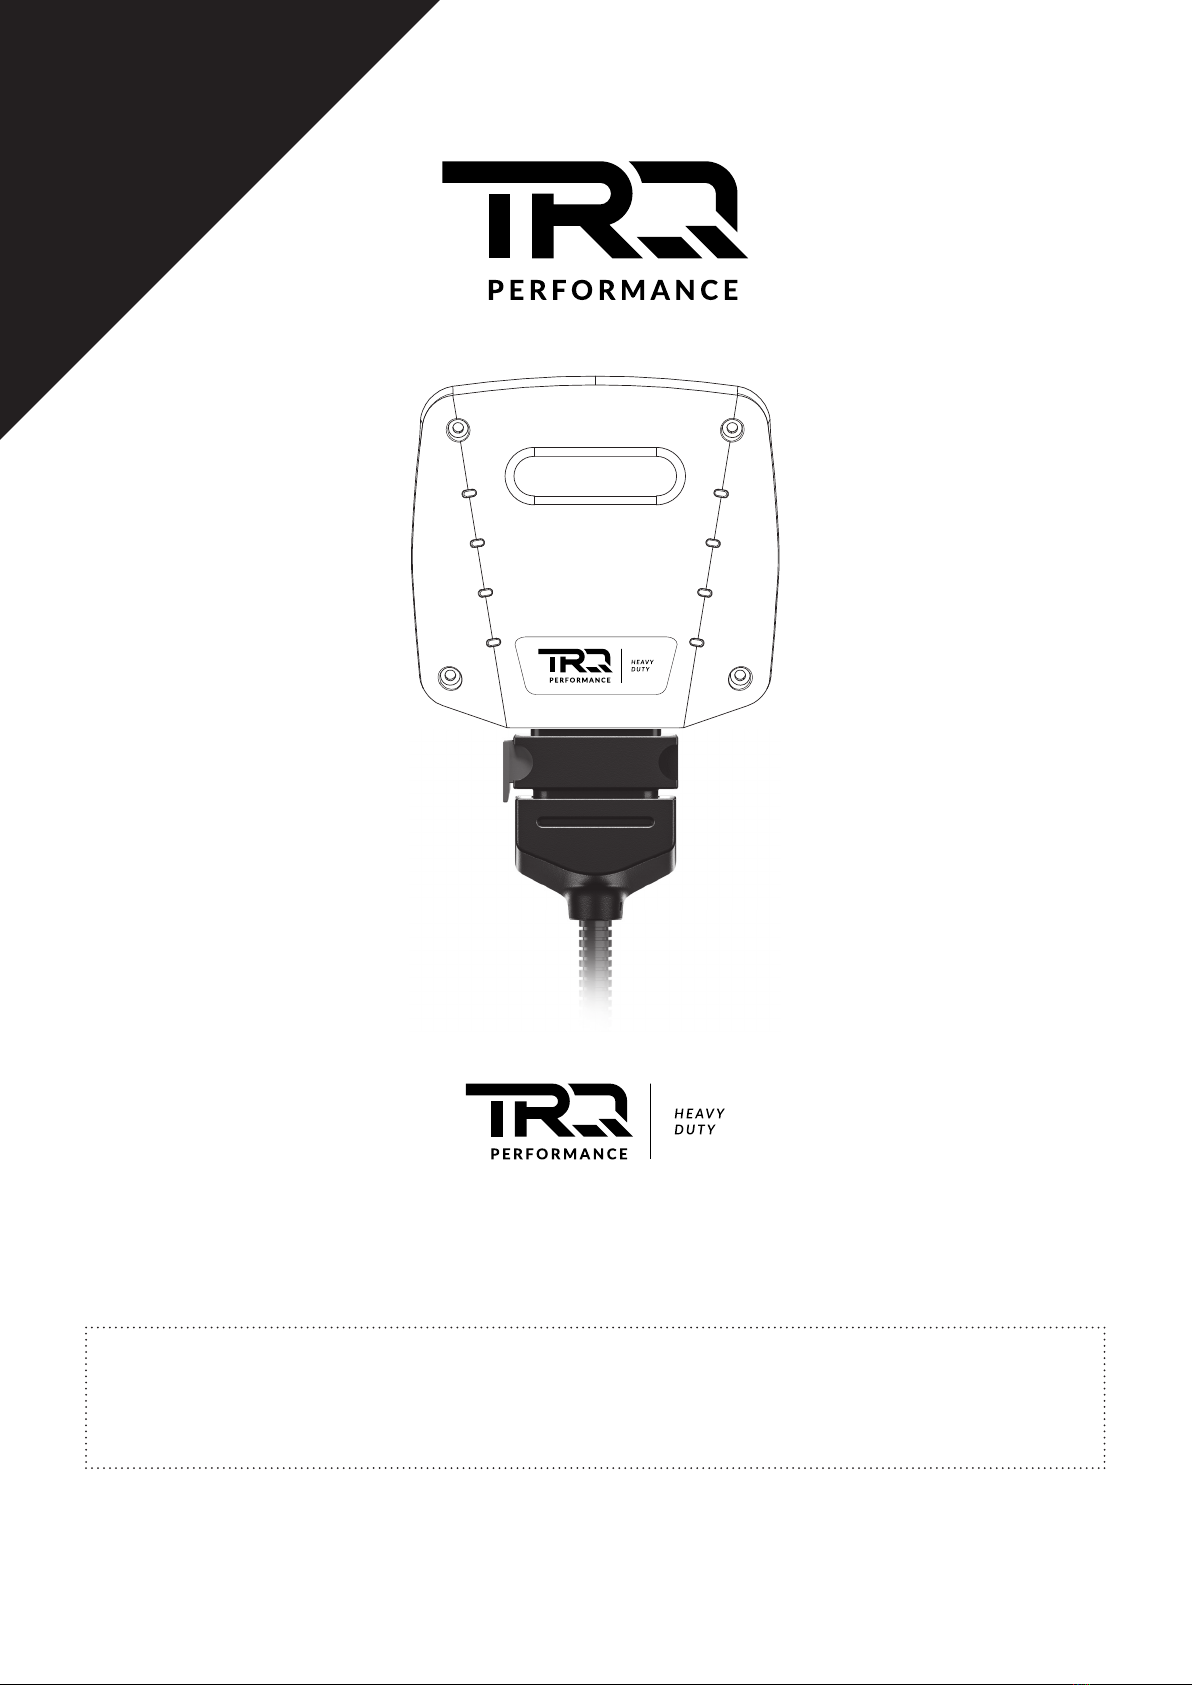
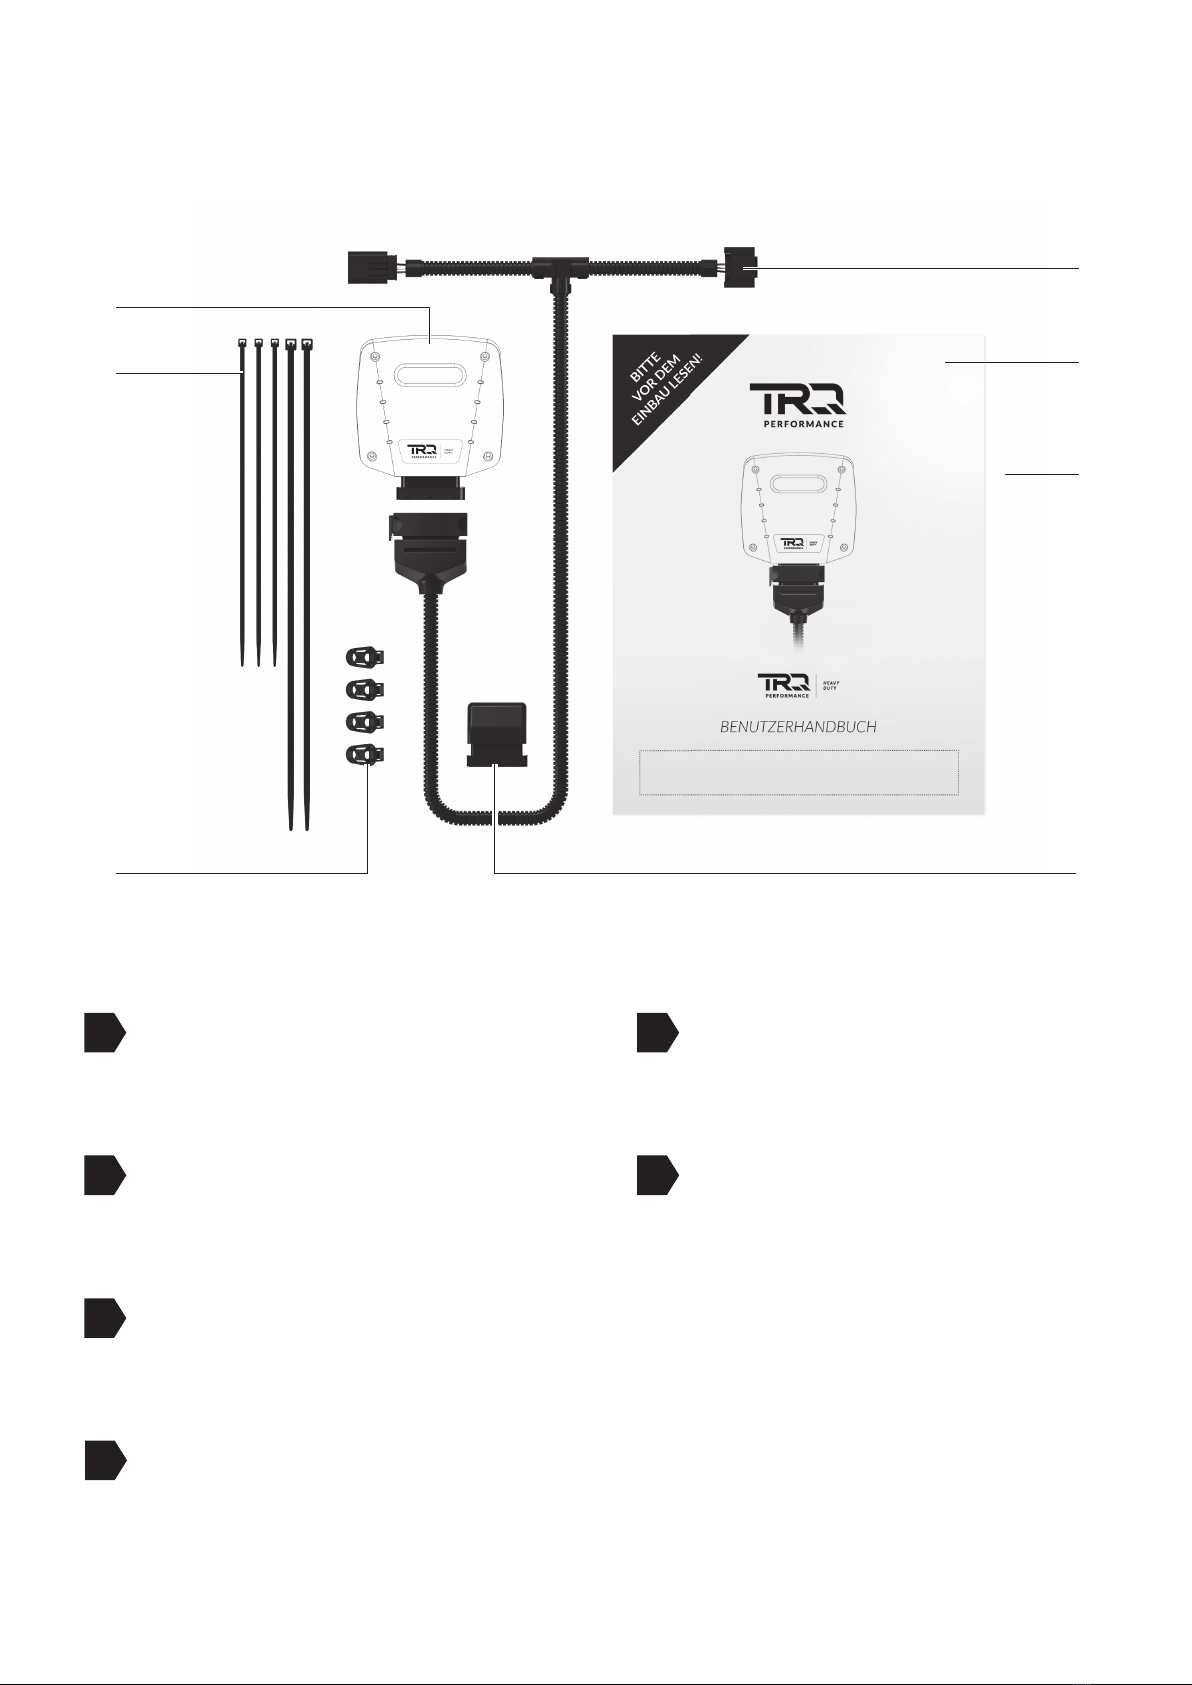
RaceChip TRQ Performance User manual

USER MANUAL
PLEASE
READ BEFORE
STARTING
INSTALLATION!

1 Scope of delivery���������������������������������������������������������������������������������������������������������������������������������������������A
2 Overview of the TRQ module ���������������������������������������������������������������������������������������������������������������������B
3 Installaon �������������������������������������������������������������������������������������������������������������������������������������������������������C
4 Fine tuning ������������������������������������������������������������������������������������������������������������������������������������������������������ D
5 Trouble Shoong ��������������������������������������������������������������������������������������������������������������������������������������������� E
6 Contact �������������������������������������������������������������������������������������������������������������������������������������������������������������� F
Contents
Overview and explanaon of symbols
Warnings and important informaon – please read!
General informaon on installaon and use
Tips to assist installaon and use

1 Scope of delivery
TRQ Module
calibrated specifi cally for your
vehicle
(1) Picture may diff er from delivered product.
A
A
Wiring harness
automobile-grade, compa ble
with your vehicle (1)
B
Cable e s
2 x long cable es
3 x short cable es
C
Fixing system Pro
4 x 360° fi xing clips
D
User Manual
installa on and opera on
F
Deac va on plug
returns your engine to stock tune
E
A
C
D E
G
F
B

2 Overview of the TRQ module
Digital User Interface for controlling
the TRQ .
A
+/- bu ons for changing the mapping
(see Fine tuning)
B
Power ON light; lights only when the
vehicle igni on is on and power is
being supplied to the TRQ.
C
Display showing mapping selected
(see Fine tuning).
D
Slot for 360° fi xing clips.
E
A
B
C
D
F
E
E
FCI plug for connec ng to the vehicle’s
wiring.
F
B

C
3 Installaon
Step 1 of 6
Before lng the cab
1. Apply the parking brake
2. Shi gearbox to neutral posion.
3. Turn o the engine.
4. Switch o the Addional heang or
staonary air condioning.
5. All loose objects (e.g. cans, boles, tools, bags
etc.) from the driver‘s cab.
6. Keep the area in front of the gear lever and in front of the cab clear for safety
reasons.
7. Close all doors and storage compartments in the cab.
8. Close all exterior hatches.
9. Addionally secure the vehicle against rolling away with wheel chocks.
10. Always lt the cab forward as far as it will go.
11. Please let the motor cool down before installing the TRQ module.
Otherwise there may be a risk of burns.
– Preparaon
Aenon Danger of injury!
• The cab can suddenly drop into the end posion when lng forward.
• Persons who are in the lng area of the cab can be injured. Only lt the cab if there
are no people in the pping area.
• Only stay under the cab area when the cab is fully lted.

C
3 Installaon
Generally speaking, you do not require special tools to perform the installaon. If you
need a tool, we will tell you when you get to the relevant step in these instrucons. You
will probably nd wire cuers useful for clipping o the loose ends of cable es.
• If an alarm system is ed: disable the alarm before starng installaon.
• If you have any quesons or dicules during the installaon, please refer to Trouble
Shoong for hints and ps.
• Our Customer Service is of course always ready to help. See Contact for details.

C
3 Installa on
Approximate posi on of
the plug connec on
Step 2 of 6 – Loca ng the plug connec on

C
3 Installaon
1
Common rail connecon
• First locate the common rail sensor connecon in your engine bay.
• The common rail sensor connecon is located either at one of the ends of or
centrally on the common rail and can be clearly idened by the large union nut.
• The best way to nd the common rail itself is by following the injecon lines. These
always lead directly from the injecon system to the cylinders, i.e. they can be traced
back from the engine block.
Setup illustraon
Cable with disconnected
stock plug
Common rail connecon
Common rail
connecon
Step 3 of 6 – Connecon to common rail sensor
Cable from the
TRQ module

C
3 Installaon
• Disconnect the plug from the common rail sensor
• Now connect the end of the TRQ wiring harness to the disconnected connector and the
other end to the sensor
If you experience dicules disconnecng the common rail sensor, see Detaching
the Connector Correctly (separate document) for assistance.
Make sure that the plug’s locking clip engages again. You should hear a sharp
CLICK.
2
3

C
3 Installa on
12
3
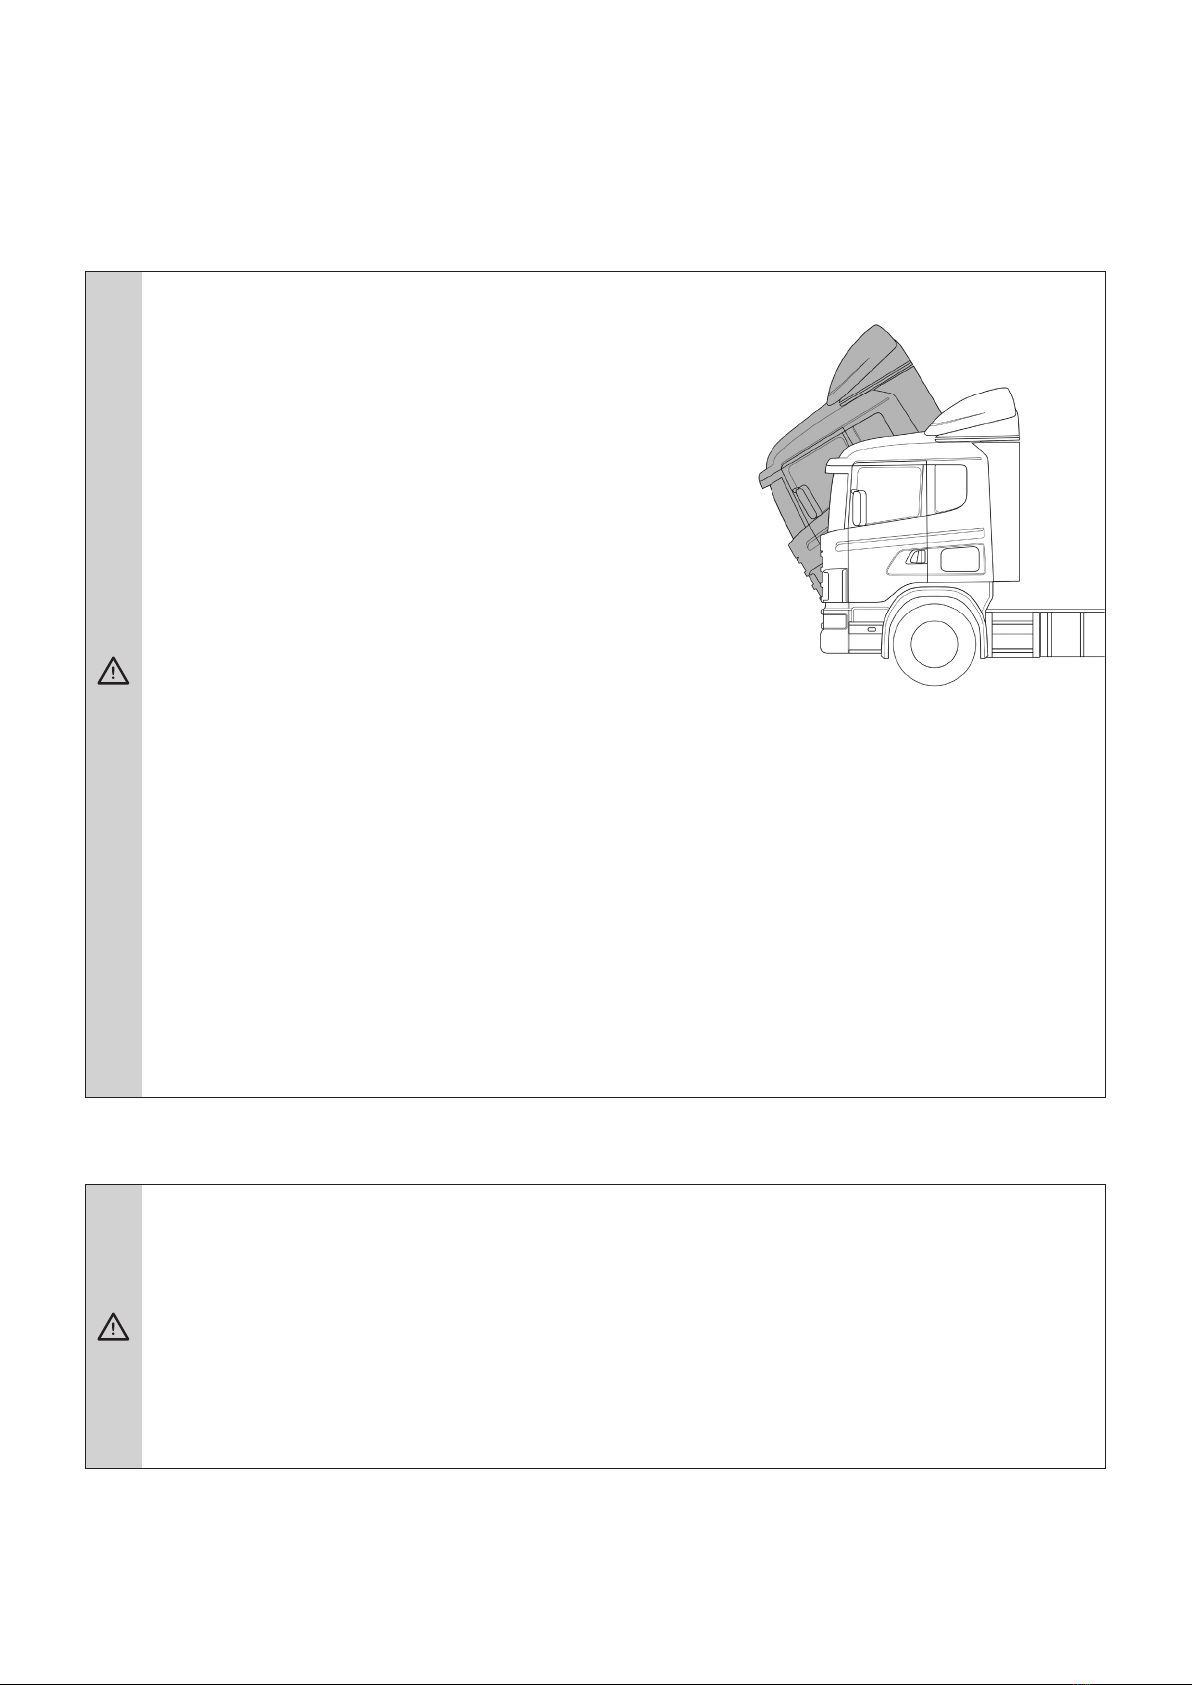
Disconnect the deac va on plug
from the wiring harness
Connect the TRQ module
Carrying out func on test
• If your car will not start as normal, please refer to Trouble Shoo ng for hints and ps
• Our Customer Service is of course always ready to help. See Contact for details
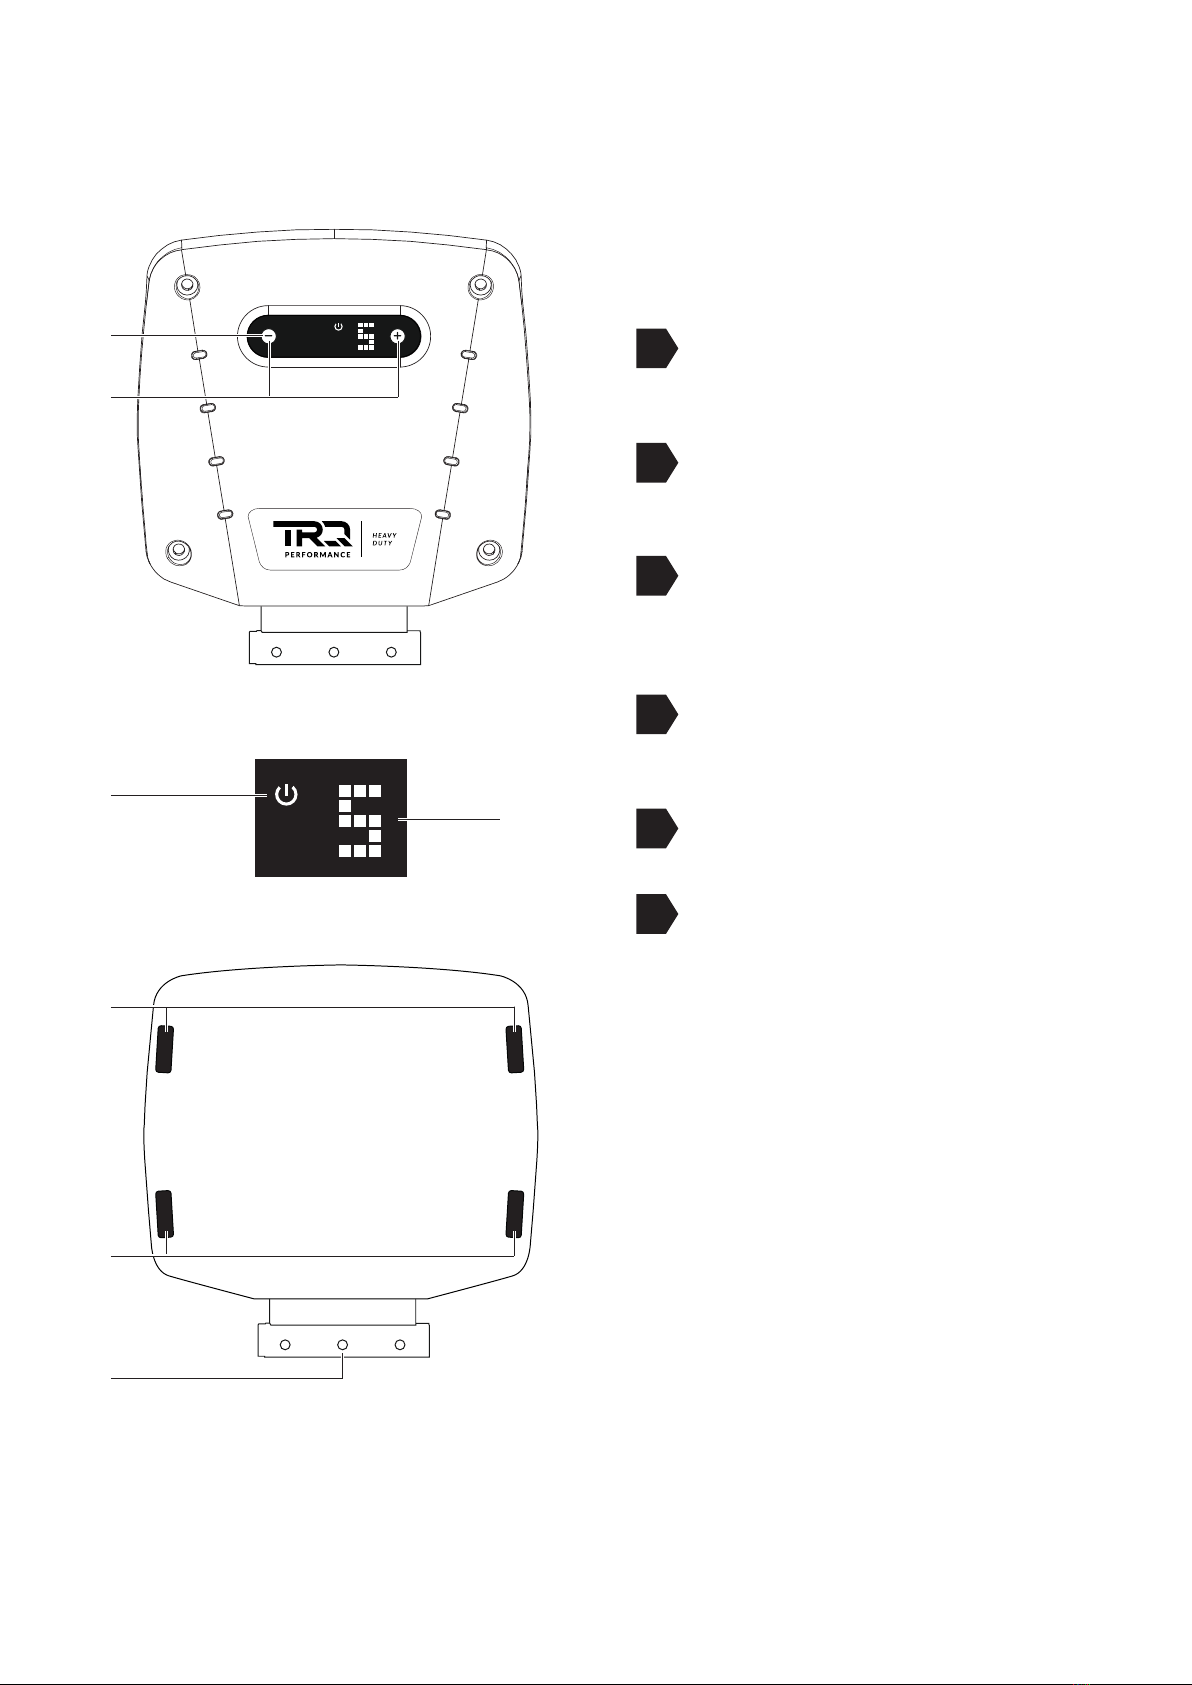
Step 4 of 6 Connec ng the TRQ module and fi rst func on test
• If the Digital User Interface lit up as soon as it was connected, this means that there
was s ll power in the system during the installa on.
• In some cases, this can lead to an error message during the rst func on test. Please
refer to Trouble Shoo ng for a solu on
• Posi on the TRQ module and the wiring harness safely in the engine bay. Do not x
anything in place yet.
• Switch the igni on on DO NOT start the engine.
• Check for the following:
- Control lights on the dashboard light up and go out as normal
- The Power ON light on the Digital User Interface of your TRQ lights up (see
Overview of the TRQ module).
• If all the above happens, you can start the engine. It should start as normal and should
react to the thro le when idling.
• Switch o the engine and igni on.

C
3 Installa on
1 2 3
• Before xing the TRQ module in place in the engine bay, ensure that the wiring harness can
also be routed and xed securely without pu ng it under excessive tension.
• Use the 360° xing clips included to x the TRQ module and thread the cable es through the
xing clips to hold the wiring harness in place.
* CLICK *
• If you need to remove the TRQ module at a later date, you can simply release the clips
and do not have to cut any cable es.
Step 5 of 6 – Fixing TRQ module and wiring harness
• Route the cable along a suitable path (for example, along exis ng wiring harness) and then
fasten it using the supplied cable e
• When selec ng a fastening point, make sure that the TRQ module is protected from
exposure to water, heat, and vibra ons
• Do not wrap the TRQ module in an air ght bag as this can lead to a built up of
condensa on
• Do not route the cable in areas in your vehicle that become overly hot during
opera on (e.g. the exhaust system, turbocharger, etc.).
• Do not route the cable along movable parts
• Never fasten the cable onto hoses (e.g. a brake hose) as this could result in abrasion
Step 6 of 6 – Comple ng the installa on
• Take your car for a test drive. If you have any ques ons, do not hesitate to contact our
Customer Service department (see Contacts for details).

4 Fine tuning
The TRQ module has been calibrated specically for the engine in your car, and further
adjustment is generally not necessary in order to get the best performance. However,
performance tolerances or the condion of the engine somemes mean that ne tuning is
needed aer installing the TRQ module.
The Digital User Interface of the TRQ module (see Overview of the TRQ module) lets you carry
out the ne tuning yourself to get the best from your TRQ-enhanced engine.
Fine tuning may be necessary if the following occurs:
AEngine idles more roughly than in stock tune.
The ne tuning mappings can be changed using the +/- buons only when the
ignion is switched on but without the engine running.
• Mapping 5 is the factory seng.
• First acvate Mapping 1.
• Take your car for a test drive. If the engine performs as smoothly as you want, i.e. no
hesitaon or knocking, please acvate Mapping 2 and go for another test drive.
• If the engine sll performs as smoothly as you want, repeat the previous step.
• If the engine does not perform as smoothly as you want with one of the mappings, go back
to the previous mapping – this is the right one for your engine.
If your engine does not run smoothly with any of the mappings or if the engine control
light is permanently on aer making all the adjustments (and aer switching the
ignion o and waing 15 minutes), please contact our Customer Service (see Contact
for details).
Mapping step -1 Mapping step +1
Engine runs roughly, knocks or “pinks” under load, or the engine warning light comes on.
D

Mapping step -1 Mapping step +1
4 Fine tuning
Making the enhanced performance more noceable
The ne tuning mappings can be changed using the +/- buons only when the
ignion is switched on but without the engine running.
• Mapping 5 is the factory seng.
• First acvate Mapping 6.
• Take your car for a test drive. Acvate Mapping 7 only if you do not experience the
enhanced performance strongly enough.
• If the engine does not perform as smoothly as you want, acvate the next mapping down
the scale (e.g. from 6 to 5).
• Mapping 0 puts the engine into stock tune with the RaceChip installed.
• You can also use the deacvaon plug to return you car to stock tune without
having to remove the wiring harness. In order to use the deacvaon plug, you need
to remove the RaceChip from the wiring harness connector and replace it with the
deacvaon plug.
• Before replacing the RaceChip with the deacvaon plug, rst ensure that there is
no residual charge in the car’s electrics (see step 1).
If the driver does not experience the extra performance, it means the driver cannot feel
the dierence from stock tuning.
B
D

5 Trouble Shoong
If the TRQ module does not funcon as it should, you can nd some inial assistance here. If the
suggesons here do not solve the problem, please contact our Customer Service (see Contact).
Descripon of problem What to do
No extra performance
or performance not
noceable enough
I am not sased with the
performance level of my
vehicle.
• You can nd detailed instrucons on how to make the extra
performance more noceable in Fine tuning (secon B).
Knocking/ raling
The engine knocks or
rales (diesel engine)
more under load. It runs
less smoothly than in
stock tune.
• If you have the impression that your engine knocks or rales
more than in stock tune, please take the car for a few test
drives to be sure that your rst impression was right. On the
test drive, pay special aenon to the engine’s behaviour
under load – the TRQ module only works then.
• If your rst impression was right, you can nd detailed
instrucons on how to make the engine run smoothly again in
Fine tuning (secon A).
• If the knocking/raling is very noceable, you can carry out
the steps described in Fine tuning immediately.
Jolng
With the TRQ module
installed, my car jolts,
stuers or hesitates in
situaons where it did not
before.
• You can nd detailed instrucons on how to make the engine
run smoothly again in Fine tuning (secon A).
• If that does not cure the problem, please contact our
Customer Service; if you can describe the circumstances when
the problem occurs, our Customer Service can make further
adjustments.
Quality of gear shi
reduced
The shi behaviour and/
or the shi quality has
worsened since the
installaon of the TRQ
module. The gearbox
somemes cannot seem
to nd the right gear.
• Select the next lowest mapping
(see Fine tuning secon A). Repeat this procedure unl you
are happy with the gear shiing.
• If that does not cure the problem, please contact our
Customer Service; if you can describe the circumstances
when the problem occurs, our Customer Service can make
further adjustments.
E

5 Trouble Shoong
Descripon of problem What to do
Engine fault light or
other warning light
comes on and stays on
aer installing.
A warning light on
the dashboard comes
on and stays on aer
installaon.
or
EDC
• If a warning light (e.g engine fault light) comes on, it does
not automacally mean something is wrong with the engine.
The lamp can simply be a measure programmed by the
manufacturer to protect the engine; it can be triggered if
a cable is disconnected from a sensor when there was sll
power in the system, for instance. (One indicaon is if the
Power On control lamp (see Overview of the TRQ module)
lit up as soon as the wiring harness was connected; it should
light up only when the ignion is switched on). Please follow
the steps below carefully unl you have found the cause of
the warning lamp and xed it.
• De-install the TRQ module wiring harness to the point that
you can reconnect all the connecons in your car as they were
before you started installing the TRQ module. Lock the car and
wait ca. 30 minutes before starng the engine. If the warning
light sll stays on, stopping and restarng the engine several
mes or waing for even longer can somemes help.
• If the warning lights have gone out, you can re-install the
TRQ module. Make sure the ignion is o and wait at least
15 minutes before disconnecng the sensors. When the
installaon is complete, double check all the connecons to
ensure the connectors are joined correctly and ghtly. Please
connect the Deacvaon plug to the wiring harness and start
the engine again.
• If the warning lights do not come on, switch o the engine
again and wait for 15 minutes. You can now replace the
Deacvaon plug with the TRQ module and start the engine
again.
• If the warning lights come on again now, please contact our
Customer Service (see Contacts).
Soot generaon
My car produces (more)
soot since installing the
TRQ module.
• You can nd detailed instrucons on how to make the engine
run smoothly again in Fine tuning (secon A). The steps will
also help stop the engine producing excess soot.
E

5 Trouble Shoong
Descripon of problem What to do
Engine fault light comes
on aer a while and stays
on
Aer driving with the
TRQ module (including
acceleraon) for while, the
engine fault light comes
on and stays on.
• Please park your car and switch the engine o while leaving
the ignion on. Acvate Mapping 1 (see Fine tuning, secon
A) and then turn the ignion o. Lock the car and wait ca. 30
minutes before starng the engine again. If the warning light
does not come on again, you can follow the steps described in
Fine tuning (secon A) to acvate the right mapping.
• If the fault light is sll on, please acvate Mapping 0 or
replace the TRQ Module with the Deacvaon plug (supplied).
This returns your car to stock tuning. Lock the car and wait ca.
30 minutes before starng the engine again. Please contact
our Customer Service (see Contact) and tell them what you
see (warning is on/not on).
The car does not start
The car’s ignion does not
work aer installing the
TRQ module.
• Something probably went wrong during the installaon
procedure. Please follow the steps below to check that the
TRQ module is installed correctly.
• De-install the TRQ module wiring harness the point that you
can reconnect all the connecons in your car as they were
before you started installing the TRQ module. (You can leave
the wiring harness in the engine bay; the important thing
is that it is not connected to the vehicle electrics). Lock the
car and wait ca. 30 minutes before trying to start the engine
again.
• If the car starts, you can re-install the TRQ module. Make sure
the ignion is switched o and wait at least 15 minutes before
disconnecng the sensors in the engine bay. Aer installing
the TRQ module, double check that all the connectors are
correctly and rmly xed. Go through all the steps described
in Installaon again. Finally, start the engine.
• If the car sll does not start, please contact our Customer
Service (see Contacts).
E

5 Trouble Shoong
Descripon of problem What to do
No noceable fuel
savings
I do not noce any fuel
savings
• Make sure you are comparing before-and-aer fuel
consumpon based on the vehicle’s actual consumpon – on-
board computers oen display incorrect values.
• It is important that your driving style remains the same, i.e.
you do not accelerate harder or drive fast more oen than
before. You will not see any fuel savings either if you oen
drive at or near maximum load – you need to adopt an
economical driving style at least some of the me in order to
save fuel.
• If your driving style matches the descripon but you sll
do not see any fuel savings, please select the next highest
mapping (see Fine tuning, secon B). Aer selecng a new
mapping, check the actual consumpon to see if there has
been any reducon.
E

6 Contact
Our Customer Service is ready to help!
Find out how to contact us at:
www.trq-performance.com/service-support
Please have your customer details close by when
you contact us.
RaceChip Chiptuning GmbH & Co. KG
Ulmer Str. 123
73037 Göppingen
Germany
Sales tax idencaon number: DE 260672432
Registered at District Court of Ulm: HRA 721734
Tax number: 63079/11153
Personally liable partner:
RaceChip Chiptuning Verwaltungs GmbH
Chief execuves: Dominic Ruopp, Dirk Bongardt
Head oce: Ulmer Str. 123, 73037 Göppingen, Germany
Registered at HRB District Court of Ulm: HRB 724254
Legal noce
F
Table of contents
Other RaceChip Automobile Accessories manuals