C
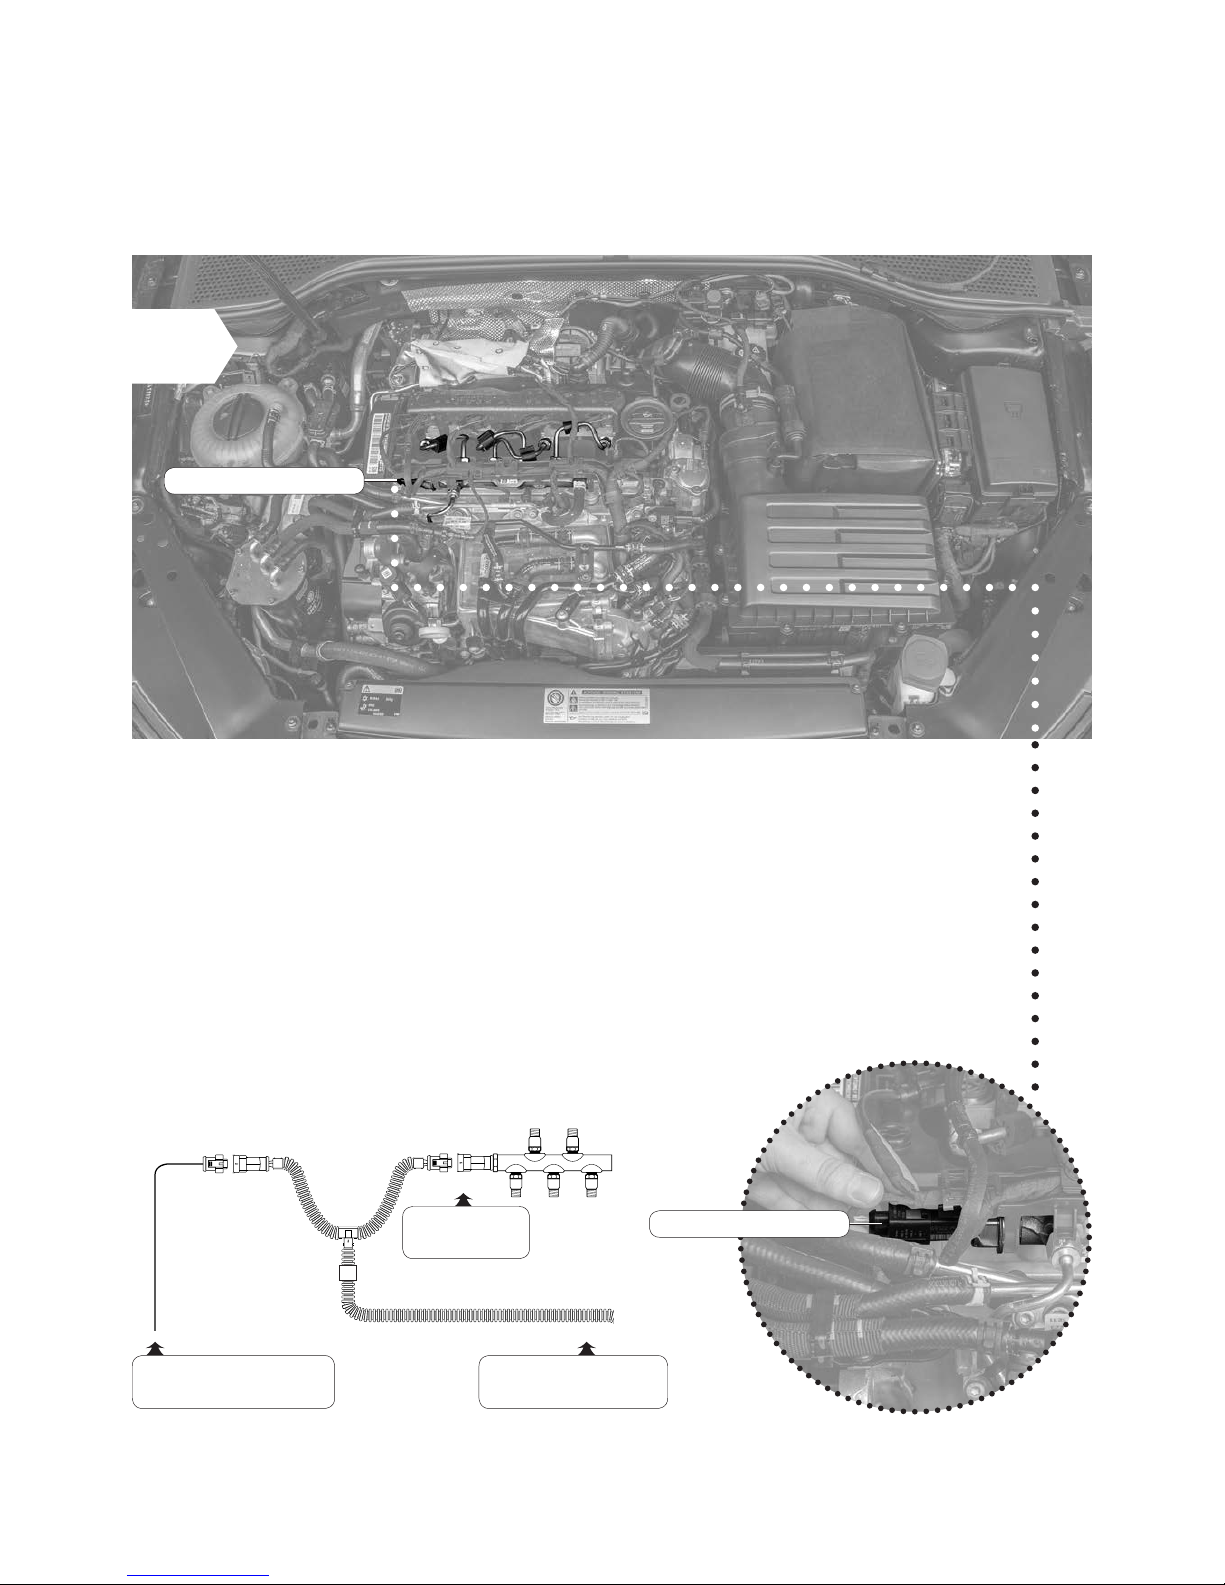
3 Installation
Step 1 of 7
1
2
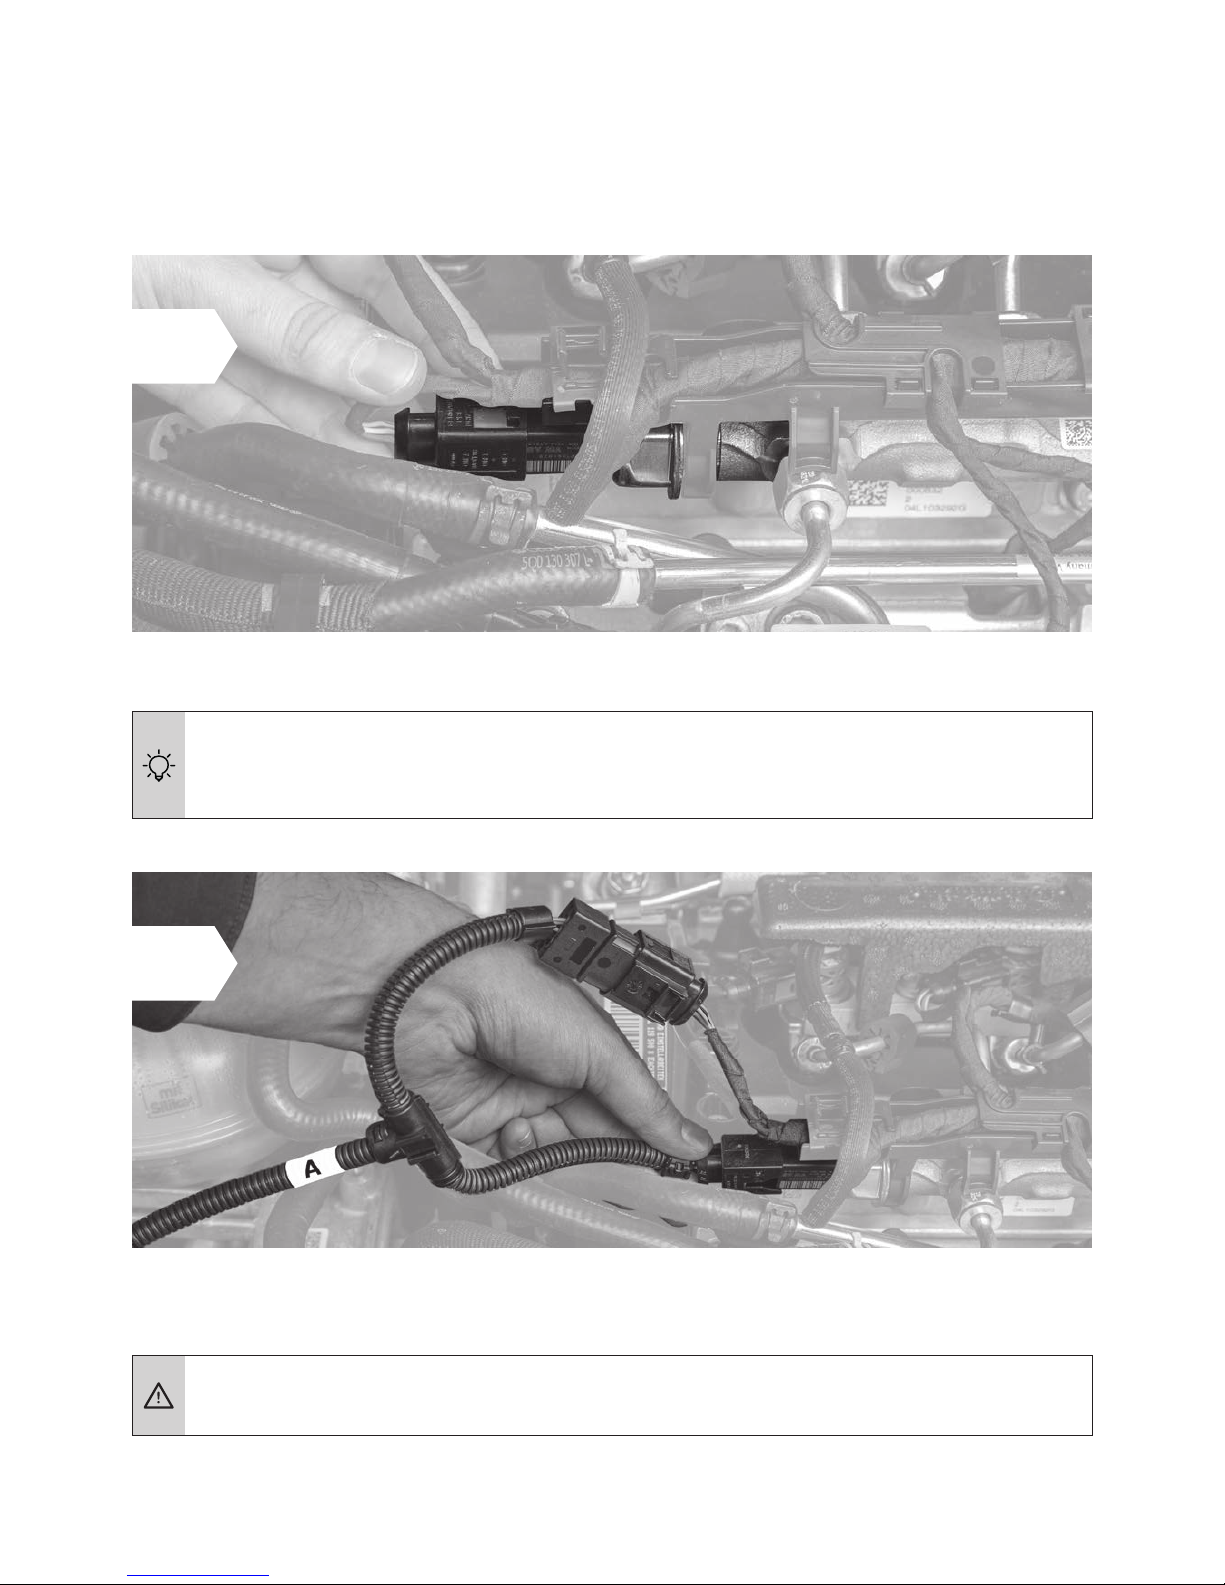
– Preparation
Before installing the RaceChip, please wait for your engine to cool down. Otherwise
there is a risk of sustaining burns.
Open your vehicle’s bonnet, and close and lock the doors.
Wait about 10 minutes before starting Step 2, as all current consumers must have
switched themselves off.
Generally speaking, you do not require special tools to perform the installation. If you
need a tool, we will tell you when you get to the relevant step in these instructions. You
• For cars with “Keyless Go”: after locking the car, place the key out of signal range
(about 10 m from the car).
• If an alarm system
• Some cars will not lock completely if the bonnet is open and electrical consumers
are still active. If this is the case with your car, push the bonnet catch over manually,
do not forget to release the catch again by pulling the bonnet release lever.
•
Trouble Shooting for hints and tips.
• Our Customer Service is of course always ready to help. See Contact for details.