RADEMACHER 2696 User manual

Item no.: 3100 00 14
VBD 549-2 (05.21)
ReWiSo 2696
Instruction manual for the electrical connection and for commissioning
EN

2
ENDear Customer,
i
...Congratulations on purchasing the ReWiSo, you have opted for
a quality product manufactured by RADEMACHER. Thank you for
the trust you have placed in us.
This manual...
...describes how to install, connect and operate the ReWiSo.
Before you begin, please read this manual through completely and follow
all the safety instructions.
This manual is part of the product. Please store it in an easily accessible place.
When passing the ReWiSo on to a third party, this manual must be passed on as well.
Damage resulting from non-compliance with this manual and the safety instructions
will void the warranty. We assume no liability for any consequential damage.
Key to symbols
i
Danger of fatal electric shock
i
This sign warns of danger when working on electrical connections, components, etc.
It requires that safety precautions be taken to protect the life and health of the person
concerned.
This concerns your safety.
Please pay attention and follow all instructions marked with this symbol.
This symbol warns of malpractices that can result in personal injury or property
damage.
NOTE/IMPORTANT/CAUTION
This is to draw your attention to information that is important for trouble-free operation.

3
ENContents
i
Dear Customer, ...........................................2
This manual.................................................2
Key to symbols...........................................2
Contents......................................................3
Description..................................................4
Included in delivery.......................................4
Instructions for commissioning .....................4
Connection and control possibilities .............4
Available automatic functions in overview....5
Operation.....................................................6
Button assignment and display symbols
on the weather data display..........................6
Display of brightness and wind velocity........7
Manual operation..........................................8
Setting the automatic functions ...............9
Calling up the automatic settings:.................9
A Brightness for the sun shading ............11
B Extension delay....................................12
C Retraction delay...................................12
D Indoor temperature lock.......................13
E Outdoor temperature lock ....................14
F Wind alarm...........................................15
Table: Wind velocity .............................16
G Rain alarm............................................16
H Saving the automatic settings..............17
Basic setting .............................................18
Calling up the basic settings:......................18
1. Radio connection to the weather
station ..................................................20
2. Rotation direction of the motor.............21
3. Running direction.................................22
4. Travel command in the event of a wind
or rain alarm............................................23
5. Transmission of the weather and
automatic data .....................................24
6. Sun shading position............................25
6.1. Retracted position ........................26
6.2. Setting the desired position..........26
6.3. Slat angle .....................................27
7. Saving the basic settings .....................27
Safety instructions for automatic
and alarm functions .................................28
Installation and commissioning..............29
Installation of the weather station
and connection of the drive.....................30
Location......................................................30
Fitting the bracket.......................................30
Preparation of the weather station..............31
Connection of the power supply and drive....32
Installation of the weather station...............33
Notes on installation of the weather station... 34
Installation of the operating unit.............34
Notes on radio systems...........................34
Commissioning.........................................35
Checking the sensors ..............................36
Checking the sun sensor............................36
Checking the wind sensor ..........................36
Checking the rain sensor............................37
Checking the temperature sensors.............37
Service / maintenance and care..............38
Weather station ..........................................38
Operating unit.............................................38
Inserting batteries (operating unit)..............38
Error messages ..........................................39
Calling up service data ...............................41
Factory settings........................................41
Abbreviations............................................42
Technical specications ..........................42
Radio technology........................................42
Operating unit.............................................42
Weather station ..........................................42
Weather station connection diagram .....43
View of the rear panel and weather station
drilling pattern..............................................44
View of the rear panel and operating unit
drilling pattern ............................................ 45
Control of several drives as a group ......46
Personal setting data for automatic
mode..........................................................46
Simplied EU declaration of conformity... 46
Warranty terms and conditions...............47

4
ENDescription
ReWiSo has been developed for automatic control and convenient manual operation
of an awning or Venetian blind. The controller has a very high degree of exibility for
connection and adjustment and can therefore be adapted individually to dierent instal-
lation conditions. Please use this operating manual to adapt the automatic functions
to suit your requirements.
Included in delivery
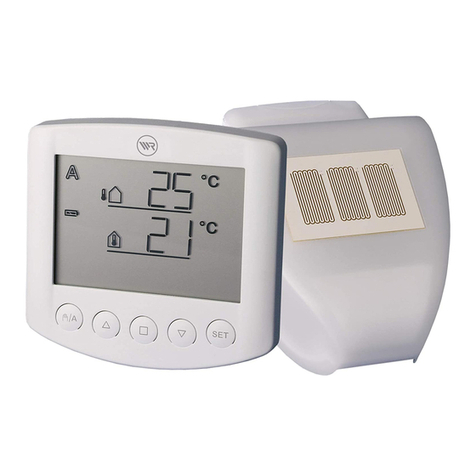
ReWiSo consists of a weather station and operating unit. Batteries (2x) to power the
operating unit are included.
Instructions for commissioning
Installation, testing, commissioning and troubleshooting on the controller may
only be carried out by a qualied electrician (according to VDE 0100).
Proceed as follows to commission the controller:
1. Carry out the mechanical installation and electrical connection (see the section
“Installation and commissioning”)
2. Carry out the basic setting (see the section “Basic setting”)
3. Adjust the automatic functions (see the section “Adjusting the automatic functions”)
Connection and control possibilities
An awning or Venetian blind drive can be connected to the controller. If several awnings
or Venetian blinds are to be controlled together, connection via a group control relay
is possible.
The following environmental parameters are measured and displayed:
uIndoor and outdoor temperature - energy-saving function
uBrightness
uWind velocity
uPrecipitation
i

5
EN
Available automatic functions in overview
uShading according to sun intensity with extension and retraction delay
uExtension to a programmed position in the case of adjustable Venetian blinds also
with setting of the slat angle
uBlocking of sun shading until a preselected indoor temperature is reached
(heat containment, only in automatic mode - energy-saving function)
uRetraction of sun shading below a preselected outdoor temperature
(frost protection, only in automatic mode)
uRetraction of sun shading above a preselected wind velocity
(wind alarm, function can be deactivated)
uRetraction of sun shading in the event of rain
(rain alarm, function can be deactivated)
The awning or Venetian blind is retracted in automatic mode below the preselected
brightness value or in the event of a rain or wind alarm. Wind and rain protection
functions are active also in manual mode if they have been set in automatic mode.
Description
i

6
ENOperation
Button assignment and display symbols on the weather data display
In the normal function, the operating unit of the controller displays the current outdoor
temperature (top line) and indoor temperature (bottom line), as well as the operating
mode (automatic or manual), the battery charge state and current alarm message for rain
or wind. The weather data is refreshed once a minute (and when a button is pressed).
Outdoor temperature
Indoor temperature
- Full (battery symbol displays the charge state of the battery)
- Half-full
- Empty
Automatic
mode
Manual
Battery
Manual/
Automatic
Up Stop Down Setting
Outdoor
temperature
Indoor
temperature
Rain alarm
Wind alarm
i

7
EN
Operation
Automatic mode active
Manual mode active. The connected drive was operated manually (with the
arrow buttons) or the button was pressed. The automatic functions are
thus deactivated and the awning or Venetian blind is not controlled according to
brightness or temperature. The safety functions ‘Rain alarm’ and ‘Wind alarm’
remain active. The controller remains in manual mode until it is switched to
automatic mode with the button.
Rain alarm. Outdoor awnings are retracted, manual operation is blocked.
The rain alarm function can be activated and deactivated in the automatic
settings (e.g. for indoor awnings or Venetian blinds).
Wind alarm. Outdoor awnings or Venetian blinds are retracted, manual operation
is blocked. The wind alarm function can be activated and deactivated in the
automatic settings (e.g. for indoor awnings).
Display of brightness and wind velocity
Press the SET button once briey while the temperature is displayed to display the
current brightness (in kilolux, kLux) and wind velocity (in metres per second, m/s).
The values are refreshed every 4 seconds.
Note: The wind velocity is not correctly displayed during the rst approx. 90 seconds
after the power is restored to the weather station (e.g. after a power failure or during
commissioning). Manual operation is therefore blocked during this period if the wind
alarm is active.
Pressing SET again briey recalls the temperature display (or the central command
display, see next section). The temperature is also displayed again automatically after
approx. 60 seconds.
i

8
EN
Operation
Manual operation
Manual control, pre-setting of the automatic functions and the basic setting of the
connected sun shading are performed with the buttons on the operating unit.
Up Stop Down
The connected awning or Venetian blind can be operated by hand using the buttons ,
and . The arrow buttons have an automatic timer function. Pressing the buttons
briey (less than 1 second) allows the awning or Venetian blind to be exactly positioned.
If the button is held depressed for longer than 1 second, the drive automatically runs
up to the end position. Pressing stops the drive.
If the rain or wind alarm is active, manual operation is blocked.
Manual/Automatic
The button switches back and forth between automatic mode (display )
and manual mode (display ). If the controller is operated manually using the ,
or buttons, it is then in manual mode. The automatic functions are then
deactivated and the awning or Venetian blind is not controlled according to brightness
or temperature. The button can be used to switch the controller back to automatic
mode (display ).
Pressing the SET button briey calls up the brightness and wind velocity display.
Holding the button depressed calls up the setting mode for the automatic functions and
the basic setting. For further details, see the section “Setting the automatic functions”
or “Basic setting”.
i

9
EN
In order that the awning or Venetian blind provides optimum sun shading, the values
for automatic mode have to be adapted to the conditions on site. The following settings
can be made in turn:
A. Brightness for the sun shading
B. Extension delay
C. Retraction delay
D. Indoor temperature lock
E. Outdoor temperature lock
F. Wind alarm
G. Rain alarm
H. Memory
Calling up the automatic settings:
Press the SET button in the weather data display for at least
3 seconds to call up the automatic settings.
You are in the automatic settings as soon as the two and symbols
appear on the left of the display. The rst parameter to be set (brightness)
is displayed.
Setting the automatic functions
i

10
ENSetting the automatic functions
You can exit the automatic settings at any time by pressing the button. The changes
made to the values are then not saved.
If no button is pressed in the automatic settings for 5 minutes, the display automatically
switches back to the temperature display. Changes to settings are again not saved.
You are in
the automatic
settings
Exit Conrm/
Next
+ -
i

11
ENA. Brightness for the sun shading
In the automatic settings, rst enter the brightness above which the sun shading
should be extended.
The sun intensity is displayed in kilolux (kLux). The value 1 kLux is achieved even with
an overcast sky, 20 kLux is achieved when the sun is just coming out and 100 kLux
is achieved with a cloudless sky at midday.
The default setting for the brightness is 40 kLux.
Adjust the value with (higher) and (lower) or select (o) to deactivate
the function. If is selected, no control by brightness takes place. The following
automatic parameters (sections B to E) are then skipped. In this case the sun shading
can be operated manually and is protected against wind and rain (if the alarm function
has been activated, see the sections “F. Wind alarm” and “G. Rain alarm”).
Press SET to proceed to the setting of the next parameter.
i

12
EN
After setting the brightness, now enter the delay time for the extension of the sun
shading.
B. Extension delay
This delay ensures that the sun shading does not constantly extend and retract in the
event of rapidly changing light conditions.
The default setting for the extension is 1 minute. The brightness must therefore lie above
the entered set value (point A of the automatic settings) continuously for 1 minute
before the sun shading is extended. The sun shading therefore reacts quickly to sun.
Adjust the value with (higher) and (lower). Then press SET to proceed to the
setting of the next parameter.
After setting the extension delay, now enter the delay time for the retraction of the
sun shading.
C. Retraction delay
The default setting for the retraction
is 12 minutes. The brightness must
therefore lie below the entered set
value (point A of the automatic settings)
continuously for 12 minutes before the
sun shading is retracted. Passing
clouds are “masked” in this way.
i
i

13
EN
C. Retraction delay
Adjust the value with (higher) and (lower). Then press SET to proceed to the
setting of the next parameter.
After setting the retraction delay, now enter the indoor temperature below which
the extension of the sun shading is to be blocked.
D. Indoor temperature lock
i
Using the indoor temperature lock, you can use the heat of the sun to achieve the desired
room temperature (e.g. in the winter - energy-saving function). The sun shading only
extends in the sunshine when the value is exceeded. The indoor temperature lock
is active only when the controller is in automatic mode. Manual operation of the sun
shading is still possible.
The default setting for the indoor temperature lock is 18° C.
Adjust the value with (higher) and (lower) or select (o) to deactivate the
indoor temperature lock. Then press SET to proceed to the setting of the next parameter.
i

14
EN
After setting the indoor temperature lock, now enter the outdoor temperature below
which the sun shading should not be moved.
E. Outdoor temperature lock
The outdoor temperature lock is important when sun shading is installed on the outside
of the building. In the event of frost, the awning or Venetian blind can freeze in the guide
rails. If the sun shading is then moved, it can be damaged. Note that the guide rails
or other mechanical parts may still be frozen even when the outdoor temperature has
already risen to quite high values. Ask your conservatory builder for the temperature
limit for your sun shading.
If your sun shading can still operate even at low temperature or if it is installed on the
inside, deactivate the outdoor temperature lock (display ).
The outdoor and indoor temperature locks are only active in automatic mode.
Operation by hand is still possible. Therefore pay attention to possible freezing
when opening and closing the sun shading manually.
The default setting for the outdoor temperature lock is 5° C.
Adjust the value with (higher) and (lower) or select (o) to deactivate
the outdoor temperature lock. Then press SET to proceed to the setting of the next
parameter.
i

15
EN
After setting the outdoor temperature lock, now enter the value for the wind alarm
function.
F. Wind alarm
The wind alarm protects outdoor sun shading against damage. If the entered wind value
is exceeded, the awning or Venetian blind is retracted and manual operation is blocked.
The wind velocity is entered in m/s (metres per second). The wind alarm is maintained
for 5 minutes. If the set wind value is exceeded again within these 5 minutes, the holding
time starts again.
The following table (see next section) contains reference values for setting the wind
alarm. Depending on the location of the conservatory and the installation position of the
weather station, dierent wind values may be optimal for protecting the sun shading.
Observe the behaviour of the awning or Venetian blind in windy weather and correct
the wind value accordingly.
The default setting for the retraction in windy weather is 4 m/s.
Adjust the value with (higher) and (lower) or select (o) to deactivate
the function. Then press SET to proceed to the setting of the next parameter.
i

16
EN
Table: Wind velocity
Description m/s km/h Beaufort Knots
Calm < 0.3 < 1.1 0 < 1
Almost calm 0.3 - 1.5 1.1 - 5.4 1 1 - 3
Very light wind 1.6 - 3.3 5.5 - 11.9 2 4 - 6
Light wind 3.4 - 5.4 12.0 - 19.4 3 7 - 10
Moderate wind 5.5 - 7.9 19.5 - 28.4 4 11 - 16
Fresh wind 8.0 - 10.7 28.5 - 38.5 5 17 - 21
Very fresh wind 10.8 - 13.8 38.6 - 49.7 6 22 - 27
Strong wind 13.9 - 17.1 49.8 - 61.5 7 28 - 33
Very strong wind 17.2 - 20.7 61.6 - 74.5 8 34 - 40
Storm 20.8 - 24.4 74.6 - 87.8 9 41 - 47
Heavy storm 24.5 - 28.4 87.9 - 102.2 10 48 - 55
Hurricane-like storm 28.5 - 32.6 102.3 - 117.3 11 56 - 63
Hurricane > 32.6 > 117.3 12 > 63
F. Wind alarm
After setting the wind alarm, now select whether or not the rain alarm is to be activated.
The rain alarm protects outdoor sun
shading, particularly cloth awnings,
against damage. If the rain alarm is
triggered, the sun shading is retracted
automatically and manual operation
is blocked.
The rain alarm is maintained for
5 minutes. If rain is detected again
within these 5 minutes, the holding
time starts again.
In the default setting, the rain alarm is activated (display ). Use the arrow buttons
to select between activated (display ) and deactivated (display ). Then press
SET to save the settings.
iG. Rain alarm
i

17
EN
At the end of the input of the automatic settings, (Save) is displayed to prompt
saving of the entered settings.
H. Saving the automatic settings
Press the SET button to save your inputs and return to the weather data display.
Press to exit the automatic settings without saving.
i

18
EN
During commissioning of the controller, the basic device settings are entered here.
The following settings can be made in turn:
1. Radio connection to the weather station
2. Rotation direction of the motor
3. Running direction
4. Travel command in the event of a wind or rain alarm
5. Transmission of the weather and automatic data
6. Sun shading position
7. Save
Calling up the basic settings:
Press the SET button in the weather data display for at least 3 seconds
to call up the automatic settings.
You are in the automatic settings as soon as the two and symbols
appear on the left of the display.
Then press SET button again for at least 3 seconds to call up
the basic settings.
You are in the basic settings as soon as the symbol appears on the
left of the display and the rst setting step (radio connection) is displayed.
Basic setting
i

19
EN
You can exit the basic settings at any time by pressing the button. The changes
made to the settings are then not saved.
If no button is pressed in the basic settings for 5 minutes, the display automatically
switches back to the temperature display. Changes to settings are again not saved.
Basic setting
You are in
the basic
settings
Edit Exit Conrm/
Next
i

20
EN
The rst step is the teach-in (or later also clearing) of the radio connection.
1. Radio connection to the weather station
The teach-in may only be carried out by a qualied electrician as the programming
button is inside the weather station.
Select the desired step with the button:
(Continue) to skip this step,
(Learn) to learn a radio connection to the weather station,
(Clear) to delete an existing radio connection.
Conrm your selection with the SET button.
When you have conrmed (Learn) with the SET button, the radio symbol stops
ashing and the radio waves are animated (they “run”).
Now press the orange programming button inside the weather station to learn the
radio connection. (An overview of the PCB can be found in the section “Preparing the
weather station”.)
Learning was successful when the LED next to the programming button ashes
twice briey and the display switches to step 2 of the basic settings (rotation direction
of the motor).
If you conrm (Clear) with the SET button, the radio connection is cleared.
The display jumps automatically to (Learn) to enable a new connection to be
taught-in.
i
Table of contents
Other RADEMACHER Control Unit manuals