manuals.online logo
Brands
  1. Home
  2. •
  3. Brands
  4. •
  5. Radial Engineering
  6. •
  7. Music Equipment
  8. •
  9. Radial Engineering JS-3 User manual

Radial Engineering JS-3 User manual

JS•3 SPECIFICATIONS
Frequency response 10Hz to 40kHz +/- 1dB
Max 20Hz input level +2.0dBu (1% THD)
Phase distortion +2.8° @ 20Hz
Total harmonic distortion 0.001% THD @ 1kHz (0.05% @ 20Hz)
Common-mode rejection 130dB @ 60Hz (96dB @ 3kHz)
Input Balanced 600-Ohm, mic-level, pin-2 hot
Outputs Balanced 600-Ohm, mic-level, pin-2 hot
Input pad -30dB
Power requirement None, completely passive
Size 3.25” x 5” x 1.875”
Weight 2 lbs.
96 7 8
INPUT PANEL
1. -30dB PAD Allows line-level
sources to connect to the JS•3’s
input.
2. Mic input For low impedance
microphone signals.
3. Direct-1 thru 600 ohm mic-
level direct output will pass
phantom power to microphone.
4. Bookend design 14 gauge
steel outer shell creates protective
zone around connectors and
switches.
5. Full-bottom no-slip pad This
provides electrical isolation and
plenty of "stay-put" friction to
keep the JS•3 in one place.
OUTPUT PANEL
6. Isolated output-2 600 ohm
mic-level transformer-isolated.
7. Ground lift (isolated-2) Lifts
the ground pin-1 on the isolated-2
XLR output connector.
8. Isolated output-1 600 ohm
mic-level transformer-isolated.
9. Ground lift (Isolated-1) Lifts
the ground pin-1 on the isolated-1
XLR connector.
CONSTRUCTION
10. Steel I-beam enclosure
eliminates stress that could
torque the PC board and cause
solder joint failure.
11. Military-grade double-sided
PCB with plated through-holes is
bolted to welded steel standoffs.
12. Jensen transformer offers
outstanding audio performance.
13. Sturdy PC mounted switches
are high-cycle rated for long life.
www.radialeng.com
JS•3
3-Way Microphone Splitter
Users Guide
True to the Music
1 52 3 4
10 11 12
13
Radial Engineering
1638 Kebet Way, Port Coquitlam BC V3C 5W9
Tel: 604-942-1001 Fax: 604-942-1010
email: [email protected]
Radial Engineering is a division of C•TEC (JP CableTek Electronics Ltd.)
Radial Twin-Iso users guide V1.0 - Part #: R870 1060 00
Subject to change without notice
RADIAL ENGINEERING 3 YEAR LIMITED WARRANTY
RADIAL ENGINEERING (a division of J.P. Cabletek Electronics Ltd.) warrants this product
to be free from defects in material and workmanship to the original owner and will remedy
any such defects free of charge according to the terms of this warranty.
Radial will repair or replace (at its option) any defective component(s) of this product
(excluding batteries, finish and wear and tear on components under normal use) for a
period of three (3) years from the original date of purchase. In the event that a particular
product is no longer available, Radial reserves the right to replace the product with a similar
product of equal or greater value.
To make a request or claim under this limited warranty, the product must be returned prepaid
in the original shipping container (or equivalent) to Radial or to an authorized Radial repair
center and you must assume the risk of loss or damage. A copy of the original invoice
showing date of purchase and the dealer name must accompany any request for work
to be performed under this limited warranty. This limited warranty shall not apply if the
product has been damaged due to abuse, misuse, misapplication, accident or as a result
of service or modification by any other than an authorized Radial repair center.
THERE ARE NO EXPRESSED WARRANTIES OTHER THAN THOSE ON THE FACE
HEREOF AND DESCRIBED ABOVE. NO WARRANTIES, WHETHER EXPRESSED
OR IMPLIED, INCLUDING BUT NOT LIMITED TO, ANY IMPLIED WARRANTIES OF
MERCHANTABILITY OR FITNESS FOR A PARTICULAR PURPOSE SHALL EXTEND
BEYOND THE RESPECTIVE WARRANTY PERIOD DESCRIBED ABOVE OF THREE
YEARS. RADIAL SHALL NOT BE RESPONSIBLE OR LIABLE FOR ANY SPECIAL,
INCIDENTAL OR CONSEQUENTIAL DAMAGES OR LOSS ARISING FROM THE USE
OF THIS PRODUCT. THIS WARRANTY GIVES YOU SPECIFIC LEGAL RIGHTS, AND
YOU MAY ALSO HAVE OTHER RIGHTS, WHICH MAY VARY FROM STATE TO STATE
OR PROVINCE TO PROVINCE.
JS•3 User Guide
Radial Engineering JS•3 User Guide
Radial Engineering
USING THE JS•3
As with all Radial products, using the JS•3 is simple and straight ahead. Make
sure the sound system is turned off and all levels are set to zero before making
audio connections. This will avoid any pops in the sound system that could
cause damage to speakers.
Connect a microphone or line-level source to the MICROPHONE INPUT on
the JS•3. Connect the DIRECT-1 THRU output to the console that supplies
phantom power and then the ISOLATED-1 and ISOLATED-2 outputs to your
monitor console and recording systems. Both isolated outputs are identical
and electrically separate from each other. If you encounter noise, simply de-
press the ground lift switches.
If you are using the JS•3 with a line-level device such as a keyboard, CD
player or line mixer, depress the -30dB input pad. This will reduce the level
going into the transformer and eliminate transformer saturation .
Start by turning up your sound system slowly to test connections before driving
at full volume. You are now ready to go!
J-RAK
The optional J-RAK is a high density rackshelf for Radial DI’s and splitters.
It’s a 2RU rack chassis that allows up to 8 Radial devices in one neat 19”
package. The DI’s can be mounted with either the input side or output side
facing the front. Ideal for studio or touring. Constructed of 14 gauge steel with
a baked enamel fi nish.
J-CLAMP
The optional J-CLAMP can mount a single Radial
device to virtually any surface. Perfect for hiding
away inside racks, on podiums or under tables.
Constructed of 14 gauge steel with a baked
enamel fi nish.
JS•3 BLOCK DIAGRAM
DIRECT-1 output con-
nects to main console. This
console supplies phantom
power back to the mic.
ISOLATED-1 output
connects to second console.
ISOLATED-1 output
connects to second console.
ISOLATED-2 output
connects to a recording
device.
3-Way Microphone Splitting
WELCOME
Congratulations on your purchase of the Radial JS•3 mic splitter. This simple
yet extremely handy device will likely fi nd its way into all types of applications
such as splitting mic signals and distributing signals throughout your sound
system.
The Radial JS•3 is equipped with the world’s fi nest Jensen bridging trans-
former to ensure the audio signal is transferred and distributed without dis-
tortion and is built using the fi nest materials to ensure years of trouble-free
performance.
We have purposely written this manual to be short, as most users will likely be
familiar with the JS•3’s applications. We do suggest that you take a moment
to read through this document to familiarize yourself with the features that are
built in. For more detailed information, please visit the Radial website. This
is also where we post questions and answers that come from users after the
product is released. If you do not fi nd an answer, we invite you to send us an
email at [email protected] and we will do our best to answer your query in
a prompt and professional manner.
The Radial JS•3 is a wonderful device that will surely provide you with years
of problem-solving connectivity. Enjoy!
INTRODUCTION
Upon inspection, you will notice the Radial JS•3 is equipped with four XLR
connectors: the MIC INPUT connector; the DIRECT-1 THRU; the ISOLATED-
1 OUTPUT with ground lift switch and the ISOLATED-2 OUTPUT with ground
lift switch.
Normally, the source microphone connects to the MICROPHONE INPUT and
the DIRECT-1 THRU connects to the mixing console that supplies phantom
power back to the microphone. If the source is a line-level device such as a
CD player, the input pad should be engaged to ensure the signal does not
saturate the transformer, causing distortion. Note that the JS•3 will always
output a mic-level signal.
The JS•3’s isolated outputs will then feed a tape recorder, broadcast truck
or other PA system. The advantage of using the transformer-isolated output
is that it creates a magnetic bridge between the source and the destination,
thus eliminating any direct electrical current from passing. This eliminates
problems such as ground loops, which can cause buzz and hum in a sound
system. A ground lift switch is provided to disconnect the ground path between
the input and output to further suppress noise.
The JS•3 is completely passive. This means that it does not require a power
supply of any kind. The magic lies in the quality of the transformer we use.
Jensen transformers are famous for their exceptional signal handling and low
distortion. The JS•3 is equipped with a Jensen JT-MBD mic-bridging trans-
former that features a laminated nickel core and Faraday shield for optimum
signal transfer. You will fi nd the JS•3 to be transparent and very effi cient, mak-
ing it the perfect choice in professional installations.
JS•3 User Guide
Radial Engineering JS•3 User Guide

Radial Engineering
Other Radial Engineering Music Equipment manuals

Radial Engineering STUDIO Q User manual

Radial Engineering

Radial Engineering STUDIO Q User manual

Radial Engineering JDX Direct-Drive User manual

Radial Engineering

Radial Engineering JDX Direct-Drive User manual

Radial Engineering StageBug SB-2 User manual
Radial Engineering

Radial Engineering StageBug SB-2 User manual

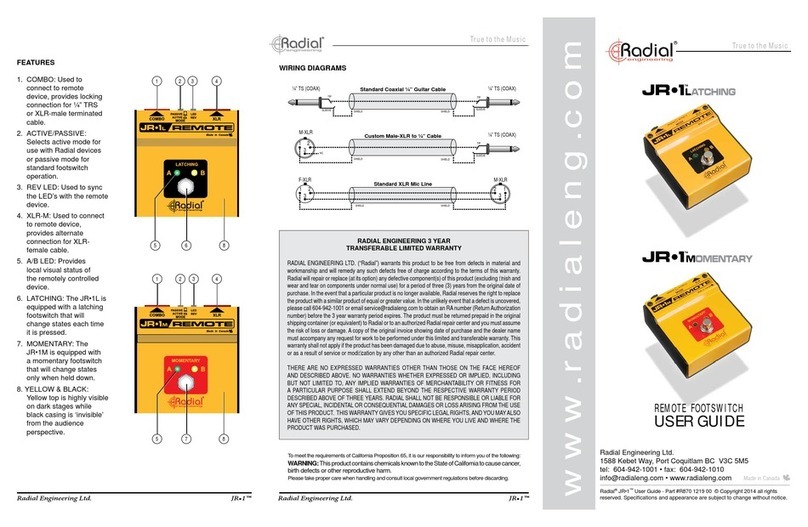
Radial Engineering JR-1L User manual

Radial Engineering

Radial Engineering JR-1L User manual

Radial Engineering Reamp JCR Studio reamper User manual
Radial Engineering
Radial Engineering Reamp JCR Studio reamper User manual
Radial Engineering Dragster User manual

Radial Engineering

Radial Engineering Dragster User manual

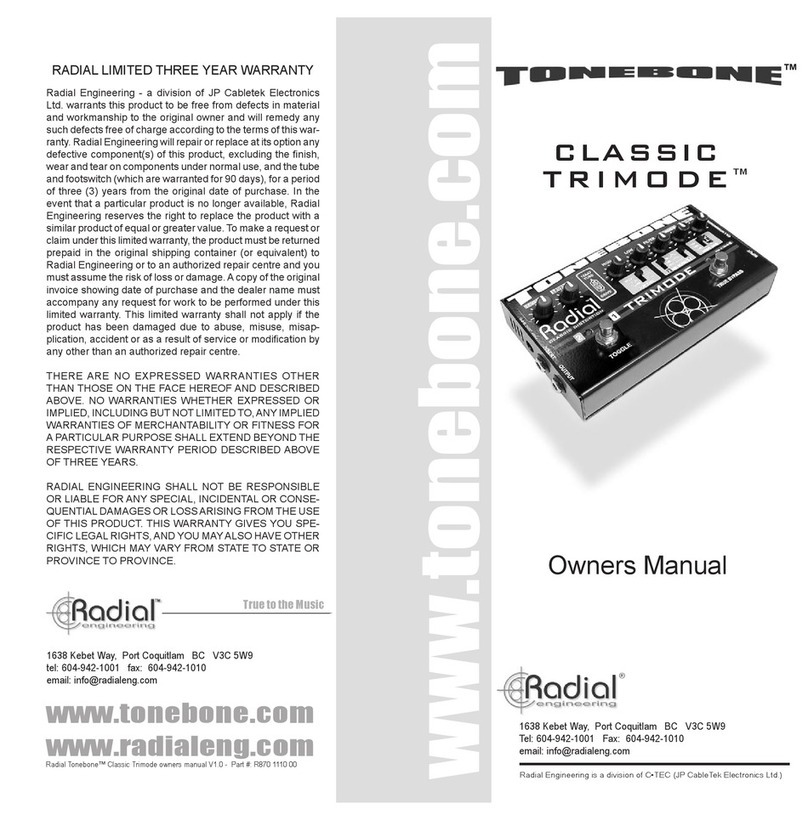
Radial Engineering CLASSIC TRIMODE TONEBONE User manual

Radial Engineering

Radial Engineering CLASSIC TRIMODE TONEBONE User manual

Radial Engineering PZ-DI User manual

Radial Engineering

Radial Engineering PZ-DI User manual

Radial Engineering ProRMP User manual

Radial Engineering

Radial Engineering ProRMP User manual

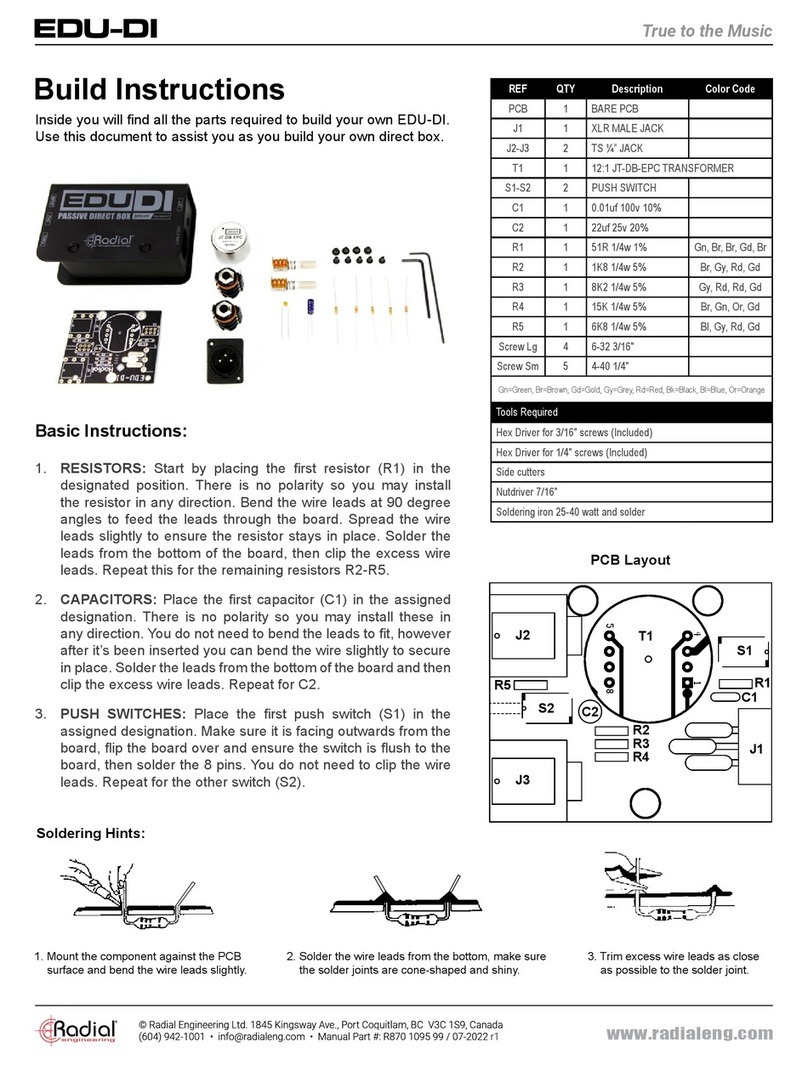
Radial Engineering EDU-DI Manual

Radial Engineering

Radial Engineering EDU-DI Manual

Radial Engineering X42 V2 User manual

Radial Engineering

Radial Engineering X42 V2 User manual

Radial Engineering StageBug SB-2 User manual

Radial Engineering

Radial Engineering StageBug SB-2 User manual

Radial Engineering SHOTGUN User manual

Radial Engineering

Radial Engineering SHOTGUN User manual

Radial Engineering Reamp X-Amp User manual

Radial Engineering

Radial Engineering Reamp X-Amp User manual

Radial Engineering Reamp HP User manual

Radial Engineering

Radial Engineering Reamp HP User manual

Radial Engineering STAGEDIRECT User manual

Radial Engineering

Radial Engineering STAGEDIRECT User manual

Radial Engineering Reamp EXTC Stereo User manual

Radial Engineering

Radial Engineering Reamp EXTC Stereo User manual

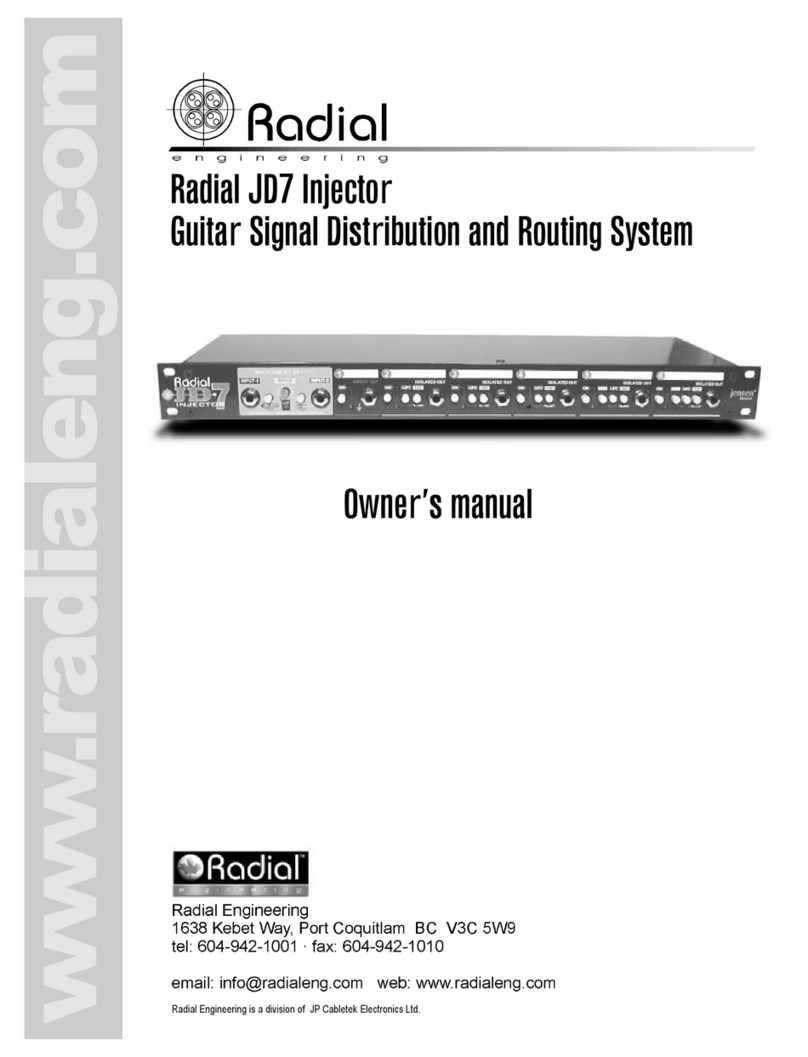
Radial Engineering JD7 Injector User manual

Radial Engineering

Radial Engineering JD7 Injector User manual

Popular Music Equipment manuals by other brands

AVGear AVG-MA1 user manual

AVGear

AVGear AVG-MA1 user manual

Akai MPD 32 Specifications

Akai

Akai MPD 32 Specifications

R.V.R. Electronica SDC200/RDS user manual

R.V.R. Electronica

R.V.R. Electronica SDC200/RDS user manual

Alesis airFX Service manual

Alesis

Alesis airFX Service manual

Roland AC-90 Acoustic Chorus user manual

Roland

Roland AC-90 Acoustic Chorus user manual

Millenium MPS-750X PRO user manual

Millenium

Millenium MPS-750X PRO user manual

Califone 6-Position Monaural Jack Box 1216AVPY Specifications

Califone

Califone 6-Position Monaural Jack Box 1216AVPY Specifications

K-array Kobra Bass KKS50 user manual

K-array

K-array Kobra Bass KKS50 user manual

TC Electronic FLASHBACK 2 X4 DELAY quick start guide

TC Electronic

TC Electronic FLASHBACK 2 X4 DELAY quick start guide

JLCooper Electronics MMC/9Pin+ Interface user manual

JLCooper Electronics

JLCooper Electronics MMC/9Pin+ Interface user manual

Burson AB160 user manual

Burson

Burson AB160 user manual

Roland DC-10 Service notes

Roland

Roland DC-10 Service notes

RCF MZ 8060 user manual

RCF

RCF MZ 8060 user manual

Whirlwind HotBox Quad overview

Whirlwind

Whirlwind HotBox Quad overview

Devialet Phantom user guide

Devialet

Devialet Phantom user guide

CubuSynth Engine Build guide

CubuSynth

CubuSynth Engine Build guide

innuos ZEN quick start guide

innuos

innuos ZEN quick start guide

JCF Audio PRELIMINARY JCN user manual

JCF Audio

JCF Audio PRELIMINARY JCN user manual

manuals.online logo
manuals.online logoBrands
  • About & Mission
  • Contact us
  • Privacy Policy
  • Terms and Conditions

Copyright 2025 Manuals.Online. All Rights Reserved.