Portable Assembly
RadiantOptics,Inc. Manual
“Providing Heat in the Cold”
HotZONE™
2001 Radiant Optics, Inc.
All Rights Reserved
Doc#: Port Manual
Theinformationsetforthonthesepagesisforyourconsiderationand
do not, in part or total, constitute a warranty or legal representation.
TheIRLensTM is patented inthe US #4841947, 4896656andabroad.
Radiant Optics
14522 NE Woodinville Way #107
Woodinville WA 98072
Step 2. Insert thescrewthroughthe twoholes and
threadthe nutontothescrew.
Step 3. Positionthehandle evenlywith thelegspro-
trudingbelow thebottom ofthemainenclosureand
tightenthe screws.(Figure 4)
Step 4. Slidetherubber trim ontotherear
support.
Step 5. Insertone endofthe wirerodinto theholein
thetabof the corner clippushingit in as far asitwill
go.Flex andinsert theotherend diagonallyinto the
holeof theoppositecorner,whileholdingthe footof
theheater.Keep pressureon the wireto preventit
fromcoming outofthe holeas youflexand insertitinto
thesecond hole. (Make surethatthe rodissecure in
thecorner ofthemain enclosure)Repeat theprocess
withthe other rodsothat thetwopieces crossinthe
centerofthe heater. (Figure 5A&B)
(Step 1A - Note there are two different types of corner brackets.
(Figure 3) Each pair go in opposing corners. Place an A style clip
aroundthe handleand slideinto position in the left upper corner
of the heater. Alternating types of clips, position the other three
clips on the heater. Be sure notches catch under the front lip of
MainEnclosure.)
Step 1. Placeheateron thetable with thelens facing
up. Positionthe frontedgeof theheater approximately
inthe middle ofthe hoop. Pushthe corner clips onto
thehandle andtwist overonto thecorner ofthe heater,
pushingoutward sothenotchcatchesundertheframe
ofthemain enclosure.(Seefigure 3 andStep1A)
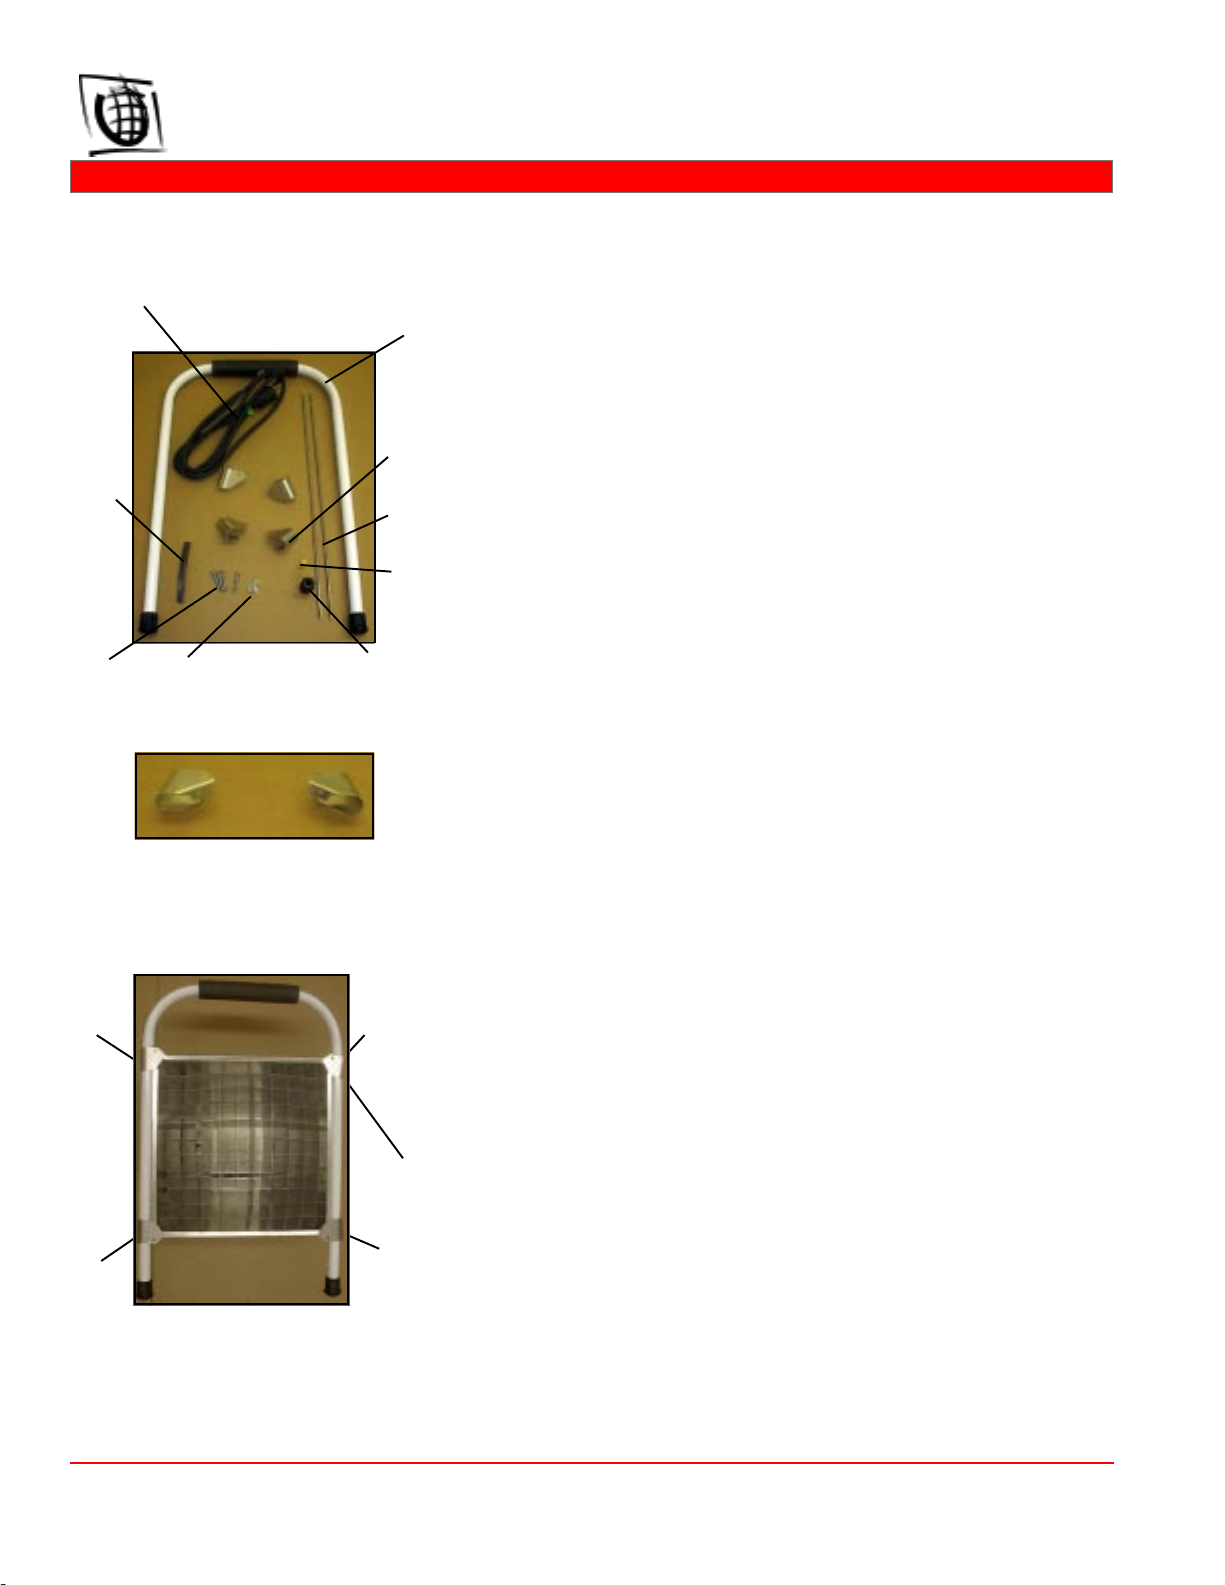
Figure 3
BA
Hoop
Clip(4)
Rod(2)
Electrical
Cord
Rubber
Strip
Figure 2
Wire Nut
WaterProof
Connector
Screws Nuts
Figure 4
Clipsattach hoop
tomain enclosure.
A
A
B
B


