RAEWHA SC Laser MX-830 User manual

1
SC_Laser MX-830
(Model No.: Laser_Beauty LB001)
(Model Name: Laser_Beauty LB001)

2
Product Introduction
SC_Laser MX-830 is a digitally operated laser_beauty apparatus for low level laser therapy
(LLLT). Adopting a laser having 500mW output of near-infrared wavelengths, the product
can transmit energy into the body’s cells and activate them to exert on skin care.
The product features:
◈No restriction on places due to its convenient portability
◈Adoption of a near-infrared laser having wavelength of 810nm which is effective on
skin care
◈Instant action with high-power outputs (dual output of 100/200mW)
[Picture 1] shows that the laser can burn black objects, producing smoke.
[Picture 2] displays that the laser beam penetrates into the human tissue without any
damages on skin.
Both picture shows that MX-830 has sufficient power but it penetrates into human tissue
without any damages.
<Picture 1> <Picture 2>
Safety Precautions
◈Safety precautions should be observed during use of the product because the product
generates Class 3B near-infrared laser beams
◈The product should be kept in a place out of the reach of children
◈Staring at a laser beam may cause loss of eyesight; in addition, the reflection on mirror
or glass of laser beams may give rise to danger.
◈Power should be turned off in the event the product is not used; if it is unused for an
extended period of time, be sure to separate the batteries from the product.
◈If there is a possibility of unauthorized people using the product, be sure to set a
password to prevent arbitrary access. In case a PIN is set, take care not to forget the
number. Be familiar with ‘How to use’ described below for setting a password. If you
forget the set password, you have to contact the manufacturer for initialization of the
product.
***** Pay attention not to be harmed by following the safety precautions****

3
Product Includings
MX-830, User’s manual, necklace string, 2 collimating zig, 2 sets of rechargeable
batteries, Battery charger
Description of Exterior and Functions
1. Beam outlet
2. Dander label
3. ON/OFF power button
4. LCD panel
5. UP/DOWN button
6. Battery cap.
How to use
As the product is set, by default, at 5 minutes of radiation time and 200mW of output
when it is shipped out, it is advised that general users should not change the settings.
The order of normal use is as follows:
1. Open the battery compartment on the back and insert two batteries with the
negative (-) terminals facing inside. [picture 3], [picture 4]: provided 2 sets of
rechargeable batteries and recharger.
2. Pull out the front cap (Careless rotations may cause damage; careful attention is
required!!) [picture 5]
3. Push the supplied transparent plastic jig into the outlet of beam. (Do not rotate
it but just pull it out when removing the jig.) [picture 6]
4. Place the transparent jig on an affected point. [picture 2]

4
5. Press the main button (big button on the front side) once, and light comes on the
LCD window. [picture 7]
6. Press the main button again. [picture 2]
7. The cooling fan and the laser begin to operate, and treatment starts.
8. When a set time passes, the product comes to a stop automatically. If you want
to stop in the middle of radiation, press the main button again.
9. Some models for professional use have their focus unfixed; minute rotation left or
right of the beam outlet can achieve fine adjustment of the focus. Be sure to
handle it carefully as any forcible movement may cause damage to the laser.
Any damage resulting from the forcible handling of the laser will be attributable to
user’s carelessness. [picture 8]
The following content describes the functions of the product. General users are advised
to read it through but not try to change settings. If any re-settings are necessary, be
sure to familiarize the directions and instructions beforehand.
◈Opening and closing of cap: Open the cap on the reverse side [picture 3] and insert
two AA batteries with the negative poles facing inside. [picture 4] Pull the cap of the
laser outlet forward to open it. [picture 5] Press the main button softly, and output and
battery display appears on the LCD window. [picture 7]
<picture 3> <picture 4>
<picture 5> < picture 6>
< picture 7> < picture 8>

5
◈Setting of operation time: A press of the UP (▲) button on the back of the LCD panel
for 1~2 seconds enables you to enter the time-setting mode. The radiation time of five
(5) minutes that has been set at factory is generally sufficient, but if you want to change it,
you can press either UP (▲)or DOWN (▼) button to determine a desired time. You need
to press the main button to give it confirmation.
< picture 9>
◈Setting of output: You can press either UP (▲)or DOWN (▼) button for a short time to
make adjustment of the output. A press of UP (▲) button displays 200mW and a press
of DOWN (▼) button exhibits 100mW on the LCD panel. The 200mW set at default in the
factory can be used for general adults. Children, those who have dark skin, or those who
suffer from rhinitis are recommended to use 100mW.
< picture 10>
◈Start and stop of laser: After determining all settings, press the main button, and the
LED display comes on, the cooling fan starts to work, and the laser starts to emit radiation.
Another press brings the laser to a stop. If you emit radiation without touching the main
button, the laser will turn off automatically after the time period displayed on the LCD
panel passes, when you should not look straightly at the laser with your bare eyes.
◈Adjustment of beams: The models for general use are not required to tune beams
because they have been adjusted to have their focus aligned on affected areas/points if
only the transparent plastic jig is mounted. Exerting forces to rotate the laser may result
in damage to it. However, some models for professional use have flexible beams, the
outlet of which can be rotated softly left or right for fine tuning. Even in this case,
forcible rotation should be refrained to prevent the laser from being damaged. Any
damage to the laser resulting from violent handling is attributable to user.
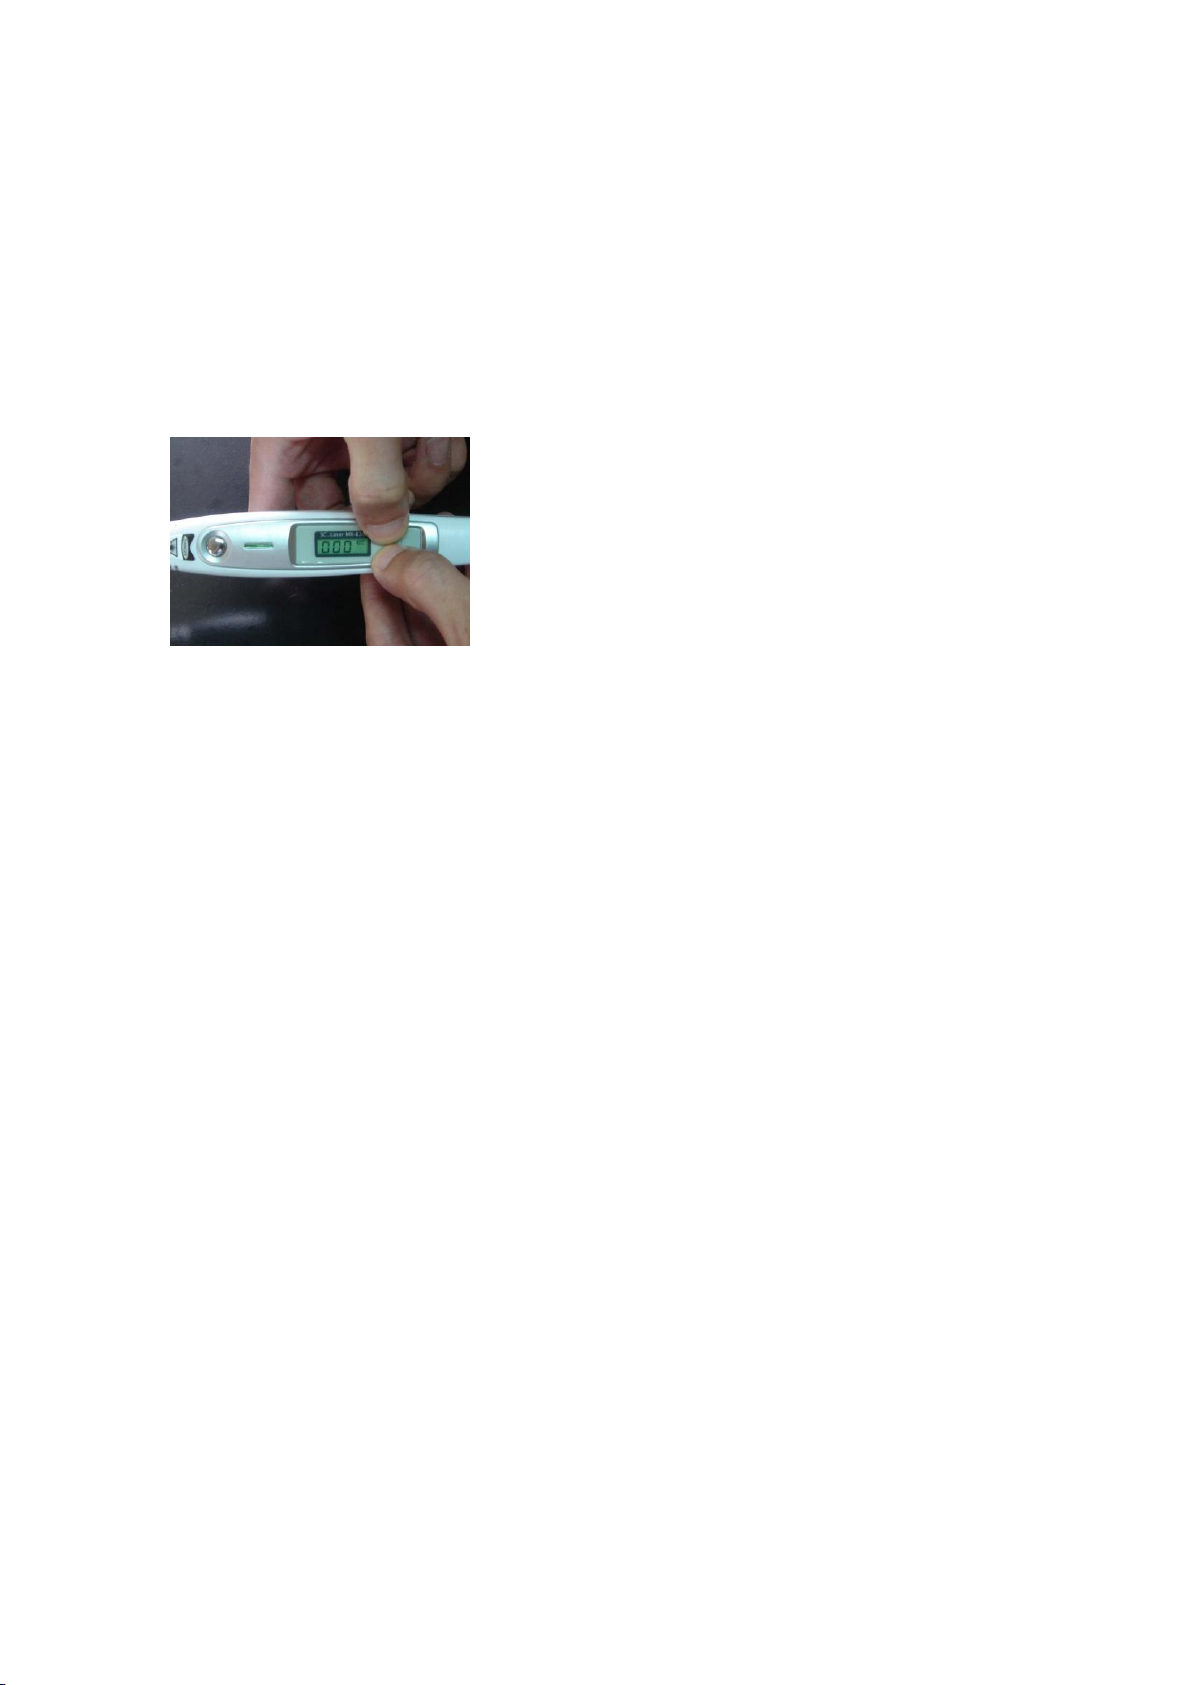
◈Setting and disabling of password: ‘000’ will appear when both UP (▲) and DOWN (▼)
button on the back of the LCD panel is pressed simultaneously. Put in a desired number
using the UP and DOWN buttons and press the main button for confirmation. Input of a

6
three digit number and a long press of the main button enable you to enter the home
screen showing output and battery display, when the password is set.
If you want to start the laser again after the LCD is turned off, you need to put in the
password to operate the instrument. If a password is not necessary because the laser is
protected from the reach of children, put in ‘000’ in the password setting mode and press
the main button for 1~2 seconds, when the password is removed. From this time on,
you don’t need to input the password to operate the product. (pwd reset fuction is
provided for the distributors)
How to emit beams
Determine radiation time, output and press the main button, and the output appears on
the LCD panel with light. Another press of the main button will display a preset time,
when the laser emits radiation through the outlet.
Caution! Because the beam outlets have fixed; any attempt to forcibly rotate the outlet of
the beam may result in damage to the laser, for which you are liable. Be sure to contact
the store when the product is damaged and requires mending.
◈Frequency of treatments: 2~3 treatments a day, for 3~5 minutes per treatment, are
recommended; however, you don’t need to be too much concerned about the frequency
and time because the low level laser therapy (LLLT) brings out adequate effects even if
they are not regular.
◈Radiation time and output
A general treatment requires 5 minutes at 200mW.
Specifications
◈Form of output radiation: near-infrared laser
◈Wavelength: ~810nm
◈Output intensity: 200/100mW
◈Electric specification: rated voltage: 3V DC, power consumption: ~400mA
Repair and maintenance
◈The warranty period for free-of-charge repair and inspection is 6 months from the
date of purchase of this product.
◈A semiconductor laser does not last permanently, but it has a limited lifespan like a
light.

7
◈Manufacturer is not responsible nor liable for any problem resulting from and in
connection with inspections on the laser by any unauthorized person other than its
engineer
◈Manufacturer is neither responsible nor liable for any damage resulting from and in
connection with user’s careless handling and/or arbitrary disassembly of the product; if
the product is entrusted to it for repair service, user will be charged at cost for
replacement of parts and components.
◈The manufacturer commits itself to provide prompt and reliable after-service if there is
any problem with the product.
Precautions for use of rechargeable batteries
◈To ease the inconvenience of continuously purchasing alkaline batteries, the product is
supplied with four nickel hydrogen batteries. Two batteries are for installation in the
product, while the other two are for recharging. Alkaline batteries purchasable at a drug
store can also be used; however, they are not rechargeable and should not be placed in
the battery charger.
◈Be sure to use the supplied battery charger for charging the nickel hydrogen batteries.
Fully charged batteries can last about 4 hours.
◈When charging begins, orange light comes on the LED panel. When charging is
completed, the LED display goes off. Flashing of the LED display indicates that the life
of the rechargeable battery expires; you need to replace it.
◈Be sure to separate the charger from the power outlet if you mount or dismount
batteries in it for recharging.
RAEWHA LMA
Suan-dong 469-1, Dongrae-gu, Busan, Korea
TEL. 82-51-556-3020
FAX 82-51-556-1691
E-mail// raewha@raewha.co.kr
This manual suits for next models
1
Table of contents
Popular Personal Care Product manuals by other brands

Silvercrest
Silvercrest SMP 6200 A1 operating instructions

Silk'n
Silk'n ND-FM05 user manual

Silvercrest
Silvercrest SWD 100 B2 Operating instructions and safety advice

Silvercrest
Silvercrest SNHT 1.5 A1 operating instructions

Silvercrest
Silvercrest SSGRB 500 A1 operating instructions

Silk'n
Silk'n FaceTite Instructions for use