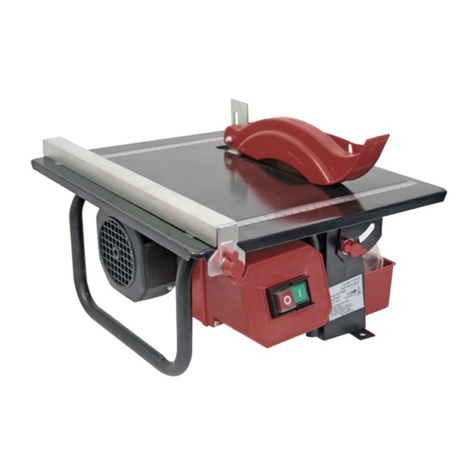
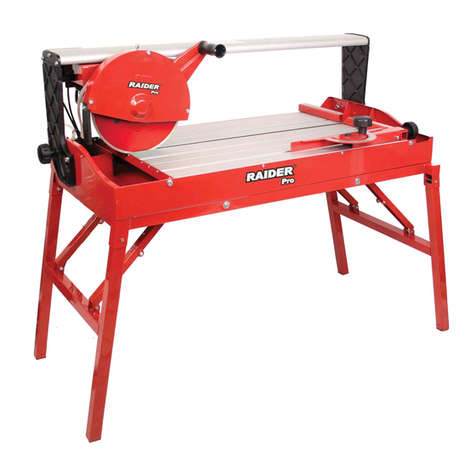
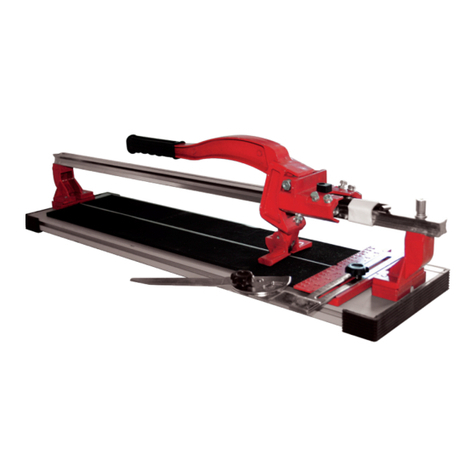
Raider RDP-ETC27 User manual

USER’S MANUAL
RDP-ETC27
○ машина за плочки
стационарна
○ tile cutting machine
○ masina de taiat placi
○ машина за сечење на
плочки
○ testera za sečenje
pločica
○ stroj za rezanje keramike
○ πριονι υγρας κοπης
πλακιδιων
www.raider.bg
Contents
2 BG схема
3 BG оригинална инструкция за употреба
11 EN original instructions’ manual
18 RO instructiuni originale
25 MK инструкции
33 SR originalno uputstvo za upotrebu
40 SL preklad pôvodného návodu na použitie
47 EL Πρωτότυπο οδηγιών χρήσης
RAIDER
PRO

2www.raider.bg
СЪСТАВНИ ЕЛЕМЕНТИ НА Машина за плочки стационарна RDP-ETC27
Description (Fig.1)
1. Angle adjusting knob
2. Blade guard
3. Access cover
4. Cutting blade
5. Water tray
6. Motor assembly
7. On/o switch
8. Height adjusting knob
9. Sliding table
10. Table locking knob
11. Mitre gauge
12. Extension bracket
13. Stand
Описание (фиг. 1)
1. Копче за регулиране на ъгъла
2. Предпазен капак на диска
3. Капак за достъп
4. Режещ диск
5. Тавичка за вода
6. Мотор
7. Превключвател вкл. / изкл
8. Ръкохватка за регулиране на височина
9. Подвижен (плъзгащ) плот
10. Ръкохватка за заключване на плота
11. Линеал (скала)
12. Удължителна скоба
13. Стойка

3
Оригинална инструкция за употреба
Уважаеми потребители,
Поздравления за покупката на машина от най-бързо развиващата се марка
за електрически и пневматични инструменти - RAIDER. При правилно инсталиране и
експлоатация, RAIDER са сигурни и надеждни машини и работата с тях ще Ви достави
истинско удоволствие. За Вашето удобство е изградена и отлична сервизна мрежа с 40
сервиза в цялата страна.
Преди да използвате тази машина, моля, внимателно се запознайте с настоящата
“Инструкция за употреба”.
В интерес на Вашата безопасност и с цел осигуряване на правилната й
употреба, прочетете настоящите инструкции внимателно, включително препоръките и
предупрежденията в тях. За избягване на ненужни грешки и инциденти, важно е тези
инструкции да останат на разположение за бъдещи справки на всички, които ще ползват
машината. Ако я продадете на нов собственик то “Инструкцията за употреба” трябва да
се предаде заедно с нея, за да може новия ползвател да се запознае със съответните
мерки за безопасност и инструкциите за работа.
“Евромастер Импорт Експорт” ООД е упълномощен представител на
производителя и собственик на търговската марка RAIDER. Адресът на управление на
фирмата е гр. София 1231, бул. “Ломско шосе” 246, тел. 02 934 33 33, 934 10 10, www.raider.
bg; www.euromasterbg.com; e-mail: info@ euromasterbg.com.
От 2006 година във фирмата е въведена системата за управление на
качеството ISO 9001:2008 с обхват на сертификацията: Търговия, внос, износ и сервиз
на професионални и хоби електрически, пневматични и механични инструменти и обща
железария. Сертификатът е издаден от Moody International Certication Ltd, England.
Технически данни
параметър мерна
единица стойност
Модел -RDP-ETC27
Захранващо напрежение V 230
Номинална честота Hz 50
Номинална консумирана мощност W 800
Обороти на празен ход min-1 5600
Диаметър на диамантения диск Ø mm 180
Размери на плота mm 400x440
Рязане на детайли с макс. дебелина mm 40
Максимална дължина на рязане mm 620
Клас на защита на електроизолацията - II
BG

4www.raider.bg
1. Общи указания за безопасна
работа.
Прочетете внимателно всички указания.
Неспазването на приведените по-долу
указания може да доведе до токов удар,
пожар и/или тежки травми. Съхранявайте
тези указания на сигурно място.
1.1. Безопасност на работното място.
1.1.1. Поддържайте работното си място
чисто и добре осветено. Безпорядъкът
и недостатъчното осветление могат да
спомогнат за възникването на трудова
злополука.
1.1.2. Не работете с машината в среда
с повишена опасност от възникване на
експлозия, в близост до лесно запалими
течности, газове или прахообразни
материали. По време на работа в
машините се отделят искри, които могат да
възпламенят прахообразни материали или
пари.
1.1.3. Дръжте деца и странични лица
на безопасно разстояние, докато работите
с машината. Ако вниманието Ви бъде
отклонено, може да загубите контрола над
машината.
1.2. Безопасност при работа с
електрически ток.
1.2.1. Щепселът на машината трябва
да е подходящ за ползвания контакт. В
никакъв случай не се допуска изменяне
на конструкцията на щепсела. Когато
работите със занулени електроуреди,
не използвайте адаптери за щепсела.
Ползването на оригинални щепсели и
контакти намалява риска от възникване на
токов удар.
1.2.2. Избягвайте допира на тялото Ви
до заземени тела, напр. тръби, отоплителни
уреди, печки и хладилници. Когато тялото
Ви е заземено, рискът от възникване на
токов удар е по-голям.
1.2.3. Предпазвайте машината си от
дъжд и влага. Проникването на вода в
машината повишава опасността от токов
удар.
1.2.4. Не използвайте захранващия
кабел за цели, за които той не е предвиден,
напр. за да носите машината за кабела
или да извадите щепсела от контакта.
Предпазвайте кабела от нагряване,
омасляване, допир до остри ръбове или
до подвижни звена на други машини.
Повредени или усукани кабели увеличават
риска от възникване на токов удар.
1.2.5. Когато работите на открито,
включвайте машината само в инсталации
оборудвани с електрически прекъсвач
Fi (прекъсвач за защитно изключване с
дефектнотокова защита), а токът на утечка,
при който се задейства ДТЗ трябва да е не
повече от 30 mA, съгласно “Наредба 3 за
устройство на електрическите уредби и
електропроводните линии”. Използвайте
само удължители, подходящи за работа
на открито. Използването на удължител,
предназначен за работа на открито,
намалява риска от възникване на токов
удар.
1.2.6. Ако се налага използването на
машината във влажна среда, използвайте
предпазен прекъсвач за утечни токове.
Използването на предпазен прекъсвач
за утечни токове намалява опасността от
възникване на токов удар.
1.3. Безопасен начин на работа.
1.3.1. Бъдете концентрирани, следете
внимателно действията си и постъпвайте
предпазливо и разумно. Не използвайте
машината, когато сте уморени или под
влиянието на наркотични вещества,
алкохол или упойващи лекарства. Един миг
разсеяност при работа с машина може да
има за последствие изключително тежки
наранявания.
1.3.2. Работете с предпазващо работно
облекло и винаги с предпазни очила.
Носенето на подходящи за ползваната
машина и извършваната дейност лични
предпазни средства, като дихателна
маска, здрави плътно затворени обувки
със стабилен грайфер, защитна каска или
шумозаглушители (антифони), намалява
риска от възникване на трудова злополука.
1.3.3. Избягвайте опасността от
включване на машината по невнимание.
Преди да включите щепсела се уверете,
че пусковият прекъсвач е в положение
«изключено». Ако, когато носите машината,
държите пръста си върху пусковия
прекъсвач, съществува опасност от
възникване на трудова злополука.
1.3.4. Преди да включите машината, се
уверете, че сте отстранили от нея всички
помощни инструменти и гаечни ключове.
Помощен инструмент, забравен на въртящо
5
се звено, може да причини травми.
1.3.5. Избягвайте неестествените
положения на тялото. Работете в стабилно
положение на тялото и във всеки момент
поддържайте равновесие. Така ще можете
да контролирате машината по-добре и
по-безопасно, ако възникне неочаквана
ситуация.
1.3.6. Работете с подходящо облекло. Не
работете с широки дрехи или украшения.
Дръжте косата си, дрехите и ръкавици
на безопасно разстояние от въртящи
се звена на машините. Широките дрехи,
украшенията, дългите коси могат да бъдат
захванати и увлечени от въртящи се звена.
1.3.7. Ако е възможно използването
на външна аспирационна система, се
уверете, че тя е включена и функционира
изправно. Използването на аспирационна
система намалява рисковете, дължащи се
на отделящата се при работа прах.
1.4. Грижливо отношение към
машините.
1.4.1. Не претоварвайте машината.
Използвайте машините само съобразно
тяхното предназначение. Ще работите по-
добре и по-безопасно, когато използвате
подходящата машина в зададения от
производителя диапазон на натоварване.
1.4.2. Не използвайте машина, чиито
пусков прекъсвач е повреден. Машина,
която не може да бъде изключвана
и включвана по предвидения от
производителя начин, е опасна и трябва да
бъде ремонтирана.
1.4.3. Преди да променяте
настройките на машината, да заменяте
работни инструменти и допълнителни
приспособления, както и когато
продължително време няма да използвате
машината, изключвайте щепсела от
захранващата мрежа. Тази мярка премахва
опасността от задействане на машината по
невнимание.
1.4.4. Съхранявайте машините на места,
където не могат да бъдат достигнати
от деца. Не допускайте те да бъдат
използвани от лица, които не са запознати
с начина на работа с тях и не са прочели
тези инструкции. Когато са в ръцете на
неопитни потребители, машините могат да
бъдат изключително опасни.
1.4.5. Поддържайте машините си
грижливо. Проверявайте дали подвижните
звена функционират безукорно, дали
не заклинват, дали има счупени или
повредени детайли, които нарушават
или изменят функциите на машината.
Преди да използвате машината, се
погрижете повредените детайли да
бъдат ремонтирани. Много от трудовите
злополуки се дължат на недобре
поддържани машини и уреди.
1.4.6. Поддържайте режещите
инструменти винаги добре заточени и
чисти. Добре поддържаните режещи
инструменти с остри ръбове оказват по-
малко съпротивление и с тях се работи по-
леко.
1.4.7. Използвайте машините,
допълнителните приспособления,
работните инструменти и т.н., съобразно
инструкциите на производителя. При
това се съобразявайте и с конкретните
работни условия и операции, които
трябва да изпълните. Използването на
машин за различни от предвидените от
производителя приложения повишава
опасността от възникване на трудови
злополуки.
1.4.8. Информация за излъчван шум и
вибрации.
Стойностите за шума са определени
съгласно EN 61029.
Ниво на звуковото налягане 95 dB(A);
Мощност на звука 108 dB(A).
Неопределеност K=3 dB.
Работете с шумозаглушители!
Пълната стойност на вибрациите
(векторната сума по трите направления) е
определена съгласно EN 61029:
Стойност на генерираните вибрации:
ah =5.16 m/s2, неопределеност K =1,5 m/s2.
Равнището на генерираните вибрации
е определено съгласно процедурата,
дефинира на в EN 61029 и може да
бъде използвано за сравняване с други
машини. То е подходящо също и за
предварителна ориентировъчна преценка
на натоварването от вибрации. Посоченото
ниво на генерираните вибрации е
представително за най-често срещаните
приложения на машината. Все пак, ако
машината се използва за други дейности, с
други работни инструменти или ако не бъде

6www.raider.bg
добре поддържана, както е предписано,
равнището на генерираните вибрации може
да се промени. Това би могло да увеличи
значително сумарното натоварване от
вибрации в процеса на работа. За точната
преценка на натоварването от вибрации
трябва да бъдат взимани предвид и
периодите, в които машината е изключена
или работи, но не се ползва. Това би
могло значително да намали сумарното
натоварване от вибрации.
1.4.9. Пазете плота равен. Не драскайте
и не натискайте плота.
1.4.10. Не поставяйте ръцете си близо
до ножа, когато се върти.
1.4.11 Не се опитвайте да освободите
заседнал нож без изключване или
изваждане на щепсела от електрическата
мрежа.
1.4.12. Дръжте резервоара за вода
пълен, когато работите с машината.
1.4.13. Не използвайте разтворители
вместо вода с този инструмент.
1.4.14. Изключете инструмента от
източника на захранване, когато не се
използва или преди обслужване.
2. Специфични правила за безопасност
2.1. Уверете се, че стрелката указваща
посоката на ножа съответства на
стрелката върху двигателя.
2.2. Периодично проверявайте за да се
уверите, че заключващия болт е здраво
стегнат и ножа е здраво закрепен към
вала.
2.3. Проверете внимателно ножа за
пукнатини или за повреди преди употреба.
При пукнатини или повреди, незабавно го
заменете с нов.
2.4. Използвайте само RCD-защитен
източник на енергия или се свържете с
електрическо захранване с одобрен RCD
прекъсвач. Това е основна предпазна
мярка за безопасност.
2.5. Пазете кабела далеч от зоната
на рязане и го поставете така, че да не
бъде захванат от движещите се части на
машината.
2.6. Преди да включите, проверете
дали всички ключове и инструменти за
настройка са отстранени от машината.
2.7. Никога не се опитвайте да режете
държейки плочка със свободна ръка.
Режете само плочки, които са сигурно
хванати към ограничителя на подвижния
плот или към линеала. Никога не се
опитвайте да режете парчета, които
са твърде малки, за да бъдат здраво
закрепени или които не ви позволяват
да държите ръцете си на безопасно
разстояние от ножа.
2.8. Уверете се, че детайлът (плочката),
които ще бъдат отрязани, имат достатъчно
място за да се преместят встрани.
Неспазването на това може да доведе до
контакт на ножа с отрязаното парче.
2.9. Никога не режете повече от една
плочка в даден момент.
2.10. Уверете се, че плота и района
около него са свободни от излишни
предмети с изключение на плочките, които
трябва да бъдат отрязани.
2.11. Преди рязане на плочка,
оставете ножа да поработи свободно в
продължение на няколко секунди. Ако
се появи непознат звук или вибрира
прекалено, незабавно изключете
машината от превключвателя и от
захранването, за да откриете източника на
проблема.
2.12. Оставете двигателя да достигне
максимални обороти преди да пристъпите
към рязане.
2.13. Позволете на двигателя да
спре напълно преди да се опитате
да премахнете заседнал или отрязан
материал от зоната около ножа.
2.14. Никога не докосвайте движещи се
части или ножа по време на употреба.
2.15. Никога не махайте хлабави
отломки и малки парчета докато ножа се
движи.
2.16. Уверете се, че отрязаните парчета
плочки няма да бъдат захванати от ножа и
захвърлени в произволна посока.
2.17. Никога не се отдалечавайте
твърде далеч от машината преди
мотора да е спрял напълно. Никога не
оставяйте инструмента без наблюдение,
когато е включен в електрическата
мрежа. Изключете инструмента от
превключвателя и от електрическата
мрежа преди да го напуснете.
2.18. Никога не позволявайте на ножа
да изсъхва. Рязане със сухо острие

7
ще доведе до прекомерно износване и
възможни повреди на ножа и мотора.
2.19. При транспортирането на
машината, използвайте само средства
за транспорт и никога не използвайте
служители за работа или транспортиране.
3. ИНСТРУКЦИИ ЗА МОНТАЖ
ВНИМАНИЕ! Никога не свързвайте
щепсела в контакта, докато всички
инсталации и корекции не бъдат
завършени и сте прочели и разбрали
инструкциите за безопасност и
експлоатация.
Отворете и поставете сгънатата стойка
на твърда, равна повърхност, която е
достатъчно здрава, за да издържи триона,
ваната за вода и работните материали.
Поставете триона върху стойката, сигурно
и здраво.
Проверете дали захранването и
електрическия контакт, който се използва
са в съответствие с машината. Погледнете
табелката върху машината. Всички
промени трябва винаги да се извършват
от квалифициран електротехник.
ВНИМАНИЕ! Тази машина трябва
да бъде заземена. Ако не е правилно
заземена, тази машина може да
предизвика токов удар. Уверете се, че
изхода за захранване е заземен. Ако
имате някакво съмнение, се обърнете към
квалифициран електротехник.
4. ИНСТРУКЦИИ ЗА ЕКСПЛОАТАЦИЯ
Заключване и отключване на
подвижния плот
● подвижния плот е заключен по време
на транспорта. Моля, да го отключите,
преди да използвате машината.
● Завъртете копчето за заключване
на плота по посока на часовниковата
стрелка.
● Дръпнете подвижния плот.
● Пуснете копчето за заключване на
плота.
● Сега плотът може да бъде лесно
придвижван напред и назад по протежение
на направляващите релси.
● Внимание: подвижния плот трябва да
бъде отново заключен преди каквато и да
е поддръжка, транспорт или съхранение.
● За да заключите, завъртете копчето
за заключване на плота, обратно на
часовниковата стрелка.
● Натиснете подвижния плот напред.
● Освободете копчето за заключване
на плота, така че ключалката в долната
страна плота да се свърже със
заключващия слот върху горната страна
на рамката.
5. Напълване на тавата (коритото) с
вода
● Бутнете подвижния плот напред,
достатъчно далеч, за да се покаже тавата
за вода отдолу.
● Напълнете тавата с чиста вода. Не
добавяйте химикали или детергенти към
водата. Уверете се, че помпата е доста под
нивото на водата.
● Можете да доливате вода ако е
необходимо, по време на работа на
машината.
6. ОСНОВНО РЯЗАНЕ
● Свържете машината към мрежата с
помощта на одобрен RCD прекъсвач.
● Уверете се, че сте маркирали плочката
за рязане.
● Преместете бавно плъзгащия плот
назад и напред, за да се уверите, че
режещия диск не докосва браздата върху

8www.raider.bg
плота или ограничителя в задния край на
плота.
● Издърпайте назад подвижния плот
достатъчно далеч от режещия диск, за да
поставите плочка на плота.
● Включете машината от превключвателя
за включване / изключване. Позволете на
режещия диск да достигне максимални
обороти. Уверете се, че режещия диск е
мокър.
● С две ръце, задръжте плочката
сигурно към ограничителя в задния край
на плъзгащия плот.
ВНИМАНИЕ! Не поставяйте ръцете или
пръстите си над жлебовете в задния край
на плъзгащия плот. Режещия диск ще
навлезе това пространство по време на
рязане.
● Бавно натиснете подвижния плот
и плочката напред към режещия диск.
Плъзнете плочката плавно в режещия
диск. Да не се прилага силен натиск, когато
бутате плочката към режещия диск.
● Внимателно следвайте линията на
плочката за да регулирате позицията на
рязане, ако е необходимо.
● Никога не режете на сухо. Уверете се,
че режещия диск остава мокър по време
на рязане. Проверявайте често нивото на
водата в тавата за вода и добавяйте вода
толкова често, колкото е необходимо.
Уверете се, че помпата е доста под нивото
на водата.
● Ако двигателят се товари, намалете
скоростта на подаване или издърпайте
плавно плочката назад от режещия диск.
● Избършете плота с гъба по време на
употреба, за да се намали натрупването на
отломки. Винаги изключвайте машината
преди извършване на това действие.
● Спрете машината с помощта
на превключвателя за включване /
изключване. Позволете на режещия диск
да спре от само себе си. Не се опитвайте
да спрете режещия диск ръчно, като го
хванете с ръка или задържите обект срещу
него.
ВНИМАНИЕ! Не се опитвайте да вземете
почти или напълно отрязана плочка, преди
режещия диск да е напълно спрял.
● Извадете щепсела от захранването
след употреба. Изпразнете тавата за вода,
почистете машината и помпата. Заключете
плъзгащия плот преди поддръжка,
транспортиране или съхранение.
7. ПРАВО РЯЗАНЕ
● Разхлабете въртящата ръчка на
линеала (транспортира).
● Монтирайте линеала (транспортира)
върху левия страничен ограничител на
задния край на плъзгащия плот.
● Задайте ъгъла на рязане с помощта на
скалата.
● Затегнете въртящата ръкохватка.
● Поставете плочката до ограничителя
на подвижния плот и до транспортира при
рязане.
8. Диагонално рязане
● Разхлабете въртящата ръкохватка на
транспортира.
● Монтирайте линеала (транспортира)
върху левия страничен ограничител на
задния край на плъзгащия плот.
● Задайте ъгъла на рязане с помощта на
скалата.
● Затегнете въртящата ръкохватка.
● Разхлабете горното копче за настройка
на ъгъла.
● Регулирайте до желания ъгъл (от 0º до
45º).
● Затегнете ръкохватката за настройка
на ъгъла.
● Поставете плочка до транспортира,
при рязане.
9. ВЕРТИКАЛНО РЯЗАНЕ ПОД 45

9
ГРАДУСА (КОНУСНО).
● Дръпнете подвижния плот назад,
достатъчно далеч от режещия диск.
● Разхлабете копчето за регулиране
на ъгъла, което се намира на гърба на
моторния механизъм (мотора).
● Наклонете моторния механизъм от 0
до 45 градуса.
● Затегнете копчето за регулиране на
ъгъла.
● Разхлабете копчето за регулиране на
височината, което се намира в предната
част на моторния механизъм.
● Повдигнете мотора до най-високата
позиция.
● Затегнете копчето за регулиране на
височината.
● Бутнете подвижния плот бавно
напред, за да се уверите, че режещия диск
не докосва някоя от страните на браздата
за рязане под 45 градуса, намираща се
върху плота или ограничителя върху ръба
на плота.
10. Използване на Удължителя
● Удължаващата скоба може да се
използва, за да даде допълнителна
подкрепа при по-големи плочки, ако е
необходимо.
● Издърпайте Удължаващата Скоба
от лявата страна на подвижния плот
на необходимото разстояние, но не я
изваждайте напълно от подвижния плот.
● Затегнете двете копчета на двете
пръчки за да застопорите удължителя на
място.
● Повдигнете страничния стоп.
● Поставете плочка срещу ограничителя
на подвижния плот и страничния стоп на
удължителя при рязане.
11. Смяна на режещия диск)
● ПРЕДУПРЕЖДЕНИЕ! За да се избегне
нараняване от случайно пускане, винаги
изключвайте от превключвателя, като го
поставите на позиция “OFF” и извадете
захранващия кабел от източника на
захранване, преди да пристъпите към
смяна на режещия диск.
● Отворете предпазния капак на диска чрез
премахване на двата свързващи винта.
● Отвийте секретния болт, като използвате
шестоъгълен гаечен ключ, докато държите
външния фланец на място с друг гаечен
ключ.
● Отстранете външния фланец, а след това
и режещия диск.
● При монтажа на новия диск, се уверете,
че стрелката на въртене върху режещия
диск сочи в същата посока, като тази,
отбелязана върху капака на режещия диск.
● Проверявайте новите дискове за
видими повреди. В случай, че е повреден,
незабавно го заменете с друг.
● Поставете обратно външния фланец и
след това затегнете здраво секретният
болт, използвайки ключове.
● Монтирайте обратно предпазния капак на
режещия диск.
Забележка: Използвайте само 180mm
дискове за мокро рязане или турбо,
специално проектирани за рязане на
плочки. Не използвайте режещи дискове,
предназначени да работят с по-малко от
5600 оборота в минута.
12. Функции и характеристики

10 www.raider.bg
Острието може да се накланя до 45º за
конусно рязане. Устройството за рязане под
ъгъл върху плотта може да се превърне
всеки ъгъл между 0º до 45º в диагонално
рязане. В процеса на рязане, помпата ще
снабдява режещия диск с вода, която ще
удължи живота на режещия диск, а също
ще намали отделянето на прах.
Вътрешния термостат е условие за
поддържане температурата на двигателя
в нормални граници на работа. В случай,
че моторът е претоварен, стане твърде
горещ или ел. напрежение е твърде високо,
вътрешният термостат автоматично ще
изключи машината. Ако това се случи,
изключете и изчакайте 5 минути, докато
двигателят се охлади, за да рестартирате
отново машината чрез превключвателя
включване / изключване. Тази функция
помага за защита на двигателя от повреди
поради прегряване.
13. Поддръжка
ВНИМАНИЕ! При обслужване, да се
използват само оригинални резервни
части. Използването на други части може
да създаде опасност или да причини
увреждане на продукта.
Не се опитвайте да правите настройки,
докато машината е в експлоатация.
Винаги изваждайте електрическия кабел
от захранването преди смяна на части,
смазване на машината или настройка,
за да се избегнат възможни сериозни
наранявания.
Почиствайте машината от натрупания прах.
14. Почистване:
Пазете вентилационните отвори на
машината чисти, за да се предотврати
прегряване на двигателя. Редовно
почиствайте корпуса на машината с
мека кърпа, за предпочитане след всяка
употреба. Дръжте вентилационните
отвори свободни от прах и мръсотия. Ако
мръсотията не се маха използвайте мека
кърпа, напоена със сапунена вода.
Забележка: Моля, почиствайте помпата
и плъзгащата се релса на плота, веднага
след като сте приключили работа с
машината. В противен случай върху
крилното витло на помпата или релсата
могат да се залепят отломки. За да
почистите помпата, извадете смукателния
капак и капака крилното витло, а след това
самото крилно витло. Използвайте малка
четка или струя вода, за да се отстраните
всички отломки от крилното витло.
Никога не използвайте разтворители
като бензин, алкохол, амоняк и вода и
др тези разтворители могат да повредят
пластмасовите части.
15. Опазване на околната среда.
С оглед опазване на околната
среда машината, допълнителните
приспособления и опаковката трябва
да бъдат подложени на подходяща
преработка за повторното използване
на съдържащите се в тях суровини. За
облекчаване на рециклирането детайлите,
произведени от изкуствени материали,
са обозначени по съответен начин. Не
изхвърляйте машините при битовите
отпадъци! Съгласно Директивата 2002/96/
ЕО относно излезлите от употреба
електрически и електронни устройства и
утвърждаването и като национален закон
машините, които не могат да се използват
повече, трябва да се събират отделно и да
бъдат подлагани на подходяща преработка
за оползотворяване на съдържащите се в
тях ценни вторични суровини.

11
Original instructions for use
Dear Customer,
Congratulations on the purchase of machinery from the fastest growing brand of electric
and pneumatic tools - RAIDER. When properly installed and operating, RAIDER are safe and
reliable machines and work with them will deliver a real pleasure. For your convenience has
been built and excellent service network of 40 service stations across the country.
Before using this machine, please carefully acquainted with these “instructions’ manual”.
In the interest of your safety and to ensure proper use and read these instructions carefully,
including the recommendations and warnings in them. To avoid unnecessary errors and
accidents, it is important that these instructions will remain available for future reference
to all who will use the machine. If you sell it to a new owner “Instructions’ manual” must
be submitted along with it to enable new users to become familiar with relevant safety and
operating instructions.
Euromaster Import Export Ltd. is an authorized representative of the manufacturer and
owner of the trademark RAIDER.
Address: Soa City 1231, Bulgaria “Lomsko shausse” Blvd. 246, tel 02 934 33 33, 934 10 10,
www.raider.bg; www.euromasterbg.com; e-mail: [email protected].
Since 2006 the company introduced the system of quality management ISO 9001:2008
with scope of certication: Trade, import, export and servicing of hobby and professional
electrical, mechanical and pneumatic tools and general hardware. The certicate was issued
by Moody International Certication Ltd, England.
Technical Data
parameter unit value
Model -RDP-ETC27
Rated voltage V 230
Frequency Hz 50
Rated power input W 800
No-load speed min-1 5600
Diamond disc diameter Ø mm 180
Dimensions of Working table mm 400x440
Cutting depth mm 40
Cutting length mm 620
Protection class - II
EN

12 www.raider.bg
1. Safety Notes. General Power Tool
Safety Warnings.
Read all safety warnings and all
instructions. Failure to follow the warnings
and instructions may result in electric shock,
re and/or serious injury. Save all warnings
and instructions for future reference.
1.1. Work area safety
1.1.1. Keep work area clean and well lit.
Cluttered or dark areas invite accidents.
1.1.2. Do not operate power tools in
explosive atmospheres, such as in the
presence of ammable liquids, gases or dust.
Power tools create sparks which may ignite
the dust or fumes.
1.1.3. Keep children and bystanders away
while operating a power tool. Distractions can
cause you to lose control.
1.2. Electrical safety.
1.2.1. Power tool plugs must match the
outlet. Never modify the plug in any way.
Do not use any adapter plugs with earthed
(grounded) power tools. Unmodied plugs
and matching outlets will reduce risk of
electric shock.
1.2.2. Avoid body contact with earthed or
grounded surfaces, such as pipes, radiators,
ranges and refrigerators. There is an
increased risk of electric shock if your body
is earthed or grounded.
1.2.3. Do not expose power tools to rain or
wet conditions. Water entering a power tool
will increase the risk of electric shock.
1.2.4. Do not abuse the cord. Never use
the cord for carrying, pulling or unplugging
the power tool. Keep cord away from heat, oil,
sharp edges and moving parts. Damaged or
entangled cords increase the risk of electric
shock.
1.2.5. When operating a power tool
outdoors, use a residual current device (RCD)
with a rated residual current of 30 mA or less.
Use an extension cord suitable for outdoor
use. Use of a cord suitable for outdoor use
reduces the risk of electric shock.
1.2.6. If operating a power tool in a damp
location is unavoidable, use a residual current
device (RCD) protected supply. Use of an RCD
reduces the risk of electric shock.
1.3. Personal safety.
1.3.1. Stay alert, watch what you are doing
and use common sense when operating a
power tool. Do not use a power tool while you
are tired or under the inuence of
drugs, alcohol or medication. A moment of
inattention while operating power tools may
result in serious personal injury.
1.3.2. Use personal protective equipment.
Always wear eye protection. Protective
equipment such as dust mask, non-skid
safety shoes, hard hat, or hearing protection
used for appropriate conditions will reduce
personal injuries.
1.3.3. Prevent unintentional starting.
Ensure the switch is in the o-position
before connecting to power source, picking
up or carrying the tool. Carrying power tools
with your nger on the switch or energising
power tools that have the switch on invites
accidents.
1.3.4. Remove any adjusting key or
wrench before turning the power tool on. A
wrench or a key left attached to a rotating
part of the power tool may result in personal
injury.
1.3.5. Do not overreach. Keep proper
footing and balance at all times. This enables
better control of the power tool in unexpected
situations.
1.3.6. Dress properly. Do not wear loose
clothing or jewellery. Keep your hair, clothing
and gloves away from moving parts. Loose
clothes, jewellery or long hair can be caught
in moving parts.
1.3.7. If devices are provided for the
connection of dust extraction and collection
facilities, ensure these are connected and
properly used. Use of dust collection can
reduce dust-related hazards.
1.4. Power tool use and care.
1.4.1. Do not force the power tool. Use the
correct power tool for your application. The
correct power tool will do the job better and
safer at the rate for which it was designed.
1.4.2. Do not use the power tool if the
switch does not turn it on and o. Any power
tool that cannot be controlled with the switch
is dangerous and must be repaired.
1.4.3. Disconnect the plug from the power
source and/or the battery pack from the
power tool before making any adjustments,
changing accessories, or storing power tools.
Such preventive safety measures reduce the
risk of starting the power tool accidentally.
1.4.4. Store idle power tools out of the
reach of children and do not allow persons
unfamiliar with the power tool or these

13
instructions to operate the power tool. Power
tools are dangerous in the hands of untrained
users.
1.4.5. Maintain power tools. Check for
misalignment or binding of moving parts,
breakage of parts and any other condition
that may aect the power tool’s operation. If
damaged, have the power tool repaired before
use. Many accidents are caused by poorly
maintained power tools.
1.4.6. Keep cutting tools sharp and clean.
Properly maintained cutting tools with sharp
cutting edges are less likely to bind and are
easier to control.
1.4.7. Use the power tool, accessories
and tool bits etc. in accordance with these
instructions, taking into account the working
conditions and the work to be performed. Use
of the power tool for operations dierent from
those intended could result in a hazardous
situation.
1.4.8. Noise&Vibration Information.
Measured sound values determined
according to EN 61029. Typically the
A-weighted noise levels of the product are:
Sound pressure level 95 dB(A);
Sound power level 108 dB(A).
Uncertainty K=3 dB.
Wear hearing protection!
Vibration total values (triad vector sum)
determined according to EN 61029:
Vibration emission value ah =3.80 m/s2
Uncertainty K =1.5 m/s2.
The vibration emission level given in this
information sheet has been measured in
accordance with a standardised test given
in EN 61029 and may be used to compare
one tool with another. It may be used for a
preliminary assessment of exposure. The
declared vibration emission level represents
the main applications of the tool. However if
the tool is used for dierent applications, with
dierent accessories or poorly maintained,
the vibration emission may dier. This may
signicantly increase the exposure level
over the total working period. An estimation
of the level of exposure to vibration should
also take into account the times when the tool
is switched o or when it is running but not
actually doing the job. This may signicantly
reduce the exposure level over the total
working period.
1.4.9. Keep the table at and do not scratch
or press the table.
1.4.10. Do not put hands anywhere near
the blade whist it is rotating.
1.4.11 Do not attempt to free a jammed
blade without rst switching o or removing
the plug from the mains power supply.
1.4.12. Keep water full in the tank when you
operate the cutter.
1.4.13. Do not use any solvents for instead
water in this tool.
1.4.14. Disconnect the tool from power
source when not in use or before servicing.
2. SPECIFIC SAFETY RULES
2.1. Ensure that the directional arrow on
the blade corresponds with the rotational
direction of the motor.
2.2. Periodically check to be sure the
locking arbor bolt is tight, and the blade is
securely fastened to the arbor shaft.
2.3. Check the blade carefully to see if
cracked or damaged before use. If cracked or
damaged, replace it immediately.
2.4. Only use a RCD-protected power
source or connect to an electrical power point
using an approved RCD circuit breaker. This
is an essential safety precaution.
2.5. Keep the cord away from the cutting
area and position it so that it will not be
caught on the work piece.
2.6. Before switching on, check that
all spanners and setting tools have been
removed.
2.7. Never try to cut freehand. Only cut
tile that is securely held against the fence of
the sliding table or the mitre gauge. Never
try to cut pieces that are too small to be held
securely or that do not allow you to keep your
hands safely away from the blade.
2.8. Ensure that the work piece that will be
cut o has sucient room to move sideways.
Failure to do so may result in the o-cut
binding against the blade.
2.9. Never cut more than one tile at a time.
2. 10. Ensure that the table and surrounding
area are clear with the exception of the tile to
be cut.
2.11. Before cutting a tile piece, let the
blade run freely for a few seconds. If it makes
an unfamiliar sound or vibrates excessively,
switch it o immediately and disconnect from
the power supply to nd the source of the

14 www.raider.bg
problem.
2.12. Allow the motor to come to full speed
before cutting.
2.13. Allow the motor to come to a full stop
before attempting to remove any jammed or
o cut material from around the blade area.
2.14. Never touch the moving parts or the
blade during use.
2.15. Never remove loose splinters, chips
pieces while the blade is moving.
2.16. Ensure that cut o tile pieces are not
caught by the blade and send ying.
2.17. Never walk away from the too until the
motor has come a complete stop. Never leave
the tool unattended when it is plugged into an
electrical outlet. Turn o the tool, and unplug
it from its electrical outlet before leaving.
2.18. Never allow the blade to run dry.
Cutting with a dry blade will cause excessive
wear and possible damage to the blade and
motor.
2.19. When transporting the machine, use
only transportation devices and do never use
guards for handling or transportation.
3. ASSEMBLY INSTRUCTIONS
WARNING! Never connect the plug to
power source outlet until all installations and
adjustments are completed and you have read
and understood the safety and operational
instructions.
Open and position the folded stand on a
solid, level surface which is sturdy enough to
support the wet saw and your work materials.
Lay the wet saw on the stand securely and
rmly.
Check that the power supply and electrical
outlet used are in accordance with your wet
saw. Have a look at the rating plate on the wet
saw. Any changes should always be carried
out by a qualied electrician.
WARNING! This machine must be earthed.
If not properly earthed this machine can cause
an electrical shock. Be sure that the power
supply outlet is earthed. If there is any doubt,
have it checked by a qualied electrician.
4. Operating Instructions
Locking and Unlocking the Sliding Table
● The sliding table is locked during
shipment. Please unlock it before using.
● Turn the table locking knob clockwise.
● Pull the sliding table back.
● Release the table locking knob.
● The sliding table may now be moved
forward and back along the guide rails.
● Warning: The sliding table should
be re-locked before any maintenance,
transportation or storage.
● To lock, turn the table locking knob anti-
clockwise.
● Push the sliding table forward.
● Release the table locking knob so the
latch underneath the sliding table is engaged
into the locking slot on the top of the saw
frame.
5. Filling the Water
● Move the sliding table forward just far
enough to expose the water tray underneath.
● Fill the water tray with clean water. Do
not add chemicals or detergents to the water.
Make sure the pump is well below the water
level.
● Water can be added or relled as needed
during the operation of the machine.
6. Basic Cutting Operation
● Connect the machine to mains by using
an approved RCD circuit breaker.
● Make sure you have marked your tile for
cutting.
● Move the sliding table back and forward
slowly to check the blade should not make
contact with either the cutting groove on the

15
top of the table or the fence on the back edge
of the table.
● Pull the sliding table back far enough
from the blade to place the tile on the table.
● Turn on the on/o witch. Allow the blade
to come up to full speed. Check that the blade
looks wet.
● Using both hands, hold the tile securely
against the fence at the back edge of the
sliding table.
WARNING! Do not allow your hands or
ngers to protrude over the notches at the
back edge of the sliding table. The blade will
enter this space during the cutting operation.
● Slowly push the sliding table and tile
forward into the blade. Feed the tile smoothly
into the blade. Do not apply heavy pressure to
bump the tile against the blade.
● Carefully follow your working line
adjusting tile cutting position if required.
● Never cut dry. Be sure the blade remains
wet during cutting operation. Frequently
check the water level in the water tray and
add water as often as necessary. Make sure
the pump is well below the water level.
● If the motor slows down, slow down your
feed rate or pull the tile smoothly back from
the blade.
● Wipe clean top with sponge during use
to reduce build up of debris. Always ensure
the machine is switched o when carrying out
this action.
● Stop the machine by using the on/o
switch. Allow the blade to come to a stop on
its own. Do not manually stop the blade by
grabbing it or holding an object against it.
WARNING! Do not attempt to pick up an
o-cut or to remove the holding tile before the
cutting blade has completely stopped.
● Remove the plug from power supply after
use. Empty the water tray, clean the machine
and pump. Lock the sliding table before
maintenance, transportation or storage.
7. Straight Cutting
● Loosen the screw knob of the mitre
gauge.
● Fit the mitre gauge onto the left side
fence at the back edge of the sliding table.
● Set the mitre gauge to the desired size
using the embossed ruler guide.
● Relock the screw knob.
● Position the tile against the fence of
the sliding table and against the mitre gauge
when cutting.
8. Diagonal Cutting
● Loosen the screw knob of the mitre
gauge.
● Fit the mitre gauge onto the left side
fence at the back edge of the sliding table.
● Set the mitre gauge to the distance
required.
● Relock the screw knob.
● Loosen the angle adjustment knob at the
top.
● Adjust to the desired angle (from 0º to
45º).
● Relock the angle adjustment knob.
● Place the tile against the mitre gauge
when cutting.
9. 45 Degree Bevel Cutting
● Pull the sliding table back far enough to
clear from the blade.
● Loosen the angle adjusting knob on the
back of the motor assembly.
● Pivot the motor assembly to 45 degree
position..
● Relock the angle adjusting knob.
● Loosen the height adjusting knob on the
front of the motor assembly.
● Lift the motor assembly to its highest
point position.
● Relock the height adjusting knob.
● Push the sliding table forward slowly to
check that the blade should not contact either
the 45 degree cutting groove on the top of
the table or the fence on the back edge of the
table.

16 www.raider.bg
10. Using the Extension Bracket
● The extension bracket can be used
to give additional support for larger tiles if
necessary.
● Pull out the extension bracket on the
left side of the sliding table to the distance
required, but do not remove it from the sliding
table.
● Tighten the two knobs on both rods to
lock in place.
● Move the side stop upwards.
● Place the tile against the fence of the
sliding table and the side stop of the extension
bracket when cutting.
11. Changing the Blade
● WARNING! To avoid injury from
accidental starting, always turn the switch
o “O” and remove the power plug from the
power source before changing the blade.
● Open the access cover of the blade
guard by removing the two securing screws.
● Remove the locking arbor bolt using the
hexagonal spanner while holding the outer
ange in place with the holding spanner
● Remove the outer ange, then the saw
blade
● When tting the new blade, the rotational
arrow on the blade must point in the same
direction as that marked on the blade cover.
● Inspect the new saw blade for visible
damage. In the event it is damaged, replace
it immediately.
● Re-t the outer ange, and then tighten
the locking arbor bolt rmly using spanners.
● Re-t the access cover of the blade
guard.
Note: Use only 180mm wet type or turbo
type blades specically designed for tile
cutting. Do not use any blade rated for less
than 5600 rpm.
12. Functions and characteristics
Blade can tilt to 45º for bevel cutting. The
mitre gauge on the table can turn to any angle
between 0º to 45º for diagonal cutting. In the
process of cutting, the pump will provide the
blade with water which can help to extend the
life of the blade and also reduce dust.
An internal thermostat has been provided
to maintain the motor temperature within
normal operating ranges. In case the motor is
over loaded, gets too hot or the current is too
high, the internal thermostat will automatically
cut o. If this happens, turn the switch o and
wait 5 minutes until the motor has cooled
down to restart the machine by on/o switch
again. This feature helps to protect the motor
from damage due to overheating.
13. Maintenance
WARNING! When servicing, use only
identical replacement parts. Use of any other
parts may create a hazard or cause product
damage.
Do not attempt to make any adjustments
while the machine is in operation.
Always remove the electric power cord
from the power supply before changing parts,
lubricating the machine or when working on
the unit to avoid possible serious injury.
Keep the machine clean from accumulated
dust.
14. Cleaning:

17
Keep the ventilation slots of the machine
clean to prevent overheating of the motor.
Regularly clean the machine housing with
a soft cloth, preferable after each use. Keep
the ventilation slot free from dust and dirt.
If the dirt does not come o use a soft cloth
moistened with soapy water.
Note: Please clean the pump and the
sliding table guide rail immediately after you
stop use, otherwise the impeller of the pump
or the guide rail could be stuck by the dry
debris. To clean the pump, remove the inhale
cover and the impeller cover, and then take
out of the impeller. Use a small brush or
stream of water to remove any debris on the
impeller.
Never use solvents such as petrol, alcohol,
ammonia water, etc. these solvents may
damage the plastic parts.
15. DISPOSAL.
The machine, accessories and packaging
should be sorted for environmental-friendly
recycling. The plastic components are
labelled for categorized recycling. Do not
dispose of power tools into household waste!
According the European Guideline 2002/96/EC
for Waste Electrical and Electronic Equipment
and its implementation into national right,
power tools that are no longer usable must
be collected separately and disposed of in an
environmentally correct manner.

18 www.raider.bg
Instrucţiuni originale
Stimate prieten,
Felicitări pentru achiziţionarea unei maşini a marca cea mai rapidă creştere de elec-
trice şi scule pneumatice - Raider. Cu instalarea corectă şi funcţionarea, Raider sunt echipa-
mente sigure şi abile şi să lucreze cu ei vă va oferi adevarata placere. Pentru confort, servicii
excelente şi a construit o reţea.
Înainte de a utiliza acest aparat, vă rugăm să citiţi cu atenţie actual “Manualul de
instrucţiuni”.
În interesul siguranţei şi pentru a asigura utilizarea corectă a acestuia, citiţi cu
atenţie aceste instrucţiuni, inclusiv recomandări şi avertismente pentru a le. Pentru a evi-
ta greşeli inutile şi accidentele, este important ca aceste instrucţiuni să rămână disponibile
pentru referinţe viitoare tuturor celor care vor utiliza aparatul. Dacă-l vinzi la un “manual de
utilizare”, noul proprietar trebuie să e prezentate împreună cu ea, pentru a permite noilor
utilizatori să se familiarizeze cu instrucţiunile de siguranţă şi de exploatare.
“Euromaster Import Export” SRL este reprezentantul un producător şi proprietar al
marcii Raider. Adresa companiei este Soa 1231, B-dul “Lom Road” 246, tel 02 934 33 33 934
10 10, www.raider.bg; www.euromasterbg.com, e-mail: [email protected].
Începând cu anul 2006, compania a introdus un sistem de management al calităţii ISO
9001:2008 de certicare cu domeniul de aplicare: instrumente de comerţ, import, export şi de
servicii profesionale si hobby electrice, pneumatice şi de putere şi hardware-ul general. Certi-
catul a fost emis de catre Moody International de Certicare Ltd, Anglia.
Date tehnice
parametru unitate valoare
Număr de identicare -RDP-ETC27
Tensiune nominală V 230
Frecvenţă Hz 50
Putere nominală W 800
Rotatii min-1 5600
Диаметър на диамантения диск Ø mm 180
Размери на плота mm 400x440
Рязане на детайли с макс. дебелина mm 40
Максимална дължина на рязане mm 620
Clasa de protecţie - II
Descriere (gura 1)
1. Unghi de ajustare butonul
2. Lamă de paza
3. Capacul de acces
4. De tăiere lama
5. Tava de apă
6. Motor de asamblare
7. Pornit / oprit
8. Înălţime de reglare butonul
9. Alunecare de masă
RO

19
10. Tabelul de blocare butonul
11. Mitre ecartament
12. Extensia placuta
13. Stativ
1. Instructiuni generale pentru funcţionarea în
condiţii de siguranţă.
Citiţi toate instrucţiunile. Nerespectarea tutu-
ror instrucţiunilor poate provoca electrocu-
tare, incendii şi / sau răniri grave. Pastrati
aceste instructiuni intr-un loc sigur.
1.1. Siguranţă la locul de muncă.
1.1.1. Păstraţi zona de lucru curat şi bine ilu-
minat. Tulburare de iluminat şi săraci pot con-
tribui la apariţia unor accidente.
1.1.2. Nu folosiţi maşina într-un mediu cu
pericol sporit de explozie, în apropiere de
lichide inamabile, gaze sau pulberi. În tim-
pul funcţionării, maşini crea scântei care pot
aprinde praful sau vaporii.
1.1.3. Nu permiteţi accesul copiilor şi a
trecătorilor în timp ce departe de funcţionare
a maşinii. În cazul în care atenţia ta este de-
viat, s-ar putea pierde controlul maşinii.
1.2. Siguranţă atunci când se lucrează cu en-
ergie electrică.
1.2.1. Conectaţi aparatul trebuie să se
potrivească la priza. În nici un caz nu pune la
modicarea ştecherului. Când se lucrează cu
adus la zero electrice, nu folosiţi adaptoare.
Ştecherele nemodicate şi prizele potrivite
vor reduce riscul de electrocutare.
1.2.2. Evitaţi contactul corp la legat la pământ.
tevi, radiatoare, sobe şi frigidere. Atunci cand
corpul tau este la pământ, riscul de electrocu-
tare este mai mare.
1.2.3. Protejaţi aparatul de la ploaie si umidi-
tate. De penetrare a apei în maşină creşte ris-
cul de electrocutare.
1.2.4. Nu utilizaţi un cablu de alimentare pen-
tru scopul pentru care se prevede, de exem-
plu. pentru a transporta maşina, trăgând sau
maşina de cordon. Păstraţi cablul de căldură,
ulei, muchii ascuţite sau părţi mobile ale
maşinilor. Cordon de alimentare deteriorat
sau înfăşurat măreşte riscul de electrocutare.
1.2.5. Atunci când se lucrează în aer liber,
porniţi maşina numai în instalaţii echipat cu
un comutator electric Fi (siguranţă de oprire
comutator cu curent rezidual) şi curentul de
scurgere, care se declanşează atunci când
DTZ trebuie să e nu mai mult de 30 mA.
Utilizaţi numai cabluri de extensie adecvate
pentru utilizare în aer liber. Folosirea unui
cablu prelungitor adecvat pentru utilizarea în
aer liber reduce riscul de electrocutare.
1.2.6. Dacă aveţi nevoie să utilizaţi aparatul
într-un mediu umed, utilizează comutatorul
curenţilor de scurgere de siguranta. Utiliza-
rea comutatorului curenţilor de scurgere de
siguranţă reduce riscul de electrocutare.
1.3. Mod sigur de lucru.
1.3.1. Fiţi întotdeauna atenţi la ceea ce faci si
rezonabile. Nu folosiţi aparatul când sunteţi
obosit sau sub inuenţa drogurilor, alcoolu-
lui sau a drogurilor. Un moment de neatenţie
în timp ce o maşină de operare poate duce la
leziuni grave.
1.3.2. Îmbrăcăminte de protecţie personală şi
întotdeauna purta ochelari de protectie. Pur-
tarea unui aparat adecvat pentru utilizarea şi
echipamentul de activitate cu scop personal
de protecţie, cum ar masca de praf, panto
de puternic închis ermetic se confrunte cu
stabilă, de protecţie casca sau de auz (anti-
foanele externe), reduce riscul de accident.
1.3.3. Evitaţi activarea accidentală a maşinii
din neatenţie. Înainte de a conecta, asiguraţi-
vă că comutatorul este în poziţia “O”. Dacă,
atunci când purtaţi aparatul cu degetul pe co-
mutator, există pericolul de accident.
1.3.4. Înainte de a porni maşina, asiguraţi-vă
că aţi îndepărtat toate utilitatile ei şi chei. In-
strumentelor de sprijin lăsat în urmă pe piese
în mişcare poate provoca leziuni.
1.3.5. Evitaţi poziţii nereşti. Lucrări în picior
de egalitate, şi în orice moment. Astfel, puteţi
controla masina mai bine şi mai sigur dacă
situaţii neaşteptate.
1.3.6. Imbraca-te corespunzator. Nu
funcţionează cu haine largi sau bijuterii.
Menţineţi părul, îmbrăcămintea şi mănuşile
departe de componente aate în mişcare.
Hainele largi, bijuteriile sau părul lung pot
prinse de piesele aate în mişcare.
1.3.7. Dacă este posibil, utilizaţi un sistem
de extragere a prafului, asiguraţi-vă că este
conectat şi în mod corespunzător. Utiliza-
rea acestor dispozitive din cauza pentru a da
praful la locul de muncă.
1.4. Atitudine atentă faţă de maşină.
1.4.1. Nu supraîncărcaţi maşina. Folosiţi
aparatul numai conform destinaţiei prevăzute.
Veţi lucra mai bine şi mai sigur atunci când
utilizaţi aparatul corespunzătoare menţionate
de către producătorul gamei de încărcare.

20 www.raider.bg
1.4.2. Nu folosiţi maşini-unelte în cazul în
care comutatorul este deteriorat. Maşină care
nu poate comutatorul furnizate de către
producătorul este periculos şi ar trebui să e
reparate.
1.4.3. Înainte de a modica setările de mas-
ini, unelte schimbarea de putere şi o lungă
perioadă de timp, atunci când nu utilizaţi
aparatul, deconectaţi sursa de alimentare.
Această măsură elimină riscul de a porni
maşina din neatenţie.
1.4.4. A se ţine maşinile în locuri unde pot
accesate de către copii. Nu le permite să
e utilizate de către persoane care nu sunt
familiarizaţi cu modul de a lucra cu ei şi nu
au citit aceste instrucţiuni. Când vă aaţi în
mâinile utilizatorilor neinstruit, maşinile pot
extrem de periculoase.
1.4.5. Păstraţi maşini-unelte. Vericaţi pentru
funcţia dezalinierea perfect, indiferent dacă
vrăji care au rupte sau deteriorate piese care
pot afecta funcţiile aparatului. Înainte de a
utiliza aparatul, asiguraţi-vă că părţile deterio-
rate care urmează să e reparate. Multe acci-
dente sunt cauzate de maşini şi echipamente
de prost întreţinute.
1.4.6. Păstraţi accesoriile aşchietoare ascuţite
şi curate. Accesoriile atent întreţinute, cu
muchii tăietoare sunt ascuţite rezistenţă mai
mică şi mai uşor de lucru cu ele.
1.4.7. De a folosi utilaje, accesorii si in-
strumente de lucru, etc, în conformitate cu
instrucţiunile producătorului. În conformitate
cu aceste instrucţiuni, precum şi condiţiile
specice de muncă şi pentru a efectua
operaţiuni. Utilizarea de maşini, altele decât
cele preconizate, poate duce la accidente.
1.4.8. Zgomot şi vibraţii de informare.
Valorile măsurate de sunet determinate
conform EN 61029. De obicei, nivelurile de
zgomot A-ponderat al produsului sunt:
Nivelul de sunet de presiune 95 dB (A);
Nivel putere sunet 108 dB (A).
Incertitudine K = 3 dB.
Purtaţi protecţie auditivă!
Valorile vibraţiilor total (triada vector
suma) determinate conform EN 61029:
Vibraţii de emisie ah valoare = 3.80 m/s2
Incertitudinea K = 1,5 m/s2.
Nivelul emisiilor de vibraţii dat în
această şă de informaţii a fost măsurat
în conformitate cu un test standardizat
precizat în EN 61029 şi poate folosit pentru
a compara o sculă cu alta. Acesta poate
folosit pentru o evaluare preliminară a
expunerii. Nivelul specicat al vibraţiilor
reprezintă aplicaţiile principale ale
instrumentului. Totuşi, dacă instrumentul
este utilizat pentru diferite aplicatii, cu
accesorii diferite şi prost întreţinute, emisiei
de vibraţii poate diferi. Acest lucru poate
creşte semnicativ nivelul de expunere
pe întreaga perioadă de lucru. O estimare
a nivelului de expunere la vibraţii, de
asemenea, ar trebui să ia în considerare
momentele în care scula este oprită sau când
este în execuţie, dar nu face de fapt treaba.
Acest lucru poate reduce semnicativ nivelul
de expunere pe întreaga perioadă de lucru.
1.4.9. Păstraţi masă plană şi nu zgâria sau
apăsaţi pe tabel.
04/01/10. Nu puneţi mâinile oriunde în
apropiere de whist lama acesta se roteşte.
1.4.11 Nu încercaţi să o lama gratuit
blocată fără ca mai întâi oprirea sau
scoaterea mufa din reţeaua de alimentare.
04/01/12. Păstraţi apă pe deplin în
rezervor, atunci când opera de tăiere.
04/01/13. Nu folosiţi solvenţi pentru orice
loc de apă în acest instrument.
04/01/14. Deconectaţi unealta de la sursa
de alimentare atunci când nu este utilizat sau
înainte de service.
2. Reguli specice de siguranţă
2.1. Asiguraţi-vă că săgeata de
direcţionale de pe lama corespunde cu
direcţia de rotaţie a motorului.
2.2. Verica periodic pentru a sigur de
blocare arborele şurubul este strâns, iar lama
este bine xată la arborele foişor.
2.3. Vericaţi cu atenţie lama pentru a
vedea dacă surate sau deteriorate înainte
de utilizare. Dacă crăpate sau deteriorate,
înlocuiţi-l imediat.
2.4. Utilizaţi numai o sursă de putere RCD-
protejate sau a vă conecta la un punct de
energie electrică cu ajutorul unui întrerupător
de circuit RCD aprobat. Aceasta este o
măsură de precauţie esenţiale de siguranţă.
2.5. Păstraţi cablul departe de zona de
tăiere şi poziţia pentru ca aceasta nu va
prins pe piesa de lucru.
2.6. Înainte de a porni, vericaţi că toate
piuliţe şi instrumentele de stabilire a au fost
Table of contents
Languages:
Other Raider Cutter manuals

Raider
Raider RDP-ETC26T User manual

Raider
Raider RD-ETC20 User manual

Raider
Raider RD-ER07 User manual

Raider
Raider RD-ETC23 User manual

Raider
Raider RD-AC11 User manual

Raider
Raider RD-ETC25 User manual

Raider
Raider RD-TC01 User manual

Raider
Raider RD-CM09 User manual

Raider
Raider RD-TC31 User manual

Raider
Raider RD-PCM29 User manual