BEFORE PAINT
INTERNAL BRACES
The body and cab are fitted with strengthening braces inside. These are to prevent the
components ‘splaying’ as they cure. They must be left attached until the bonnet and cab are
glued to the running board.
SUPPORTS AND FLASH
Use a modelling knife with a sharp blade (recommend a Swann-Morton) to slice the remaining
‘nubs’ of the 3D printing supports off as flush as you can get them, then sand or file the surface
flat.
HANDRAIL HOLES
Holes for handrails have been printed as part of the model. However, due to the small size, they
may have been clogged with excess resin and require drilling out, we recommend doing this
even if the holes appear clear, the recommended tool is a pin vice drill.
Handrail mounting holes should be opened out to .45-0.55mm for handrails mounted directly to
the body, and 0.8mm-1mm for the handrail knobs.
PREP AND PAINT
As with any 3D printed kit, the sanding and painting is the most important stage to get right.
One of the reasons for splitting the model into separate sections was to make it easier to
prepare for paint. 3D printing tends to have layers and these need to be sanded and
filled in order to get a smooth surface.
The knack is to use a bit of filler primer and sanding (using fine wet-and-dry sandpaper),
but not too much, so as to fill and smooth the layers but also not lose the rivets and other small
details.
Be careful around the front grille - it may be best to mask this area off while using filler primer to
avoid filling the grille holes with paint.
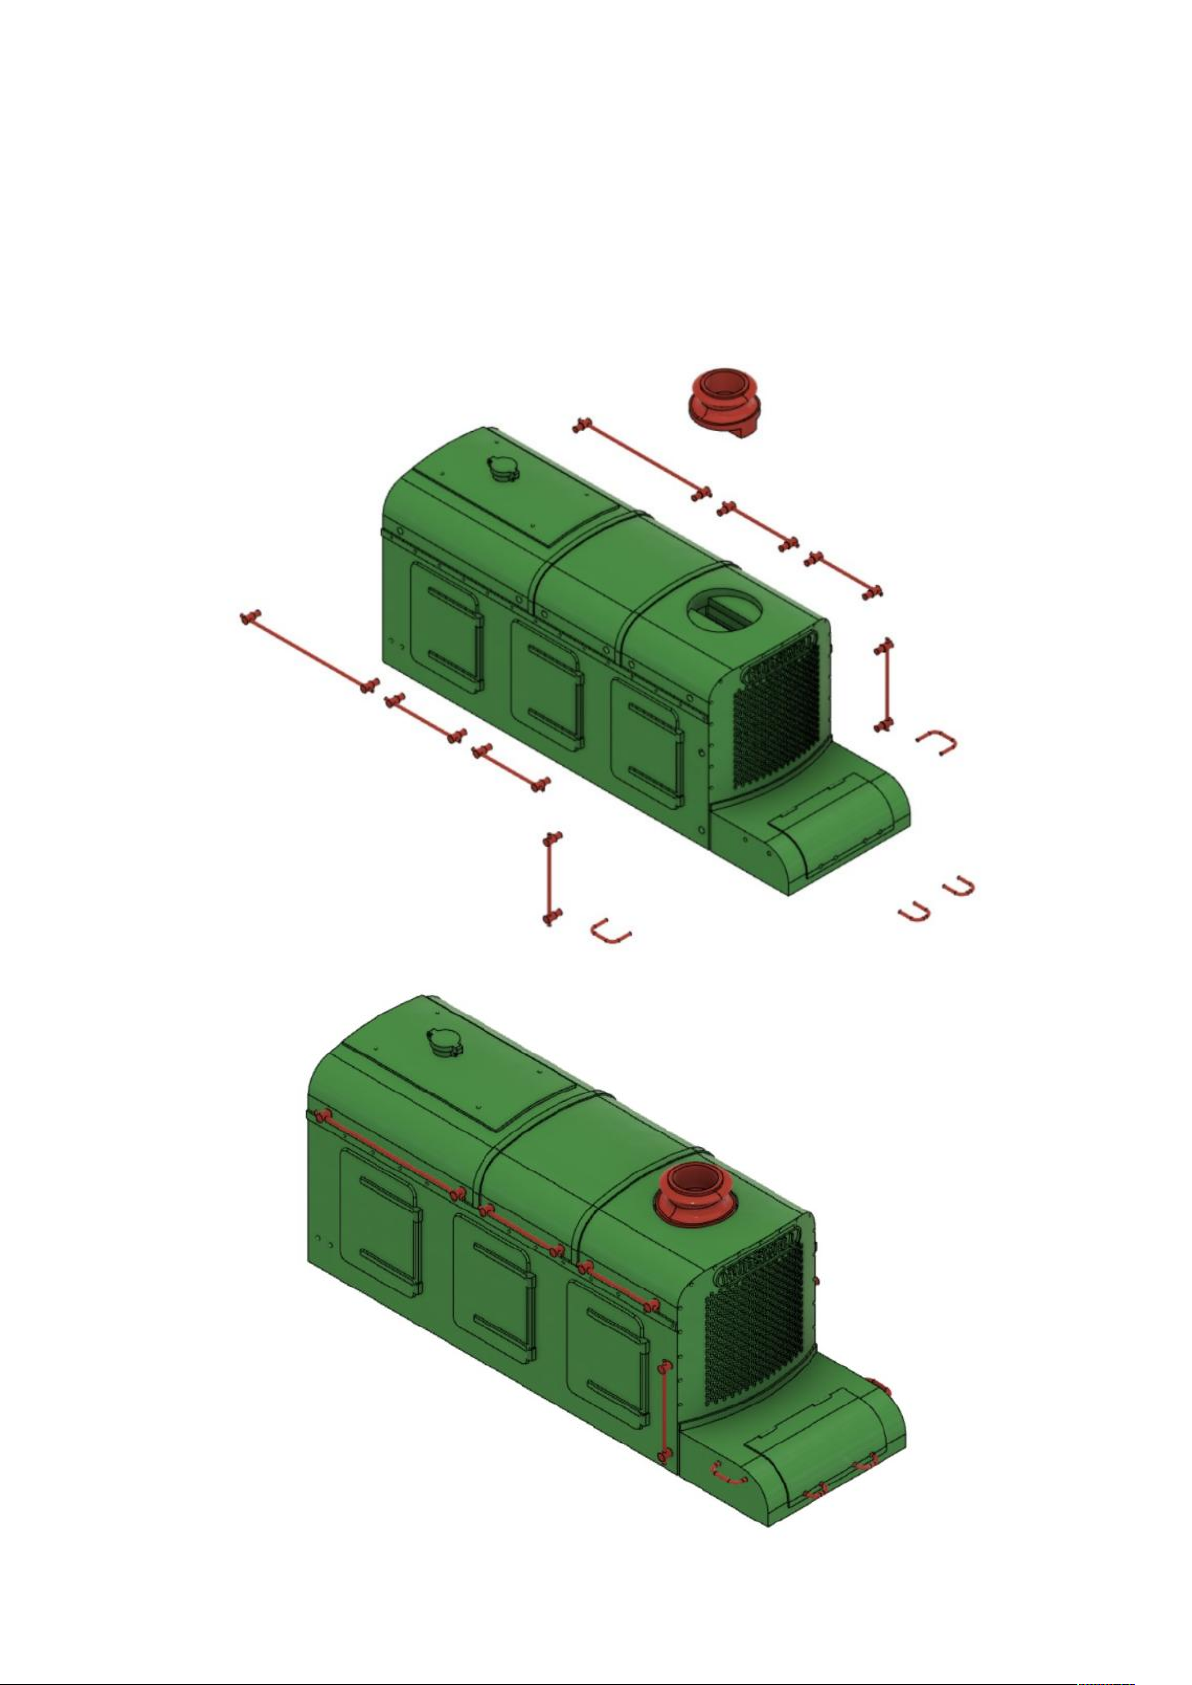
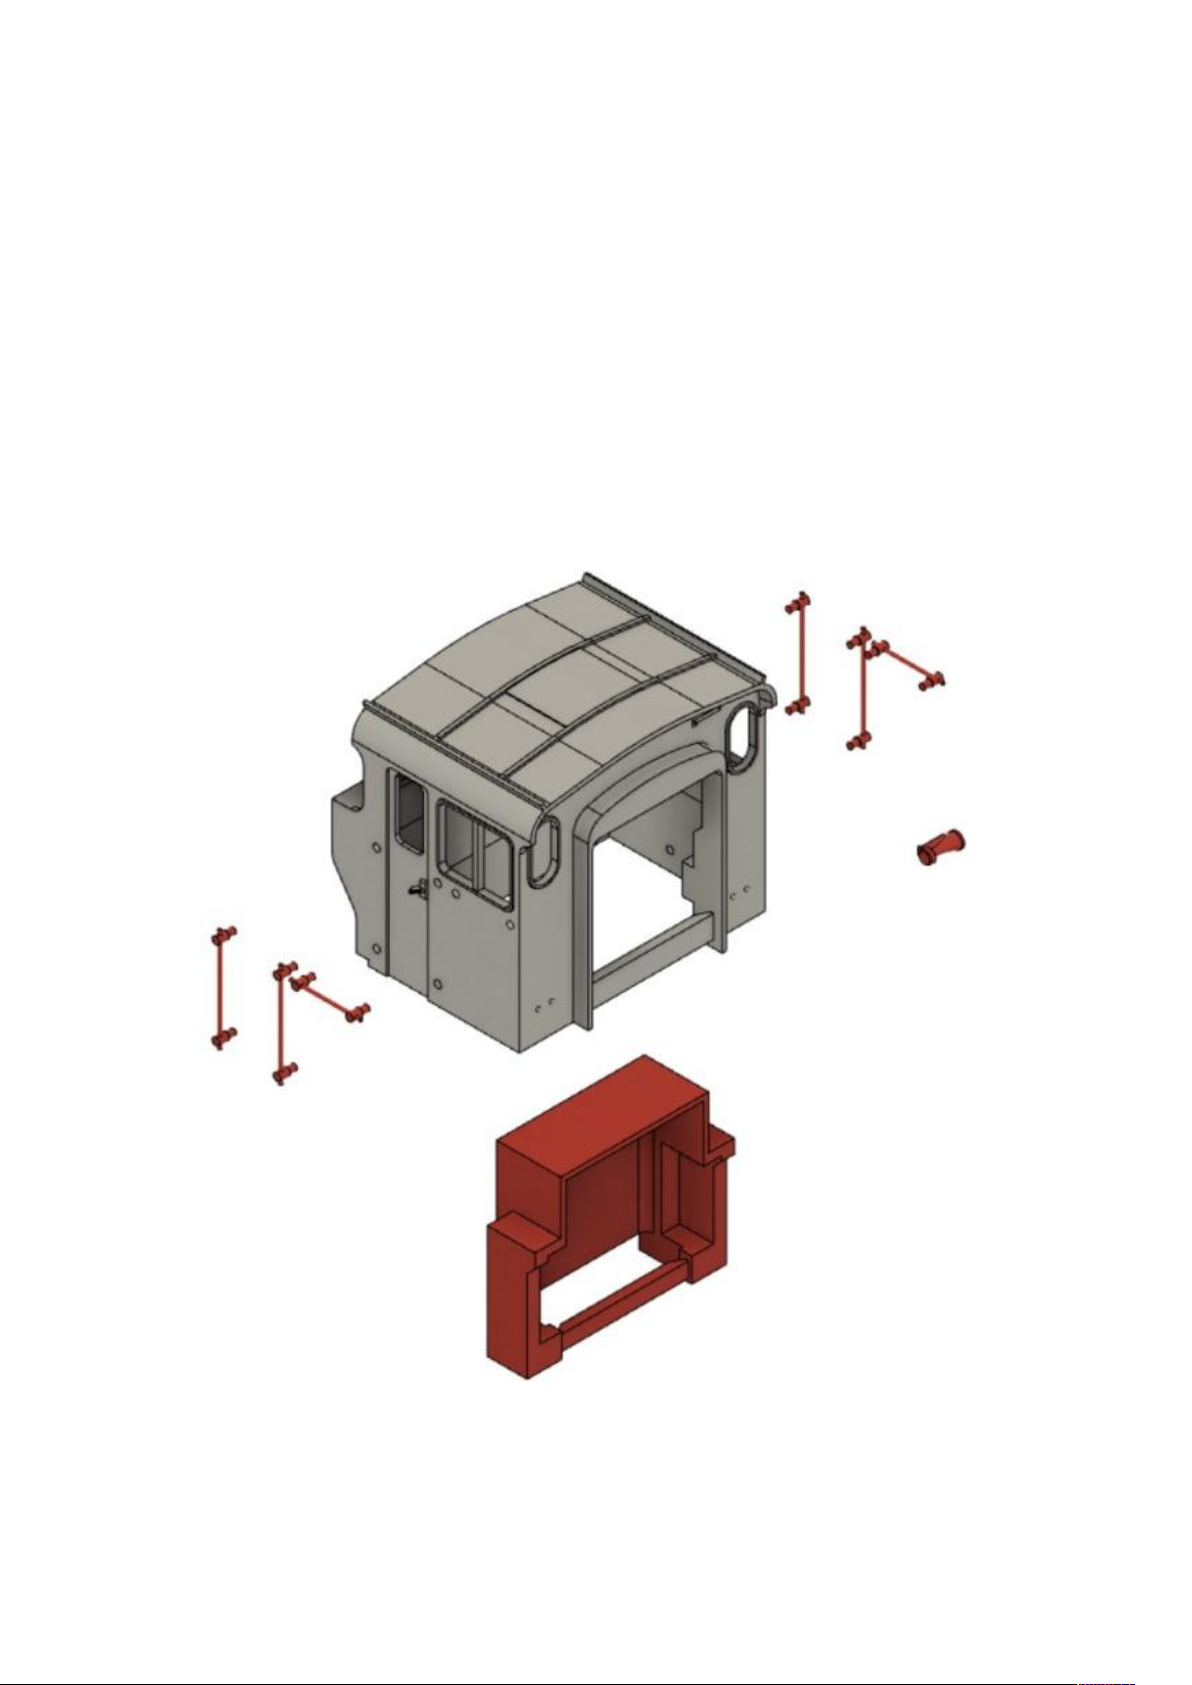
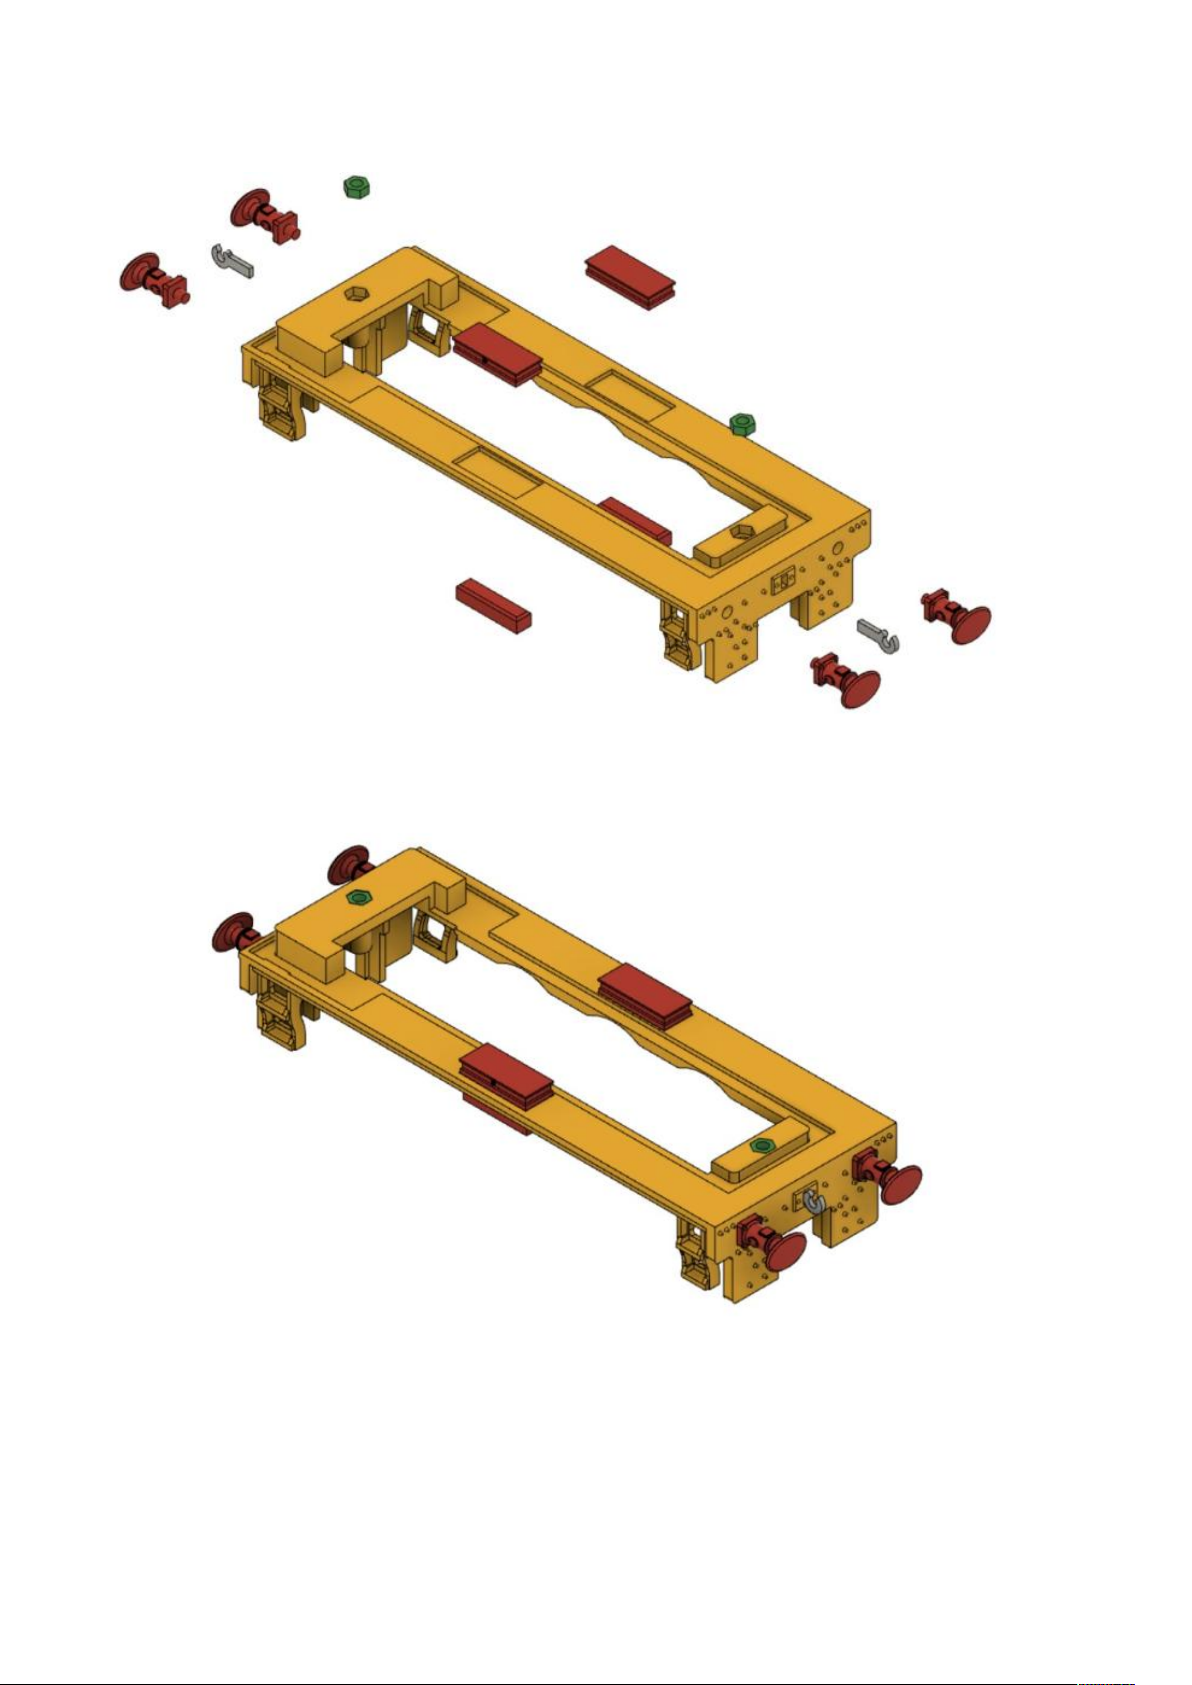
ACCESSORIES
Each accessory pack includes:
-Buffers x 4! ! -Sandboxes x 2! ! -Chimney! !
-Horn!!!-Toolboxes!!!-Air tanks x 2!
-Handrail knobs (WD short type) x 28 (BR) x 20 (industrial)
-.45mm Handrail Wire ! ! -10BA countersunk bolts and nuts x 2
-Cab interior/Motor Cover! ! -Dummy coupling hooks x 2
!!
Accessories differ in detail depending on the kit but the fitment is the same.
The printed accessories are supplied on a ‘float’ with support material included. To remove the
support material, we recommend using some snips to slice the supports and then the scalpel/
modelling knife to cut off the ‘nubs’ left over from the supports.