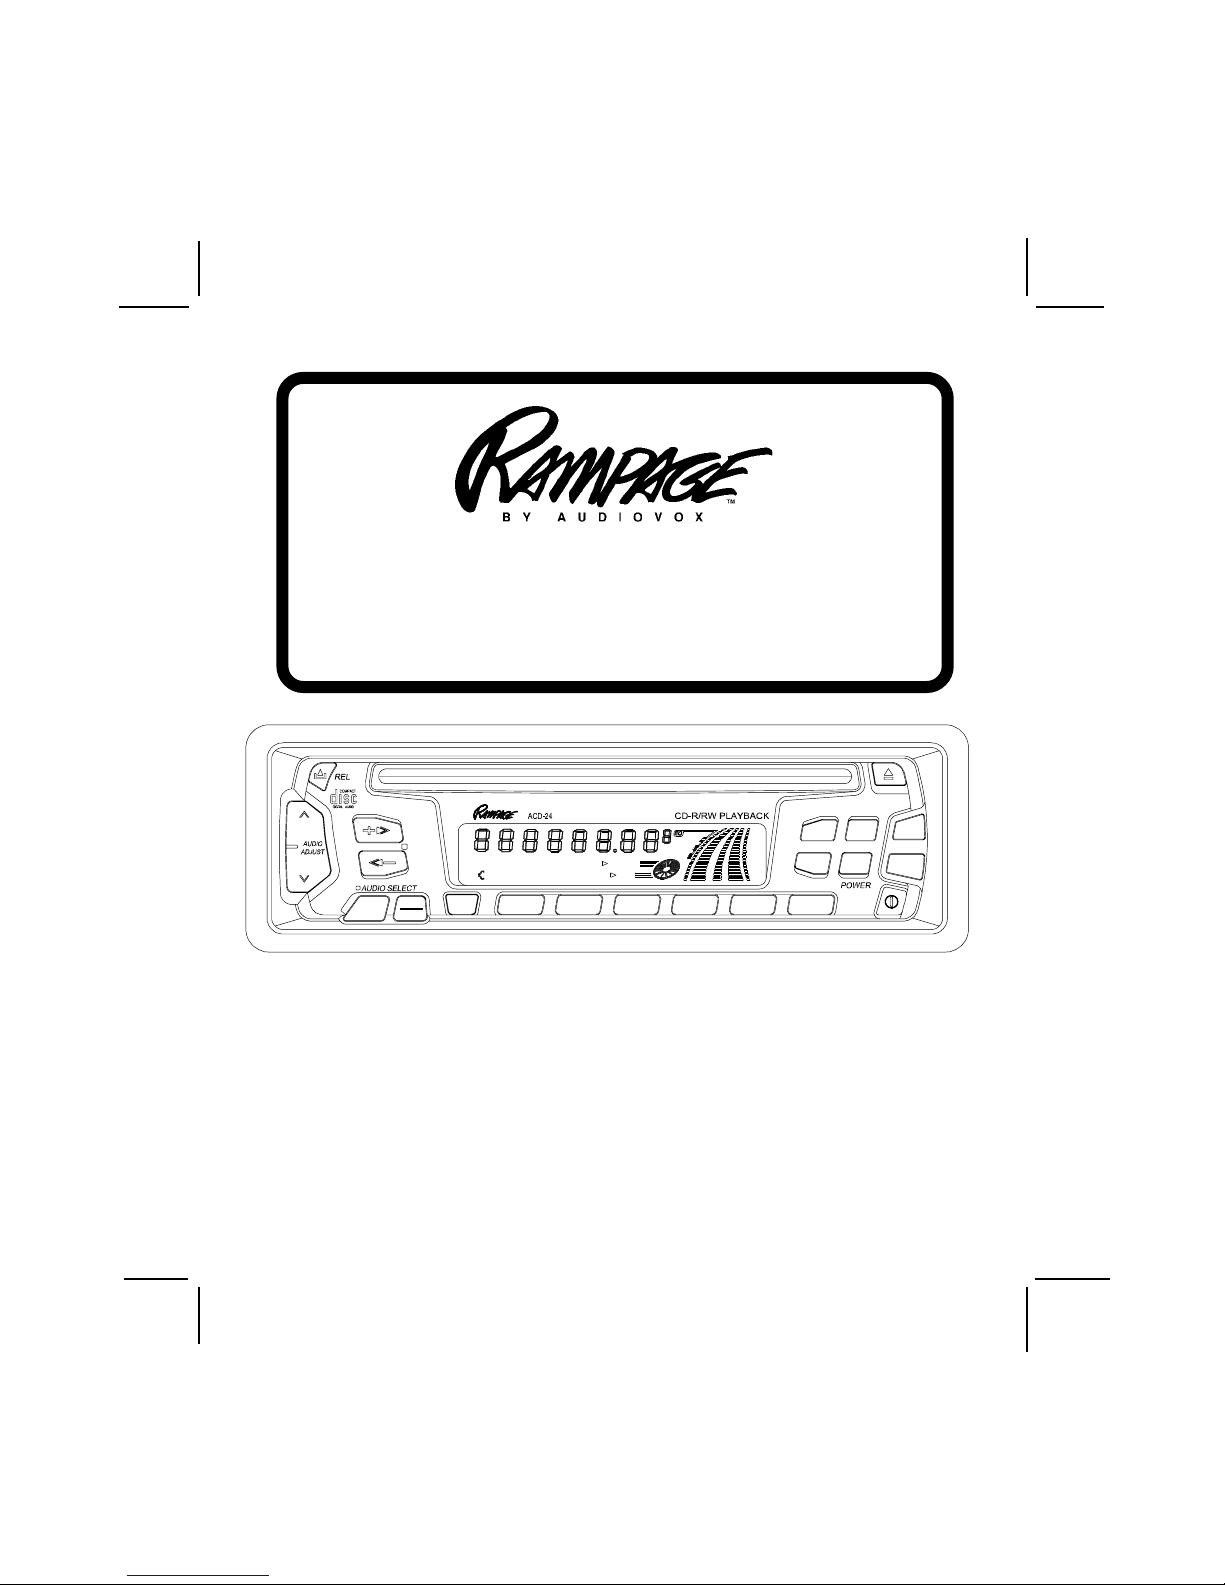
Rampage 1285780E User manual

128-5780E
1 of 48
Released 4-24-00.
Revision A: Corrected pages 8,9,10,12,13. 6-13-00.
ACD-24ACD-24
ACD-24ACD-24
ACD-24
DETACHABLE FRONT PANEL AM/FM/MPX RADIO WITH
COMPACT DISC PLAYER, CD CHANGER CONTROLS AND
QUARTZ CLOCK
OO
OO
OWNER'S MANUWNER'S MANU
WNER'S MANUWNER'S MANU
WNER'S MANUALAL
ALAL
AL
Revision B: Changed clock description and setting procedure 11-3-00.
Revision C: Translated to Spanish 12-5-00.
Revision D: Added CD-R and CD-RW specification notice 5-9-02.
Revision E: Incorporated new front panel layout and text changes.
1 2 3 4 5 6PAU SCN RPT SHF D.DN D.UP
VOL
VOL
TUNE/
SKIP/
TRACK
BAND
SEL
MODE
MUTE
T/F MONO
P.EQLOC
AS/PS
LOUD
TA
ME/CR
AFSW LOUD
MP3 PTYST
CDPMONOTP REC
TAPE INLOCEON ROCK
CLAS
POP

128-5780E
2 of 48
11
11
1
INSTINST
INSTINST
INSTALLALL
ALLALL
ALLAA
AA
ATT
TT
TION INSTRUCION INSTRUC
ION INSTRUCION INSTRUC
ION INSTRUCTT
TT
TIONSIONS
IONSIONS
IONS
INSTALLATION INSTRUCTIONSINSTALLATION INSTRUCTIONS
INSTALLATION INSTRUCTIONS
This unit is designed for installation in cars, trucks, and vans with an existing radio opening. In many cases, a special
installation kit will be required to mount the radio to the dashboard. These kits are available at electronics supply
stores and car stereo specialist shops. Always check the kit application before purchasing to make sure the kit
works with your vehicle. If you need a kit but cannot find it available, call our toll-free “HELP” line (1-800-645-4994).
UNIVERSALINSTALLATIONPROCEDUREUSINGMOUNTINGSLEEVE
1. Remove the detachable front panel if it is attached to the chassis by pushing the “Release”button. Slide the
mounting sleeve off of the chassis. If it is locked into position, use the removal tools (supplied) to disengage it.
2. Checkthedashboardopeningsizebyslidingthemountingsleeveintoit. Iftheopeningisnotlargeenough,carefully
cut or file as necessary until the sleeve easily slides into the opening. Do not force the sleeve into the opening
or cause it to bend or bow. Check that there will be sufficient space behind the dashboard for the radio chassis.
3. Locatetheseriesofbendtabsalongthetop,bottom,andsidesofthemountingsleeve. Withthesleevefullyinserted
into the dashboard opening, bend as many of the tabs outward as necessary so that the sleeve is firmly secured
to the dashboard.
4. Place the radio in front of the dashboard opening so that the wiring can be brought through the mounting sleeve.
Followthewiringdiagramcarefullyandmakecertainallconnectionsofthewiringharnessaresecureandinsulated
with wire nuts or electrical tape to insure proper operation of the unit. After completing the wiring connections,
attachthefrontpanelandturntheunitontoconfirmoperation(ignitionswitchmustbe“on”). Ifunitdoesnotoperate,
re-check all wiring until problem is corrected. Once proper operation is achieved, turn off the ignition switch and
proceed with final mounting of the chassis.
5. Carefullyslide theradiointo themounting sleeve makingsure itisright-side-up untilit is fullyseated andthespring
clips lock it into place.
6. Attach one end of the perforated support strap (supplied) to the screw stud on the rear of the chassis using
the hex nut provided. Fasten the other end of the perforated strap to a secure part of the dashboard either above
or below the radio using the screw and hex nut provided. Bend the strap to position it as necessary.
CAUTION: The rear of the radio must be supported with the strap to prevent damage to the dashboard from the
weight of the radio or improper operation due to vibration.
7. Re-attach the front panel to the chassis. Establish a location for the remote input jack (usually the underside of
the dashboard) if it is a feature of the radio. Anchor it in place using two self-tapping screws (M5x6). Do
not over-tighten screws. Test radio operation by referring to the Operating Instructions for the unit.
INSTALLATIONUSINGKITS
1. If your vehicle requires the use of an installation kit to mount this radio, follow the instructions included with the
installation kit to attach the radio to the mounting plate supplied with the kit.
2. Wire and test the radio as described in Step 4 above.
3. Install the radio/mounting plate assembly to the sub-dashboard according to the instructions of the installation kit.
4. Attach the support strap to the radio and dashboard as described in Step 6 above.
5. Replace the dashboard trim panel.
ISOINSTALLATIONPROCEDURE
Thisunithasthreaded holes inthechassis side panelswhichmaybe used withtheoriginal factory mounting
brackets of some Toyota, Nissan, Mitsubishi, Isuzu, Hyundai and Honda vehicles to mount the radio to the
dashboard. Please consult with your local car stereo specialist shop for assistance on this type of installation.
1. Remove the existing factory radio from its dashboard or center console mounting. Save all hardware and
brackets as they will be used to mount the new radio.
2. Carefully un-snap the plastic frame from the front of the new radio chassis. Remove and discard the frame.
3. Remove the factory mounting brackets and hardware from the existing radio and attach them to the new radio.
CAUTION: DONOTEXCEEDM5X6MMMAXIMUMSCREWSIZE.
LONGERSCREWSMAYTOUCHANDDAMAGECOMPONENTSINSIDETHECHASSIS.
4. Wire the new radio to the vehicle as per step 4 above.
5. Mount the new radio assembly to the dashboard or center console using the reverse procedure of step 1.

128-5780E
3 of 48
INSTINST
INSTINST
INSTALLALL
ALLALL
ALLAA
AA
ATT
TT
TION INSTRUCION INSTRUC
ION INSTRUCION INSTRUC
ION INSTRUCTT
TT
TIONSIONS
IONSIONS
IONS
22
22
2
8:30AM - 7PM
9AM - 5PM
CENTRAL EASTERN
6:30AM - 5PM
7AM - 3PM
MOUNTAIN
5:30AM - 4PM
6AM - 2PM
PACIFIC
MON. - FRI.
SATURDAY
DAY
TT
TT
TOLL-FREE INSTOLL-FREE INST
OLL-FREE INSTOLL-FREE INST
OLL-FREE INSTALLALL
ALLALL
ALLAA
AA
ATT
TT
TION ASSISTION ASSIST
ION ASSISTION ASSIST
ION ASSISTAA
AA
ANCENCE
NCENCE
NCE
The installation and wiring connections for this unit are so simple, we doubt you'll need our help, but, if you
do, we're here to help you. Just call our toll-free telephone assistance line at 1-800-645-4994 during the days
and hours shown (U.S.A. and Canada only).
7:30AM - 6PM
8AM - 4PM
FASTEN THIS END TO SCREW
STUD ON REAR OF CHASSIS
NUT (5MM)
FASTEN THIS END TO SECURE PART OF DASH-
BOARD. DRILL HOLE IF NECESSARY.
SCREW
(5MM)
DETACHABLE
FRONT PANEL
EXISTING DASH OPENING
FILE EDGES TO FIT IF NECESSARY - DO NOT OVERFILE
NOTE: IF DASH IS SOLID, USE REAR SIDE (WITHOUT THE LIP) OF
MOUNTINGSLEEVE AS ATEMPLATE & CUTOPENING
UNIVERSAL INSTALLATION USING MOUNTING SLEEVEUNIVERSAL INSTALLATION USING MOUNTING SLEEVE
UNIVERSAL INSTALLATION USING MOUNTING SLEEVE
NUT (5MM)
REMOVE THE PLASTIC FRAME FROM THE FRONT OF THE
CHASSIS BY CAREFULLY UN-SNAPPING IT.
TYPICAL INSTALLATION
ISOINSTALLATIONISOINSTALLATION
ISOINSTALLATION
20° MAX.
FRONT PANEL
CAUTION:
FOR PROPER OPERATION OF THE CD PLAYER, THE CHASSIS
MUST BE MOUNTED WITHIN 20° OF HORIZONTAL. MAKE
SURE THE UNIT IS MOUNTED WITHIN THIS LIMITATION.
SIDE VIEW
OF
CHASSIS
UN-SNAP AT 2 PLACES
EACH ON TOP AND BOTTOM
MAXIMUM
SCREW SIZE
M5 x 6
MAXIMUM
SCREW SIZE
M5 x 6
PERFORATED STRAP
RADIO
SCREW STUD
MOUNTING SLEEVE
PLASTIC FRAME FACTORY MOUNTING
BRACKETS
REMOVAL TOOLS
BEND BOTTOM
TABS DOWNWARD
BEND TOP
TABS UPWARD

128-5780E
4 of 48
33
33
3
33
33
3
RADIO WIRING
RR
RR
RAA
AA
ADIO WIRINGDIO WIRING
DIO WIRINGDIO WIRING
DIO WIRING
REFERTOPAGE5FORSPEAKERWIRING
33
33
3
BLACK
EXISTING
ANTENNA
CABLE
"RADIO"OR
"ACCESSORY"FUSE
ANTENNA AUTOMATIC
ANTENNA
CAR
FUSEBLOCK
IMPORTANT
THEBLUEWIRECANBEUSED
TO REMOTELY ACTIVATE AN
AUTOMATICANTENNAORAN
EXTERNAL AMPLIFIER (SEE
ANTENNA OR AMPLIFIER
MANUAL)
ANTENNASOCKET
ONREAROFRADIO
POSITIVE (+) TERMINAL
12 VOLT BATTERY
CARBATTERY
METAL PART OF DASH
(DRILLHOLEIF
NECESSARY)
SCREW
RED
RADIO
IMPORTANT
THISWIREMUSTBECONNECTED
AS SHOWN OR RADIO WILL NOT
OPERATEPROPERLY
SEEPAGE4FOR
SPEAKERWIRING
14 PIN PLUG
MATING 14 PIN SOCKET
BLUE
YELLOW
REMOTEINPUTJACK
FILTER/FUSE
BOX
CONTAINS:
ONE1-AMPFUSE
ONE10-AMPFUSE

128-5780E
5 of 48
44
44
4
SPESPE
SPESPE
SPEAA
AA
AKK
KK
KER WIRINGER WIRING
ER WIRINGER WIRING
ER WIRING
SPESPE
SPESPE
SPEAA
AA
AKK
KK
KER WIRINGER WIRING
ER WIRINGER WIRING
ER WIRING
REFERTOPAGE4
FORRADIOWIRING
WARNING!
!THEAMPLIFIERSINTHISRADIOAREONLYDESIGNEDFORUSEWITH4 SPEAKERS.
!NEVERCOMBINE(BRIDGE)OUTPUTSFORUSEWITH2SPEAKERS.
!NEVERGROUNDNEGATIVESPEAKERLEADSTOCHASSISGROUND.
!FAILURETOWIREEXACTLYASSHOWNBELOWMAYCAUSEELECTRICALDAMAGETO
THERADIO.
RCA
JACKS
LINEOUT
FORUSEWITH
OPTIONAL
EXTERNAL
AMPLIFIERS
RED=RIGHTREAR
WHITE=LEFTREAR
WHITEw/BLACKSTRIPE
WHITE
LEFTFRONTSPEAKER RIGHTFRONTSPEAKER
LEFTREARSPEAKER RIGHTREARSPEAKER
GREEN
GRAYw/BLACKSTRIPE
9-PINPLUGS
GREENw/BLACKSTRIPE VIOLETw/BLACKSTRIPE
RADIO
8:30am - 7:00pm Eastern
9:00am - 5:00pm Eastern
Monday - Friday
Saturday
1-800-645-49941-800-645-4994
1-800-645-49941-800-645-4994
1-800-645-4994
HELP!
GRAY
VIOLET
4-PINPLUGS
SEEPAGE3FOR
RADIOWIRING
8-PIN DIN SOCKET FOR CONNECTION
TO OPTIONAL CD CHANGER
6
COMPAC T
DINCABLE
(SUPPLIEDWITH
CDCHANGER).
OPTIONAL
CDCHANGER
NOTE:
CHECKWITHYOURRAMPAGE/AUDIOVOXCARSTE-
REO SPECIALIST OR CALL 1-800-645-4994 FOR
RECOMMENDATIONSOFTHEMODELSTHATWILL
WORKWITHYOURRADIO.
REMOTEINPUT INPUTJACKFOR
USEWITHEXTERNALCDPLAYER,
CASSETTE PLAYER, OR MP3
PLAYBACK

128-5780E
6 of 48
OPEROPER
OPEROPER
OPERAA
AA
ATT
TT
TING INSTRUCING INSTRUC
ING INSTRUCING INSTRUC
ING INSTRUCTT
TT
TIONSIONS
IONSIONS
IONS
11
11
1ON/OFF POWER BUTTON
Press this button to turn the unit on or off. If the unit
is off and the ignition switch is "on", the unit will
turn on automatically when a disc is inserted, or
when the "MODE" switch or "BAND" switch is
pressed.
22
22
2VOLUME / LEVEL CONTROL
To increase the volume level, press the button.
The volume will increase and the level will be shown
on the display panel from a minimum of “VOL 00” to
a maximum of “VOL 39”. To increase the volume
quickly, keep the button pressed. To decrease the
volume level, press the button. Keep the button
pressed to decrease the volume quickly. The display
will automatically return to the normal indication
5 seconds after the last volume adjustment or when
another function is activated. These buttons are
also used in conjunction with the ''AUDIO SELECT"
(SEL) button 3to adjust the bass, treble, balance,
and fader levels as described in 4, 5, 6and 7.
33
33
3AUDIO SELECT (SEL) BUTTON
This button is used to select the audio function
(volume, treble, bass, balance, or fade) to be ad-
justed using the Volume/Level Control
2. Press-
ing the "SEL" button will select bass (“BAS” on
the display), treble ("TRE"), balance (“BAL”),
fader (“FAD”) or volume (“VOL”). The display
will automatically return to the normal indication
5 seconds after the last adjustment or when another
function is activated. The unit will produce a single
beep tone whenever the button is pressed.
44
44
4BASS CONTROL
To adjust the bass level, first select the Bass mode
by pressing the "SEL" button 3so that the “BAS”
indication appears on the display panel. Within 5
seconds of choosing the Bass mode, press the
or button of the Level Control 2to adjust the
bass response as desired. The bass level will be
shown on the display panel from a minimum of -12
to a maximum of +12 (0 is flat response). The
display will automatically return to the normal
indication 5 seconds after the last adjustment or
when another function is activated.
55
55
5TREBLECONTROL
To adjust the treble level, first select the Treble mode
by pressing the "SEL" button 3so that the “TRE”
indication appears on the display panel. Within 5
seconds of choosing the Treble mode, press the
or button of the Level Control 2to adjust the
treble response as desired. The treble level will be
shown on the display panel from a minimum of
-12 to a maximum of +12 (0 is flat response). The
display will automatically return to the normal
indication 5 seconds after the last adjustment or
when another function is activated.
66
66
6LEFT/RIGHT BALANCE CONTROL
To adjust the left-right speaker balance, first select
the Balance mode by pressing the "SEL" button 3so
that the “BAL” indication appears on the display
55
55
5
OPEROPER
OPEROPER
OPERAA
AA
ATT
TT
TING INSTRUCING INSTRUC
ING INSTRUCING INSTRUC
ING INSTRUCTT
TT
TIONSIONS
IONSIONS
IONS
13
31,30
(BEHINDPANEL)
1 2 3 4 5 6
PAU SCN RPT SHF D.DN D.UP
VOL
VOL
TUNE/
SKIP/
TRACK
BAND
SEL
MODE
MUTE
T/F MONO
P.EQLOC
AS/PS
LOUD
TA
ME/CR
AFSW LOUD
MP3 PTYST
CDPMONOTP REC
TAPE INLOCEON
ROCK
CLAS
POP
27,3328,3420,3919,3821,3718
3, 4, 5, 6, 7
2
11
16
17
35
36
12
10
29 15 14 82425
23 22
26, 32
9
1

128-5780E
7 of 48
panel. Within 5 seconds of choosing the Balance
mode, press the or button of the Level
Control 2to adjust the balance as desired. The
balance position will be shown on the display panel
from “BAL.L 16” (full left) through “BAL.R 16” (full
right). When the volume level between the left and
right speakers is equal, “BAL 00” will be shown on
the display panel. The display will automatically
return to the normal indication 5 seconds after the
last adjustment or when another function is activated.
77
77
7FRONT/REARFADER CONTROL
To adjust the front-rear speaker balance, first select
the Fader mode by pressing the "SEL" button 3so
thatthe “FAD”indication appearson thedisplay panel.
Within 5 seconds of choosing the Fader mode, press
the or button of the Level Control 2to adjust
the front-rear speaker balance as desired. The fader
position will be shown on the display panel from
“FAD.R 16” (full rear) through “FAD.F 16” (full front).
When the level between the front and rear speakers
is equal, “FAD 00” will be shown on the display
panel. The display will automatically return to
the normal indication 5 seconds after the last
adjustment or when another function is activated.
88
88
8LOCAL (LOC) OPERATION
This feature sets the signal level at which the radio
willstopduringManual Up/Down,Seekand/or Auto-
Store (AS) tuning; thus, only strong (local) stations
will be received and selected. When Auto-Store
(AS) tuning is not in effect, LOC will disappear from
the display panel, and the radio will stop at a wider
range of signals, including weaker (more distant)
stations.
99
99
9AUDIO MUTE (MUTE)
This button is used to mute the volume from the
system. By pressing the button,a flashing "MUTE"
indication will appear on the display panel and the
volume will be muted. Pressing the Mute button
again, or activating the Volume Control 2Select
("SEL") button 3 "LOUD"button, orEqualizer ("EQ")
button will return the volume level to the setting in
use before the Mute function was activated.
blbl
blbl
bl BAND/LOUDNESSCONTOUR SELECTION
(BAND/LOUD)
During radio operation, each momentary press of
this button will change the radio band. The indication
“AM1”, “AM2”, “FM1”, “FM2”, or “FM3” will appear on
the display panel according to your selection.
During disc play, pressing this button will stop play
of the disc and switch to radio operation without
ejecting the disc. During this time, the IN
indication will remain on the display panel to show
that a disc is still loaded in the unit. Press the
"Mode" button cr to return to disc play from the
beginning of the last track in play.
When listening to music at low volume levels, the
loud feature will boost the bass and treble ranges
to compensate for the characteristics of hu-
man hearing. Press the BAND/LOUD button for at
least 2 seconds to activate this feature and the indi-
cation LOUD will appear on the display panel.
Pressing the button again for 2 seconds will
deactivate the feature (the LOUD indication will
disappear from the display panel).
bmbm
bmbm
bm MANUAL UP/DOWN TUNING (+ / -)
AUTOMATIC SEEK TUNING
Each time the + button is tapped, the radio will
tune one frequency step higher. Similarly, each tap
of the - button will tune one frequency step
lower. To manually tune in a station, tap the button of
the appropriate direction until the desired frequency
is reached.
Pressing either button for longer than 2.0 seconds
and then releasing will activate the Automatic Seek
Tuning function. The radio will seek the next available
station and stop at that frequency. The Seek function
can be stopped by pressing the button again or ac-
tivating any other tuning function.
bnbn
bnbn
bn AUTO-STORE TUNING (AS)
PRE-SET SCAN TUNING (PS)
During radio operation, press this button momen-
tarily to scan the 6 stations pre-set into the memo-
ries of that band. The unit will stop at each pre-set
station for 5 seconds before continuing to the next
pre-set station. During this time, the pre-set station
number ("CH") in the band will flash. Press the but-
ton again momentarily to stop Pre-Set Scan op-
eration and remain on the selected frequency.
The station number ("CH") stops flashing.
Pressing the button for longer than 2 seconds will
activate the Auto-Store Tuning feature which will
automaticallyscan the band andenter up to 6 strong
stations into the 6 pre-set memories (the indication
“AST” will flash on the display panel to show that
Auto-Store Tuning is in progress). After entering the
stations into the memories, the unit will automatically
stop at each station for 5 seconds so each can be
heard. If you have already set the pre-set memories
to your favorite stations, activating the Auto-Store
feature will erase those stations and enter the new
strong stations. This feature is most useful when
OPEROPER
OPEROPER
OPERAA
AA
ATT
TT
TING INSTRUCING INSTRUC
ING INSTRUCING INSTRUC
ING INSTRUCTT
TT
TIONSIONS
IONSIONS
IONS
66
66
6

128-5780E
8 of 48
77
77
7
travelling in a new area where you are not familiar
with the local stations.
bobo
bobo
bo STATION PRE-SET MEMORIES
To set any of the 6 pre-set memories in each band,
use the following procedure:
1. Turn the radio on and select the desired band.
2. Select the first station to be pre-set using the
Manual Up/Down or Automatic Seek Tuning
Controls bm.
3. Press the pre-set button ("1-6") to be set and
continue to hold it in. After approximately 2
seconds, the pre-set number will appear on the
display panel, indicating that the station is now
set into that pre-set memory position. The station
can now be recalled at any time by pressing
that button.
4. Repeat the above procedure for the remain in
pre-sets on that band and for the other 4 bands
on the unit.
bpbp
bpbp
bp LIQUID CRYSTAL DISPLAY PANEL
FUNCTIONS
The Liquid Crystal Display (LCD) panel displays the
frequency, time, and all activated functions, including
five bar graphs which provide a visual representation
of the volume level and the left and right channel
balance levels. The volume level is represented by
three thin bar graphs. As the volume is increased,
the number of illuminated segments will increase.
The left and right channels are represented by the
wider bar graphs. As the strength of the signal ap-
plied to either the left or right channel increases, the
number of illuminated segments will increase.
NOTE: It is a characteristic of LCD panels that, if
subjected to cold temperatures for an
extended period of time, they may take longer
to illuminate than under normal conditions. In
addition, the visibility of the numbers on the
LCD may slightly decrease. The LCD
read-out will return to normal when the
temperature increases to a normal range.
bqbq
bqbq
bq DISC SLOT
With the label surface facing up, gently insert the
disc into the slot until the soft-loading mechanism
engages and disc play begins. The indication
illuminates and becomes animated, the IN
symbol lights, and the track number and elapsed
time will appear on the display panel.
CAUTION: This unit is designed for play of
standard 5" (12cm) Compact Discs
ONLY. Do not attempt to use 3" (8cm)
CD-Singles in this unit, either with or
without an adaptor, as damage to the
player and/or disc can occur. Such
damage will not be covered by the
Warranty on this product.
brbr
brbr
br TRACK SELECT
These buttons are used to quickly select the beginning
of a particular track. With each momentary tap of
the Forward Track Select button (+), the next
higher track number will be selected as shown on the
display panel. Similarly, with each momentary tap of
the Backward Track Select button ( -), the next
lower track number will be selected.
bsbs
bsbs
bs CUE/REVIEW FUNCTIONS
High-speed audible search to any section of the
disc can be made by the Cue and Review functions.
Press and hold the Cue button (+) to advance
rapidly in the forward direction or the Review button
(-) to advance rapidly in the backward direction.
During either function, the elapsed time within each
trackwill automatically beshown onthe displaypanel.
btbt
btbt
bt CD TRACK ONE POSITION (TOP) SELECTOR
During disc play, press this button to return to begin-
ning of first track on disc. Disc counter will return to
zero and "TRACK" number 01 will appear on dis-
play panel.
bubu
bubu
bu REPEAT PLAY SELECTOR (RPT)
During disc play, press this button to repeat the play
of the selected track (“RPT” will appear on the
display panel). Play of the track will continue to
repeatuntil thebutton ispressed againand the “RPT”
indication disappears from the display panel. Repeat
Play mode will also be cancelled by activating the
Random Play cl or Track Scan cm functions.
clcl
clcl
clRANDOM PLAY SELECTOR (SHF)
During disc play, press this button to play the tracks
on the disc in a random or shuffled order (“RND”)
will appear on the display panel). In Random Play
mode, pressing the Forward Track Select (+)
or Backward Track Select ( -) will also select
tracks in a random order instead of the normal pro-
gression. Additional presses will select tracks in
random order. The Random Play mode can be
cancelled by pressing the button again (“RND”)
indication will disappear from the display panel) or
by activating the Repeat Play bu or Track Scan cm
functions.
cmcm
cmcm
cm TRACK SCAN (SCN)
During disc play, press this button to play the first 10
seconds of each track on the disc (“SCAN” will ap-
77
77
7
OPEROPER
OPEROPER
OPERAA
AA
ATT
TT
TING INSTRUCING INSTRUC
ING INSTRUCING INSTRUC
ING INSTRUCTT
TT
TIONSIONS
IONSIONS
IONS

128-5780E
9 of 48
pear on the display panel). When a desired track is
reached, press the Scan button again to cancel
the function and play of the selected track will
continue. Track Scan mode will also be cancelled
by activating the Repeat Play bu or Random Play cl
functions.
cncn
cncn
cn DISC EJECT ( )
Disc play is stopped, the disc is ejected and the unit
will change to radio operation by pressing this button.
If the disc is not removed from the unit and the button
is pressed again, the disc will be re-loaded and
begin playing.
If the disc is not removed from the disc slot within
15 seconds of being ejected, it will automatically be
re-loaded into the unit to prevent it from being
accidentally damaged. Play of the disc can be
resumedbyusing theCD ModeSelector cr tochoose
CD player function.
coco
coco
co TIME/FREQUENCY SELECTOR (T/F)
This unit can display the clock time, radio frequency or
CD player functions on the display panel. Pressing
the Time/Frequency Selector button when the
radio frequency or CD player track indication is
shown will change the display to show the time.
The time display will automatically return to the radio
frequency or CD player function indication after 5
seconds.
cpcp
cpcp
cp FM MONO/STEREO SELECTOR (MONO)
During FM radio operation, this button is used to
select mono or stereo reception of the broadcast
signal. Under normal reception conditions, the unit
should be left in the stereo mode, as indicated by
"ST " on the display panel when listening to an FM
stereo signal. If the stereo signal is too weak for
comfortable listening, press the button to switch to
mono reception (the "ST " indication will disap-
pear from the display panel). To return to the
stereo reception mode, press the button again so
that the "ST " indication returns.
cqcq
cqcq
cq EQUALIZER SELECTOR (P.EQ)
The P.EQ button applies preset sound effects to
the unit's audio output signal. The P.EQ button,
when pressed, will activate one of three operating
modes ("ROCK, CLAS, or POP"). When the P.EQ
function is active, the bass and treble levels cannot
be changed. When the P.EQ function is not ac-
tive, the unit returns to the user-set bass and
treble levels.
crcr
crcr
cr MODE SELECTOR (MODE)
This button is used to select the radio, or the playback
mode for the CD player or remote CD changer (if
installed). Each press of the button will select a
different mode as indicated on the display panel.
During CD player operation, this button may be used
to change to radio or remote CD changer mode
("CDC") without ejecting the disc (the IN indi-
cation will remain on the display panel to show that a
discis still loadedin theunit). Pressthe buttonagain to
return to integral CD player mode and resume play of
the disc from the point at which it was stopped.
cscs
cscs
cs & ctct
ctct
ct DISC SELECT (CD+ & CD-)
These buttons are used to increase or decrease
selection of a desired disc for play in the remote CD
changer. To advance to a higher number disc, press
the "CD+" button cs. To return to a lower number
disc, press the "CD-" button ct. The number of the
disc in play will be shown on the display panel.
cucu
cucu
cu FRONTPANEL RELEASEBUTTON
This button is used to release the mechanism that
holds the front panel to the chassis. To detach the
frontpanel, press the button sothat the left side ofthe
panel is released. Grasp the released side and pull it
off of the chassis.
To re-attach the panel, position the right side of the
panel in place first and then press the left side of the
panel until the mechanism locks it into place.
dldl
dldl
dl THEFT-DETERRENTL.E.D.
The theft-deterrent Light Emitting Diode (L.E.D.) is
locatedbehindthe frontpaneland isaccessiblewhen
the front panel is removed. The flashing light serves
as a visual warning to the would-be thief that the unit
has been disabled by removal of the front panel.
dmdm
dmdm
dmRESETBUTTON
A"RESET"buttonislocatedonthefrontofthechassis
(front panel must be removed to access the button).
The "RESET" circuitry is provided to protect the
microprocessor circuitry and should only be acti-
vated under the following circumstances as it will
erase the time and pre-set memories:
1. Uponinitialinstallationafterallwiringiscompleted.
2. After the position of the frequency step switch on
the bottom of the chassis has been changed.
3. If there is a malfunction of any of the switches on
the unit, pressing the "RESET" button may clear
the system and return to normal operation.
OPEROPER
OPEROPER
OPERAA
AA
ATT
TT
TING INSTRUCING INSTRUC
ING INSTRUCING INSTRUC
ING INSTRUCTT
TT
TIONSIONS
IONSIONS
IONS
88
88
8

128-5780E
10 of 48
SETSET
SETSET
SETTT
TT
TING THE CLOCKING THE CLOCK
ING THE CLOCKING THE CLOCK
ING THE CLOCK
1.Turn the vehicle ignition and radio “on”.
2. Press the Time/Frequency Selector button co to display the time.
3. While the time is being displayed, press the Time /Frequency Selector button co together with the
ManualDown Tuning button( -) toadjust the hours or the Manual Up Tuning button (+ ) to adjust
the minutes to the correct time.
4. Five seconds after the last hour or minute adjustment is made, the time will be set in the unit and normal
operation can resume.
99
99
9
OPEROPER
OPEROPER
OPERAA
AA
ATT
TT
TING INSTRUCING INSTRUC
ING INSTRUCING INSTRUC
ING INSTRUCTT
TT
TIONS / SETIONS / SET
IONS / SETIONS / SET
IONS / SETTT
TT
TING THE CLOCKING THE CLOCK
ING THE CLOCKING THE CLOCK
ING THE CLOCK
NOTES ON USE OF FRONT PANEL
1. Make sure the front panel is right-side-up when
attaching it to the chassis as it cannot be
attached when up-side down.
2. Do not press very hard on the front panel when
attaching it to the chassis. No more than light
to moderate pressure should be needed.
3. When attaching the front panel, make sure the
right side is correctly engaged before pressing
the left side to lock it into position.
4. When taking the front panel with you, please
use the supplied carrying case to protect the
panel from dirt and damage. Make sure there
is no dust or dirt on the electrical terminals on
the back of the panel as this could cause
intermittent operation or other malfunctions.
Engage right
side first
ATTACHING THE FRONT PANEL
Release Button
DETACHING THE FRONT PANEL
NOTESONUSEOFREMOTEINPUTJACK
The remote input jack provides the user option of
applying an external audio source to the radio.
Theaudiojackiscompatiblewithmost"Walkman"
CD and cassette players, or an MP3 digital audio
playback unit. When the external source is
connected,onlythatmediaisplayedbytheradio;
nootherinputsources(radioorCD)areoperative.

128-5780E
11 of 48
SPECIFICATIONSSPECIFICATIONS
SPECIFICATIONS
Size: 7" W x 2" H x 6-5/16" D
178 mm x 50 mm x 163 mm
Operating Voltage: 12 volts DC, negative ground
Output Power: 140 watts maximum
( 35 watts x 4 channels)
Output Wiring: Floating-ground type designed for 4 speaker use.
Front and rear channels CANNOT be combined (bridged)
for use with 2 speakers.
RCA low-level outputs (rear channels).
Output Impedance: Compatible with 4 ohm speakers.
Low-Level Output: 2.0 volts (2,000 mv.)
Tuning Range: AM:530 - 1,720 KHz. (10 KHz. step)
FM:87.5 - 107.9 MHz. (200 KHz. step)
Sensitivity: < 70 V
FM Stereo Separation: > 20 dB
CD Frequency Response: 20 - 20,000 Hz. +0 / -3 dB
CD Signal/Noise Ratio: 85 dB
CD Channel Separation: 65 dB
CD Distortion: 0.2%
*Specifications are subject to change without notice.
SPECIFICASPECIFICA
SPECIFICASPECIFICA
SPECIFICATT
TT
TIONSIONS
IONSIONS
IONS
1010
1010
10
CD-RANDCD-RWPLAYBACKCAPABILITY
This model can play most CD-R and CD-RW media that contains audio programs.
Playbackof bothCD-RandCD-RW dependsontheconditionsof therecording equipment
andtheCD-RorCD-RW discquality. In some cases, a CD-R or CD-RW disc cannot be
played on this unit.

128-5780E
12 of 48
1212
1212
12
CD CHCD CH
CD CHCD CH
CD CHAA
AA
ANGER CONTRNGER CONTR
NGER CONTRNGER CONTR
NGER CONTROLOL
OLOL
OLSS
SS
S
CD CHCD CH
CD CHCD CH
CD CHAA
AA
ANGER CONTRNGER CONTR
NGER CONTRNGER CONTR
NGER CONTROLOL
OLOL
OLSS
SS
S
Built into this radio are controls to operate an
optional CD changer. Please check with your
Rampage/Audiovox car stereo specialist or
call 1-800-645-4994 for recommendations of
the models that will work with this radio.
Adjustment of the audio functions (volume,
tone, balance, and fader) for the CD changer
operate in the same manner as they do for
radio play. The following controls will operate
the CD changer when it is installed and
connected to this radio. Refer to the owner’s
manual included with the CD changer for
instructions on the installation and correct
loading and use of the CD magazine.
dn CDCHANGERMODESELECTOR(MODE)
During radio or CD play, press this button to
select operation of the CD changer as shown
by CDC on the display panel. Disc play will
begin and the disc and track number will be
shownonthe display panel. Ifanew magazine
has been loaded into the changer, play will
begin from the first track of the first disc in the
magazine. If a magazine was already in the
changer, play will resume from the track on the
disc previously in play.
do&dp DISCSELECT(CD+& CD-)
These buttons are used to select the desired
disc for play. To advance to a higher number
disc, press the CD+ button do. To return to a
lower number disc, press the CD- button dp.
Thenumber ofthe discin play will be shown on
the display panel.
dq TRACKSELECT (+ / -)
The Track Select functions are used to quickly
access the beginning of a particular track.
Each time the Forward Track Select (+)
1111
1111
11
CD CHCD CH
CD CHCD CH
CD CHAA
AA
ANGER CONTRNGER CONTR
NGER CONTRNGER CONTR
NGER CONTROLOL
OLOL
OLSS
SS
S
in side of the button is pressed, the next higher
track number will be selected as shown on
display panel. Similarly, each time the
Backward Track Select ( -) side of the
button is pressed, the next lowertrack number
will be selected as shown on the display panel.
dr CUE/REVIEWFUNCTIONS (+ / -)
High-speed audible search to any section of
the disc can be made by the Cue and Review
functions. Press and hold the Cue (+) side
of the button to advance rapidly in the forward
direction(thediscplaysymbolwillrotatefoward
on the display panel) or the Review ( -) side
ofthebuttontoadvancerapidlyinthebackward
direction(thediscsymbolwillrotate backwards
on the display panel).
dsTRACK/DISCSCANSELECTOR(SCN)
When the SCAN button is pressed, the SCAN
indication will appear on the display panel, and
thefirst10secondsofeachtrackonthediscwill
be played in order. When a desired track is
reached, press the SCAN button twice with a
one second interval between presses and play
of the selected track will continue (SCAN will
disappear from the display panel). The Track
Scan mode will also be canceled by activating
any other disc function (Track Select, Cue/
Review, Repeat or Random Play).
When the SCAN button is pressed twice,
the DISCandSCANindicationswillappearon
the display panel and the first 10 seconds of
each trackoneachdiscinthemagazinewillbe
played. When a desired disc is reached, press
the Scan button again and play of the selected
disc will continue ( DISC and SCAN will
disappear from the display panel). The Disc
Scan mode will also be canceled by activating
any other disc function (Disc or Track Select,
Cue/Review, Repeat Play etc.).

128-5780E
13 of 48
CD CHCD CH
CD CHCD CH
CD CHAA
AA
ANGER ERRNGER ERR
NGER ERRNGER ERR
NGER ERROR CODESOR CODES
OR CODESOR CODES
OR CODES
1212
1212
12
dtDISC/TRACKREPEATPLAY(RPT)
When the Repeat button is pressed, the RPT
indication will appear on the display panel and
play of the selected track will be continually
repeated until the Track Repeat mode is
canceled by pressing the Repeat button again
orbyactivatingtheDiscSelectdoanddp,Scan
ds or Random Play du functions.
When the Repeat button is pressed twice
the DISC and RPT indications will appear on
the display panel and play of the selected disc
willbecontinuallyrepeateduntiltheDiscRepeat
mode is canceled by pressing the Repeat
button again or by activating the Scan ds or
Random Play du functions.
duDISC/TRACKRANDOMPLAY(SHF)
When the Random button is pressed, the RND
indication will appear on the display panel and
thetracksonthediscwillbeplayedinarandom,
shuffled order. The Track Select button dp will
also select tracks in the shuffled order instead
of the normal progression. The Random Track
modecanbecanceledbypressingtheRandom
buttonagain or by activating theDisc Select do
and dp, Scan ds or Repeat Play dt functions.
When the Random button is pressed again,
the DISC and RND indications will appear on
the display panel and the tracks on the disc will
be played in a random, shuffled order. After all
tracksonthedischavebeenplayed,anewdisc
will be selected and all the tracks on this disc
willbe randomly played. Thiswill continue until
theRandomDiscmodeiscanceledbypressing
the Random button again or by activating the
Scan ds or Repeat Play dt functions.
CD CHCD CH
CD CHCD CH
CD CHAA
AA
ANGER CONTRNGER CONTR
NGER CONTRNGER CONTR
NGER CONTROLOL
OLOL
OLSS
SS
S

128-5780E
14 of 48
CD PLCD PL
CD PLCD PL
CD PLAA
AA
AYER AYER A
YER AYER A
YER AND CD CHND CD CH
ND CD CHND CD CH
ND CD CHAA
AA
ANGER ERRNGER ERR
NGER ERRNGER ERR
NGER ERROR CODESOR CODES
OR CODESOR CODES
OR CODES
1313
1313
13
If a problem should develop while operating the CD player, an error code (ER-1, ER-2, ER-3,
etc.) may appear on the display panel. This can indicate a number of problems with the unit,
including a mechanical error or an error in the microprocessor control of the player. If an error
code should appear, try ejecting and re-loading the disc into the player. While the disc is out of
the unit, make sure it is clean, undamaged, and loaded correctly (label surface up). You may
also try activating the RESET button dm on the unit, but this will also erase the time and pre-set
memories.
If the suggested measures do not solve the problem, contact an approved warranty station near
you for further assistance.
CD PLCD PL
CD PLCD PL
CD PLAA
AA
AYER ERRYER ERR
YER ERRYER ERR
YER ERROR CODESOR CODES
OR CODESOR CODES
OR CODES
If a problem should develop while operating the CD changer, the following error codes may
appear on the display panel.
ER-1: Indicates that there is no magazine loaded in the CD changer.
ER-2: Indicates a problem with the magazine eject function.
ER-3: Indicates an error in the disc loading function.
ER-4: Indicates an error in the disc un-loading function.
ER-5: Indicates an error in the magazine position.
ER-6: Indicates an error in the laser pick-up position.
ER-7: Indicates an error in the laser focus on the disc.
In any of the above situations, try ejecting the CD magazine from the changer and make sure
the discs are clean, undamaged, and loaded correctly (refer to the Owner’s Manual of the CD
changer). Re-load the magazine and check for proper operation. You may also try activating
the RESET button dm on the unit, but this will also erase the time and pre-set memories.
If the suggested measures do not solve the problem, contact an approved warranty station near
you for further assistance.
CD CHCD CH
CD CHCD CH
CD CHAA
AA
ANGER ERRNGER ERR
NGER ERRNGER ERR
NGER ERROR CODESOR CODES
OR CODESOR CODES
OR CODES
CD CHCD CH
CD CHCD CH
CD CHAA
AA
ANGER ERRNGER ERR
NGER ERRNGER ERR
NGER ERROR CODESOR CODES
OR CODESOR CODES
OR CODES

128-5780E
15 of 48
CARE AND MAINTENANCECARE AND MAINTENANCE
CARE AND MAINTENANCE
The radio section of your new sound system does not require any maintenance. We
recommend that you keep this manual for reference on the many features found in this unit as
well as how to set the clock.
The compact disc player section also requires no routine maintenance, but proper
understanding of its use and handling will help you obtain maximum enjoyment of its
capabilities. The following points should be observed:
!When cleaning the interior of the vehicle, do not get water or cleaning fluids on the unit.
!TheCDplayer is a precisioninstrumentand will notoperateproperlyin extreme heatorcold.
In case of such conditions, wait until the interior temperature of the vehicle reaches a normal
temperature before using the player.
!If the temperature inside the player gets too hot, a protective circuit will automatically stop
play of the disc. In this case, allow the unit to cool off before operating the player again.
!Neverinsert anything otherthan a5" (12 cm)compact disc intothe playeras the mechanism
can be damaged by foreign objects.
!Donot attempt to use 3"(8 cm)CD-Single discs in this unit,either with or without anadaptor,
as damage to the player and/or disc may occur. Such damage will not be covered by the
Warranty on this product.
!When not using the disc player, always remove the compact disc. Do not leave an ejected
disc sitting in the disc slot as this can expose it to sunlight and other causes of damage.
!Do not attempt to open the unit chassis. There are no user serviceable parts or adjustments inside.
!When the vehicle warms up during cold weather or under damp conditions, moisture may
condense on the lens of the disc player. Should this occur, the player will not operate
properly until the moisture has evaporated.
!The unit is designed with a vibration dampening CD mechanism to minimize interruption of
disc play due to normal vibration in a moving vehicle. When driving on very rough roads,
however, occasional sound skips may occur. This will not scratch or damage the disc and
normal play will resume when the rough conditions cease.
HANDLING COMPACT DISCS
Dirt, dust, scratches, and warpage can cause skips in the playback and deterioration of sound
quality. Please follow these guidelines to take care of your compact discs:
!Use only compact discs with the mark .
!Fingerprints, dust, and dirt should be carefully wiped off the disc’s playing surface (shiny side)
with a soft cloth. Wipe in a straight motion from the inside to the outside of the disc.
!Neverusechemicalssuchasrecordsprays,household cleaners or thinner to clean compact
discs. Such chemicals can irreparably damage the disc’s surface.
!Discs should be kept in their storage cases when not in use.
!Donotexposediscstodirectsunlight,hightemperaturesorhighhumidityfor extendedperiods.
!Donotstickpaper,tape,orlabelsonthediscsurfacesnorwriteonthemwithanytypeofmarker.
CACA
CACA
CARE ARE A
RE ARE A
RE AND MAND MA
ND MAND MA
ND MAINTENAINTENA
INTENAINTENA
INTENANCENCE
NCENCE
NCE
1414
1414
14

128-5780E
16 of 48
©2002AudiovoxElectronics Corporation ! Hauppauge, NY11788 128-5780E
1515
1515
15
Form No. 128-4270E
AUDIOVOXCORPORATION(theCompany)warrantstotheoriginalretailpurchaserof
this product that should this product or any part thereof, under normal use and
conditions, be proven defective in material or workmanship within 12 months from the
date of original purchase, such defect(s) will be repaired or replaced with new or
reconditioned product (at the Company's option) without charge for parts and repair
labor.
To obtain repair or replacement within the terms of this Warranty, the product is to be
deliveredwithproofofwarrantycoverage(e.g.dated billofsale),specificationofdefect(s),
transportation prepaid, to the warranty center at the address shown below.
ThisWarrantydoesnotextendtotheeliminationofcarstaticormotornoise,tocorrection
of antenna problems, to costs incurred for installation, removal, or reinstallation of the
product,ordamagetotapes,compactdiscs,speakers,accessories,orvehicleelectrical
systems.
This Warranty does not apply to any product or part thereof which, in the opinion of the
Company, has suffered or been damaged through alteration, improper installation,
mishandling,misuse,neglect,accident,orbyremovalordefacementofthefactoryserial
number/bar code label(s). THE EXTENT OF THE COMPANY'S LIABILITY UNDER
THIS WARRANTY IS LIMITED TO THE REPAIR OR REPLACEMENT PROVIDED
ABOVE AND, IN NO EVENT, SHALL THE COMPANY'S LIABILITY EXCEED THE
PURCHASE PRICE PAID BY PURCHASER FOR THE PRODUCT.
This Warranty is in lieu of all other express warranties or liabilities. ANY IMPLIED
WARRANTIES, INCLUDING ANY IMPLIED WARRANTY OF MERCHANTABILITY,
SHALL BE LIMITED TO THE DURATION OF THIS WRITTEN WARRANTY. ANY
ACTION FORBREACH OF ANY WARRANTYHEREUNDERINCLUDINGANYIMPLIED
WARRANTYOFMERCHANTABILITY MUST BE BROUGHT WITHIN A PERIOD OF 30
MONTHS FROM DATE OF ORIGINAL PURCHASE. IN NO CASE SHALL THE
COMPANY BE LIABLE FOR ANY CONSEQUENTIAL OR INCIDENTAL DAMAGES
FOR BREACH OF THIS OR ANY OTHER WARRANTY, EXPRESS OR IMPLIED,
WHATSOEVER. NopersonorrepresentativeisauthorizedtoassumefortheCompany
any liability other than expressed herein in connection with the sale of this product.
Some states do not allow limitations on how long an implied warranty lasts or the
exclusionorlimitationofincidentalorconsequentialdamagesotheabovelimitationsor
exclusions may not apply to you. This Warranty gives you specific legal rights and you
may also have other rights which vary from state to state.
12 MONTH LIMI12 MONTH LIMI
12 MONTH LIMITED WTED W
TED WTED W
TED WAA
AA
ARRRR
RRRR
RRAA
AA
ANTNT
NTNT
NTYY
YY
Y
U.S.A.: AUDIOVOX CORPORATION, 150 MARCUS BLVD., HAUPPAUGE, NEW YORK 11788 • 1-800-645-4994
CANADA:CALL1-800-645-4994FORLOCATIONOFWARRANTYSTATIONSERVINGYOURAREA
WW
WW
WAA
AA
ARRRR
RRRR
RRAA
AA
ANTNT
NTNT
NTYY
YY
Y

128-5780E
17 of 48
1616
1616
16
MANUEL D'INSTALLATION
Cet appareil a éte élaboré pour être installé dans les voiture, camions et camionettes disposant d’une ouverture radio. La
plupart du temps, une trousse de montage comprenant des consignes d’installations particulières sera nécessaire pour
installer la radio sur le tableau de bord. Ces trousses sont disponibles dans les magasins de matériel électronique et les
magasins spécialisés en stéréo-automobile. Vérifiez toujours le mode d’emploi de la trousse avant l’achat pour vous assurer
qu’elle convient à votre véhicule. Si vous souhaitez acheter une trousse mais n’en trouvez pas de disponible téléphonez à
notre numéro vert “Assistance” (1-800-645-4994).
PROCEDURE D'INSTALLATION UNIVERSELLE EN UTILISANT DES BAGUES D'ASSEMBLAGE
1. Enlever le tableau de bord frontal détachable s’il est fixé au châssis en poussant la touche de
“relachement”. Glisser les bagues d’assemblage hors du châssis. Si elles sont bloquées, utiliser les outils
de démontage (fournis) pour les désangager.
2. Vérifier la taille d’ouverture du tableau de bord en y glissant les bagues d’assemblage. Si l’ouverture n’est
pas assez large, coupez soigneusement ou limer au besoin jusqu’à ce que la bague d’assemblage glisse
facilement dansl’ouverture. Ne pas engager la bague d’assemblage de force et ne pas la courber ou la plier.
Vérifier que l’espace derrière le tableau de bord est suffisant pour le châssis de la radio.
3. Trouver la série d’attaches au dessus, au dessous et sur les côtés des bagues d’assemblage. Lorsque la bague
est introduite complètement dans l’ouverture du tableau de bord, plier autant d’attaches vers l’exterieur qu’il
sera nécéssaire pour que les bagues soient attachées fermement au tableau de bord
4. Placer la radio devant l'ouveture du tableau de bord pour que les cables puissent etre achemines à travers les bagues
d'assemblage. Suivre le schema de cablage attentivement verifier que tous les raccords des harnais electriques
sont surs et isoles avec des ecrous pour fil ou du ruban pour fil electrique afin que l'appareil fonctionne correctement.
Apres avoir finit la pose des fils electriques, attacher le panneau frontal et mettre l'appareil en marche pour s'assurer
du bon fonctionnement (la touche de mise en marche doit etre allumee). Si l'appareil ne fonctionne pas verifier
tous les cables jusqu' à ce que le probleme soit regle. Lorsque l'appareil fonctionne, éteignez la touche de mise
en marche et finnissez de monter le châssis.
5. Lisser la radio soigneusement dans la bague d’assemblage en vous assurant qu’elle est à l’endroit, jusqu’à
ce qu' elle soit installée correctement et que les sauterelles de fixation s’enclenchent.
6. Attacher l’une des extremités de l’attache de support perforée (fournie) au goujon de la vis à l’arrière du châssis
en utilisant l’écrou hexagonal fourni. Attacher l’autre extremité de l’attache perforée sur un côté du panneau
de bord au-dessus ou au dessous de la radio en utilisant le vis ou l’écrou hexagonal fourni. Plier l’attache
autant qu’il le faut.
ATTENTION:L’arrière de la radio doit être maintenu avec l’attache afin d’éviter que le tableau de bord soit
endommagé par le poid de la radio ou une mauvaise utilisation provoquée par les vibrations.
7. Rattacher le panneau frontal au châssis. Choisir un endroit ou placer la prise d’entrée à distance
(d’ordinaire sous le tableau de bord) si cela fait partie de la radio. Fixez-la avec deux vis auto-
taraudeuses (M5x6). Ne pas trop serrer les vis. A l’aide du Manuel D’utilisation de l’appareil vérifiez le bon
fonctionnement de la radio.
TROUSSE DE MONTAGE
1. S’il est nécessaire d’utiliser une trousse de montage pour installer la radio dans votre véhicule, suivre les
consignes figurant dans la trousse pour attacher la radio aux plaques de montage fournies avec la trousse
de montage.
2. Faites l’installation électrique et testez la radio en suivant les indications de l’Etape 4 ci-dessus.
3. Installer l’assemblage plaques de montage/radio au sous-tableau de bord en suivant les indications de la
trousse de montage.
4. Attacher l’attache de support à la radio et au tableau de bord comme indiqué dans l’etape 6 ci-dessus.
5. Remplacer le panneau de garnissage du tableau de bord.
METHODE INSTALLATION ISO
Cet appareil dispose de trous taraudés sur les panneaux latéraux du chassis qui peuvent être utilisés avec les supports de
montage de certains véhicules Toyota, Nissan, Mitshubishi, Isuzu, Hyundai et Honda pour installer la radio au tableau de
bord. Veuillez demander conseil à votre détaillant de stéréo automobile local pour vous aider à l’installer.
1. Enlever la radio de fabrique existante du tableau de bord ou de la console centrale de montage. Conserver
tous les accessoires et les supports car ils serviront à installer la nouvelle radio.
2. Désenclencher soigneusement le cadre de plastique du devant du châssis de la nouvelle radio. Enlever et
jeter le cadre.
3. Enlever les supports de montage de fabrique et les accessoires de la radio existante et attachez-les à la
nouvelle radio.
ATTENTION:NE PAS DEPASSER LA TAILLE DE VIS DE M5XM6 MM AU MAXIMUM DES VIS PLUS LONGUES
RISQUENT DE TOUCHER ET D’ENDOMMAGER L’EQUIPEMENT A L’INTERIEUR DU CHASSIS.
4. Câbler la nouvelle radio au véhicule en suivant les consignes de l’etape 4 ci-dessus.
5. Monter l’assemblage de la nouvelle radio au tableau de bord ou la console centrale en utilisant la méthode
inverse de celle décrite dans l’e tape 1.
MAMA
MAMA
MANUEL D'INSTNUEL D'INST
NUEL D'INSTNUEL D'INST
NUEL D'INSTALLALL
ALLALL
ALLAA
AA
ATT
TT
TIONION
IONION
ION

128-5780E
18 of 48
22
22
2
8:30AM - 7PM
9AM - 5PM
CENTRE COTE EST
6:30AM - 5PM
7AM - 3PM
MONTAGNE
5:30AM - 4PM
6AM - 2PM
PACIFIQUE
JOUR
NUMNUM
NUMNUM
NUMEE
EE
ERO VERT POUR TOUT AIDE LORS DE L’INSTALLATIONRO VERT POUR TOUT AIDE LORS DE L’INSTALLATION
RO VERT POUR TOUT AIDE LORS DE L’INSTALLATIONRO VERT POUR TOUT AIDE LORS DE L’INSTALLATION
RO VERT POUR TOUT AIDE LORS DE L’INSTALLATION
L’installation et le cablage de cet appareil sont si simples que vous n’aurez certainement pas besoin
d’aide, cependant en cas de probleme vous pouvez nous contacter. Appelez notre numéro vert d’aide
au 1-800-645-4994 pendant les jours et heures indiqués (U.S.A. et Canada seulement).
7:30AM - 6PM
8AM - 4PM
ATTACHER CETTE
EXTREMITE AU GOUJON DE
LA VIS SUR L‘ARRIERE DU
CHâSSIS
ECROU (5MM)
ATTACHER CETTE EXTREMITE POUR PROTEGER UN COTE
DU TABLEAU DE BORD. PERFORER CI NECESSAIRE.
SCREW
(5MM)
PANNEAU FRONTA
L
OUVERTUREDU TABLEAU DE BORD D’ORIGINE,
LIMERLESBORDSAUTANTQUENECESSAIRE-NE
PASTROPELARGIR-
REMARQUE:SILETABLEAUESTDUR,SERVEZ-VOUSDU
COTE ARRIERE (SANS LE REBORD) DES BAGUES
D’ASSEMBLAGE COMME MODELE OU TAILLE
D’OUVERTURE.
NSTALLATIONUNIVERSELLEENUTILISANTDESBAGUESD’ASSEMBLAGE
ECROU (5MM)
OTER LE CADRE EN PLATIQUE DU DEVANT DU CHâSSIS EN LE
DETACHANT SOIGNEUSEMENT..
INSTALLATIONTYPIQUE
INSTALLATION ISO
20° AU PLUS.
PANNEAU
FRONTAL.
ATTENTION: POUR GARANTIR LE BON FONCTIONNEMENT
DU LECTEUR CD, LE CHâSSIS DOIT ETRE INSTALLé à 20°
DE L’HORIZONTALE. PRENEZ GARDE à RESPECTER CES
LIMITES
..
VUE LATERALE
DU
CHâSSIS.
DETACHER à DEUX
ENDROITS AU-DESSUS ET
AU-DESSOUS.
TAILLE
MAXIMUM DE
LA VIS M5X6
TAILLE
MAXIMUM DE
LA VIS M5X6
ATTACHE PERFOREE
RADIO
GOUJON DE LA VIS
BAGUES
D’ASSEMBLAGE
CADRE EN PLASTIQUE SUPPORTS DE
MONTAGE DE FABRIQUE
OUTILS DETACHABLE
º
P
LIER LE
DESSOUS DES
ATTACHES VERS
LE BAS
PLIERLEDESSUSDESATTACHES
VERSLEHAUT
LUNDI à VENDREDI
SAMEDI
MANUEL D'INSTALLATIONMANUEL D'INSTALLATION
MANUEL D'INSTALLATION
1717
1717
17

128-5780E
19 of 48
CABLAGE DE LA RADIOCABLAGE DE LA RADIO
CABLAGE DE LA RADIO
1818
1818
18
CABLCABL
CABLCABL
CABLAA
AA
AGE DE LGE DE L
GE DE LGE DE L
GE DE LA RA R
A RA R
A RAA
AA
ADIODIO
DIODIO
DIO
CONSULTERLAPAGE19POURLECABLAGEDESHAUT-PARLEURS
NOIR
CABLEDE
L'ANTENNE
D'ORIGINE
FUSIBLEPOURLA
RADIOOUPOURLES
"ACCESSORIES"
ANTENNE ANTENNE
AUTOMATIQUE
IMPORTANT
LE CABLE DE COULEUR
BLEUE PEUT ETRE UTILISE
POUR ALLUMER UNE
ANTENNEAUTOMATIQUEOU
UN AMPLIFICATEUR EXTERNE
A DISTANCE (CONSULTER LE
MANUEL DE L'ANTENNE OU DE
L'AMPLIFICATEUR).
PRISEDE
L'ANTENNEA
L'ARRIEREDELA
RADIO
POSITIVE (+) TERMINAL
BATTERIE DE 12 VOLT
PARTIEMETALLIQUE
DUTABLEAUDEBORD
(PERFORERSI
NECESSAIRE)
ECROU
ROUGE
RADIO
IMPORTANT
CE FIL DOIT ETRE PROPREMENT
BRANCHE SINON LA RADIO NE
FONTIONNERAPAS
CORRECTEMENT.
CONSULTER LA PAGE 4 POUR
LECABLAGE DU HAUT-
PARLEUR
FICHEDEGOUPILLE
PRISEDEGOUPILLEDECOUPLAGE14
BLEU
JAUNE
TÉLÉCOMMANDE DE LA PRISE
D’ENTRÉ
BOITE A FILTRE
AFUSIBLE
CONTIENT:
UN FUSIBLE D'UNE AM-
PERE UN FUSIBLE DE 10
AMPERES
DELAVOITURE
BOITEAFUSIBLE

128-5780E
20 of 48
CABLAGEDESCABLAGEDES
CABLAGEDES
HAUT-PARLEURSHAUT-PARLEURS
HAUT-PARLEURS
CONSULTER
LAPAGE18
ATTENTION!
!LESAMPLIFICATEURSDECETTERADIOSONTELABORESPOURETREUTILISESUNIQUEMENT AVEC
4HAUT-PARLEURS.
!NEJAMAIS ASSOCIERDESDEBITS(ONPONT)POURUNEUTILISATIONAVEC2HAUT-PARLEURS.
!NEJAMAIS METTREALAMASSEDESBRANCHEMENTSDEHAUT-PARLEURSNEGATIFSAVECDES
MASSEDUCHASSIS.
!LESYSTEME ELECTRIQUEDELARADIOPEUTETREENDOMMAGESILECABLAGEN'ESTPASEFFECTUE
EXACTEMENTCOMMEDANSLESEXPLICATIONSCI-DESSOUSTHERADIO.
BLANCAVECDESRAYURES
NOIRES
BLANC
HAUT-PARLEUR DE DEVANT DE GAUCHE
HAUT-PARLEUR ARRIÈRE DE GAUCHE HAUT-PARLEUR ARRIÈRE DE DROITE
VERT
GRISAVECDESRAYURESNOIRE
GRIS
9-FICHE DE
GOUPILLE
VERTAVECDESRAYURESNOIRES VIOLETAVECDESRAYURESNOIRES
RADIO
8:30am - 7:00pm Est
9:00am - 5:00pm Est
Lundy -
Vendredi
Samedi
1-800-645-49941-800-645-4994
1-800-645-49941-800-645-4994
1-800-645-4994
VIOLET
4-FICHE DE
GOUPILLE
CONSULTER LA PAGE 3
POUR LE CABLAGE DE
LA RADIO
DOUILLE DE GOUPILLE POUR BRANCHER UN
LECTEUR DE CD FACULT
6
COMPACT
CABLE …. (FOURNI
AVEC L’INVERSEUR
DE CD
INVERSEUR DE CD
FACULTATIF
REMARQUE:
CONSULTER VOTRE DETAILLANT EN ESTEREO
AUTOMOBILERAMPAGE/AUDIOVOXOUAPPELER
LE 1-800-645-4994 POUR OBTENIR LA LISTE DES
MODELES QUI FONCTIONNERONT AVEC VOTRE
RADIO.
PRISE D’ENTRÉE À DISTANCE À
UTILISER AVEC UN LECTEUR DE CD
EXTERNE, UN MAGNÉTOPHONE, OU
UNE LECTURE DU SON MP3
ASSISTANCE!
SORTIEDE LIGNEDEPRISE
ÀUTILISER AVECDES
AMPLIFICATEURS
EXTERNES
FACULTATIFS.
ROUGE= ARRIÈRE
DROITE
BLANC= ARRIÈRE
GAUCHE
HAUT-PARLEUR ARRIÈRE DE
DROITE
CABLAGE DES HAUT-PARLEURS
1919
1919
19
This manual suits for next models
1
Table of contents
Languages:
Other Rampage Car Receiver manuals

Rampage
Rampage ACD-28 Programming manual

Rampage
Rampage AM/FM/MPX Radio ACD-91 User manual

Rampage
Rampage ACD-13CS User manual

Rampage
Rampage ACD-27 Programming manual

Rampage
Rampage ACD-12 User manual

Rampage
Rampage ACD-16 User manual

Rampage
Rampage ACD-83 User manual

Rampage
Rampage EZCRG User manual

Rampage
Rampage ACD-83 User manual

Rampage
Rampage ACD-13 User manual