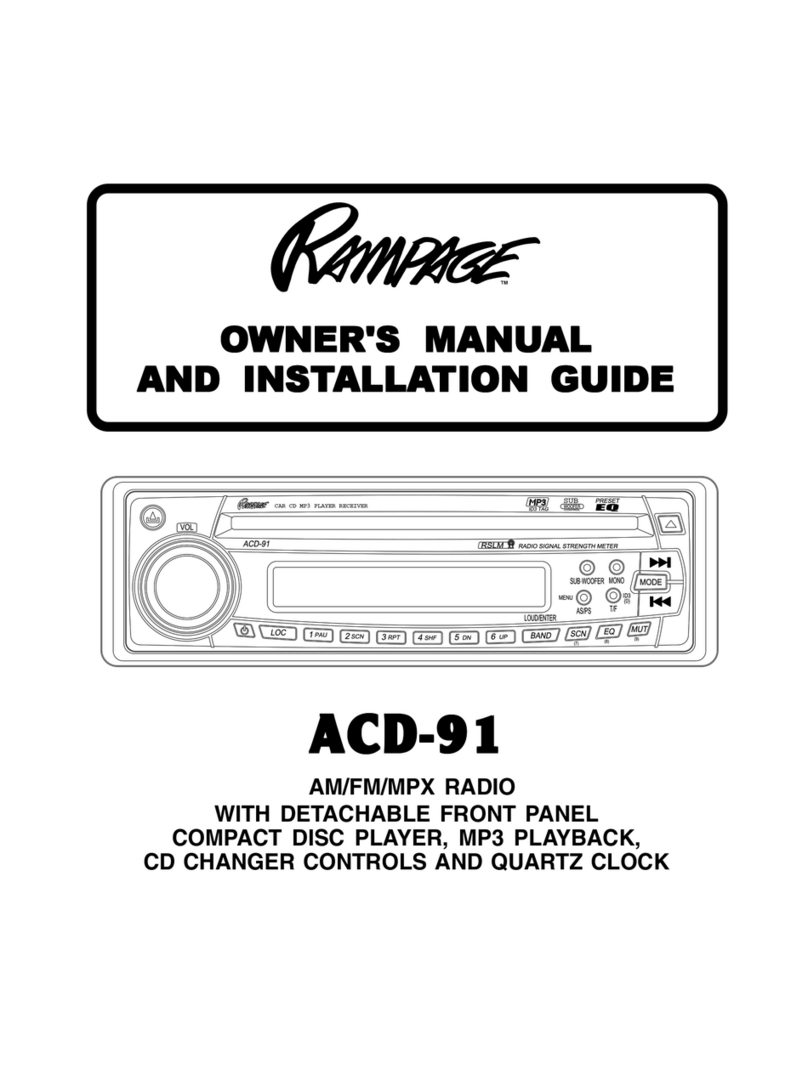
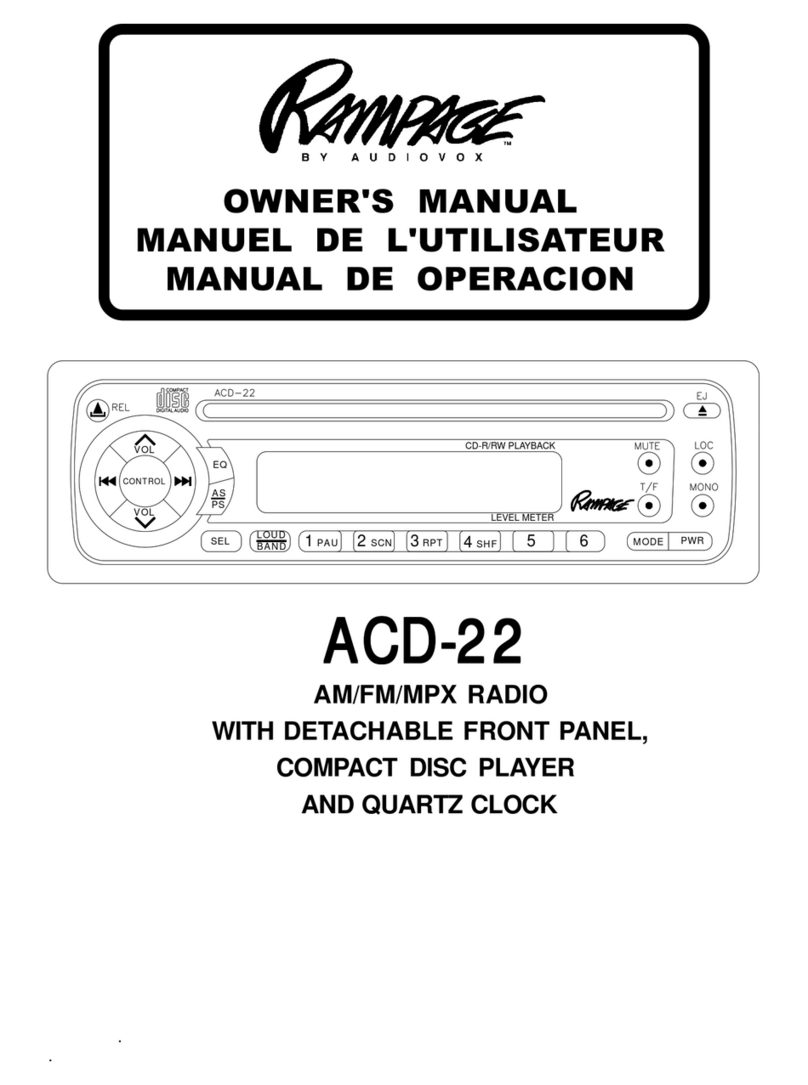
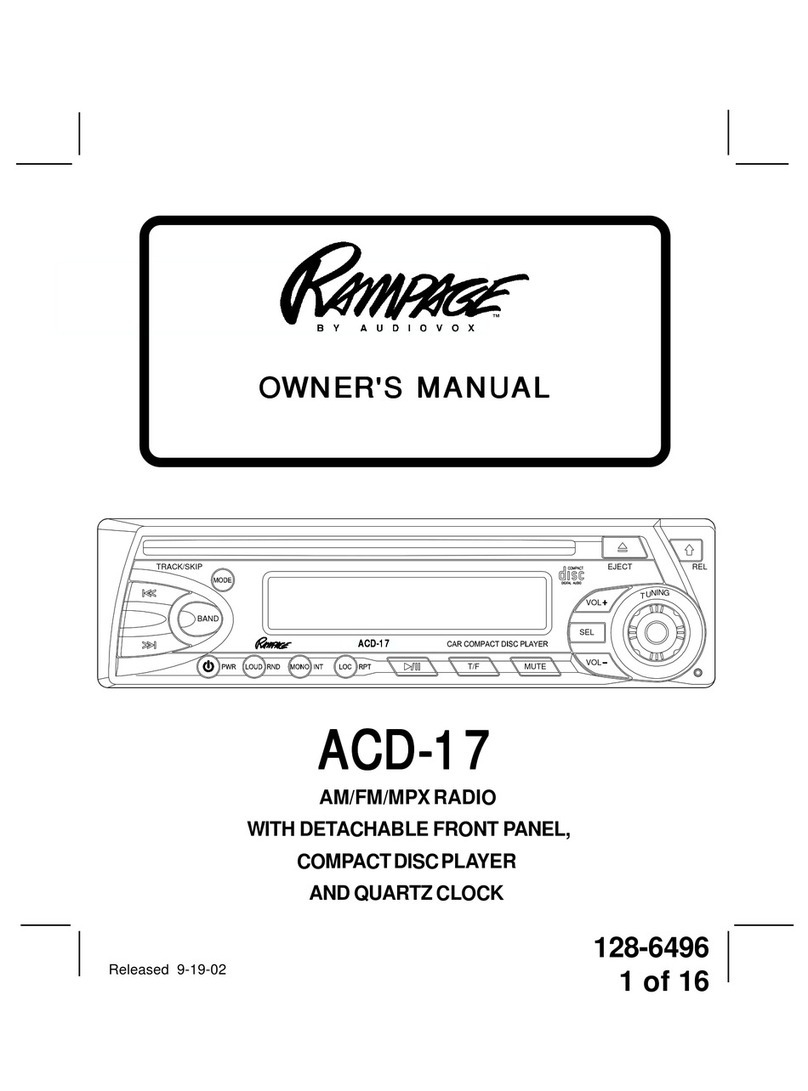
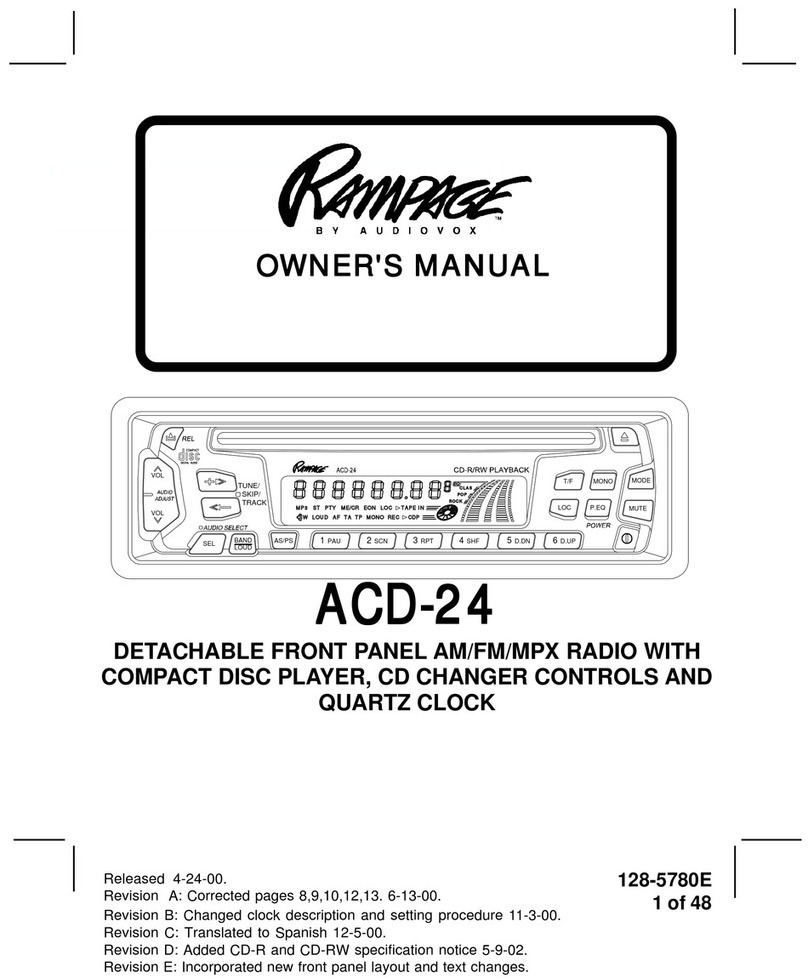
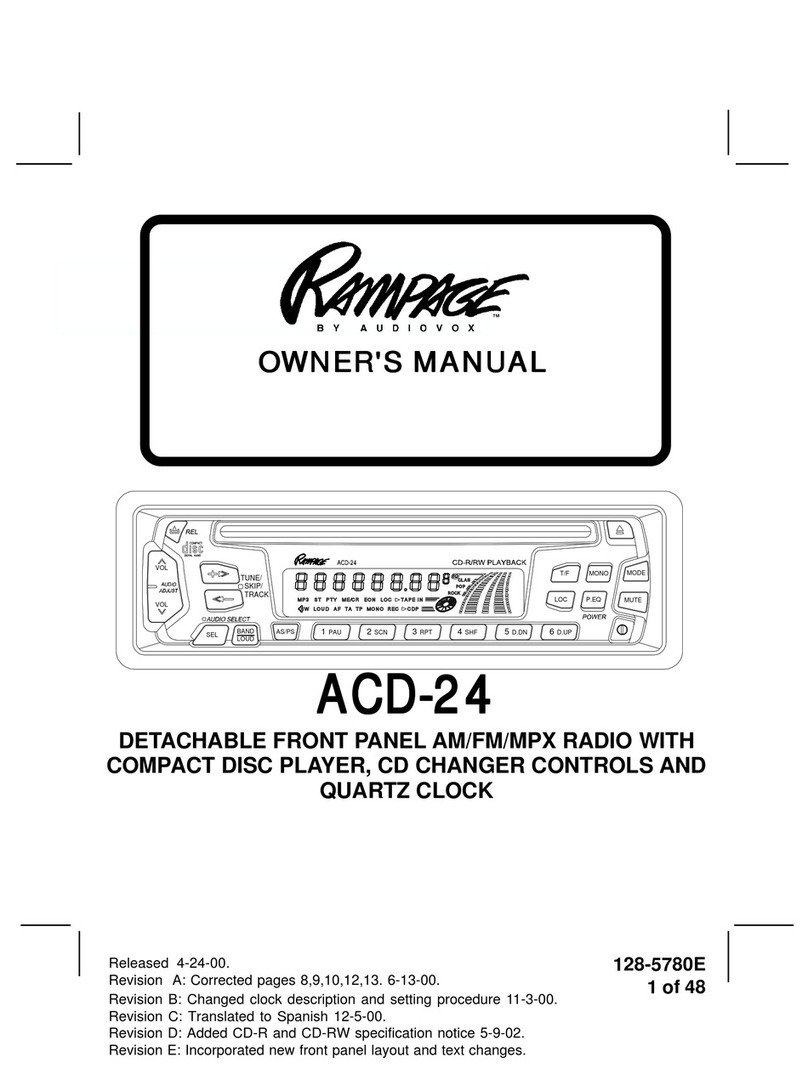
Rampage ACD-16 User manual

128-5807C
1 of 44
Released 5-10-00.
Rev. A: 6-7-00 – Add French and Spanish.
Rev. B: 5-7-02 Added CD-R and CD-RW specification notice.
Rev. C: 10-03-02- Changed power ratings.
DETACHABLEFRONTPANEL,AM/FM/MPXRADIOWITHCOMPACTDISC
PLAYER,CDCHANGERCONTROLS
ANDQUARTZCLOCK
AUTORADIOAM/FM/MPXAVEC FAÇADEAMOVIBLE,DOTÉ D'UNLECTEUR
DEDISQUESCOMPACTS, DE COMMANDESDECHANGEUR DE CDETD'UNE
MONTREÀQUARTZ
PANELDELANTERODESMONTABLECON
RADIOAM/FM/MPX,CON REPRODUCTORYCAMBIADOR
DEDISCOSCOMPACTOS Y RELOJDECUARZO
ACD-16ACD-16
ACD-16ACD-16
ACD-16
OO
OO
OWNER'S MANUWNER'S MANU
WNER'S MANUWNER'S MANU
WNER'S MANUALAL
ALAL
AL
MANUEL D'UTILISAMANUEL D'UTILISA
MANUEL D'UTILISATIONTION
TIONTION
TION
MANUMANU
MANUMANU
MANUAL DEL USUAL DEL USU
AL DEL USUAL DEL USU
AL DEL USUARIOARIO
ARIOARIO
ARIO
BAND
ACD-16
EJ
REL
PWR
SEL
VOL
VOL
CD- CD+ T/F
MONLOU LOC/RPT
TRACK
MUTE
RND INT
T
I
G
U
N
N
AUX IN

128-5807C
2 of 44
11
11
1
INSTINST
INSTINST
INSTALLALL
ALLALL
ALLAA
AA
ATT
TT
TION INSTRUCION INSTRUC
ION INSTRUCION INSTRUC
ION INSTRUCTT
TT
TIONSIONS
IONSIONS
IONS
INSTALLATION INSTRUCTIONSINSTALLATION INSTRUCTIONS
INSTALLATION INSTRUCTIONS
This unit is designed for installation in cars, trucks, and vans with an existing radio opening. In many cases, a
special installation kit will be required to mount the radio to the dashboard. These kits are available at electronics
supply stores and car stereo specialist shops. Always check the kit application before purchasing to make sure the
kit works with your vehicle. If you need a kit but cannot find it available, call our toll-free “HELP” line at 1-800-645-4994.
UNIVERSAL INSTALLATION PROCEDURE USING MOUNTING SLEEVE
1. Slide the mounting sleeve off of the chassis. If it is locked into position, use the removal tools (supplied)
to disengage it.
2. Check the dashboard opening size by sliding the mounting sleeve into it. If the opening is not large enough, carefully
cut or file as necessary until the sleeve easily slides into the opening. Do not force the sleeve into the opening
or cause it to bend or bow. Check that there will be sufficient space behind the dashboard for the radio chassis.
3. Locate the series of bend tabs along the top, bottom, and sides of the mounting sleeve. With the sleeve
fully inserted into the dashboard opening, bend as many of the tabs outward as necessary so that the
sleeve is firmly secured to the dashboard.
4. Place the radio in front of the dashboard opening so that the wiring can be brought through the mounting
sleeve. Follow the wiring diagram carefully and make certain all connections of the wiring harness are
secure and insulated with wire nuts or electrical tape to insure proper operation of the unit. After completing
the wiring connections, turn the unit on to confirm operation (ignition switch must be “on”). If unit does not
operate, re-check all wiring until problem is corrected.
NOTE: Adjust AM antenna trimmer NOW. Refer to label on right side of chassis for adjustment instructions.
Once proper operation is achieved, turn off the ignition switch and proceed with final mounting of the chassis.
5. Carefully slide the radio into the mounting sleeve making sure it is right-side-up until it is fully seated and
the spring clips lock it into place.
6. Attach one end of the perforated support strap (supplied) to the screw stud on the rear of the chassis using
the hex nut provided. Fasten the other end of the perforated strap to a secure part of the dashboard either
above or below the radio using the screw provided. Bend the strap to position it as necessary.
CAUTION: The rear of the radio must be supported with the strap to prevent damage to the dashboard
from the weight of the radio or improper operation due to vibration.
7. Test radio operation by referring to the Operating Instructions.
INSTALLATION USING KITS
1. If your vehicle requires the use of an installation kit to mount this radio, follow the instructions included with
the installation kit to attach the radio to the mounting plate supplied with the kit.
2. Wire and test the radio as described in Step 4 above.
3. Install the radio/mounting plate assembly to the sub-dashboard according to the instructions of the installation kit.
4. Attach the support strap to the radio and dashboard as described in Step 6 above.
5. Replace the dashboard trim panel.
ISO INSTALLATION PROCEDURE
This unit has threaded holes in the chassis side panels which may be used with the original factory mounting
brackets of some Toyota, Nissan, Mitsubishi, Isuzu, Hyundai and Honda vehicles to mount the radio to the
dashboard. Please consult with your local car stereo specialist shop for assistance on this type of installation.
1. Remove the existing factory radio from its dashboard or center console mounting. Save all hardware and
brackets as they will be used to mount the new radio.
2. Carefully un-snap the plastic frame from the front of the new radio chassis. Remove and discard the frame.
3. Remove the factory mounting brackets and hardware from the existing radio and attach them to the new radio.
CAUTION: DO NOT EXCEED M5 X 6 MM MAXIMUM SCREW SIZE.
LONGER SCREWS MAY TOUCH AND DAMAGE COMPONENTS INSIDE THE CHASSIS.
4. Wire the new radio to the vehicle as per step 4 above.
5. Mount the new radio assembly to the dashboard or center console using the reverse procedure of step 1.

128-5807C
3 of 44
INSTINST
INSTINST
INSTALLALL
ALLALL
ALLAA
AA
ATT
TT
TION INSTRUCION INSTRUC
ION INSTRUCION INSTRUC
ION INSTRUCTT
TT
TIONSIONS
IONSIONS
IONS
22
22
2
8:30AM - 7PM
9AM - 5PM
CENTRAL EASTERN
6:30AM - 5PM
7AM - 3PM
MOUNTAIN
5:30AM - 4PM
6AM - 2PM
PACIFIC
MON. - FRI.
SATURDAY
DAY
TT
TT
TOLL-FREE INSTOLL-FREE INST
OLL-FREE INSTOLL-FREE INST
OLL-FREE INSTALLALL
ALLALL
ALLAA
AA
ATT
TT
TION ASSISTION ASSIST
ION ASSISTION ASSIST
ION ASSISTAA
AA
ANCENCE
NCENCE
NCE
The installation and wiring connections for this unit are so simple, we doubt you'll need our help, but, if you
do, we're here to help you. Just call our toll-free telephone assistance line at 1-800-645-4994 during the days
and hours shown (U.S.A. and Canada only).
7:30AM - 6PM
8AM - 4PM
NUT (5MM) EXISTING DASH OPENING
FILE EDGES TO FIT IF NECESSARY - DO NOT OVERFILE
NOTE: IF DASH IS SOLID, USE REAR SIDE (WITHOUT THE LIP) OF
MOUNTINGSLEEVEASATEMPLATE&CUT OPENING
UNIVERSAL INSTALLATION USING MOUNTING SLEEVEUNIVERSAL INSTALLATION USING MOUNTING SLEEVE
UNIVERSAL INSTALLATION USING MOUNTING SLEEVE
REMOVE THE PLASTIC FRAME FROM THE FRONT OF THE
CHASSIS BY CAREFULLY UN-SNAPPING IT.
TYPICAL INSTALLATION
ISO INSTALLATIONISO INSTALLATION
ISO INSTALLATION
20° MAX.
FRONT PANEL
CAUTION:
FORPROPEROPERATIONOFTHE CDPLAYER,THECHASSIS MUST BE
MOUNTED WITHIN 20° OF HORIZONTAL. MAKESURETHEUNITIS
MOUNTED WITHIN THIS LIMITATION.
SIDE VIEW
OF
CHASSIS
UN-SNAP ON LEFT AND
RIGHT SIDES
MAXIMUM
SCREW SIZE
M5 x 6
MAXIMUM
SCREW SIZE
M5 x 6
PERFORATED STRAP
MOUNTING SLEEVE
PLASTIC FRAME FACTORY MOUNTING
BRACKETS
BEND BOTTOM
TABS DOWNWARD
BEND TOP
TABS UPWARD
RADIO
SCREW STUD
NOTE: PLASTIC FRAME MUST BE REMOVED (UN-SNAP ON LEFT
AND RIGHT SIDES) TO USE REMOVAL TOOLS.
REMOVAL TOOLS
FASTEN THIS END TO SECURE
PART OF DASHBOARD.
DRILL HOLE IF NECESSARY.
FASTEN THIS END TO SCREW
STUD ON REAR OF CHASSIS
SCREW
(5MM)

128-5807C
4 of 44
BLACK
ANTENNA SOCKET
ON REAR OF RADIO
POSITIVE (+) TERMINAL
12 VOLT BATTERY
CARBATTERY
METAL PART OF DASH
(DRILL HOLE IF
NECESSARY)
SCREW
RADIO
SEE PAGE 4 FOR
SPEAKER WIRING
ANTENNA AUTOMATIC
ANTENNA
CAR
FUSEBLOCK
IMPORTANT
THEBLUEWIRE CANBEUSED
TO REMOTELY ACTIVATE AN
AUTOMATIC ANTENNA OR AN
EXTERNAL AMPLIFIER (SEE
ANTENNA OR AMPLIFIER
MANUAL)
BLUE (0.5 AMP FUSE)
"RADIO" OR
"ACCESSORY" FUSE
EXISTING
ANTENNA
CABLE
RED (0.5 AMP FUSE)
IMPORTANT
THISWIREMUST BECONNECTED
AS SHOWN OR RADIO WILL NOT
OPERATE PROPERLY
YELLOW (5 AMP FUSE)
RADIO WIRING
RR
RR
RAA
AA
ADIO WIRINGDIO WIRING
DIO WIRINGDIO WIRING
DIO WIRING
REFER TO PAGE 4 FOR SPEAKER WIRING
33
33
3

128-5807C
5 of 44
SPESPE
SPESPE
SPEAA
AA
AKK
KK
KER WIRINGER WIRING
ER WIRINGER WIRING
ER WIRING
44
44
4
SPEAKER WIRINGSPEAKER WIRING
SPEAKER WIRING
REFER TO PAGE 3
FOR RADIO WIRING
RCAJACKS
LINEOUT
FOR USE WITH
OPTIONAL
EXTERNAL
AMPLIFIERS
RED=RIGHTREAR
WHITE=LEFTREAR
WHITEw/BLACK STRIPE
WHITE
LEFTFRONT SPEAKER RIGHT FRONTSPEAKER
LEFTREAR SPEAKER RIGHTREARSPEAKER
GREEN
GRAYw/BLACK STRIPE
9-PINPLUGS
GREENw/BLACK STRIPE
WARNING!
!THE AMPLIFIERS IN THIS RADIO ARE ONLY DESIGNED FOR USE WITH 4 SPEAKERS.
!NEVER COMBINE (BRIDGE) OUTPUTS FOR USE WITH 2 SPEAKERS.
!NEVER GROUND NEGATIVE SPEAKER LEADS TO CHASSIS GROUND.
!FAILURE TO WIRE EXACTLY AS SHOWN BELOW MAY CAUSE ELECTRICAL
VIOLETw/BLACK STRIPE
RADIO
8:30am - 7:00pm Eastern
9:00am - 5:00pm Eastern
Monday - Friday
Saturday
1-800-645-49941-800-645-4994
1-800-645-49941-800-645-4994
1-800-645-4994
HELP!
GRAY
VIOLET
4-PINPLUGS
SEE PAGE 3 FOR
RADIOWIRING
8-PIN DIN SOCKET FOR CONNECTION TO
OPTIONAL CD CHANGER
6
COMPACT
DIN CABLE
(SUPPLIED WITH
CD CHANGER).
OPTIONAL
CD CHANGER
NOTE:
CHECK WITH YOUR RAMPAGE/AUDIOVOX CAR
STEREO SPECIALIST OR CALL 1-800-645-4994 FOR
RECOMMENDATIONS OF THE MODELS THAT WILL
WORK WITH YOUR RADIO.

128-5807C
6 of 44
OPEROPER
OPEROPER
OPERAA
AA
ATT
TT
TING INSTRUCING INSTRUC
ING INSTRUCING INSTRUC
ING INSTRUCTT
TT
TIONSIONS
IONSIONS
IONS
11
11
1ON-OFF POWER BUTTON (PWR)
Press thisbutton to turn the unit on or off. The
unit will also turn on automatically when a
compactdiscisinserted iftheignition switch
is “on”.
22
22
2VOLUME/LEVEL CONTROL
(VOL / VOL )
To increase the volume level, press the
volume up side of the control. The volume
will increase and the level will be shown on
the display panel from a minimum of
VOL 0 to a maximum of VOL 63. To
decrease the volume level, press the
volume down side of the control. The
displaywillautomaticallyreturn to the normal
indication 5 seconds after the last volume
adjustment or when another function is
activated. This control is also used in
conjunction with the Select button 3to
adjust the bass, treble, balance and fader
levels as described in 4, 5, 6and 7.
33
33
3SELECT BUTTON (SEL)
This button is used to select the audio
function (volume, bass, treble, balance, or
fade) to be adjusted using the Level
control 2. Pressing the Select button
oncewill settheunit forvolume adjustment.
It is recommended that the volume level
control 2be used. Pressing the Select
button twice will set the unit for bass
adjustment(BASwill appear onthe display
panel). Pressingthe buttonadditional times
will select treble adjustment (TRE on the
display), balance (BAL), or fader (FAd).
The display will automatically return to the
normal indication 5 seconds after the last
adjustment or when another function is
activated.
44
44
4BASS CONTROL
To adjust the bass level, first select the
OPEROPER
OPEROPER
OPERAA
AA
ATT
TT
TING INSTRUCING INSTRUC
ING INSTRUCING INSTRUC
ING INSTRUCTT
TT
TIONSIONS
IONSIONS
IONS
55
55
5
BAND
ACD-16
EJ
REL
PWR
SEL
VOL
VOL
CD- CD+ T/F
MONLOU LOC/RPT
TRACK
MUTE
RND INT
T
I
G
U
N
N
AUX IN
2
1
15
11
15
12
10
3
4
5
6
7
8
9
13 16
17
18
19
14
20
24 23 25 22 21
26

128-5807C
7 of 44
Bass mode by pressing the Select button
3so the BAS indication appears on the
displaypanel. Within5secondsofchoosing
the Bass mode, press the down side of the
Level control 2to decrease the bass
response or press the up side to increase
itasdesired. The levelwillbe shown onthe
display panel from a minimum BAS -7 to a
maximum of BAS 7 (BAS 0 indicates flat
response). The display will automatically
return to the normal indication 5 seconds
after the last adjustment or when another
function is activated.
55
55
5TREBLE CONTROL
To adjust the treble level, first select the
Treble mode by pressing the Select button
3so the TRE indication appears on the
displaypanel. Within5secondsofchoosing
the Treble mode, press the down side of
the Level control 2to decrease the treble
response or press the up side to increase
itasdesired. The levelwillbe shown onthe
display panel from a minimum TRE -7 to a
maximum of TRE 7 (TRE 0 indicates flat
response). The display will automatically
return to the normal indication 5 seconds
after the last adjustment or when another
function is activated.
66
66
6LEFT/RIGHT BALANCE CONTROL
To adjust the left-right speaker balance,
first select the Balance mode by pressing
the Select button 3so the BAL indication
appears on the display panel. Within 5
seconds of choosing the Balance mode,
press the down side of the Level control 2
to adjust the stereo balance to the left
channel speakers or press the up side to
adjust it to the right channel speakers. The
balancepositionwillbeshownonthedisplay
panel from BAL 10 (full left) to BAr 10 (full
right). When the volume level between the
left and right speakers is equal, BAL 0 will
be shown on the display panel. The display
will automatically return to the normal
indication 5 seconds after the last
adjustment or when another function is
activated.
77
77
7FRONT/REAR FADER CONTROL
To adjust the front-rear speaker balance,
first select the Fader mode by pressing the
Select button 3so the FAd indication
appears on the display panel. Within 5
secondsofchoosingtheFadermode,press
the down side of the Level control 2to
adjustthe front-rear speakerbalance to the
rear speakers or press the up side to adjust
it to the front speakers. The fader position
willbe shown onthedisplay panelfromFAr
10 (fullrear)to FAF10(fullfront). Whenthe
level between the front and rear speakers
is equal, FAd0 will beshownon the display
panel. The display will automatically return
to the normal indication 5 seconds after the
lastadjustmentor when another function is
activated.
88
88
8TRACK SELECT (TRACK /
TRACK )
The Track Select functions are used to
quicklyaccessthe beginningofa particular
track during CD player and CD changer
operation. Each time the Forward Track
Select (TRACK ) side of the button is
pressed, the next higher track number will
be selected as shown on the display panel.
Similarly, each time the Backward Track
Select (TRACK ) side of the button is
66
66
6
OPEROPER
OPEROPER
OPERAA
AA
ATT
TT
TING INSTRUCING INSTRUC
ING INSTRUCING INSTRUC
ING INSTRUCTT
TT
TIONSIONS
IONSIONS
IONS

128-5807C
8 of 44
pressed, the next lower track number will
be selected as shown on the display panel.
99
99
9DISC SELECT ( CD- CD+)
During CD changer operation, this button
is used to select the desired disc play. To
advanceto a highernumberdisc, pressthe
CD+ button. To decrement to a lower
number disc, press the CD- button. The
number of the disc in play will be shown on
the display panel.
blbl
blbl
blCD PLAY/PAUSE SELECTOR ( )
During CD player and CD changer
operation, pressing this button will
temporarily stop play of the disc (the
indication will flash on the display panel).
Press the button again to resume play of
the disc from the point at which it was
stopped.
bmbm
bmbm
bm AUDIO MUTE SELECTOR (MUTE)
Press this button to mute the volume from
the unit (MUTE will appear on the display
panel). Pressing the button again or
adjusting the Volume control 2will return
tothevolume levelsettingin use beforethe
Mute function was activated.
bnbn
bnbn
bnLIQUID CRYSTAL DISPLAY PANEL
The Liquid Crystal Display (LCD) panel
displays the frequency and activated
functions.
NOTE: It is a characteristic of LCD panels
that,ifsubjectedtocoldtemperatures
for an extended period of time,
they may take longer to illuminate
than under normal conditions. In
addition,thevisibilityofthenumbers
ontheLCDmay slightly decrease.
The LCD read-out will return to
normal when the temperature
increases to a normal range.
bobo
bobo
bo DISC SLOT
With the label surface facing up, fully
insert a compact disc into the slot until
the soft-loading mechanism engages and
pulls the disc in. The LOAdCd indication
willmomentarilyappearonthedisplaypanel
followed by CdPand the playingtimeof the
disc. Disc play will then begin with the track
numberand rotatingdisc playsymbol( )
on the display panel.
NOTE:This unit is designed for play of
standard 5" (12cm) Compact Discs
ONLY. Do not attempt to use 3"
(8cm) CD-Singles in this unit, either
with or without an adapter, as
damage to the player and/or disc
can occur. Such damage will not be
covered by the Warranty on this
product.
bpbp
bpbp
bpDISC EJECT (EJ)
Disc play is stopped and the disc is ejected
by pressing this button (EJCd will appear on
the display panel). Remove the disc and
insert another discinto the unittobeginplay
of the new disc or press the Function Mode
Selector cmcm
cmcm
cmto choose radio or CD changer
mode operation. Discs will be ejected
when the button is pressed and the ignition
switch is on.
Radio or CD changer operation will
automatically resume depending on which
mode was in operation prior to disc play. If
the disc is not removed from the unit within
10 seconds of being ejected, it will
automatically be re-loaded into the unit to
OPEROPER
OPEROPER
OPERAA
AA
ATT
TT
TING INSTRUCING INSTRUC
ING INSTRUCING INSTRUC
ING INSTRUCTT
TT
TIONSIONS
IONSIONS
IONS
77
77
7

128-5807C
9 of 44
88
88
8
OPEROPER
OPEROPER
OPERAA
AA
ATT
TT
TING INSTRUCING INSTRUC
ING INSTRUCING INSTRUC
ING INSTRUCTT
TT
TIONSIONS
IONSIONS
IONS
preventit from beingaccidentallydamaged
(will appear on the display panel to
indicate that a disc is loaded in the player).
Play of the disc can be resumed by using
the Function Mode Selector cm to choose
CD player function.
NOTE: To prevent an ejected disc from
accidentallybeingdamaged,always
remove the disc from the unit. Do
not leave the disc extending from
the disc slot.
bqbq
bqbq
bqFRONT PANEL RELEASE BUTTON
(REL)
This button is used to release the mechanism
that holds the front panel to the chassis. To
detach the front panel, press the button so
that the panel releases form the chassis.
Grasp the panel at the middle and pull it off
of the chassis.
To re-attach the panel, press the left side of
thepanelinplace first (left facing radio) and
then press the right side of the panel until
the mechanism locks it into place.
NOTES ON USE OF FRONT PANEL
1. Make sure the front panel is right-
side-up when attaching it to the chassis
as it cannot be attached when up-side
down.
2. Do not press very hard on the front
panel when attaching it to the chassis.
Nomore thanlightto moderatepressure
should be needed.
3. When attaching the front panel, make
sureit is centered in the chassis frame
and is pressed straight into position.
4. When taking the front panel with you,
pleaseusethe suppliedcarryingcase to
protectthepanel from dirt and damage.
Make sure there is no dust or dirt on
the electrical terminals on the back of
the panel as this could cause
intermittent operation or other
malfunctions.
brbr
brbr
br THEFT-DETERRENT L.E.D.
Located on the chassis behind the front
panel,alight-emitting diode (LED) willflash
when the panel is removed. The flashing
light serves as a visual warning to the
would-bethiefthatthe unithasbeendisabled
by removal of the front panel.
bsbs
bsbs
bs RE-SET BUTTON
ARe-Set button islocated onthefront ofthe
chassis (front panel must be removed to
access the button). The re-set circuitry is
provided to protect the microprocessor
circuitryand should onlybeactivated under
thefollowing circumstances as it will erase
the time and pre-set memories.
1. Upon initial installation after all wiring
is completed.
2. If there is a malfunction of any of the
switchesontheunit,pressingtheRe-Set
button may clear the systemandreturnto
normal operation.
btbt
btbt
btMANUAL TUNING CONTROL
Turn this knob clockwise to tune upward in
frequency on the band in use, counter-
clockwise to tune downward in frequency.
The frequency to which you are tuned will be
shown in digital form on the display panel.
When tuning in a station, always adjust

128-5807C
10 of 44
the control so that the correct broadcast
frequency is shown on the display and
adjust the control so that you are receiving
a clear signal. If the radio is tuned off-
frequency, you could experience distorted
audio,noiseandother reception problems.
bubu
bubu
buAM/FM BAND SELECTOR (BAND)
Each time this button is pressed, the radio
band is changed. The indication AM or FM
will appear on the display panel according
to your selection.
clcl
clcl
cl LEVEL METER
This display consists of two bar segments
which indicate the level of the audio signal.
The number of segments present in each
bar corresponds to the audio signal level
(more segments equals astrongersignal).
During CD Player and CD Changer
operation,thedisplayprovidesan indication
of the audio signal level present on the CD.
cmcm
cmcm
cm FUNCTION SELECTOR (MODE)
This button is used to select the playback
mode (radio, CD Player or optional CD
Changer). With each press of the button, a
different playback mode will be selected as
indicated on the front panel display.
Radio (FM or AM on display) !CD Disc
Player (CdP on display) !CD Changer
(CdC on display).
During CD Player operation, the button
may be used to change to radio or CD
changer without ejecting the disc.
cncn
cncn
cnTIME/FREQUENCY SELECTOR (T/F)
During operation, press this button to call
the time display on the incorporated quartz
clock. The display will return to the radio
frequency indication after 5 seconds.
DuringCD playerandCDchangeroperation,
the first press of the button will call the time
display. In either case, the display will
returnto the discindication after 5seconds.
coco
coco
coLOCAL/REPEATCONTROL(LOC/RPT)
Duringradio operation,pressingthis button
selects the local setting for the reception of
strong signals. The LOC indication will
appear on the display panel. Pressing the
button again will deactivate the function.
DuringCD PlayerandCDChangeroperation,
pressing the button will continously repeat
the current disc track. The RPT indication
will appear in the display panel. Pressing
thebutton againwildeactivate thisfunction.
cpcp
cpcp
cp LOUD/RANDOM CONTROL
(LOU/RND)
Duringradio orCD operationwhen listening
to music at low volume levels this feature
will boost bass and treble ranges to
compensate for the characteristics of
human hearing. Press the button
momentarilytoactivate thisfeatureand the
indication LOUD will appear on the display
panel. Pressing the button again
momentarilywill deactivate thefeature(the
LOUD indication will disappear from the
display panel). During CD Player and CD
Changer operation, pressing and holding
this button for several seconds will cause
the CdP and CD Changer to play disc
tracks in random order. The indication
RND will appear on the display panel.
Pressing and holding the button again for
severalsecondswill deactivatethisfunction.
OPERATING INSTRUCTIONS
99
99
9

128-5807C
11 of 44
1010
1010
10
OPEROPER
OPEROPER
OPERAA
AA
ATT
TT
TING INSTRUCING INSTRUC
ING INSTRUCING INSTRUC
ING INSTRUCTT
TT
TIONSIONS
IONSIONS
IONS
cqcq
cqcq
cqMONORADIOPLAY/INTRODUCTION
DISC PLAY (MON/INT)
During FM radio operation, this button is
used to select mono or stereo reception of
the broadcast signal. Under normal
reception conditions, the unit should be left
in the stereo mode as indicated by the
ST indicationon thedisplaypanelwhen
tuned to an FM stereo signal. If the stereo
signal is too noisy for comfortable listening,
press the FM Mono/Stereo Selector button
to switch to mono reception (the ST
indication will disappear from the display
panel). Toreturnto stereo receptionmode,
press the button again so that the ST
indication appears in the display panel.
During CD player or optional CD changer
disc play, press this button to play the first
10 seconds of each track on the disc (INT
will appear on the display panel). When a
desired track is reached, press the button
again to cancel the function (INT will
disappear from the display panel) and play
of the selected track will continue. Intro-
Scan mode will also be canceled by
activating the Repeat Play co function.
crcr
crcr
crAUX IN CONNECTOR
The AUX IN connector provides the user
option of applying an external source to the
radio. The connector is compatable with
most portable CD and cassette players or
an MP3 digital audio playback unit. When
the external source is connected, only that
media is played by the radio; no other input
sources (radio or CD) are operative.

128-5807C
12 of 44
1111
1111
11
SETSET
SETSET
SETTT
TT
TING THE CLOCK / ERRING THE CLOCK / ERR
ING THE CLOCK / ERRING THE CLOCK / ERR
ING THE CLOCK / ERROR CODEOR CODE
OR CODEOR CODE
OR CODE
1. Switch the vehicle ignition and radio “on”.
2. Press the Time/Frequency button to call the time display.
3. Press and hold in the Time/Frequency Selector button cnwith the time displayed. The
time display will blink.
4. Press the VOL button to adjust the hours and AM/PM indication and VOL button
to adjust the minutes to the correct time.
5. Five seconds after the last hour or minute adjustment is made, the time will be set in
the unit and the display will return to the normal indication.
SETSET
SETSET
SETTT
TT
TING THE CLOCKING THE CLOCK
ING THE CLOCKING THE CLOCK
ING THE CLOCK
CD PLCD PL
CD PLCD PL
CD PLAA
AA
AYER ERRYER ERR
YER ERRYER ERR
YER ERROR CODESOR CODES
OR CODESOR CODES
OR CODES
ER-1: Indicates excessive temperature conditions at the CD changer. The error code
will go off and play will resume when the temperature at the changer returns to a
normal range.
ER-2: Indicates the disc is not loading or ejecting properly. Try re-loading or pressing
the Eject button. Check the condition of the disc in use or try another disc.
ER-3: Not user serviceable, contact an approved warranty station near you for
further assistance.
ER-4: Not user serviceable, contact an approved warranty station near you for
further assistance.
ER-5: Not user serviceable, contact an approved warranty station near you for
further assistance..
ER-6: Not user serviceable, contact an approved warranty station near you for
further assistance..
ER-7: Not user serviceable, contact an approved warranty station near you for
further assistance.
ER-8: Not user serviceable, contact an approved warranty station near you for
further assistance.
ER-9: Eject the disc, make sure it is clean, undamaged and loaded correctly (label
side up).
ER-10: Not user serviceable, contact an approved warranty station near you for
further assistance.
ER-11: Indicates that there is no magazine loaded in the CD Changer.

128-5807C
13 of 44
SPECIFICATIONSSPECIFICATIONS
SPECIFICATIONS
Size: 7" W x 2" H x 6-1/8" D
178 mm x 50 mm x 155 mm
OperatingVoltage: 12 volts DC,negative ground
Fuse Ratings: Constant (yellow) lead: 5 AMP.
Switched (red) lead: 0.5 AMP.
OutputPower: 160 watts maximum
(40 watts x 4 channels)
Output Wiring: Floating-ground type designed for 4 speaker use.
Output Impedance: Compatible with 4-8 ohm speakers.
Tuning Range: AM: 530 – 1,720 KHz.
FM: 87.5 – 107.9 MHz.
Sensitivity: AM: 20 uv.
FM: 1.5 uv.
FM Stereo Separation: >25 dB
CD Frequency Response: 20 – 20,000 Hz. ±1 dB
CD Signal/Noise Ratio: >60 dB
CD Channel Separation: >60 dB
CD Distortion: 0.2%
*Specifications are subject to change without notice.
SPECIFICATIONS
1212
1212
12
CD-RANDCD-RWPLAYBACKCAPABILITY
This model can play most CD-R and CD-RW media that contains audio programs.
Playbackof bothCD-RandCD-RW depends ontheconditionsof therecording equipment
and the CD-R or CD-RW disc quality. In some cases, a CD-R or CD-RW disc cannot be
played on this unit.

128-5807C
14 of 44
CARE AND MAINTENANCECARE AND MAINTENANCE
CARE AND MAINTENANCE
The radio section of your new sound system does not require any maintenance. We
recommend that you keep this manual for reference on the many features found in this unit as
well as how to set the clock.
The compact disc player section also requires no routine maintenance, but proper
understanding of its use and handling will help you obtain maximum enjoyment of its
capabilities. The following points should be observed:
!When cleaning the interior of the vehicle, do not get water or cleaning fluids on the unit.
!The CD player is a precision instrument and will not operate properly in extreme heat or cold.
In case of such conditions, wait until the interior temperature of the vehicle reaches a normal
temperature before using the player.
!If the temperature inside the player gets too hot, a protective circuit will automatically stop
play of the disc. In this case, allow the unit to cool off before operating the player again.
!Never insert anything other than a 5" (12 cm) compact disc into the player as the mechanism
can be damaged by foreign objects.
!Do not attempt to use 3" (8 cm) CD-Single discs in this unit, either with or without an adaptor,
as damage to the player and/or disc may occur. Such damage will not be covered by the
Warranty on this product.
!When not using the disc player, always remove the compact disc. Do not leave an ejected
disc sitting in the disc slot as this can expose it to sunlight and other causes of damage.
!Do not attempt to open the unit chassis. There are no user serviceable parts or adjustments inside.
!When the vehicle warms up during cold weather or under damp conditions, moisture may
condense on the lens of the disc player. Should this occur, the player will not operate
properly until the moisture has evaporated.
!The unit is designed with a vibration dampening CD mechanism to minimize interruption of
disc play due to normal vibration in a moving vehicle. When driving on very rough roads,
however, occasional sound skips may occur. This will not scratch or damage the disc and
normal play will resume when the rough conditions cease.
HANDLING COMPACT DISCS
Dirt, dust, scratches, and warpage can cause skips in the playback and deterioration of sound
quality. Please follow these guidelines to take care of your compact discs:
!Use only compact discs with the mark .
!Fingerprints, dust, and dirt should be carefully wiped off the disc’s playing surface (shiny side)
with a soft cloth. Wipe in a straight motion from the inside to the outside of the disc.
!Never use chemicals such as record sprays, household cleaners or thinner to clean compact
discs. Such chemicals can irreparably damage the disc’s surface.
!Discs should be kept in their storage cases when not in use.
!Do not expose discs to direct sunlight, high temperatures or high humidity for extended periods.
!Do not stick paper, tape, or labels on the disc surfaces nor write on them with any type of marker.
CACA
CACA
CARE ARE A
RE ARE A
RE AND MAND MA
ND MAND MA
ND MAINTENAINTENA
INTENAINTENA
INTENANCENCE
NCENCE
NCE
1313
1313
13

128-5807C
15 of 44
Form No. 128-4270E
AUDIOVOX CORPORATION (the Company) warrants to the original retail purchaser of
this product that should this product or any part thereof, under normal use and
conditions, be proven defective in material or workmanship within 12 months from the
date of original purchase, such defect(s) will be repaired or replaced with new or
reconditioned product (at the Company's option) without charge for parts and repair
labor.
To obtain repair or replacement within the terms of this Warranty, the product is to be
delivered withproofof warranty coverage(e.g. dated bill of sale),specification of defect(s),
transportation prepaid, to the warranty center at the address shown below.
ThisWarranty does notextend tothe elimination ofcar staticor motor noise,to correction
of antenna problems, to costs incurred for installation, removal, or reinstallation of the
product,or damage totapes, compact discs,speakers,accessories, or vehicleelectrical
systems.
This Warranty does not apply to any product or part thereof which, in the opinion of the
Company, has suffered or been damaged through alteration, improper installation,
mishandling, misuse, neglect, accident, or by removal or defacement of the factory serial
number/bar code label(s). THE EXTENT OF THE COMPANY'S LIABILITY UNDER
THIS WARRANTY IS LIMITED TO THE REPAIR OR REPLACEMENT PROVIDED
ABOVE AND, IN NO EVENT, SHALL THE COMPANY'S LIABILITY EXCEED THE
PURCHASE PRICE PAID BY PURCHASER FOR THE PRODUCT.
This Warranty is in lieu of all other express warranties or liabilities. ANY IMPLIED
WARRANTIES, INCLUDING ANY IMPLIED WARRANTY OF MERCHANTABILITY,
SHALL BE LIMITED TO THE DURATION OF THIS WRITTEN WARRANTY. ANY
ACTION FOR BREACH OF ANY WARRANTY HEREUNDER INCLUDING ANY IMPLIED
WARRANTY OF MERCHANTABILITY MUST BE BROUGHT WITHIN A PERIOD OF 30
MONTHS FROM DATE OF ORIGINAL PURCHASE. IN NO CASE SHALL THE
COMPANY BE LIABLE FOR ANY CONSEQUENTIAL OR INCIDENTAL DAMAGES
FOR BREACH OF THIS OR ANY OTHER WARRANTY, EXPRESS OR IMPLIED,
WHATSOEVER. No person or representative is authorized to assume for the Company
any liability other than expressed herein in connection with the sale of this product.
Some states do not allow limitations on how long an implied warranty lasts or the
exclusion or limitation of incidental or consequential damage so the above limitations or
exclusions may not apply to you. This Warranty gives you specific legal rights and you
may also have other rights which vary from state to state.
U.S.A.: AUDIOVOX CORPORATION, 150 MARCUS BLVD., HAUPPAUGE, NEW YORK 11788 • 1-800-645-4994
CANADA: CALL 1-800-645-4994 FOR LOCATION OF WARRANTY STATION SERVING YOUR AREA
12 MONTH LIMI12 MONTH LIMI
12 MONTH LIMITED WTED W
TED WTED W
TED WAA
AA
ARRRR
RRRR
RRAA
AA
ANTNT
NTNT
NTYY
YY
Y
1414
1414
14
WW
WW
WAA
AA
ARRRR
RRRR
RRAA
AA
ANTNT
NTNT
NTYY
YY
Y

128-5807C
16 of 44
1515
1515
15
NONO
NONO
NOTT
TT
TICE D'INSTICE D'INST
ICE D'INSTICE D'INST
ICE D'INSTALLALL
ALLALL
ALLAA
AA
ATT
TT
TIONION
IONION
ION
NOTICE D'INSTALLATIONNOTICE D'INSTALLATION
NOTICE D'INSTALLATION
Cet appareil est conçu pour être installé dans les voitures, camions et fourgonnettes dotés d'un logement aménagé dans le
tableau de bord. Le recours à une trousse d'installation sera souvent nécessaire pour poser l'autoradio sur le tableau de bord.
On peut se procurer ces trousses dans les magasins d'électronique et chez les spécialistes de l'autoradio. Vérifiez toujours
l'usage de la trousse avant l'achat de façon à être sûr que celle-ci est compatible avec votre véhicule. Si vous avez besoin
d'une trousse mais ne pouvez vous la procurer, appelez notre service de dépannage sans frais au 1-800-645-4994.
MÉTHODEDE POSEUNIVERSELLE À L'AIDEDE LADOUILLE DE MONTAGE
1. Dégagez la douille de montage du châssis. Si celle-ci est verrouillée, utilisez les outils de dépose (fournis) pour l'extraire.
2. Vérifiez la taille du logement sur le tableau de bord en y introduisant la douille de montage. Si l'ouverture est trop juste,
découpez-la ou limez-la avec précaution pour l'agrandir jusqu'à ce que la douille de montage puisse facilement coulisser
dans le logement. Ne forcez pas sur la douille pour la faire rentrer dans l'ouverture, elle pourrait se tordre ou se gauchir.
Vérifiez que le dégagement derrière le tableau de bord est suffisant pour accueillir le châssis de l'autoradio.
3. Localisez la série de lames à plier situées sur le haut, le bas et les parties latérales de la douille de montage. Après avoir
complètement introduit la douille dans le logement du tableau de bord, pliez autant de lames qu'il le faudra vers l'extérieur
pour fixer solidement la douille au tableau de bord.
4. Placez l'autoradio en face de l'ouverture du tableau de bord de façon à pouvoir faire passer les fils à travers la douille
de montage. Suivez attentivement le schéma de câblage et assurez-vous que toutes les connexions du faisceau de fils
sont solides et qu'elles sont isolées à l'aide d'écrous fils ou de chatterton de façon à assurer le bon fonctionnement de
l'appareil. Après avoir effectué le câblage, allumez l'appareil pour en vérifier le fonctionnement (vous devez mettre le
contact). Si l'appareil ne fonctionne pas, revérifiez les branchements jusqu'à ce que le problème soit résolu.
REMARQUE : Réglez le condensateur ajustable d'appoint de l'antenne AM MAINTENANT. Reportez-vous aux consignes
d'installation figurant sur l'étiquette située sur le côté droit du châssis de l'autoradio. Une fois que l'appareil fonctionne,
coupez le contact et procédez à la pose définitive du châssis.
5. Introduisez avec précaution l'autoradio dans la douille de montage, en vous assurant que vous l'avez bien mis à l'endroit,
jusqu'à ce qu'il soit complètement encastré et que les agrafes à ressort se ferment.
6. Fixez une extrémité de la patte de support perforée (fournie) au goujon prisonnier à l'aide de l'écrou hexagonal fourni.
Fixez l'autre extrémité de la patte perforée à un endroit solide du tableau de bord situé soit au-dessus, soit au-dessous
de l'autoradio à l'aide de la vis et de l'écrou hexagonal fournis. Pliez la patte selon l'angle voulu.
ATTENTION: L'arrière de l'autoradio doit impérativement être soutenu par la patte afin de prévenir tout dommage que
pourrait occasionner le poids de l'autoradio au tableau de bord ainsi que tout mauvais fonctionnement
dû aux vibrations.
7. Testez le fonctionnement de l'autoradio en vous reportant à la Notice d'utilisation de l'appareil.
INSTALLATIONAU MOYENDE LATROUSSE
1. Si votre véhicule nécessite une trousse d'installation pour poser cet autoradio, suivez les instructions de la trousse pour
fixer l'autoradio sur la douille de montage fournie.
2. Branchez et testez l'autoradio comme décrit à l'étape 4.
3. Installez l'ensemble autoradio/plaque de montage sur la partie inférieure du tableau de bord en suivant les instructions
de la trousse d'installation.
4. Fixez la patte de support à l'autoradio et au tableau de bord comme décrit à l'étape 6 ci-dessus.
5. Remettez le panneau d'habillage sur le tableau de bord.
MÉTHODEDE POSEISO
Les panneaux latéraux du châssis de cet appareil sont dotés de trous filetés pouvant être utilisés avec les supports de montage
d'origine de certains véhicules Toyota, Nissan, Mitsubishi, Isuzu, Hyundai et Honda pour monter l'autoradio sur le tableau de
bord. Veuillez consulter votre magasin d'autoradios local pour toute assistance concernant ce type de pose.
1. Enlevez l'autoradio d'origine du tableau de bord ou de sa console centrale. Conservez tout le matériel et les fixations car
vous en aurez besoin pour monter le nouvel autoradio.
2. Désencliquetez avec précaution le cadre en plastique situé sur le devant du châssis du nouvel autoradio. Retirez et jetez
le cadre.
3. Retirez les supports de montage et le matériel de l'autoradio d'origine et fixez-les sur le nouvel autoradio.
ATTENTION: NE PAS UTILISER DE VIS D'UNE TAILLE SUPÉRIEURE À M5 X 8 MM.
DES VIS D'UNE LONGUEUR SUPÉRIEURE POURRAIENT TOUCHER ET ENDOMMAGER LES
ÉLÉMENTS SE TROUVANT À L'INTÉRIEUR DU CHÂSSIS.
4. Branchez le nouvel autoradio sur le véhicule en suivant l'étape 4 ci-dessus.
5. Montez le nouveau bloc autoradio sur le tableau de bord ou sur la console centrale en suivant l'étape 1 en sens inverse.

128-5807C
17 of 44
NONO
NONO
NOTT
TT
TICE D'INSTICE D'INST
ICE D'INSTICE D'INST
ICE D'INSTALLALL
ALLALL
ALLAA
AA
ATT
TT
TIONION
IONION
ION
1616
1616
16
DE 8 H 30 À 19 H
DE 9 H À 17 H
PRAIRIES
DE 6 H 30 À 17 H
DE 7 H À 15 H
ROCHEUSES
DE 5 H 30 À 16 H
DE 6 H À 14 H
PACIFIQUE
DU LUN. AU VEND.
LE SAMEDI
JOUR
ASSISTANCE SANS FRAIS POUR L'INSTALLATIONASSISTANCE SANS FRAIS POUR L'INSTALLATION
ASSISTANCE SANS FRAIS POUR L'INSTALLATION
L'installation et les branchements de l'appareil sont très simples et vous n'aurez en principe pas besoin d'aide, dans le cas
contraire cependant, nous sommes là pour vous aider. Il vous suffit d'appeler notre service dépannage sans frais au
1-800-645-4994 aux horaires et jours indiqués (États-Unis et Canada uniquement).
DE 7 H 30 À 18 H
DE 8 H À 16 H
ÉCROU (5 MM) LOGEMENT EXISTANT DU TABLEAU DE BORD
LIMEZLESBORDSPOUR ADAPTERL'OUVERTURE-NELIMEZ
PASTROP
REMARQUE : S'IL N'Y A PAS D'OUVERTURE DANS LE TAB-
LEAUDEBORD,SESERVIRDEL'ARRIÈRE(SANSREBORD)DE
LA DOUILLE DE MONTAGE COMME D'UN GABARIT POUR EN
DÉCOUPER UNE
POSE UNIVERSELLE À L'AIDE DE LA DOUILLE DE MONTAGEPOSE UNIVERSELLE À L'AIDE DE LA DOUILLE DE MONTAGE
POSE UNIVERSELLE À L'AIDE DE LA DOUILLE DE MONTAGE
RETIREZLECADRESITUÉSURLEDEVANTDUCHÂSSISENLE
DÉSENCLIQUETANTAVECPRÉCAUTION. POSE TYPE
POSE ISOPOSE ISO
POSE ISOPOSE ISO
POSE ISO
20° MAXI.
FAÇADE
ATTENTION:
POUR QUE LE LECTEUR DE CD FONCTIONNE CORRECTEMENT,
L'ANGLED'INSTALLATIONDUCHÂSSISNEDOITPASDÉPASSER20°
PAR RAPPORT À L'HORIZONTALE. ASSUREZ-VOUS QUE L'INSTA-
LLATIONDEL'APPAREILRÉPONDÀCES SPÉCIFICATIONS.
VUE LATÉRALE
DU
CHÂSSIS
DÉSENCLIQUETEZLES
PARTIES GAUCHE ET
DROITE
TAILLE
MAXIMUMDES
VIS M5 X 8
TAILLE
MAXIMUMDES
VIS M5 X 8
PATTEPERFORÉE
DOUILLE DE MONTAGE
CADRE EN PLASTIQUE SUPPORTSDE
MONTAGE D'ORIGINE
PLIEZLESLAMES
INFÉRIEURES
VERSLEBAS
AUTORADIO
GOUJON PRISONNIER
REMARQUE: LE CADRE EN PLASTIQUE DOIT ÊTRE RETIRÉ
(DÉSENCLIQUETEZLESPARTIES GAUCHES ETDROITES)
POUR POUVOIR UTILISER LES OUTILS DE DÉPOSE.
OUTILSDE DÉPOSE
FIXEZ CETTE EXTRÉMITÉ À UN ENDROIT
SOLIDE DU TABLEAU DE BORD. PERCEZ
UN TROU LE CAS ÉCHÉANT.
FIXEZCETTEEXTRÉMITÉAU
GOUJON PRISONNIER À
L'ARRIÈRE DU CHÂSSIS
VIS
(5 MM)
EST
PLIEZLESLAMES
SUPÉRIEURES
VERS LE HAUT

128-5807C
18 of 44
33
33
3
NOIR
PRISEDEL'ANTENNE
ÀL'ARRIÈRE DE
L'AUTORADIO
BORNEPOSITIVE(+)
DELABATTERIE
DE 12 VOLTS
BATTERIEDU
VÉHICULE
PARTIEMÉTALLIQUEDU
TABLEAU DE BORD
(PERCEZ UN TROU LE
CASÉCHÉANT)
VIS
AUTORADIO
VOIRCÂBLAGE DES
HAUT-PARLEURS
PAGE 18
ANTENNE ANTENNE
AUTOMATIQUE
BOÎTEÀFUSIBLES DU
VÉHICULE
IMPORTANT
ON POURRA UTILISER DU FIL BLEU
POUR ACTIVER À DISTANCE UNE
ANTENNEAUTOMATIQUE OU POUR
ALLUMER UN AMPLI EXTÉRIEUR.
(REPORTEZ-VOUS À LA NOTICE
D'INSTALLATIONDE L'ANTENNE OU
DEL'AMPLI.)
BLEU (FUSIBLE 0,5 A)
FUSIBLE « AUTORADIO »
OU « ACCESSOIRE »
CÂBLE
D'ANTENNE
EXISTANT
ROUGE(FUSIBLE 0,5 A)
IMPORTANT
CE FIL DOIT ÊTRE RELIÉ COMME
ILLUSTRÉ OU L'AUTORADIO NE FONC-
TIONNERA PAS CORRECTEMENT
JAUNE (FUSIBLE 5 A)
CÂBLAGE DE L'AUTORADIO
SCHÉMA DE CÂBLSCHÉMA DE CÂBL
SCHÉMA DE CÂBLAA
AA
AGE DE L'AUTGE DE L'AUT
GE DE L'AUTGE DE L'AUT
GE DE L'AUTOROR
OROR
ORAA
AA
ADIODIO
DIODIO
DIO
VOIRCÂBLAGEDESHAUTS-PARLEURSPAGE18
1717
1717
17

128-5807C
19 of 44
1818
1818
18
CÂBLAGE DESCÂBLAGE DES
CÂBLAGE DES
HAUT-PARLEURSHAUT-PARLEURS
HAUT-PARLEURS
VOIR CÂBLAGE DE
L'AUTORADIO PAGE 17
SORTIES RCA BAS
NIVEAU À
CONNECTER À UN/
DES AMPLI(S)
EXTÉRIEUR(S) EN
OPTION
ROUGE - ARRIÈRE
DROIT
BLANC - ARRIÈRE
GAUCHE
BLANC AVEC RAYURE NOIRE
BLANC
HAUT-PARLEUR AVANT GAUCHE HAUT-PARLEUR AVANT DROIT
HAUT-PARLEUR ARRIÈRE GAUCHE HAUT-PARLEUR ARRIÈRE DROIT
VERT
GRIS AVEC RAYURE NOIRE
PRISES 9 BROCHES
VERT AVEC RAYURE NOIRE
ATTENTION!
!LES AMPLIS DE CET AUTORADIO SONT UNIQUEMENT CONÇUS POUR UNE UTILISATION AVEC
4HAUT-PARLEURS.
!NE JAMAIS COMBINER (PAR UN MONTAGE EN PONT) DES SORTIES POUR UNE UTILISATION
AVEC2 HAUT-PARLEURS.
!NE JAMAISMETTRE À LAMASSE LES CÂBLESNÉGATIFSDES HAUT-PARLEURS ENLESRELIANT
AU CHÂSSIS DE LA VOITURE.
!TOUT MAUVAIS CÂBLAGE EST SUSCEPTIBLE D'ENDOMMAGER L'AUTORADIO.
VIOLET AVEC RAYURE NOIRE
AUTORADIO
Du lundi au vendredi De 8 h 30 à 19 h 00, heure de l'Est
Le samedi De 9 h 00 à 17 h 00, heure de l'Est
1-800-645-49941-800-645-4994
1-800-645-49941-800-645-4994
1-800-645-4994
DÉPANNAGE
GRIS
VIOLET
PRISES 4 BROCHES
VOIRCÂBLAGEDE
L'AUTORADIOPAGE17
PRISEDINÀ8BROCHESPOURLEBRANCHEMENT
DU CHANGEUR DE CD EN OPTION
6
COMPACT
CÂBLEDIN
(FOURNIAVECLE
CHANGEURDECD)
CHANGEURDECD
ENOPTION
REMARQUE:
CONSULTEZ VOTRE SPÉCIALISTE DES AUTORADIOS
RAMPAGE/AUDIOVOXOUAPPELEZLE1-800-645-4994
POUR SAVOIR QUELS SONT LES MODÈLES COM-
PATIBLESAVECVOTREAUTORADIO.
CÂBLCÂBL
CÂBLCÂBL
CÂBLAA
AA
AGE DES HGE DES H
GE DES HGE DES H
GE DES HAUT-PAUT-P
AUT-PAUT-P
AUT-PAA
AA
ARLEURSRLEURS
RLEURSRLEURS
RLEURS

128-5807C
20 of 44
NONO
NONO
NOTT
TT
TICE D'UTICE D'UT
ICE D'UTICE D'UT
ICE D'UTILISAILISA
ILISAILISA
ILISATT
TT
TIONION
IONION
ION
11
11
1TOUCHEDEMARCHE-ARRÊT(PWR)
Appuyez sur cette touche pour allumer ou
éteindre l'appareil. L'appareil s'allume égale-
ment automatiquement lorsque l'on insère un
disque compact, si le contact est mis.
22
22
2TOUCHESDERÉGLAGEDUVOLUME
(VOL / VOL )
Pour augmenter le volume, appuyez sur la
partie « vers le haut » de la touche. Le volume
augmentera et le niveau s'inscrira sur
l'afficheur, sa valeur étant comprise entre VOL
0et VOL 63. Pour baisser le volume, appuyez
sur la partie « vers le bas » de la touche.
Maintenez la touche enfoncée pour baisser le
volume rapidement. L'affichage reviendra
automatiquement à l'indication normale 5
secondes après le dernier réglage du volume
ou lorsqu'une autre fonction sera activée. Cette
touche permet également, en conjonction avec
la touche de sélection 3, de régler le niveau
des basses, des aigus, de la balance et de
l'équilibreur avant-arrière, comme le décrivent
les sections 4, 5, 6et 7.
33
33
3SÉLECTEUR(SEL)
Cette touche permet de sélectionner la fonction
audio (volume, basses, aigus, balance ou
équilibreur avant-arrière) à régler à l'aide de la
touche de réglage du volume 2. Une pression
unique sur le sélecteur permet d'accéder au
réglage du volume de l'appareil. Il est conseillé
d'utiliser la touche de réglage du volume 2.
Deux pressions sur cette touche permettent
d'accéder au réglage des basses (BAS
s'affiche). Les pressions suivantes permettent
de sélectionner le réglage des aigus (TRE
s'affiche),dela balance (BAL)oudel'équilibreur
avant-arrière (FAd). L'affichage reviendra
automatiquement à l'indication normale
5 secondes après le dernier réglage ou
lorsqu'une autre fonction sera activée.
44
44
4RÉGLAGEDESBASSES
Pour régler le niveau des basses, commencez
par appuyer sur le sélecteur 3de façon à ce
NONO
NONO
NOTT
TT
TICE D'UTICE D'UT
ICE D'UTICE D'UT
ICE D'UTILISAILISA
ILISAILISA
ILISATT
TT
TIONION
IONION
ION
1919
1919
19
BAND
ACD-16
EJ
REL
PWR
SEL
VOL
VOL
CD- CD+ T/F
MONLOU LOC/RPT
TRACK
MUTE
RND INT
T
I
G
U
N
N
AUX IN
2
1
15
11
15
12
10
3
4
5
6
7
8
9
13 16
17
18
19
14
20
24 23 25 22 21
26
Table of contents
Languages:
Other Rampage Car Receiver manuals

Rampage
Rampage AM/FM/MPX Radio ACD-91 User manual

Rampage
Rampage 1285780E User manual

Rampage
Rampage ACD-83 User manual

Rampage
Rampage ACD-24 User manual

Rampage
Rampage ACD-28 Programming manual

Rampage
Rampage ACD-83 User manual

Rampage
Rampage ACD-12 User manual

Rampage
Rampage AV-301N User manual

Rampage
Rampage ACD-13 User manual

Rampage
Rampage Rampage ACD-20 Safety guide
Popular Car Receiver manuals by other brands

Fusion
Fusion MS-BT100 installation guide

Boss Audio Systems
Boss Audio Systems BV6652 user manual

Lancia
Lancia YPSILON 2003 quick start guide

Blaupunkt
Blaupunkt Bologna C52 operating instructions

Phonocar
Phonocar VM 026 instruction manual

Blaupunkt
Blaupunkt Caracas 2010 U OPERATING AND INSTALLATION Manual