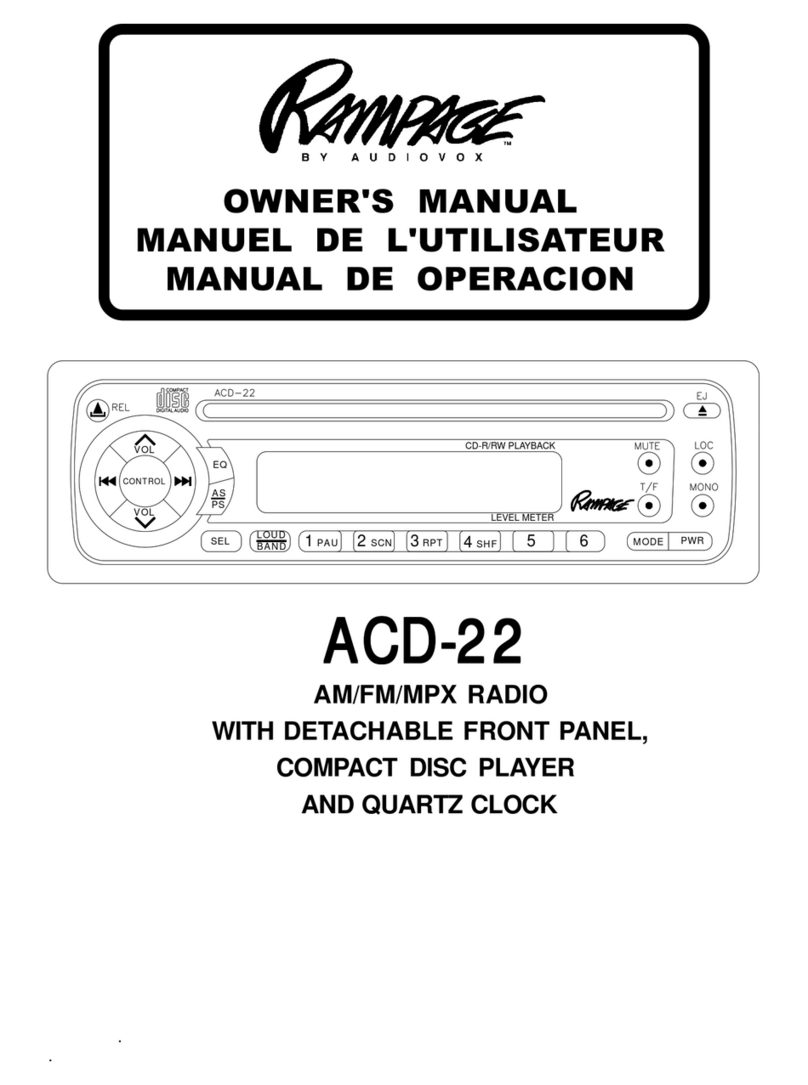
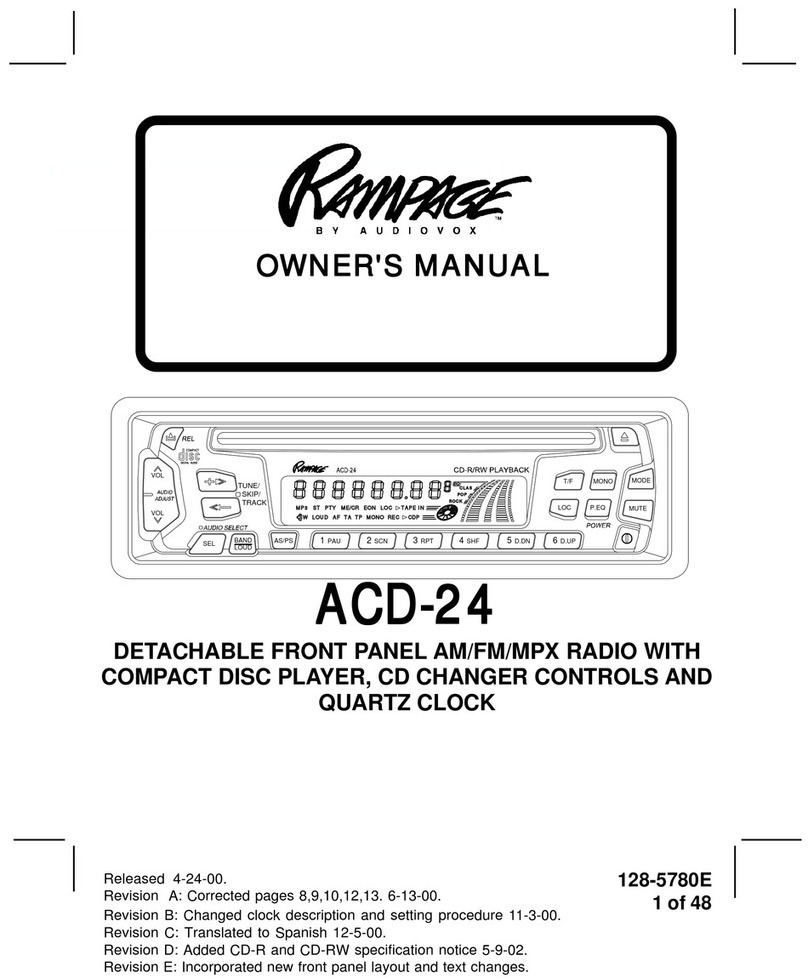
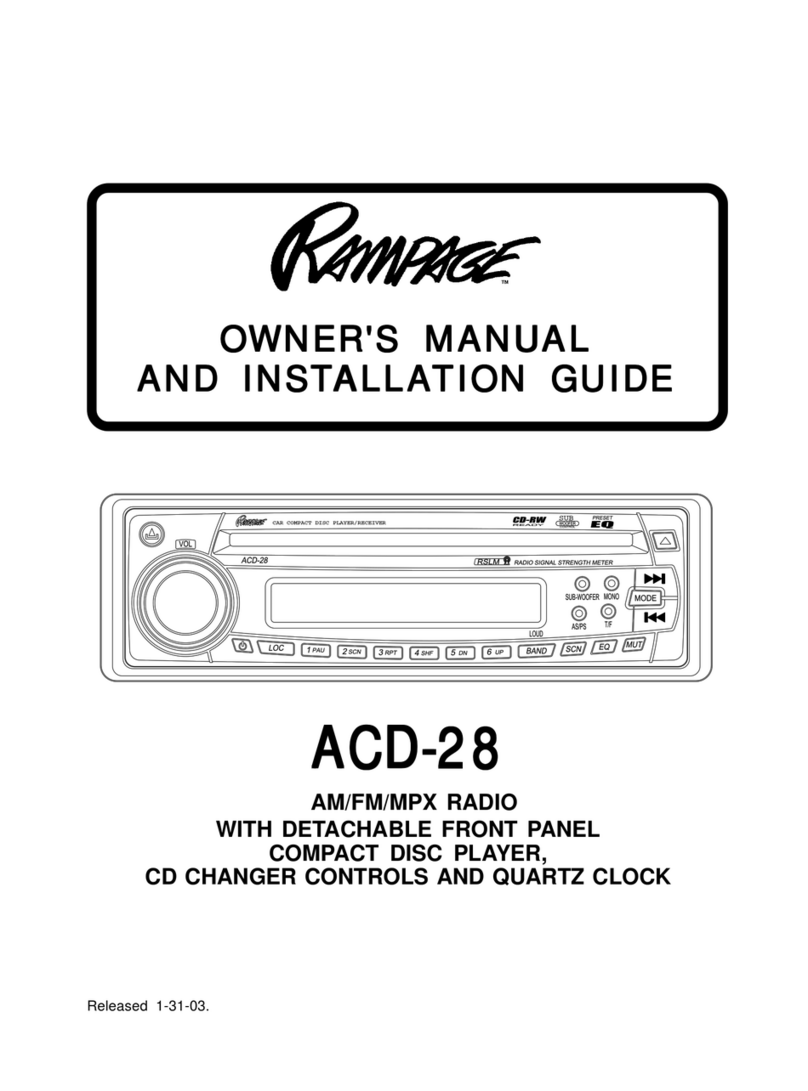
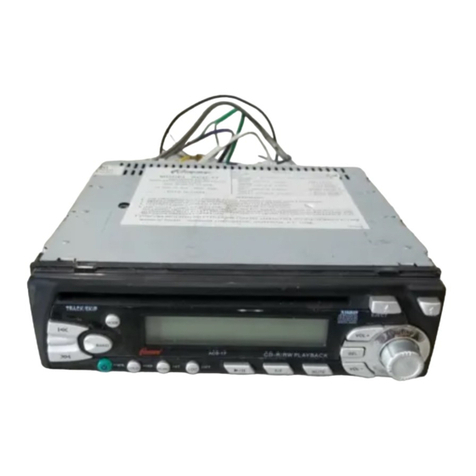
Rampage ACD-83 User manual

ACD-83ACD-83
ACD-83ACD-83
ACD-83
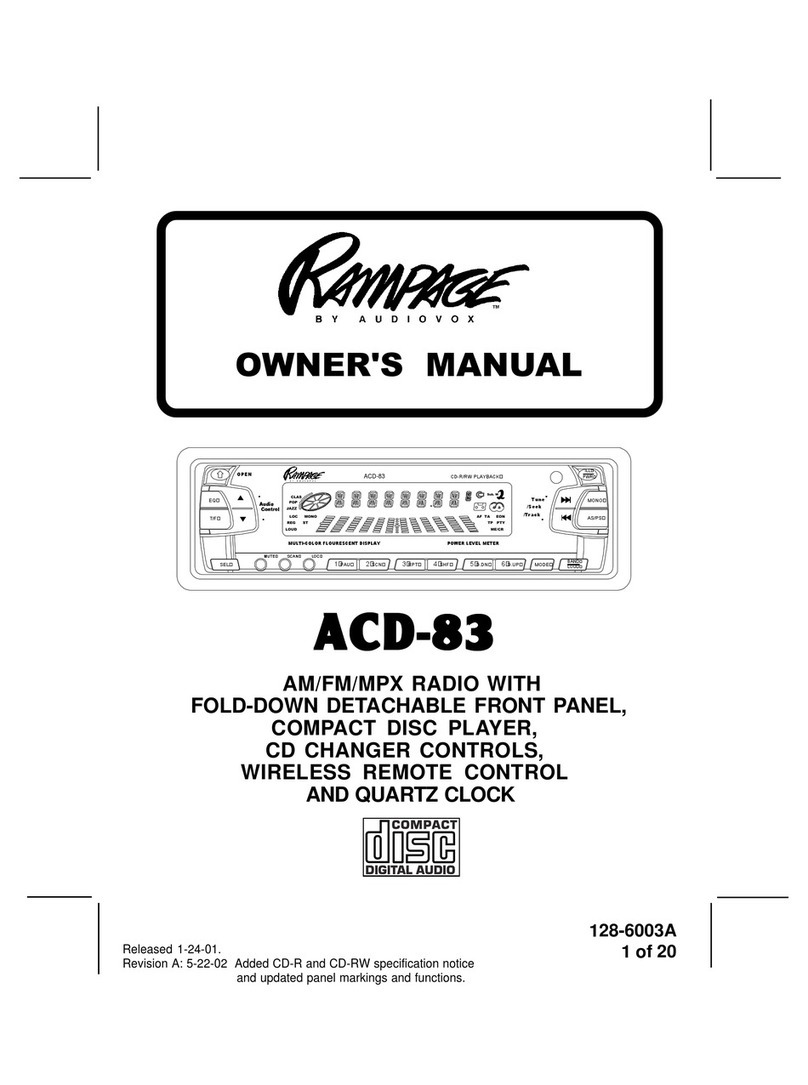
AM/FM/MPX RADIO WITH
FOLD-DOWN DETACHABLE FRONT PANEL,
COMPACT DISC PLAYER,
CD CHANGER CONTROLS,
WIRELESS REMOTE CONTROL
AND QUARTZ CLOCK
OWNER'S MANUAL
CAR COMPACT DISC PLAYER
LOUD
EQ
SEL
MUTE
OPEN
TOP
MULTI-COLOR FLUORESCENT DISPLAY
AS/PST/F
1
ControlControl
AudioAudio
2
SCN
43
RPT
POWER LEVEL METER
D.DN
5
RND
6
D.UP
ILL
BANDMODE
TuneTune
ACD-83ACD-83
/Track/Track
/Seek/Seek
LOC
MONO
PWR
CHCH
TRACKTRACK
LOCLOC
LOUDLOUD
ST
EQEQ
ROCKROCK
CLASCLAS
POPPOP
Sub. W
DISC RNDDISC RND
RPTRPT
SCANSCAN

INSTINST
INSTINST
INSTALLALL
ALLALL
ALLAA
AA
ATT
TT
TION INSTRUCION INSTRUC
ION INSTRUCION INSTRUC
ION INSTRUCTT
TT
TIONSIONS
IONSIONS
IONS
11
11
1
INSTALLATION INSTRUCTIONSINSTALLATION INSTRUCTIONS
INSTALLATION INSTRUCTIONS
This unit is designed for installation in cars, trucks, and vans with an existing radio opening. In many cases, a
specialinstallationkitwillberequiredtomounttheradiotothedashboard. Thesekitsareavailableatelectronics
supply stores and car stereo specialist shops. Always check the kit application before purchasing to make sure the
kitworks with yourvehicle. If youneed a kitbut cannot findit available, callour toll-free “HELP”line at 1-800-645-4994.
UNIVERSAL INSTALLATION PROCEDURE USING MOUNTING SLEEVE
1. Open, fold down and remove the detachable front panel, if it is attached to the chassis, by grasping the
groovedcenterportion andpullingthepanelassemblystraightout.Slidethemountingsleeveoffof thechassis.
If it is locked into position, use the removal tools (supplied) to disengage it.
2. Checkthedashboardopeningsizebyslidingthemountingsleeveintoit. Iftheopeningisnotlargeenough,carefully
cut or file as necessary until the sleeve easily slides into the opening. Do not force the sleeve into the opening or
cause it to bend or bow. Check that there will be sufficient space behind the dashboard for the radio chassis.
3. Locate theseries of bendtabs alongthe top,bottom, and sidesof themounting sleeve. Withthe sleevefully
inserted into the dashboard opening, bend as many of the tabs outward as necessary so that the sleeve is
firmly secured to the dashboard.
4. Place the radio in front of the dashboard opening so that the wiring can be brought through the mounting
sleeve. Follow thewiringdiagramcarefullyandmakecertainallconnectionsofthewiringharnessaresecure
and insulated with wire nuts or electrical tape to insure proper operation of the unit. After completing the
wiring connections, attach the front panel and turn the unit on to confirm operation (ignition switch must be
“on”). If unit does not operate, re-check all wiring until problem is corrected. Once proper operation is
achieved, turn off the ignition switch and proceed with final mounting of the chassis.
5. Carefully slide the radio into the mounting sleeve making sure it is right-side-up until it is fully seated
and the spring clips lock it into place.
6. Attachone endofthe perforated supportstrap (supplied) tothe screw studonthe rearofthe chassisusing
thehex nutprovided. Fasten the other end of the perforated strap toa securepart ofthe dashboardeither
aboveor below theradio using thescrewand hexnutprovided. Bend thestrapto positionitas necessary.
CAUTION: The rear of the radio must be supported with the strap to prevent damage to the dashboard
from the weight of the radio or improper operation due to vibration.
7. Re-attachthe frontpanel tothe chassis andtest radiooperation byreferringto theOperating Instructionsfor the unit.
INSTALLATION USING KITS
1. If your vehicle requires the use of an installation kit to mount this radio, follow the instructions included
with the installation kit to attach the radio to the mounting plate supplied with the kit.
2. Wire and test the radio as described in Step 4 above.
3. Install the radio/mounting plate assembly to the sub-dashboard according to the instructions of the installation kit.
4. Attach the support strap to the radio and dashboard as described in Step 6 above.
5. Replace the dashboard trim panel.
ISO INSTALLATION PROCEDURE
This unit has threaded holes in the chassis side panels which may be used with the original factory mounting
brackets of some Toyota, Nissan, Mitsubishi, Isuzu, Hyundai and Honda vehicles to mount the radio to the
dashboard. Pleaseconsult with your local car stereo specialistshop forassistance onthis typeof installation.
1. Remove the existing factory radio from its dashboard or center console mounting. Save all hardware and
brackets as they will be used to mount the new radio.
2. Carefullyun-snaptheplasticframefromthefrontofthenewradiochassis. Removeanddiscardtheframe.
3. Removethefactory mounting bracketsandhardwarefromtheexistingradioand attachthemtothenewradio.
CAUTION: DONOTEXCEEDM5X8MMMAXIMUMSCREWSIZE. LONGERSCREWSMAYTOUCHAND
DAMAGECOMPONENTSINSIDETHECHASSIS.
4. Wire the new radio to the vehicle as per step 4 above.
5. Mount the new radio assembly to the dashboard or center console using the reverse procedure of step 1.
INSTINST
INSTINST
INSTALLALL
ALLALL
ALLAA
AA
ATT
TT
TION INSTRUCION INSTRUC
ION INSTRUCION INSTRUC
ION INSTRUCTT
TT
TIONSIONS
IONSIONS
IONS

INSTINST
INSTINST
INSTALLALL
ALLALL
ALLAA
AA
ATT
TT
TION INSTRUCION INSTRUC
ION INSTRUCION INSTRUC
ION INSTRUCTT
TT
TIONSIONS
IONSIONS
IONS
8:30AM - 7PM
9AM - 5PM
CENTRAL EASTERN
6:30AM - 5PM
7AM - 3PM
MOUNTAIN
5:30AM - 4PM
6AM - 2PM
PACIFIC
MON. - FRI.
SATURDAY
DAY TIME ZONE
TOLL-FREE INSTALLATION ASSISTANCETOLL-FREE INSTALLATION ASSISTANCE
TOLL-FREE INSTALLATION ASSISTANCE
The installation and wiring connections for this unit are so simple, we doubt you'll need our help, but, if you do,
we're here to help you. Just call our toll-free telephone assistance line at 1-800-645-4994 during the days and
hours shown (U.S.A. and Canada only).
7:30AM - 6PM
8AM - 4PM
FASTEN THIS END TO SCREW
STUD ON REAR OF CHASSIS
NUT (5MM)
FASTEN THIS END TO SECURE PART OF DASHBOARD.
DRILL HOLE IF NECESSARY.
SCREW
(5MM)
FOLD-DOWN
DETACHABLE
FRONT PANEL
EXISTING DASH OPENING
FILE EDGES TO FIT IF NECESSARY - DO NOT OVERFILE
NOTE:IF DASHISSOLID,USEREARSIDE(WITHOUTTHE LIP)OF
MOUNTING SLEEVE AS A TEMPLATE & CUT OPENING
UNIVERSAL INSTALLATION USING MOUNTING SLEEVEUNIVERSAL INSTALLATION USING MOUNTING SLEEVE
UNIVERSAL INSTALLATION USING MOUNTING SLEEVE
NUT (5MM)
REMOVE THE PLASTIC FRAME FROM THE FRONT OF
THE CHASSIS BY CAREFULLY UN-SNAPPING IT.
ISO INSTALLATIONISO INSTALLATION
ISO INSTALLATION
20° MAX.
FRONT PANEL
CAUTION:
FOR PROPER OPERATION OF THE CD PLAYER, THE CHASSIS
MUST BE MOUNTED WITHIN 20° OF HORIZONTAL. MAKE SURE
THE UNIT IS MOUNTED WITHIN THIS LIMITATION.
SIDEVIEW
OF
CHASSIS
22
22
2
UN-SNAP AT 2 PLACES
EACH ON TOP AND BOTTOM
MAXIMUM
SCREWSIZE
M5 x 8
MAXIMUM
SCREWSIZE
M5 x 8
PERFORATED STRAP
RADIO
SCREW STUD
MOUNTINGSLEEVE
PLASTICFRAME
FACTORY MOUNTING
BRACKETS
REMOVALTOOLS
BEND BOTTOM
TABS DOWNWARD
BEND TOP
TABS UPWARD
TYPICAL INSTALLATION

RR
RR
RAA
AA
ADIO WIRINGDIO WIRING
DIO WIRINGDIO WIRING
DIO WIRING
33
33
3
RADIO WIRINGRADIO WIRING
RADIO WIRING
REFER TO PAGE 4 FOR SPEAKER WIRING
IMPORTANT
THE BLUE WIRE CAN BE USED TO
REMOTELYACTIVATEANAUTOMATIC
ANTENNAORANEXTERNALAMPLIFIER
(SEE ANTENNAORAMPLIFIERMANUAL)
ANTENNALEAD
ONREAROFRADIO
9PINPLUG
(SEEPAGE4FORSPEAKERWIRING)
POSITIVE(+)TERMINAL
12 VOLT BATTERY
METALPARTOFDASH
(DRILLHOLEIFNECESSARY)
SCREW
BLACK
RED(0.5AMP.FUSE)
EXISTING
ANTENNA
CABLE
BLUE
ANTENNA AUTOMATIC
ANTENNA
FUSEBLOCK
IMPORTANT
YELLOW WIRE MUST BE
CONNECTEDASSHOWNOR
RADIO WILL NOT OPERATE
PROPERLY
4-PINPLUGS
YELLOW(15AMP.FUSE)
CARBATTERY
“RADIO”FUSE
+12VACCESSORY
FILTER/FUSE
BOX
CONTAINS:
ONE0.5 AMP FUSE
ONE15 AMP FUSE
SPESPE
SPESPE
SPEAA
AA
AKK
KK
KER WIRINGER WIRING
ER WIRINGER WIRING
ER WIRING
EXTERNALINVERTER FOR
VFDDISPLAYBACKLIGHTING
RR
RR
RAA
AA
ADIO WIRINGDIO WIRING
DIO WIRINGDIO WIRING
DIO WIRING

44
44
4
SPESPE
SPESPE
SPEAA
AA
AKK
KK
KER WIRINGER WIRING
ER WIRINGER WIRING
ER WIRING
SPEAKER WIRINGSPEAKER WIRING
SPEAKER WIRING
REFER TO PAGE 3
FOR RADIO WIRING
WHITEw/BLACKSTRIPE
WHITE
LEFTFRONTSPEAKER RIGHTFRONTSPEAKER
LEFTREARSPEAKER RIGHTREARSPEAKER
GREEN
GRAYw/BLACKSTRIPE
9-PINPLUGS
GREENw/BLACKSTRIPE
WARNING!
lTHE AMPLIFIERS IN THIS RADIO ARE ONLY DESIGNED FOR USE WITH 4 SPEAKERS.
lNEVER COMBINE (BRIDGE) OUTPUTS FOR USE WITH 2 SPEAKERS.
lNEVER GROUND NEGATIVE SPEAKER LEADS TO CHASSIS GROUND.
lFAILURE TO WIRE EXACTLY AS SHOWN BELOW MAY CAUSE ELECTRICAL
VIOLETw/BLACKSTRIPE
RADIO
8:30am - 7:00pm Eastern
9:00am - 5:00pm Eastern
Monday - Friday
Saturday
1-800-645-4994
HELP!
GRAY
VIOLET
4-PINPLUGS
SEEPAGE 3FOR
RADIOWIRING
8-PIN DIN SOCKET FOR CONNECTION TO
OPTIONAL CD CHANGER
6
COMP AC T
DINCABLE(SUPPLIED
WITH CD CHANGER). OPTIONALCDCHANGER
RCALINE OUTJACKS
FOR USE WITH OPTIONAL
EXTERNALAMPLIFIERS
NOTE:
THIS RADIO WILL CONTROL RAMPAGE CD
CHANGERMODEL. CHECKWITHYOURRAMPAGE
AUDIOVOXCAR STEREOSPECIALIST ORCALL
1-800-645-4994 FOR RECOMMENDATIONS OF
OTHER MODELS THAT WILL WORK WITH YOUR
RADIO.

1ON-OFF POWER BUTTON ( PWR )
Press this button to turn the unit on or off. If
the ignition switch is “on”, the unit will also
turn on automatically when a compact disc is
inserted, or if the MODE switch or BAND
switch is pressed.
2AUDIO CONTROL ( / ) BUTTONS
To increase the volume level, press the
button. The volume will increase and the
level will shown on the display panel from a
minimum of VOL 00 to a maximum of
VOL 39. To decrease the volume level,
press the button. The display will
automatically return to the normal indication
5 seconds after the last volume adjustment
orwhen anotherfunction isactivated. These
control buttons are also used in conjunction
with the Select (SEL) button 3to adjust
the bass, treble, balance and fader levels
as described in 4, 5, 6and 7.
3PUSH SELECT CONTROL BUTTON
This button is used to select the audio
function (volume, bass, treble, balance, or
fade) whose setting is adjusted using the
AUDIO CONTROL buttons 2. Pressing the
SEL button once will set the unit for bass
adjustment (BAS will appear on the display
panel) and an audible beep will occur.
Pressing the button additional times will
select treble adjustment (TRE on the
display), balance (BAL), or fader (FAD),
each accompanied by a beep tone. The
display will automatically return to the
normal indication 5 seconds after the last
adjustment or when another function is
activated.
NOTE: Bass and Treble cannot be adjusted
while Equalizer function cu is in
ROCK, CLAS or POP mode.
4BASS CONTROL
To adjust the bass level (equalizer function
inactive), first select the Bass mode by
pressing the SEL button 3so the BAS
indication appears on the display panel.
Within 5 seconds of choosing the Bass
mode, press the AUDIO CONTROL 2
button to decrease the bass response, or
the AUDIO CONTROL button to increase
it as desired. The level will be shown on the
55
55
5
OPEROPER
OPEROPER
OPERAA
AA
ATT
TT
TING INSTRUCING INSTRUC
ING INSTRUCING INSTRUC
ING INSTRUCTT
TT
TIONSIONS
IONSIONS
IONS
3, 4, 5, 6, 7 15
CAR COMPACT DISC PLAYER
LOUD
EQ
SEL
MUTE
OPEN
TOP
MULTI-COLOR FLUORESCENT DISPLAY
AS/PST/F
1
Control
Audio
2
SCN
43
RPT
POWER LEVEL METER
D.DN
5
RND
6
D.UP
ILL
BANDMODE
Tune
ACD-83ACD-83
/Track
/Seek
LOC
MONO
PWR
CHCH
TRACKTRACK
LOCLOC
LOUDLOUD
STST
EQEQ ROCKROCK
CLASCLAS
POPPOP
Sub. W
DISC RNDDISC RND
RPTRPT
SCANSCAN
29 28 18
34 10
14 26
35
22 23
38 25
40
24
39
12
13
1
2
32 17 16
33 19, 27, 30, 31
11, 20, 21, 36, 37
8
9
(BEHINDPANEL)

display panel from a minimum BAS -12 to a
maximum of BAS +12 (BAS 00 indicates
flat response). The display will automatically
return to the normal indication 5 seconds
after the last adjustment or when another
function is activated.
NOTE: Bass and Treble cannot be adjusted
while Equalizer function cu is in
ROCK, CLAS or POP mode.
5TREBLE CONTROL
To adjust the treble level (equalizer function
inactive), first select the Treble mode by
pressing the SEL button 3so the TRE
indication appears on the display panel.
Within 5 seconds of choosing the Treble
mode,press the AUDIOCONTROL button
2to decrease the treble response or the
AUDIO CONTROL button to increase it
as desired. The level will be shown on the
display panel from a minimum TRE -12 to a
maximum of TRE +12 (TRE 00 indicates flat
response). The display will automatically
return to the normal indication 5 seconds
after the last adjustment or when another
function is activated.
6LEFT/RIGHT BALANCE CONTROL
To adjust the left-right speaker balance, first
select the Balance mode by pressing the
SEL button3sotheBAL indication appears
on the display panel. Within 5 seconds of
choosing the Balance mode, press the
AUDIO CONTROL button 2to adjust the
stereo balance to the left channel speakers
or the AUDIO CONTROL button to adjust
it to the right channel speakers. The balance
position will be shown on the display panel
fromBAL L16 (full left)toBAL R16 (fullright).
When the volume level between the left and
right speakers is equal, BAL 00 will be
shown on the display panel. The display will
automatically return to the normal
indication 5 seconds after the last
adjustment or when another function is
activated.
7FRONT/REAR FADER CONTROL
Toadjust thefront-rear speakerbalance, first
select the Fader mode by pressing the SEL
button 3so the FAD indication appears on
the display panel. Within 5 seconds of
choosing the Fader mode, press the
AUDIO CONTROL button 2to adjust the
front-rear speaker balance to the rear
speakersor the AUDIOCONTROL button
to adjust it to the front speakers. The fader
position will be shown on the display panel
from FAD R16 (full rear) to FAD F16 (full
front). When the level between the front and
rearspeakers isequal, FAD 00 willbe shown
on the display panel. The display will
automatically return to the normal indication
5 seconds after the last adjustment or when
another function is activated.
8LOUDNESS CONTOUR (LOUD)
When listening to music at low volume
levels, this feature will boost the bass and
treble ranges to compensate for the
characteristics of human hearing. Press the
button momentarily to activate this feature;
the LOUD indication will appear on the
display panel. Pressing the button again
momentarily will deactivate the feature (the
LOUD indication will disappear from the
display panel).
9AUDIO MUTE SELECTOR (MUTE)
Press this button momentarily to mute the
volume from the system ( MUTE will appear
blinking on the display panel). Pressing the
button again or adjusting the AUDIO
CONTROL
2levelwill returnto thevolume
66
66
6
OPEROPER
OPEROPER
OPERAA
AA
ATT
TT
TING INSTRUCING INSTRUC
ING INSTRUCING INSTRUC
ING INSTRUCTT
TT
TIONSIONS
IONSIONS
IONS

levelsetting in usebefore theMutefunction
wasactivated.
During disc play, pressing this button will
mute disc audio; however, disc play will
continue and not be paused. During this time,
the indication will remain on the display
panel to show that a disc is still loaded in
the unit.
bl AM/FM BAND SELECTOR (BAND)
Eachtimethisbuttonis pressed,theradioband
is changed. The indication AM1, AM2, FM1,
FM2 or FM3 will appear on the display panel
accordingto yourselection.
bm UP/DOWN TUNE/SEEK/TRACK
( / ) BUTTONS
Tomanually select aradiostation,momentarily
pressthe Up Tuning( ) buttonto advance
theunithigher,ortheDownTuning( )button
totune lower withinthe selected band.
Pressingeithersideofthebuttonforlongerthan
0.5secondand thenreleasingwillactivate the
AutomaticSeekTuningfunction. Theradiowill
seek the next available station in the selected
directionandstop at thatfrequency. TheSeek
functioncanbestoppedbypressingthe button
againor activating anyothertuning function.
bn LOCAL/ILL BUTTON
This feature is used to select the strength of
the signals at which the radio will stop during
Automatic Seek Tuning. Pressing and
holding the button will select the Local setting
(LOC will appear on the display panel) and
only strong (local) stations will be received.
Pressing and holding the button again will
select the Distant setting (LOC will disappear
from the display panel) and the radio will stop
at a wider range of signals, including weaker
(more distant) stations.
Each time the button is momentarily pressed
and released, the VFD display panel
back-lighting intensity will change from low-
to-medium-to-high, and then back to low,
thereby providing three different intensity
settings.
bo FM MONO/STEREO BUTTON (MONO)
During FM radio operation, this button is
used to select mono or stereo reception of
thebroadcastsignal. Under normal reception
conditions, the unit should be left in the
stereo mode as indicated by the ST
indication on the display panel when tuned
to an FM stereo signal. If the stereo signal
is too noisy for comfortable listening, press
the FM Mono/Stereo Selector button to
switch to mono reception (the ST
indication will disappear from the display
panel). To return to stereo reception mode,
press the button again so that the ST
indication appears in the display panel.
bp PRE-SET SCAN (PS)
AUTO-STORE TUNING (AS)
Press this button momentarily to scan the
stations pre-set into the six memories of the
current band in use. The unit will stop at each
pre-set station for 5 seconds before
continuing to the next pre-set station (the
pre-setnumber onthe display panelwill flash
during Pre-Set Scan operation). Press the
button again momentarily to stop Pre-Set
Scan operation and remain on the selected
frequency. If no buttons are pressed during
the scan, the unit will return to the original
station before the scan started.
Pressing and holding the button for longer
than 2 seconds will activate the Auto-Store
Tuning feature which will automatically scan
and enter up to 6 stations into the pre-set
memories on the band in use. If you have
already set the pre-set memories to your
77
77
7
OPEROPER
OPEROPER
OPERAA
AA
ATT
TT
TING INSTRUCING INSTRUC
ING INSTRUCING INSTRUC
ING INSTRUCTT
TT
TIONSIONS
IONSIONS
IONS

favorite stations, activating the Auto-Store
Tuning feature will erase those stations and
enterthenewones. This featureismostuseful
when traveling in a new area where you are
notfamiliar withthelocal stations.
bq STATION PRE-SET MEMORIES
To set any of the 6 pre-set memories in each
band, use the following procedure:
1. Turnthe radio onand select thedesired
band.
2. Select the first station to be pre-set
using the Manual TUNE or Automatic
SEEK Controls bm.
3. Press the pre-set button to be set and
continue to hold it in for
approximately 2 seconds. The pre-
set number, followed by CH (channel)
will appear on the display panel and
two beeps will sound, indicating that
the station is now set into that pre-set
memory position. The station can now
be recalled at any time by pressing that
button.
4. Repeat the above procedure for the
remaining 5 pre-sets on that band and
for the other 4 bands on the unit.
br VACUUM FLOURESCENT DISPLAY
(VFD)
The Vacuum Fluorescent Display (VFD)
panel displays the frequency, time, and
activated functions using one of three
illumination levels as selected by the
Loc/ILL button bn.
bs POWER LEVEL METER DISPLAY
This display consists of a left and right five-
bargraph,and a centergraph whichprovides
avisualrepresentationofthevolumeleveland
the left and right channel audio signal levels.
The volume level is represented by the two
outerbargraphs. As the volumeisincreased,
the number of illuminated segments will
increase. The left and right channels are
representedby the threeinner and centerbar
graphswhose illuminated segmentsincrease
and decrease as a function of the signal
strengthapplied to theleftand right channels.
As the signal increases, the number of
illuminated segments will increase and vice-
versa.
bt MODE SELECTOR (MODE)
This button is used to select the radio, CD
player or CD changer (if installed) playback
mode. Each press of the button will select
a different mode as indicated on the display
panel.
During CD player operation, this button may
be used to change to radio CD player or CD
changer mode without ejecting the disc.
The DISC indication will remain on the
display panel to show that the CD changer
is operating. Press the button again to return
to CD player mode and resume play of the
disc from the point at which it was stopped.
bu DISC SLOT
Withthe frontpanel in thefold-down position,
gently insert the disc into the slot (label
surface facing up) until the soft-loading
mechanism engages and pulls the disc in.
TheLOAD indication will momentarilyappear
on the display panel followed by the total
playing time of the disc. The ( ) indication
illuminates and becomes animated, the
symbol lights, and the track number and
elapsed time will appear on the display
panel.
88
88
8
OPEROPER
OPEROPER
OPERAA
AA
ATT
TT
TING INSTRUCING INSTRUC
ING INSTRUCING INSTRUC
ING INSTRUCTT
TT
TIONSIONS
IONSIONS
IONS

CAUTION:This unit is designed for play of
standard 5" (12cm) compact
discs ONLY. Do not attempt to
use 3" (8cm) CD-Singles in this
unit, either with or without an
adapter, as damageto theplayer
and/or disc can occur. Such
damage will not be covered by
the Warranty on this product.
cl TRACK SELECT ( / )
The Track Select function of the TUNE/
SEEK/TRACK buttons are used to quickly
access the beginning of a particular track
when a disc is in play. Each time the Forward
TRACK Select ( ) side of the button is
pressed, the next higher track number will
be selected as shown on the display panel.
Similarly, each time the Backward TRACK
Select ( ) side of the button is pressed,
the next lower track number will be selected
as shown on the display panel.
cm CUE/REVIEW FUNCTIONS
( / )
High-speed audible search to any section
of the disc can be made by the Cue and
Review functions. Press and hold the Cue
( ) button to advance rapidly in the
forward direction (the advancing disc playing
time will be shown on the display panel),or
the Review ( ) button to advance rapidly
in the backward direction (the decreasing
disc playing time will be shown on the
display panel). During either function, the
elapsed time within each track will
automaticallybe shownon thedisplay panel.
cn TRACK ONE POSITION (TOP)
The Track One Position function is used to
quickly return to the begining of the current
CD in play (Track 1).
99
99
9
OPEROPER
OPEROPER
OPERAA
AA
ATT
TT
TING INSTRUCING INSTRUC
ING INSTRUCING INSTRUC
ING INSTRUCTT
TT
TIONSIONS
IONSIONS
IONS
co TRACK SCAN SELECTOR (SCN)
During disc play, press this button to play the
first 10 seconds of each track on the disc
(SCAN) will appear on the display panel).
When a desired track is reached, press the
SCNbuttonagaintocancelthefunction(SCAN
willdisappearfromthe display panel)andplay
oftheselectedtrack will continue. Scanmode
willalso be canceledby activating theRepeat
Play cp, or Random Play cq functions.
cp REPEAT PLAY SELECTOR (RPT)
During disc play, press this button to repeat
theplay of theselectedtrack (RPTwill appear
on the display panel). Play of the track will
continue to repeat until the button is pressed
againandthe RPT indication disappearsfrom
the display panel. Repeat Play mode will
also be canceled by activating the Track
Scan co or Random Play cq functions.
cq RANDOM PLAY SELECTOR (RND)
During disc play, press this button to play the
tracks on the disc in a random shuffled order
(RND will appear on the display panel). In
RandomPlaymode,theTRACK Select function
willalsoselecttracks intherandomorderinstead
of the normal progression. The Random Play
mode can be canceled by pressing the button
again (RND indication will disappear from the
display panel) or by activating the Repeat Play
cp or Track Scan co functions.
cr DISC SELECT UP/DOWN
(D.UP/D.DN)
These buttons are used to select the desired
disc for play during changer operation. To ad-
vance to a higher number disc, press the D.UP
button, and to return to a lower number disc,
press the D.DN button. The number of the disc
in play will be shown on the display panel.
cs DISC EJECT ( )

1010
1010
10
OPEROPER
OPEROPER
OPERAA
AA
ATT
TT
TING INSTRUCING INSTRUC
ING INSTRUCING INSTRUC
ING INSTRUCTT
TT
TIONSIONS
IONSIONS
IONS
Disc play is stopped and the disc is ejected
when the front panel is folded down and this
button on the rear of the panel is pressed.
RadioorCDchangeroperationwillautomatically
resume depending on which mode was in
operation prior to disc play. If the disc is
not removed from the unit within 15 seconds
of being ejected, it will automatically be re-
loaded into the unit to prevent it from being
accidentally damaged ( will appear on the
display panel to indicate that a disc is
loaded in the player). Play of the disc can
be resumed by using the MODE button bt
to choose CD player function.
ct TIME/FREQUENCY SELECTOR (T/F)
During radio operation, press this button to
call the time display on the incorporated
quartz clock. The current time will appear
together with an AM or PM indication. The
display will return to the radio frequency
indication after 5 seconds.
During CD player operation, a second press
of this button will call the time display.
During CD changer operation the first press
of the button will call the time display. In
either case, the display will return to the
disc indication after 5 seconds.
cu EQUALIZER BUTTON (EQ)
The EQ button applies preset sound effects
to the unit’s audio output signal. The EQ
button, when pressed, will activate one of
three operating modes (ROCK, CLAS, or
POP). When the EQ function is active, as
displayed on the panel, the bass and treble
levels cannot be changed. When the EQ
function is not active, the unit returns to the
user set bass and treble levels.
dl THEFT-DETERRENT LED
Located on the chassis behind the front
panel, a light-emitting diode (LED) will flash
when the panel is physically removed. The
flashing light serves as a visual warning to
the would-be thief that the unit has been
disabled by removal of the front panel.
dm RESET BUTTON
The RESET button is located to the right of
the theft deterrent LED. The reset circuitry
should only be activated under the following
circumstances as it will erase the time
and pre-set memories:
1.Upon initial installation after all wiring is
completed.
2.If there is a malfunction of any of the
switcheson theunit, pressing the RESET
button may clear the system and return
to normal operation.
dn FRONT PANEL RELEASE BUTTON
(OPEN)
This button is used to release the
mechanism that holds the front panel to the
chassis. To detach the front panel, press
the button so that the panel drops to the
lowered position. Grasp the panel at the
middle and pull it off of the chassis. To re-
attach the panel, press it straight onto the
chassis until the mechanism locks it into
place.
NOTESONUSEOF FRONTPANEL:
1.Make sure the front panel is positioned
correctly when attaching it to the chassis
as it cannot be attached when up-side
down. Use modeate pressure to fully seat
the panel into position.
2.To verify correct panel installation, swing the
panel assembly up into position until it locks
easily into place. If any resistance is
encountered, re-check panel opientation in
chassis mounting plate.
3.When taking the front panel with you,

1111
1111
11
OPEROPER
OPEROPER
OPERAA
AA
ATT
TT
TING INSTRUCING INSTRUC
ING INSTRUCING INSTRUC
ING INSTRUCTT
TT
TIONS / SETIONS / SET
IONS / SETIONS / SET
IONS / SETTT
TT
TING THE CLOCK / ERRING THE CLOCK / ERR
ING THE CLOCK / ERRING THE CLOCK / ERR
ING THE CLOCK / ERROR CODESOR CODES
OR CODESOR CODES
OR CODES
please use the supplied carrying case to
protect the panel from dirt and damage.
Make sure there is no dust or dirt on the
electrical terminals on the back of the
panel as this could cause intermittent
operation or other malfunctions.
do REMOTE SENSOR
Thesensortodetect theinfraredsignalfrom
thewirelessremotecontrolis locatedbehind
theVFDdisplaylens.Foroptimumoperation
oftheremote control,alwaysaimthe control
at the VFD display.
CD PLCD PL
CD PLCD PL
CD PLAA
AA
AYER ERRYER ERR
YER ERRYER ERR
YER ERROR CODESOR CODES
OR CODESOR CODES
OR CODES
1. Switchthe vehicle ignitionand radio“on”.
2. Press the Time/Frequency (T/F) button to call the time display.
3. While holding theT/F button in, pressthe Down TUNE/SEEK/TRACK ( )button
to adjust the hours and AM/PM indication, or the Up TUNE/SEEK/TRACK ( )
button to adjust the minutes to the correct time.
4. Five seconds after the last hour or minute adjustment is made, the time will be set in
the unit and the display will return to the normal indication.
If a problem should develop while operating the CD player, an error code (ER-1, ER-2,
ER-3, etc.) may appear on the display panel. This can indicate a number of problems
withthe unit,including amechanical errororanerrorinthemicroprocessor controlof the
player. If anerror codeshouldappear,try ejectingand re-loadingthediscintothe player.
Whilethedisc isoutof the unit,make sure itis clean, undamaged,and loaded correctly
(labelsurfaceup). Youmay also tryactivating the RESETbutton dm on theunit,but this
will also erase the time and pre-set memories.
If the suggested measures do not solve the problem, contact an approved warranty
station near you forfurther assistance.
SETSET
SETSET
SETTT
TT
TING THE CLOCKING THE CLOCK
ING THE CLOCKING THE CLOCK
ING THE CLOCK
FRONTPANEL
MOUNTINGPLATE
GUIDE (2 PLACES)
PANEL
MOUNTING
PLATE
RESETBUTTON
(31)
THEFT DETERRENT
LED (30)
DISC SLOT
(19)
CD EJECT
BUTTON (27)

1212
1212
12
SPECIFICASPECIFICA
SPECIFICASPECIFICA
SPECIFICATT
TT
TIONSIONS
IONSIONS
IONS
Size: 7" W x 2" H x 6-5/16" D
178 mm x 50 mm x 160 mm
Operating Voltage: 12 volts DC, negative ground
Fuse Ratings: Constant (Yellow wire): 15 AMP.
Switched (Red wire): 0.5 AMP.
Output Power: 160watts maximum
(40 watts x 4 channels)
Output Wiring: Floating-ground type designed for 4 speaker use.
Front and rear channels CANNOT be combined
(bridged) for use with 2 speakers.
RCA low-level outputs (front and rear channels).
Output Impedance: Compatible with 4 – 8 ohm speakers.
Low-Level Output: 500 mv.
Tuning Range: AM: 530 – 1,720 kHz. (10 kHz. step)
FM: 87.5 – 107.9 MHz. (200 kHz. step)
Sensitivity: AM: 20 uv.
FM: 1.5 uv.
FM Stereo Separation: >20 dB
CD Frequency Response: 17 – 20 kHz. +0/-3 dB
CD Signal/Noise Ratio: >65 dB
CD Channel Separation: >60 dB
CD Distortion: 0.2%
*Specifications are subject to change without notice.
SPECIFICATIONSSPECIFICATIONS
SPECIFICATIONS

1313
1313
13
CD CHCD CH
CD CHCD CH
CD CHAA
AA
ANGER CONTRNGER CONTR
NGER CONTRNGER CONTR
NGER CONTROLOL
OLOL
OLSS
SS
S
Built into this radio are controls to operate
anoptionalCD changer. Pleasecheck with
your Rampage/Audiovox car stereo
specialist or call 1-800-645-4994 for
recommendations of the models that will
work with this radio.
Adjustmentof the audiofunctions (volume,
tone,balance,andfader)fortheCDchanger
operate in the same manner as they do for
radioplay. Thefollowingcontrolswilloperate
the CD changer when it is installed and
connectedtothisradio. Referto theowner’s
manual included with the CD changer for
instructions on the installation and correct
loadingand use ofthe CDmagazine.
dp CD CHANGER MODE SELECTOR
(MODE)
During radio or CD play, press this button
to select operation of the CD changer as
shown by CDC on the display panel. Disc
play will begin and the disc and track
numberwill beshownon thedisplay panel.
When the magazine is loaded into the
changer, play will begin from the first track
of the first disc in the magazine.
dq DISC SELECT (D.UP/D.DN)
Thesebuttonsareusedtoselectthedesired
discforplay. Toadvancetoa highernumber
disc, press the D.UP button. To return to a
lower number disc, press the D.DN button.
Thenumberof thediscin playwillbe shown
on the display panel.
dr TRACK SELECT ( / )
The Track Select functions are used to
quicklyaccess thebeginning ofaparticular
track. Each time the Forward Track Select
()side ofthebuttonispressed, thenext
higher track number will be selected as
shownon thedisplay panel. Similarly,each
timetheBackwardTrackSelect( )button
ispressed, the nextlower tracknumberwill
beselected as shownon the displaypanel.
ds CUE/REVIEW FUNCTIONS( /
)
High-speed audible search to any section
of the disc can be made by the Cue and
Reviewfunctions. RepeatedlypresstheCue
() side of the button to advance rapidly
in the forward direction (disc play symbol
rotation on the display panel will stop) or
the Review ( ) side of the button to
advance rapidly in the backward direction.
dt TRACK/DISC SCAN SELECTOR
(SCN)
WhentheSCN buttonispressed,the SCAN
indication will appear on the display panel,
and the first 10 seconds of each track on
the disc will be played in order. When a
desired track is reached, press the SCN
button twice and play of the selected track
willcontinue (SCANwill disappearfrom the
display panel). The Track Scan mode will
also be canceled by activating the Repeat
orRandom Playfunction.
When the Scan button is pressed twice
the DISCandSCAN indications willappear
onthedisplay panelandthefirst 10seconds
ofthefirsttrackon eachdiscinthemagazine
willbe played. Whenadesired disctrack is
reached, press the SCN button again and
playof theselected discwillcontinue(DISC
and SCAN will disappear from the display
panel). The Disc Scan mode will also be
canceledbyactivatingtheRepeatorRandom
Playfunction.
CD CHCD CH
CD CHCD CH
CD CHAA
AA
ANGER CONTRNGER CONTR
NGER CONTRNGER CONTR
NGER CONTROLOL
OLOL
OLSS
SS
S

CD CHCD CH
CD CHCD CH
CD CHAA
AA
ANGER CONTRNGER CONTR
NGER CONTRNGER CONTR
NGER CONTROLOL
OLOL
OLS / CD CHS / CD CH
S / CD CHS / CD CH
S / CD CHAA
AA
ANGER ERRNGER ERR
NGER ERRNGER ERR
NGER ERROR CODESOR CODES
OR CODESOR CODES
OR CODES
1414
1414
14
du DISC/TRACK REPEAT PLAY (RPT)
When the RPT button is pressed, the RPT
indication will appear on the display panel
and play of the selected track will be
continuallyrepeated untiltheTrack Repeat
mode is canceled by pressing the RPT
button twice or by activating the Scan or
RandomPlay functions.
WhentheRPT buttonis pressed twice, the
DISC and RPT indications will appear on
the display panel and play of the selected
disc will be continually repeated until the
Disc Repeat mode is canceled by pressing
the RPT button again or by activating the
Scan or Random Play functions.
el DISC/TRACK RANDOM PLAY (RND)
Whenthe RND buttonis pressed, theRND
indication will appear on the display panel
and the tracks on the disc will be played in
arandom, shuffledorder. The TrackSelect
button willalso select tracksin theshuffled
orderinsteadofthenormalprogression. The
Random Track mode can be canceled by
pressing the RND button twice or by
activating the Scan or Repeat Play
functions.
When the RND button is pressed twice,
the DISC and RND indications will appear
on the display panel and the discs in the
magazinewillbeplayedinarandom,shuffled
order, as well as the tracks on each disc.
Afterplayingatrackselectedatrandomfrom
a disc in the magazine, the unit will select
another disc at random and play all the
trackson itin arandom shuffledorder. This
will continue from disc-to-disc until the
RandomDiscmode iscanceledby pressing
the RND button again or by activating the
Scan or Repeat Play functions.
Ifaproblem shoulddevelopwhileoperating theCDchanger,thefollowingerrorcodesmay
appearon the displaypanel.
ER-1: Indicatesthat there isno magazine loadedin theCDchanger.
ER-2: Indicatesa problem withthe magazineejectfunction.
ER-3: Indicatesan error inthe discloading function.
ER-4:Indicates anerror inthe discun-loadingfunction.
ER-5: Indicatesan errorinthe magazineposition.
ER-6: Indicatesan error inthe laser pick-upposition.
ER-7: Indicates an error in the laser focus on the disc.
Inany of theabove situations, tryejecting the CDmagazinefrom thechangerand make
surethe discs areclean, undamaged,andloaded correctly(refer to theOwner’s Manual
ofthe CDchanger). Re-loadthemagazineand checkfor properoperation. Youmay also
tryactivating theRESET buttondm ontheunit,but thiswill alsoerase thetime andpre-set
memories.
Ifthe suggestedmeasures donotsolvetheproblem, contactan approvedwarranty station
nearyoufor furtherassistance.
CD CHCD CH
CD CHCD CH
CD CHAA
AA
ANGER ERRNGER ERR
NGER ERRNGER ERR
NGER ERROR CODESOR CODES
OR CODESOR CODES
OR CODES

REMOREMO
REMOREMO
REMOTE CONTRTE CONTR
TE CONTRTE CONTR
TE CONTROL OPEROL OPER
OL OPEROL OPER
OL OPERAA
AA
ATT
TT
TIONION
IONION
ION
Thewirelessremotecontrolsuppliedwiththis
model is capable of operating most of the
features of the unit from a remote location.
Eachbutton onthe remotecontrol functions
inthesamewayasthereferencedbuttonon
the main unit. For optimal operation of the
remotecontrol, alwaysaim ittowardtheRe-
mote Sensor do on the front panel of the
main unit.
1ON-OFF POWER - See Main Unit 1
2VOLUME (LEVEL) CONTROL- See
Main Unit 2, 34, 5, 6, and 7
except +press to increase level,
and press -to decrease level
3SELECT BUTTON (S) - See Main Unit
3, 4, 5, 6, and 7
4AUDIOMUTE (MUTE) –SeeMainUnit
9
5AM/FMBANDSELECTOR(BND)–See
Main Unit bl
6MANUAL UP/DOWN TUNING – See
Main Unit bm except press +to in-
crease frequency, press -to de-
creasefrequency.
AUTOMATIC SEEK TUNING – See
MainUnitbm exceptpress+toSeek
upward,press - toSeekdownward.
CD TRACK SELECT – See Main Unit
cl and dr except press +to
selectahighertracknumber, press
- to select a lower track number.
1515
1515
15
WIRELESS REMOTE
CONTROLOPERATION
CD CUE/REVIEW – See Main Unit
cm and ds except press +for
Cue function, and press - for
Review function.
7RADIO PRE-SET MEMORY 1-6 - See
Main Unit bq
8DISC UP SELECT (CD+) - See
Main Unit cr

The radio section of your new sound system does not require any maintenance. We
recommendyoukeepthismanualforreferenceonthemanyfeaturesfoundinthisunitas
well as how to set the clock.
The compact disc player section also requires no routine maintenance, but proper
understanding of its use and handling will help you obtain maximum enjoyment of its
capabilities. Thefollowingpointsshouldbeobserved:
lWhencleaningtheinteriorofthevehicle,donotgetwaterorcleaningfluidsontheunit.
lTheCDplayerisaprecisioninstrumentandwillnotoperateproperly inextremehotor
cold. Incaseofsuchconditions,waituntiltheinteriortemperatureofthevehiclereaches
anormaltemperaturebeforeusingtheplayer.
lIfthetemperatureinsidetheplayergetstoohot,aprotectivecircuitwillautomaticallystop
playofthedisc. Inthiscase,allowtheunittocooloffbeforeoperatingtheplayeragain.
lNever insert anything other than a 5" (12 cm) compact disc into the player as the
mechanismcan bedamaged byforeign objects.
lDo not attempt to use 3" (8 cm) CD-Single discs in this unit, either with or without an
adaptor, as damage to the player and/or disc may occur. Such damage will not be
covered by the Warranty on this product.
lWhen not using the disc player, always remove the compact disc.
REMOREMO
REMOREMO
REMOTE CONTRTE CONTR
TE CONTRTE CONTR
TE CONTROL OPEROL OPER
OL OPEROL OPER
OL OPERAA
AA
ATT
TT
TION / CAION / CA
ION / CAION / CA
ION / CARE ARE A
RE ARE A
RE AND MAND MA
ND MAND MA
ND MAINTENAINTENA
INTENAINTENA
INTENANCENCE
NCENCE
NCE
1616
1616
16
9DISC DOWN SELECT (CD-) - See
Main Unit cr
bl TRACK/DISC REPEAT (RPT) - See
Main Unit cp and du
bm TRACK/DISC RANDOM (RND) - See
Main Unit cq and el
bn TRACK/DISCTRACKONEPOSITION
(TOP) - See Main Unit cn
bo TRACK/DISC SCAN (SCN) - See
Main Unit co anddt
bp MODE SELECTOR (MOD) - See
Main Unit bt and dp
bq AUDIOEQUALIZATIONBUTTON(EQ)
-See Main Unit cu
br INFRARED SENDER - Emitsinfrared
signalto radiowhich isdetectedbythe
sensor do
bs BATTERY COMPARTMENT - Holds
twoAAA batteries forremote wireless
controloperation.
CAREANDMAINTENANCE

lWhenthevehiclewarmsupduringcoldweatherorunderdampconditions,moisturemay
condense on the lens of the disc player. Should this occur, the player will not operate
properlyuntilthemoisturehasevaporated.
lTheunitisdesignedwithavibrationdampeningCDmechanismtominimizeinterruptionof
discplayduetonormalvibrationinamovingvehicle. Whendrivingonveryroughroads,
however, occasional sound skips may occur. This will not scratch or damage the disc
andnormal play willresume when therough conditions cease.
HANDLING COMPACT DISCS
Dirt, dust, scratches, and warpage can cause skips in the playback and deterioration of
sound quality. Please follow these guidelines to take care of your compact discs:
lUse only compact discs with the mark:
lFingerprints,dust,anddirtshouldbecarefullywipedoffthedisc’splayingsurface(shiny
side)withasoftcloth. Wipeinastraightmotionfromtheinsidetotheoutsideofthedisc.
lNever use chemicals such as record sprays, household cleaners or thinner to clean
compact discs. Such chemicals can irreparably damage the disc’s surface.
lDiscs should be kept in their storage cases when not in use.
lDonotexposediscstodirectsunlight,hightemperaturesorhighhumidityforextended
periods.
lDonotstick paper,tape,or labelsonthe disc surfacesnor write onthem with anytype
ofmarker.
CD-R PLAYBACK CAPABILITY
This model can play most CD-R media that contains audio programs.
Playback of CD-R depends on the conditions of the recording equipment and the CD-R
disc quality. In some cases, a CD-R disc cannot be played on this unit.
CACA
CACA
CARE ARE A
RE ARE A
RE AND MAND MA
ND MAND MA
ND MAINTENAINTENA
INTENAINTENA
INTENANCENCE
NCENCE
NCE
1717
1717
17

U.S.A.: AUDIOVOX CORPORATION, 150 MARCUS BLVD., HAUPPAUGE, NY 11788 l1-800-645-4994
WW
WW
WAA
AA
ARRRR
RRRR
RRAA
AA
ANTNT
NTNT
NTYY
YY
Y
1818
1818
18
CANADA: CALL 1-800-645-4994 FOR LOCATION OF WARRANTY STATION SERVING YOUR AREA
12 MONTH LIMITED WARRANTY
AUDIOVOX CORPORATION (the Company) warrants to the original retail purchaser of
thisproduct that should this product oranypart thereof, under normal use andconditions,
be proven defective in material or workmanship within 12 months from the date of original
purchase, such defect(s) will be repaired or replaced with new or reconditioned product
(at the Company's option) without charge for parts and repair labor.
To obtain repair or replacement within the terms of this Warranty, the product is to be
delivered with proof of warranty coverage (e.g. dated bill of sale), specification of
defect(s), transportation prepaid, to the warranty center at the address shown below.
This Warranty does not extend to the elimination of car static or motor noise, to correction
of antenna problems, to costs incurred for installation, removal, or reinstallation of the
product, or damage to tapes, compact discs, speakers, accessories, or vehicle electrical
systems.
This Warranty does not apply to any product or part thereof which, in the opinion of the
Company, has suffered or been damaged through alteration, improper installation,
mishandling, misuse, neglect, accident, or by removal or defacement of the factory serial
number/barcodelabel(s). THE EXTENTOFTHE COMPANY'SLIABILITYUNDERTHIS
WARRANTYISLIMITEDTOTHEREPAIRORREPLACEMENTPROVIDEDABOVEAND,
INNOEVENT,SHALLTHECOMPANY'SLIABILITYEXCEEDTHEPURCHASEPRICE
PAID BY PURCHASER FOR THE PRODUCT.
This Warranty is in lieu of all other express warranties or liabilities. ANY IMPLIED
WARRANTIES,INCLUDINGANYIMPLIEDWARRANTYOFMERCHANTABILITY,SHALL
BELIMITED TO THE DURATIONOFTHIS WRITTEN WARRANTY. ANY ACTIONFOR
BREACHOFANYWARRANTYHEREUNDERINCLUDINGANYIMPLIEDWARRANTYOF
MERCHANTABILITY MUST BE BROUGHT WITHIN A PERIOD OF 30 MONTHS FROM
DATEOFORIGINALPURCHASE. INNOCASESHALLTHECOMPANYBELIABLEFOR
ANYCONSEQUENTIALORINCIDENTALDAMAGESFORBREACHOFTHISORANY
OTHERWARRANTY,EXPRESSORIMPLIED,WHATSOEVER. Nopersonorrepresentative
is authorized to assume for the Company any liability other than expressed herein in
connection with the sale of this product.
Some states do not allow limitations on how long an implied warranty lasts or the
exclusion or limitation of incidental or consequential damage so the above limitations
or exclusions may not apply to you. This Warranty gives you specific legal rights and you
may also have other rights which vary from state to state.
128-4270E

©2001AudiovoxElectronicsCorp.,Hauppauge,NY11788 PrintedinChina
128-6003
Other manuals for ACD-83
1
Table of contents
Other Rampage Car Receiver manuals

Rampage
Rampage ACD-27 Programming manual

Rampage
Rampage ACD-13CS User manual

Rampage
Rampage 1285300F User manual

Rampage
Rampage AV-301N User manual

Rampage
Rampage ACD-13 User manual

Rampage
Rampage 1285780E User manual

Rampage
Rampage ACD-28 Programming manual

Rampage
Rampage ACD-16 User manual

Rampage
Rampage ACD-12 User manual

Rampage
Rampage AM/FM/MPX Radio ACD-91 User manual