128-6496
8 of 16
77
77
7
88
88
8
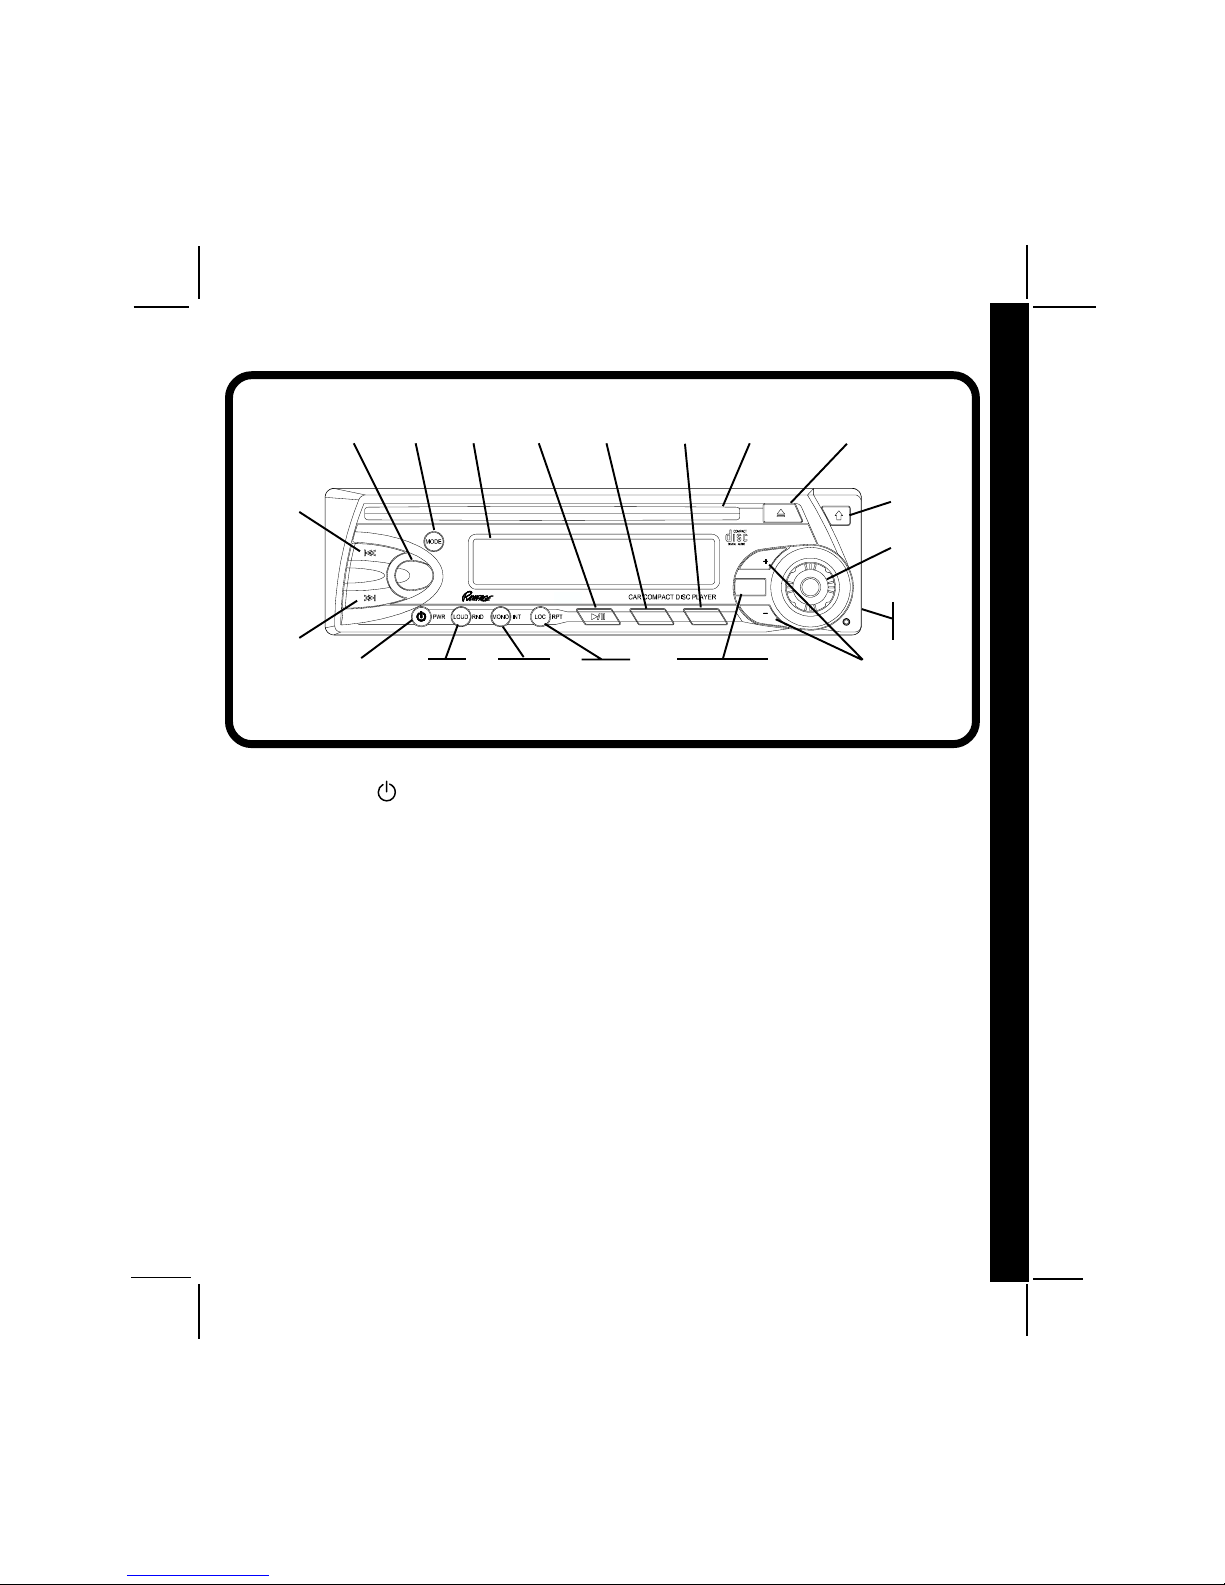
OPEROPER
OPEROPER
OPERAA
AA
ATT
TT
TING INSTRUCING INSTRUC
ING INSTRUCING INSTRUC
ING INSTRUCTT
TT
TI0NSI0NS
I0NSI0NS
I0NS
response as desired. The bass level will be
shown on the display panel from a mini-
mum of B -7 to a maximum of B 7 (BAS 0
represents flat response), with each change
accompanied by a beep tone. The display
will automatically return to the normal indication
5 seconds after the last adjustment or
when another function is activated.
55
55
5TREBLECONTROL
Toadjustthe treble level,first select theTreble
mode by pressing the SEL button until the
TRE indication appears on the display
panel. Within 5 seconds of choosing the
Treble mode, press the VOL + or - buttons
to adjust the treble response as desired. The
treble level will be shown on the display panel
from a minimum of TRE -7 to a maximum of
TRE 7 (TRE 0 representsflat response),with
eachchangeaccompaniedbyabeeptone. The
display will automatically return to the
normal indication 5 seconds after the last
adjustment or when another function is
activated.
66
66
6LEFT/RIGHTBALANCECONTROL
To adjust the left-right speaker balance, first
select the Balance mode by pressing the SEL
button until the BAL indication appears on the
display panel. Within 5 seconds of choosing
theBalance mode,presstheVOL +or -buttons
to adjust the audio balance between the right
channel or left channel speakers, respectively.
The balance position will be shown on the
display panel from BAL 10 (full left) to BAr 10
(full right), with each change accompanied by a
beeptone. Whenthevolumelevelbetweenthe
left and rightspeakers is equal, BAL 0willbe
shown on the display panel. The display will
automatically return to the normal indica-
tion5secondsafter thelast adjustment or when
another function is activated.
77
77
7FRONT/REARFADERCONTROL
To adjust the front-rear speaker balance,
first select the Fader mode by pressing the
SEL button until the FAd indication appears
on the display panel. Within 5 seconds of
choosing the Fader mode, press the VOL + or
-buttons toadjust thefront-rearspeakerlevels
asdesired.The fader positionwillbe shown on
the display panel from FAF 10 (full front) to
FAr10 (full rear), with each change
accompanied by a beep tone. When the vol-
ume level between the front and rear speak-
ers is equal, FAd 0 will appear on the display
panel.Thedisplaywillautomaticallyreturntothe
normal indication 5 seconds after the last
adjustment or when another function is acti-
vated.
88
88
8LOUDNESSCONTOUR(LOUD)
When listening to music at low volume levels,
this feature willboostthe bassandtreble ranges
to compensate for the characteristics of
human hearing. Momentarily press the
LOUD/RND button to activate this feature as
indicated by LOUD on the display panel.
Pressing the button again will de-activate
the function and LOUD will disappear from
the display.
99
99
9AM/FMBANDSELECTOR
During radio play, each time the BAND button
is pressed, the radio band changes. The
indications AM or FM will appear on the
display panel according to your selection.
During CD play, pressing this button will
change to radio operation without ejecting the
disc.
blbl
blbl
bl
MANUALTUNINGCONTROL
Turn this knob clockwise to tune upward in
frequency on the band in use, counter-clock-
wise to tune downward in frequency. The fre-
quency to which you are tuned will be shown in
digitalformon the displaypanel. When tuning
in a station, always adjust the control so that
the correct broadcast frequency is shown on
the display and adjust the control so that you
arereceivingaclearsignal. Iftheradioistuned
off-frequency, you could experience distorted
audio, noise and other reception problems.