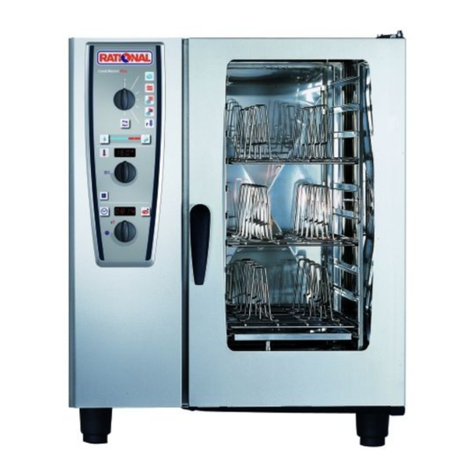
Rational SelfCookingCenter series User manual

Original operating instructions
SelfCookingCenter ®

Dear Customer,
We reserve the right to make technical changes in the interest of progress!
Dealer: Installer:
installed on:
Unit number:

Contents
Explanation of the pictograms 5
Initial start-up 6
Safety Instructions 8
Liability 11
Care, inspection, maintenance and repair 13
Function parts 16
Notes on using your appliance 17
Working with the core temperature probe 20
Working with the hand shower 22
General operation 23
General notes 23
Help function 25
Explanation of pictograms 25
Overview of the cooking modes 26
Display after switching on the appliance 26
Overview of the cooking modes 28
The different modes 28
iCookingControl 30
iCC cockpit display 30
Explanation of pictograms 30
Information and requests during the cooking process 30
Options after end of cooking 30
iCC Cockpit 33
iCC Monitor 33
iCC Messenger 33
Top 10 36
Combi-steamer mode 37

Contents
Pictogram explanation 37
Programming mode 39
Explanation of pictograms 39
Image view 39
Efficient CareControl 42
Care and soiling status display 42
Cleaning request 44
Start clean 45
Cleaning stages 49
CleanJet ® +care failure 50
MySCC appliance configuration 51
Communication 52
Networking appliances with the KitchenManagement System 52
Networking appliances with the RATIONAL Remote App 52
Domestic technology 54
Cleaning the glass panes and the LED covers 54
Servicing the air filter 54
Replacing the door seal 54
Replacing the lamps 54
Descaling the moisturing nozzle 58
Fault messages 60
Before you call Service: 65
EU Declaration of Conformity for electrical appliances 68
EU Declaration of Conformity for electrical appliances 69
EU Declaration of Conformity for gas appliances 70

Explanation of the pictograms
5 / 72
Danger!
Imminently hazardous
situation, which, if not
avoided, will result in severe
injuries or death.
Warning!
Potentially hazardous
situation, which, if not
avoided, may result in
serious injury or death.
Caution!
Potentially hazardous
situation, which, if not
avoided, may result in slight
or minor injuries.
Corrosive
substances
Risk of fire! Risk of burning!
Note:
Damage may be caused if
this is ignored.
Handy tips for everyday
use.
Read the manual carefully
prior to initial start-up.
The highest rack height is a
maximum of 160 cm.

Initial start-up
6 / 72
Please read the manual carefully prior to initial start-up.
During initial start-up of your new appliance, you will be requested to start an automatic one-
off self-test. This self-test takes about 45 minutes and is used to adapt the appliance to the
specific environmental conditions. Please note the following:
- For the self-test to be carried out, all the packaging materials must be have been removed
from the appliance; check the grid shelves and the air baffle for a correct fit.
- The appliance must be connected in accordance with the installation instructions.
- For appliance sizes 6 x 2/3, 6 x 1/1, 10 x 1/1, 6 x 2/1 and 10 x 2/1 GN place a flat GN
container with the opening facing downwards into the centre of the grid shelves.
- For the appliance size 20 x 1/1 and 20 x 2/1 GN place two GN containers in the mobile
oven rack. Place one flat GN container with the opening facing downwards in the centre
in front of both the upper and lower fan wheel.
- For further details please follow the instructions shown on the display and the installation
manual.
Risk of fire!
Remove the packaging material, starter kit as well as grids and containers.
The cooking chamber door must not be opened during the self-test. Opening the cooking
chamber door will lead to failure of the self-test. Restart the self-test by switching the appliance
off. Always allow a hot appliance to cool down first. If the test is interrupted you will be
requested next day by the appliance to start the self-test again.

Initial start-up
7 / 72
step info/button instructions
1START Follow the instructions on the display. Press
the button to start the self-test.
2Select type of connection to normal or soft
water.
3Next Click “Next” to confirm.
4
The following test will take place automatically.
The status is displayed in the upper field, the
time remaining until the self-test has been
completed is shown in the lower time field.
Where gas appliances are used, exhaust gas measurement must always be carried out when
the self-test has been completed.

Safety Instructions
8 / 72
Keep this manual in a safe place so that it can always be consulted by anyone using the
appliance.
This appliance may not be used by children or people with limited physical, sensor or mental
capacity or those without the necessary experience and/or knowledge, unless such people
are supervised by a person who is responsible for their safety.
Operate using hands only. Damage caused by the use of pointed, sharp or other objects will
invalidate the warranty.
We recommend regular training of your staff to avoid the risk of accident or damage to the
appliance. Operators must also receive regular safety instruction.
In the event that the connection cable becomes damaged, it must be replaced by the
manufacturer, a service agent or qualified specialists to prevent any hazards or damages
to the appliance.
If the appliance is installed in a position where the highest rack is higher than 160 cm, the
supplied sticker must be affixed to the appliance.
Warning!
Daily checks before switching on and use
-Lock the air baffle at the top and bottom as per the instructions - risk of injury from the
rotating fan wheel.
-Make sure that the hanging racks or mobile oven rack are correctly locked in place in the
cooking chamber - containers with hot liquids can fall through or slip out of the cooking
chamber - risk of combustion.
-Make sure that there are no cleaning tab residues in the cooking chamber before you start
cooking with the appliance. Thoroughly rinse away any cleaning tab residues with the hand
shower - risk of chemical burns.
Safety Instructions
9 / 72
Warning!
Specific national and regional standards and regulations which concern the installation and
operation of commercial cooking appliances must be complied with.
Incorrect installation, servicing, maintenance, cleaning or modifications to the appliance
may result in damage, injury or death. Read these operating instructions carefully before
you start to use the appliance.
This appliance must only be used to cook food in catering establishments. Any other use is
not intended and is therefore considered dangerous.
It must not be used to cook food containing flammable materials (such as food with
alcohol). Substances with a low flash point can ignite spontaneously - risk of fire.
Cleaning and descaling products and the associated accessories must only be used for
the purposes described in this manual. Any other use is not intended and is therefore
considered dangerous.
In case of damage to the glass plate, please replace the entire plate immediately.
Warning!
Smoking food in the appliance
Smoking food in the appliance may only be done using the original RATIONAL smoking
accessory, VarioSmoker.
Warning!
No objects on the appliance ceiling.
Do not place any objects on the appliance ceiling. Risk of injury if they fall down.

Safety Instructions
10 / 72
Warning!
Gas appliances only
-If your appliance is installed under an extractor hood, this must be switched on when the
appliance is in use - combustion gases!
-If your appliance is connected to a chimney, the flue duct must be cleaned in compliance
with specific regional regulations - risk of fire! (Contact your installer).
-Do not put objects on your appliance's exhaust pipes - risk of fire!
-Do not let objects block or obstruct the area below the appliance's base - risk of fire!
-The appliance must only be used in still conditions - risk of fire!
What to do if you smell gas:
-Shut off the gas supply immediately!
-Do not touch any electrical controls!
-Make sure the room is well ventilated!
-Avoid naked flames or sparking!
-Use an external telephone to notify the appropriate gas supplier (if the gas supplier is
unobtainable call the nearest fire station)

Safety instructions and liability
11 / 72
Warning!
Safety instructions during use
-When filling containers with liquids or if containers fill up with liquid food products during
cooking, only use the rack levels where the user can easily look into the inserted container
- risk of burns! Information sticker is enclosed with the unit.
-Always open the cooking cabinet door very slowly (hot vapours) - risk of burns!
-Always wear heat protective clothing when handling accessories and other objects in the
hot cooking cabinet with - risk of burns!
-The exterior temperatures of the unit can reach above 60 °C, only touch the appliance on
the operating controls - risk of burns!
-The hand shower and the water coming out of the hand shower can be hot - risk of burns!
-Cool Down operation - only activate the Cool Down function if the air baffle has been
locked as per instructions - risk of injury!
-Do not reach into the wheel fan - risk of injury!
-Cleaning - aggressive chemicals - risk of chemical burns! Appropriate protective clothing,
protective glasses, gloves and protective face masks must be worn for cleaning. Please
observe the safety instructions in the "Cleaning" section.
-Do not store any flammable or combustible substances near the unit - risk of fire!
-Apply the brakes on mobile units and mobile oven racks when not moving them. The racks
could roll away on uneven floors - risk of injury!
-During mobile use of mobile oven racks, you must always close the container locks. Cover
containers with liquids to prevent hot liquids from spilling out - risk of burns!
-The transport trolley must be properly fixed to the appliance when loading and unloading
the mobile plate rack and the mobile oven rack - risk of injury.
-Mobile oven racks, mobile plate racks, transport trolleys and units mounted on castors may
tip over during transportation over sloping surfaces or bumps - risk of injury!

Safety instructions and liability
12 / 72
Liability
Installations and repairs that are not carried out by authorised specialists or using original
spare parts, and any technical modification that is not approved by the manufacturer will void
the manufacturer’s warranty and product liability.

Care, inspection, maintenance and repair
13 / 72
In order to retain the high quality of the stainless steel, for hygienic reasons and to avoid
interferences to operation, the appliance must be cleaned daily or when prompted to clean.
Follow the instructions in the "Efficient CareControl" section.
Constant operation at high cooking chamber temperatures (≥ 260°C), the use of high
browning levels (browning 4/5) and preparation of food with high fat and gelatin content can
subject the cooking chamber seal to faster wear.
Cleaning the cooking chamber seal daily with a non-abrasive rinsing agent will prolong the
service life.
Warning!
If the appliance is not cleaned or is not cleaned well enough, deposits of grease or
food residues in the cooking chamber may catch fire - Risk of fire.
-If fat deposits and/or food waste in the cooking chamber ignite, shut down the appliance
immediately and keep the cooking chamber door closed to put out the fire! If further
extinguishing is required, disconnect the appliance from the mains and use a fire
extinguisher (do not use water to extinguish a fat fire!).
-To avoid corrosion in the cooking chamber, your appliance must be cleaned every day,
even if it is only operated in “Moist Heat” (steaming) mode.
-Apply vegetable oil or grease to the inside of the cooking chamber at regular intervals
(every 2 weeks or so) to prevent corrosion.
-Do not use a high pressure cleaner, steam cleaner or a direct water jet to clean the
appliance. Observe the protection class IPx5.
-Do not treat the appliance with acids or expose to acid fumes – this will damage the
passivated coating of the nickel-chromium steel and the appliances might discolour.
-To clean the exterior panelling, only use mild household cleaning agents such as washing-
up liquid on a damp soft cloth. Corrosive or irritating substances must not be used.
-Only use cleaning agents from the appliance manufacturer. Cleaning agents from other
manufacturers can damage the appliance. Damage to a device that has been caused by
using different cleaning and care products than those recommended by the manufacturer
is not covered under warranty.
-Do not use scouring products or abrasive cleaning agents.

Care, inspection, maintenance and repair
14 / 72
Warning!
Inlet filter maintenance The device automatically detects if the air filter is dirty. You will receive
a service message and prompt to clean or replace the air filter when it is dirty. The appliance
may only be operated without an air filter. When replacing the air filter, please take into account
the following specifications:
Appliance size 6 x 2/3 GN, 6 x 1/1 GN, 6 x 2/1 GN, 10 x 1/1 GN
and 10 x 2/1 GN
Air filter article number 6 x 2/3 GN: 40.04.771
Air filter article number
6 x 1/1 GN, 6 x 2/1 GN, 10 x 1/1 GN, 10 x 2/1 GN: 40.03.461
This air filter may only be removed and cleaned by the user. When replacing the filter, make
sure that the air filter carefully locks into the correct position. To replace the air filter, please
follow the instructions in the "Domestic technology" section.
Appliance size 20 x 1/1 GN and 20 x 2/1 GN
This air filter may only be replaced by an authorised service partner.
Note! The appliance is only guaranteed protection against sprayed water if the filter and cover
are assembled correctly.

Care, inspection, maintenance and repair
15 / 72
Inspection, maintenance and repair
Danger - high voltage
-Inspection, maintenance and repair work must only be carried out by trained technicians.
-The appliance must be switched off at the mains for cleaning (apart from CleanJet ® +care
cleaning) and for inspection, maintenance or repair work.
-If the appliance is installed on casters (mobile), freedom of movement must be restricted
so that power, water and drainage pipes cannot be damaged when the appliance is
moved. If the appliance is moved, make sure that power, water and drainage lines are
correctly disconnected. If the appliance is returned to its original position, make sure that
the retention device, energy, water and drainage pipes are correctly attached.
-Your appliance should be serviced by an authorised service partner at least once a year
to ensure that it remains in perfect working order.

Function parts
16 / 72
Appliance number
(only visible when the door is open)
Flow guard (optional)
(for gas appliances only)
Cooking chamber lighting
Appliance door with triple glazing
Door handle
Table-top appliances: One-handed
operation with sure-shut function
Standalone appliances: One-handed
operation
Unlocking mechanism to open the
triple-glazed door (inside)
Integrated and self-emptying door drip
tray (inside)
Appliance drip tray with direct
connection to the drain
Appliance feet (height adjustable)
Type plate
(contains important data such as power
consumption, gas type, voltage, number
of phases and frequency as well as
appliance type, appliance number and
option number)
Control panel
Cover for the electric installation
space
Central dial
Hand shower (with automatic return)
Positioning aid (stand-alone
appliances)
Air filter for table-top appliance
(installation space inlet)
Air filter for stand-alone appliance
(installation space inlet, back of
appliance)
Drawer/flap for care tabs

Notes on using your appliance
17 / 72
- Avoid having heat sources (e.g. grill plates, deep-fat fryers etc.) near the appliance.
- Only use the appliance in areas with a room temperature of between +5 °C to +40 °C. For
ambient temperatures of less than + 5 °C, you must heat the cooking chamber to room
temperature (> + 5 °C) before starting.
- As soon as you open the cooking chamber door, the heating and fan wheel shut down
automatically. The integral fan wheel brake is activated. The fan wheel keeps running for
a brief period only.
- A drip tray should always be inserted under the food when grilling and roasting (e.g.
chicken) in order to catch the fat.
- Only use genuine heatproof accessories made by the appliance manufacturer.
- Always clean accessories before use.
- Leave the appliance door slightly open if it is going to be idle for a prolonged period (e.g.
overnight).
- The cooking chamber door has a sure shut function; the door of the floor appliance is not
closed tight unless the door handle is vertical.
- For long stoppages (e.g. non-work day), shut off the water, power and gas supplies to
the appliance.
- At the end of its service life, the appliance must not be disposed of with the general waste.
We will be happy to help you with the disposal of your appliance. You can reach our
technical customer services at: +49 8191 327333
If the appliance is without voltage or switched off for less than 15 minutes, the
process being executed will continue from where it was interrupted.

Notes on using your appliance
18 / 72
Max. load sizes depending on appliance size
6 x 2/3 GN 20 kg (max. 10 kg for each rack)
6 x 1/1 GN 30 kg (max. 15 kg for each rack)
6 x 2/1 GN 60 kg (max. 30 kg for each rack)
10 x 1/1 GN 45 kg (max. 15 kg for each rack)
10 x 2/1 GN 90 kg (max. 30 kg for each rack)
20 x 1/1 GN 90 kg (max. 15 kg for each rack)
20 x 2/1 GN 180 kg (max. 30 kg for each rack)
If the maximum load sizes are exceeded, this can damage the appliance.
Please note the maximum load sizes for food in the application manual.
Table-top appliances with hanging racks
(6 x 1/1 GN, 6 x 2/1 GN, 10 x 1/1 GN, 10 x 2/1 GN)
- To remove, raise the hanging rack slightly in the middle.
Pull it out of the front, lower locking mechanism and
then from the top locking mechanism.
- Swivel the hanging rack to the middle of the cooking
chamber.
- Lift the hanging rack out of its fixing by lifting it up.
Reverse the above sequence to reset.
Table-top appliance 6 x 2/3 GN with hanging rack
- To remove the right hanging rack, hold the top of
the hanging rack and press it upwards. The hanging
rack releases from the 2 locking pins and can now be
removed.
- To install the hanging rack, align the hooks on the
hanging rack with the locking pins and press down on
the hooks until they engage in the locking bolts.
- To remove the left hanging rack, raise it slightly and
swivel it right into th cooking chamber to release both
locking pins from the air baffle. Use a screwdriver to
loosen the upper and lower locking hooks on the air
baffle. You can now remove the hanging rack together
with the air baffle. The left hanging rack can now be
removed together with the air baffle.

Notes on using your appliance
19 / 72
Working with mobile oven racks, mobile plate racks
and transport trolleys for table-top appliances (option)
- Remove the hanging rack as described above.
- Place the run-in rail on the fixing provided on the
appliance's base. Make sure it is fixed accurately in
place (4 pins).
- Remember that the appliance must be matched to
the exact height of the transport trolley and must be
levelled.
- Move the transport trolley as far as it will go on the
run-in rail and make sure that the transport trolley is
correctly locked on the appliance.
- Push the mobile oven rack or mobile plate rack into the
appliance as far as it will go, and check that the locking
mechanism in the appliance is working correctly.
- To remove the mobile oven rack or mobile plate rack,
release the locking mechanism and pull the rack out of
the cooking chamber. First insert the core temperature
probe with the run-in rail in the park position.
- Make sure that the mobile oven rack or mobile plate
rack is securely locked on the transport trolley during
transportation.

Notes on using your appliance
20 / 72
Working with the core temperature probe
For information about working with the 3 core temperature sensor option, please read the
iLevelControl section.
Caution!
The core temperature probe and its positioning aid may both be hot – risk of burns!
Insert the core temperature
probe into the thickest point
of your cooking product.
You must insert the needle
through the middle of
the food (see application
manual).
Use the positioning aid
if the core temperature
probe could fall out of the
food(for instance if the food
to be cooked is of a soft
consistency or not very
thick).
For Finishing ® with the
plate rack, insert the core
temperature probe into the
ceramic tube on the mobile
plate rack.
No externally attachable core temperature probes should be placed in the cooking chamber
through the cooking chamber wall during cleaning. These sensors must not be cleaned with the
chamber! This can cause leaks during cleaning.
Other manuals for SelfCookingCenter series
1
Table of contents
Other Rational Electric Steamer manuals