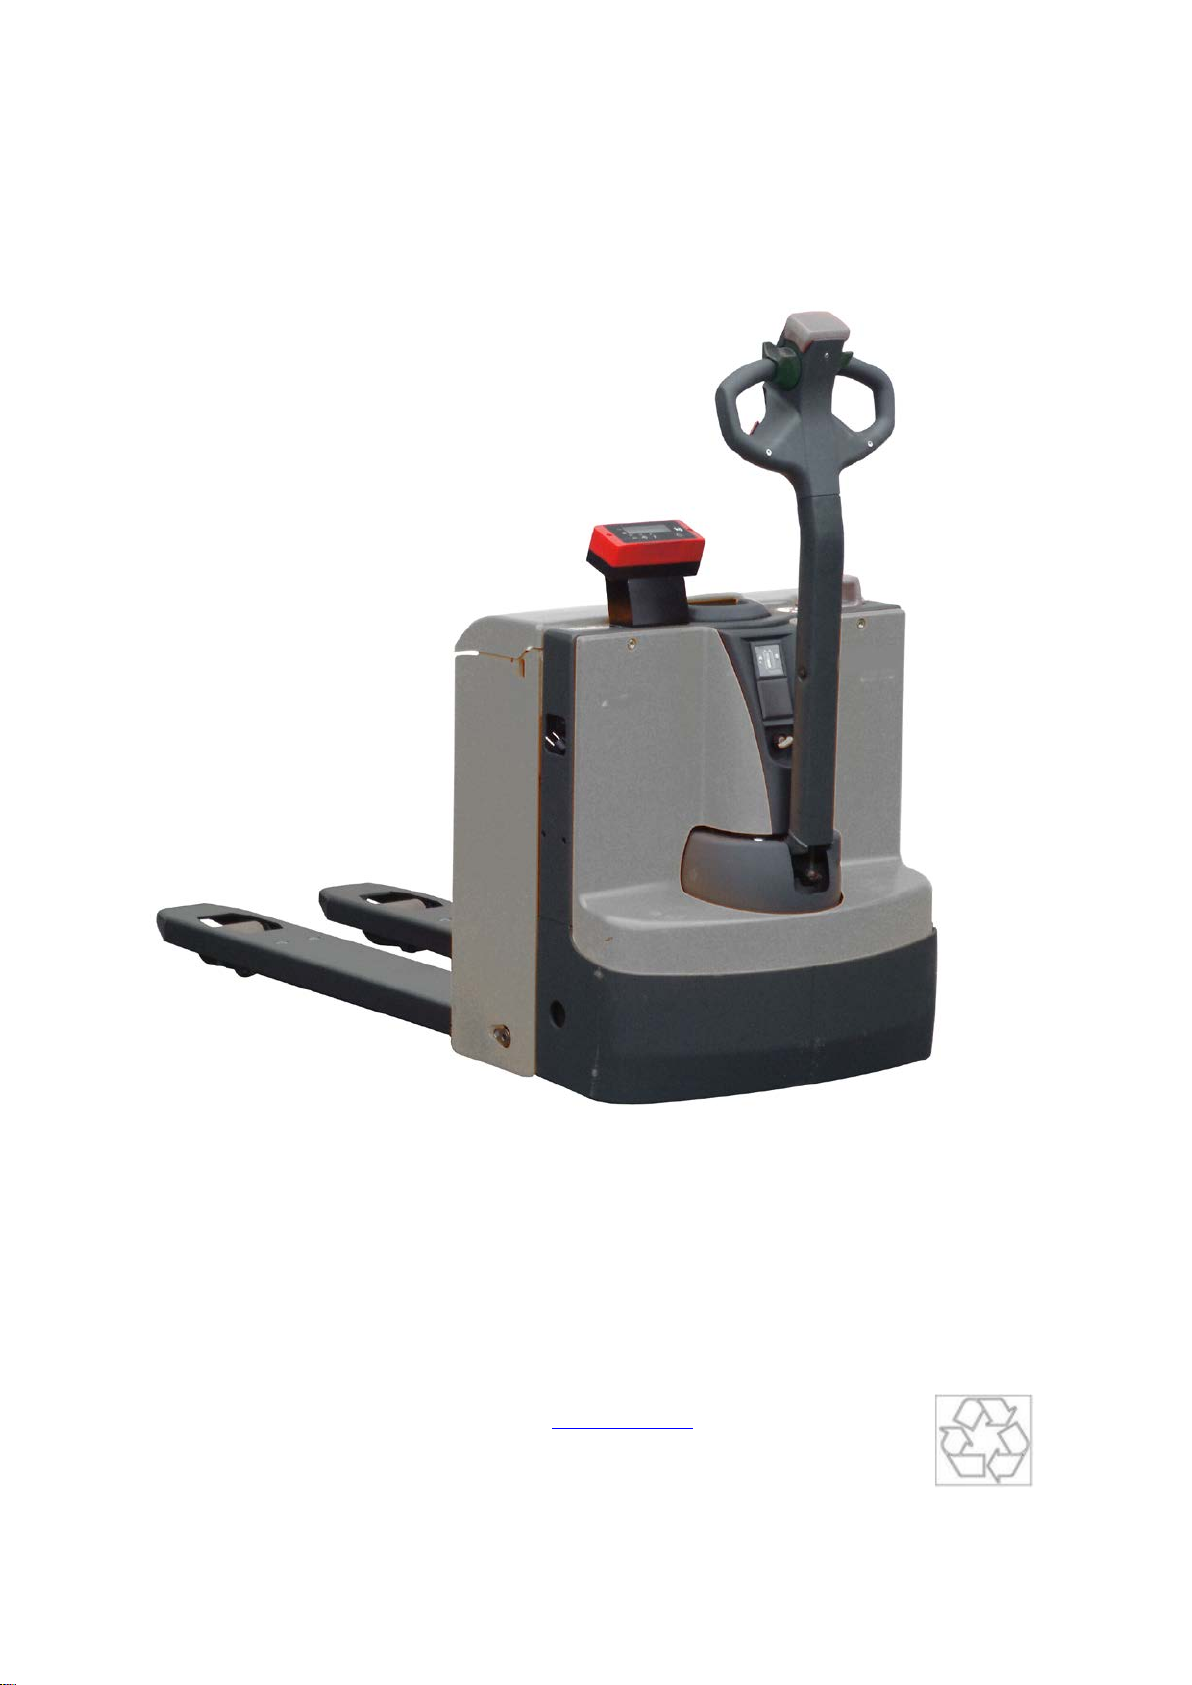
Ravas RPW-310-EL User manual

1
OPERATORS MANUAL
RPW-310-EL
We would like to inform you about the fact that this RAVAS product is 100 % recyclable on the basis
that the parts are processed and disposed off in the right manner.
More information can be found on our website www.ravas.com.
Rev.20180612
Printing/typographical errors and model changes reserved

2
OPERATION MANUAL
RPW-310-EL
INDEX page
1. Safety Instructions 3
2. The Weighing Electric Pallet Truck 4
3. Touch Panel Indicator 6
4. Indicator Functions 8
5. Printer (Option) 12
6. Relay (Option) 13
7. Trouble Shooting. 17
8. Calibration 21
9. Parameter Settings 23
Contact Us:
RAVAS USA, LLC
PO BOX 3098 3195 Grand Prix drive – Ste. A
Decatur IL 62524 Decatur, IL 62526
Phone number: +1 (217) 412-1100
Fax: +1 (312) 610-5660
backoffice@ravas.com
www.ravas.com
Rev.20180612

3
1. SAFETY INSTRUCTIONS
1. All safety regulations that apply on the electric pallet truck remain valid and
unchanged
2. No weighing operation is allowed while others are on or near the load.
3. No weighing operations allowed if any objects are in the vicinity; around, or
close to the load.
4. RAVAS is not responsible for physical harm done to the operator because of
the presence of the indicator.
5. Any modifications done to the system must be approved in writing from the
supplier, prior to any work being completed.
6. It is the sole responsibility of the purchaser to train their own employees in the
proper use and maintenance of this equipment.
7. Do not operate this unit unless you have been fully trained of its capabilities.
8. Do not use the weighing system in potentially explosive areas.
9. Do not weld to the lift truck without disconnecting the pressure sensor.
10. Check the accuracy of the scale on a regular basis to prevent faulty readings.
11. Only trained and authorized personnel are allowed to operate the scale.
12. Always follow the operating, maintenance and repair instructions of this truck
and ask the supplier when in doubt.
13. Never lower loads if you are unsure you can place the goods on a stable
surface. Personal injury may result from placement on an unstable
environment.
14. RAVAS is not responsible for errors that occur due to incorrect weighings or
inaccurate scales.

4
2. THE WEIGHING ELECTRIC PALLET TRUCK
TAKING THE SYSTEM INTO OPERATION
The power supply to the weighing system takes place through the battery of
the electric pallet truck.
To activate the system, turn it on using the on/off () key on the indicator.
It is recommended not to lift loads before the zero point correction has been
executed. (See page 9)
Accurate Weighing
The weight must be centered over the forks of the pallet truck and be able to lift
freely: without touching the electric pallet truck or other pallets. The wheels of the
electric pallet truck must not be touching the pallet or any other part of the load.
The RPW-310-EL comes equipped with a level switch. This means that when the
system is tilted by greater than 2º the indicator will automatically shut off. An uneven
floor will have a greater effect on weighing ability. An even floor is optimal.
The most accurate weighing result is obtained when the center of gravity of the load
is placed evenly between the forks.

5
TEMPERATURE
Temperature range: between 15 – 105 ºF (-10 - +40 ºC) the maximum inaccuracy is
0.1% of the weighed load. Outside this range inaccuracies of up to 0.3% may occur.
Fast temperature changes must be avoided because it can cause condensation in
the electronics. During acclimatization the weighing system must be shut off.
MAINTENANCE
The maintenance guidelines for normal electric pallet trucks apply to the chassis of
the mobile weighing system. The integrated weighing system still functions even
when the chassis is damaged by overloading. Care should be taken to prevent
damage to the load cells.
Main guidelines:
- Clean only with a damp cloth. Chemical cleaners and high pressure washers will
cause damage to the system. System should be cleaned regularly to remove any
accumulating dirt between the parts of the system.
- Check bolts regularly. When used roughly, they may loosen.
- The weighing system meets up to the protection class IP65. This means that dust
or moisture (rain or water beam from all sides), will not influence the operation of
the electronics. However, high-pressure cleansing in combination with warm water
or chemical cleansers will lead to the entry of moisture and therefore negatively
influence the operation of the system.
- Only specialists may perform any welding. This is to avoid damage to electronics
and load cells.

6
3. TOUCH PANEL INDICATOR
Indicator Front
There are 3 display-modes.
The display may show the weight in kgs, lbs or it shows the number of pieces.
Also the battery sign is integrated in the display in order to show low battery status.
THE DISPLAY
By means of eight pointer bars the display shows:
◄
the weighing system (including load) is stable
▬
the weight shown is negative
ZERO
◄
the weight shown is within the zero range
NET
◄
the display is showing the net weight
e1
▼
displayed weight is in range 1
e2
▼
displayed weight is in range 2
e3
▼
displayed weight is in range 3
stp1
▼
setpoint 1 is activated
stp2
▼
setpoint 2 is activated

7
THE TOUCH PANEL
Each key has 2 operational and one entry function
Key
Function level 1
(short key press)
Function level 2
(long key press)
Function level 3
(entry mode)
zero setting
code entry
enter
automatic tare
pre-set tare
decrease the value of
the digit flashing
print weight and add
to the total
check subtotal and
print total
increase the value of
the digit flashing
sampling a piece
weight
enter a piece weight
shift to the next digit
on the left
on/off switch
toggle units
clear entry
IMPORTANT
Operation of a key is not accepted unless the weighing system is stable (and the
“load stable” pointer lights up). This means that the indicator only executes
commands with a stable load.
WARNING
When the weighed load surpasses the pre-set maximum, the display shows:
“ERR02”. In order to prevent damage to the indicator or load cells, the weighing
system must be unloaded immediately.

8
4. INDICATOR FUNCTIONS
GRADUATION
The indication is shown in 2 lb steps.
BEFORE WEIGHING: CHECK ZERO POINT
Before each weighing it is necessary to check whether the system is unloaded and
free. The indicator is fitted with an automatic zero correction. This means that small
deviations of the zero point will be corrected automatically. If the indicator does not
determine the zero point automatically, it must be done manually using the >0< key.
GROSS WEIGHING
After lifting a load, the display shows the gross value of the weighed load.
NET WEIGHING: AUTOMATIC TARE
The indicator offers the possibility to reset tare weights to zero automatically. This
way added or subtracted weights can be determined. After taring, the graduation on
the display will not change.
Lift load.
Press the T key.
The indicator is set to zero.
The "NET" pointer shows that a tare weight is activated.
Place or remove the net load.
The display shows the net value of the weighed load.
When removing load, this is a negative value.
By pressing the T key again, the gross weight is displayed.

9
NET WEIGHING: MANUAL TARE ENTRY
A tare weight can be entered at any moment, either in a loaded or unloaded
situation. For a higher accuracy, a tare weight can be entered with a smaller
graduation step, independent of the applied load and the active graduation of the
indicator.
Press the PT key for 3 seconds.
The display shows the current tare value.
The right digit is flashing.
Press ENTER(↵) if the current tare value is required.
Or
Press the PT key for 3 seconds.
Press the ∧key to go up a value or press the ∨key to go down a value until the
required value is reached.
Press <to change to the next digit.
Repeat this procedure until the required tare value is displayed.
Press ENTER (↵) to activate the tare weight.
The tare weight is activated.
The “NET” pointer lights up.
When the system is loaded, the net value appears in the display
When the system is unloaded, the read-out displays the negative value of the
given tare.
The entered value remains active until a new tare weight is entered (display
shows the new net weight).
Press the T key to return to gross weighing mode.
CODE ENTRY
The indicator offers the possibility to enter 1 numeric code of 5 digits. Entry of codes
is useful when the weighing system is connected to a printer or other peripheral
equipment, in order to identify various weighings during a later processing of the
information.
Press the key for 3 seconds.
The display will show the last used code with the right digit flashing.
To accept the old value press ENTER (↵).
The code is activated and the display returns to the weighing mode.
Or
Press the key for 3 seconds.
Press the ∧key to go up a value or press the ∨key to go down a value until the
required value is reached.
Press <to change to the next digit.
Repeat this procedure until the required code is displayed.
To accept the new code press ENTER (↵).
The code is activated and the display returns to normal weighing mode.
10
You may make a printout and add up the weights. A special printout will be made
which includes the code. (See option printer).
NOTE: if the code is “000000” it will be ignored and it will not be printed on the ticket.
PIECE COUNT: SAMPLING
If an unknown piece weight is to be determined you may do this by sampling a
certain number of pieces. The number of pieces taken from or placed on the
weighing system determines the accuracy of the sampling. The total weight of the
pieces taken from or placed on the weighing system for the sampling should be no
less than 4-5 kg. The greater the weight difference, the greater accuracy. The
standard sampling amount is 10 pieces, but this number can be increased up to 95
pieces.
NOTE: If the accuracy is too low when sampling, the indicator will show “ERR05”.
Press any key to return to piece counting mode and increase the sampling amount.
Press the key.
The display shows “add10”. The ‘kg’ pointer turns off and the ‘pcs’ pointer
goes on.
Take or place 10 pieces from/on the weighing system and press the ENTER (↵)
key.
The sampling is done and the display will show the total number of pieces on
the weighing system.
Or
Press the ∧key or the ∨key to change the number of pieces to add.
The display will show the new value to add (for example “add50”).
Take or place the correct number of pieces from/on the weighing system and
press the ENTER (↵) key.
The sampling is done and the display will show the total number of pieces on
the weighing system.
You may make a printout and add up the weights. A special printout will be made
which includes the piece weight sampled and the number of pieces. (See option
printer).
To return to the normal weighing mode press the key for 3 seconds. Once your
return to normal weighing mode the piece count total will be lost.
PIECE COUNT: ENTER A PIECE WEIGHT
Press the key for 3 seconds.
The last used piece weight will be displayed with the right digit flashing.
To accept the old value press ENTER (↵).
The display shows the number of pieces currently on the weighing system.
Or
Press the key for 3 seconds.

11
Press the ∧key to go up a value or press the ∨key to go down a value until the
required value is reached.
Press <to change to the next digit.
Repeat this procedure until the required piece weight is displayed.
To accept the new value press ENTER (↵).
The display shows the number of pieces currently on the weighing system.
You may make a printout and add up the weights. A special printout will be made
which includes the piece weight sampled and the number of pieces. (See option
printer).
To return to the normal weigh mode press the key for 3 seconds. Once you return
to normal weighing mode the piece count total will be lost.
SUMMING
The indicator offers the possibility to add weighings and show the total weight. When
a tare weight is active, the net weight is added automatically.
Load the system with the weight that should be added.
Press the key to add the weighed load to the total weight.
The display shortly shows the message “ADDED” and then automatically
returns to the weighing mode.
If a printer is installed, a printout will be made. The gross, net and tare weights
are totalled.
No weight can be recorded twice. The system needs to be returned to the net
zero-range before another weight can be added up.
The subtotal can be checked by pressing the key for 3 seconds.
The display shows the net total weight and the number of weightings totalled
so far repeatedly for 3 seconds.
If the key is pressed shortly during this period, the total is printed out (if
option is installed) and reset to 0.
If the “CE” key is pressed during this period, the total is reset but not
printed out.
If no key is pressed during this period, the subtotal stays in memory and
the system returns to the weighing mode after 60 seconds.
CHANGE UNITS
The system is set to start up in ‘kgs’ or in ‘lbs’. However you may, at any time in the
weighing mode, change to the second unit (lb⇔kg or kg⇔lb).
Press the key for 3 seconds.
❏The display will show the current weight in the new units for 5 seconds and
then automatically change back to the start up units.
The same key is used to change from the piece counting mode back to the weighing
mode.

12
NOTE: It is not possible to use any of the scale functions when the display has been
changed to the second unit. If any key is pressed the indicator will display “ERR99”
and return to normal weighing mode.
5. PRINTER (Option)
If the weighing system has been equipped with a printer, obtained and entered
weighing data can be printed. Date and time are only printed out with the option
board installed.
In the printout a gross weight is indicated with the letters “B/G” and a net weight with
the letter “N”. A manually entered tare weight will also be printed and is indicated
with the letters “PT”. The total weight is shown with the letters “TOT”.
Standard printout Standard printout
without code with code
B/G 1234.5 kg. CODE 12345
T 34.5 kg. B/G 1234.5 kg.
N 1200.0 kg. T 34.5 kg.
N 1200.0 kg.
Nr. 1
10/07/03 17:45 Nr. 1
10/07/03 17:45
Piececount printout Piececount printout
without code with code
B/G 1234.5 kg. CODE 12345
T 34.5 kg. B/G 1234.5 kg
N 1200.0 kg. T 34.5 kg
N 1200.0 kg
PcWt 1.234 kg.
Qty 12345 PCs PcWt 1.234 kg
Qty 12345 PCs
Nr. 1
10/07/03 17:45 Nr. 1
10/07/03 17:45
Total printout (always without code)
Tot. B/G1234.5 kg.
Tot. T 34.5 kg.
Tot. N 1200.0 kg.
Tot. Nr. 999
10/07/03 17:45

13
CHANGE TIME AND DATE ON THE PRINTOUT
If the weighing system has been equipped with a printer, and an option board, the
date and time can be printed together with the weight information.
Press the key for 6 seconds.
The display will show “ho_00” or the previous hour time setting, with the right
digit flashing.
To accept the old value press ENTER (↵).
Or
Press the ∧key to go up a value or press the ∨key to go down a value until the
required value is reached.
Press <to change to the next digit and use the ∧or ∨key to change the value
until the required value is reached.
To accept the new value press ENTER (↵).
The display will show “m_00” or the previous minute time setting, with the right
digit flashing.
Repeat the above procedure to accept or change the minute setting.
The display will show “dA_00” or the previous date of the month setting, with
the right digit flashing.
Repeat the above procedure to accept or change the date of the month setting.
The display will show “m_00” or the previous month setting, with the right digit
flashing.
Repeat the above procedure to accept or change the month setting.
The display will show “YE_00” or the previous year setting, with the right digit
flashing.
Repeat the above procedure to accept or change the year setting.
The indicator will return to normal weighing mode.
6.RELAY (Option)
If this option is used, it is no longer possible to use the piece-counting mode. The
setting of the set-points for the relay is done with the same key as is used for
sampling or entering a piece weight.
Relay technical specifications: Type: Zettler AZ833-12DE
Coil voltage: 12VDC
Switched capacity: max. 30VDC/2A
The choice of relay application is made when the system is ordered and the program
is selected in the parameter menu. The instructions for use depend on the
application chosen.
Four different applications are possible; 1 – overload check gross weight
2 – overload check net weight
3 – dosing/filling with manual tare & start
4 – dosing/filling with auto tare & start

14
OVERLOAD CHECK Gross Weight / Net Weight
In this setting set-point 1 is activated as soon as the gross or net value exceeds the
set-point value. In this case the set-point value is an absolute value.
To enter a new value:
Press the key.
The display shows the last entered value with the left digit blinking. The pointer
for set-point 1 is on.
Press ↵to accept the old value.
The set-point value is activated and the display returns to the weighing mode.
Or
Press the key.
Press the ∧key to go up a value or press the ∨key to go down a value until the
required value is reached.
Press <to change to the next digit.
Repeat this procedure until the required value is displayed.
Press ↵to accept the new value.
The set-point value is activated and the display returns to the weighing mode.
DOSING/FILLING with Manual Tare & Start
In this setting set-point 1 and 2 are switched on as soon as the tare key has been
activated and after the set-point values have been entered.
To enter new set-point values:
Press the key.
The display shows the last entered value with the left digit blinking. The pointer
for set-point 1 is on.
Press ↵to accept the old value.
The value for set-point 1 is activated. The display shows the last entered value
for set-point 2 with the left digit blinking. The pointer for set-point 2 is on.
Or
Press the key.
Press the ∧key to go up a value or press the ∨key to go down a value until the
required value is reached.
Press <to change to the next digit.
Repeat this procedure until the required value is displayed.
Press ↵to accept the new value.
The set-point value is activated and the display returns to the weighing mode.
The display shows “tare”.

15
FILLING:
Place an empty container on the scale.
Press the T key.
The display shows the net value and the pointers stp1 and stp2 are on.
Relays 1 and 2 are closed.
As soon as set-point 1 is reached, pointer stp1 will turn off and relay 1 will be
opened.
As soon as set-point 2 is reached, pointer stp2 will turn off and relay 2 will be
opened.
The display shows “done” for a few seconds and will return in the normal
weighing mode.
The net weight is displayed. A printout may be made at this point.
It is possible to cancel the filling procedure at any time by pressing the CE key (see
page 18).
DOSING:
Place a full container on the scale.
Press the T key.
The display shows the net value and the pointers stp1 and stp2 are on.
Relays 1 and 2 are closed.
As soon as set-point 1 is reached, pointer stp1 will turn off and relay 1 will be
opened.
As soon as set-point 2 is reached, pointer stp2 will turn off and relay 2 will be
opened.
The display shows “done” for a few seconds and returns in the normal
weighing mode.
The net weight is displayed. A printout may be made at this point.
It is possible to cancel the dosing procedure at any time by pressing the CE key (see
page 18).
The printout will show the following:
-The gross weight is the weight of the container with rest material.
-The tare weight is the weight of the container with material before dosing.
-The net weight will show a minus sign as token of weight being removed from the
scale.
DOSING / FILLING with Automatic Tare & Start
In this setting set-point 1 and 2 are switched on as soon as the set-point values have
been entered. The tare action is done automatically in this mode.
To enter new set-point values:
Press the key.
The display shows the last entered value with the left digit blinking. The pointer
for set-point 1 is on.
Press ↵to accept the old value.
The value for set-point 1 is activated. The display shows the last entered value
for set-point 2 with the left digit blinking. The pointer for set-point 2 is on.

16
Or
Press the key.
Press the ∧key to go up a value or press the ∨key to go down a value until the
required value is reached.
Press <to change to the next digit.
Repeat this procedure until the required value is displayed.
Press ↵to accept the new value.
The set-point value is activated and the display returns to the weighing mode.
The display shows “tare” and the indicator automatically tares out the scale
after the scale has been stable for a few seconds.
Attention: be sure the container is already in place at this moment!
Filling & Dosing:
The display shows the net value and the pointers stp1 and stp2 are on.
Relays 1 and 2 are closed.
As soon as set-point 1 is reached, pointer stp1 will turn off and relay 1 will be
opened.
As soon as set-point 2 is reached, pointer stp2 will turn off and relay 2 will be
opened.
The display shows “done” for a few seconds and will return in the normal
weighing mode.
The net weight is displayed. A printout may be made at this point.
It is possible to cancel the filling or dosing procedure at any time by pressing the CE
key (see below).
The printout will show the following:
-The gross weight is the weight of the container with rest material.
-The tare weight is the weight of the container with material before dosing.
-The net weight will show a minus sign as token of weight being removed from the
scale.
CANCEL DOSING / FILLING
It is possible to cancel the filling or dosing procedure at any time by pressing the CE
key.
Press the CE key to stop the procedure.
The display shows “stop” and the relays are opened. Pointers stp1 and stp2
will be turned off.
Press ENTER to start the procedure again.
The display sign “stop” is cleared and the net weight is displayed again.
The relays are closed. Pointers stp1 and/or stp2 will be turned on.
Or
Press the CE key to stop the procedure.
The display shows “done” for a few seconds and will return in the normal
weighing mode.
The net weight is displayed.

17
7. TROUBLE SHOOTING
No power
Open indicator
and measure
power on the
board.
Is voltage coming from
the truck battery?
Check where the power line comes from. See if power
is available on this point.
Mostly a fuse is installed. Measure is voltage is also
available after the fuse.
If power is available in the indicator then check if the
power board is not functioning.
If the power from the
truck is more than 12
Vdc, then the first
board is a power
converter board.
Check if red and black wire connected between the
power board and the main board has 12 Vdc.
If there is no 12Vdc coming out of this board check
this board. If nothing can be found it needs to be
replaced.
If 12Vdc is supplied to the main board. Then check
the main board.
12Vdc on the
board
Check the board for
burned components
Picture of component most likely to blow when
batteries have been entered the wrong way.
Accuracy
No repeatability
Check if there is a
mechanical problem.
Load left and right fork with for example body weight
and see if weight changes when you are in different
positions on the scale.
There should not be a difference larger than 2 lb.
If there is a bigger difference then 5 lb you have a load
cell or a mechanical problem.
To make sure it is a mechanical problem, repeat test
with a heavy load on the scale, Lift a pallet with 2000
or 3000 lb.
Reset Indicator for 0 lb using the tare function.
Load corners with body weight by standing on or on
the sides of the pallet. If readings change more than 5
lb you have a mechanical problem.
The push rods in the forks may not interfere with the
load cells. Take of the fork shoe by unscrewing the
nuts on the bottom side of the pallet truck.
Push the pushrods sideways towards the load cells to
see if they come in contact with the load cells: see if
they can interfere with the load cells.
With the forks lifted half way up, the brackets for the
loading wheels may touch the fork shoe. By taking off
the fork shoe, Scratches will show if it does and where
it does.
Check if bolts are loose.
Check the load cells. If
one is broken or gives
more or less signal
than the others, the
scale will give different
reading depending
how it is loaded.
To be sure that it is not a mechanical problem, load
the load cells directly. Take off the fork cover. Try to
apply weight 25 to 50 kg / lb, direct onto each load
cell. If the indicator shows the same reading, the load
cells are OK.
Tap with a hammer onto the load cells. Do not be
afraid to break it. Repeat the test for each load cell.

18
Measure resistance with ohm meter between wires
and load cell body. Do this with the other load cells
disconnected from indicator. No resistance is allowed.
The load cells should have +/- 350 ohm between the
signal wires: yellow and green, and excitation wires,
black and red.
Check cables
Bad connections will cause changes when moving the
scale.
Bend and move the cable briskly especially where the
cable is moving continuously while lifting. While doing
so, look at the display to see if it reacts to the
movements.
The potentiometers
with which we calibrate
the output of the load
cells, are mechanical
parts therefore, higher
risk components
Move the board and but pressure with fingers on the
potentiometers while looking at the display to see if it
reacts. Do not touch the contact itself.
Not linear
Check if it is load cells
or indicator
Load cells or indicator are very rarely the cause of this
problem. Easiest way to check is by changing the
indicator temporarily. If problem is not solved when
changing the indicator, the problem is the load cell,
cable or mechanics
Check cable
Very rarely the cause. Maybe in a lift truck.
Instability
With no load it
is most of the
time humidity,
bad connection
or component r
bad shield.
Check for humidity
Check for water marks on the indicator board or load
cell connections (potentiometers).
Check the indicator.
Sometimes the indicator will show a weight when the
load cells are disconnected. If you do this and the
indicator becomes more stable, it is most likely
elsewhere in the system.
Check visually for traces of oxidation. If found, heating
the solder contacts can solve the problem.
Check cables. In
warehouse and lift
truck the cable is
working all the time
when following the
lifting movement. It
may be worn or
damaged. Changing
temperatures and
chemicals have an
effect on the lifetime of
a cable.
Bad connections will cause changes when moving the
scale.
Bend and move the cable briskly especially where the
cable is moving continuously when lifting. While doing
so, look at the display to see if it reacts to the
movements.
The potentiometers
with which we calibrate
the output of the load
cells are mechanical
parts and are sensitive
to humidity, shocks
and vibration.
Move the board and but pressure with fingers on the
potentiometers while looking at the display to see if it
reacts. Do not touch the contact itself.

19
Check the load cells.
If connected independently to the indicator, it can be
checked which one is unstable and which one is not.
With load
Check mechanics.
Function
error
No reaction
when pushing
keys
Check the touch panel
Test can be done by making short cut on connection
of the touch panel to simulate a key being pressed.
Check for wear of broken contacts in the flat cable
going to the indicator board
Lock up
Take out the battery pack and replace to see if it starts
up afterwards.
Not summing
Operator error
.
Load is not stable.
Scale needs to be unloaded before accepting new
print.
System will not print weights that are smaller than the
graduation.

20
ERROR MESSAGES INDICATOR
Displayed error
Meaning
Out of error mode
Err01
Load cell signal is unstable
Disappears when signal is
stable again
Err02
Overload on full weighing system
Disappears when overload is
removed
Err03
Gross negative. This action is not allowed
Disappears after 3 sec. No
Tare action will be accepted
Err04
Out of zero range
Press any key
Err05
Sampling accuracy too low
Press any key
Err06
Input signal too high (over load positive)
Check weighing system
(load cells + cabling)
Err07
Input signal too low (over load negative)
Check weighing system
(load cells + cabling)
Err08
Calibration out of range (negative)
Follow correct calibration
procedure
Err09
Calibration out of range (signal too low)
Follow correct calibration
procedure
Err10
Calibration count 2nd (3rd) point lower than
count 1st(2nd) point
Follow correct calibration
procedure
Err11
Calibration from within piece counting mode
Follow correct calibration
procedure
Err14
Setpoint value 2 < setpoint value 1. This is not
allowed
Enter limit values correctly
Err20
Err97
Signal of load cell is not correct during start-up
of indicator
Calibration locked (jumper JP1 placed)
Check weighing system
Place Jumper JP1. Located
next to the –EX connection
Err98
Calibration point must be higher than previous
one
Follow correct calibration
procedure
Err99
-----
Or
-----
Action only allowed in start-up units (kg/lb)
Lower than – 2% of full scale value
Level ERROR > 2% non-level
Press ON/OFF (CE) key
Check weighing system
(mechanical) perhaps even
execute a zero calibration
Place weighing system in
horizontal position
Table of contents
Other Ravas Forklift manuals
Popular Forklift manuals by other brands

CombiLift
CombiLift C3000CB manual

Jungheinrich
Jungheinrich AM 20T operating instructions

Hyster
Hyster Narrow Aisle N30XMR3 operating manual

AGRIA HISPANIA
AGRIA HISPANIA TH-350 Instruction and maintenance manual

Jungheinrich
Jungheinrich ETV 110 operating instructions

Jungheinrich
Jungheinrich DFG 540 operating instructions