Ravas iForks-52 User manual

We would like to inform you about the fact that this RAVAS product is 100% recyclable on the basis that the
parts are processed and disposed of in the right manner.
More information can be found on our website: www.ravas.com
Rev. 20210330
Printing/Typographical errors and model changes reserved.
iForks-52 (BLE)
USER MANUAL
–iForks-52 (BLE) 1
USER MANUAL

USER MANUAL
–iForks-52 (BLE) 2
PLEASE RETAIN THESE INSTRUCTIONS FOR FUTURE REFERENCE
If you have any queries concerning the duration and terms of the guarantee, please contact
your supplier. We would also refer you to our General Sale and Supply Conditions, which are
available on request.
The manufacturer accepts no liability for any damage or injury caused by failure to follow
these instructions, or from negligent operation or assembly, even if this is not expressly stated
in this instruction manual.
In light of our policy of continuous improvement, it is possible that details of the product may
dier from those described in this manual. For this reason, these instructions should only be
treated as guidelines for the installation of the relevant product. This manual has been com-
piled with all due care, but the manufacturer cannot be held responsible for any consequences
of errors. All rights are reserved and no part of this manual may be reproduced in any way.

USER MANUAL
–iForks-52 (BLE) 3
Table of Contents
1. Introduction 4
2. Warning & Safety measures 4
2.1 Lithium Ion Battery 5
3. System setup 7
3.1 Installing the iForks-52 (BLE) 7
3.2 Locking the iForks-52 (BLE) 7
3.3 Installing the indicator 8
3.4 Placing the battery packs in the iForks-52 (BLE) 9
3.5 Connecting and switching on the iForks-52 (BLE) 10
4. Use 11
4.1 Indicator functions 11
4.2 Display functions 11
4.3 Net / Tare / Gross weight 13
4.3.1 Net weighing: automatic tare 13
4.3.2 Net weighing: manual tare (PT) 15
4.4 Net weighing: reset tare (two options) 16
4.4.1 Option 1 16
4.4.2 Option 2 16
4.5 Activate and edit ID-Code 17
4.6 Adding, print, clear memory & send data 19
4.6.1 Add weight to subtotal 19
4.6.2 Change active total memory 19
4.6.3 Print single weight 20
4.6.4 Send WiFi 20
4.6.5 Edit, clear and print total registers 21
4.7 Piece counting 23
4.7.1 Activating piece count function 23
4.7.2 Entering piece weight manually 24
4.7.3 Calculating piece weight 25
4.8 Data storage on USB Stick 26
4.9 Change the time and date 27
4.10 Change button functions & positions 29
4.10.1 Change button functions 29
4.10.2 Change button positions 30
4.11 Show/hide buttons on startup 31
4.12 Debug mode for user 32
4.13 Alibi memory 34
5. Warnings and error messages 36
5.1 Tip and side load warnings 36
5.2 Mast position 37
5.3 Error messages 38
6. Maintenance 40
7. RAVAS WeightsApp 41

1. Introduction
2. Warning & Safety measures
When using the iForks-52 (BLE), please observe carefully the
instructions and guidelines contained in this manual.
Always perform each step in sequence. If any of the
instructions are not clear, please contact RAVAS.
This manual describes the installation and use of the iForks-52 (BLE). Read this manual
carefully. The installer must be informed of the contents of this manual. Always do things in the
correct order. This manual should be kept on a safe and dry place. In case of damage or loss
the user may request a new copy of the manual from RAVAS.
• All safety regulations that apply to the truck remain valid and unchanged;
• No weighing operations are allowed if any persons or objects are in the vicinity; around,
under or close to the load;
• RAVAS is not responsible for any physical harm done to the operator because of the
presence of the indicator in the cabin;
• Any modications done to the system must be approved in writing by the supplier, prior to
any work being completed;
• It is the sole responsibility of the purchaser to train their own employees in the proper use
and maintenance of this equipment;
• Do not operate this unit unless you have been fully trained in its capabilities;
• Check the accuracy of the scale on a regular basis to prevent faulty readings;
• Only trained and authorized personnel are allowed to service the scale;
• Always follow the operating, maintenance and repair instructions of this truck and ask the
supplier when in doubt;
• RAVAS is not responsible for errors that occur due to incorrect weightings or inaccurate
scales.
Should you have any further questions after reading this manual then you can contact us at:
RAVAS Europe B.V. Phone: +31 (0)418-515220
Toepadweg 7 Fax: +31 (0)418-515320
Postbus 2023 Internet: www.ravas.com
Nederland Changes reserved
IP65
min -10°C
15°F
00
max 40°C
105°F
READ
CAREFULLY
!
USER MANUAL
–iForks-52 (BLE) 4

2.1 Lithium Ion Battery
• Use the specic Li-ion charger and observe the specied charging conditions when
charging the battery.
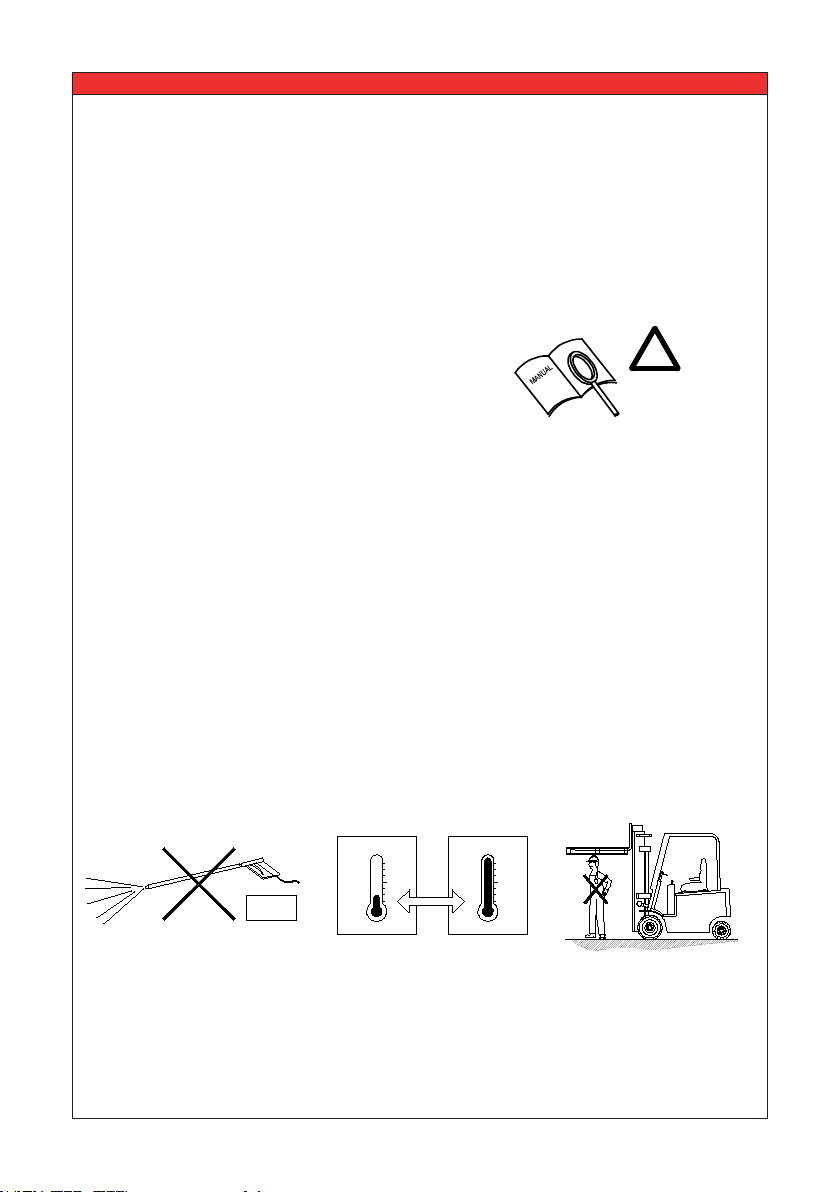
• Avoid inuences of high temperature and keep away from re.
• Do not deform, modify or disassemble the battery.
• Do not connect the (+) and (-) terminals with metal objects.
• Do not put the battery in (sea) water.
• Do not throw with the battery to avoid strong shocks.
• When a battery leaks, the battery should directly be wrapped up properly and treated as
recyclable resource.
• When, due to leaking from the battery, liquid gets into your eyes, immediately clean the
aected area with water without rubbing your eyes, and seek medical advice immediately.
• The charging of the battery will be stopped automatically. When due to what cause the
battery is not fully charged after 8 hours (LED of the charger doesn’t become green),
immediately unplug the battery from the holder to stop charging. Battery or charger does
not work properly, exchange battery or charger.
• Storing and/or using the battery outside the given temperature range may have a
negative eect on the lifetime and/or the performance of the battery.
• Do not longer use a battery with leakages, deformation or when any other abnormalities
occur.
• Battery should be charged in a dry surrounding.
Charging can be carried out at any time regardless of the amount of charge remaining, but
you should fully charge the battery at the following moments:
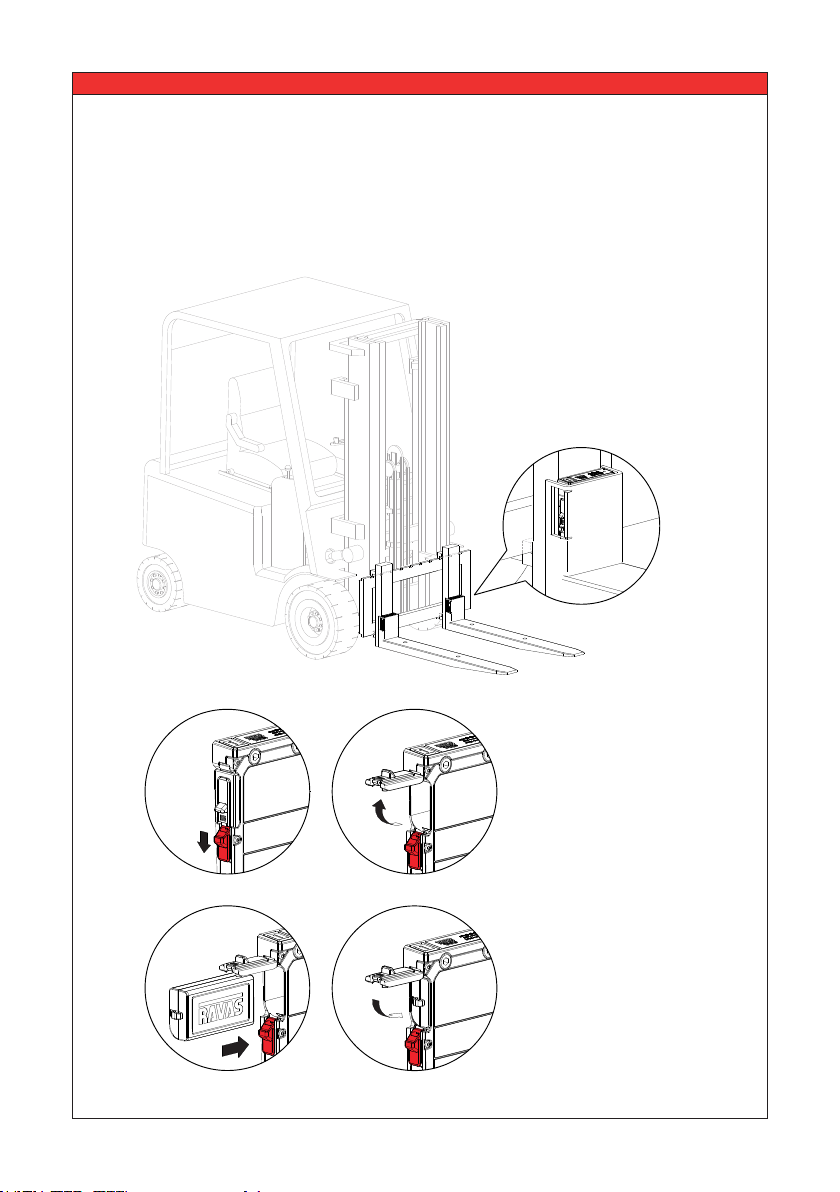
• The battery is not fully charged at the time of delivery! The battery can be used
after fully charging with the specic Li-ion charger. The LED on the battery charger will
become green when fully charged. Note: Before using the weighing system, be sure that
the battery is fully charged.
• After the battery has become completely empty. An empty battery will break (loss of
capacity) when not directly fully charged.
Important Safety Information
DANGER
WARNING
WARNING
USER MANUAL
–iForks-52 (BLE) 5

Disposal information for countries outside the European Union
This symbol is only valid within the European Union. Follow local
regulations when disposing used batteries. If you are not sure,
consult the place of purchase or a RAVAS dealer.
Nominal voltage / capacity BA-3.7V-5.2A: 5.2 Ah
Operating temperature range During use: -10°C -+50°C
During charging: 0°C - +40°C
Specications
• Normal charging
- Charging takes up to 6-7 hours for a full charge (a partially discharged battery will be
fully charged sooner).
- When the battery is fully charged, charger stops automatically.
- After charging, the battery should be taken out of the charger.
• Storing the battery
- When the weighing system is not used for a longer period, make sure the battery has
approximately 70% of the battery capacity remaining. Take care not to let the battery
become completely empty by charging it every 6 months.
- Store the battery separated from the weighing system in an indoor place
(approx. +10°C - +20°C) where it is not exposed to direct sunlight or rain.
• Battery life
The battery is a consumable item. The battery will gradually lose its capacity for charging
after repeated use and after time has passed. If the operating time that the battery can be
used becomes shorter and shorter, it has probably reached the end of its life.
Note: For replacement or additional battery pack, contact your distributor.
• About used batteries
Lithium ion batteries are recyclable, valuable resources. For recycling of broken or used
batteries, follow the local guidelines in your country. If you are not sure, please send back
to the distributor for proper way of recycling.
Operation
USER MANUAL
–iForks-52 (BLE) 6

3. System setup
3.1 Installing the iForks-52 (BLE)
The standard forks must be taken o the carriage plate. The iForks-52 (BLE) are placed on the
carriage plate.
3.2 Locking the iForks-52 (BLE)
1.
2.
USER MANUAL
–iForks-52 (BLE) 7

3.3 Installing the indicator
Find a suitable position for the indicator:
1. at the cabin’s roof.
2. on the right side of the cabin, mounted onto a side-rail.
3. on the dashboard.
Installation of the indicator bracket & support.
3
2
1
USER MANUAL
–iForks-52 (BLE) 8

3.4 Placing the battery packs in the iForks-52 (BLE)
1. 2.
3. 4.
1. Push the red locking clips down to unlock the battery holders.
2. Open the battery holders of both forks.
3. Position the battery packs in the battery holders of both forks until the red locking clip shifts
up again.
4. Close the battery holders of both forks until you hear a “click”.
USER MANUAL
–iForks-52 (BLE) 9

e1 e2 e3 F1 F2
NET
ID CODE PT TOTAL KG/LB
CLR
12
3.5 Connecting and switching on the iForks-52 (BLE)
• The Bluetooth link between the indicator and the forks will connect automatically.
• The forks are ‘ACTIVE’ when the blue LEDs on both iForks (1 & 2) ash repeatedly.
• After 5 seconds all electronics are warmed up and you can start weighing.
1
3
2
OR
Switch on the iForks-52 (BLE):
Move the iForks-52 (BLE) quickly in upwards or
downwards direction.
NOTE: When the forks are not powered on, the indicator will show the following text messages
repeatedly: “Initializing…” and “Transmitters powered?”.
Make sure you have powered on the transmitter modules. Also check the batteries!
On/ O
switch
Switch on the indicator by
pressing the On/O button.
USER MANUAL
–iForks-52 (BLE) 10

4. Use
4.1 Indicator functions
On/O
switch
USB input
(for USB sck)
4.2 Display Functions
USER MANUAL
–iForks-52 (BLE) 11

4.2 Display Functions
USER MANUAL
–iForks-52 (BLE) 12
No. Functionality / Description Remark
1
2
3
4
5
6
7
8
9
10
11
12
13
14
15
16
17
18
19
20
21
22
23
24
25
26
27
Electronic typeplate
Approved class III symbol
Weight display
USB symbol*1
Stable weight symbol
Range pointer
Scale pointer
Identication code label
Mast tilting position
Gravity pointer mass
Show/hide function buttons
Select next button row
Empty button elds
Summation button
Tare button
Preset tare button
Zero button
Total register label
Tare code label
Zero pointer
Message line
Load bar
Memory active
Net pointer
Units
Time
Battery status symbol
Shows the min., max. and divisions
Only visible when OIML or NTEP approved
For divisions <1 the decimal point is active
Only visible if USB connection is active
Visible if weight is stable
Shows the active range
Shows which scale is active (e.g. reference scale)
For more ID’s click on this eld
For OIML/NTEP this is limited (degrees become red)
Shows ‘TIP’ or ‘SIDE’ if gravity point is too far o
For bigger weight display choose ‘hide’
Also used for going to the user mode
For more functions see user menu
For adding a weight to a total
Tares out the present weight and returns NET weight
Opens the preset tare input eld
Sets the present weight to zero (only for small deviations)
For more totals click on this eld
For more tare codes click on this eld
Only active if within zero range
Error messages are displayed here
Indication of the present load on the scale
Indication that a total memory is used
Only active if a net value is displayed
KG or LB units are displayed here
hh:mm
Displays the status of F1, F2 and indicator in a sequence
*1: The USB icon is determined at powering up the indicator.
Powered up in ‘DEVICE’ mode. In this mode it is possible to read and write
to a USB stick.
Powered up in ‘HOST’ mode. In this mode it is possible to update rmware
via a PC connection (only for RAVAS technicians). If powered up in host
mode it will stay in this mode until the indicator has been powered down
again.

USER MANUAL
–iForks-52 (BLE) 13
4.3 Net / Tare / Gross weight
4.3.1 Net weighing: automatic tare
12
34
EXPLANATION: Net(1) + Tare(2) = Gross(3)
1 2 3
The indicator is set to zero. The ‘NET’ sign shows
that the tare weight is activated.
‘Tare:25kg’ shows the tare weight.
Press the →T← key.

USER MANUAL
–iForks-52 (BLE) 14
5
78
9
6
The display shows the net value of the load weight.
The gross weight is displayed again.
NOTE: for OIML approved RAVAS 5200
the tare will be erased automatically
when the weight returns to gross zero!
For the next weighing the tare must be
activated again.
Press the →T← key.

USER MANUAL
–iForks-52 (BLE) 15
4.3.2 Net weighing: manual tare (PT)
1
34
56
2
Press the TARE eld. A pop-up screen appears. Select the desired
Preset Tare eld.
If the preset tare you select is empty you have
to enter the tare value. Conrm with ‘Enter’.
Name your Preset Tare value (max. 14 characters).
The ‘NET’ sign shows that the tare weight is
activated. ‘Tare: Euro pallet 25kg’ shows the
tare weight.
The indicator now shows the NET weight.
Pick up the load.

USER MANUAL
–iForks-52 (BLE) 16
4.4 Net weighing: Reset Tare (two ways)
If a tare weight is active
press the →T← key.
The indicator is back in the weighing mode and is
ready for the next weighing. NET sign is gone. In
the tare eld ‘None’ is active.
4.4.1 option 1
4.4.2 option 2
Press the preset tare button. Select > none.
NOTE
For OIML approved RAVAS 5200 the tare will
be erased automatically when the weight
returns to gross zero! For the next weighing
the tare must be activated again.
1 2
1 2

USER MANUAL
–iForks-52 (BLE) 17
4.5 Activate and edit ID code
The RAVAS 5200 allows you to enter up to 4 ID codes which will be visible on the printout
or when used with data communication.
1
3 4
5
2
The ID eld will show the 4 ID-codes.
Press the ID eld again.
On the left side of the button you can activate the
ID elds (only the active ID elds will be visible
on the printout).
If you press on the right side of the button an ID
entry eld pops up, which allows you to select one
of the 10 preset ID codes.
Note: they must be named rst on a new system.
To change a name, press the settings symbol.
Enter ID code or name (max. 14 characters).
Press the ‘ID 1’ eld.

USER MANUAL
–iForks-52 (BLE) 18
After entering one or more ID codes, select your
preferred ID and press the back button.
Press the back button to return
to the weighing mode.
Only ID-1 will be shown. All codes will now be
shown on the printout, or when transferring data.
5 6
7 8
For viewing the active codes in the display, repeat
steps 1 and 2. Press the arrow left to return to the
main screen (see step 6).

USER MANUAL
–iForks-52 (BLE) 19
4.6 Adding, print, clear memory & send data
4.6.1 Add weight to subtotal
If preferred you can select a total memory.
The weight is added.
Load scale.
Press the → Σ ← key.
The weight has been added to the selected
total memory.
Select your preferred total memory.
4.6.2 Change active total memory
1 2
3
1 2
Press the total eld.

USER MANUAL
–iForks-52 (BLE) 20
4.6.3 Print single weight
Load scale. Press the printer key.
The indicator is now printing. The weight is printed and the indicator is
ready for the next weighing.
4.6.4 Send WiFi
First a new weight must be on the display.
Press the WiFi button.
The indicator is sending.
1 2
3 4
1 2
This manual suits for next models
1
Table of contents
Other Ravas Forklift manuals