manuals.online logo
Brands
  1. Home
  2. •
  3. Brands
  4. •
  5. RCA
  6. •
  7. Media Player
  8. •
  9. RCA Lyra rd2780 User manual

RCA Lyra rd2780 User manual

AV Jukebox
Thomson Inc.
P.O. Box 1976
Indianapolis, IN 46206-1976
©2003 Thomson Inc.
Trademark(s)® Registered
Marca(s) Registrada(s)
Printed in China
TOCOM 5583118B
Visit us at www.rca.com/lyra-avdownloads
FEDERAL COMMUNICATIONS COMMISSION INFORMATION
This device complies with Part 15 of the FCC Rules. Operation
is subject to the following two conditions:
(1) This device may not cause harmful interference, and
(2) This device must accept any interference received,
including interference that may cause undesired operation.
Note: This equipment has been tested and found to comply
with the limits for a Class B digital device, pursuant to part 15
of the FCC rules. These limits are designed to provide reasonable protection against harmful
interference in a residential installation. This equipment generates, uses and can radiate radio
frequency energy and, if not installed and used in accordance with the instructions, may cause
harmful interference to radio communications. However, there is no guarantee that interference
will not occur in a particular installation. If this equipment does cause harmful interference to
radio or television reception, which can be determined by turning the equipment off or on, the
user is encouraged to try to correct the interference by one or more of the following measures:
– Reorient or relocate the receiving antenna.
– Increase the separation between the equipment and the receiver.
– Connect the equipment into an outlet on a circuit different from that to which the receiver is
connected.
– Consult the dealer or an experienced Radio/TV technician for help.
This Class B digital apparatus complies with Canadian ICES-003.
SERVICE
This product should be serviced only by those specially trained in appropriate servicing techniques.
For instructions on how to obtain service, refer to the warranty that’s in the User’s Guide.
Attach your sales receipt for future reference, or write down the date you purchased or received
this product as a gift. This information will be valuable if service should be required during the
warranty period.
Model No: RD2780 Purchase Date:
Serial No: Purchased From:
IMPORTANT NOTE: To reduce the risk of fire or electric shock, do not expose this
product or AC charger to rain or moisture.
Important Safety Information
Be sure to read all the safety information before you begin to use this product.
This symbol indicates "dangerous voltage" inside the
product that presents a risk of electric shock or
personal injury.
To reduce the risk of electric shock, do not remove cover (or back). No user serviceable parts
inside. Refer servicing to qualified service personnel.
This symbol indicates important instructions
accompanying the product.
CAUTION
RISK OF ELECTRIC
SHOCK.
DO NOT OPEN.
ATTENTION
RISQUE DE CHOC
ELECTRIQUE.
NE PAS OUVRIR.
Tips and Troubleshooting
Problem: Audio files added to the hard drive through Windows Explorer via drag
and drop do not appear in Audio navigation sorting categories (Artist, Album,
Genre, etc.).
•The audio content of the Lyra AV Jukebox hasn’t been profiled. From the Lyra System
Application ( ) on your PC, select the Profile Device Contents... option to sort (profile)
the contents of the hard drive (go to Chapter 1 of the User’s Guide for details).
Problem: Video files added to the hard drive through Windows Explorer via drag
and drop do not appear in Video navigation mode.
•Video content must be stored on the hard drive in the VIDEO system folder in order to be
properly recognized and available for playback. Sub-folders may be created under the
VIDEO system folder for easy navigation and organization of your video files.
Problem: Photo files added to the hard drive through Windows Explorer via drag
and drop do not appear in Photos navigation mode.
• Photo content must be stored on the hard drive in the PHOTOS system folder in order to
be properly recognized and available for playback. Sub-folders may be created under the
PHOTOS system folder for easy navigation and organization of your photo files.
Problem: Lyra AV Jukebox does not respond.
•When this happens, you can recover the unit by inserting a sharp object (e.g. paper clip)
into the Reset hole, located on the bottom of the unit to reset the device. Press ON/OFF
to turn device back on.
Problem: Some .AVI video files do not play on my Lyra AV Jukebox.
•Make sure the video is encoded in MPEG4 and the audio is encoded in mp3 audio. The
.AVI files may be encoded in audio/video formats that are not currently supported by the
Lyra AV Jukebox device.
Note: The Lyra AV Jukebox can play MPEG4 video content encoded with the DivX 4/5
codecs.
SELECT
SELE CT
+
-
Disconnecting Your Lyra From the Computer
Note: Before disconnecting the USB cable from the computer or the Lyra AV Jukebox, to
ensure there is no loss of data:
1. From the System Tray, left click on the icon (or the
icon in Windows 98SE/Me) and select Unplug or eject
hardware. The Unplug or Eject Hardware screen appears.
Select the drive(s) corresponding to your Lyra Personal
player and click Stop.
2. The Stop a Hardware device screen appears. Select the
device to be stopped again for confirmation and click
OK.
You can also stop your Lyra AV Jukebox by right clicking on
the icon from the system tray and selecting the drive
corresponding to your player.
The battery should only be repaired or replaced by a qualified technician.
RCA RD2780
Tested to Comply
With FCC Standards
FOR HOME OR OFFICE USE
RD2780 Quick Start Guide
•100MB free hard disk space for the software
•64MB RAM (128 MB recommended)
•CD-ROM drive capable of digital audio
extraction
•USB port (2.0 recommended)
•Installed sound card
•16-bit color video card
This Lyra Quick Start just gives you the basics. For more information, go to the User’s Guide
located at www.rca.com/lyra-avdownloads. To make sure your Lyra AV Jukebox includes the
lastest features and performance improvements, visit the website as well.
Note: The User’s Guide is in the Adobe Acrobat PDF format. If you don’t have the Adobe
Acrobat Reader on your computer, download it for free at www.adobe.com.
You can also get FAQ information at www.rca.com/digitalaudiofaq.
Welcome to Lyra
The Lyra AV Jukebox works with your computer to let you play your favorite multimedia files
such as audio files encoded with the popular mp3 audio format; video files encoded in
MPEG4; photo files created in the JPEG and JPG format.Visit http://www.rca.com/lyra-
avdownloads for the latest upgrades.
You can download mp3 encoded music files from several internet sites to your computer hard
drive or record from your favorite CD using the software supplied.
Some of the internet sites you may want to explore are:
www.mpeg.org • www.mp3.com • www.emusic.com
Computer System Requirements
•Pentium III 500MHz or higher recommended
Macintosh iMac G3 or higher
• Windows®98SE, Me, 2000 with Service
Pack 3, or XP
Mac OS X Version 10.1.5 or higher
•Internet Explorer 4.0 or higher
•Internet access
Multimedia File Basics
Audio MP3
Photos JPEG, JPG
Video AVI MPEG4- SP
Important Battery Information
Note: Be sure to charge battery before use with your Lyra AV Jukebox. The built-in battery
needs to be charged 4 hours by the supplied AC/DC adapter before it is fully charged.
• The battery used in this device may present a risk of fire or chemical burn if mistreated.
Do not separately recharge, disassemble, heat above 100C (212F), or incinerate.
•Battery replacement should only be made by trained technicians. Refer to
Limited Warranty in the User’s Guide for details.
•Do not attempt to open the unit. No user servicable parts inside.
• Keep the unit away from children. Do not disassemble or dispose product in fire.
•Use only the specified chargers which were packaged with the product. Use of another
charger may present a risk of fire or explosion.
•Keep charger plugged in to device for at least 30 minutes before attempting to operate
device if battery is completely run down and is insufficient to power up device.
Supported File Formats Supported Video Codec Format
File
(Transfer files to Your Lyra Jukebox continued)
It is recommended that Audio content be copied into the AUDIO subfolder off of the root of
the device.
Video content MUST be copied into the VIDEO subfolder off of the root of the device to be
properly recognized by the device.
Photo content MUST be copied into the PHOTOS subfolder off of the root of the device to be
properly recognized by the device.
For more information about transferring files, go to the Lyra User’s Guide.
Caution: Make sure all data are transferred to the Lyra AV Jukebox before unplugging the
USB cable.
Notes: You can also transfer audio files via MusicMatch Jukebox. Refer to your Lyra User’s
Guide for details.
You must profile your audio contents after file transfer in order for the new files to appear
in the Navigation Menu. Refer to the User’s Guide for details. Video and Photos content
will appear in the Navigation menus based on the folder/file structures in the VIDEO and
PHOTOS system folder. Profiling of content is not necessary.
As with any portable device that has a hard drive, you must back up the drive. RCA and
Thomson Inc. are not responsible for lost data.
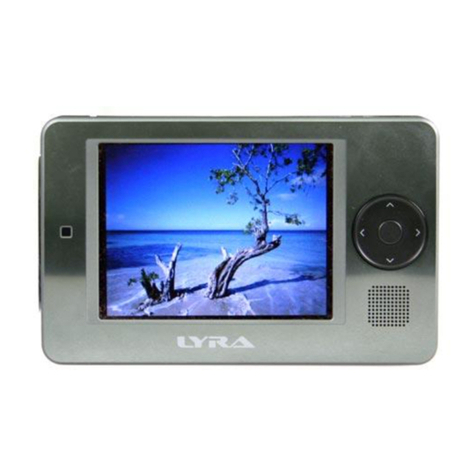
General Controls
Front View
Top View
COMPUTER
DIGITAL
USB PORT
ON/OFF
RECORD
1 LCD (Liquid Crystal Display) – This is where the Lyra’s user interface and multimedia
content appear (go to the User’s Guide for an explanation of the items that appear on
the LCD during playback).
2Reverse button- When you’re playing a file, press and release to skip back to the
previous file (to scan backwards in the audio or video file that’s playing, press and hold).
3SmartTag button (+) –Allows you to tag the file to be included in Favorites or Program
Play, depending on which mode you are in. (Feature currently not available. Visit http://
www.rca.com/Lyra-avdownloads for the latest software and updates).
4Play/Pause – Press to play. During playback, press to pause.
5Forward button – When you’re playing a file, press and release to skip forward to the
next file (to scan forward in the audio or video file that’s playing, press and hold).
6SmartUntag button (-) – Allows you to remove the tags from Favorites or Program
Play, depending on which mode you are in. (Feature currently not available. Visit http://
www.rca.com/Lyra-avdownloads for the latest software and updates).
7Up arrow button – Moves highlight up.
8Right arrow button – If you’re viewing a folder or playlist, moves highlight forward
one level and expands the item’s contents.
9 SELECT– When using the Lyra AV Jukebox menu, selects a highlighted item. If file
highlighted, press to display the options menu.
10 Down arrow button – Moves highlight down.
11 Left arrow button – If you’re viewing a folder or playlist, moves highlight back one
level and collapses the item.
Bottom View
Stand – Pull the stand out to place the Lyra AV Jukebox upright on a surface.
VOL (Volume up and down)- Press VOL+ to increase the volume level; press VOL- to decrease
the volume level.
CompactFlash port –Insert a CompactFlash memory card to copy files to your Lyra AV Jukebox.
When connected to a computer, the CompactFlash card port functions as a high-speed card reader.
RECORD –Displays Recording Mode options menu.
ON/OFF button and Stop icon – Turns on your Lyra AV Jukebox. To turn off the Lyra AV Jukebox,
press and hold. When you’re playing files, stops playback.
USB port –Attach the small end (Type mini-B) of the mini-USB cable here. Attach the large end
(Type A) to your computer.
Note: Your Lyra AV Jukebox has a lithium ion rechargable battery that starts charging every
time you plug in your player to an electrical outlet. It takes about 4 hours to fully charge the
battery. In order to extend the life of the battery as long as possible, make sure you fully
charge the battery.
Install Software In Your Computer
The Music Management CD that came with your Lyra AV Jukebox contains all of the necessary
software components you need to make your Lyra AV Jukebox work properly.
1. Place the Music Management CD that came with your Lyra AV Jukebox into your computer
(the startup screen appears).
If the setup screen doesn’t appear, double click My Computer, double click your CD-ROM drive
icon, and double click Install to run the installer.
Transfer Files to Your Lyra AV Jukebox
From Windows Explorer or My Computer, transfer the files to your Lyra AV Jukebox by
highlighting the files you want to transfer, and then copy or drag them to the drive letter that
is associated with the Lyra AV Jukebox.
To transfer pre-defined audio playlists that you have created in MusicMatch Jukebox , drag
them to the AUDIO folder located in the drive letter associated with your Lyra AV Jukebox
from Windows Explorer.
(Continued on other side)
MusicMatch Jukebox is a trademark of MusicMatch, Inc.
ON/OFF
+
-
VOL
RECORD
CompactFlash
SELECT
SEL ECT
+
-
123
4
5
6
7
8
9
10
11
Right Side View
RESET button – If your Lyra AV Jukebox appears to be locked up, press the RESET button (the
memory will be cleared and settings will return to the factory defaults).
CONTROLS HOLD –To make the buttons inactive, slide the switch to the CONTROLS HOLD
(button lock on) position (the icon appears in the display to remind you that you’ve locked
the buttons). Slide the switch to the NORMAL position for normal operation (button lock off).
NORMAL – To listen to music, view photos, or watch video, slide the switch to Normal mode.
TV OUT – If you’ve connected a cable to the LINE OUT jack, slide the switch to TV OUT to
display the Lyra’s user interface and mutlimedia content on the connected video component.
Install System Applications (Windows 2000/XP)
Click Install System Application to install applications that will help you better manage your
Lyra AV Jukebox.
Install MusicMatch Jukebox
MusicMatch Jukebox is a music management software used to organize and manage digital
audio files and to transfer the music to your Lyra AV Jukebox.
Click Install MusicMatch Jukebox on the startup screen to run the MusicMatch setup program.
Wait while the installation program begins. It may take up to 20 seconds for the installer to
start. Follow the on-screen instructions to install MusicMatch Jukebox.
Note: It is recommended to uninstall any previous installations of the MusicMatch Jukebox
software before proceeding. After the uninstall process has been completed, delete the
C:\Program Files\MusicMatch folder from Windows and where C:\Program Files is the path
where the software was installed. If you do not wish to uninstall the previous MusicMatch
Jukebox software, go to “Install MusicMatch Plug-in”.
For more information on MusicMatch Jukebox, click Tutorials on the CD or go to
www.musicmatch.com.
Install MusicMatch Plug-in
MusicMatch requires a plug-in for your particular device in order to transfer audio files from
your computer to your Lyra AV Jukebox through the MusicMatch Jukebox software. Click
Install MusicMatch Plug-in on the startup screen.
Install Additional Services
Click on Install ID3man by Auditude, Get 100 Free mp3 Tracks from eMusic, Install Moodlogic
Mix and Transfer, or Try Rhapsody Music services for additional digital music services provided
by our partners.
Connecting Lyra AV Jukebox to the Computer
Connect the mini-USB (small) connector to your Lyra AV Jukebox, and connect the Type-A
(large) connector to an available USB port on your computer. Turn on the unit by pressing the
ON/OFF button. The Lyra AV Jukebox will appear as a Removal Disk drive letter.
If a CompactFlash memory card is properly inserted, an additional drive letter may be accessed
as a Removable Disk drive letter through Windows Explorer as well. The Lyra AV Jukebox
functions as a high-speed CompactFlash memory card reader as well.
RECORD USB port
ON/OFF
Volume CompactFlash
port
Stand
2. Select your Lyra model (RD2780 (Lyra AV Jukebox Player)) on
the setup screen and click Install to access installation
programs corresponding to your Lyra device.
3. Click on the software components you’re going to install.
4. Follow the on-screen instructions to install all necessary files.
5. Click Finish to complete installation and return to the
startup screen.
Installing Software Components
Install the USB Driver/System Applications (Windows 98SE and Me
Only)
For Windows 98SE and Me systems, you need to install a USB driver before your computer can
recognize your Lyra AV Jukebox along with the Lyra applications to help you better manage
your Lyra AV Jukebox. Click Install USB Driver/System Applications on the set-up screen to
install the required driver and application for your Lyra AV Jukebox.
DC IN LINE OUT LINE IN
M
E
N
U
DC IN LINE OUT
jack
Headphones
jack
LINE IN
jack
MENU
button
DC IN jack –Plug in the AC power adapter here. When you plug in the AC adapter, the battery
inside of the Lyra AV Jukebox automatically starts charging.
LINE OUT jack – Attach the line out cable here when you’re connecting the Lyra AV Jukebox to an
audio/video component, such as a stereo receiver or TV.
LINE IN jack – Attach the line in cable here when you’re connecting the Lyra AV Jukebox to an
audio/video component, such as a TV, VCR or camcorder.
Headphones jack – Insert the headphones plug here.
MENU button – When you’re in the menu system, a momentary press brings navigation up one
level; press and hold to return to Main Menu (InstaHome™).
TV OUT
NORMAL
CONTROLS HOLD
Reset Mode Switch
InstaHome is a registered trademark of Thomson Inc.

Other RCA Media Player manuals

RCA 5588825C User manual

RCA

RCA 5588825C User manual

RCA LYRA X3000 User manual

RCA

RCA LYRA X3000 User manual

RCA DSB778W User manual

RCA

RCA DSB778W User manual

RCA LYRA X3000 User manual

RCA

RCA LYRA X3000 User manual

RCA X3030 - Lyra - Digital AV Recorder User manual

RCA

RCA X3030 - Lyra - Digital AV Recorder User manual

RCA DSB7788W User manual

RCA

RCA DSB7788W User manual

RCA M4001 - 1 GB Digital Player User manual

RCA

RCA M4001 - 1 GB Digital Player User manual

RCA Scenium DRS7000N User manual

RCA

RCA Scenium DRS7000N User manual

RCA DSB778W User manual

RCA

RCA DSB778W User manual

RCA LYRA X3000 User manual

RCA

RCA LYRA X3000 User manual

RCA DSB772WE User manual

RCA

RCA DSB772WE User manual

RCA LYRA X3000 User manual

RCA

RCA LYRA X3000 User manual

RCA DSB772WE User manual

RCA

RCA DSB772WE User manual

RCA Lyra M1001GBUS User manual

RCA

RCA Lyra M1001GBUS User manual

RCA DRC7005N User manual

RCA

RCA DRC7005N User manual

RCA M7208 User manual

RCA

RCA M7208 User manual

RCA X2400 - Lyra Video Flash Recorder User manual

RCA

RCA X2400 - Lyra Video Flash Recorder User manual

RCA M2001 User manual

RCA

RCA M2001 User manual

RCA MSN TV 2 User manual

RCA

RCA MSN TV 2 User manual

Popular Media Player manuals by other brands

CrowdDJ Nightlife installation guide

CrowdDJ

CrowdDJ Nightlife installation guide

D-Link DSM-312 datasheet

D-Link

D-Link DSM-312 datasheet

Fortec Star VideoPoster-III user manual

Fortec Star

Fortec Star VideoPoster-III user manual

LG 32SE3B owner's manual

LG

LG 32SE3B owner's manual

LEGRAND NUVO P10 product manual

LEGRAND

LEGRAND NUVO P10 product manual

Sony LocationFree LF-B10 operating instructions

Sony

Sony LocationFree LF-B10 operating instructions

invotel DS9600P user manual

invotel

invotel DS9600P user manual

Roku Streaming Stick Get started

Roku

Roku Streaming Stick Get started

Sony XDS-PD1000C Operation guide

Sony

Sony XDS-PD1000C Operation guide

Yukon Mobile instructions

Yukon

Yukon Mobile instructions

WebDT SA2000 Basic operation guide

WebDT

WebDT SA2000 Basic operation guide

IconBiT Toucan W quick start guide

IconBiT

IconBiT Toucan W quick start guide

Panasonic SV-SW31VGC Service manual

Panasonic

Panasonic SV-SW31VGC Service manual

Philips GoGear Opus SA1OPS08K Specifications

Philips

Philips GoGear Opus SA1OPS08K Specifications

MEDIAZONE PRO Player installation guide

MEDIAZONE

MEDIAZONE PRO Player installation guide

Integra DPS-10.5 Service manual

Integra

Integra DPS-10.5 Service manual

AUDIOropa PRO LOOP NX7 user manual

AUDIOropa

AUDIOropa PRO LOOP NX7 user manual

TBM movebox 1080P-1 user guide

TBM

TBM movebox 1080P-1 user guide

manuals.online logo
manuals.online logoBrands
  • About & Mission
  • Contact us
  • Privacy Policy
  • Terms and Conditions

Copyright 2025 Manuals.Online. All Rights Reserved.