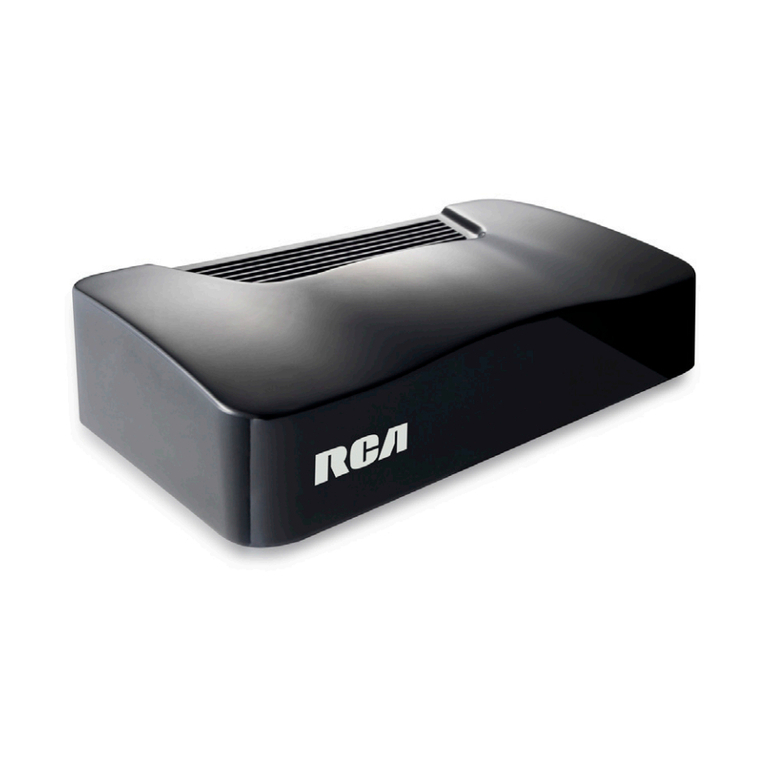
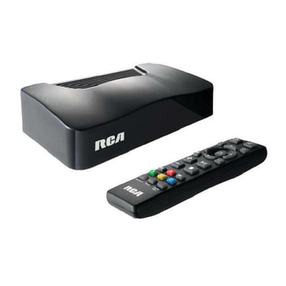
RCA DSB778W User manual

AV receiver/amplifier
AUDIOIN
RL
(White)(Red)
(White)
(Red)
B. Usingan Analog Audio cable
Connect an audio cable (not included) to the red and
whiteAUDIO OUT jacks on your playerand to the AUDIO
IN jacks on your AVreceiver or amplifier.
The picture noise appears“noisy” or degraded
• YourPlayermaybesettoaHDMIresolutionthat’shigherthanyourTV’s.Changetheresolutiontomatchyour
TV’sresolution.
Player doesn’tdisplay video on my TV screen
• SelecttheappropriatevideoinputmodeontheTVsothepicturefromthePlayerappearsontheTVscreen.
• MakesureyourHDMIcableorRCAcableissecurelyinsertedinboththePlayerandyourTV.
• YourTVmaynotsupporttheresolutionyouhavesetonthePlayer.ChangetheresolutiontomatchyourTV’sresolution.
• Theplayer’sHDMIOUTcableisnotsecurelyconnectedtoyourplayeroryourTV.
I need to input text to manually configure log-in IDs,passwords or network settings, but I don’tsee an
on-screen keyboard
• TrypressingtheOKbuttononyourremotecontrolwhilethecursorisblinkingonthescreen’sentryeld,this
shouldbringupanon-screenkeyboard.Tryadjustingthefrequencyrangeandchannelofyournetwork.
The Player has a poor or intermittentconnection to the Wi-Fi access point (eg wireless router)
• Thewirelesscommunicationmay beinterruptedfromhousehold devicesthatareusing radiofrequencies.
MovethePlayerawayfromthem.
• TheAccessPointislocatedtoofarfromthePlayer.
How can I check if my network connection is OK?
• GotothePlayer’sSettingsMenu,thenselectNetwork->NetworkTest.Thiswilltestifyouaresuccessfully
connectedtoyourHomeNetworkandifyourbroadbandconnectionisconnectedtotheinternet.
• GotothePlayer’sEntertainmentMenu,selectVUDUMovies->MyVUDU->Info&Settings->NetworkSpeed
Test.Thiswilltestthespeed/performanceofyournetwork
The remote control does not workproperly
Checkthefollowing:
• Thebatteriesareinsertedcorrectly.
• Thebatteriesarefresh.
• TheremotecontrolispointeddirectlyattheremotesensorofthePlayer.
• TheremotecontrolisnotbeingusedfromtoofaradistancefromthePlayer.
• Nothingisobstructingremotesensor(locatedonfrontofthePlayer).
AV receiver/amplifier
OPTICALIN
user manual
DSB778W
www.RCAav.com
Safety Precautions
1
2
3
Thisdevicecomplies withPart 15of theFCCRules.Operation issubject tothe followingtwoconditions:(1) This
devicemay notcause harmfulinter ference,and(2) thisdevice mustaccept anyinterference received,including
interferencethatmaycauseundesiredoperation.
ThisequipmenthasbeentestedandfoundtocomplywiththelimitsforaClassBdigitaldevice,pursuanttoPart15
ofFCCRules.Theselimitsaredesignedtoprovidereasonableprotectionagainstharmfulinterferenceinaresidential
installation.Thisequipmentgenerates,uses,andcanradiateradiofrequencyenergyand,ifnotinstalledandusedin
accordancewiththeinstructions,maycauseharmfulinterferencetoradiocommunications.
However,thereisnoguaranteethatinterferencewillnotoccurinaparticularinstallation.Ifthisequipmentdoescause
harmfulinterferencetoradioortelevisionreception,whichcanbedeterminedbyturningtheequipmentoffandon,
theuserisencouragedtotrytocorrecttheinterferencebyoneormoreofthefollowingmeasures:
• Reorientorrelocatethereceivingantenna.
• Increasetheseparationbetweentheequipmentandreceiver.
• Connecttheequipmentintoanoutletonacircuitdifferentfromthattowhichthereceiverisconnected.
• Consultthedealeroranexperiencedradio/TVtechnicianforhelp.
WARNING:Changes ormodicationsnotexpressly approvedbytheparty responsibleforcompliancecouldvoid
theuser’sauthoritytooperatetheequipment.
HDMI,theHDMI logo and High-
DenitionMultimediaInterfaceare
trademarksorregisteredtrademarks
ofHDMILicensing,LLC.
Manufactured under license from
DolbyLaboratories.“Dolby”andthe
double-Dsymbolaretrademarksof
DolbyLaboratories.
GeneralControlsReferenceGuide
1. POWERbutton
Presstoturnon/offtheplayer.
2. RETURN button
Presstoreturntothepreviousscreen.
3. Audio button
Presstoselecttheaudiomode.
4. VOLUME +/- buttons
Presstoadjustthevolume.
5. Reverse Scan button
Presstofastreverseplayback.
6. A,B, C, D buttons
Ifacolor-codedmenuoptionappearsonyourscreen,
youcanpressthecorrespondingcolor-codedbutton
to select this option.
7. NETFLIX button
PresstoaccessNetixservicedirectly.
8. Mute button
Presstomuteallsound.
9. Home button
Presstodisplaythemainmenuoftheplayer.
10. , , , (Cursor) buttons
Pressto select itemsor settings inon-screen
menus.
OK/ENTERbutton
Presstoconrmorselectmenuitems.
11. Subtitle button
Presstodisplaythesubtitlemenu.
12. Play/Pause button
Presstostartplayback.
Presstopauseplayback.
13. Stop button
Presstostopplayback.
14. Forward Scan button
Presstofastforwardplayback.
15. VUDU button
PresstoaccessVUDUservicedirectly.
16. Pandora button
PresstoaccessPandoraservicedirectly.
1. IR(remotecontrol)sensor
2. Statusindicator
3. DC IN power jack
4. AnalogAUDIO OUT jacks
5. CompositeVIDEOOUT jack
6. DigitalOPTICALOUT port
7. HDMIOUT jack
8. LANjack
A. Using an HDMI cable (for best connection)
ConnectanHDMIcable(notincluded)totheHDMIOUTjackonyourplayerandtotheHDMIINjackonyourTV.
A. Using a Digital Audio Optical cable
(for best connection)
ConnectingtoaTV
ConnectingtoanAudioSystem
ConnectingtoYourNetwork
4Poweringup&Initialsetup
5Settings&Entertainment
Troubleshooting
A. Connecting your playerto a wired router
A. Operating with the remote control
Openthecoverandinsertthebatteries(AAAx2)matchingthepolarityindicatedinsidebatterycompartmentofthe
remotecontrol.Touse,pointtheremotecontrolattheremotesensorlocatedonthefrontoftheplayer.Pleaseensure
thefrontoftheplayerisnotobstructed.Donotexposetheremotesensorofyourplayertoastronglightsourcesuch
asdirectsunlightorotherillumination.Ifyoudoso,youmaynotbeabletooperateyourplayerviatheremotecontrol.
B. Starting up & Basic setup
1.Afterallconnectionsarecomplete,connectthepoweradaptortoyourplayer.
2.IfPlayerdoesn’tturnonautomaticallywithintenseconds,press onthe remote control to turn on your player.
3.TurnonyourTV.EnsureyourTVisswitchedtotheinputsourcethatyou’veconnectedtheplayer.(Fordetails,refer
toTV’susermanual).
IftheTVisconnectedbyanHDMIcable,pleaseallowafewmomentsfortheopeningscreentodisplay.
4.ThePlayerwilldisplayabasicsetupscreenwhichwillguideyouthoughinitialsetup.
Settings options
Network-->Info-->QuickSetup-->Display-->Audio
-->Language-->System
The main menu includes Settings & Entertainmentoptions.Press , , , tohighlightanoption,pressOK/ENTER
toconrmyourselectionandsetting,press toreturn to previous menu.
Streaming video services (such as YouTube™,etc.) often stop, pause or “buffer”during playback
• YourWi-FiAccessPoint(egwirelessrouter)maybetoofarfromthePlayer.Ifpossible,trytolocateyourWi-Fi
routerclosertoyourPlayer,oruseethernetconnection,orconsultanexpertonwaystoimproveyourhome
network’sbandwidth.
• Yourbroadbandservicespeedmay notbefastenough tostreamvideo services.Ifso,yourInternetService
Provider(ISP)mayhaveotherserviceplansthatprovidehigherbandwidth.
Player does not work
• UnplugtheACpoweradapter,waitatleasttenseconds,thenplugitbackin.
• EnsuretheACadapter issecurelyinserted intothePlayer’spower jackandan ACoutlet.ThePlayer’sblue
powerindicatorshouldturnonwithintensecondsofthePlayer’sACAdapterbeingpluggedin.
• Seetroubleshootingtipsbelow.
My Wi-Finetwork is not displayed on the “Network List”
• TheaccesspointorwirelessLANroutermaynotbroadcastitsSSID.
-Manuallyenteryouraccesspoint’sSSIDintheNetworkSettingsMenuofthePlayer.
-OrsetyouraccesspointtobroadcastitsSSID.
• YourWi-FinetworkmaynotbesettothefrequencyrangeorrangeofchannelsthatthisPlayercansupport.
Tryadjustingthefrequencyrangeand/orchannelofyournetwork.
The Player has“frozen”or stopped working
• ToresetthePlayer,unplugtheACpoweradapter,waitatleasttenseconds,andthenplugitbackin.
• MakesureyourRemoteControlisfunctioningproperly.
My Player seems to shut down byitself, is there a problem?
• No,inordertosaveyoupower,thePlayerwillshutdownafterprolongedperiodsoninactivity-don’tworry,
itwon’tshutdownwhileyou’reusingit.”Note:youcandisablethisfeature,oradjusttheAutoPowerDown
DurationbygoingtoSettings->System->AutoPowerDown
B. Usingan A/V cable
Connect the yellow co nnectors on an A/V
cable(not included) tothe VIDEOjack on
yourplayer andthe VIDEO INjack on your
TV.Connect the red and white connectors to
theAUDIOOUTjacksonyourplayerandL/R
AUDIO IN jacks on yourT V.
Notes:
Donottiltthe connectorwheninserting itintothe HDMI• jack,andmakesuretheshapesofthejackandtheconnector
are matched.
Whenusingnon-HDCP compatibleTV,theimagewillnot•
display properly.
AnHDMIcablecarriesbothvideoandaudiosignals.IfyouwanttouseTVspeakers,• youdo not needto make anadditional audio connection ifyou are usingan
HDMIcable.
Notes:
DonotconnectamodularphonecabletotheLANjack.•
Whenpluggingorunpluggingthecable,holdtheconnectoronthe endofthecable.Whenunplugging,donot•
pullonthecable.Pressdownthelocktabandpulltheconnectoroutofthejack.
B. Connecting yourplayer to a wireless access point or router
C. Connection Status
Tocheckyournetworkconnectionstatus,selecttheSettingsOptionfromMainMenu,thenselect
Network->NetworkTest.
Note:
Donotplaceanything onthetop ofyourplayer.Placingobjectsonthe topofyourplayer mayinterferewiththe
wirelesssignal,orcausetheplayertooverheat.
Thelightningashwithanarrowheadsymbol,withintheequilateral
triangle,isintendedtoalertthe usertothe presenceofuninsulated
“dangerousvoltage”withinthe product’senclosure that maybe of
sufcientmagnitudetocauseanelectricshock.
WARNING:
TOREDUCETHERISKOF ELECTRICSHOCK,DONOT REMOVECOVER(ORBACK).NOUSER-SER VICEABLE
PARTSINSIDE.REFERSERVICINGTOQUALIFIEDSERVICEPERSONNEL.
WARNING:
TOPREVENTFIRE ORSHOCK HAZARD,DONOTEXPOSE THISAPPLIANCETO RAINOR MOISTURE.DONOTPLACE
OBJECTSFILLEDWITHLIQUIDSONORNEARTHISUNIT.
RISK OF ELECTRIC SHOCK
DO NOT OPEN
CAUTION
Limitedwarranty
AVC MULTIMEDIA (“AVC”) makesthe followin glimite dwarran ty.Thislimited warrant yexten dto the original
consumerpurchaserandislimitedtonon-commercialuseoftheproduct.
One Year Parts & Labor Warranty
AVCproductspurchasedintheUnitedStatesarewarrantedtobefreefromdefectsinmaterialsorworkmanshipfor
aperiodofoneyearfromthedateoftheiroriginalretailpurchase.Iftheunitfailstoconformtothiswarranty,wewill
servicetheproductusingneworrefurbishedpartsandproducts,atAVC’ssolediscretion.
Duringaperiodofoneyearfromtheeffectivewarrantydate,AVCwillprovide,whenneeded,servicelabortorepaira
manufacturingdefectatitsdesignatedServiceCenter.ToobtainwarrantyserviceintheUnitedStates,youmustrst
call our Customer Support Center at 1-800-506-5746 or 1-877-252-6873, during the hours listedin the b ox
below.ThedeterminationofservicewillbemadebyAVCCustomerSupport.PLEASEDO NOT RETURNYOUR UNIT
TO AVCWITHOUT PRIOR AUTHORIZATION.Neworremanufacturedreplacementsfordefectivepartsorproducts
willbeusedforrepairsbyAVC atitsdesignatedServiceCenterforoneyearfromtheeffectivewarrantydate.Such
replacementpartsorproductsarewarrantedforanadditionaloneyearfromthedateofrepairorreplacement.The
CustomerwillberequiredtoshiptheunittotheServiceCenterindicatedatthetimeCustomerSupportiscontacted
tomakethenecessaryrepairs.Thecustomerisresponsibleforalltransportationchargestotheservicefacility.
Packaging and Shipping Instruction
Whenyousendtheproducttothe AVC servicefacilityyoumustusethe originalcartonboxandpackingmaterial
oranequivalentasdesignatedbyAVC.
LIMITEDWARRANTY
YourResponsibility
1)Youmustretainthe originalsale receipttoprovide proofof purchase.
2)Thesewarrantiesare effectiveonly iftheproduct ispurchased andoperatedin theU.S.A.or Canada.
3)Warranti esex tend only todefe cts inma terial orw orkmanship, and dono text endto any produc tor par ts
which have been lost or discar ded,or damag eto prod uct orp arts cause dby misu se,accid ent,imp roper
operationormaintenance,or usein violationof instructionsprovided withthe product,orto product which
hasbeen alteredor modied without authorizationof AVC ,or toproducts or parts thereofwhich havehad
theserialnumber removedorchanged.
Out of Warranty
Important:
Alsokeepyour"BillofSale"asproofofpurchase.
Modelno.......................................................................................... Product name................... ......................................... ......................
Typeofset ........................................................................................ Serialno.................................................................................................
Invoice no.......................................................................................... Date purchased ................................. ................................................
Dealer name ..........................................................................................................................................................................................................
FORSERVICEAND REPAIR,PLEASEVISITwww.RCAav.com
Specificationsandexternal appearanceare subjecttochange withoutnotice.
Inthe event yourproduct requires repair aftert helimited warranty period hasexpired, pleasecontact our
CustomerSupportCenterat1-800-506-5746,1-877-252-6873 or www.RCAav.com
Hours: Monday–Thursday:9am–7pm, Friday: 9am–5pm, Saturday: 9am–NOON Eastern time.Important:
Youare responsibl efor any transpor tation,sh ipping ori nsurance relative to the return ofp roduct too ur
ProductReturnsCenter.
Allwarrantiesimpliedbystatelaw,includingtheimpliedwarrantiesofmerchantabilityand tnessforaparticular
purpose,are expressly limited toth eduration of the limited warranties set forth above.Withthe exception of
anywarrantiesimplied bystatelaw ashereby limited,theforegoingwarranty isexclusiveand inlieu ofall other
warranties,guarantees,agreementsand similarobligationsof manufacturerorsellerwith respecttothe repairor
replacementofanyparts.InnoeventshallAVCbeliableforconsequentialorincidentaldamages.
Noperson, agent,distributor,dealer or companyis authorized to change,modify or extendthe terms of these
warrantiesinanymannerwhatsoever.ThetimewithinactionmustbecommencedtoenforceanyobligationofAVC
arisingunderthewarrantyorunderanystatute,orlawoftheUnitedStatesoranystatethereof,isherebylimitedto
oneyearfromthedateofpurchase.Thislimitationdoesnotapplytoimpliedwarrantiesarisingunderstatelaw.
Thiswarrantygivesyouspeciclegalrightsandyoumayalsohaveotherrights,whichmayvary,fromstatetostate.
Somestatesdonotallowlimitationonhowlonganimpliedwarrantylasts,whenanactionmaybebrought,orthe
exclusionorlimitationofincidentalorconsequentialdamages,sotheaboveprovisionsmaynotapplytoyou.
Formoreinformationonotherproductsandservices,pleasevisitourwebsiteatwww.RCAav.com
Theexclamationpoint withintheequilateral triangleis intendedto
alerttheusertothepresenceofimportantoperatingandmaintenance
(servicing)instructionsinthisowner’smanual.
Yourplayercanbeconnectedtoyourhomenetwork:
ByconnectinganEthernetcabletotheLANjackonyourplayerandtoawiredhuborrouter.Usingawirednetwork•
providesthebestperformance,becausetheattacheddevicesconnectdirectlytothenetworkandarenotsubject
toradiofrequencyinterference.
ByconnectingtheplayertoyourWi-Finetwork.•
Modem Cable
Modem Port
Wireless access point
©2011AVCMultimediaTrademark(s)®RegisteredPrintedinChina
811-778891W013
12
Accessories
• ACAdapter.................................................................x1
• RemoteControl(withbatteries).............................x1
FCC RF Radiation Exposure Statement :
ThisequipmentcomplieswithFCCradiationexposurelimitssetforthforanuncontrolledenvironment.Thisequip-
mentshouldbe installedand operatedwithminimum distance20 cmbetween theradiatorand yourbody.End
usersmustfollowthespecic operatinginstructionsfor satisfyingRFexposurecompliance.Thistransmittermust
notbeco-locatedoroperatinginconjunctionwithanyotherantennaortransmitter.
CAUTION:RegulationsoftheFCCandFAAprohibitairborneoperationofradio-frequencywirelessdevicesbecause
theirsignalscouldinterferewithcriticalaircraftinstruments.
HDMIIN
High
Definition
TV
345678
CAUTION: Dangerof explosionif battery is
incorrectlyreplaced.Replace only withthe
sameorequivalenttype.
Unit
Remote Control
ToInstall Batteries
2.Inser t two AAA
batteries.
1. Open the battery door.
Battery Replacement
When t he ba tter ies b ecome weak ,t he op erat ing
distanceoftheremotecontrolisgreatlyreducedand
you will need to replace them.
Notes:
• Iftheremotecontrolisnot goingtobeusedfora
longtime,removethebatteriestoavoidcorrosion
damagecausedbybatteryleakage.
• Donot mix oldand new batteries.Donot mix
ALKALINE,standard(CARBON-ZINC)orrechargeable
(NICKEL-CADMIUM)batteries.
• Alwaysremovebatteriesas soonas theybecome
weak.
• Weakbatteriescanleakand severelydamagethe
remote control.
• WARNING:Donot disposeof batteries ina fire.
Batteriesmayexplodeorleak.
Wi-FiStreamingMediaPlayer
with1080pHDMIoutput
It'simportanttoreadthisinstructionpriortousingyournewproductforthersttime.
Connecta digitalaudio opticalcable (notincluded) tothe
OPTICALOUTPUTonyourplayerandtotheOPTICALINPUT
on your AVreceiver or amplifier.
Need More Help?
Please visit online help at http://www.RCAav.com
EN-1 EN-2 EN-3 EN-4 EN-5 EN-6
Connectan Ethernetcable to theLAN jack
onthebackofyourplayerandtoanEthernet
jack on a hub or broadband router.
Settings:Use to defineyour basic settingsto your
preference.Toreturntoapreviousscreen,press .
Yourplayerhas an integratedWi-Fi deviceand
antenna. No physicalconnection to the wireless
routerisnecessary.Placeyourplayerwithinrange
ofyour wirelessnet work.Duringconguration
ofyourplayerfornetworkaccess,youmayneed
toenterapasswordifyournetworkhassecurity
turned on.
Unit
AUDIOIN
RL
VIDEOIN
Standard
Definition
TV
(White)(White) (Red)(Red) (Yellow)(Yellow)
ImportantInformationRelatingtoNetworkServices
Allinformation,data,documents,communications,downloads,les,text,images,photographs,graphics,videos,
webcasts,publications,tools,resources,software,code,programs,applets,widgets,applications,productsand
othercontent(“Content”)andallservicesandofferings(“Services”)providedormadeavailablebyorthrough
anythirdparty(eacha“ServiceProvider”)isthesoleresponsibilityoftheServiceProviderfromwhomitoriginated.
TheavailabilityofandaccesstoContentandServicesfurnishedbytheSer viceProviderthroughthisdevice
aresubjecttochangeatanytime,withoutpriornotice,including,butnotlimitedtothesuspension,removal
orcessationofalloranypartoftheContentorServices.
Shouldyou haveany inquiry orproblem related tothe Contentor Services,you mayrefer to theSer vice
Provider’swebsitefor themost up-to-date information.AVC Multimedia is neither responsible nor liable
forcustomerservicerelatedtotheContentandSer vices.Anyquestionorrequestforservicerelatingtothe
ContentorServicesshouldbemadedirectlytotherespectiveContentandServiceProviders.
PleasenotethatAVC MultimediaisnotresponsibleforanyServicesprovidedbytheServiceProviderorany
changesto,removalof,orcessationofsuch Servicesanddoesnot warrantorguarantytheavailabilityofor
accesstosuchContentorServices.
Entertainment:Thisgivesyouaccesstomanyapplications
andservices. Someof the servicesmay requirea log-in
ID and passw ord,so me of the ser vices may r equire a
subscription.ThePlayerwill provideyou withon-screen
instructionsifalog-inIDorpasswordisrequired.
LANWANLAN
12345
Internet
LAN cable LAN cable
Networking equipment
(modem, etc.)
Hub or broadband router
18
29
10
11
12
13
14
15
16
3
4
5
6
7

AUDIOIN
RL
VIDEOIN
(White)(White) (Red)(Red) (Yellow)(Yellow)
TV de
definición
estándar
HDMIIN
TV
de alta
definición
la imagen se ve“arenosa” o degradada
• PuedequeelreproductorestéconguradoenresoluciónparaHDMI,lacualesmásaltaquelaresolucióndesu
televisor.Cambielaresoluciónparaqueéstasealamismaquelaresolucióndesutelevisor.
El reproductor no muestra videos en la pantalla de mi televisor
• Seleccionelamodalidaddeentradadevideoapropriadaeneltelevisordemaneraquelaimagendelreproductor
aparezca en la pantalla del televisor.
• AsegúresedequeelcabledeHDMIoRCAestéconectadormementeenelreproductoryensutelevisor.
• Puedeque sutelevisor no cuentecon respaldo parala resolución conguradaen el reproductor.Cambiela
resoluciónparaqueéstasealamismaquelaresolucióndesutelevisor.
• ElcabledeHDMIOUTdelreproductornoestábienconectadoasureproductoroasutelevisor.
Necesito ingresar texto para configurar manualmente los identificadores de ingreso,contraseñas o las
configuraciones de red,pero no veo ningún teclado en pantalla
• PruebeapretandoelbotónOKdelcontrolremotomientras elursorestéparpadeandoenelcampo deingreso
detextodelapantalla.Estodebierahacerqueaparezcaenpantallaunteclado.
El reproductor presenta una conexión baja o intermitenteal punto de acceso de la red Wi-Fi
(por ejemplo,un enrutador inalámbrico)
• Puedequelacomunicacióninalámbricaestéinterrumpidaporquehayaaparatosdesuhogarqueesténusando
frecuenciasderadio.Alejeelreproductordeestosaparatos.
• Elpuntodeaccesoestáubicadodemasiadolejosdelreproductor.
¿Cómo puedo revisar si la conexión de mi red está bien?
• VayaalmenúdeconguraciónSettingsdelreproductoryluegoseleccioneNetwork->NetworkTest.Estoprobará
siustedestábienconectadoalareddesuhogarysilaconexióndebandaanchaestáconectadaalareddeInternet.
• VayaalmenúEntertainmentdelreproductoryluegoseleccioneVUDUMovies->MyVUDU->Info&Settings->
NetworkSpeedTest.Estoprobarálavelocidadyrendimientodesured.
Mi red Wi-Fino aparece bajo la lista de redes “Network List”
• PuedequeelpuntodeaccesooelenrutadordelaredLANinalámbricanoesténtransmitiendosuSSID.
-IngresemanualmenteelSSIDdesupuntodeaccesoenelmenúdeconguraciónderedesdelreproductor.
-Obien,congureelpuntodeaccesoparaquetransmitasuSSID.
• PuedeserquesuredWi-Finoestconguradaparaelrangodefrecuenciaodecanalesparaelcualtienerespaldo
estereproductor.Pruebeajustandoelrangodefrecuenciay/oelcanaldesured.
El reproductor se“congeló” o dejó de funcionar
• Pararecongurarelreproductor,desenchufeeladaptadordeCA,esperealmenosdiezsegundos,yluegovuelvaaenchufarlo.
• Asegúresedequeelcontrolremotoestéfuncionandobien.
Parece que el reproductor se apaga solo.¿Hay algún problema?
• No,paraahorrarconsumodecorrienteeléctrica,elreproductorseapagarátrasperiodosdeinactividadprolongados.
Nose preocupe,el reproductorno seapagará mientras loesté usando”.Nota: ustedpuede desactivar esta
opciónoajustarlaopcióndeduraciónparaapagadoautomático(AutoPowerDownDuration)llendoaSettings
(Conguración)->System(Sistema)->AutoPowerDown(Apagadoautomático)
Modem Cable
Modem Port
Wireless access point
Puertodelmódem
Cabledelmódem
Puntodeacceso
inalámbrico
Unit
AV receiver/amplifier
AUDIOIN
RL
(White)(Red)
(White)
(Red)
ReproductorWi-Fidemediosde
comunicaciónaudiovisualporInternet
consalidaHDMIde1080p
manual de usuario
DSB778W
www.RCAav.com
HDMI,ellogotipo HDMI yHigh-
DenitionMultimedia Interface
son marcas come rciales o marca s
comercialesregistradas deHDMI
Licensing,LLC.
RISK OF ELECTRIC SHOCK
DO NOT OPEN
CAUTION
Esimportantequeleaestasinstruccionesantesdeusarestenuevoproductoporprimeravez.
Elrayoconpuntadeechadentrodeltriánguloequiláteropretende
alertaralusuariodelapresenciade“voltajepeligroso”sinaislamiento
en el interior de la cubierta de protección de este producto,el
quepuede tenerla magnitudsucientecomo paraprovocar una
descargaeléctrica.
Elsignode exclamacióndentrodel triánguloequiláteropretende
alertar al usuario de la presencia de importantes instrucciones de
funcionamiento y mantenimiento (reparación) en este manual
para el usuario.
Fabricado bajo la licencia de Dolby
Laboratories.“Dolby”yelsímbolodela
dobleDSYMBOLsonmarcasregistra-
dasdeDolbyLaboratories.
Guíadereferenciageneralparaloscontroles
1. Botón POWER
Oprimaparaencender/apagarelreproductor.
2. Botón RETURN
Oprimapararegresaralapantallaanterior.
3. Botón Audio
Oprima para seleccionar la modalidad de audio.
4. Botones VOLUME +/-
Oprima para ajustar el volumen.
5. BotónReverse Scan
Oprima para reproducir a alta velocidad en sentido de
retroceso.
6. Botones A, B, C, D
Sienlapantallaapareceunaopcióndemenúcodicado
porcolor,ustedpuedeapretarelbotóncodicadode
colorcorrespondiente paraseleccionar esta opción.
7. Botón NETFLIX
OprimaparateneraccesodirectoalserviciodeNetix.
8. Botón Mute
Oprima para enmudecer totalmente el sonido.
9. Botón Home
Oprimaparadeplegarelmenúdeprincipal del
reproductor.
10. Botones , , , (Cursor)
Oprimaparaseleccionaropciones oconguraciones
delosmenúsenpantalla.
Botón OK/ENTER
Oprimaparaconrmaroseleccionarítemesdelmenú.
11. BotónSubtitle
Oprimaparadeplegarelmenúdesubtítulo.
12. BotónPlay/Pause
Oprimaparadarinicioalareproducción.
Oprimaparahacerunapausaenlareproducción.
13. Botón Stop
Oprimaparadetenerlareproducción.
14. Botón Forward Scan
Oprimaparaadelantarlareproducciónaalta
velocidad.
15. Botón VUDU
Oprima para tener acceso directo al servicio de VUDU.
16. Botón Pandora
OprimaparateneraccesodirectoalserviciodePandora.
1. SensorIR(controlremoto)
2. Indicador de estado
3. EnchufeDCIN
4. Enchufesparasalidadeaudioanalógico
5. EnchufeparasalidadeVIDEOcompuesto
6. PuertoparasalidaÓPTICAdigital
7. EnchufeparasalidadeHDMI
8. EnchufeLAN
12
Accesorios
• Adaptadorde CA......................................................x1
• ControlRemoto(conlasbaterías).......................... x1
345678
CUIDADO: Peligrodeexplosiónal cambiarla
pilademaneraincorrecta.Alcambiarlaspilas,
utilicesóloelmismotipo depilaoun tipode
pilaequivalente.
Unidad
ToInstall Batteries
2.Introduzca dos pilas
tamaño AAA.
Para instalar las pilas
1.Abra la tapa del
compartimiento para
pilas.
Cambio de las pilas
Alagotarse las pilas,ladistancia de funcionamiento
delcontrol remotodisminuirá considerablemente y
deberácambiarlaspilas.
Notas:
• Cuando no vaya au sar elc ontrol remoto por un
períodoprolongado,retirelapilaparaevitareldaño
queproduce la corrosióna causa delderrame del
líquidodelapila.
• Nomezclepilasantiguasy pilasnuevas.Nomezcle
pilasALCALINAS,con pilas estándar(CARBONO Y
ZINC)niconpilasrecargables(NÍQUEL-CADMIO)
• Retiresiemprelaspilastanprontocomoseagoten.
• Laspilasagotadaspuedenderramarellíquidodesu
interior y dañar seriamente el control remoto.
• ADVERTENCIA:no desechelaspilasenelfuego,ya
quelaspilaspuedenexplotaroderramar ellíquido
de su interior.
AV receiver/amplifier
OPTICALIN
1
2
3
A. Uso con cable de HDMI (para una conexión óptima)
ConecteelcabledeHDMI(novieneincluido)alenchufeHDMIOUTdelreproductoryalenchufeHDMIINdesutelevisor.
A. Uso de un cable óptico para audio
digital (para una conexión óptima)
B.Uso de un cable para audio analógico
Conexiónauntelevisor
Conexiónaunequipodesonido
Conexiónasured
B. Usandoun cable para A/V
Conecte los conectores amarillos del cable
deA/V(novieneincluido)al enchufeVIDEO
desu reproductory alenchufe VIDEOINde
su telev isor. Conec te los co necto res rojo
yblanco a losenchufes AUDIOOUT de su
reproductoreyalosenchufes L/RAUDIOIN
de su televisor.
Notas:
Noinclineelconectoralinser tarloenelenchufeHDMI,y• asegúresedeque lasformas delenchufe ydel conector
seaniguales.
AlusaruntelevisornocompatibleconHDCP,laimagenno• severácorrectamenteenlapantalla.
Elcable HDMI transmiteseñales de audioy video.Si desea usarlos parlantes• deltelevisor,ustednonecesitahacer conexionesadicionales,siestáusando un
cableparaHDMI.
Sureproductorpuedeconectarsealareddesuhogar:
ConectandouncabledeEthernetalenchufeLANubicadoenlaparteposteriordelreproductoryaunconcentradordered• concablejoounenrutador.Elusodeunaredconcablejobrindaelmejorrendimientoposible,yaquelosdispositivos
conectadosseconectandirectamenteala redynoquedanexpuestosala interferenciadelasradiofrecuencias.
ConectandoelreproductoralareddeWi-Fi.•
Conecteuncableópticoparaaudiodigital(novieneincluido)
alenchufeOPTICALOUTPUTdesu reproductoryalenchufe
OPTICALINPUTdesureceptordeAVodesuamplicador.
Conecte un cable de audio ( no viene incluido) a los
enchufesrojoy blancoAUDIOOUT desu reproductor
ya losenchufes AUDIOIN de sureceptor deAV ode
su amplificador.
AVo de su amplificador
5
4Encendidoy
conguracióninicial
Opcionesdeconguracióny
entretenimiento
A.Conexiónde su reproductor a un
enrutador con cable
Notas:
NoconecteuncableparateléfonomodularalenchufeLAN.•
Alenchufarodesenchufarelcable,tomeelconectorporelextremodeéste.Aldesenchufar,notireelcable.Oprima•
haciaabajolalengüetadebloqueoysaquefueradelenchufeelconector.
B. Conexión de su reproductor a un punto de acceso o enrutador inalámbrico
Sureproduc tortiene incorporado un dispositivo de Wi-Fiy una antena;por consiguiente, noes necesaria una
conexiónfísicaaunenrutador inalámbrico.Pongaelreproductordentrodelrangodealcance suredinalámbrica.
Nota:Noponga objetossobre elreproductor,
yaque estopuede interferiren latransmisión
deseñales inalámbricaso hacerque serecali-
enteel reproductor.
A. Funcionamientodel control remoto
Abralatapaeintroduzcalaspilas(2pilasAAA)segúnlapolaridadindicadadentrodelcompartimientoparapilasdel
controlremoto.Parausarlo,apunteconelcontrolremotoendirecciónalsensorremotoubicadoenlapartefrontal
delreproductor.Porfavor,asegúresedequelapartefrontaldelreproductornoseencuentreobstruida.Noexpongael
sensorremotodesureproductorafuentespotentesdeluz,talescomolaluzdirectadelsoluotrotipodeiluminación,
yaquealhaceresto,esposiblequeustednopuedahacerfuncionarsureproductorusandoelcontrolremoto.
B. Encendidoy configuración básica
1.Unavezterminedehacertodaslasconexiones,conecteeladaptadordecorrientealreproductor.
2.Sielreproductornoseenciendeautom icamenteluegodediez segundos,oprimaenelcontrolremotopara
encender el reproductor.
3.Encie nda su te lev iso r. Ase gúr ese de q ue s u te lev iso r es té p ues to b ajo la f uen te d e ent rad a a l a
cualhaya conectado elreproductor.(Para másinformación, leael manual delusuario del televisor).
SieltelevisorestconectadopormediodeuncabledeHDMI,espereunmomentoparaqueaparezcalapantallainicial.
4.Elreproductormostraráunapantalladeconguraciónbásicaqueloguiaráatravésdelospasosdeconguración
inicial.
Elmenú de principalincluye las opcionesde Settings & Entertainment (configuración y entretenimiento).
Oprima , , , paradestacarunaopción,oprimaOK/ENTERparaconrmarsuselecciónyconguración,oprima
pararegresaralmenúanterior.
Settings: use para defini r las configura ciones básic as
segúnsupreferencia.Paravolveraunapantallaanterior,
oprima .
Entertainment: Estaopción le daacceso a varias
aplicacionesyservicios.Puedequealgunosdelosservicios
exijanunidenticadordeiniciodesesiónyunacontraseña.
Algunosservicios pueden requerir subscripción.El
reproductorlemostraráinstruccionesenpantalla,sifuera
necesarioingresarun identicadorde iniciodesesión y
una contraseña.
S-1 S-2 S-5
Rojo Rojo
Blanco Blanco
C. Estado de la conexión
Pararevisarelestadodelaconexiónasured,seleccionelaopcióndeconguración“Settings”delmenúprincipal,
yluegoseleccioneNetwork->NetworkTest.
El control remoto no funciona correctamente
Reviselosiguiente:
• Quelaspilasesténpuestascorrectamente.
• Quelaspilasesténcargadas.
• Queelcontrolremotoestéapuntandodirectamenteendirecciónalsensorremotodelreproductor.
• Elcontrolremotoestus醤dosedemasiadolejosdelreproductor.
• Quenadaestéobstruyendoelsensorremoto(localizadoenlapartefrontaldelreproductor).
Cambielaresoluciónparaqueéstasea la misma quela
resolucióndesutelevisor
Los servicios para descargas instantáneas de videos (tales como YouTube™,etc.) frecuentemente se
detienen,hacen una pausa o se registran en la “memoria intermedia”durante la reproducción.
• SiestáusandounaredWi-Fi,puedequeelpuntodeaccesodelaredinalámbricaWi-Fi(porejemplo,elenrutador
inalámbrico)estémuylejosdel reproductor.Siesposible,intenteponerelenrutadorparaWi-Fimás cercadel
reproductor,ouseunaconexiónparaethernet,oconsulteaunexpertoparasabercómopuedemejorarenancho
debandadelareddesuhogar.
• Puedequelavelocidaddesuserviciodebandaanchanosealosucientementerápidaparatransmitirservicios
devideo.Deserasí,esposiblequesuproveedordeserviciosdeInternet(ISP)tengaotrosplanesdeservicioque
ofrezcanunanchodebandademayormagnitud.
S-6
El reproductor no funciona
• DesenchufeeladaptadordeCA,esperealmenosdiezsegundos,luegovuelvaaenchufarlo.
• Asegúresedeque eladaptadorde CAesté insertadormemente eneltomacorriente delreproductor yenel
enchufedeCA.Elindicadordecorrienteazuldelreproductorsedebieraencenderdentrodediezsegundos,una
vezsehayaenchufadoeladaptadordeCAdelreproductor.
• Lealassugerenciasqueseindicanacontinuaciónpararesolverproblemas.
Garantíalimitada
AVCMULTIMEDIA (“AVC”)ofrecelasiguientegarantíalimitada,lacualseextiendealcomprador-consumidororiginalyestá
limitada al uso no comercial del producto.
Garantía de repuestos y reparaciones por Uno Año
Losprodu ctosAV C que sehayan comprad oen los Estados Unidos tienen unag arantía deuno año ap artir dela fecha
originalde compra encaso de presentar defectosen los materiales oen su fabricación.Si launidad no see ncuentraen
conformidada estagarantía,nosotros repararemosel producto usandopiezas y productosnuevos yreparados,según lo
estime AVCúnicamente.
Duranteunperíododeunoañoapartirdelafechaefectivadelagarantía,AVCproporcionará,cuandoseanecesario,manode
obradereparaciónpara reparardefectosde fabricaciónensu centrodereparaciones designado.Paraobtenerlosservicios
delagarantía enlos EstadosUnidos,usted deberállamar primeroa nuestroCentro de Servicio para el Cliente al 1-800-
506-5746 o 1-877-252-6873 durante las horas que se indican en el recuadro más abajo.La decisión desi bien usted
estáfacultado pararecibir estos serviciosla tomará laocina de Respaldoal Cliente deAV C. POR FAVOR NO DEVUELVA
ESTA UNIDAD A AVC SIN CONTAR CON AUTORIZACIÓN PREVIA.En los centrosdesignados para reparacionesy porun
períododeunoañoa contardelafechade efectividaddelagarantía,AVC utilizarápiezas oproductosderecambionuevos
orefabricadosalefectuar reparacionesdeproductosopiezas defectuosas.Dichosproductosopiezas derecambiocuentan
conunagarantíaadicionaldeuno añoacontardelafecha delcambioodela reparación.Parapoderhacerlasreparaciones
quesean necesarias,elcliente deberáenviar launidad al centrode reparacionesque sele indiqueal contactarse conla
ocinaderespaldoalcliente.Elclienteesresponsableportodoslosgastosdeenvíoalcentrodereparaciones.
Instrucciones para envolver la unidad y parasu envío
Cuandousted envíe elproduc toal centro dereparacione sde AVC ,usted debeutil izarla caja decar tóny el materialde
embalajeoriginalountipodeembalajeequivalente,segúnloestablezcaAVC.
GARANTÍALIMITADA
Su responsabilidad
1) Usteddebeguardar laboletade ventaoriginalcomo pruebade sucompra.
2) Estasgarantías sóloson efectivassi el productoha sido compradoy puestoa funcionar enEstados Unidoso Canadá.
3) Lasga rantías sólo se extienden en caso de materiale so de fabricaci ónde fectuosa y nose ext iende apro ductos o
piezasque se hayanperdido o tiradoa la basura,ni aproduc toso piezas dañadasa causa del maluso de launidad,
deaccidentes,delfuncionamientoomantenimientoinapropiados delequipo,asícomotampocoencaso deno
haberseguidolasinstruccionesqueacompañanesteproducto,odehabermodificadooalterado elproducto
sinlaautorizacióndeAVC,odehaberquitadoocambiadoelnúmerodeseriedelaspiezasodelproducto.
Fuera de la Garantía
Importante:
Guarde su “Boleta de venta” como prueba de su compra.
N° de modelo ................................................................................. Nombre del producto .............................................................................
Tipo de aparato ............................................................................. N° de serie .................................................................................................
N° de recibo .................................................................................... Fecha de compra ....................................................................................
Nombre del comerciante ....................................................................................
PARA SERVICIO Y REPARACIÓN, POR FAVORVISTITA www.RCAav.com
Estas especificaciones y la apariencia externa de este aparato están sujetas a cambio sin previo aviso.
Encasoquesuproductonecesiteserreparadoyqueel períododegarantíayahayaexpirado,sírvasecontactarse con el
CentrodeAyudaalClienteenelfono1-800-506-5746, 1-877-252-6873 o www.RCAav.com
Hora:Lunes–Jueves: 9am–7pm, Viernes: 9am–5pm, Sábado: 9am–MEDIODíA Tiempo del Este.
Importante:Ustedse haceresponsablede cualesquiergastos porrazonesde transporte,envíooseguro relacionados
conladevolucióndelproductoalCentrodeDevolucionesdeProductos.
©2011AVCMultimediaMarca(s)®Registrada(s) Impresoen China
Todaslasgarantías implícitassegún laley deun estado,incluidaslasgarantías implícitasde comercializacióny deaptitud
paraunpropósitoespecíco,estánlimitadasexpresamentealaduracióndelagarantía limitadaexpuestamásarriba.Conla
excepcióndecualesquieragarantías implícitassegúnla leydeun estado,queporlapresente quedanlimitadas,lagarantía
precedentetienecarácterdeexclusivaypredomina sobrelasdemásgarantías,cauciones,acuerdosyobligacionessimilares
delvendedorodelfabricanteconrespectoala reparaciónoalreemplazodecualesquierpartes delaparato.AVCenningún
casoseharáresponsablededaños fortuitosnidedañosresultantesde cualquierotrasituaciónqueno sealaindicadaenla
garantíalimitadadeesteaparato.
Ningunapersona,agente,distribuidor,comercianteniempresa estáautorizada paracambiar,modificaro extenderlos
términosde estasgarantías en ningunamanera,cualquiera queésta fuese.El tiempodentro del cualse debeiniciar una
acciónparahacer cumplircualquier obligaciónde AVC que surja en virtud de lagaran tíao de cualquier estatuto ol ey
deEstados Unidoso decualesquier desus estados,quedaaquí limitadoa unoaño acontar dela fechade adquisición
delproducto.Estarestricciónnoseaplicaalasgarantíasimplícitasplanteadasenvirtuddelaleydeunestado.
Estagarantía lebrinda derechos legalesespecícos ypuede que ustedtambién tengaotros derechos quepueden variar,
dependiendodelestado.Algunos estadosno ponenlímite encuanto ala duraciónde unagarantía implícita,acuándo se
puedetomar acción,oa la exclusióno limitaciónde losdaños fortuitos oconsiguientes,de modoque esposible que las
disposiciones anteriores no sean aplicables en su caso.
Paramayorinformación acercadeotros productosy servicios,sírvasecontactar nuestrapágina deinternet enlasiguiente
dirección:www.RCAav.com
¿Necesita más ayuda? Por favor, o visite nuestra página de ayuda en internet
http://www.RCAav.com
ConecteuncabledeEthernet alenchufeLAN
ubicadoenlapartedeatrásdesureproductory
aunenchufeparaEthernetdeunconcentrador
de red o enrutador para banda ancha.
Durantelaconguracióndesureproductorpara
accederalared,puedequetenga queingresar
unacontraseña,silaredtienelacaracterísticade
seguridadactivada.
Opciones de configuración
Network(Red)-->Info(Información)-->QuickSetup
(Conguraciónrápida)-->Display(Visualizador)
-->Audio(Audio)-->Language(Idioma)-->System
(Sistema)
S-3 S-4
LANWANLAN
12345
Internet
LAN cable LAN cable
Networking equipment
(modem, etc.)
Hub or broadband router
Equiposdered
(módem,etc.)
Concentrador de redo enrutador de banda ancha
CableparalaredlocalLAN
Cablepara la
redlocalLAN
Blanco Blanco
Rojo RojoAmarillo Amarillo
Unidad
Informaciónimportantereferentealosserviciosdelared
Todainformación,datos,documentos,comunicaciones,descargas,archivos,texto,imágenes,fotografías,gráca,
videos,webcasts,publicaciones,herramientas,recursos,software,códigos,programas,applets,widgets,aplicaciones,
productosy otro contenido(“Contenido”) y todoslos servicios y ofertas(“Ser vicios”)ofrecidos o puestosa
disposiciónsuya por oa través decualquier tercero (cadauno de ellos un“Proveedorde Servicios”) esde
responsabilidadúnicadelproveedordeserviciosdequienéste/éstasehayaoriginado.
LadisponibilidadyelaccesoalContenidoyalosServiciosprovistosporelProveedordeServiciospormediode
esteaparato,quedansujetosacambioencualquiermomento,ysinavisoprevio,incluyendo,demaneraenunciativa
masnolimitativa,lasuspensión,elretirooel cesedelatotalidado deunapartedel ContenidoodelosSer vicios.
Encaso quetuviera cualquier inquietudo problemarelacionado con elContenido ocon los Servicios,usted
puedever lapágina webdel Proveedorde Serviciospara encontrarahí lainformación másac tualizada.La
empresa AVCMultimedianoestáexpuestaniesresponsabledelserviciodeatenciónalclienterelacionadoal
ContenidoyalosServicios.CualquierpreguntaosolicituddeserviciorelacionadaalContenidooalosServicios
debierahacersedirectamentealProveedordelServiciooContenidorespectivo.
Cabenotar que AVC Multimediano esresponsable de ningún servicio proporcionadopor el Proveedorde
Serviciosni de ningún cambio,retiro ocese de tales servicios.Asimismo, AVCMultimedia no garantiza la
disponibilidadoelaccesoadichoContenidooServicio.
Precauciones para su seguridad
ADVERTENCIA:
PARAREDUCIRELRIESGODESUFRIRDESCARGASELÉCTRICAS,NORETIRELACUBIERTA(NILAPARTEPOSTERIOR).
NOHAYPIEZAS DEREPUESTO PARAEL USUARIODENTRO DELAPARATO.DERIVE CUALQUIERREPARACIÓNA
PERSONALCALIFICADO.
ADVERTENCIA:
PARAEVITARINCENDIOSODESCARGASELÉCTRICAS,NOEXPONGAESTEAPARATOALALLUVIANIALAHUMEDAD.NOPONGA
OBJETOSQUECONTENGANLÍQUIDOSOBRELAUNIDADNICERCADEELLA.
Esteaparatocumple con laParte 15de lasNormas FCC.Elfuncionamiento dela unidadestá sujetoa lasdos condiciones
siguientes:(1)Esteaparatonopuedeprovocarinterferenciasperjudicialesy(2)esteaparatodebeaceptartodainterferencia
querecibainclusoaquellasqueprovoquenunfuncionamientoincorrecto.
Esteaparatoha sidopuesto aprueba yseha vericado quecumple conlasrestricciones delos equiposdigitalesclase B,
encon formidadcon el Capítulo15 delR eglamentode laFCC.Dichas restricciones estándiseñadas para proporcionarla
debidaprotección contrainterferencia dañinaen lasinstalaciones reside nciales.Esteequipo genera,usa ypuede irradiar
energíade frecuenciasradialesy,deno instalarseyusarse segúnlasinstrucciones,puede causarinterferenciadañina para
las comunicaciones de radio.
Noobstante,no haygarantía de queen una instalaciónespecí ca nose produzca interferencia.Si este equipocausara
interferenciaenlarecepcióndelaradioolatelevisión(loquersepuededeterminarencendiendoyapagandoelequipo),le
sugerimosalusuarioqueintentecorregirdichainterferencia,adoptandounaomásdelassiguientesmedidas:
• Reorienteoubiqueenotrolugarlaantenaderecepción.
• Aumenteladistanciaqueseparaalequipodelreceptor.
• Conecteelequipoaunenchufedepared queseencuentreenuncircuitodiferenteadonde tengaconectadoelreceptor.
• Pidaayudaalvendedoroauntécnicoderadiosytelevisoresconexperiencia.
ADVERTENCIA:loscambios omodi cacionesque sehagan a estaunidad,queno esténexpresamente aprobadospor la
parteresponsable dehacercumplir lasreglas defuncionamiento deesteaparato,pueden anularla autoridaddelusuari o
paraoperaresteequipo.
Declaración de la FCC sobre la exposición a la radiación de radiofrecuencias:
Este equipo cumple con los límites de exposición a radiación establecidos por la FCC para ambientes no contro-
lados.Esteequipo debe serinstalado y operadoa una distanciamínima de 20cms entre elradiador y sucuerpo.El usu-
ario nal debe seguir las instrucciones especícas de operaciónpara satisfacer el cumplimiento con la exposición a las
radiofrecuencias.Estetransmisornodebe estarubicado niseroperado enconjuntocon ningunaotraantena otransmisor.
CUIDADO: LasregulacionesdelaFCCydelaFAAprohibenlaoperaciónaéreadeaparatosderadiofrecuenciainalámbri-
cos,porquesusseñalespodríaninterferirconinstrumentoscríticosdelaaeronave.
18
29
10
11
12
13
14
15
16
3
4
5
6
7
Table of contents
Languages:
Other RCA Media Player manuals

RCA
RCA M4001 - 1 GB Digital Player User manual

RCA
RCA DSB7788W User manual

RCA
RCA LYRA X3000 User manual

RCA
RCA LYRA X3000 User manual

RCA
RCA Scenium DRS7000N User manual

RCA
RCA Lyra rd2780 User manual

RCA
RCA LYRA X3000 User manual

RCA
RCA DSB772WE User manual

RCA
RCA M2001 User manual

RCA
RCA DSB778W User manual