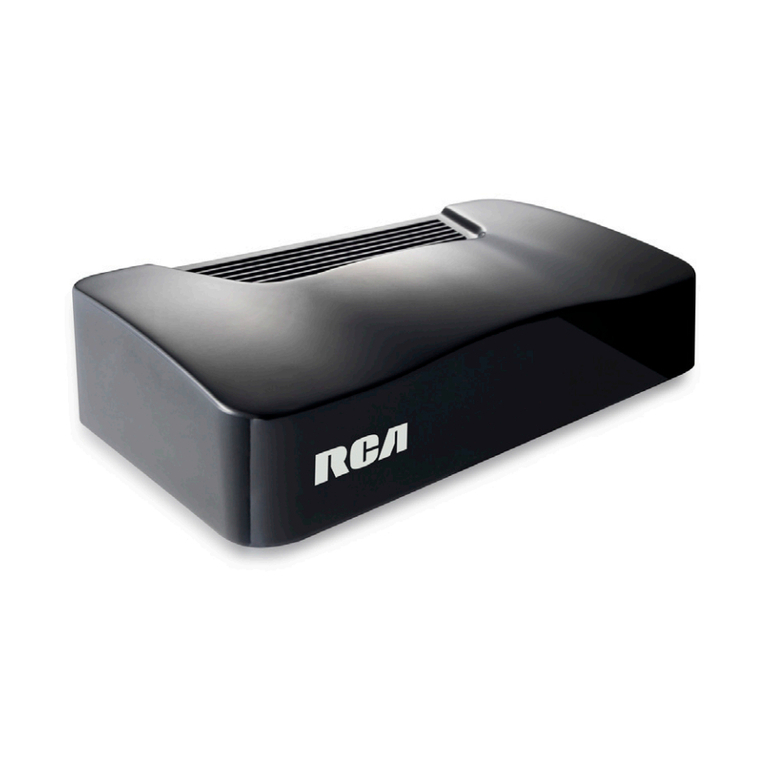
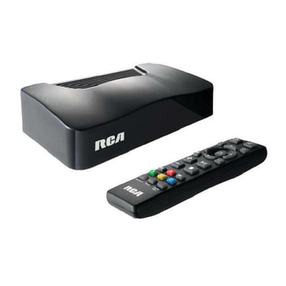
RCA DSB772WE User manual

user manual
DSB772WE
www.RCAav.com
General Controls Reference Guide
Unit
Wi-Fi Streaming Media Player
with 1080p HDMI output
It's important to read this instruction prior to using your new product for the first time.
EN - 1 EN - 2 EN - 3 EN - 4 EN - 6
To Change Remote Battery
2.Inser t one
CR2032
(3V) size
battery.
1.Open the
battery
door.
Take out the plastic sheet
before
operating
the Remote
Control.
EN - 5
Safety Precautions
This device complieswith Part 15 of the FCC Rules. Operation is subject to the following two conditions:(1) This
devicemay not cause harmful interference, and(2) this device must accept any interference received,including
interference that may cause undesired operation.
This equipment has been tested and found to comply with the limits for a Class B digital device,pursuant to
Part 15 of FCC Rules.These limits are designed to provide reasonable protection against harmful interference
in a residential installation.This equipment generates, uses,and can radiate radio frequency energy and,if not
installed and used in accordancewith the instruc tions,may cause harmful interference to radio communications.
However,thereis no guarantee that interferencewill not occur in a particular installation.If this equipmentdoes
causeharmful interference to radio or televisionreception, which can be determinedby turning the equipment
off and on,the user is encouraged to try to correct the inter ferenceby one or more of the following measures:
• Reorientorrelocatethereceivingantenna.
• Increasetheseparationbetweentheequipmentandreceiver.
• Connecttheequipmentintoanoutletonacircuitdifferentfromthattowhichthereceiverisconnected.
• Consultthedealeroranexperiencedradio/TVtechnicianforhelp.
WARNING:Changesor modicationsnotexpresslyapprovedbythepartyresponsibleforcompliancecould
void the user’s authority to operate the equipment.
HDMI, the HDMI logo and High-
Definition Multimedia Interface are
trademarksorregisteredtrademarks
of HDMI Licensing,LLC.
Manufactured under licensefrom
Dolby Laboratories.“Dolby” and
the double-D symbol are trade-
marks of Dolby Laboratories.
Thelightningflashwith anarrowheadsymbol,withintheequilateral
triangle,isintended toalert theuser tothe presenceof uninsulated
“dangerous voltage”within the product’s enclosure that may be
of sufficient magnitude to cause an electric shock.
WARNING:
TOREDUCETHE RISKOF ELECTRICSHOCK,DO NOTREMOVECOVER (ORBACK).NOUSER-SERVICEABLE
PARTSINSIDE. REFER SERVICING TO QUALIFIED SERVICE PERSONNEL.
WARNING:
TO PREVENT FIRE OR SHOCK HAZARD,DO NOT EXPOSE THIS APPLIANCE TO RAIN OR MOISTURE.DO NOT
PLACE OBJECTS FILLED WITH LIQUIDS ON OR NEARTHIS UNIT.
RISK OF ELECTRIC SHOCK
DO NOT OPEN
CAUTION
Theexclamationpointwithintheequilateraltriangleisintended
to alert the user to the presence of important operating and
maintenance (servicing) instructions in this owner’s manual.
FCC RF Radiation Exposure Statement :
Thisequipmentcomplieswith FCCradiationexposurelimits setforthforan uncontrolledenvironment.This
equipment should be installed and operated with minimum distance 20 cm between the radiator and your
body.Endusersmust followthe specicoperating instructionsfor satisfyingRF exposurecompliance.This
transmitter must not be co-located or operating in conjunction with any other antenna or transmitter.
CAUTION: Regulations of the FCC and FAA prohibitairbor ne operationof radio-frequenc y wirelessdevices
because their signals could interfere with critical aircraft instruments.
1. IR (remote control) sensor
2. Status indicator
3. DC IN power jack
4. Analog AUDIO OUT jacks
5. Composite VIDEO OUT jack
6. HDMI OUT jack
34
56
12
1. POWER button
Presstoturnon/offtheplayer.
2. RETURN button
Pressto return to the previous screen.
3. Audio button
Pressto select the audio mode.
4. VOLUME +/- buttons
Pressto adjust the volume.
5. ReverseScan button
Pressto fast reverse playback.
6. A, B,C, D buttons
If a color-coded menu option appears on your
screen, you can press the corresponding color-
coded button to select this option.
7. NETFLIX button
PresstoaccessNetixservicedirectly.
8. Mute button
Pressto mute all sound.
9. Home button
Pressto display the main menu of the player.
10. , , , (Cursor) buttons
Press to select items or settings in on-screen
menus.
OK/ENTERbutton
Pressto confirm or select menu items.
11. Subtitle button
Press to display the subtitle menu.
12. Play/ Pause button
Press to start playback.
Press to pause playback.
13. Stop button
Press to stop playback.
14. Forward Scan button
Press to fast forward playback.
15. VUDU button
Press to access VUDU service directly.
16. Pandora button
Press to access Pandora service directly.
Accessories
• ACAdapter.................................................................x1
• RemoteControl (withbatter y)............................. x1
CAUTION: Dangerofexplosionifbatter yis
incorrectly replaced. Replace only with the
same or equivalent type.
Remote Control
Battery Replacement
When th e batte ry bec ome wea k, the ope ratin g
distance of the remote control i s greatly reduced
and you will need to replace them.
Notes:
• Iftheremotecontrolisnotgoingtobeusedfora
long time,remove the battery.
WARNING:
• Do notdispose ofthe batteryin are or it may
leakand/orexplode.
• Batteriesshouldnotbeexposedtoexcessiveheat
such as sunshine,fire or the like.
2
8
9
10
11
12
13
14
15
16
3
4
5
6
7
1
Re
m
ov
e
b
e
f
or
e
u
s
e
Connect an audio cable (not included) to the red and white AUDIOOUT jacks on your player and to the AUDIO
IN jacks on your AVreceiver or amplifier.
1
2
A. Using an HDMI cable (for best connection)
Connect an HDMI cable (not included) to the HDMI OUT jack on your player and to the HDMI IN jack on your
TV.
Connecting to a TV
Connecting to an Audio System
B. Usingan A/V c able
Connectthe yellow connectorson an A/Vcable (not included) to the VIDEO jack on your player and the
VIDEO IN jack on your TV.Connect the red and white connectors to the AUDIO OUT jacks on your player and
L/RAUDIOINjacksonyourTV.
Notes:
Do not tilt the connector when inserting it into the HDMI jack, and make sure the shapes of the jack and•
the connector are matched.
HDMI IN
High
Definition
TV
4Connecting to Your Network
Yourplayer can be connected to your home network by connecting the player to your Wi-Fi network.
Modem Cable
Modem Port
Wireless access point
A. Connecting your player to a wireless access point or router
B. Connection Status
To check yournet workconnec tion status,select the Settings Option from Main Menu, then select
Network -> Network Test.
Note:
Do not place anything on the top of your player.Placing objects on the top of your player may interfere with
the wireless signal,or cause the player to overheat.
Yourplayer has an integrated Wi-Fi device
and an tenn a. No phys ical c onne cti on
to the wireless router is necessary. Place
your player within range of your wireless
networ k. During co nfigur ation of y our
player for network access, you may need
to enter a password if your network has
security turned on.
Unit
3Powering up & Initial setup
A. Operating with the remote control
Touse,point the remotecontrol at the remotesensor locatedon the front of the player.Please ensure the frontof
theplayerisnotobstructed.Donotexposetheremotesensorofyourplayertoastronglightsourcesuchasdirect
sunlight or other illumination.If you do so, you may not be able to operate your player via the remotecontrol.
B. Starting up & Basic setup
1. After all connections are complete, connect the power adaptor to your player.
2. If Player doesn’t turn on automatically within ten seconds,press on the remotecontrol to turn on your
player.
3. Turn on your TV.Ensure your TV is switched to the input source that you’veconnected the player. (For details,
refer to TV’s user manual).
If the TV is connected by an HDMI cable, please allow a few moments for the opening screen todisplay.
4. The Player will display a basic setup screen which will guide you though initial setup.
AV receiver/amplifier
AUDIO IN
RL
(White) (Red)
(White)
(Red)
(Yellow)
AUDIO IN
RL
VIDEO IN
Standard
Definition
TV
(White)(White) (Red)(Red)
(Yellow)
When using non-HDCP compatible TV,•
the image will not display properly.
An HDMI cable carries both video and•
audio s igna ls. If you w ant to us e TV
speakers, you do not need to make an
additional audio connection if you are
using an HDMI cable.
The picture noise appears“noisy” or degraded
• YourPlayermaybesettoaHDMIresolutionthat’shigherthanyourTV’s.Changetheresolutiontomatch
your TV’s resolution.
Player doesn’tdisplay video on my TV screen
• SelecttheappropriatevideoinputmodeontheTVsothepicturefromthePlayerappearsontheTVscreen.
• MakesureyourHDMIcableorRCAcableissecurelyinsertedinboththePlayerandyourTV.
• YourTVmaynotsupporttheresolutionyouhavesetonthePlayer.Changetheresolutiontomatchyour
TV’s resolution.
• Theplayer’sHDMIOUTcableisnotsecurelyconnectedtoyourplayeroryourTV.
I need to input text to manually configure log-in IDs,passwords or network settings, but I don’tsee
an on-screen keyboard
• Trypressingthe OKbutton onyour remotecontrolwhile thecursor isblinking onthe screen’sentry
field,this should bring up an on-screen keyboard.Try adjusting the frequency range and channel of your
network.
The Player has a poor or intermittentconnec tion tothe Wi-Fi access point (eg wireless router)
• Thewirelesscommunicationmaybeinterruptedfromhouseholddevicesthatareusingradiofrequencies.
Move the Player away from them.
• TheAccessPointislocatedtoofarfromthePlayer.
How can I check if my network connection is OK?
• GotothePlayer’sSettingsMenu,thenselectNetwork->NetworkTest.Thiswilltestifyouaresuccessfully
connected to your Home Network and if your broadband connection is connected to the internet.
• GotothePlayer’sEntertainmentMenu,selectVUDUMovies->MyVUDU->Info&Settings->Network
SpeedTest.Thiswilltestthespeed/performanceofyournetwork
The remote control does not workproperly
Check the following:
• Thebatteriesareinsertedcorrectly.
• Thebatteriesarefresh.
• TheremotecontrolispointeddirectlyattheremotesensorofthePlayer.
• TheremotecontrolisnotbeingusedfromtoofaradistancefromthePlayer.
• Nothingisobstructingremotesensor(locatedonfrontofthePlayer).
5Settings & Entertainment
Troubleshooting
Settings options
Network --> Info --> Quick Setup --> Display --> Audio
--> Language --> System
The main menu includes Settings & Entertainment options.Press , , , to highlight an option, press OK/
ENTER to confirm your selection and setting ,press to return to previous menu.
Streaming video services (such as YouTube™,etc.) often stop, pause or“buffer” during playback
• YourWi-FiAccess Point(eg wirelessrouter) may betoo far fromthe Player.If possible,try tolocate
yourWi-Firoutercloserto yourPlayer,orconsultanexpert onwaysto improveyourhomenetwork ’s
bandwidth.
• Yourbroadbandser vicespeed maynot be fast enoughto stream videoservices.If so,your Internet
Service Provider (ISP) may have other service plans that provide higher bandwidth.
Player does not work
• UnplugtheACpoweradapter,waitatleasttenseconds,thenplugitbackin.
• EnsuretheACadapter issecurelyinser tedintothe Player’spowerjackand anACoutlet.ThePlayer’s
green power indicator should turn on within ten seconds of the Player’sAC Adapter being plugged in.
• Seetroubleshootingtipsbelow.
My Wi-Finetwork is not displayed on the “Network List”
• TheaccesspointorwirelessLANroutermaynotbroadcastitsSSID.
- Manually enter your access point’s SSID in the Network Settings Menu of the Player.
- Or set your access point to broadcast its SSID.
• YourWi-Finetworkmay not beset tothe frequency rangeor rangeof channels thatthis Playercan
support.Tryadjustingthefrequencyrangeand/orchannelofyournetwork.
The Player has“frozen”or stopped working
• ToresetthePlayer,unplugtheACpoweradapter,waitatleasttenseconds,andthenplugitbackin.
• MakesureyourRemoteControlisfunctioningproperly.
My Player seems to shut down by itself,is there a problem?
• No,inordertosaveyoupower,thePlayerwillshutdownafter prolongedperiodsoninactivity -don’t
worry, it won’t shut down while you’re using it.” Note: you can disable this feature, or adjust the Auto
Power Down Duration by going to Settings -> System -> Auto Power Down
Need More Help?
Please visit online help at http://www.RCAav.com
Settings: Use to d efin e your b asi c sett ings t o your
preference.To return to a previous screen,press .
Important Information Relating to Network Services
All information, data, documents, communications, downloads, les, text, images, photographs,
graphics, videos, webcasts, publications,tools, resources, software, code, programs, applets, widgets,
applications, products and other content (“Content”)and all ser vices and offerings (“Services”) provided
or made available by or through any third party (each a“Ser vice Provider”)is the sole responsibilit y of
the Service Provider from whom it originated.
The availability of and access to Content and Services furnished by the Service Provider through this
device are subject to change at any time,without prior notice, including,but not limited to the suspension,
removal or cessation of all or any part of the Content or Services.
Should you have any inquiry or problem related to the Contentor Ser vices,you may refer to the Service
Provider’swebsite for the most up-to-date information. AVCMultimedia is neither responsible nor liable
for customer service related to the Content and Services. Any question or request for service relating
to the Content or Services should be made directly to the respective Content and Service Providers.
Please note that AVCMultimedia is not responsible for any Services provided by the Service Provider
or any changes to, removal of, or cessation of such Services and does not wa rrant or guaranty the
availability of or access to such Content or Services.
Entertainment:This gives you accessto many applications
and services. Some of the services may require a log-in
ID and pass word, some of the se rvices m ay require a
subscription. The Player will provide you with on-screen
instructions if a log-in ID or password is required.
Limited warranty
AVCMULTIMEDIA (“AVC”) makesthefollowinglimitedwarranty.Thislimitedwarrantyextendtotheoriginal
consumer purchaser and is limited to non-commercial use of the product.
One Year Parts & Labor Warranty
AVC products purchased in the United States are warranted to be free from defects in materials or
workmanship for a period of one year from the date of their original retail purchase.If the unit fails to conform to
this warranty,we will service the product using new or refurbished parts and products, at AVC ’s sole discretion.
During a period of one year from the effective warranty date, AVC will provide,when needed, service labor
to repair a manufacturing defect at its designated Service Center.To obtain warranty service in the United
States, you must first call our Customer Support Center at 1-800-506-5746 or 1-877-252-6873,during
the hours listed in the box below. The determination of service will be made by AVC Customer Support.
PLEASE DO NOT RETURNYOUR UNIT TO AVCWITHOUT PRIOR AUTHORIZATION. New or remanufactured
replacements for defective parts or products will be used for repairs by AVC at its designated Service Center
for one year from the effec tive warranty date. Such replac ement parts or pro ducts are warrante d for an
additional one year from the date of repair or replacement.The Customer will be required to ship the unit to
the Service Center indicated at the time Customer Support is contacted to make the necessary repairs. The
customer is responsible for all transportation charges to the service facility.
Packaging and Shipping Instruction
When you send the product to the AVC service facilityyou must usethe original cartonbox and packing
material or an equivalent as designated by AVC.
LIMITED WARRANTY
YourResponsibility
1) You must retain the original sale receipt toprovide proof of purchase.
2) These warranties are effective only if the product is purchased and operated in the U.S.A.or Canada.
3)Warran ties extend only to defects in materi alo rwor kmanship, and don otex tend toa nypr oduct or
parts which have b een lost or discard ed, or damage to product or par ts caused by misu se, accident,
improper operation or ma intenance, or use in violation of instru ctions provided with t he product, or
to product which has been altered or modified without authorization of AVC, or to products or parts
thereof which have had the serial number removed or changed.
Out of Warranty
Important:
Also keep your "Bill of Sale" as proof of purchase.
Model no. .................................................................................... Product name ...................... ......................... ........................
Type of set ................................................................................... Serial no. ....................................................................................
Invoice no..................................................................................... Date purchased ....................... ..............................................
Dealer name ..............................................................................................................................................................................................
FOR SERVICE AND REPAIR,PLEASE VISIT www.RCAav.com
Specificationsandexternal appearanceare subjectto changewithoutnotice.
Inthe eventyour productrequires repairafter thelimited warrantyperiod has expired,pleasecontact
our Customer Support Center at 1-800-506-5746,1-877-252-6873 or www.RCAav.com
Hours: Monday–Thursday:9am–7pm, Friday: 9am–5pm, Saturday: 9am–NOON Eastern time.Impor tant:
You are responsible forany transpor tation,shipping or insurance relative to the return of product to our
Product Returns Center.
All warranties implied by state law,including the implied warranties of merchantability and fitness for a particular
purpose,areexpressly limited tothe durationof the limitedwarranties set forthabove.With theexception
ofanywarranties impliedby statelaw ashereby limited,theforegoing warrantyis exclusiveandin lieuof all
other warranties, guarantees,agreements and similar obligations of manufacturer or seller with respect to the
repair or replacement of any parts. In no event shall AVC be liable for consequential or incidental damages.
Noperson,agent,distributor,dealerorcompanyisauthorizedtochange,modifyorextendthetermsofthese
warranties in any manner whatsoever.The time within action must be commenced to enforce any obligation
of AVC arising under the warranty or under any statute, or law of the United States or any state thereof, is
hereby limited to one year from the date of purchase.This limitation does not apply to implied warranties
arising under state law.
This warranty gives you specific legal rights and you mayalso have other rights, which may vary,from state to state.
Some states do not allow limitation on how long an implied warranty lasts,when an ac tion maybe brought, or
theexclusionorlimitationofincidentalorconsequentialdamages,sotheaboveprovisionsmaynotapplytoyou.
For more information on other products and services,please visit our web site at www.RCAav.com
©2011 AVCM ultimedia Trademark(s) ® Registered Printed in China
811-772291W010

Antes de USAR el control
remoto,
retire la
lámina de
PLÁSTICO.
Reproductor Wi-Fi de medios de
comunicación audiovisual por Internet
con salida HDMI de 1080p
manual de usuario
DSB772WE
www.RCAav.com
Precauciones para su seguridad
HDMI, el logotipo HDMI y High-
Definition Multimedia Interface
sonmarcas comerciales o marcas
comercialesregistradas de HDMI
Licensing,LLC.
RISK OF ELECTRIC SHOCK
DO NOT OPEN
CAUTION
Es importante que lea estas instrucciones antes de usar este nuevo producto por primera vez.
El rayo con punta de flecha dentro del triángulo equilátero
pretende alertar al usuario de la presencia de“voltaje peligroso”
sinaislamiento en el interior de la cubier ta de protecciónde este
producto,el que puede tener la magnitud suficiente como para
provocar una descarga eléctrica.
ADVERTENCIA:
PARA REDUCIR EL RIESGO DE SUFRIR DESCARGAS ELÉCTRICAS, NO RETIRE LA CUBIERTA (NI LA PARTE
POSTERIOR). NO HAY PIEZAS DE REPUESTO PARA EL USUARIODENTRO DEL APARATO.DERIVE CUALQUIER
REPARACIÓNA PERSONAL CALIFICADO.
ADVERTENCIA:
PARAEVITAR INCENDIOS O DESCARGAS ELÉCTRICAS, NO EXPONGA ESTE APARATO A LA LLUVIA NI A LA HUMEDAD.NO
PONGA OBJETOS QUE CONTENGAN LÍQUIDO SOBRE LA UNIDAD NI CERCA DE ELLA.
Elsignodeexclamacióndentrodeltriánguloequiláteropretende
alertaral usuariode lapresencia deimportantes instruccionesde
funcionamiento y mantenimiento (reparación) en este manual
para el usuario.
Este aparato cumple conla Parte 15 de las Normas FCC. El funcionamiento de la unidad está sujeto a las dos condiciones
siguientes: (1) Este aparato no puede provo car inter fe rencias perjudic iales y (2) este aparato debe ace ptar toda
interferencia que reciba incluso aquellas que provoquen un funcionamiento incorrecto.
Este aparato ha sid o puesto a prueba y se ha verifi cado que cumple con las restricciones de los equipos digitales clase
B,en con formidad con el Capítulo 15 del Reglamento de la FCC. Dichas restricciones están diseñadas paraproporcionar
la debida protección contra interferencia dañina en las instalaciones reside nciales. Este equipo genera,usa y puede
irradiar ener gía de frecuencias radiales y,de no instalarse y usarse según las instrucciones, puede causar interferencia
dañina para las comunicaciones de radio.
No obstante,no hay garantía de que en una instalación específi ca no se produzca inte rferencia. Si este equipo causara
interferencia en la recepciónde la radio o la televisión (lo quer se puede det er minar encendiendoy ap ag and o el equipo),
le sugerimos al usuario que intent e corregir dicha interferencia,ado ptando una o más de las siguientes medidas:
• Reorienteoubiqueenotrolugarlaantenaderecepción.
• Aumenteladistanciaqueseparaalequipodelreceptor.
• Conecteelequipoaunenchufedeparedqueseencuentreenuncircuitodiferenteadondetengaconectadoelreceptor.
• Pidaayudaalvendedoroauntécnicoderadiosytelevisoresconexperiencia.
ADVERTENCIA:loscambiosomodicacionesquesehaganaestaunidad,quenoesténexpresamenteaprobadospor
la parte responsable de hacer cumplir las reglas de funcionamiento de este aparato, pueden anular la autoridad del
usuari o para operar este equipo.
Fabricado bajo la licencia de Dolby
Laboratories. “Dolby” y el símbolo
de la doble D SYMBOL son marcas
registradas de Dolby Laboratories.
S - 1
Guía de referencia general para los controles
1. Botón POWER
Oprimaparaencender/apagarelreproductor.
2. Botón RETURN
Oprima para regresar a la pantalla anterior.
3. Botón Audio
Oprima para seleccionar la modalidad de audio.
4. BotonesVOLUME +/-
Oprima para ajustar el volumen.
5. Botón Reverse Scan
Oprima para reproducir a alta velocidad en sentido
de retroceso.
6. BotonesA, B, C, D
Sienlapantallaapareceunaopcióndemenúcodificado
porcolor,ustedpuedeapretar elbotóncodificadode
color correspondientepara seleccionar esta opción.
7. BotónNETFLIX
OprimaparateneraccesodirectoalserviciodeNetix.
8. Botón Mute
Oprima para enmudecer totalmente el sonido.
9. BotónHome
Oprima para deplegar el menú de principal d el
reproductor.
10. Botones , , , (Cursor)
Oprima paraseleccionaropcioneso configuraciones
de los menús en pantalla.
Botón OK/ENTER
Oprima para confirmaro seleccionar ítemes delmenú.
11. Botón Subtitle
Oprima para deplegar el menú de subtítulo.
12. Botón Play/Pause
Oprima para dar inicio a la reproducción.
Oprima para hacer una pausa en la reproducción.
13. BotónStop
Oprima para detener la reproducción.
14. Botón Forward Scan
Oprima para adelantar la reproducción a alta
velocidad.
15. Botón VUDU
Oprima para tener accesodirecto al servicio de VUDU.
16. Botón Pandora
Oprima parateneracceso directoal serviciode Pandora.
1. Sensor IR (control remoto)
2. Indicador de estado
3. Enchufe DC IN
4. Enchufes para salida de audio analógico
5. Enchufe para salida de VIDEO compuesto
6. Enchufe para salida de HDMI
Accesorios
• Adaptadorde CA......................................................x1
• ControlRemoto (con pila)...................................... x1
Unidad
Para instalar las pilas
S - 2
34
56
12
Para cambiar las pilas
del control remoto
2.Introduzca una
pila tamaño
CR2032
(3V).
1.Abra la tapa del
compartimento
para la pila.
CUIDADO:Peligro deexplosión al cambiar
la batería por una batería incorrecta.Cambie
la baterí a por un ti po de bate ría simi lar o
equivalente.
Cambio de la pila
Al agotarse la pila, la distancia de funcionamiento
del control remoto disminuirá considerablemente y
deberá cambiar la pila.
Nota:
• Cuando no vaya a usar el control remoto por un
periodo prolongado,retire la pila.
ADVERTENCIA:
• Noarrojelaspilasalfuego,yaquepuedenexplotar
o se puede d errama r el líqui do que hay e n su
interior.
• Bateríasno se debenexponer a fuentes decalor
excesivo,comolaluzdelsol,fuegouotros.
2
8
9
10
11
12
13
14
15
16
3
4
5
6
7
1
Re
m
ov
e
b
e
f
or
e
u
s
e
S - 3 S - 4
Conecte un cable de audio ( no viene incluido) a los enchufes rojo y blanco AUDIO OUT de su reproductory a
los enchufes AUDIO IN de su receptor de AVo de su amplificador.
1
2
A. Uso con cable de HDMI (para una conexión óptima)
Conecte el cable de HDMI (no viene incluido) al enchufe HDMI OUT del reproductor y al enchufe HDMI IN
de su televisor.
Conexiónauntelevisor
Conexiónaunequipodesonido
B. Usandoun c able paraA/V
Conectelos conectoresamarillos delcable deA/V (noviene incluido) alenchufeVIDEO desu reproductor
y al enchufe VIDEOIN de su televisor.Conecte los conectores rojo y blanco a los enchufes AUDIO OUT de su
reproductoreyalosenchufesL/RAUDIOINdesutelevisor.
Notas:
No incline el conector al insertarlo en el enchufe HDMI, y asegúrese de que las formas del enchufe y del•
conector sean iguales.
HDMI IN
TV
de alta
definición
AV o de su amplificador
AUDIOIN
RL
(Blanco) (Blanco)
(Rojo) (Rojo)
Al usar un televisor no compatible•
co n HD CP, la i ma ge n n o se v er á
correctamente en la pantalla.
El cable HDMI transmite señales de•
audio y video.Si desea usar los parlantes
del televisor, usted no necesita hacer
conexionesadicionales,si está usando
un cable para HDMI.
AUDIOIN
RL
VIDEO IN
TV de
definición
estándar
(Blanco) (Blanco)
(Amarillo)(Amarillo)
(Rojo) (Rojo)
3Encendido y configuración inicial
A. Funcionamientodel control remoto
Para usarlo, apunte con el control remoto en dirección al sensor remoto ubicado en la parte frontal del
reproductor. Por favor, asegúrese de que la parte frontal del reproductor no se encuentre obstruida. No
expongael sensorremoto desu reproductor afuentes potentesde luz,talescomo la luzdirecta delsol u
otro tipo de iluminación,ya que al hacer esto, es posible que usted no pueda hacer funcionar su reproductor
usando el control remoto.
B. Encendido y configuración básica
1.Unavezterminedehacertodaslasconexiones,conecteeladaptadordecorrientealreproductor.
2. Si el reproductor no se enciende autom icamente luego de diez segundos,oprima en el control remoto
para encender el reproductor.
3. Encienda su televisor. Asegúrese de que su televisor esté puesto bajo la fuente de entrada a la cual
haya conectado el reproductor. (Para más información, lea el manual del usuario del televisor).
Siel televisorest conectado pormedio deun cablede HDMI,espereun momentopara queaparezca lapantalla inicial.
4. El reproductor mostrará una pantalla de configuración básica que lo guiará a través de los pasos de
configuración inicial.
4Conexiónasured
Su reproductor se puede conectar a la red de su hogar,conectando el reproductor a su red Wi-Fi.
A. Conexión de su reproductor a un puntode acceso o enrutador inalámbrico
Su reproductor tiene incorporado un dispositivo de Wi-Fi y una antena; por consiguiente, no es necesaria
unaconexión física aun enrutador inalámbrico.Pongael reproductordentro del rangode alcance sured
inalámbrica.Durantela configuraciónde su reproductor paraacceder a la red,puede que tengaque ingresar una
Nota: No ponga objetos sobre e l
reproductor, ya que estopuede inter ferir
en la transmisión de señales inalámbricas
o hacer que se recalienteel reproductor.
B. Estado de la conexión
Pararevisarelestadodelaconexiónasured,seleccionelaopcióndeconguración“Settings”delmenú
principal, y luego seleccione Network -> NetworkTest.
contraseña,si la red tiene la característica
de seguridad activada.
Modem Cable
Modem Port
Wireless access point
Puerto del módem
Cable del módem
Punto de acceso
inalámbrico Unidad
la imagen se ve“arenosa” o degradada
• PuedequeelreproductorestéconguradoenresoluciónparaHDMI,lacualesmásaltaquelaresolucióndesu
televisor. Cambie la resolución para que ésta sea la misma que la resolución de su televisor.
El reproductor no muestra videos en la pantalla de mi televisor
• Seleccionelamodalidaddeentradadevideoapropriadaeneltelevisordemaneraquelaimagendelreproductor
aparezca en la pantalla del televisor.
• AsegúresedequeelcabledeHDMIoRCAestéconectadormementeenelreproductoryensutelevisor.
• Puedeque sutelevisor nocuente con respaldopara laresolución conguradaen el reproductor.Cambiela
resolución para que ésta sea la misma que la resolución de su televisor.
• ElcabledeHDMIOUTdelreproductornoestábienconectadoasureproductoroasutelevisor.
Necesito ingresar texto para configurarmanualmente los identificadores de ingreso, contraseñas o
las configuraciones de red,pero no veo ningún teclado en pantalla
• PruebeapretandoelbotónOKdelcontrolremotomientraselursorestéparpadeandoenelcampodeingreso
detextodelapantalla.Estodebierahacerqueaparezcaenpantallaunteclado.
El reproductor presenta una conexión baja o intermitente al puntode acceso de la red Wi-Fi
(por ejemplo,un enrutador inalámbrico)
• Puedequelacomunicacióninalámbricaestéinterrumpidaporquehayaaparatosdesuhogarqueesténusando
frecuencias de radio.Aleje el reproductor de estos aparatos.
• Elpuntodeaccesoestáubicadodemasiadolejosdelreproductor.
¿Cómo puedo revisar si la conexión de mi red está bien?
• VayaalmenúdeconguraciónSettingsdelreproductoryluegoseleccioneNetwork->NetworkTest.Estoprobará
siustedestábienconectadoalareddesuhogarysilaconexióndebandaanchaestáconectadaalareddeInternet.
• VayaalmenúEntertainmentdelreproductoryluegoseleccioneVUDUMovies->MyVUDU->Info&Settings
-> Network Speed Test.Esto probará la velocidad y rendimiento de su red.
Mi red Wi-Fino aparece bajo la lista de redes “Network List”
• PuedequeelpuntodeaccesooelenrutadordelaredLANinalámbricanoesténtransmitiendosuSSID.
- Ingrese manualmente el SSID de su punto de acceso en el menú de configuración de redes del reproductor.
- O bien, configure el punto de acceso para que transmita su SSID.
• PuedeserquesuredWi-Finoestconguradaparaelrangodefrecuenciaodecanalesparaelcualtienerespaldo
estereproductor.Pruebeajustandoelrangodefrecuenciay/oelcanaldesured.
El reproductor se“congeló” o dejó de funcionar
• Pararecongurarelreproductor,desenchufeeladaptadordeCA,esperealmenosdiezsegundos,yluegovuelva
a enchufarlo.
• Asegúresedequeelcontrolremotoestéfuncionandobien.
Parece que el reproductor se apaga solo.¿Hay algún problema?
• No,paraahorrar consumode corriente eléctrica,el reproductor seapagará tras periodosde inactividad
prolongados.Nose preocupe,el reproductorno se apagará mientraslo esté usando”. Nota:usted puededesactivar
esta opción o ajustar la opción de duración para apagado automático (Auto Power Down Duration) llendo a
Settings (Configuración) -> System (Sistema) -> Auto Power Down (Apagado automático)
5Opciones de configuración y entretenimiento
El menú de principal incluye las opciones de Settings & Entertainment (configuración y entretenimiento).
Oprima , , , para destacar una opción, oprima OK/ENTER para confirmar su selección y configuración ,
oprima para regresar al menú anterior.
Settings: use para definir las configuraciones básicas
según su preferencia.Para volver a una pantalla anterior,
oprima .
Entertainment: Esta o pci ón le da a cce so a var ias
aplicaciones y servicios. Puede que algunos de los
serviciosexijan un identicador deinicio de sesióny
una contraseña. Algunos servicios pueden requerir
subscripción. El reproductor le mostrará instrucciones
en pantalla, si fuera necesario ingresar un identificador
de inicio de sesión y una contraseña.
S - 5
El control remoto no funciona correctamente
Revise lo siguiente:
• Quelaspilasesténpuestascorrectamente.
• Quelaspilasesténcargadas.
• Queelcontrolremotoestéapuntandodirectamenteendirecciónalsensorremotodelreproductor.
• Elcontrolremotoestus醤dosedemasiadolejosdelreproductor.
• Quenadaestéobstruyendoelsensorremoto(localizadoenlapartefrontaldelreproductor).
Cambie la resolución para que ésta sea la misma que la
resolución de su televisor
Losser vicios para descargas instantáneasde videos (tales como YouTube™,etc.)frecuentemente se
detienen, hacenuna pausa o se registran en la “memoria intermedia”durante la reproducción.
• SiestáusandounaredWi-Fi,puedequeelpuntodeaccesodelaredinalámbricaWi-Fi(porejemplo,elenrutador
inalámbrico) esté muy lejos del reproductor. Si es posible, intente poner el enrutador para Wi-Fi más cerca
delreproductor,oconsulteaunexpertopara sabercómopuedemejoraren anchodebandade lareddesu
hogar.
• Puedequelavelocidaddesuserviciodebandaanchanosealosucientementerápidaparatransmitirservicios
de video.De ser así, es posible que su proveedorde ser vicios de Internet (ISP) tenga otrosplanes de ser vicio que
ofrezcan un ancho de banda de mayor magnitud.
S - 6
El reproductor no funciona
• DesenchufeeladaptadordeCA,esperealmenosdiezsegundos,luegovuelvaaenchufarlo.
• Asegúresedequeeladaptadorde CAestéinsertadormemente eneltomacorrientedelreproductory enel
enchufe de CA. El indicador de corriente azul del reproductor se debiera encender dentro de diez segundos,
una vez se haya enchufado el adaptador de CA del reproductor.
• Lealassugerenciasqueseindicanacontinuaciónpararesolverproblemas. ¿Necesita más ayuda? Por favor, o visite nuestra página de ayuda en internet
http://www.RCAav.com
Opciones de configuración
Network (Red) --> Info (Información) --> Quick Setup
(Configuración rápida) --> Display (Visualizador)
--> Audio (Audio) --> Language (Idioma) --> System
(Sistema)
Información importante referente a los servicios de la red
Todainformación, datos,documentos,comunicaciones, descargas,archivos,texto, imágenes,fotografías,
gráfica, videos, webcasts, publicaciones, herramientas, recursos, software, códigos, programas, applets,
widgets, aplicaciones, productos y otro contenido (“Contenido”) y todos los servicios y ofertas (“Servicios”)
ofrecidos o puestos a disposición suya por o a travésde cualquier tercero (cada uno de ellos un “Proveedor de
Servicios”)esderesponsabilidadúnicadelproveedordeserviciosdequienéste/éstasehayaoriginado.
Ladisponibilidadyel accesoalContenidoya losServiciosprovistospor elProveedordeServicios pormediodeeste
aparato,quedan sujetos a cambio en cualquier momento,y sin aviso previo,incluyendo,de manera enunciativa
masno limitativa, la suspensión,el retiro o el cese de la totalidad o de una parte del Contenido o de los Servicios.
En caso que tuviera cualquier inquietud o problema relacionado con el Contenido o con los Servicios,usted
puede ver la página web del Proveedor de Servicios para encontrar ahí la información más actualizada. La
empresa AVCMultimedianoestáexpuestanies responsabledelserviciodeatenciónalclienterelacionado
al Contenido y a los Servicios. Cualquier pregunta o solicitud de servicio relacionada al Contenido o a los
Servicios debiera hacerse directamente al Proveedor del Servicio o Contenido respectivo.
Cabe notar que AVCMultimedia no es responsable de ningún ser vicio proporcionado por el Proveedorde
Servicios ni de ningún cambio, retiro o cese de tales servicios. Asimismo, AVC Multimedia no garantiza la
disponibilidad o el acceso a dicho Contenido o Servicio.
Garantía limitada
AVCMULTIMEDIA (“AVC”)ofrecelasiguientegarantíalimitada,lacualseextiendealcomprador-consumidororiginal
y está limitada al uso no comercial del producto.
Garantía de repuestos y reparaciones por Uno Año
Los productos AVC que se hayan comprado en los Estados Unidos tienen una garantía de uno año a partir de la fecha
original de compra en caso de presentar defectos en los materiales o en su fabricación.Si la unidad no se encuentra en
conformidad a esta garantía,nosotros repararemos el producto usando piezas y productos nuevos y reparados, según
lo estime AVC únicamente.
Durante un período de uno año a partir de la fecha efectiva de la garantía, AVC proporcionará, cuando sea necesario,
mano de obra de reparación para reparar defectos de fabricación en su centro de reparaciones designado.Para
obtener los servicios de la garantía en los Estados Unidos, usted deberá llamar primero a nuestro Centrode Servicio
para el Cliente al 1-800-506-5746 o 1-877-252-6873 durante las horas que se indican en el recuadromás abajo.
La decisión de si bien usted está facultado para recibir estos servicios la tomará la oficina de Respaldo al Cliente de
AVC. POR FAVOR NO DEVUELVA ESTA UNIDAD A AVCSIN CONTAR CON AUTORIZACIÓN PREVIA. En los centros
designados para reparaciones y por un período de uno año a contar de la fecha de efectividad de la garantía, AVC
utilizará piezas o productos de recambio nuevos o refabricados al efectuar reparaciones de productos o piezas
defectuosas. Dichos productos o piezas de recambio cuentan con una garantía adicional de uno año a contar de la
fecha del cambio o de la reparación. Para poder hacer las reparacionesque sean necesarias, el cliente deberá enviar
la unidad al centro de reparaciones que se le indique al contactarse con la oficina de respaldo al cliente.El cliente es
responsable por todos los gastos de envío al centrode reparaciones.
Instrucciones para envolver la unidad y parasu envío
Cuando usted envíe el producto al centro de reparacionesde AV C, usted debe utilizar la caja de cartón y el material de
embalaje original o un tipo de embalaje equivalente,según lo establezca AVC .
GARANTÍA LIMITADA
Su responsabilidad
1) Usted debe guardar la boleta de venta original como prueba de su compra.
2) Estas garantías sólo son efectivas si el producto ha sido comprado y puesto a funcionar en Estados Unidos o Canadá.
3) Lasgarantíassólo seex tiendenen casode materialeso defabricación defectuosay nose extiendea productos
o piezas que se hayan perdido o tirado a la basura, ni a productos o piezas dañadas a causa del mal uso de la unidad,
de accidentes, del funcionamiento o mantenimiento inapropiados del equipo,así como tampoco en caso de no
haber seguido las instrucciones que acompañan este producto,o de haber modificado o alterado el producto
sin la autorización de AVC, o de haber quita do o cambiado el número de se rie de las piezas o del prod ucto.
Fuera de la Garantía
Importante:
Guarde su“Boleta de venta” como prueba de su compra.
N° de modelo ............................................................................ Nombre del producto .................................................................
Tipo de aparato ........................................................................ N° de serie......................................................................................
N° de recibo .............................................................................. Fecha de compra .........................................................................
Nombre del comerciante .........................................................................................................................................................................................
PARA SERVICIO Y REPARACIÓN, POR FAVOR VISTITA www.RCAav.com
Estasespecificacionesy laapariencia externadeeste aparatoestánsujetas acambio sinprevioaviso.
Encasoquesuproductonecesite serreparadoyqueelperíodo degarantíayahayaexpirado,sírvasecontactarse
con el Centro de Ayuda al Clienteen el fono 1-800-506-5746, 1-877-252-6873 o www.RCAav.com
Hora:Lunes–Jueves: 9am–7pm, Viernes: 9am–5pm, Sábado: 9am–MEDIODíA Tiempo del Este.
Importante: Usted se hace responsablede cualesquier gastos por razones de transporte,envío o seguro
relacionados con la devolución del producto al Centro de Devoluciones de Productos.
©2011 AVCMultimedia Marca(s)® Registrada(s) Impreso en China
Todas las garantías implícitas según la ley de un estado,incluidas las garantías implícitas de comercialización y de
aptitudparaunpropósitoespecíco,estánlimitadasexpresamentealaduracióndelagarantíalimitadaexpuestamás
arriba.Conla excepcióndecualesquiera garantíasimplícitas segúnla leyde unestado,que porla presentequedan
limitadas,lagarantíaprecedentetiene carácterdeexclusiva ypredominasobre lasdemásgarantías,cauciones,
acuerdos y obligaciones similares del vendedor o delfabricante con respecto a la reparación o al reemplazo de
cualesquier partes del aparato.AV C enningún caso se hará responsable de daños fortuitos ni de daños resultantes de
cualquier otra situación que no sea la indicada en la garantía limitada de este aparato.
Ningunapersona,agente,distribuidor,comerciante niempresa estáautorizada paracambiar,modicar oextender
los términos de estas garantías en ninguna manera,cualquiera que ésta fuese. El tiempo dentro del cual se debe
iniciar una acción para hacer cumplir cualquier obligación de AVC que surja en virtud de la garantía o de cualquier
estatuto o ley de Estados Unidos o de cualesquier de sus estados,queda aquí limitado a uno año a contar de la fecha
de adquisición del producto.Esta restricción no se aplica a las garantías implícitas planteadas en virtud de la ley de un
estado.
Esta garantía le brinda derechos legales específicos y puede que usted también tenga otros derechos que pueden
variar,dependiendo del estado. Algunos estados no ponen límite en cuanto a la duración de una garantía implícita, a
cuándosepuede tomaracción,o alaexclusión olimitaciónde losdaños fortuitoso consiguientes,demodoque es
posible que las
disposiciones anteriores no sean aplicables en su caso.
Para mayor informació n acerca de otros prod uctos y servic ios, sírvase contactar n uestra página de internet en la
siguiente dirección: www.RCAav.com
Declaración de la FCC sobre la exposición a la radiación de radiofrecuencias:
Esteequipocumplecon loslímitesdeexposición aradiaciónestablecidospor laFCCparaambientesno controlados.
Este equipo debe ser instalado y operado a una distancia mínima de 20 cms entre el radiador y su cuerpo.El usuar io
naldebe seguir las instrucciones especícas de operación para satisfacer el cumplimiento con la exposición a las
radiofrecuencias.Estetransmisor no debe estar ubicadoni ser operado enconjunto con ninguna otraantena o transmisor.
CUIDADO: Las regulaciones de la FCC y de la FAA prohiben la operación aérea de aparatos de radiofrecuencia
inalámbricos,porque sus señales podrían interferir con instrumentos críticos de la aeronave.
Table of contents
Languages:
Other RCA Media Player manuals

RCA
RCA LYRA X3000 User manual

RCA
RCA X3030 - Lyra - Digital AV Recorder User manual

RCA
RCA Lyra M1001GBUS User manual

RCA
RCA DSB7788W User manual

RCA
RCA LYRA X3000 User manual

RCA
RCA DSB778W User manual

RCA
RCA M2001 User manual

RCA
RCA DSB778W User manual

RCA
RCA 5588825C User manual

RCA
RCA LYRA X3000 User manual