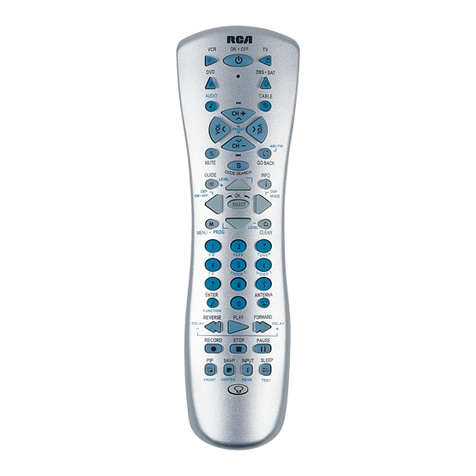
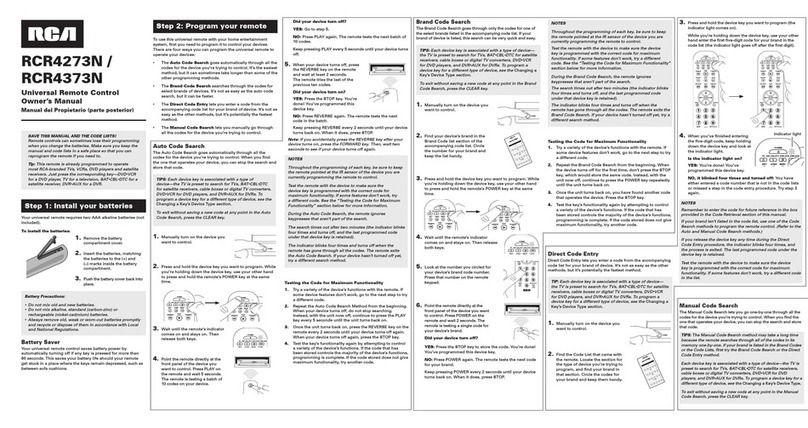
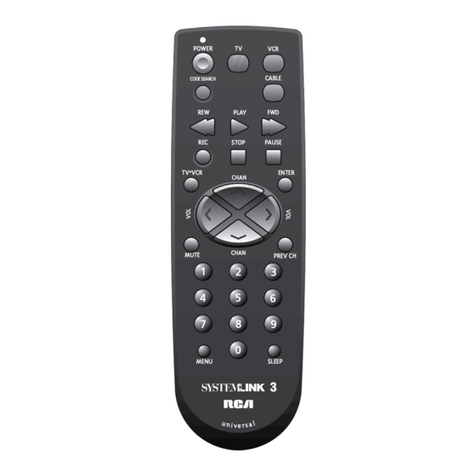
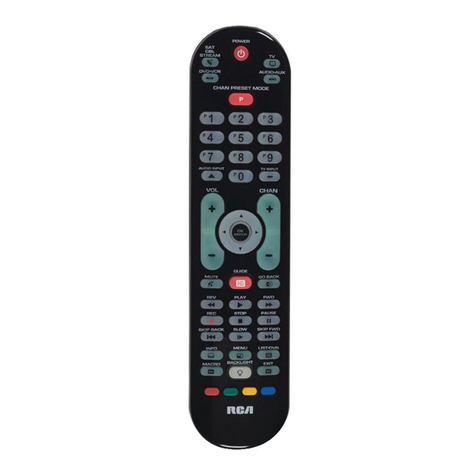
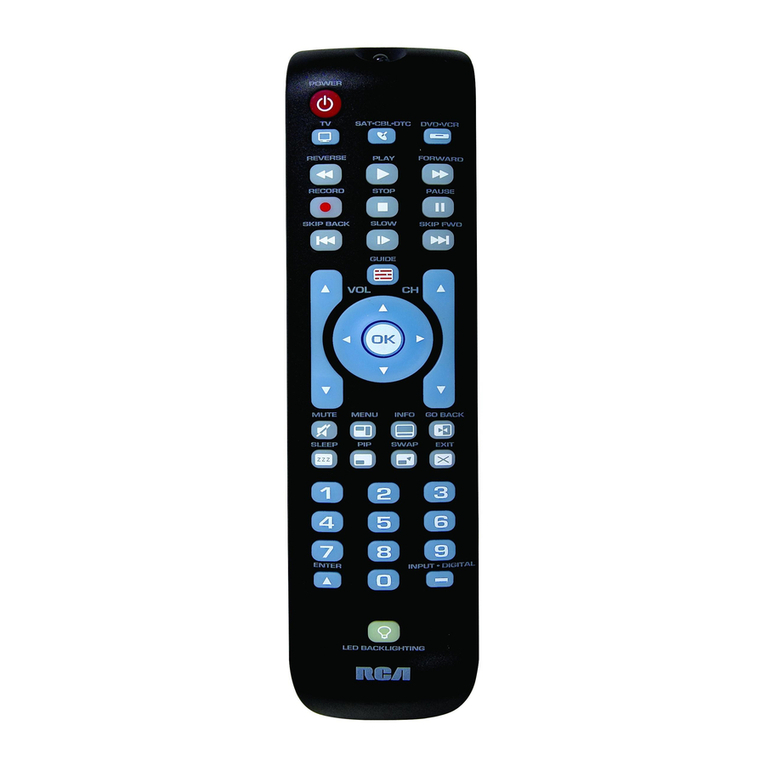
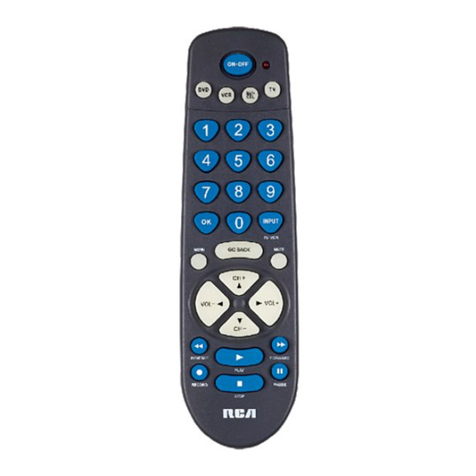
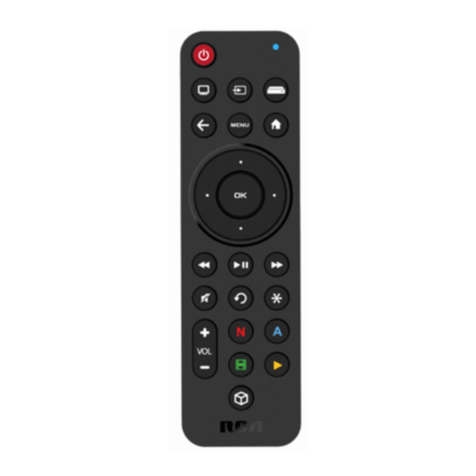
RCA RCU811 - Learning Remote User manual

universal
Compatible with today’s
most popular brands.
Compatible avec la plupart
des marques actuelles.
remote
UNIVERSAL
Learning Remote
LCD Status Display
• Provides step-by-
step programming
instructions; prompts
for next steps; validates
correct entries. Displays
time and the code
tables programmed
for your components.
Fully Backlit Keypad
• Illuminates the keypad
for night navigation.
Learns Commands
from Original
Remotes
• Can store more than
30 key commands
for each original remote.
SmartMacro™ Keys
• Control multiple
commands with two
simple keypresses.
UNIVERSAL
RCU811
UNIVERSEL
Télécommande intelligente
Afficheur d’état ACL
• Présente les
instructions détaillées
de programmation;
demande les prochaines
étapes; valide les entrées
correctes. Affiche l'heure
et les tableaux de codes
programmés pour
vos appareils.
Touche entièrement
rétroéeclairée
• Éclaire le clavier pour
la navigation la nuit.
Apprend les
commandes des
télécommandes
originales
• Peut mémoriser quelque
30 commandes de
touches pour chaque
télécommande originale.
Touches SmartMacro
mc
•
Pour commander
plusieurs commandes
par deux simples
pressions de touches.
télécommande
RCU811US_IB_REVB 9/26/03 11:54 AM Page 1

2
Introduction . . . . . . . . . . . . . . . . . . . . . . . . . . . . . . . . . . . . . . . . . . . . . . . . . . . . . . . . . . . . . . . . . . . . . . . . . . .3
Battery Information . . . . . . . . . . . . . . . . . . . . . . . . . . . . . . . . . . . . . . . . . . . . . . . . . . . . . . . . . . . . . . . . . . . . .3
Battery Installation . . . . . . . . . . . . . . . . . . . . . . . . . . . . . . . . . . . . . . . . . . . . . . . . . . . . . . . . . . . . . . . . . . .3
Battery Saver . . . . . . . . . . . . . . . . . . . . . . . . . . . . . . . . . . . . . . . . . . . . . . . . . . . . . . . . . . . . . . . . . . . . . . . .3
Code Saver . . . . . . . . . . . . . . . . . . . . . . . . . . . . . . . . . . . . . . . . . . . . . . . . . . . . . . . . . . . . . . . . . . . . . . . . . .3
Power-on Default . . . . . . . . . . . . . . . . . . . . . . . . . . . . . . . . . . . . . . . . . . . . . . . . . . . . . . . . . . . . . . . . . . . .3
Product Diagram . . . . . . . . . . . . . . . . . . . . . . . . . . . . . . . . . . . . . . . . . . . . . . . . . . . . . . . . . . . . . . . . . . . . . . .4
LCD Status Display . . . . . . . . . . . . . . . . . . . . . . . . . . . . . . . . . . . . . . . . . . . . . . . . . . . . . . . . . . . . . . . . . . . . .4
Setup Routine and Procedures . . . . . . . . . . . . . . . . . . . . . . . . . . . . . . . . . . . . . . . . . . . . . . . . . . . . . . . . . . . .4
Enter Setup Mode . . . . . . . . . . . . . . . . . . . . . . . . . . . . . . . . . . . . . . . . . . . . . . . . . . . . . . . . . . . . . . . . . . . .5
Exit Setup Mode . . . . . . . . . . . . . . . . . . . . . . . . . . . . . . . . . . . . . . . . . . . . . . . . . . . . . . . . . . . . . . . . . . . . .5
Code Entry . . . . . . . . . . . . . . . . . . . . . . . . . . . . . . . . . . . . . . . . . . . . . . . . . . . . . . . . . . . . . . . . . . . . . . . . . . . .6
Code List Entry . . . . . . . . . . . . . . . . . . . . . . . . . . . . . . . . . . . . . . . . . . . . . . . . . . . . . . . . . . . . . . . . . . . . . .6
Code Search . . . . . . . . . . . . . . . . . . . . . . . . . . . . . . . . . . . . . . . . . . . . . . . . . . . . . . . . . . . . . . . . . . . . . . .6-7
Code Identification . . . . . . . . . . . . . . . . . . . . . . . . . . . . . . . . . . . . . . . . . . . . . . . . . . . . . . . . . . . . . . . . . . .7
Code Identification Chart . . . . . . . . . . . . . . . . . . . . . . . . . . . . . . . . . . . . . . . . . . . . . . . . . . . . . . . . . . . . . .8
Learning . . . . . . . . . . . . . . . . . . . . . . . . . . . . . . . . . . . . . . . . . . . . . . . . . . . . . . . . . . . . . . . . . . . . . . . . . . . . . .8
Learning Tips . . . . . . . . . . . . . . . . . . . . . . . . . . . . . . . . . . . . . . . . . . . . . . . . . . . . . . . . . . . . . . . . . . . . . . .8
Code Learning . . . . . . . . . . . . . . . . . . . . . . . . . . . . . . . . . . . . . . . . . . . . . . . . . . . . . . . . . . . . . . . . . . . . . . .9
Learning Commands . . . . . . . . . . . . . . . . . . . . . . . . . . . . . . . . . . . . . . . . . . . . . . . . . . . . . . . . . . . . . . . . .9
Clear All Stored Learned Commands Under a Component Mode . . . . . . . . . . . . . . . . . . . . . . . . . . .10
SmartMacro™ Key Operations . . . . . . . . . . . . . . . . . . . . . . . . . . . . . . . . . . . . . . . . . . . . . . . . . . . . . . . . . . .10
Program a SmartMacro . . . . . . . . . . . . . . . . . . . . . . . . . . . . . . . . . . . . . . . . . . . . . . . . . . . . . . . . . . . .10-11
Execute a SmartMacro . . . . . . . . . . . . . . . . . . . . . . . . . . . . . . . . . . . . . . . . . . . . . . . . . . . . . . . . . . . . . . .11
Delete a Single SmartMacro . . . . . . . . . . . . . . . . . . . . . . . . . . . . . . . . . . . . . . . . . . . . . . . . . . . . . . . .11-12
Delete ALL SmartMacros . . . . . . . . . . . . . . . . . . . . . . . . . . . . . . . . . . . . . . . . . . . . . . . . . . . . . . . . . . . . .12
Event Timer . . . . . . . . . . . . . . . . . . . . . . . . . . . . . . . . . . . . . . . . . . . . . . . . . . . . . . . . . . . . . . . . . . . . . . . . . .12
Set an Event Timer . . . . . . . . . . . . . . . . . . . . . . . . . . . . . . . . . . . . . . . . . . . . . . . . . . . . . . . . . . . . . . . .12-13
Delete or Review an Event Timer . . . . . . . . . . . . . . . . . . . . . . . . . . . . . . . . . . . . . . . . . . . . . . . . . . . . . .13
TV Volume Punch-through . . . . . . . . . . . . . . . . . . . . . . . . . . . . . . . . . . . . . . . . . . . . . . . . . . . . . . . . . . . . . .13
VCR/DVD Punch-through . . . . . . . . . . . . . . . . . . . . . . . . . . . . . . . . . . . . . . . . . . . . . . . . . . . . . . . . . . . . . .14
Record Key . . . . . . . . . . . . . . . . . . . . . . . . . . . . . . . . . . . . . . . . . . . . . . . . . . . . . . . . . . . . . . . . . . . . . . . . . . .14
Additional Features . . . . . . . . . . . . . . . . . . . . . . . . . . . . . . . . . . . . . . . . . . . . . . . . . . . . . . . . . . . . . . . . . . . .14
Set Time for LCD Display . . . . . . . . . . . . . . . . . . . . . . . . . . . . . . . . . . . . . . . . . . . . . . . . . . . . . . . . . . . .14
Backlighting . . . . . . . . . . . . . . . . . . . . . . . . . . . . . . . . . . . . . . . . . . . . . . . . . . . . . . . . . . . . . . . . . . . . . . . .14
Master Reset . . . . . . . . . . . . . . . . . . . . . . . . . . . . . . . . . . . . . . . . . . . . . . . . . . . . . . . . . . . . . . . . . . . . . . .15
RCA All Power Off Feature . . . . . . . . . . . . . . . . . . . . . . . . . . . . . . . . . . . . . . . . . . . . . . . . . . . . . . . . . . .15
Glossary . . . . . . . . . . . . . . . . . . . . . . . . . . . . . . . . . . . . . . . . . . . . . . . . . . . . . . . . . . . . . . . . . . . . . . . . . . .16-17
Troubleshooting . . . . . . . . . . . . . . . . . . . . . . . . . . . . . . . . . . . . . . . . . . . . . . . . . . . . . . . . . . . . . . . . . . . . . . .18
Limited 90-Day Warranty . . . . . . . . . . . . . . . . . . . . . . . . . . . . . . . . . . . . . . . . . . . . . . . . . . . . . . . . . . . . . . .39
Helpline . . . . . . . . . . . . . . . . . . . . . . . . . . . . . . . . . . . . . . . . . . . . . . . . . . . . . . . . . . . . . . . . . . . . . . . . . . . . . .40
Table of Contents
RCU811US_IB_REVB 9/26/03 11:54 AM Page 2

3
Congratulations on your purchase of the RCU811. This unit is one of the most sophisticated, yet
easy to use, remote controls available today. With the RCU811, juggling multiple remote controls is a
thing of the past! This one unit controls up to eight components, including the most popular brands
of TV, VCR, DVD, PVR, SAT•CBL, CD and AUDIO equipment. The RCU811 has the ability to learn
commands from your existing remotes, and the SmartMacro™ feature allows multiple commands to
be executed with two simple keypresses. The RCU811 is easy to use, easy to program, and it gives
you total control—at the touch of your fingertips!
Universal Learning Remote
with LCD Status Display
Battery Information
Your RCU811 Universal Learning Remote with LCD Status Display requires four AAA alkaline
batteries (sold separately).
Battery Installation
To install the batteries:
1. Turn the unit over, lift tab and pick the cover up.
2. Insert the batteries, matching the batteries to the (+) and (-) marks inside the battery case.
3. Replace the battery cover and snap into place.
Battery Saver
Your RCU811 saves battery power by automatically turning off if any key is pressed for more than
30 seconds. This saves your batteries should your remote get stuck in a place where the keys remain
depressed, such as under a book or between the sofa cushions.
Code Saver
With the RCU811, you don’t have to worry about losing programmed information when you change
batteries. All programmed parameters are retained indefinitely in the event of battery replacement.
Power-on Default
When you replace batteries, your RCU811 remote always powers on in the TV Mode. If your TV,
VCR, DVD, or satellite receiver are RCA, PROSCAN or GE brands, you may not even need to set
up the RCU811 to control them. In these instances, the remote should work as soon as the batteries
are installed.
RCU811US_IB_REVB 9/26/03 11:54 AM Page 3

4
The LCD (Liquid Crystal Display) status display on your RCU811 provides a visual interface
between the user and the remote. This display makes it easy to program and use your remote
with many components.
The LCD status display remains blank when the remote is not in use. Pressing any key displays
the time and the current component mode. The status display turns off after approximately
15 seconds from the last keypress, except when an Event Timer is set. In this case, the display
remains on until the event has occurred.
RCU811 Product Diagram
Liquid Crystal
Status Display
(LCD)
MM
Macro
Level-
LEARN
23
RECORD STOP PAUSE
DELAY DELAY
REVERSE PLAY FORWARD
FUNCTION
CD TA P E TUNER
TV VIDEO1 VIDEO2
CLEAR
MENU
SELECT
INFO
GUIDE
INPUT
LEVEL+
REAR
GO BACK
TEST
DSP
DSP
ON.OFF MODE
CH +
CH
PIP
FRONT
SLEEP
AM FM
L1
AUDIO CD
L2
L3
SWAP
CENTER
SETUP
MACRO
VCR
DVD AU X1
TV
ON OFF
AUX 2 SAT CBL
ENTER TV VCR
97 8
6
0
4
1
5
MUTE
VOL
VOL
M
S
SETUP key
ENTER key
CLEAR key
LEARN keys
(L1, L2, L3)
BACKLIGHT key
LCD Status Display
Setup Routine and Procedures
MACRO (M) key
The SETUP (S) key is located towards the upper right-hand side of the RCU811 unit. The
SETUP (S) key is used to walk you through the steps in setting up the remote. To enter the Setup
Mode, press and hold the SETUP (S) key for 2-3 seconds until the Setup Mode? Screen is shown.
Successive presses of the SETUP (S) key walk you through all the available setup routines.
MACRO 1, 2, 3 keys
RCU811US_IB_REVB 9/26/03 11:54 AM Page 4

5
The following are the screen selections available in the Setup Mode.
1. Setup Mode?
2. Set Time Display?
3. Timer 1 Mode?
4. Timer 2 Mode?
5. Timer 3 Mode?
6. Timer 4 Mode?
7. Cancel Timer 1
(Only appears once
Timer 1 has been set.)
8. Cancel Timer 2
(Only appears once
Timer 2 has been set.)
9. Cancel Timer 3
(Only appears once
Timer 3 has been set.)
10. Cancel Timer 4
(Only appears once
Timer 4 has been set.)
11. Learn Mode?
12. Clear Mode?
(Only appears after commands
have been learned.)
13. Reset?
(Master Reset to clear all settings—
return to factory default)
14. Exit
Enter Setup Mode
Exit Setup Mode
To exit the Setup Mode at any time and return to normal operation, follow these steps:
1. Press and release the CLEAR key.
The remote is now in normal operation mode.
OR
2. Press and release the SETUP (S) key repeatedly until the
status display shows the Exit Screen. Press and release the
ENTER key. The remote is now in normal operation mode.
During a Setup function, if no key is pressed for 30 seconds, the
unit automatically exits from the Setup mode. The status display
shows the TimeOut Screen for three seconds prior to returning to
normal operation. Any operation that is not completed when the
timeout occurs is not saved.
RCU811US_IB_REVB 9/26/03 11:54 AM Page 5

6
In order for the RCU811 to control your components (TV, VCR, DVD, etc.), you must program it
with the corresponding code from the Code Lists. (Refer to the Code List enclosed.) This enables
the remote to control your component with the proper commands. If your TV, VCR, DVD or satellite
receiver is an RCA, PROSCAN or GE brand, the RCU811 may not need any programming to control
it. To program the remote with the codes for your components, you can use one of three methods:
Code List Entry, Code Search or Code Autosearch.
You can enter codes in your RCU811 from the Code Lists using the SETUP (S) key. When you
enter a valid code for any given mode (e.g., when you enter a valid code for a TV), any previously
Learned functions for that mode are deleted.
To enter a code directly from one of the Code Lists, follow these steps:
1. Manually turn on the component to be controlled
(TV, VCR, DVD, etc.).
2. Press and hold the SETUP (S) key for 2-3 seconds
until the LCD display shows the Setup Mode? Screen.
3. Release the SETUP (S) key.
4. Press and release the desired component key
(TV, VCR, SAT•CBL, etc.). For AUX1 or AUX2, press
and release the AUX1 or AUX2 key followed by the desired
component key to be programmed under that key.
Note: If the AUX1 or AUX2 key is selected, the status
display will alternate between showing the AUX number
(AUX1 or AUX2) and the component label (TV, VCR,
SAT•CBL, etc.) at 0.5-second intervals.
5. Enter the three-digit code for your component brand from
the corresponding Code Lists at the back of this User’s Guide.
If your brand has more than one code listed, begin with the
first code. When a valid code from the list is entered, the
LCD displays the Success Screen, then returns to the normal
time display.
Note: For an invalid code entry, the LCD displays the Invalid
Screen for three seconds before returning to the normal time
display. In this case, no changes are made.
6. With the component on, aim the RCU811 at the component
and press and release the ON•OFF key. If you have entered
the correct code number for your component, it responds
to the ON•OFF key. If the component responds, no further
programming is required. Code List Entry is now complete.
7. If your component does not respond, try the next code in the
list for your brand by repeating the procedure starting at step
two. If no other codes exist for your brand, try the Code Search
or Code Autosearch methods.
Code Entry
Code List Entry
Code Search
If the component you wish to control does not respond to any of the codes you have entered
using the Code List Entry method, you can search the entire Code List for a particular component
that might not be listed in the Code List or might be listed under a different brand.
When you enter a valid code for any given mode (e.g., when you enter a code for a TV),
any previously Learned functions for that mode are deleted.
RCU811US_IB_REVB 9/26/03 11:54 AM Page 6

7
To search for a specific code in one of the Code Lists, follow these steps:
Code Identification allows you to find out what code is currently
programmed in the remote under a given mode (TV, VCR, DVD, etc.).
To find the currently programmed code, follow these steps:
1. Manually turn on the component to be controlled
(TV, VCR, DVD, etc.).
2. Press and hold the SETUP (S) key for 2-3 seconds until
the LCD display shows the Setup Mode? Screen.
3. Release the SETUP (S) key.
4. Press and release the desired component key (TV, VCR,
SAT•CBL, etc.). For AUX1 or AUX2, press and release the
AUX1 or AUX2 key followed by the desired component
key to be programmed under that key.
Note: If the AUX1 or AUX2 key is selected, the status display
will alternate between showing the AUX number (AUX1 or
AUX2) and the component label (TV, VCR, SAT•CBL, etc.)
at 0.5-second intervals.
5. The LCD shows the Code Search Screen, which displays
the component mode and its current programmed code.
Press and release the CH+ or ON•OFF key repeatedly until
the component to be controlled responds to the command.
Press and release the ENTER key to save the code. After
you install this code, any previously Learned commands
will be deleted.
Note: The Code Search starts from the currently stored code
under that mode. For example, if the component Code List
contains 100 codes and the currently stored code is 050,
the Code Search starts from 051 and continues to 100 before
looping back to 000 and finishing at 050. This speeds up
the process of finding the correct code for your component,
since you may discover that some codes can turn your
component on and off but are not able to control its other
functions. This process allows you to bypass codes you’ve
already tried. The display will show the End Screen once
all code list entries have been searched.
6. If your component responds and you accidentally overshoot
that code by pressing the CH+ or ON•OFF key again, press
and release the CH- key to backtrack through the Code List.
You can change the direction to forward once again by
pressing the CH+ or ON•OFF keys.
7. After pressing the ENTER key in step five, the LCD
displays the Success Screen, then returns to the normal time
display. The Code Search Entry method is now complete.
Code Identification
1. During normal remote operation, press and hold any
component key. The top right corner of the LCD display
shows the current code programmed for that component.
2. Release the component key to return the display to normal.
RCU811US_IB_REVB 9/26/03 11:54 AM Page 7

8
Code Identification Chart
Learning Tips
Before transferring commands from your original remote to the RCU811,
check out these useful tips on Learning.
1. Make sure you are using fresh batteries in both the RCU811 and
your original remote(s).
2. It is recommended that you clear all Learned commands under all
component modes before attempting any Learning. (See section on
Clear all Stored Learned Commands Under a Component Mode.)
3. Point the top of the original remote at the base of the RCU811 so the
IR LED on the original remote is in line with the RCU811 Learn sensor,
located at the bottom of the remote.
4. The distance between the two remotes should be approximately
2-3 inches apart.
5. To ensure that your units are compatible and to increase your
familiarity with the Learning process, you may wish to experiment
by learning two or three keys initially. Then, carry out a Clear all
Stored Learned Commands Under a Component Mode operation
before learning all the desired functions from your original remote.
6. Incandescent or low-energy light can cause interference with the
IR transmissions. When using the Learning function, keep the
remotes at least three feet away from such light sources.
7. When learning a key, do not release the key on your original remote
until the Success Screen is displayed on the RCU811 status display,
which takes approximately 2-3 seconds. Until this occurs, the LCD
will display the Learn Screen.
8. Any key on your RCU811 can be programmed with Learned
commands, with the exception of the MACRO (M), SETUP (S),
BACKLIGHT, INPUT or any component key. In addition, the L1, L2
and L3 keys are generic keys to be programmed as you wish.
9. If there is a problem during the Learning process, the Learn Error
Screen appears in the display. The unit still remains in Learning Mode.
10. All Learned keys are saved automatically.
11. When the memory is full, the display shows the Full Screen.
It is not possible to learn any additional keys without first clearing
Learned commands under a component mode.
Enter your code here for easy reference.
AUDIO
Tuner
❒
AMP
❒
Tape
❒
TV CODE AUX 1 device:______
AUX 2 device:______ CD CODEVCR CODE
SAT•CBL CODE
DVD CODE
Learning
RCU811US_IB_REVB 9/26/03 11:54 AM Page 8

9
Learning Commands
Now you’re ready to have your RCU811 learn the commands from your existing remote(s).
All Learned keys are saved automatically. Remember, only one original remote can be stored
under any one mode.
Codes from the Code Lists include basic functionality for each component they control. Once
you have programmed in the code for your specific component, you can customize the RCU811 to
include certain functions from your original remote(s) that were not embedded in the preset code.
Your RCU811 has the ability to learn and store commands from your original remote(s) under
the mode(s) of your choice. The RCU811 can store more than 30 key commands for each original
remote. Only one original remote can be learned under any one mode (i.e., the RCU811 can learn
the commands for one TV remote, one VCR remote, one DVD remote, etc.).
Code Learning
1. Gather all the remotes that you want to learn and have
them all lined up on a flat surface before going into the
Learn IR Mode.
2. Place the first original remote in the Learning position.
Point the top of the original remote at the base of the RCU811
so the IR LED on the original remote is in line with the
RCU811 Learn sensor, located at the bottom of the remote.
The remotes should be positioned 2-3 inches apart.
3. Press and hold the SETUP (S) key for 2-3 seconds
until the LCD display shows the Setup Mode? Screen.
4. Release the SETUP (S) key.
5. Press and release the SETUP (S) key repeatedly
until the LCD display shows the Learn Mode? Screen.
6. Press and release the desired component key (TV, VCR,
SAT•CBL, AUX1, etc.). The Key? Screen is displayed.
7. Press and release the key on the RCU811 that you wish to
use to store the Learned commands. The Learn Screen appears.
Note: You cannot learn any commands under the MACRO (M),
SETUP (S), BACKLIGHT, INPUT or any component keys.
8. Press and hold the original remote key you want to transfer
to the RCU811 until the Success Screen appears in the display.
This process can take 2-3 seconds to complete.
9. Release the original remote key. If there is a problem during
the Learning process, the LCD displays the Learn Error Screen
for three seconds but still remains in the Learning Setup
Mode. If this occurs, try adjusting the distance between the
remotes slightly and repeat from step 7.
10. Repeat steps 7-9 for other keys to be learned.
11. When all the original remote commands have been learned,
press and release the SETUP (S) key. The display returns to
the normal time display. At this point, you can learn other
keys under another component key by repeating steps 3-9.
The Learning process is now complete.
RCU811US_IB_REVB 9/26/03 11:54 AM Page 9

1. Press and hold the SETUP (S) key for 2-3 seconds
until the status display shows the Setup Mode? Screen.
2. Release the SETUP (S) key.
3. Press and release the SETUP (S) key repeatedly
until the Clear Mode? Screen appears.
4. Press and release the desired component key for the
Learned commands you want the RCU811 to clear
(TV, VCR, SAT•CBL, AUX1, etc.). The chosen component
will appear in the display.
5. Press and release the ENTER key.
The display shows the Clearing Wait Screen.
Note: If, at this point, you wish to cancel this process,
press and release the CLEAR key.
6. The LCD display shows the Success Screen,
then returns to the normal time display.
7. All Learned commands that were previously stored
under that component mode are now cleared. If you
wish to clear all Learned commands under another
component mode, repeat steps 1-6.
10
Your RCU811’s SmartMacro feature allows you to execute a sequence of commands with only two
keypresses. A SmartMacro learns any sequence of original remote commands. A total of six Learned
commands can be programmed under each of the three MACRO 1, 2, and 3digit keys. If you
program all six keystrokes into a SmartMacro, the Macro is automatically stored after the sixth
Learned command is completed. The commands you want a SmartMacro to execute must be
programmed in correct sequential order. Any sequence of commands that you regularly perform
can be programmed as a SmartMacro and reduced to two keypresses, MACRO (M) followed by
the 1, 2, or 3digit key. You cannot program a Macro within a Macro.
Clear All Stored Learned Commands
Under a Component Mode
To program a SmartMacro, follow these steps:
1. Gather all your original remotes that contain functions
you would like to add to a SmartMacro.
2. Place the first original remote in the Learning position.
Point the top of the original remote at the base of the RCU811
so the IR LED on the original remote is in line with the
RCU811 Learn sensor, located at the bottom of the remote.
The remotes should be positioned 2-3 inches apart.
3. Press and hold the RCU811 SETUP (S) key for 2-3 seconds
until the LCD display shows the Setup Mode? Screen.
SmartMacro™Key Operations
Program a SmartMacro
Example of Programming a Macro
1. Turn on the TV.
2. Turn on the satellite receiver and set it to channel 57.
3. Turn on the VCR.
4. Now you’re ready to record your favorite satellite program with two simple keypresses.
It is recommended that you clear all Learned commands under a component mode before
attempting any Learning under that mode. If you want to clear all of the Learned commands
under one component mode (e.g., TV, VCR, DVD, etc.), follow these steps:
Note: Upon deletion of Learned commands, all previously Learned
keys under that component mode return to their preset code functions.
RCU811US_IB_REVB 9/26/03 11:54 AM Page 10

11
To execute a SmartMacro that has been previously programmed, follow these steps:
4. Release the SETUP (S) key.
5. Press and release the MACRO (M) key. The Macro Key?
Screen is displayed.
6. Press and release the MACRO 1, 2, or 3digit key
under which you want to program the SmartMacro.
7. The LCD now shows the Macro X Setup Screen. Press
and release the MACRO (M) key.
8. The Macro X Learn Screen is now displayed. Press and
hold the key on the original remote until the Macro X
Success Screen is displayed. This process takes 2-3 seconds
to complete.
Note: If there is a problem during the Learning process,
the Macro X Error Screen is displayed for three seconds
but remains in the SmartMacro routine and returns to the
Macro X Setup Screen. If no Learned command is detected,
the RCU811 will timeout after 30 seconds. In this case,
repeat from step 7.
9. Release the original remote key.
10. The Macro X Key Y screen is displayed, where Y
is the next Macro sequence count.
Note: It may be necessary to increase the delay between the
Macro commands to allow your components time to respond
to all commands within the Macro. The default delay is 0.5
seconds. However, if you find this is not sufficient, you can
increase the delay. This can be achieved by pressing and
releasing the PAUSE key, followed by the number of seconds
(using the digit keys) to delay between Macro commands
(e.g., for a delay of 2 seconds, press and release the PAUSE
key; then press and release the 2digit key). Pressing the
0digit key or CLEAR key programs the default delay of
0.5 seconds.
11. Program additional commands in the order you want
them to occur in the SmartMacro. To add commands to
the SmartMacro, repeat steps 7-9 above, using the original
remotes to program. You can program up to six Learned
commands under one SmartMacro.
12. Once you are finished programming the Macro, press and
release the ENTER key to save. The LCD will show the
Success Screen, then return to the normal time display.
1. Press and release the MACRO (M) key.
2. Press and release the MACRO 1, 2, or 3digit key
corresponding to the Macro you wish to activate.
Execute a SmartMacro
Delete a Single SmartMacro
To delete a single SmartMacro that has previously been
programmed, follow these steps:
1. Press and hold the SETUP (S) key for 2-3 seconds
until the status display shows the Setup Mode? Screen.
2. Release the SETUP (S) key.
3. Press and release the MACRO (M) key. The Macro Key?
Screen is displayed
4. Press and release the MACRO 1, 2or 3digit key to select
the previously programmed Macro you wish to delete.
The Macro X Setup Screen is displayed where X is the
Macro number you’ve selected.
RCU811US_IB_REVB 9/26/03 11:54 AM Page 11

12
Event Timer
1. Press and hold the SETUP (S) key for 2-3 seconds
until the LCD display shows the Setup Mode? Screen.
2. Release the SETUP (S) key.
3. Press and release the MACRO (M) key. The Macro Key?
Screen is displayed
4. Press and release the SETUP (S) key. The Macro X Clear?
Screen appears in the display. Note: To cancel at this point,
press and release the CLEAR key.
5. Press and release the ENTER key to clear ALL the
Macros. The Clearing Wait Screen appears in the display.
6. The LCD display shows the Success Screen, then returns
to the normal time display. Deletion of ALL SmartMacros
is now complete.
5. Press and release the SETUP (S) key. The Macro X Clear?
Screen is displayed.
Note: If you are in the process of deleting a SmartMacro
and you decide not to delete it, you can cancel the deletion
process by pressing and releasing the CLEAR key.
6. Press and release the ENTER key to delete the selected
Macro. The Macro X Clearing Screen is displayed.
7. The LCD display shows the Success Screen, then returns
to the normal time display. The SmartMacro deletion is
now complete.
To delete ALL SmartMacros that have previously been programmed, follow these steps:
Delete ALL SmartMacros
The Event Timer allows you to set your RCU811 to turn a component (TV, VCR, AUDIO, etc.) on
or off at the preprogrammed time. For example, you can set your AUDIO equipment to turn music
on, set your TV to turn off at a certain time, or set your VCR to turn on and record. Up to four
timer events can be set. However, events you program happen only once, on the day you set them.
You cannot set events for future days; they must be on the current day. After setting up your
Event Timer, be sure to leave the remote pointed at the component(s) you have set it to control.
Note: The RCU811 also has a SLEEP (ZZZ) key, which can be used to activate the Sleep function in
your TV, if equipped with this feature. You may want to try this before setting up an Event Timer
to turn off your TV after a certain time.
To set an Event Timer, follow these steps:
1. Press and hold the SETUP (S) key for 2-3 seconds
until the LCD display shows the Setup Mode? Screen.
2. Release the SETUP (S) key.
3. Press and release the SETUP (S) key repeatedly
until the Timer 1 Mode? Screen appears.
4. Press and release the desired component key
(TV, VCR, SAT•CBL, AUX1, etc.).
5. The Timer Key? Screen is shown. Press and release the key
you want to set to activate after a certain time delay. For
example, to set your VCR to record, press and release the
VCR component key in step four, then the RECORD key.
Note: Any incorrect keypress results in
the Invalid Screen being shown in the display.
Set an Event Timer
Delete a Single SmartMacro (continued)
RCU811US_IB_REVB 9/26/03 11:54 AM Page 12

13
6. The Time Display Screen is shown. The cursor is flashing
under the hour (HH) digits. Press and release the
LEVEL+/UP ARROW or LEVEL-/DOWN ARROW key to
select the desired hour. Press and release the ENTER key.
7. The cursor under the minutes (MM) digits is now flashing.
Press and release the LEVEL+/UP ARROW or LEVEL-/
DOWN ARROW key to select the minutes. Press and release
the ENTER key.
8. The LCD shows the Success Screen.
9. Once the first Event Timer is set, the LCD displays the
Timer 2 Mode? Screen for setting the next Event Timer.
If you want to set another Event Timer, repeat steps 4-8.
If you do not want to set any more Event Timers, press
and release the SETUP (S) key repeatedly until the Exit
screen is displayed, then press and release the ENTER key.
The Set an Event process is now complete.
Note: A symbol (T) will be displayed to signify a Timer is set.
The LCD display will remain on until the Timer expires.
TV Volume Punch-through
Delete or Review an Event Timer
Any set Event Timer is indicated by the symbol (T) displayed above the clock
on your LCD display. To delete or review an Event Timer, follow these steps:
Note: If no Event Timer has been previously set, this option is not shown in Setup Mode.
1. Press and hold the SETUP (S) key for 2-3 seconds
until the LCD display shows the Setup Mode? Screen.
2. Release the SETUP (S) key.
3. Press and release the SETUP (S) key repeatedly until the
Cancel X Screen is displayed (X=1, 2, 3, or 4 and corresponds
to the timer you wish to delete.).
4. To cancel this event, press and release the ENTER key.
The LCD displays the Success Screen.
Note: If you wish to cancel the Timer deletion process, or
if you only wish to review a previously set Event Timer and
exit from Setup Mode, press and release the CLEAR key.
5. The display returns to either the Cancel X+1 Screen or,
if no more Event Timers have been programmed, to the
Learn Mode? Screen.
6. Deleting or reviewing an Event Timer is now complete.
To exit Setup Mode, press and release the SETUP (S)
repeatedly until the Exit Setup Screen is shown, then
press and release the ENTER key.
Your RCU811’s Volume Punch-through feature allows you to control the volume and mute
functions of your television without the need to place the RCU811 in TV mode. For example,
your TV volume can work even when you are in VCR Mode, because it “punches through”
from one component to another.
Specifically, the TV VOL+, VOL-and MUTE keys work even when you are in VCR, DVD, CABLE,
or SAT Modes. This feature is also available if one of the AUX keys is programmed to control a
second VCR, DVD, CABLE, or SAT component.
The LCD shows component changes for the Volume Punch-through keys if they are pressed
in other modes (e.g., If you are in CABLE Mode and you press and release the VOL+key,
TV is displayed in the LCD).
Note: All CD/AUDIO Modes take any Volume/Mute keypress commands from the
CD/AUDIO code. All other components punch through to the TV Volume/Mute control.
RCU811US_IB_REVB 9/26/03 11:54 AM Page 13

14
Set Time for LCD Display
You can set the time the LCD displays. To set the time for the status display, follow these steps:
1. Press and hold the SETUP (S) key for 2-3 seconds
until the LCD display shows the Setup Mode? Screen.
2. Release the SETUP (S) key.
3. Press and release the SETUP (S) key repeatedly
until the Clock Setup Screen 1 appears.
4. The cursor under the Hours digits (HH) will be flashing.
Press and release the LEVEL+/UP ARROW or LEVEL-/DOWN
ARROW keys to select the hour. Press and release the ENTER
key once you have reached the correct hour.
Note: To adjust the AM/PM designation, repeatedly
scroll through the hour settings.
5. The cursor under the Minutes digits (MM) now flashes.
Press and release the LEVEL+/UP ARROW or LEVEL-/DOWN
ARROW keys to select the minutes. Press and release the
ENTER key once you have reached the correct minute setting.
The LCD display shows the Success Screen, then returns to
the normal time display. The time setting is now complete.
Backlight illumination is generated by an Electroluminescent (EL) panel that gives a blue light,
which lets you see the status display in the dark. Backlight illumination is toggled on or off with
successive keypresses of the BACKLIGHT key. When toggled on, the backlighting remains on as
long as keys are being pressed. The backlighting will turn off five seconds after the last keypress.
Once the Backlight time has expired, the Backlight does not reactivate until a key is pressed again.
If the Backlight illumination is on, and the BACKLIGHT key is pressed again, the Backlight turns off.
Backlighting
VCR/DVD Punch-through
Record Key
Additional Features
Your RCU811 punches through the six transport keys (REVERSE, PLAY, FORWARD, RECORD,
STOP and PAUSE) to VCR or DVD Mode, whichever was used most recently. Punch-through to
VCR or DVD transport keys is only allowed for TV, VCR, DVD and CABLE Modes. The SAT and
CD/AUDIO transport keys are dedicated to their programmed modes.
The LCD shows component changes for the VCR or DVD Punch-through keys if they are pressed
in other modes (e.g., If you are in CABLE Mode and you press and release PLAY, either VCR or
DVD is displayed in the LCD).
In the VCR and AUDIO/CD Modes (including Punch-through), the RECORD key must be pressed
twice before the command is sent. This is also true if a VCR component is programmed under any
other mode. The exceptions are for TV, DVD, CABLE and SAT codes, where the RECORD key
transmits the command after only a single RECORD keypress.
RCU811US_IB_REVB 9/26/03 11:54 AM Page 14

15
A Master Reset returns the RCU811 back to the original factory settings. The Master Reset
clears all user-programmed codes, Learned commands, Event Timers and SmartMacros.
To perform a Master Reset, follow these steps:
1. Press and hold the SETUP (S) key for 2-3 seconds
until the LCD display shows the Setup Mode? Screen.
2. Release the SETUP (S) key.
3. Press and release the SETUP (S) key repeatedly
until the Reset Screen appears.
4. Press and release the ENTER key.
5. The LCD displays the Confirm? Screen. Press and release
the ENTER key. The Wait Screen appears while entries
are being cleared and the LCD returns to the normal
time display.
Note: If at this point, you wish to cancel the
Master Reset operation, press and release the CLEAR key.
6. All settings are now reset to the factory default.
The RCA All Power Off feature is available in all normal operating modes. If the ON•OFF
key is pressed twice consecutively (within two seconds), all RCA equipment is turned off.
The LCD shows the All Off Screen while this routine is active.
Master Reset
RCA All Power Off Feature
RCU811US_IB_REVB 9/26/03 11:54 AM Page 15

16
AUDIO FEATURES
AM•FM KEY
The AM•FM key allows you to select the AM or FM band on your AUDIO system.
CENTER, FRONT, REAR & TEST KEYS
You can adjust the levels of the center, front and rear speakers by using the LEVEL+/UP
ARROW or LEVEL-/DOWN ARROW keys. The TEST key is used when you make speaker
balance adjustments to maximize the performance of your AUDIO system.
CD, TAPE, TUNER, TV, VIDEO KEYS
Use the CD, TAPE, TUNER, TV and VIDEO keys to select the component
you want to control.
DSP MODE KEY
When the Digital Signal Processing (DSP) Mode is enabled, pressing this key
allows you to cycle through the various DSP Modes.
DSP ON.OFF KEY
Pressing this key allows you to turn the DSP mode on or off.
LEVEL+/UP ARROW AND LEVEL-/ DOWN ARROW KEYS
The LEVEL+/UP and LEVEL-/DOWN ARROW keys are used to make adjustments
on delay time, center speaker output level, rear speaker output level, front speaker
level or subwoofer level.
BACKLIGHT KEY
The BACKLIGHT key turns the LCD Backlighting on or off.
COMPONENT KEYS
The component keys change the component currently being controlled by the remote
(e.g., TV, VCR, SAT•CBL, DVD, AUDIO, CD, AUX1, AUX2). The AUDIO key allows you
to control your TUNER, TAPE and AMP.
ENTER KEY
The ENTER key is used to complete channel selections for some brands of TVs. Sometimes
it is also used to complete the highlighted sections when navigating through menu screens.
This key is also used during Setup Mode to activate certain functions.
GO BACK KEY
The GO BACK key allows you to go to the previous channel you selected. It operates
the same as the Last Channel, Previous Channel or Recall keys on your existing remote.
GUIDE KEY
If your component is equipped with this feature, the GUIDE key brings up the on-screen
program listing.
LEARN
The LEARN feature is used to supplement the preprogrammed Code Lists. The standard
Code Lists provide most of the functions needed, but you can add a small number of additional
functions of your choice.
LIQUID CRYSTAL DISPLAY
The Liquid Crystal Display (LCD) provides a visual interface between the user and the remote.
The LCD status display remains blank when the remote is not in use. Pressing any key displays
the current component mode and the time. The LCD status display turns off after approximately
15 seconds from the last keypress, except when an Event Timer is set. In this case, the LCD
remains on until the event has occurred.
L1, L2, L3 KEYS
The L1, L2, and L3 are generic keys that can be used to store learned commands.
Glossary of Terms
RCU811US_IB_REVB 9/26/03 11:54 AM Page 16

17
MENU KEY
The MENU key brings up the Main Menu. If you are already in the menu system, press
and release the SELECT/OK, ENTER, or MENU keys to select a highlighted choice. Use the
NAVIGATION keys (UP, DOWN, LEFT, and RIGHT ARROW keys) to move through the
menu selections.
NOTE: With some brands, the CH+, CH-, VOL+ and VOL- keys navigate through
the highlighted choices.
MUTE KEY
The MUTE key mutes the volume on your component with volume control.
NAVIGATION KEYS & SELECT/OK KEY
Use the NAVIGATION keys (UP, DOWN, LEFT and RIGHT ARROW keys) to move through
on-screen menu and guides. The NAVIGATION keys may also be used to move through the
highlighted choices. The SELECT/OK key chooses the highlighted choice.
NOTE: With some manufactured models, the MENU or ENTER key is used to select
the highlighted choices.
PIP & SWAP KEYS
The Picture-in-Picture (PIP) and SWAP keys operate your TV’s Picture-in-Picture,
if equipped with this feature.
PUNCH-THROUGH
A Punch-through command has the ability to punch through from one component to another
(e.g., pressing the TV VOL+/VOL- keys can work while the remote is in the VCR Mode).
REVERSE, PLAY, FORWARD, RECORD, STOP, PAUSE KEYS
These keys operate the same as your existing remotes.
SETUP (S) KEY
The SETUP (S) key is used to walk you through the steps in setting up the remote. Setup is used
for Code List Entry, Code Search, Code Identification and other functions. During a Setup function,
if no key is pressed for 30 seconds, the remote automatically exits from the Setup routine.
SLEEP (ZZZ) KEY
The SLEEP (ZZZ) key allows you to turn your TV off automatically, if equipped
with this feature.
SMARTMACRO
When programmed, the SmartMacro function causes a series of events to occur in sequential order.
Once programmed, pressing the MACRO (M) key and 1, 2, or 3 digit keys activates one of your
programmed Macros. An example of a Macro sequence could be “Turn on the TV; then turn on
the satellite receiver; then set it to channel 57.” You can program and store three SmartMacros,
each consisting of up to six commands.
TIMER
This feature allows an event to happen at a later time on the current day, such as “Turn the TV
on at 7:00 PM.” The Timer Mode allows you to set up to four individual commands and must be
reprogrammed after each event occurs.
TV•VCR KEY
The TV•VCR key operates the same as the TV/VCR or antenna keys on your original remotes.
VOLUME AND CHANNEL KEYS
The VOLUME and CHANNEL keys (VOL+/VOL-, CH+ and CH- keys) increase
and decrease the volume level and channel numbers.
NOTE: With some brands, these keys also navigate through the highlighted choices
in the menu options.
RCU811US_IB_REVB 9/26/03 11:54 AM Page 17

PROBLEM
The LCD status display is
blank when you press a key.
The remote does not operate
your audio or video components.
You have problems programming a TV/VCR,
TV/DVD, or VCR/DVD combination unit.
Your VCR is not recording.
You have trouble changing the channels
on your TV.
The SELECT/OK key is not responding.
The IR Learning or SmartMacro processes
cannot be completed successfully.
SOLUTION
• Check to make sure the
batteries are properly installed.
• Replace the batteries with
four new AAA alkaline batteries.
• Try all code programming procedures
with all the codes from the appropriate
part of the Code Lists.
• Make sure the remote is in the correct mode
for the component you are attempting to
control (TV, VCR, DVD, etc.)
• Make sure the remote is pointed
at the component being operated.
• Try the VCR or DVD code for your brand.
Some combination units, however, may
require both a TV and a VCR and/or DVD
code for full operation depending on your
unit. To do this, program the TV code under
the TV key and the VCR and/or DVD under
the VCR and/or DVD key.
• As a safety feature on your remote,
you must press the RECORD key twice.
• If your original remote requires the ENTER
key to be pressed after a channel is selected,
press the ENTER key on the RCU811 to
select the channel.
• Try using the MENU, GUIDE or ENTER
key to make the selection.
• Replace batteries in the RCU811 and the
remote from which you are trying to learn.
• The distance between the remotes
should be approximately 2-3 inches.
• Do not conduct the Learning process
near an incandescent lamp.
• The memory capacity is full (six Learned
commands for each of the three Macros).
• The original remote may not be
compatible with the Learning procedure.
18
Troubleshooting
RCU811US_IB_REVB 9/26/03 11:54 AM Page 18

19
universal
Compatible avec
la plupart des
marques actuelles.
Afficheur d'etat ACL
• Présente les
instructions détaillées
de programmation;
demande les prochaines
étapes; valide les entrées
corrects. Affiche l'heure
et les tableaux de codes
programmés pour
vos appareils.
Touche entiérement
rétroéeclairée
• Éclaire le clavier pour
la navigation la nuit.
Apprend les
commandes des
télécommandes
originales
• Peut mémoriser quelque
30 commandes de touches
pour chaque télécommande
originale.
Touches SmartMacro
•
Pour commander
plusieurs commandes
par deux simples
pressions de touches.
UNIVERSEL
Télécommande intelligente
RCU811US_IB_REVB 9/26/03 11:54 AM Page 19

20
Table des matières
Introduction . . . . . . . . . . . . . . . . . . . . . . . . . . . . . . . . . . . . . . . . . . . . . . . . . . . . . . . . . . . . . . . . . . . . . . . . . .21
Information sur les piles . . . . . . . . . . . . . . . . . . . . . . . . . . . . . . . . . . . . . . . . . . . . . . . . . . . . . . . . . . . . . . . .21
Installation des piles . . . . . . . . . . . . . . . . . . . . . . . . . . . . . . . . . . . . . . . . . . . . . . . . . . . . . . . . . . . . . . . . .21
Économiseur de piles . . . . . . . . . . . . . . . . . . . . . . . . . . . . . . . . . . . . . . . . . . . . . . . . . . . . . . . . . . . . . . . .21
Sauvegardeur de code . . . . . . . . . . . . . . . . . . . . . . . . . . . . . . . . . . . . . . . . . . . . . . . . . . . . . . . . . . . . . . .21
Mise en marche par défaut . . . . . . . . . . . . . . . . . . . . . . . . . . . . . . . . . . . . . . . . . . . . . . . . . . . . . . . . . . .21
Schéma du produit . . . . . . . . . . . . . . . . . . . . . . . . . . . . . . . . . . . . . . . . . . . . . . . . . . . . . . . . . . . . . . . . . . . . .22
Afficheur d'état ACL . . . . . . . . . . . . . . . . . . . . . . . . . . . . . . . . . . . . . . . . . . . . . . . . . . . . . . . . . . . . . . . . . . .22
Opérations de programmation . . . . . . . . . . . . . . . . . . . . . . . . . . . . . . . . . . . . . . . . . . . . . . . . . . . . . . . . . . .22
Accéder au mode de programmation . . . . . . . . . . . . . . . . . . . . . . . . . . . . . . . . . . . . . . . . . . . . . . . . . . .23
Quitter le mode de programmation . . . . . . . . . . . . . . . . . . . . . . . . . . . . . . . . . . . . . . . . . . . . . . . . . . . .23
Entrée de code . . . . . . . . . . . . . . . . . . . . . . . . . . . . . . . . . . . . . . . . . . . . . . . . . . . . . . . . . . . . . . . . . . . . . . . .24
Entrée de liste de codes . . . . . . . . . . . . . . . . . . . . . . . . . . . . . . . . . . . . . . . . . . . . . . . . . . . . . . . . . . . . . .24
Recherche de code . . . . . . . . . . . . . . . . . . . . . . . . . . . . . . . . . . . . . . . . . . . . . . . . . . . . . . . . . . . . . . . . . .25
Identification de code . . . . . . . . . . . . . . . . . . . . . . . . . . . . . . . . . . . . . . . . . . . . . . . . . . . . . . . . . . . . . . . .26
Tableau d'identification de code . . . . . . . . . . . . . . . . . . . . . . . . . . . . . . . . . . . . . . . . . . . . . . . . . . . . . . .26
Apprentissage . . . . . . . . . . . . . . . . . . . . . . . . . . . . . . . . . . . . . . . . . . . . . . . . . . . . . . . . . . . . . . . . . . . . . . . . .27
Conseils d'apprentissage . . . . . . . . . . . . . . . . . . . . . . . . . . . . . . . . . . . . . . . . . . . . . . . . . . . . . . . . . . . . .27
Apprentissage de codes . . . . . . . . . . . . . . . . . . . . . . . . . . . . . . . . . . . . . . . . . . . . . . . . . . . . . . . . . . . . . .27
Apprentissage de commandes . . . . . . . . . . . . . . . . . . . . . . . . . . . . . . . . . . . . . . . . . . . . . . . . . . . . . . . . .28
Suppression de toutes les commandes apprises sauvegardées sous un mode de composant . . . . .28
Opérations de touche macro intelligente . . . . . . . . . . . . . . . . . . . . . . . . . . . . . . . . . . . . . . . . . . . . . . . . . . .28
Programmer une macro intelligente . . . . . . . . . . . . . . . . . . . . . . . . . . . . . . . . . . . . . . . . . . . . . . . . .29-31
Exécuter une macro intelligente . . . . . . . . . . . . . . . . . . . . . . . . . . . . . . . . . . . . . . . . . . . . . . . . . . . . . . .31
Supprimer une seule macro intelligente . . . . . . . . . . . . . . . . . . . . . . . . . . . . . . . . . . . . . . . . . . . . . . . . .31
Supprimer TOUTES les macros intelligentes . . . . . . . . . . . . . . . . . . . . . . . . . . . . . . . . . . . . . . . . . . . . .31
Minuterie d'événement . . . . . . . . . . . . . . . . . . . . . . . . . . . . . . . . . . . . . . . . . . . . . . . . . . . . . . . . . . . . . . . . .32
Programmation d'une minuterie d'événement . . . . . . . . . . . . . . . . . . . . . . . . . . . . . . . . . . . . . . . . . . .32
Supprimer ou consulter une minuterie d'événement . . . . . . . . . . . . . . . . . . . . . . . . . . . . . . . . . . . . . .33
Transfert de volume de téléviseur . . . . . . . . . . . . . . . . . . . . . . . . . . . . . . . . . . . . . . . . . . . . . . . . . . . . . . . .33
Transfert VCR/DVD . . . . . . . . . . . . . . . . . . . . . . . . . . . . . . . . . . . . . . . . . . . . . . . . . . . . . . . . . . . . . . . . . . .33
Touche Record . . . . . . . . . . . . . . . . . . . . . . . . . . . . . . . . . . . . . . . . . . . . . . . . . . . . . . . . . . . . . . . . . . . . . . . .34
Autres caractéristiques . . . . . . . . . . . . . . . . . . . . . . . . . . . . . . . . . . . . . . . . . . . . . . . . . . . . . . . . . . . . . . . . .34
Régler l'heure de l'afficheur ACL . . . . . . . . . . . . . . . . . . . . . . . . . . . . . . . . . . . . . . . . . . . . . . . . . . . . . .34
Rétroéclairage . . . . . . . . . . . . . . . . . . . . . . . . . . . . . . . . . . . . . . . . . . . . . . . . . . . . . . . . . . . . . . . . . . . . . .34
Rétablissement général . . . . . . . . . . . . . . . . . . . . . . . . . . . . . . . . . . . . . . . . . . . . . . . . . . . . . . . . . . . .34-35
Fonction Mise à l'arrêt général RCA . . . . . . . . . . . . . . . . . . . . . . . . . . . . . . . . . . . . . . . . . . . . . . . . . . . .35
Glossaire . . . . . . . . . . . . . . . . . . . . . . . . . . . . . . . . . . . . . . . . . . . . . . . . . . . . . . . . . . . . . . . . . . . . . . . . . . .36-37
Dépannage . . . . . . . . . . . . . . . . . . . . . . . . . . . . . . . . . . . . . . . . . . . . . . . . . . . . . . . . . . . . . . . . . . . . . . . . . . .38
Garantie limitée de 90 jours . . . . . . . . . . . . . . . . . . . . . . . . . . . . . . . . . . . . . . . . . . . . . . . . . . . . . . . . . . . . .39
Assistance téléphonique . . . . . . . . . . . . . . . . . . . . . . . . . . . . . . . . . . . . . . . . . . . . . . . . . . . . . . . . . . . . . . . .40
RCU811US_IB_REVB 9/26/03 11:54 AM Page 20
Other manuals for RCU811 - Learning Remote
1
Table of contents
Languages:
Other RCA Remote Control manuals

RCA
RCA RCR615 User manual

RCA
RCA RCRPS04GR Parts list manual

RCA
RCA RCU300TZ Series User manual

RCA
RCA RCR503BR Administrator guide

RCA
RCA RCRN05BHZ User manual

RCA
RCA RCU500 User manual

RCA
RCA SystemLink 6 AV RCU600RS User manual

RCA
RCA RCR4383 User manual

RCA
RCA RCU 404 User manual

RCA
RCA RCRN04GBE User manual
Popular Remote Control manuals by other brands

BMW Motorrad
BMW Motorrad DWA 5 Supplementary Rider's Manual

Keyline
Keyline MAVIK Manufacturer's information and instructions for use

Garmin
Garmin Fusion Apollo MS-ERX400 owner's manual

Control
Control SR260 Installation and setup guide

Leviton
Leviton Bitwise BWRMT installation guide

Somogyi
Somogyi URC 2 instruction manual