1
Introduction
Table of Contents
Important Information
Warnings______________________________ i
Cautions ______________________________ i
Note to Cable TV Installer _______________ i
Product Registration ____________________ i
Hooking Up the VCR
Choosing a Hookup ____________________ 2
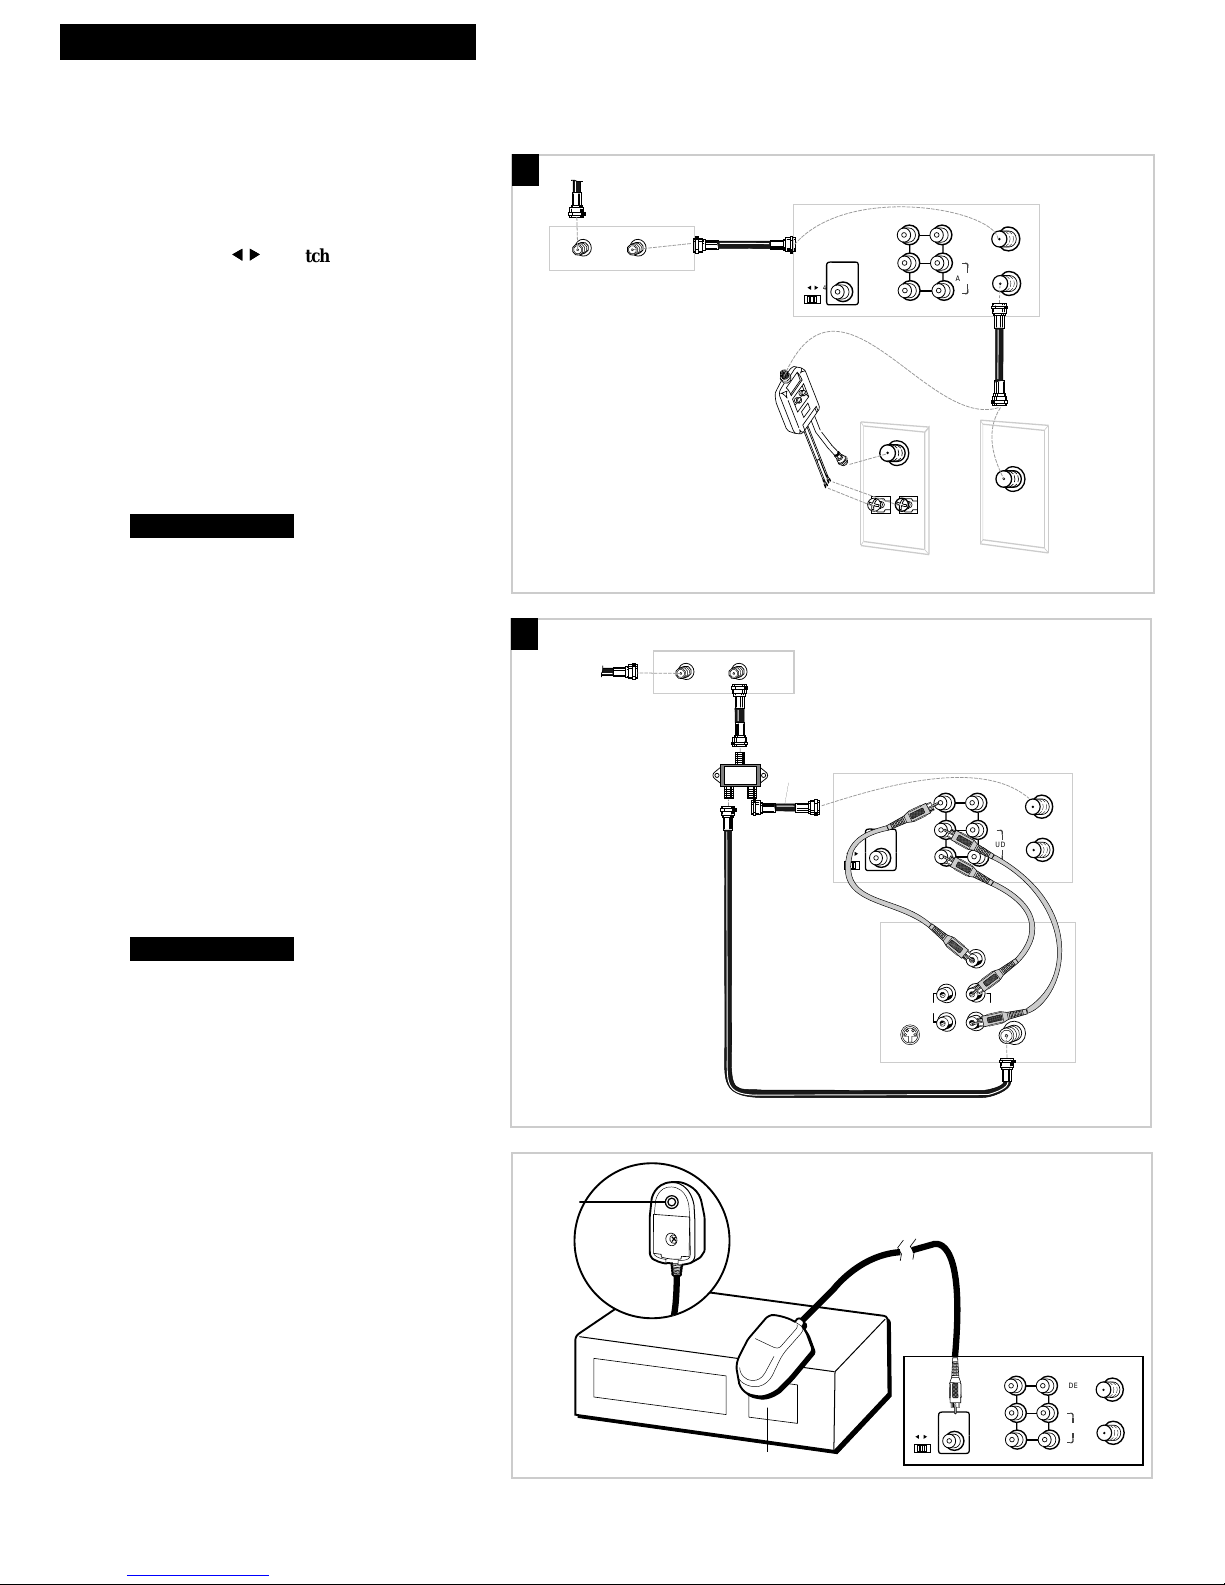
Antenna or Cable System Without a
Cable Box _________________________ 3
Cable System With Cable Box to
Unscramble All Channels ___________ 4
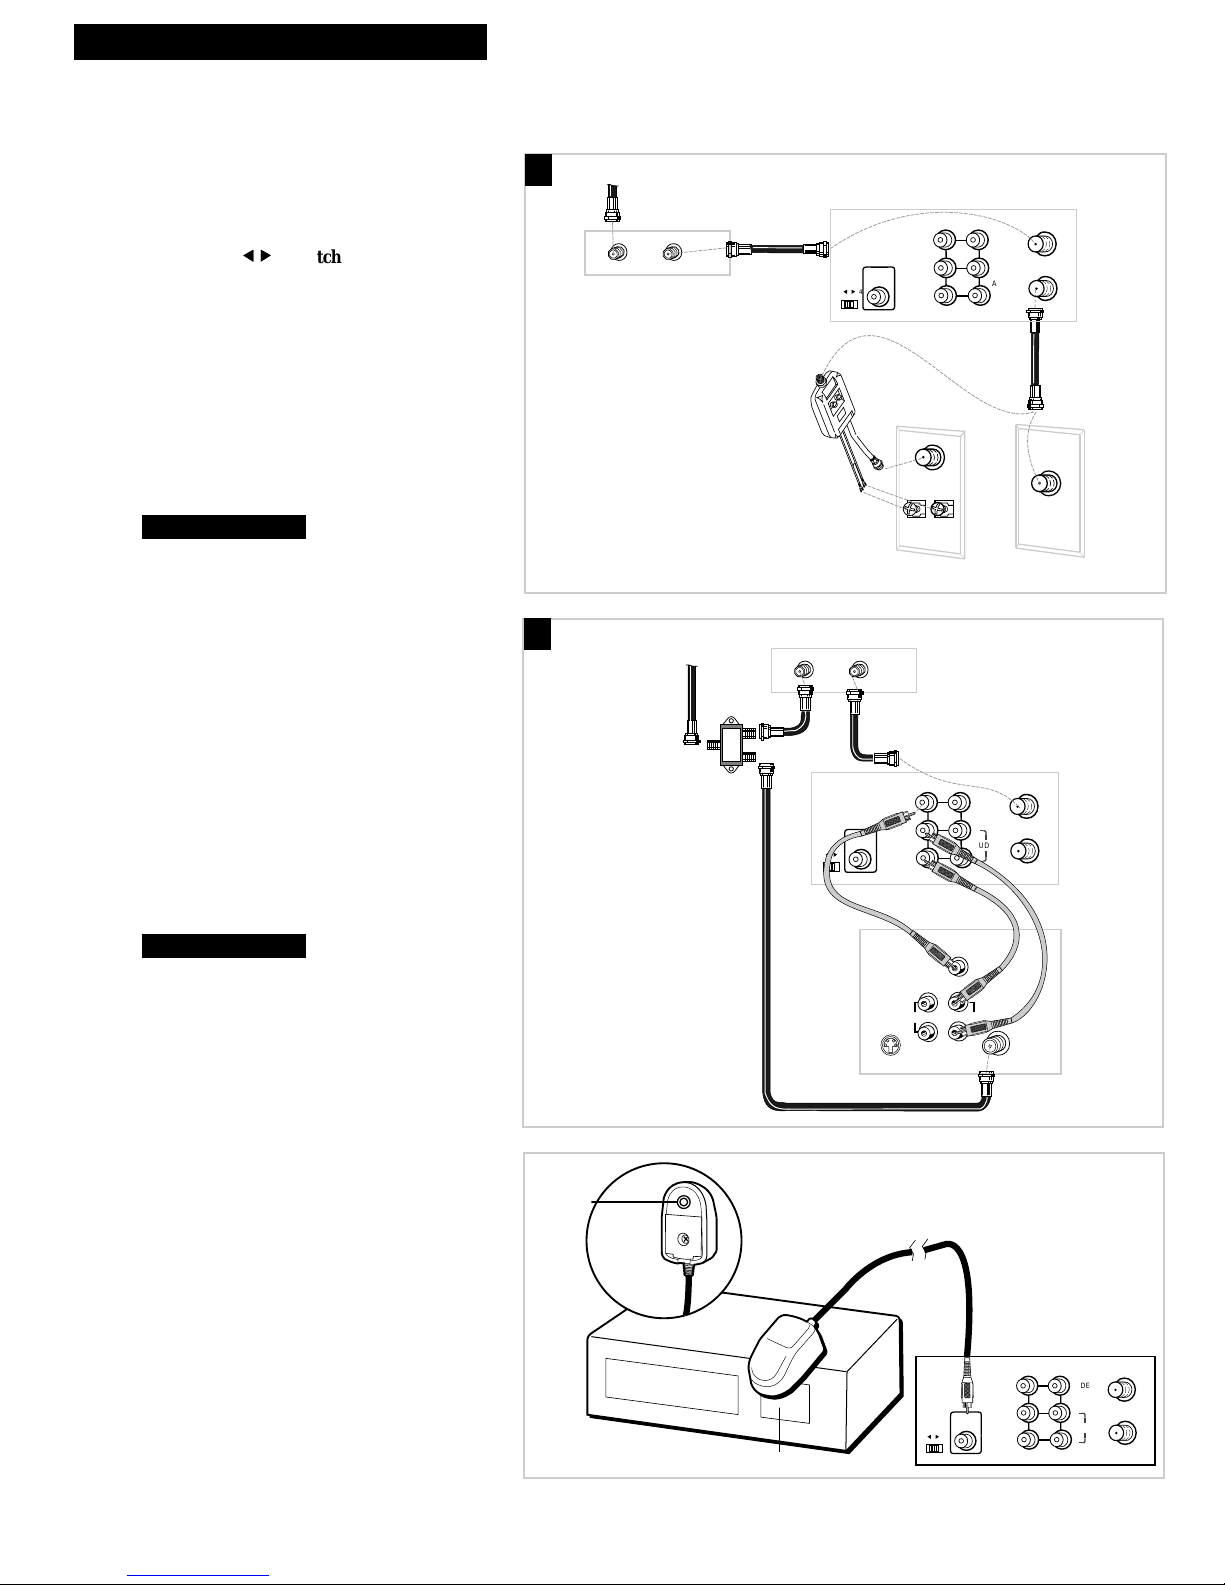
Cable System With Cable Box to
Unscramble Pay Channels___________ 5
Connecting Two VCRs for Copying Tapes_ 6
Setting Up the VCR
Startup
Check Accessories With VCR ________ 7
Insert Batteries in Remote ___________ 7
Turn on TV and VCR _______________ 7
Use On-Screen Menu System ________ 8
Select Signal Type__________________ 8
Set the Time and Date ______________ 9
Place Channels in VCR's Memory ____ 9
Add or Remove Channels from
VCR's Memory_________________ 10
Use TV•VCR Button _______________ 10
Set Up Cable Box__________________ 11
Using the Remote Control
Component, VCR, TV, and
StarSight Function Buttons ______ 12-14
Controlling a TV ______________________ 15
Playing a Tape
Operating Instructions_________________ 16
Using the Playback Features
Auto Play Feature_________________ 17
Tracking _________________________ 17
Pause for Stop-Action______________ 17
Slow Motion______________________ 17
Picture Search ____________________ 18
Variable Speed Picture Search and
Frame Advance ________________ 18
Go-To 0:00:00 and STOP ___________ 18
Index Search _____________________ 19
Scan and Play ________________ 19
Skip Search_______________________ 19
Tape Length______________________ 20
Repeat Function __________________ 20
Audio Playback___________________ 20
Closed Captioning ________________ 21
On-Screen Status Displays__________ 21
Recording Features
Recording Speeds _____________________ 22
Pause________________________________ 22
Recording Options______________ 22
Basic Recording_______________________ 23
Watching a TV Channel While VCR
is Recording a Different Channel ____ 23
Timer Recording ___________________ 24-25
Recording Broadcast Stereo TV or SAP___ 26
Recording Audio Only_________________ 27
Using Two VCRs for Copying
and Editing Tapes__________________ 28
StarSight System
Introduction__________________________ 29
Subscribing to StarSight Information_____ 29
Activating StarSight ________________ 31-32
Using the StarSight Features
INFO Button_______________________ 33
Grazing___________________________ 33
Browsing _________________________ 34
Grid Guide________________________ 35
Tuning by Channel_________________ 35
Channel Guide ____________________ 36
Theme Guide______________________ 37
Recording ______________________ 38-40
Selecting and De-selecting Channels__ 41
Changing the Channel Order ________ 41
Scheduling Data Reception __________ 42
What you should do when you move _ 42
Changing Your Cable Box___________ 43
References
PBS Stations _______________________ 44-46
Cable Box Codes ______________________46
Specifications_________________________ 47
Cleaning the VCR _____________________ 47
Location of Controls
Front Panel_______________________ 48
Display Panel_____________________ 49
Back Panel _______________________ 50
Limited Warranty _____________________ 51
Trouble Checks ____________________ 52-55
Index _____________________________ 56-57