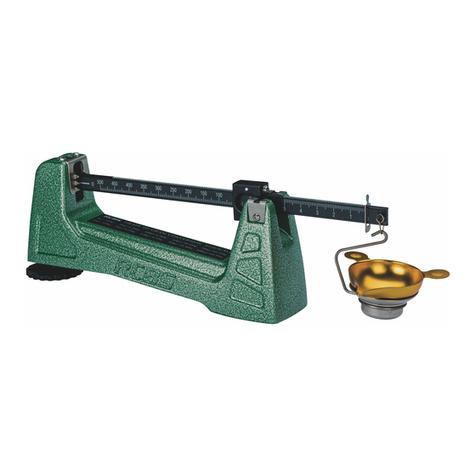
RCBS M1000 User manual

M1000 MECHANICAL SCALE
PRODUCT INSTRUCTIONS
151020

WARNING!
Before using this product, read and follow these instructions carefully. Failure to
do so could result in serious injury or death, or property damage.
If you have any questions while assembling or operating this product,
call us at 1-800-379-1732 (U.S. or Canada)
Or email us at rcbs.tech@vistaoutdoor.com
This manual contains important safety and operating information. Keep this as a
permanent part of your reloading equipment. If lost, contact us for a replacement.
1

GUNPOWDER WARNINGS
WARNING! Keep out of reach of children
• Store powders in their original package in a cool, dry environment free from wide temperature
variations.
• Keep cans tightly sealed and labels intact.
• Markdateofpurchaseoncan,forfuturereference.Useolderstockrst.
• Never use glass as a storage container. This may cause a “greenhouse effect” raising temperature
in container and degrade the powder.
• Checkcansandpowderforsignsofdegradation.Manypowderswillexhibitanered-browndust
on the granules and/ or inside the container when this happens. If it does, do not use propellant;
dispose of it properly in compliance with local regulations.
• DO NOT have more than one can of powder on the bench at one time. Powder Cans should be
stored away from the bench to avoid picking up the wrong one.
• DONOTuseanypowderunlessitsidentityispositivelyknown.Theonlypositiveidenticationis
the manufacturer’s label on the original canister. Properly discard all mixed powders and those of
uncertain identity in compliance with local regulations.
• If you use a powder measure, replace the lids on both the Powder Hopper and Powder Can after
thePowderHopperhasbeenlled.
• When using a Powder Measure, settle the powder in the Powder Hopper before charging any
cases. Throw and check the weight of at least ten (10) charges. This will assure you that the
correct powder charge is being thrown.
• Whenyounishareloadingsession,pouranyremainingpowderbackintoitsoriginalfactory
container. This will preserve the identity and shelf life of the powder.
• DO NOT smoke while reloading.
-
mation on how to reload, or handle or use reloading components. Always read and thoroughly
understand a reloading manual before attempting to reload ammunition.
Reloading is an enjoyable and rewarding hobby when conducted safely. But, as with many hobbies,
carelessness or negligence can make reloading hazardous. When
reloading, always follow these safety guidelines to minimize the risk of personal injury or death.
• Always wear safety glasses.
• Understand what you are doing and why. Read handbooks and manuals on reloading. Talk to
experienced reloaders. Write or call suppliers of equipment or components if you have questions
or are in doubt.
• Read and understand all warnings and instructions accompanying your equipment and
components. If you do not have written instructions, request a copy from the manufacturer. Keep
instructions for future reference.
• Don’t rush or take short cuts. Establish a routine and follow it at a leisurely pace.
• Keep complete records of reloads. Label each box showing the date produced, and the type of
primer, powder and bullet used.
• Donotsmokewhilereloading,orreloadnearsourcesofheat,sparksorame.
• Observe good housekeeping in the reloading area. Keep tools and components neat, clean and
orderly. Promptly and completely clean up any spills.
• Keepyourhandsandngersawayfrom“danger”spotsandpinch-pointswheretheymightbe
injured.
• Keep all reloading equipment and components out of reach of children.
• Stay alert. Reload only when you can give your undivided attention. Do not reload when tired, ill,
rushedorundertheinuenceofdrugsoralcohol.
Because RCBS®has no control over the choice, assembly or use of components or other reloading
equipment, RCBS assumes no liability, expressed or implied, for the use of ammunition reloaded
with this product.
2
Use only laboratory tested reloading data. We highly recommend the current Speer®Reloading
Manual.
OBSERVE ALL WARNINGS ABOUT THE USE OF MAXIMUM LISTED LOADS.
• Examine empty cases to be sure they are in good condition before reloading. Thin, split,
deformed, or badly corroded or pitted cases may be structurally weak, and result in a dangerous
condition. Pay particular attention to splits in the mouth, separation between the case and the
head, and dents in the shoulder.
• Do not store cartridge cases or ammunition near harsh chemicals such as gasoline, household
cleaners or cat urine. The fumes can weaken the metal and present a dangerous condition.
• Donotcleancaseswithchemicalsotherthanthosespecicallydesignedforthepurpose.
• Do not attempt to clean loaded ammunition or primed cases. Doing so can cause corrosion, and
weakenthecase,orcauseamisre/hangrecondition.
• Ensure cases have proper primer pocket sizes; remove primer staking/crimp if necessary.
Attempting to seat a primer into an undersized pocket or pocket with staking/crimping can result
in detonation.
• Donotreamoutorenlargeashholesofcartridgecases.Thismaychangetheignitionrateand
result in dangerous pressures.
• Resizeandtrimredcasestoensurereliablechamberingandobtainproperbullettensionand
crimp.
• Never attempt to guess at the identity of your ammunition.
3

• Magnetic damping
• Leveling foot for easy zero balancing of scale
• Ruggeddie-castaluminumbase
• Ambidextrous design
• Ambidextrous scale pan
• Dust/storage Cover
The M1000 has a 1021 grain capacity, and features a three poise system.
Adjustments made using the large poise on the main beam, adjust from 0 to 1000
grains,in20grainincrements.Themediumpoiseonthetop,adjustsfrom0-20
grains in 1 grain increments. The small poise on bottom, in line with the main beam,
adjusts from 0 to 1 grains, in 0.1 grain increments. The M1000 utilizes magnetic
dampingtoeliminateunnecessarybeamoscillation.Itfeaturesaruggeddie-cast
basewithalargeadjustablelevelingfootforextrastabilityonthebench.Self-
aligning ceramic bearings support the hardened steel beam pivots to guarantee
sensitivity to 0.1 grains. Ambidextrous design with dual graduation markings allows
the user to read the weight from either side of the scale.
UNPACKING
Your M1000 Scale is packed in a specially designed carton to provide maximum
protection. Unpack the scale carefully to avoid damaging components. Identify parts
as you carefully unpack your new M1000 Mechanical Scale (Photo 1). To remove the
dust/storage cover, squeeze the cover at the middle tabs and lift off.
The M1000 scale is a highly precision reloading instrument. Included is a 694.6 grain
check weight. This weight was chosen to ensure that the operator positions all three
poises to a load greater than the mid capacity of the scale. RCBS suggests using
either OIML Class F2 standard check weights or NIST class F RCBS Check Weights
for checking the accuracy of your scale at other weigh points.
ToassembleyourM1000scale,placethebeamassemblyontothebasebyrst
inserting the damping vane in between the zero reference pointers (Photo 2).
Next rest the sharp edges of the pivot portion of the beam onto the ceramic bearings
(Photo 3). Place pan support onto shackle located at the end of the beam (Photo 4).
To complete assembly place scale pan onto pan support (Photo 5).
4
(See back of this manual for a detailed expolded parts diagram)
Photo 1: Scale Components
BEAM ASSEMBLY
BASE
SCALE PAN
SCALE PAN
SUPPORT
CHECK WEIGHT

5
Photo 2: Beam placement
Photo 3: Placement of pivots onto ceramic bearings
Photo 4: Place pan support onto shackle
Photo 5: Place pan onto pan support

The M1000 Scale is designed for use by both right and left handed users. The scale
pan consists of two tabs, a main beam with graduation markings on both sides and
a set of reference pointers on each side. Photos 6 & 7 below show the M1000 with a
100 grain load in both a right and left handed orientation.
(directions below are for right-handed use)
• Placethescaleonaat,levelsurface
• Set in a location which allows viewing of scale as near to eye level as possible;
this will eliminate any potential parallax error
• Place all three poises at zero
• Place scale pan on pan support
• Scale is balanced when zero line on main beam lines up with center reference
pointer (Photo 8)
• If zero line does not line up with center reference pointer, rotate leveling foot
clockwisetomovereferencepointerupward,orrotatecounter-clockwisetomove
reference pointer downward (Photo 9)
• The scale should be zero balanced before use and checked periodically during
use for maximum accuracy and protection against error.
NOTE: DO NOT MOVE SCALE ONCE BALANCED. IF SCALE IS MOVED, FOLLOW
STEPSABOVETORE-ZEROSCALE.
6
Photo6:Right-handedoperation
Photo7:Left-handedoperation

7
The pan support on the M1000 scale is calibrated prior to packaging and there
shouldbenodifcultyin“zero”balancingyourscale,however,ifthereisnotenough
adjustment in the leveling foot, to “zero” balance your scale, it may be necessary to
re-calibratethepansupport.Toaccomplishthis,removethepansupporttopfrom
the weight holder, using a Phillips screwdriver (Photo 10). The weight holder contains
several Non-Magnetic weights; if weight needs to be added to pan make sure to
use only Non-Magnetic material, if not the accuracy of the scale could be affected
(Photo 11). Place all weights and pan support screw into scale pan (Photo 12). Place
pansupportbackontoweightholderandre-attachpansupporttoshackleonbeam.
Place scale pan containing calibration weights and pan support screw onto pan
support (Photo 13). Adjust leveling foot to its midpoint and add or remove weights
to bring beam into balance (Photo 14). When “zero” balanced is achieved, as shown
in Photo 8, place all calibration weight material into weight holder and secure pan
supporttoweightholder(Photos15&16).Thepansupportisnowre-calibratedand
ready for use.
Photo 8: Scale balanced
Photo 9: Rotating leveling foot to zero balance scale

8
Photo 10: Removing pan support
Photo11:Weightholdercontainingnon-magneticmaterial
Photo 12: Place calibration weights into scale pan
Photo 13: Place scale pan onto pan support

9
The main poise consists of an accurately adjusted weight which moves parallel to
the axis of the beam and is positioned at weight values by means of a pawl engaging
notchesinthebeam.Thepoiserunisfrom0-1000grainsandtheequally-spaced
notches divide this distance into 50 equal parts so that each subdivision is equiva-
lent to 20 grains of weight.
To zero the main poise, move it to the position where the pawl, located on the right
sideofthepoise,engagestherstnotchontherightendofthepoisetravel.The
poise indicator will line up with the “0” graduation (Photo 17).
Photo 14: Add or remove calibration weights
Photo 15: Place calibration material back into weight holder
Photo 16: Secure pan support to weight holder

To increase weight values, move the poise to the left and line up the indicator with
the desired graduation. Always make sure the pawl is seated in the notch. For
example, the correct setting for 160 grains is shown below (Photo 18).
Donotattempttosetthemainpoiseatanypositionexceptrmlyseatedinanotch.
Alwaysusethemediumpoiseforweightvalues(0-20)andthesmallpoiseforweight
values(0-1)betweenthe20grainincrementsofthelargepoise.
The medium poise functions the same as the large poise. This poise run is from 0 to
20 grains and the equally spaced notches divide this distance into 20 equal parts so
that each subdivision is equivalent to 1.0 grain of weight.
To zero the medium poise, move it to the position where the pawl, which is the top
edge of the rectangular slot through the poise, engages the notch directly above the
“0” graduation. The long, vertical edge of the poise is the indicator and will line up
with the”0” graduation.
To increase weight values, move the poise and line it up with the desired graduation.
Always make sure the pawl is seated in the notch. For example, the correct
setting for 14.0 grains is shown above (Photo 19). Do not attempt to set the poise at
anyposition,onlysetinapositionwhereitisrmlyseatedinanotch.
10
Photo 17: Main poise set on zero
Photo 18: Main poise set at 160 grains

11
The small poise functions the same as the large poise. This poise run is from 0 to
1 grains and the equally spaced notches divide this distance into 10 equal parts
so that each subdivision is equivalent to 1/10th (0.1) grain of weight. To zero the
small poise, move it to the position where the pawl, which is the top edge of
the rectangular slot through the poise, engages the notch directly above the “0”
graduation. The long, vertical edge of the poise is the indicator and will line up with
the”0” graduation. To increase weight values, move the poise and line it up with
the desired graduation. Always make sure the pawl is seated in the notch. For
example, the correct setting for 0.7 grains is shown below (Photo 20).
Do not attempt to set the poise at any position, only set in a position where it is
rmlyseatedinanotch.
The Pointer contains three separate pointers for easy reading of over and under
loads. The center Pointer is what is used when balancing the scale and establishes
aZEROBalance.ThetopandbottomPointersrepresentapproximately1.5grain
above and below target load. The top and bottom pointers allow the user to quickly
weigh loads knowing that if the beam pointer is oscillating between the top and
bottompointerstheloadiswithin+/-1.5grains.Havingtopandbottompointers
also eliminate the need to move the small poise to check powder charge variations.
NOTE:WHENSCALEISZEROBALANCEDITISGOODPRACTICETOVERIFYTHE
EXACT LOAD REQUIRED FOR THE BEAM POINTER TO REACH THE TOP AND
BOTTOM POINTERS.
Photo 20: Small poise set at 0.7 grains
Photo 19: Medium poise set at 14.0 grains

The M1000 scale is equipped with magnetic damping which causes the beam to
come to rest quickly without affecting sensitivity or accuracy. It operates on the
principleofapermanentmagneticeldresistingthemotionofanon-magnetic,
aluminum damper vane attached to the beam.
The damping magnets are positioned inside the base on both sides of the slot in
which the damper vane travels.
12
Photo 22: Top pointer at 0.5 grains above reference target load
Photo 23: Bottom pointer at 0.5 grains below reference target load
Photo 21: Center pointer at 0.1 grain above reference target load

13
The only maintenance required is to keep this slot free of magnetic particles which
could interfere with free movement of the damper vane. The magnetic damping is
effective at all loads and will speed up weighing.
To weigh an unknown load, place the load in the scale pan. Move the main poise to
therstnotchwhichcausesthebeampointertodropbelowthecenterreference
pointer and then move it back one notch. Next move the medium poise to the notch
which brings the beam pointer to below the center reference pointer and move it
back one notch. Lastly move the small poise to the notch that brings the beam
pointer to the center reference pointer. The weight of the unknown load is the sum of
the three poise readings (Photo 24).
The scale can also be used to weigh out predetermined powder charges; either
alone or in combination with a powder measure set to throw a light charge.
Ineithercasethedesirednalweightofthechargeispresetonthepoises.Thiswill
cause the beam pointer to fall below the center reference pointer. Add powder to the
panuntilthebeambalances.Forefcientandeffectiveresultswerecommendusing
anRCBS®PowderTrickler-2(soldseparately).
When making repeated weighings in this manner, avoid weighing errors by making
sure that the poises remain in their correct positions and are not accidentally moved.
Keep the scale clean at all times and be particularly careful to prevent the
accumulation of dirt on the pivots and bearings. NOTE: NEVER APPLY OIL OR
ANY LUBRICANT TO THE PIVOTS OR BEARINGS, AS THIS CAN LOWER THE
ACCURACY AND REPEATABILITY OF THE SCALE.
To store the scale while not in use, place scale pan into slot in base. Hook the scale
pan support into the hole underneath the beam. Slide the large poise to the 840
grain position, this will keep the check weight in place. Remove the beam from the
ceramic bearings and place in the slot. Install the dust/storage cover.
Photo 24: Scale reading of 174.7 grains

14
Photo 25: Scale pan placed into slot in base
Photo 26: Main poise at 840 grain position
Photo27:Storageconguration
Photo 28: Ribs in Dust/Storage cover keep components properly oriented

15

16
Item Description Qty
1 Base 1
2 Beam 1
3 Pointer 1
4 Leveling Foot 1
5 Ceramic Bearing 2
6 Bearing Retainer 2
7 Magnet Fixing 1
8 Magnets 2
9 Screws (M3x6) 4
10 Screws (ST2.9x8) 1
11 Conversion Label 1
12 Center Pivot 1
13 Front Pivot 1
14 Damping Vane 1
15 Main Poise (Front) 1
16 Main Poise (Rear) 1
17 Small Poise 1
18 Graduation Mark (Front) 1
19 Graduation Mark (Rear) 1
20 S/S Shackle 1
21 Scale Pan 1
22 Pan Support (Top) 1
23 S/S Hook 1
24 Weight Holder 1
25 Screws (M5x10) 1
26 Washer 1
27 Screws (M3x10) 2
28 Screws (M3x6) 1
29 Middle Poise 1
30 Small Graduation Mark (Front) 1
31 Small Graduation Mark (Rear) 1
32 Connection 1
33 Check Weight (694.6 gr.) 1
34 Plastic Cover 1

17
Your RCBS®M1000 Mechanical Scale is warranted to be free from defects in material or workmanship for as
long as the original owner owns it. This warranty is extended only to the original consumer purchaser. All RCBS
products are intended for non-commercial use by hobbyists. Any other use of these products will void the
warranty. If you believe that your product is covered by this warranty, you must return the product to RCBS at the
address below, postage paid, with proof of purchase for evaluation. If covered, we will (at our sole option) repair,
replace or refund the purchase price of any part or product found to be defective. This remedy will be without
charge except for reasonable shipping, handling and insurance charges.
TO ENSURE ACCURACY OF YOUR WARRANTY INFORMATION, SEND YOUR DATED PROOF OF PURCHASE
TO THE ADDRESS BELOW. This limited warranty does not cover defects or damage resulting from carelessness,
misuse, commercial use, abuse, neglect, improper installation or assembly, water submersion, unauthorized or
improperrepair,failuretofollowoperationinstructions,modicationornormalwearandtear.
ANY WARRANTIES IMPLIED BY LAW SHALL IN NO EVENT EXTEND BEYOND DURATION OF THIS EXPRESS
WARRANTY. Some states do not allow limitations on how long an implied warranty lasts, so the above limitation
may not apply to you. REPAIR OR REPLACEMENT AS PROVIDED HEREIN IS YOUR EXCLUSIVE REMEDY
FOR ANY DEFECTIVE PRODUCT. IN NO EVENT SHALL WE BE LIABLE FOR ANY SPECIAL, INCIDENTIAL, OR
CONSEQUENTIAL DAMAGES OF ANY KIND ARISING OUT OF THE PURCHASE OR USE OF THIS PRODUCT,
WHETHER BASED UPON CONTRACT, TORT, STATUTE OR OTHERWISE. Some states do not allow the exclusion
or limitation of incidental or consequential damages, so the above limitation or exclusion may not apply to you.
Thiswarrantygivesyouspeciclegalrights,andyoumayalsohaveotherrightswhichvaryfromstatetostate.
RCBS • 605 Oro Dam Blvd East
Oroville, CA, 95965
1-800-379-1732(U.S.orCanada)
E-mail:rcbs.tech@vistaoutdoor.com
Website: rcbs.com


We think we make the world’s best reloading equipment.
If you agree, please tell your friends. If you disagree,
tell us—we want to do something about it!
Customer Service
1-800-379-1732(U.S.orCanada)
Hours:Monday-Friday,5:00a.m.–5:00p.m.PacicTime
(hours may vary)
E-mailrcbs.tech@vistaoutdoor.com,orvisitrcbs.com
RCBS • 605 Oro Dam Blvd. East • Oroville, CA 95965
151020
Table of contents
Other RCBS Scale manuals

RCBS
RCBS RC-130 Instruction sheet

RCBS
RCBS Powder Pro Instruction sheet

RCBS
RCBS ChargeMaster 1500 User manual

RCBS
RCBS M500 Instruction sheet

RCBS
RCBS RangeMaster 750 Instruction sheet

RCBS
RCBS CHARGEMASTER LITE Instruction sheet

RCBS
RCBS 1500 GN User manual

RCBS
RCBS RangeMaster 2000 Instruction sheet

RCBS
RCBS Partner-Electronic Instruction sheet