ReadyNet AC1100MSF User manual

AC1100MSF
User Manual

Table of Contents
User Manual..........................................................................................................................................................1
1 Preface ..........................................................................................................................................................1
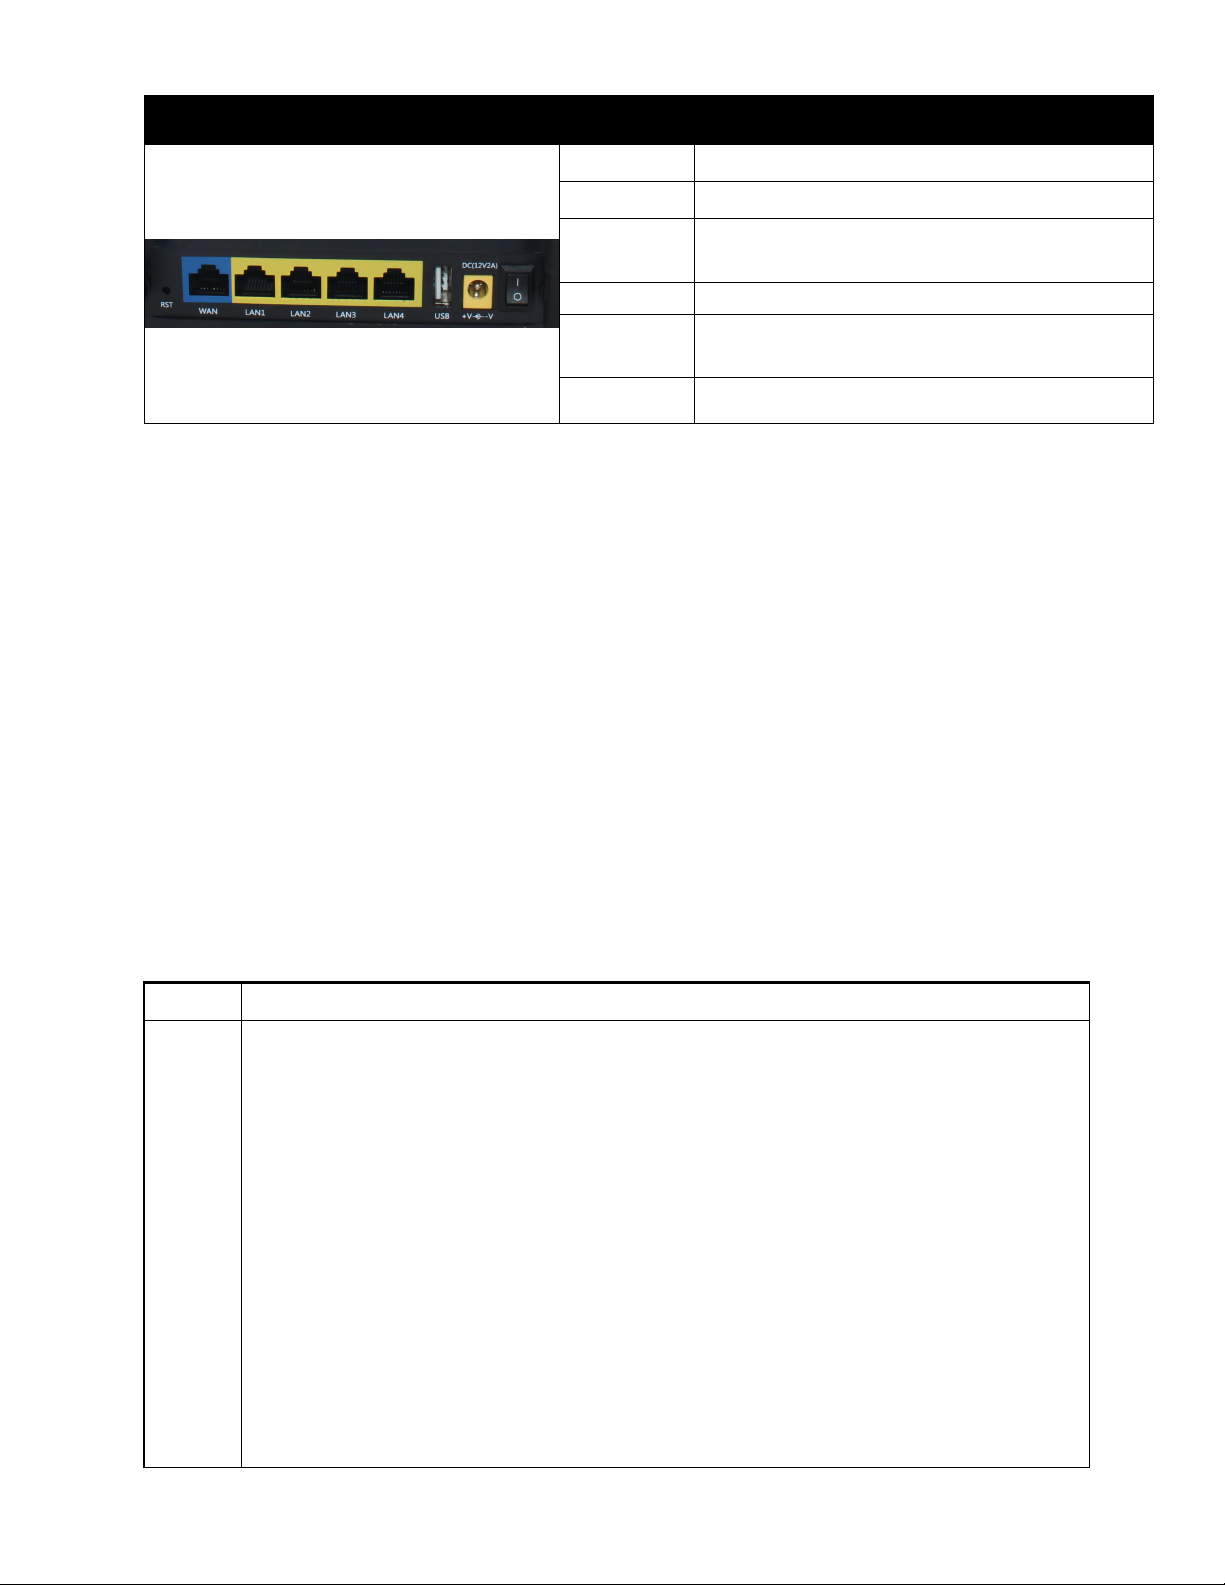
2 LED Indicators and Connectors....................................................................................................................1
2.1 LED Indicators..............................................................................................................................1
2.2 Hardware Installation....................................................................................................................2
3 Voice Prompt (AC1100MSF)........................................................................................................................2
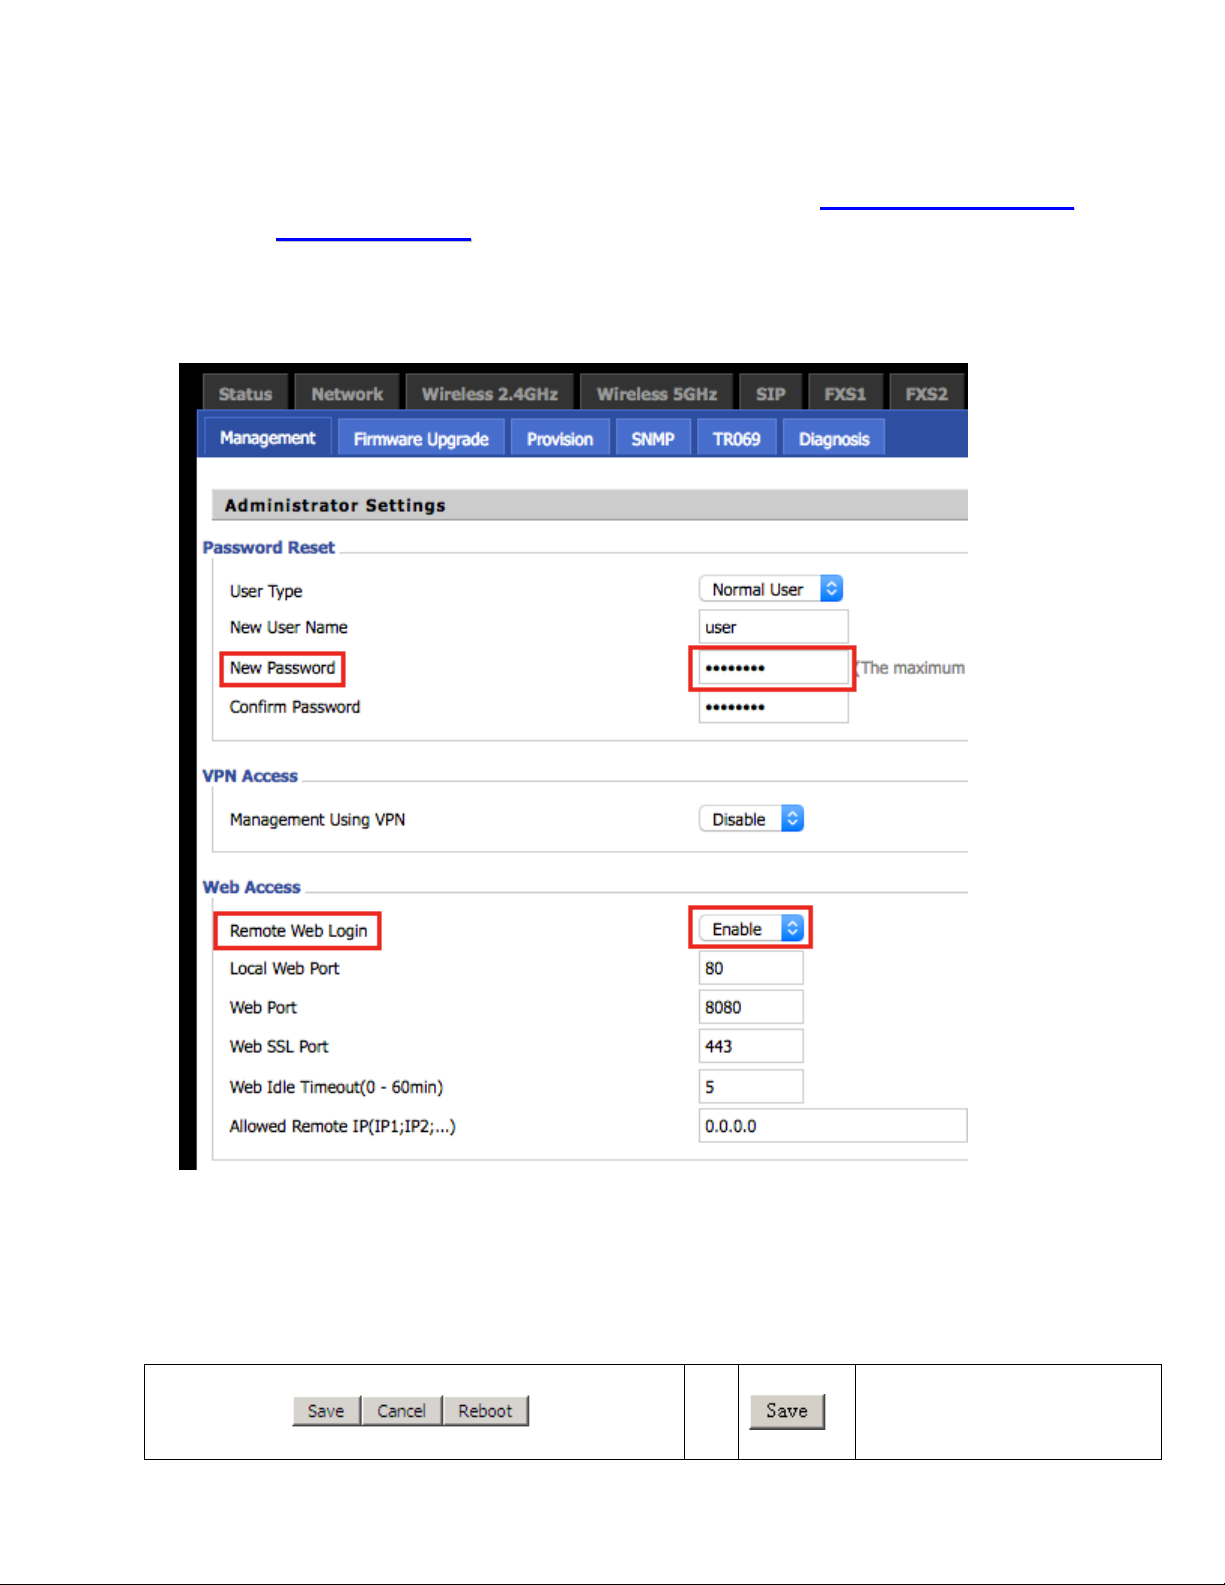
4 User Interface Web Page...............................................................................................................................5
4.1 Two-Level Management ...............................................................................................................5
4.2 Accessing the User Interface Web Page........................................................................................5
4.2.1 From the LAN Port ...............................................................................................................5
4.2.2 From the WAN Port ..............................................................................................................5
4.3 Web Page ......................................................................................................................................6
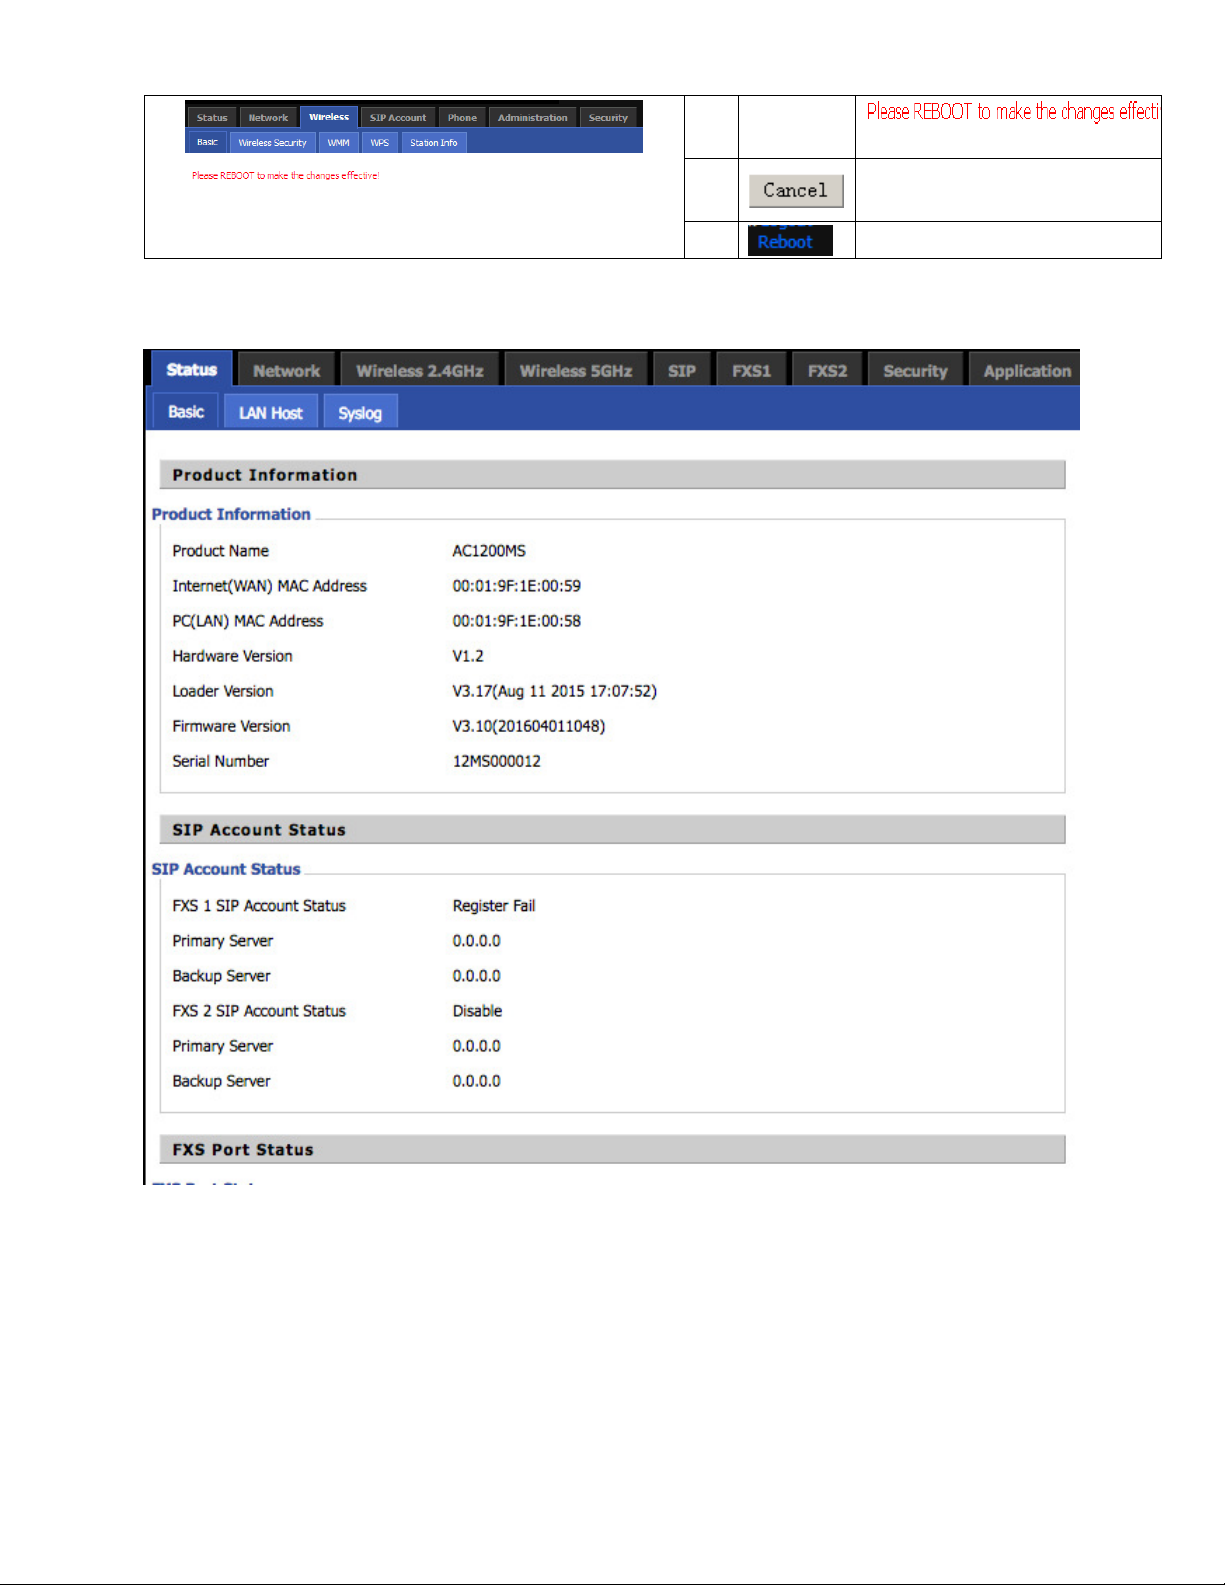
5 Status.............................................................................................................................................................7
5.1 System Log ...................................................................................................................................7
6 Network ........................................................................................................................................................8
6.1 WAN .............................................................................................................................................8
6.1.1 Static IP.................................................................................................................................9
6.1.2 DHCP....................................................................................................................................9
6.1.3 PPPoE .................................................................................................................................10
6.2 LAN ............................................................................................................................................10
6.3 Port Forward ............................................................................................................................... 11
6.4 DMZ............................................................................................................................................ 11
6.5 MAC Clone................................................................................................................................. 12
7 2.4GHz and 5GHz Wireless Connection.....................................................................................................12
7.1 Enable Wireless and Set the SSID ..............................................................................................12
7.1.1 Advanced (Administrative Users).......................................................................................13
7.2 Wireless Security ........................................................................................................................13
7.3 WMM (Administrative Users) ....................................................................................................14
7.4 WPS ............................................................................................................................................15
7.5 Station Info..................................................................................................................................15
8 SIP, FXS1 and FXS2 (AC1100MSF)..........................................................................................................16
8.1 Register .......................................................................................................................................16
8.1.1 Configure SIP from Web Page ............................................................................................16
8.1.2 View the Register Status .....................................................................................................17
8.2 Phone Features ............................................................................................................................18
8.2.1 Calling phone or extension numbers...................................................................................18
8.2.2 Direct IP calls......................................................................................................................18
8.2.3 Call Hold.............................................................................................................................18
8.2.4 Blind Transfer .....................................................................................................................18
8.2.5 Attended Transfer................................................................................................................19
8.2.6 Conference ..........................................................................................................................19
8.2.7 SIP Settings .........................................................................................................................19

8.2.8
VoIP QoS.............................................................................................................................20
8.3
FSX .............................................................................................................................................20
8.3.1
Dial Plan..............................................................................................................................20
8.3.2
Call Log ..............................................................................................................................21
9
Security .......................................................................................................................................................22
9.1
Filtering Setting ..........................................................................................................................22
9.2
DMZ............................................................................................................................................22
9.3
MAC Clone.................................................................................................................................23
9.4
Port Forward ...............................................................................................................................23
9.5
Content Filtering .........................................................................................................................23
10
Administration ....................................................................................................................................24
10.1
Management................................................................................................................................24
10.1.1
Setting Up the Time Zone ...................................................................................................24
10.2
TR-069 ........................................................................................................................................25
10.3
Logout.........................................................................................................................................25
10.4
Reboot.........................................................................................................................................25
11
FCC Statement ....................................................................................................................................26

Version 1.0 P a g e | 1
1Preface
T
Th
ha
an
nk
k
y
yo
ou
u
f
fo
or
r
c
ch
ho
oo
os
si
in
ng
g
t
th
he
e
R
Re
ea
ad
dy
yN
Ne
et
t
A
AC
C1
11
10
00
0M
MS
SF
F
w
wi
ir
re
el
le
es
ss
s
r
ro
ou
ut
te
er
r
w
wi
it
th
h
V
Vo
oI
IP
P.
.
T
Th
he
e
A
AC
C1
11
10
00
0M
MS
SF
F
w
wi
il
ll
l
a
al
ll
lo
ow
w
y
yo
ou
u
t
to
o
m
ma
ak
ke
e
A
AT
TA
A
c
ca
al
ll
ls
s
u
us
si
in
ng
g
y
yo
ou
ur
r
b
br
ro
oa
ad
db
ba
an
nd
d
c
co
on
nn
ne
ec
ct
ti
io
on
n
a
an
nd
d
p
pr
ro
ov
vi
id
de
es
s
W
Wi
i-
-F
Fi
i
r
ro
ou
ut
te
er
r
f
fu
un
nc
ct
ti
io
on
ns
s.
.
T
Th
hi
is
s
m
ma
an
nu
ua
al
l
p
pr
ro
ov
vi
id
de
es
s
b
ba
as
si
ic
c
i
in
nf
fo
or
rm
ma
at
ti
io
on
n
o
on
n
h
ho
ow
w
t
to
o
i
in
ns
st
ta
al
ll
l
a
an
nd
d
c
co
on
nn
ne
ec
ct
t
t
th
he
e
R
Re
ea
ad
dy
yN
Ne
et
t
A
AC
C1
11
10
00
0M
MS
SF
F
t
to
o
t
th
he
e
I
In
nt
te
er
rn
ne
et
t.
.
I
It
t
a
al
ls
so
o
d
di
is
sc
cu
us
ss
se
es
s
t
th
he
e
r
ro
ou
ut
te
er
r’
’s
s
f
fe
ea
at
tu
ur
re
es
s
a
an
nd
d
f
fu
un
nc
ct
ti
io
on
ns
s
a
an
nd
d
h
ho
ow
w
t
to
o
u
us
se
e
t
th
he
em
m
c
co
or
rr
re
ec
ct
tl
ly
y.
.
B
Be
ef
fo
or
re
e
y
yo
ou
u
c
ca
an
n
c
co
on
nn
ne
ec
ct
t
t
th
he
e
A
AC
C1
11
10
00
0M
MS
SF
F
t
to
o
t
th
he
e
I
In
nt
te
er
rn
ne
et
t
a
an
nd
d
u
us
se
e
i
it
t,
,
y
yo
ou
u
m
mu
us
st
t
h
ha
av
ve
e
a
a
h
hi
ig
gh
h-
-s
sp
pe
ee
ed
d
b
br
ro
oa
ad
db
ba
an
nd
d
c
co
on
nn
ne
ec
ct
ti
io
on
n
i
in
ns
st
ta
al
ll
le
ed
d.
.
T
Th
he
e
R
Re
ea
ad
dy
yN
Ne
et
t
A
AC
C1
11
10
00
0M
MS
SF
F
i
is
s
a
a
s
st
ta
an
nd
d-
-a
al
lo
on
ne
e
d
de
ev
vi
ic
ce
e
s
so
o
n
no
o
c
co
om
mp
pu
ut
te
er
r
i
is
s
r
re
eq
qu
ui
ir
re
ed
d
t
to
o
m
ma
ak
ke
e
I
In
nt
te
er
rn
ne
et
t
c
ca
al
ll
ls
s.
.
T
Th
he
e
A
AC
C1
11
10
00
0M
MS
SF
F
p
pr
ro
ov
vi
id
de
es
s
c
cl
le
ea
ar
r
a
an
nd
d
r
re
el
li
ia
ab
bl
le
e
v
vo
oi
ic
ce
e
q
qu
ua
al
li
it
ty
y
t
th
hr
ro
ou
ug
gh
h
t
th
he
e
I
In
nt
te
er
rn
ne
et
t,
,
i
is
s
f
fu
ul
ll
ly
y
c
co
om
mp
pa
at
ti
ib
bl
le
e
w
wi
it
th
h
S
SI
IP
P
i
in
nd
du
us
st
tr
ry
y
s
st
ta
an
nd
da
ar
rd
ds
s,
,
a
an
nd
d
i
is
s
a
ab
bl
le
e
t
to
o
i
in
nt
te
er
ro
op
pe
er
ra
at
te
e
w
wi
it
th
h
m
ma
an
ny
y
o
ot
th
he
er
r
S
SI
IP
P
d
de
ev
vi
ic
ce
es
s
a
an
nd
d
s
so
of
ft
tw
wa
ar
re
e
o
on
n
t
th
he
e
m
ma
ar
rk
ke
et
t.
.
2LED Indicators and Connectors
2.1 LED Indicators
Front Panel
LED Status Explanation
P
PO
OW
WE
ER
R
O
On
n
(
(R
Re
ed
d)
)
T
Th
he
e
r
ro
ou
ut
te
er
r
i
is
s
p
po
ow
we
er
re
ed
d
o
on
n
a
an
nd
d
r
ru
un
nn
ni
in
ng
g
n
no
or
rm
ma
al
ll
ly
y.
.
O
Of
ff
f
T
Th
he
e
r
ro
ou
ut
te
er
r
i
is
s
p
po
ow
we
er
re
ed
d
o
of
ff
f.
.
W
WA
AN
N
O
On
n
(
(G
Gr
re
ee
en
n)
)
T
Th
he
e
p
po
or
rt
t
i
is
s
c
co
on
nn
ne
ec
ct
te
ed
d
w
wi
it
th
h
1
10
00
00
0M
Mb
bp
ps
s.
.
O
Of
ff
f
T
Th
he
e
p
po
or
rt
t
i
is
s
d
di
is
sc
co
on
nn
ne
ec
ct
te
ed
d.
.
B
Bl
li
in
nk
ki
in
ng
g
(
(G
Gr
re
ee
en
n)
)
I
It
t
w
wi
il
ll
l
b
bl
li
in
nk
k
w
wh
hi
il
le
e
t
tr
ra
an
ns
sm
mi
it
tt
ti
in
ng
g
d
da
at
ta
a.
.
L
LA
AN
N
1
1/
/2
2/
/3
3/
/4
4
O
On
n
(
(G
Gr
re
ee
en
n)
)
T
Th
he
e
p
po
or
rt
t
i
is
s
c
co
on
nn
ne
ec
ct
te
ed
d
w
wi
it
th
h
1
10
00
00
0M
Mb
bp
ps
s.
.
O
Of
ff
f
T
Th
he
e
p
po
or
rt
t
i
is
s
d
di
is
sc
co
on
nn
ne
ec
ct
te
ed
d.
.
B
Bl
li
in
nk
ki
in
ng
g
(
(G
Gr
re
ee
en
n)
)
T
Th
he
e
d
da
at
ta
a
i
is
s
t
tr
ra
an
ns
sm
mi
it
tt
ti
in
ng
g.
.
2
2.
.4
4G
G
5
5G
G
On (Green) Wireless access point is
ready.
Blinking (Green) It will blink while wireless
traffic goes through.
U
US
SB
B
O
On
n
(
(G
Gr
re
ee
en
n)
)
U
US
SB
B
d
de
ev
vi
ic
ce
e
i
is
s
c
co
on
nn
ne
ec
ct
te
ed
d.
.
O
Of
ff
f
N
No
o
U
US
SB
B
d
de
ev
vi
ic
ce
e
c
co
on
nn
ne
ec
ct
te
ed
d.
.

Version 1.0 P a g e | 2
2.2 Hardware Insta ation
S
St
te
ep
p
1
1.
.F
Fo
or
r
t
th
he
e
A
AC
C1
11
10
00
0M
MS
SF
F,
,
c
co
on
nn
ne
ec
ct
t
L
Li
in
ne
e
1
1
o
or
r
L
Li
in
ne
e
2
2
p
po
or
rt
ts
s
t
to
o
a
a
l
la
an
nd
d
l
li
in
ne
e
p
ph
ho
on
ne
e
j
ja
ac
ck
k
w
wi
it
th
h
a
an
n
R
RJ
J-
-1
11
1
c
ca
ab
bl
le
e
(
(s
st
ta
an
nd
da
ar
rd
d
p
ph
ho
on
ne
e
c
co
or
rd
d)
).
.
S
St
te
ep
p
2
2.
.C
Co
on
nn
ne
ec
ct
t
t
th
he
e
W
WA
AN
N
p
po
or
rt
t
t
to
o
a
an
n
a
ac
cc
ce
es
ss
s
p
po
oi
in
nt
t
s
su
uc
ch
h
a
as
s
a
a
m
mo
od
de
em
m,
,
s
sw
wi
it
tc
ch
h,
,
o
or
r
r
ro
ou
ut
te
er
r
w
wi
it
th
h
a
an
n
E
Et
th
he
er
rn
ne
et
t
c
ca
ab
bl
le
e.
.
S
St
te
ep
p
3
3.
.C
Co
on
nn
ne
ec
ct
t
o
on
ne
e
o
of
f
t
th
he
e
L
LA
AN
N
p
po
or
rt
ts
s
t
to
o
y
yo
ou
ur
r
c
co
om
mp
pu
ut
te
er
r
w
wi
it
th
h
a
an
n
E
Et
th
he
er
rn
ne
et
t
c
ca
ab
bl
le
e.
.
S
St
te
ep
p
4
4.
.C
Co
on
nn
ne
ec
ct
t
o
on
ne
e
e
en
nd
d
o
of
f
t
th
he
e
p
po
ow
we
er
r
c
co
or
rd
d
t
to
o
t
th
he
e
p
po
ow
we
er
r
p
po
or
rt
t
o
of
f
t
th
hi
is
s
d
de
ev
vi
ic
ce
e.
.
C
Co
on
nn
ne
ec
ct
t
t
th
he
e
o
ot
th
he
er
r
e
en
nd
d
t
to
o
t
th
he
e
w
wa
al
ll
l
o
ou
ut
tl
le
et
t
o
of
f
e
el
le
ec
ct
tr
ri
ic
ci
it
ty
y.
.
S
St
te
ep
p
5
5.
.P
Pu
us
sh
h
t
th
he
e
O
ON
N/
/O
OF
FF
F
s
sw
wi
it
tc
ch
h
t
to
o
p
po
ow
we
er
r
o
on
n
t
th
he
e
r
ro
ou
ut
te
er
r.
.
S
St
te
ep
p
6
6.
.C
Ch
he
ec
ck
k
t
th
he
e
P
Po
ow
we
er
r,
,
W
WA
AN
N,
,
a
an
nd
d
L
LA
AN
N
L
LE
ED
Ds
s
t
to
o
a
as
ss
su
ur
re
e
n
ne
et
tw
wo
or
rk
k
c
co
on
nn
ne
ec
ct
ti
io
on
ns
s.
.
3Voice Prompt (AC1100MSFF)
V
Vo
oi
ic
ce
e
M
Me
en
nu
u
S
Se
et
tt
ti
in
ng
g
O
Op
pt
ti
io
on
ns
s
Code
Contents
1
Step 1. Pick up phone and press “****” to start IVR.
Step 2. Choose “1” and the AC1100MSF reports the current WAN port connection type.
Step 3. Prompt "Please enter password”, user needs to input password with end char # if user
wants to configure WAN port connection type.
Password in the IVR is same as the Web login. User can use phone keypad to enter
password directly and the matching table is in Note 4.
For example: WEB login password is “admin”, so password in IVR is “admin” too, user
inputs “23646” to access and then configure the WAN connection port.
Step 4. Report “operation successful” if password is correct.
Step 5. Choose the new WAN port connection type, either 1. DHCP or 2. Static.
Step 6. Report “operation successful”, indicates user successfully made the changes.
AC1100MSF will return to sound prompting “please enter your option, one WAN
Port …….”.
If at any time you want to quit, press “**”.
Rear Panel
Interface
Description
R
RS
ST
T
R
Re
es
se
et
t
t
to
o
f
fa
ac
ct
to
or
ry
y
d
de
ef
fa
au
ul
lt
t
s
se
et
tt
ti
in
ng
gs
s
W
WA
AN
N
C
Co
on
nn
ne
ec
ct
to
or
r
f
fo
or
r
a
ac
cc
ce
es
ss
si
in
ng
g
t
th
he
e
I
In
nt
te
er
rn
ne
et
t.
.
L
LA
AN
N
(
(1
1/
/2
2/
/3
3/
/4
4)
)
C
Co
on
nn
ne
ec
ct
to
or
rs
s
f
fo
or
r
l
lo
oc
ca
al
l
n
ne
et
tw
wo
or
rk
ke
ed
d
d
de
ev
vi
ic
ce
es
s.
.
U
US
SB
B
C
Co
on
nn
ne
ec
ct
to
or
r
f
fo
or
r
U
US
SB
B
d
de
ev
vi
ic
ce
e.
.
DC
12V/2A Connector for a power adapter.
ON/OFF Power Switch.

Version 1.0 P a g e | 3
2
Step 1. Pick up phone and press “****” to start IVR.
Step 2. Choose “2”, and the AC1100MSF reports current WAN Port IP Address.
Step 3. Input the new WAN port IP address with the end char #.
Using “*” to replace “.”, user can input 192*168*20*168 to set the new IP address
192.168.20.168.
Press # key to indicate you have finished.
Step 4. Report “operation successful” if user operation is correct.
If at any time you want to quit, press “**”.
3
Step 1. Pick up phone and press “****” to start IVR.
Step 2. Choose “3”, and the AC1100MSF reports the current WAN port subnet mask.
Step 3. Input a new WAN port subnet mask with the end char #.
Using “*” to replace “.”, user can inpu
t 255*255*255*0 to set the new WAN port subnet mask
255.255.255.0.
Press # key to indicate you have finished.
Step 4. Report “operation successful” if user operation is correct.
If at any time you want to quit, press “**”.
4
Step 1. Pick up phone and press “****” to start IVR.
Step 2. Choose “4”, and the AC1100MSF reports current gateway.
Step 3. Input the new gateway with the end char #.
Using “*” to replace “.”, user can input 192*168*20*1 to set the new gateway 192.168.20.1.
Press # key to indicate you have finished.
Step 4. Report “operation successful” if user operation is correct.
If at any time you want to quit, press “**”.
5
Step 1. Pick up phone and press “****” to start IVR
Step 2. Choose “5”, and the AC1100MSF reports current DNS
Step 3. Input the new DNS with the end char #
Using “*” to replace “.”, user can input 192*168*20*1 to set the new gateway to
192.168.20.1
Press # key to indicate you have finished
Step 4. Report “operation successful” if user operation is correct.
If at any time you want to quit, press “**”.
6
Step 1. Pick up phone and press “****” to start IVR.
Step 2. Choose “6”, and the AC1100MSF reports “Factory Reset”.
Step 3. Prompt "Please enter password", inputting password is the same as in operation 1.
If at any time you want to quit, press “*”.
Step 4. Prompt “operation successful” if the password is correct.
Step 5. Press “7”, reboot to make changes effective.
7
Step 1. Pick up phone and press “****” to start IVR.
Step 2. Choose “7”, and the AC1100MSFs report “Reboot”.
Step 3. Prompt "Please enter password", inputting password is the same as in operation 1.
Step 4. The AC1100MSF will reboot if the operation is correct.

Version 1.0 P a g e | 4
8
Step 1. Pick up phone and press “****” to start IVR.
Step 2. Choose “8”, and the AC1100MSF reports “WAN Port Login”.
Step 3. Prompt "Please enter password", inputting password is the same as in operation 1.
If at any time you want to quit, press “*”.
Step 4. Report “operation successful” if user operation is correct.
Step 5. Prompt “1enable 2disable”, choose 1 or 2 with confirm char #.
Step 6. Report “operation successful” if user operation is correct.
9
Step 1. Pick up phone and press “****” to start IVR.
Step 2. Choose “9”, and the AC1100MSF reports “ WEB Access Port”.
Step 3. Prompt “Please enter password”, inputting password is the same as in operation 1.
Step 4. Report “operation successful” if user operation is correct.
Step 5. Report the current WEB Access Port.
Step 6. Set the new WEB access port with end char #.
Step 7. Report “operation successful” if user operation is correct.
0
Step 1. Pick up phone and press “****” to start IVR.
Step 2. Choose “0”, and the AC1100MSF reports the current Firmware version.
N
No
ot
te
es
s
W
Wh
he
en
n
u
us
si
in
ng
g
V
Vo
oi
ic
ce
e
M
Me
en
nu
u,
,
p
pr
re
es
ss
s
“
“*
*”
”
(
(s
st
ta
ar
r)
)
t
to
o
r
re
et
tu
ur
rn
n
t
to
o
t
th
he
e
m
ma
ai
in
n
m
me
en
nu
u.
.
I
If
f
a
an
ny
y
c
ch
ha
an
ng
ge
es
s
a
ar
re
e
m
ma
ad
de
e
i
in
n
t
th
he
e
I
IP
P
a
as
ss
si
ig
gn
nm
me
en
nt
t
m
mo
od
de
e,
,
p
pl
le
ea
as
se
e
r
re
eb
bo
oo
ot
t
t
th
he
e
A
AC
C1
11
10
00
0M
MS
SF
F
t
to
o
a
ap
pp
pl
ly
y
t
th
he
e
c
ch
ha
an
ng
ge
es
s.
.
W
Wh
he
en
n
e
en
nt
te
er
ri
in
ng
g
a
an
n
I
IP
P
a
ad
dd
dr
re
es
ss
s
o
or
r
s
su
ub
bn
ne
et
t
m
ma
as
sk
k,
,
u
us
se
e
“
“*
*”
”
(
(s
st
ta
ar
r)
)
t
to
o
r
re
ep
pl
la
ac
ce
e
“
“.
.”
”
(
(d
do
ot
t)
).
.
F
Fo
or
r
e
ex
xa
am
mp
pl
le
e,
,
t
to
o
e
en
nt
te
er
r
t
th
he
e
I
IP
P
a
ad
dd
dr
re
es
ss
s
1
19
92
2.
.1
16
68
8.
.2
20
0.
.1
15
59
9
b
by
y
k
ke
ey
yp
pa
ad
d,
,
p
pr
re
es
ss
s
1
19
92
2*
*1
16
68
8*
*2
20
0*
*1
15
59
9#
#,
,
u
us
se
e
t
th
he
e
“
“#
#”
”
(
(p
po
ou
un
nd
d)
)
k
ke
ey
y
t
to
o
i
in
nd
di
ic
ca
at
te
e
y
yo
ou
u
h
ha
av
ve
e
f
fi
in
ni
is
sh
he
ed
d
e
en
nt
te
er
ri
in
ng
g
t
th
he
e
I
IP
P
a
ad
dd
dr
re
es
ss
s.
.
W
Wh
he
en
n
a
as
ss
si
ig
gn
ni
in
ng
g
a
an
n
I
IP
P
a
ad
dd
dr
re
es
ss
s
i
in
n
S
St
ta
at
ti
ic
c
I
IP
P
m
mo
od
de
e,
,
y
yo
ou
u
m
mu
us
st
t
a
al
ls
so
o
s
se
et
t
t
th
he
e
s
su
ub
bn
ne
et
t
m
ma
as
sk
k
a
an
nd
d
d
de
ef
fa
au
ul
lt
t
g
ga
at
te
ew
wa
ay
y.
.
I
If
f
i
in
n
D
DH
HC
CP
P
m
mo
od
de
e,
,
p
pl
le
ea
as
se
e
m
ma
ak
ke
e
s
su
ur
re
e
t
th
ha
at
t
D
DH
HC
CP
P
S
SE
ER
RV
VE
ER
R
i
is
s
a
av
va
ai
il
la
ab
bl
le
e
i
in
n
y
yo
ou
ur
r
e
ex
xi
is
st
ti
in
ng
g
b
br
ro
oa
ad
db
ba
an
nd
d
c
co
on
nn
ne
ec
ct
ti
io
on
n
t
to
o
w
wh
hi
ic
ch
h
W
WA
AN
N
p
po
or
rt
t
o
of
f
A
AC
C1
11
10
00
0M
MS
SF
F
i
is
s
c
co
on
nn
ne
ec
ct
te
ed
d.
.
T
Th
he
e
d
de
ef
fa
au
ul
lt
t
L
LA
AN
N
p
po
or
rt
t
I
IP
P
a
ad
dd
dr
re
es
ss
s
o
of
f
A
AC
C1
11
10
00
0M
MS
SF
F
i
is
s
1
19
92
2.
.1
16
68
8.
.1
11
1.
.1
1
a
an
nd
d
d
do
o
n
no
ot
t
s
se
et
t
t
th
he
e
W
WA
AN
N
p
po
or
rt
t
I
IP
P
a
ad
dd
dr
re
es
ss
s
o
of
f
A
AC
C1
11
10
00
0M
MS
SF
F
i
in
n
t
th
he
e
s
sa
am
me
e
n
ne
et
tw
wo
or
rk
k
s
se
eg
gm
me
en
nt
t
o
of
f
L
LA
AN
N
p
po
or
rt
t
o
of
f
A
AC
C1
11
10
00
0M
MS
SF
F,
,
o
ot
th
he
er
rw
wi
is
se
e
i
it
t
m
ma
ay
y
l
le
ea
ad
d
t
to
o
t
th
he
e
A
AC
C1
11
10
00
0M
MS
SF
F
f
fa
ai
il
l
t
to
o
w
wo
or
rk
k
p
pr
ro
op
pe
er
rl
ly
y.
.
E
En
nt
te
er
r
t
th
he
e
p
pa
as
ss
sw
wo
or
rd
d
b
by
y
p
ph
ho
on
ne
e
k
ke
ey
yp
pa
ad
d.
.
T
Th
he
e
m
ma
at
tc
ch
hi
in
ng
g
t
ta
ab
bl
le
e
b
be
et
tw
we
ee
en
n
n
nu
um
mb
be
er
r
a
an
nd
d
l
le
et
tt
te
er
rs
s
i
is
s
a
as
s
f
fo
ol
ll
lo
ow
ws
s:
:
To input: D, E, F, d, e, f -- press ‘3’
To input: G, H, I, g, h, i -- press ‘4’
To input: J, K, L, j, k, l -- press ‘5’
To input: M, N, O, m, n, o -- press ‘6’
To input: P, Q, R, S, p, q, r, s -- press ‘7’
To input: T, U, V, t, u, v -- press ‘8’
To input: W, X, Y, Z, w, x, y, z -- press ‘9’
To input all other characters in the administrator password-----press ‘0’, e.g. password
is ‘admin-admin’, press ‘23646023646’

Version 1.0 P a g e | 5
4User Interface Web Page
4.1 Two-Leve Management
T
Th
he
e
A
AC
C1
11
10
00
0M
MS
SF
F
s
su
up
pp
po
or
rt
ts
s
u
us
se
er
r
m
ma
an
na
ag
ge
em
me
en
nt
t.
.
F
Fo
or
r
u
us
se
er
r
m
mo
od
de
e
o
op
pe
er
ra
at
ti
io
on
n,
,
p
pl
le
ea
as
se
e
l
lo
og
g
i
in
n
t
to
o
t
th
he
e
u
us
se
er
r
i
in
nt
te
er
rf
fa
ac
ce
e
w
we
eb
b
p
pa
ag
ge
e.
.
T
Th
he
e
U
Us
se
er
rn
na
am
me
e
i
is
s
“
“u
us
se
er
r”
”
a
an
nd
d
t
th
he
e
d
de
ef
fa
au
ul
lt
t
P
Pa
as
ss
sw
wo
or
rd
d
i
is
s
t
th
he
e
l
la
as
st
t
8
8
l
le
et
tt
te
er
rs
s
o
of
f
t
th
he
e
L
LA
AN
N
p
po
or
rt
t
M
MA
AC
C
a
ad
dd
dr
re
es
ss
s.
.
T
Th
hi
is
s
s
se
ec
ct
ti
io
on
n
a
al
ls
so
o
e
ex
xp
pl
la
ai
in
ns
s
h
ho
ow
w
t
to
o
s
se
et
t
u
up
p
a
a
p
pa
as
ss
sw
wo
or
rd
d
f
fo
or
r
a
an
n
a
ad
dm
mi
in
ni
is
st
tr
ra
at
to
or
r/
/r
ro
oo
ot
t
u
us
se
er
r
a
an
nd
d
h
ho
ow
w
t
to
o
a
ad
dj
ju
us
st
t
b
ba
as
si
ic
c/
/a
ad
dv
va
an
nc
ce
ed
d
s
se
et
tt
ti
in
ng
gs
s
f
fo
or
r
s
su
uc
cc
ce
es
ss
sf
fu
ul
ll
ly
y
a
ac
cc
ce
es
ss
si
in
ng
g
t
th
he
e
I
In
nt
te
er
rn
ne
et
t.
.
4.2 Accessing the User Interface Web Page
4.2.1 From the LAN Port
S
St
te
ep
p1
1.
.
C
Co
on
nn
ne
ec
ct
t
y
yo
ou
ur
r
c
co
om
mp
pu
ut
te
er
r
t
to
o
o
on
ne
e
o
of
f
t
th
he
e
r
ro
ou
ut
te
er
r’
’s
s
L
LA
AN
N
p
po
or
rt
ts
s
u
us
si
in
ng
g
a
an
n
E
Et
th
he
er
rn
ne
et
t
c
ca
ab
bl
le
e.
.
Notice: You may either simply set up your computer to get IP dynamically from the router or
set up the IP address of the computer to be the same subnet as the default IP address
of the router, which is 192.168.11.1.
S
St
te
ep
p
2
2.
.
O
Op
pe
en
n
a
a
w
we
eb
b
b
br
ro
ow
ws
se
er
r
o
on
n
y
yo
ou
ur
r
c
co
om
mp
pu
ut
te
er
r,
,
t
ty
yp
pe
e
h
ht
tt
tp
p:
:/
//
/1
19
92
2.
.1
16
68
8.
.1
11
1.
.1
1.
.
T
Th
he
e
f
fo
ol
ll
lo
ow
wi
in
ng
g
l
lo
og
gi
in
n
w
wi
in
nd
do
ow
w
w
wi
il
ll
l
o
op
pe
en
n.
.
S
St
te
ep
p
3
3.
.
T
To
o
l
lo
og
gi
in
n,
,
t
ty
yp
pe
e
i
in
n
t
th
he
e
U
Us
se
er
rn
na
am
me
e
a
an
nd
d
P
Pa
as
ss
sw
wo
or
rd
d
f
fo
ou
un
nd
d
o
on
n
t
th
he
e
l
la
ab
be
el
l
o
on
n
t
th
he
e
b
bo
ot
tt
to
om
m
o
of
f
t
th
he
e
A
AC
C1
11
10
00
0M
MS
SF
F
a
an
nd
d
c
cl
li
ic
ck
k
L
Lo
og
gi
in
n.
.
(
(T
Th
he
e
u
us
se
er
rn
na
am
me
e
i
is
s
“
“u
us
se
er
r”
”
a
an
nd
d
t
th
he
e
p
pa
as
ss
sw
wo
or
rd
d
i
is
s
p
pr
ri
in
nt
te
ed
d
o
on
n
t
th
he
e
l
la
ab
be
el
l
o
on
n
t
th
he
e
b
bo
ot
tt
to
om
m
o
of
f
y
yo
ou
ur
r
r
ro
ou
ut
te
er
r.
.)
)
T
Th
he
e
w
we
eb
b
p
pa
ag
ge
e
w
wi
il
ll
l
l
lo
og
g
o
ou
ut
t
a
af
ft
te
er
r
5
5
m
mi
in
nu
ut
te
es
s
o
of
f
n
no
o
a
ac
ct
ti
iv
vi
it
ty
y.
.
4.2.2 From the WAN Port
B
By
y
d
de
ef
fa
au
ul
lt
t,
,
r
re
em
mo
ot
te
e
w
we
eb
b
l
lo
og
gi
in
n
f
fr
ro
om
m
t
th
he
e
W
WA
AN
N
p
po
or
rt
t
i
is
s
d
di
is
sa
ab
bl
le
ed
d.
.
T
To
o
e
en
na
ab
bl
le
e
r
re
em
mo
ot
te
e
w
we
eb
b
l
lo
og
gi
in
n
f
fr
ro
om
m
t
th
he
e
W
WA
AN
N
p
po
or
rt
t,
,
y
yo
ou
u
w
wi
il
ll
l
n
ne
ee
ed
d
t
to
o
l
lo
og
g
i
in
n
t
th
hr
ro
ou
ug
gh
h
a
a
L
LA
AN
N
p
po
or
rt
t
(
(s
se
ee
e
4
4.
.2
2.
.1
1)
)
t
to
o
g
ge
et
t
t
th
he
e
W
WA
AN
N
I
IP
P
a
ad
dd
dr
re
es
ss
s
(
(s
se
ee
e
S
St
ta
at
tu
us
s
p
pa
ag
ge
e)
),
,
c
ch
ha
an
ng
ge
e
t
th
he
e
d
de
ef
fa
au
ul
lt
t
p
pa
as
ss
sw
wo
or
rd
d
(
(A
Ad
dm
mi
in
ni
is
st
tr
ra
at
ti
io
on
n
>
>
M
Ma
an
na
ag
ge
em
me
en
nt
t
>
>
P
Pa
as
ss
sw
wo
or
rd
d
R
Re
es
se
et
t)
),
,
a
an
nd
d
e
en
na
ab
bl
le
e
r
re
em
mo
ot
te
e
m
ma
an
na
ag
ge
em
me
en
nt
t
(
(A
Ad
dm
mi
in
ni
is
st
tr
ra
at
ti
io
on
n
>
>
M
Ma
an
na
ag
ge
em
me
en
nt
t
>
>
W
We
eb
b

Version 1.0 P a g e | 6
A
Ac
cc
ce
es
ss
s)
).
.
T
Th
he
e
r
re
em
mo
ot
te
e
l
lo
og
gi
in
n
p
po
or
rt
t
i
is
s
8
80
08
80
0.
.
S
St
te
ep
p
1
1.
.
M
Ma
ak
ke
e
s
su
ur
re
e
y
yo
ou
ur
r
P
PC
C
c
ca
an
n
c
co
on
nn
ne
ec
ct
t
t
to
o
t
th
he
e
r
ro
ou
ut
te
er
r’
’s
s
W
WA
AN
N
p
po
or
rt
t.
.
S
St
te
ep
p
2
2.
.
O
Op
pe
en
n
a
a
w
we
eb
b
b
br
ro
ow
ws
se
er
r
o
on
n
y
yo
ou
ur
r
c
co
om
mp
pu
ut
te
er
r
a
an
nd
d
t
ty
yp
pe
e
h
ht
tt
tp
p:
:/
//
/W
WA
AN
N
I
IP
P
A
AD
DD
DR
RE
ES
SS
S:
:8
80
08
80
0,
,
r
re
ep
pl
la
ac
ci
in
ng
g
W
WA
AN
N
I
IP
P
A
AD
DD
DR
RE
ES
SS
S
w
wi
it
th
h
t
th
he
e
a
ac
ct
tu
ua
al
l
W
WA
AN
N
I
IP
P
a
ad
dd
dr
re
es
ss
s
y
yo
ou
u
o
ob
bt
ta
ai
in
ne
ed
d
w
wh
hi
il
le
e
l
lo
og
gg
ge
ed
d
i
in
n
t
th
hr
ro
ou
ug
gh
h
t
th
he
e
L
LA
AN
N
p
po
or
rt
t.
.
T
Th
he
en
n
f
fo
ol
ll
lo
ow
w
t
th
he
e
l
lo
og
gi
in
n
p
pr
ro
oc
ce
ed
du
ur
re
es
s
i
in
n
4
4.
.2
2.
.1
1.
.
S
St
te
ep
p
3
3.
.
G
Go
o
t
to
o
A
Ad
dm
mi
in
ni
is
st
tr
ra
at
ti
io
on
n
>
>
M
Ma
an
na
ag
ge
em
me
en
nt
t
t
to
o
e
en
na
ab
bl
le
e
R
Re
em
mo
ot
te
e
W
We
eb
b
L
Lo
og
gi
in
n
a
an
nd
d
t
to
o
r
re
es
se
et
t
y
yo
ou
ur
r
l
lo
og
gi
in
n
p
pa
as
ss
sw
wo
or
rd
d.
.
4.3 Web Page
S
Su
ub
b-
-n
na
av
vi
ig
ga
at
ti
io
on
n
b
ba
ar
rs
s
w
wi
il
ll
l
a
ap
pp
pe
ea
ar
r
o
on
n
t
th
he
e
l
li
in
ne
e
b
be
el
lo
ow
w
t
th
he
e
t
to
op
p
n
na
av
vi
ig
ga
at
ti
io
on
n
b
ba
ar
r.
.
C
Cl
li
ic
ck
k
o
on
n
t
th
he
e
s
su
ub
b-
-n
na
av
vi
ig
ga
at
ti
io
on
n
b
ba
ar
rs
s
t
to
o
c
ch
ho
oo
os
se
e
a
a
c
co
on
nf
fi
ig
gu
ur
ra
at
ti
io
on
n
p
pa
ag
ge
e.
.
T
Th
he
e
w
we
eb
b
p
pa
ag
ge
e
w
wi
il
ll
l
l
lo
og
g
o
ou
ut
t
a
af
ft
te
er
r
5
5
m
mi
in
nu
ut
te
es
s
o
of
f
n
no
o
a
ac
ct
ti
iv
vi
it
ty
y.
.
After every change, click this button
to apply the change.
After clicking Save, the red

Version 1.0 P a g e | 7
will appear.
Click to cancel changes.
Click to reboot the router.
5Status
5.1 System
Log
B
By
y
d
de
ef
fa
au
ul
lt
t,
,
t
th
he
e
l
lo
oc
ca
al
l
s
sy
ys
st
te
em
m
l
lo
og
g
i
is
s
e
en
na
ab
bl
le
ed
d.
.
U
Us
se
er
r
c
ca
an
n
c
ch
he
ec
ck
k
t
th
he
e
s
sy
ys
st
te
em
m
l
lo
og
g
i
in
n
S
St
ta
at
tu
us
s
>
>
S
Sy
ys
s
L
Lo
og
g.
.

Version 1.0 P a g e | 8
6Network
6.1 WAN
O
Op
pe
en
n
t
th
he
e
N
Ne
et
tw
wo
or
rk
k
>
>
W
WA
AN
N
w
we
eb
b
p
pa
ag
ge
e
a
as
s
s
sh
ho
ow
wn
n
b
be
el
lo
ow
w
a
an
nd
d
s
se
el
le
ec
ct
t
t
th
he
e
a
ap
pp
pr
ro
op
pr
ri
ia
at
te
e
I
IP
P
M
Mo
od
de
e
a
ac
cc
co
or
rd
di
in
ng
g
t
to
o
t
th
he
e
i
in
nf
fo
or
rm
ma
at
ti
io
on
n
f
fr
ro
om
m
y
yo
ou
ur
r
I
IS
SP
P.
.
T
Th
he
er
re
e
a
ar
re
e
t
th
hr
re
ee
e
t
ty
yp
pe
es
s
o
of
ff
fe
er
re
ed
d
–
–
S
St
ta
at
ti
ic
c,
,
D
DH
HC
CP
P
a
an
nd
d
P
PP
PP
Po
oE
E.
.

Version 1.0 P a g e | 9
6.1.1 Static IP
Y
Yo
ou
u
w
wi
il
ll
l
r
re
ec
ce
ei
iv
ve
e
a
a
f
fi
ix
xe
ed
d
p
pu
ub
bl
li
ic
c
I
IP
P
a
ad
dd
dr
re
es
ss
s
o
or
r
a
a
p
pu
ub
bl
li
ic
c
s
su
ub
bn
ne
et
t
(
(m
mu
ul
lt
ti
ip
pl
le
e
p
pu
ub
bl
li
ic
c
I
IP
P
a
ad
dd
dr
re
es
ss
se
es
s)
)
f
fr
ro
om
m
y
yo
ou
ur
r
D
DS
SL
L
o
or
r
C
Ca
ab
bl
le
e
I
IS
SP
P
s
se
er
rv
vi
ic
ce
e
p
pr
ro
ov
vi
id
de
er
rs
s.
.
I
In
n
m
mo
os
st
t
c
ca
as
se
es
s,
,
a
a
C
Ca
ab
bl
le
e
s
se
er
rv
vi
ic
ce
e
p
pr
ro
ov
vi
id
de
er
r
w
wi
il
ll
l
o
of
ff
fe
er
r
a
a
f
fi
ix
xe
ed
d
p
pu
ub
bl
li
ic
c
I
IP
P
w
wh
hi
il
le
e
a
a
D
DS
SL
L
s
se
er
rv
vi
ic
ce
e
p
pr
ro
ov
vi
id
de
er
r
w
wi
il
ll
l
o
of
ff
fe
er
r
a
a
p
pu
ub
bl
li
ic
c
s
su
ub
bn
ne
et
t.
.
I
If
f
y
yo
ou
u
h
ha
av
ve
e
a
a
p
pu
ub
bl
li
ic
c
s
su
ub
bn
ne
et
t,
,
y
yo
ou
u
c
ca
an
n
a
as
ss
si
ig
gn
n
a
an
n
I
IP
P
a
ad
dd
dr
re
es
ss
s
t
to
o
t
th
he
e
W
WA
AN
N
i
in
nt
te
er
rf
fa
ac
ce
e.
.
IP Address Type the IP
address.
Subnet
Mask
Type the subnet
mask.
Gateway
IP Address
Type the gateway
IP address.
Primary
DNS
Server
Type in the primary
IP address for the
route.
Secondary
DNS
Server
Type in secondary
IP address for
necessity in the
future.
6.1.2 DHCP
T
Th
he
e
r
ro
ou
ut
te
er
r
h
ha
as
s
a
a
b
bu
ui
il
lt
t-
-i
in
n
D
DH
HC
CP
P
s
se
er
rv
ve
er
r
t
th
ha
at
t
a
as
ss
si
ig
gn
ns
s
a
a
p
pr
ri
iv
va
at
te
e
I
IP
P
a
ad
dd
dr
re
es
ss
s
t
to
o
e
ea
ac
ch
h
l
lo
oc
ca
al
l
h
ho
os
st
t.
.
D
DH
HC
CP
P
s
st
ta
an
nd
ds
s
f
fo
or
r
D
Dy
yn
na
am
mi
ic
c
H
Ho
os
st
t
C
Co
on
nf
fi
ig
gu
ur
ra
at
ti
io
on
n
P
Pr
ro
ot
to
oc
co
ol
l.
.
T
Th
he
e
r
ro
ou
ut
te
er
r
b
by
y
f
fa
ac
ct
to
or
ry
y
d
de
ef
fa
au
ul
lt
t
a
ac
ct
ts
s
a
as
s
a
a
D
DH
HC
CP
P
s
se
er
rv
ve
er
r
f
fo
or
r
y
yo
ou
ur
r
n
ne
et
tw
wo
or
rk
k
s
so
o
i
it
t
a
au
ut
to
om
ma
at
ti
ic
ca
al
ll
ly
y
d
di
is
sp
pa
at
tc
ch
he
es
s
r
re
el
la
at
te
ed
d
I
IP
P
s
se
et
tt
ti
in
ng
gs
s
t
to
o
a
an
ny
y
l
lo
oc
ca
al
l
u
us
se
er
r
c
co
on
nf
fi
ig
gu
ur
re
ed
d
a
as
s
a
a
D
DH
HC
CP
P
c
cl
li
ie
en
nt
t.
.
I
It
t
i
is
s
h
hi
ig
gh
hl
ly
y
r
re
ec
co
om
mm
me
en
nd
de
ed
d
y
yo
ou
u
l
le
ea
av
ve
e
t
th
he
e
r
ro
ou
ut
te
er
r
e
en
na
ab
bl
le
ed
d
a
as
s
a
a
D
DH
HC
CP
P
s
se
er
rv
ve
er
r
i
if
f
y
yo
ou
u
d
do
o
n
no
ot
t
h
ha
av
ve
e
a
a
D
DH
HC
CP
P
s
se
er
rv
ve
er
r
f
fo
or
r
y
yo
ou
ur
r
n
ne
et
tw
wo
or
rk
k.
.
DNS Mode
Set the DNS Mode to Auto or Manual. If
user chooses Manual, fill in the primary
and secondary DNS addresses.
Primary DNS
Server
Type in the primary IP address for the
route.
Secondary
DNS Server
Type in secondary IP address for
necessity in the future.

Version 1.0 P a g e | 10
6.1.3 PPPoE
P
PP
PP
Po
oE
E
s
st
ta
an
nd
ds
s
f
fo
or
r
P
Po
oi
in
nt
t-
-t
to
o-
-P
Po
oi
in
nt
t
P
Pr
ro
ot
to
oc
co
ol
l
o
ov
ve
er
r
E
Et
th
he
er
rn
ne
et
t.
.
I
It
t
r
re
el
li
ie
es
s
o
on
n
t
tw
wo
o
w
wi
id
de
el
ly
y
a
ac
cc
ce
ep
pt
te
ed
d
s
st
ta
an
nd
da
ar
rd
ds
s:
:
P
PP
PP
P
a
an
nd
d
E
Et
th
he
er
rn
ne
et
t.
.
I
It
t
c
co
on
nn
ne
ec
ct
ts
s
u
us
se
er
rs
s
t
th
hr
ro
ou
ug
gh
h
a
an
n
E
Et
th
he
er
rn
ne
et
t
t
to
o
t
th
he
e
I
In
nt
te
er
rn
ne
et
t
w
wi
it
th
h
a
a
c
co
om
mm
mo
on
n
b
br
ro
oa
ad
db
ba
an
nd
d
m
me
ed
di
iu
um
m,
,
s
su
uc
ch
h
a
as
s
a
a
s
si
in
ng
gl
le
e
D
DS
SL
L
l
li
in
ne
e,
,
w
wi
ir
re
el
le
es
ss
s
d
de
ev
vi
ic
ce
e,
,
o
or
r
c
ca
ab
bl
le
e
m
mo
od
de
em
m.
.
A
Al
ll
l
u
us
se
er
rs
s
o
ov
ve
er
r
t
th
he
e
E
Et
th
he
er
rn
ne
et
t
c
ca
an
n
s
sh
ha
ar
re
e
a
a
c
co
om
mm
mo
on
n
c
co
on
nn
ne
ec
ct
ti
io
on
n.
.
P
PP
PP
Po
oE
E
i
is
s
o
of
ft
te
en
n
u
us
se
ed
d
f
fo
or
r
D
DS
SL
L.
.
A
Al
ll
l
l
lo
oc
ca
al
l
u
us
se
er
rs
s
c
ca
an
n
s
sh
ha
ar
re
e
o
on
ne
e
P
PP
PP
Po
oE
E
c
co
on
nn
ne
ec
ct
ti
io
on
n
f
fo
or
r
a
ac
cc
ce
es
ss
si
in
ng
g
t
th
he
e
I
In
nt
te
er
rn
ne
et
t.
.
Y
Yo
ou
ur
r
s
se
er
rv
vi
ic
ce
e
p
pr
ro
ov
vi
id
de
er
r
w
wi
il
ll
l
p
pr
ro
ov
vi
id
de
e
y
yo
ou
u
i
in
nf
fo
or
rm
ma
at
ti
io
on
n
a
ab
bo
ou
ut
t
u
us
se
er
r
n
na
am
me
e,
,
p
pa
as
ss
sw
wo
or
rd
d,
,
a
an
nd
d
a
au
ut
th
he
en
nt
ti
ic
ca
at
ti
io
on
n
m
mo
od
de
e.
.
PPPoE
Account
Assign a specific valid user name
provided by the ISP.
PPPoE
Password
Assign a valid password provided by
the ISP.
Confirm
Password Input the password again.
DNS Mode
Set the DNS Mode to Auto or
Manual.
If Manual, fill in primary and
secondary DNS addresses.
Primary
DNS Server
Type in the primary IP address for
the route.
Secondary
DNS Server
Type in secondary IP address for
necessity in the future.
6.2 LAN
Local IP
Address
Type in local IP address
(Default: 192.168.11.1)
Local Subnet
Mask
Type in an address code that
determines the size of the
network. (Default:
255.255.255.0/ 24)
Local DHCP
Server If or not enable DHCP server.

Version 1.0 P a g e | 11
DHCP
Start/End
Address
The DHCP start/end address.
DNS Mode
Set the DNS Mode to Auto or
Manual.
If Manual, fill in the primary and
secondary DNS addresses.
Primary DNS
Server
Type in the primary IP address
for the route
Secondary
DNS Server
Type in the secondary IP
address for the route
6.3 Port Forward
6.4 DMZ
DMZ
Enable
Enable DMZ
DMZ
Host IP
Address
Enter the private
IP address of
the DMZ host

Version 1.0 P a g e | 12
6.5 MAC C one
S
So
om
me
e
I
IS
SP
Ps
s
w
wi
il
ll
l
r
re
eq
qu
ui
ir
re
e
y
yo
ou
u
t
to
o
r
re
eg
gi
is
st
te
er
r
y
yo
ou
ur
r
M
MA
AC
C
a
ad
dd
dr
re
es
ss
s.
.
I
If
f
y
yo
ou
u
d
do
o
n
no
ot
t
w
wi
is
sh
h
t
to
o
r
re
e-
-r
re
eg
gi
is
st
te
er
r
y
yo
ou
ur
r
M
MA
AC
C
a
ad
dd
dr
re
es
ss
s,
,
y
yo
ou
u
c
ca
an
n
h
ha
av
ve
e
t
th
he
e
r
ro
ou
ut
te
er
r
c
cl
lo
on
ne
e
t
th
he
e
M
MA
AC
C
a
ad
dd
dr
re
es
ss
s
t
th
ha
at
t
i
is
s
r
re
eg
gi
is
st
te
er
re
ed
d
w
wi
it
th
h
y
yo
ou
ur
r
I
IS
SP
P.
.
T
To
o
u
us
se
e
t
th
he
e
C
Cl
lo
on
ne
e
A
Ad
dd
dr
re
es
ss
s
b
bu
ut
tt
to
on
n,
,
t
th
he
e
c
co
om
mp
pu
ut
te
er
r
v
vi
ie
ew
wi
in
ng
g
t
th
he
e
W
We
eb
b-
-b
ba
as
se
e
u
ut
ti
il
li
it
ty
y
s
sc
cr
re
ee
en
n
w
wi
il
ll
l
h
ha
av
ve
e
t
th
he
e
M
MA
AC
C
a
ad
dd
dr
re
es
ss
s
a
au
ut
to
om
ma
at
ti
ic
ca
al
ll
ly
y
e
en
nt
te
er
re
ed
d
i
in
n
t
th
he
e
C
Cl
lo
on
ne
e
W
WA
AN
N
M
MA
AC
C
f
fi
ie
el
ld
d.
.
Step 1. Press
to
clone the current PC or MAC
address to router’s Internet
port..
Step 2. Press to
save the changes.
Step 3. Press Reboot to
make changes effective.
72.4GHz and 5GHz Wire ess Connection
7.1 Enab e Wire ess and Set the SSID
O
Op
pe
en
n
t
th
he
e
W
Wi
ir
re
el
le
es
ss
s
>
>
B
Ba
as
si
ic
c
w
we
eb
b
p
pa
ag
ge
e
a
as
s
s
sh
ho
ow
wn
n
b
be
el
lo
ow
w.
.
Radio
On/Off
Press to
disable.
Press to
enable.
Network
Mode
Choose one network mode
from the drop down list.
Network
Name
(SSSID)
The SSID can be any text,
number, or special
characters. The default
SSID is 1200MXXXXXX or
1200MSXXXXXX (last 6
digits of the LAN MAC).
Multiple
SSSD1-3
For adding additional
wireless networks.
Broadcast
(SSID)
Allows user to disable SSID
broadcast.
Frequency For choosing channel
frequency.

Version 1.0 P a g e | 13
7.1.1 Advanced (Administrative Users)
7.2 Wire ess Security
O
Op
pe
en
n
t
th
he
e
W
Wi
ir
re
el
le
es
ss
s
>
>
S
Se
ec
cu
ur
ri
it
ty
y
w
we
eb
b
p
pa
ag
ge
e
t
to
o
s
se
et
t
u
up
p
e
en
nc
cr
ry
yp
pt
ti
io
on
n
f
fo
or
r
2
2.
.4
4G
Gh
hz
z
b
ba
an
nd
d
a
an
nd
d
5
5G
Gh
hz
z
b
ba
an
nd
d.
..
.
SSID
Choice
Select the SSID you’d like
to configure.
Security
Mode
Select an appropriate
encryption mode for the
security and privacy of your
wireless data packets.
Each encryption mode will
bring out a different web
page to offer additional
configurations.

Version 1.0 P a g e | 14
SSID
Choice
Select the SSID you’d like
to configure.
Security
Mode
Select an appropriate
encryption mode to improve
the security and privacy of
your wireless data
packets.
Each encryption mode will
activate a different web
page to configure.
7.3 WMM (Administrative Users)

Version 1.0 P a g e | 15
7.4 WPS
W
WP
PS
S
(
(W
Wi
i-
-F
Fi
i
P
Pr
ro
ot
te
ec
ct
te
ed
d
S
Se
et
tu
up
p)
)
p
pr
ro
ov
vi
id
de
es
s
a
an
n
e
ea
as
sy
y
p
pr
ro
oc
ce
ed
du
ur
re
e
t
to
o
m
ma
ak
ke
e
a
a
n
ne
et
tw
wo
or
rk
k
c
co
on
nn
ne
ec
ct
ti
io
on
n
b
be
et
tw
we
ee
en
n
a
a
w
wi
ir
re
el
le
es
ss
s
s
st
ta
at
ti
io
on
n
a
an
nd
d
a
a
w
wi
ir
re
el
le
es
ss
s
a
ac
cc
ce
es
ss
s
p
po
oi
in
nt
t
(
(r
ro
ou
ut
te
er
r)
)
w
wi
it
th
h
t
th
he
e
e
en
nc
cr
ry
yp
pt
ti
io
on
n
o
of
f
W
WP
PA
A
a
an
nd
d
W
WP
PA
A2
2.
.
I
It
t
i
is
s
t
th
he
e
s
si
im
mp
pl
le
es
st
t
w
wa
ay
y
t
to
o
b
bu
ui
il
ld
d
a
a
c
co
on
nn
ne
ec
ct
ti
io
on
n
b
be
et
tw
we
ee
en
n
w
wi
ir
re
el
le
es
ss
s
n
ne
et
tw
wo
or
rk
k
c
cl
li
ie
en
nt
ts
s
a
an
nd
d
t
th
he
e
r
ro
ou
ut
te
er
r.
.
U
Us
se
er
rs
s
d
do
o
n
no
ot
t
n
ne
ee
ed
d
t
to
o
s
se
el
le
ec
ct
t
a
an
ny
y
e
en
nc
cr
ry
yp
pt
ti
io
on
n
m
mo
od
de
e
o
or
r
t
ty
yp
pe
e
a
a
l
lo
on
ng
g
e
en
nc
cr
ry
yp
pt
ti
io
on
n
p
pa
as
ss
sp
ph
hr
ra
as
se
e
t
to
o
s
se
et
t
u
up
p
a
a
w
wi
ir
re
el
le
es
ss
s
c
cl
li
ie
en
nt
t
e
ev
ve
er
ry
y
t
ti
im
me
e.
.
U
Us
se
er
rs
s
n
ne
ee
ed
d
o
on
nl
ly
y
p
pr
re
es
ss
s
a
a
b
bu
ut
tt
to
on
n
o
on
n
t
th
he
e
w
wi
ir
re
el
le
es
ss
s
c
cl
li
ie
en
nt
t
a
an
nd
d
W
WP
PS
S
w
wi
il
ll
l
c
co
on
nn
ne
ec
ct
t
t
th
he
e
c
cl
li
ie
en
nt
t
a
an
nd
d
r
ro
ou
ut
te
er
r
a
au
ut
to
om
ma
at
ti
ic
ca
al
ll
ly
y.
.
WPS Enable WPS.
Press the button to
apply.
7.5 Station Info

Version 1.0 P a g e | 16
8SIP, FXS1 and FXS2 (AC1100MSF)
8.1 Register
T
Th
he
e
A
AC
C1
11
10
00
0M
MS
SF
F
h
ha
as
s
t
tw
wo
o
F
FX
XS
S
p
po
or
rt
t
u
us
se
ed
d
f
fo
or
r
S
SI
IP
P
c
ca
al
ll
ls
s.
.
B
Be
ef
fo
or
re
e
r
re
eg
gi
is
st
te
er
ri
in
ng
g
y
yo
ou
u
w
wi
il
ll
l
n
ne
ee
ed
d
a
a
S
SI
IP
P
a
ac
cc
co
ou
un
nt
t
f
fr
ro
om
m
y
yo
ou
ur
r
a
ad
dm
mi
in
ni
is
st
tr
ra
at
to
or
r
o
or
r
p
pr
ro
ov
vi
id
de
er
r.
.
8.1.1 Configure SIP from Web Page
S
St
te
ep
p
1
1.
.
O
Op
pe
en
n
F
FX
XS
S1
1
o
or
r
F
FX
XS
S2
2
>
>
S
SI
IP
P
A
Ac
cc
co
ou
un
nt
t
w
we
eb
b
p
pa
ag
ge
e.
.

Version 1.0 P a g e | 17
S
St
te
ep
p
2
2.
.
E
En
nt
te
er
r
t
th
he
e
S
Se
er
rv
ve
er
r
d
do
om
ma
ai
in
ns
s
a
an
nd
d
P
Po
or
rt
t
a
ad
dd
dr
re
es
ss
se
es
s
p
pr
ro
ov
vi
id
de
ed
d
b
by
y
y
yo
ou
ur
r
a
ad
dm
mi
in
ni
is
st
tr
ra
at
to
or
r
o
or
r
p
pr
ro
ov
vi
id
de
er
r
i
in
nt
to
o
t
th
he
e
S
Se
er
rv
ve
er
r
a
an
nd
d
P
Po
or
rt
t
p
pa
ar
ra
am
me
et
te
er
rs
s.
.
S
St
te
ep
p
3
3.
.
E
En
nt
te
er
r
t
th
he
e
a
ac
cc
co
ou
un
nt
t
n
na
am
me
e,
,
p
ph
ho
on
ne
e
n
nu
um
mb
be
er
r,
,
a
ac
cc
co
ou
un
nt
t
n
nu
um
mb
be
er
r,
,
a
an
nd
d
p
pa
as
ss
sw
wo
or
rd
d
f
fr
ro
om
m
y
yo
ou
ur
r
p
pr
ro
ov
vi
id
de
er
r
o
or
r
a
ad
dm
mi
in
ni
is
st
tr
ra
at
to
or
r
i
in
nt
to
o
D
Di
is
sp
pl
la
ay
y
N
Na
am
me
e,
,
P
Ph
ho
on
ne
e
N
Nu
um
mb
be
er
r,
,
A
Ac
cc
co
ou
un
nt
t,
,
a
an
nd
d
P
Pa
as
ss
sw
wo
or
rd
d
p
pa
ar
ra
am
me
et
te
er
rs
s.
.
S
St
te
ep
p
5
5.
.
C
Cl
li
ic
ck
k
o
on
n
S
Sa
av
ve
e
a
at
t
t
th
he
e
b
bo
ot
tt
to
om
m
o
of
f
t
th
he
e
w
we
eb
b
p
pa
ag
ge
e.
.
N
No
ot
te
e:
:
I
If
f
a
ap
pp
pe
ea
ar
rs
s,
,
C
Cl
li
ic
ck
k
t
to
o
m
ma
ak
ke
e
c
ch
ha
an
ng
ge
es
s
e
ef
ff
fe
ec
ct
ti
iv
ve
e.
.
8.1.2 View the Register Status
T
To
o
v
vi
ie
ew
w
t
th
he
e
s
st
ta
at
tu
us
s,
,
o
op
pe
en
n
t
th
he
e
S
St
ta
at
tu
us
s
w
we
eb
b
p
pa
ag
ge
e.
.
I
If
f
t
th
he
e
v
va
al
lu
ue
e
i
is
s
r
re
eg
gi
is
st
te
er
re
ed
d
a
as
s
f
fo
ol
ll
lo
ow
ws
s,
,
t
th
he
e
A
AC
C1
11
10
00
0M
MS
SF
F
i
is
s
r
re
ea
ad
dy
y
t
to
o
m
ma
ak
ke
e
p
ph
ho
on
ne
e
c
ca
al
ll
ls
s.
.
AC1100MSF
Other manuals for AC1100MSF
1
Table of contents
Other ReadyNet Network Router manuals

ReadyNet
ReadyNet LTE520S User manual

ReadyNet
ReadyNet AC1200MS User manual

ReadyNet
ReadyNet LTE520S User manual

ReadyNet
ReadyNet LTE520S User manual

ReadyNet
ReadyNet QX300 User manual

ReadyNet
ReadyNet SOLUTIONS GSX1204 User manual

ReadyNet
ReadyNet WRT300N-DD User manual

ReadyNet
ReadyNet VWRT510 User manual
Popular Network Router manuals by other brands

Teldat
Teldat H2 RAIL Lite installation manual

Quantum
Quantum FC1202 user guide

ExtremeSwitching
ExtremeSwitching 3600 Series Documentation Reference

ZyXEL Communications
ZyXEL Communications ZyXEL Prestige 310 user guide

SMART-AVI
SMART-AVI HDTV Router user manual

Porter-Cable
Porter-Cable 690LRVS instruction manual