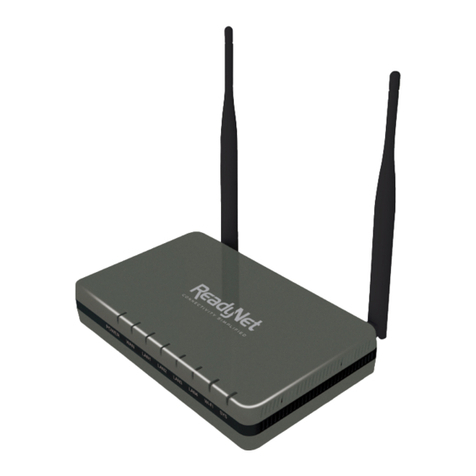
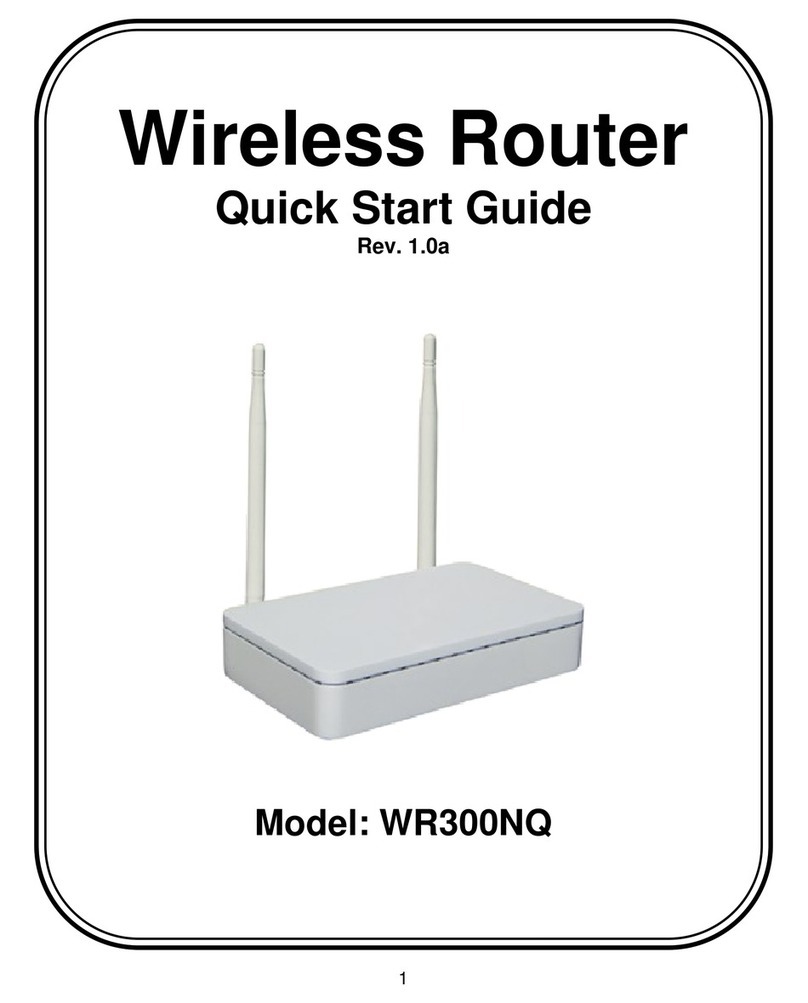
ReadyNet WR300NQ User manual

1
WR300NQ
Wireless Broadband Router
User Guide
Ver. 1.0b
October 2011

2
Contents
Included Items...................................................................................................................................4
Chapter 1: User's Guide ....................................................................................................................5
1.1 Purpose................................................................................................................................5
1.2 User's Guide Overview .......................................................................................................5
Chapter 2: Overview .........................................................................................................................6
2.1 Introduction.........................................................................................................................6
2.2 Features and Specifications.................................................................................................6
2.2.1 Features ....................................................................................................................6
2.2.2 Product Specifications..............................................................................................7
Chapter 3: Hardware Installation ......................................................................................................8
3.1 Panel Layout .......................................................................................................................8
3.1.1 Panel Layout ............................................................................................................8
3.1.2 Rear Panel ................................................................................................................8
3.2 System Requirements..........................................................................................................9
3.3 Installation Environment.....................................................................................................9
3.4 Hardware Installation Procedure.........................................................................................9
3.4.1 Wired Network Installation ......................................................................................9
3.4.2 Wireless Network Installation ................................................................................10
Chapter 4: Configuration Guide......................................................................................................10
4.1 Access the Configuration Menu........................................................................................10
4.2 Setup Wizard .....................................................................................................................12
4.3 Wireless.............................................................................................................................15
4.3.1 Basic.......................................................................................................................15
4.3.2 Advanced................................................................................................................15
4.3.3 Security ..................................................................................................................17
4.3.4 Access Control .......................................................................................................17
4.3.5 WDS.......................................................................................................................18
4.3.6 WPS .......................................................................................................................19
4.3.7 Site Survey .............................................................................................................20
4.4 WAN Setting .....................................................................................................................20
4.4.1 Basic.......................................................................................................................20
4.4.2 WAN Advanced......................................................................................................21
4.4.3 Upload/Download Bandwidth................................................................................22
4.5 LAN ..................................................................................................................................22
4.5.1 LAN .......................................................................................................................22
4.5.2 Static DHCP...........................................................................................................24
4.5.3 DHCP Client ..........................................................................................................24
4.7 Security .............................................................................................................................26
4.7.1 Port filter ................................................................................................................26
4.7.2 MAC filter..............................................................................................................27
3
4.7.3 IP filter ...................................................................................................................27
4.7.4 URL filter ...............................................................................................................28
4.7.5 Firewall ..................................................................................................................28
4.8 Service...............................................................................................................................29
4.8.1 DMZ.......................................................................................................................29
4.8.2 Virtual Server .........................................................................................................29
4.8.3 DDNS.....................................................................................................................30
4.8.4 NTP ........................................................................................................................31
4.9 Management......................................................................................................................32
4.9.1 System Mode..........................................................................................................32
4.9.2 Save & Upload .......................................................................................................33
4.9.3 Upgrade..................................................................................................................33
4.9.4 Password ................................................................................................................34
4.9.5 Reboot ....................................................................................................................34
4.9.6 System Log ............................................................................................................34
5.0 Status.................................................................................................................................35
5.1.1 System Status .........................................................................................................35
5.1.2 Statistics .................................................................................................................36
Chapter 6: Wireless Overview ........................................................................................................38
6.1 ReadyNet WLAN Information..........................................................................................38
6.2 What is a Wireless Network..............................................................................................38
6.3 How does a wireless network work?.................................................................................38
Chapter 7: Frequently Asked Questions..........................................................................................39

4
Included Items
Carefully open the box and remove the contents. Your ReadyNet WR300NQ Wireless Router
should include the following items:
1- WR300NQ wireless router
1- External power adapter
1- Ethernet cable
1- Quick start guide
Note: If the product is found to be damaged or if any of the listed parts are missing, please contact
the dealer where the product was purchased.

5
Chapter 1: User's Guide
Thank you for purchasing the ReadyNet WR300NQ Wireless Broadband Router! The
WR300NQ router is designed for SOHO (small office and home office) use and provides many of
the features and functions you expect in a mainstream broadband router. The router features
network security defense and filtering capabilities allowing you greater security and safety within
your SOHO network. The router provides the latest encryption and other security mechanisms
including WPA2. WPS allows you to connect to wireless devices more conveniently with the
push of a button. The WR300NQ router provides an enjoyable internet experience while
providing the peace of mind of having a secure product. The WR300NQ router functions as a
wireless AP (access point) using the IEEE 802.11n standard, but it is also backwards compatible
with 802.11b and 802.11g. The WR300NQ router supports a 802.11n 2T2R dual stream
connection allowing combined data rate up to 300Mbps. The WR300NQ Wireless Router
features a Quick Setup Wizard that helps you quickly configure the router for operation.
Advanced menus provide manual setup of advanced settings for those requiring a more complex
configuration. Before setting up your new WR300NQ Wireless Router, please read this manual
carefully to help you understand the features and functions of this product.
1.1 Purpose
The purpose of this manual is to help you become familiar with and the proper setup and use
of your WR300NQ Wireless Router.
1.2 User's Guide Overview
Chapter I: Introduction: An introduction to the WR300NQ router.
Chapter II: Product Overview: A description of the main features and specifications of the router.
Chapter III: Hardware installation: Provides a guide for the router hardware installation.
Chapter IV: Configuration Guide: Assist with configuring the router's basic network parameters
and advanced features.

6
Chapter 2: Overview
Thank you for purchasing the WR300NQ Wireless Router. This manual will assist you with
the installation and use this product.
2.1 Introduction
WR300NQ Wireless Broadband Router features an integrated firewall, router, wired and
wireless network connectivity. The wireless features are based on the IEEE 802.11n standard.
The WR300NQ router can extend your wireless network range and provide stable connection rates
up to 150Mbps. It is also backwards compatible with the IEEE 802.11b and IEEE 802.11g
standards. Multiple encryption mechanisms help ensure secure data transmission in your
wireless network. A powerful firewall provides security against threats from outside networks
and helps prevent viruses. Menu driven settings allow for quick network setup to provide:
high-speed computer and Internet connection, file transfer, printer sharing, video and audio
streaming, gaming and other communications services.
2.2 Features and Specifications
2.2.1 Features
Meets the IEEE 802.11n, IEEE 802.11g, IEEE 802.11b, IEEE 802.3, IEEE 802.3u standards.
Supports CSMA / CA, CSMA / CD, TCP / IP, PPPoE, DHCP, ICMP, and NAT protocols.
Provides one WAN port, four LAN ports: 10/100M self-adaptive, and automatic rollover
support.
Router is both accessible via wireless and hard wired cabling.
Supports transmission rates up to 150Mbps.
Offers three operating modes: Bridging Mode, Gateway Mode and Wireless ISP Mode.
Supports Quality of Service (QoS)-802.11e, WMM (Wi-Fi Multimedia).
Support WDS (Wireless Distribution Service) repeater functionality allowing for wireless
network expansion.
Support NAT / NAPT IP Sharing, Wide Area Network support: PPPoE / Static IP / DHCP.
Supports virtual server, DMZ host.
Supports WPS push-button encryption.
Supports the latest 64/128-bit WEP, WPA-PSK, WPA2-PSK wireless security standards.
Supports UPnP and DDNS functions.
Built-in DHCP server and built-in firewall.
Provides system security log and traffic statistics.
Remote Web management and configuration in Chinese and English.
Provides a Web management page with a factory settings reset option.
External power adapter.

7
2.2.2 Product Specifications
Model
WR300NQ
Supported standards and protocols
IEEE 802.11n, IEEE 802.11g, IEEE 802.11b,
IEEE 802.3, IEEE 802.3u, CSMA/CA,
CSMA/CD, TCP/IP, DHCP, ICMP, NAT, PPPoE
Port
WAN
1- 10/100M Adaptive RJ45 Port
LAN
4- 10/100M Auto-Negotiation RJ45 Ports
Wireless
Parameters
Frequency range
2.4 ~ 2.4835 GHz
Transmission rate
11n: 150/270/243/216/162/108/81/54/27 Mbps
135/121.5/108/81/54/40.5/27/13.5 Mbps
130/117/104/78/52/39/26/13 Mbps
65/58.5/52/39/26/19.5/13/6.5 Mbps
IEEE 802.11g: 54/48/36/24/18/12/9/6 Mbps
(adaptive)
IEEE 802.11b: 11/5.5/2/1 Mbps (adaptive)
Number of working channels
11
Spread Spectrum Technology
DSSS (Direct Sequence Spread Spectrum)
Data modulation
DBPSK, DQPSK, CCK and FDM
(BPSK/QPSK/16-QAM/64-QAM)
Sensitivity @ PER
(packet error rate)
150M
:
-68dBm@10% PER
;
150M
:
-68dBm@10% PER
;
108M
:
-68dBm@10% PER
;
54M
:
-68dBm@10%
PER
11M
:
-85dBm@8% PER
;
6M
:
-88dBm@10%
PER
1M
:
-90dBm@8% PER
;
(Typical)
Transmission distance
(approximate)
Interior up to 120 meters
Outdoors up to 360 meters
(varies depending on router placement)
RF power
16 dBm EIRP
Antenna
2- 5 dBi high-gain omnidirectional fixed antennas
Network Media
10 Base-T: 3 Class 3 and above, or UTP 100
Base-TX: class 5 UTP
LED
indication
WAN
Link / Activity (Connection)
LAN
Link / Activity (Connection)

8
Other
Power, WPS
Dimensions (L × W × H) (mm)
168 x 117 x 33 (mm)
Chapter 3: Hardware Installation
3.1 Panel Layout
3.1.1 Panel Layout
LED Indicators
Name Action Description
Power LED Off No electric power
On (Solid) Router is powered
SYS LED Off Faulty
On (Flashing) Router Working properly
WLAN LED Off Wireless functionality not enabled
On (Solid or Flashing) Wireless is enabled
WPS LED On (Flashing) WPS search initiated
Off WPS normal operation
WAN / LAN LED’s
Link/Activity
Off Port is not connected equipment
On (Solid) Port is connected to a device
On (Flashing) Port is receiving and sending data
3.1.2 Rear Panel
1) Power (power jack): This jack connects to the included power supply.
Note: You must use the supplied power supply; if you use a different power supply you may
permanently damage the router.
2) 1- WAN Port (RJ-45): The WAN port connects to your Cable modem, xDSL modem, or
another Ethernet connection that provides your Internet service. Connection is made using
a standard Ethernet cable.
3) 4- LAN Ports (RJ-45): The LAN ports can be used where a wired Ethernet connection is
possible. The LAN ports can connect to an Ethernet hub, switch or other Ethernet enabled
device on the network.
4) Reset Button: If you have password protected your router and have forgotten the password,
or if you would like to set your router back to the factory defaults; press and hold the reset
button for about 8 seconds. The SYS light will go off, the system will re- restart, and the

9
system will be configured with the factory default settings.*
5) WPS button: Selects WPS setup mode when adding a WPS enabled device to your wireless
network. When adding WPS enabled devices to your network, you can use this push button
and the push button on the WPS enabled wireless device to link them together and provide a
secure connection.
6) Antenna Interface: Two high-gain omnidirectional antennas are provided. The antennas are
permanently connected to the case of the wireless router and cannot be removed without
damage to the router.
*-Note: After resetting the router, make sure the router fully re-boots before turning off the
power, otherwise the router might not reconfigure to the factory default settings.
3.2 System Requirements
Broadband Internet service: xDSL Modem, Cable Modem, Fiber Optic Modem, Ethernet, etc.
Personal computer to configure the router. During router configuration this computer must be
connected to a router LAN port using an Ethernet cable.
TCP / IP networking software (Windows 95/98/Me/NT/2000/XP/VISTA/7 or other)
Internet Explorer 5.0 or newer.
3.3 Installation Environment
Installation environment requirements:
Place the router horizontally on a flat surface.
Adjust the antennas to point in the vertical direction.
Avoid placing the router near heaters or other heat producing devices.
Do not place the router in dirty or damp locations.
Routers recommended environment:
Ambient Room Temperature: 10° to 40° Centigrade
Humidity: 5% to 90% Relative Humidity (Non-condensing)
3.4 Hardware Installation Procedure
3.4.1 Wired Network Installation
The following procedure will assist with setup of one to four wired network connections:
1) Establish a LAN connection: Connect one end of a network cable to one of the four router
LAN port’s and connect the other end of the network cable to an Ethernet hub, Ethernet
switch or directly to the LAN port of a computer.

10
2) Repeat step 1 for up an additional three LAN connections.
3) Establish a WAN connection: Connect one end of a network cable to the router WAN port,
connect the other end of the network cable to an xDSL Modem, Cable Modem, Fiber Optic
Modem or Ethernet WAN system.
4) Provide power to the router: Connect the barrel connector on the power supply cord to the
back of the router. Plug the power supply into a functional electrical outlet. The router
should start up automatically after about 30 seconds.
3.4.2 Wireless Network Installation
The following procedure will assist with setup of one or more wireless network connections:
1) Establish a WAN connection: Connect one end of a network cable to the router WAN port,
connect the other end of the network cable to an xDSL Modem, Cable Modem, Fiber Optic
Modem or Ethernet WAN system.
2) Provide power to the router: Connect the barrel connector of the power supply to the back of
the router. Plug the wall outlet into a functional electrical outlet. The router should start up
automatically.
3) Connect a personal computer directly to one of the router LAN ports using an Ethernet cable.
the router
5) Configure the router following the steps given in chapter 4. Make sure you assign a SSID,
set up the security and assign a password. You will need the SSID and password to add
wireless devices to the wireless network.
6) After configuring the router it should now be ready to add wireless devices to the network.
7) Go to each 802.11x enabled PC or internet appliance, set the wireless settings using the user
guide for each product. You will need to select the proper SSID name from the list of
available routers, and then enter the wireless password you set up in the router.
8) Repeat the previous step for each additional wireless device you wish to add to the network.
Chapter 4: Configuration Guide
4.1 Access the Configuration Menu
Connect a personal computer directly to one of the four LAN ports of the router using an
Ethernet cable.
Run Internet Explorer ( ) or other internet browser software on the PC.
You can gain direct access to the router configuration menu by entering the following IP
address in the internet browser and press return: http:// 192.168.1.1.

11
192.168.1.1 is the default router IP address.
Users will see the following login page where a User Name and Password box will be
displayed. Enter the user name and password (The WR300NQ default user name and
password are "admin"), click the "OK" button. You will then enter the router configuration
menu.
Note: If you changed the WR300NQ's default IP address, you will need to use the new IP
address you chose in order to access the WEB management interface.
Note: The router's default username and password are set to “admin” at the factory.
You can change the default username and password in the router settings page. If you have
forgotten your username and password, you can use the reset button to restore the router to
the original factory settings, including the default user name and password.
If after entering the router IP address in your internet browser and pressing “return”, ensure that
your Ethernet cable is connected directly between your PC and one of the four LAN ports of the
router. Make sure the router has been powered on for at least 30 seconds. Make sure you use
the proper IP address in your web browser to access the router. The router default IP address is
192.168.1.1.
After a successful login the main menu will be shown on the left of the page. The menu
contains the following menu items
:
Setup Wizard, Wireless, WAN Setting, LAN, Security,
Service, Management, and Status. You may choose any of the menu items to access the
associated sub-menu items. Within each sub-menu you can set up the corresponding functions.
More detail regarding the various menu items is given below.

12
4.2 Setup Wizard
For Quick and Easy configuration a setup wizard is provided to set the WR300NQ basic
settings. This should provide basic Internet access, wireless encryption and other basic
functions:
Setup Wizard: Wireless Network Setup welcome screen.
1 Choose the type of wireless router work you require. The most common will be”Gateway”.

13
2. Set up the NTP server location and select the time zone. Preferably choose the closest time
server and the time zone that matches the location of the router.
3. Set up a wireless router's LAN interface configuration. The IP address is the address used to
access the router from your web browser. The subnet mask address should match the subnet
mask address of the network you are connecting to, or if you are setting up a new home network,
you may use the default setting.
4. This page is used to configure the network settings for the network connected to your WAN port.
In most cases the default setting will work, or your Internet Service Provider can assist with the
necessary changes to these options in order to work with their network. You can choose: static IP
access, DHCP, PPPoE
,
PPTP or L2TP.
User Name: This is the user name for access to the broadband account.
Password: This is the password for access to the broadband account.

14
5. The basic wireless parameter settings. Here you can customize the 802.11x wireless settings.
First time users should use the default settings. You can choose which of the 802.11 bands to use,
b, g, n. You can alter the router mode of operation and you can set your own SSID for the router.
Make sure you know the SSID for the router as it will be required when adding wireless devices to
your network. The radio channel width and sideband can be modified. If the default channel is
heavily used, you may wish to try another channel that is less congested.
6. Set up wireless router encryption. You can select the type of encryption you wish to use to
prevent unauthorized access to your network. Select “Finished” to complete the setup wizard.

15
4.3 Wireless
4.3.1 Basic
Wireless Basic Settings
Disable Wireless: Disable or enable the wireless network. (Enabled = Default)
Mode: Select the wireless network mode. (Default = B+G+N)
Use Type: Choose the type of wireless network job
(
Default = AP
)
SSID: Identifies you wireless network. (Default = WR300NQ
)
Channel Width: Wireless channel operating frequency bandwidth. (Default = 40 MHz)
Control Sideband: The sideband can be set to upper (High) or lower. (Default = High)
Associated Clients: Display the wireless clients connected to the router.
Broadcast SSID: Choose to broadcast the SSID, or hide it from others. (Default = Enabled
)
Channel: Select the 802.11x channel you wish to use. (Default = 9)
Enable Universal Repeater Mode: Allows the router to act as an 802.11x repeater mode.
(Default = Disabled)
SSID of Extended Interface: If you use repeater mode, you must assign another SSID to
access the repeater instead of the originating routers SSID. (Default =
802.11bgn-SSID-Repeater)
4.3.2 Advanced
Wireless Advanced Settings

16
Fragment Threshold: Specifies the data packet fragmentation size threshold. When the data
packet is longer than the fragmentation size threshold, the packet will automatically be
divided into multiple packets. Small packets can cause poor network performance, so this
value should not be set too low. Small packets are only beneficial if periodic interference is
causing interference with larger packet sizes.
RTS Threshold: Specifies the data packet RTS (Request to Send) threshold. When the
packet length exceeds this value, the router will send an RTS to the destination site, and then
negotiates to receive the RTS frame. The wireless station responds with a CTS (Clear to
Send) frame to respond to the router.
Beacon Interval: Increasing the Beacon interval can increase the wireless network
performance. If you set the client-side beacon interval to a lower value (more frequent) you
can speed up the wireless client connection speed in a number of online and roaming
environments (such as public hotspots). Beacon units are usually in millisecond’s (1 / 1000
second), the default value is 100 ms.
Preamble Type: The router default uses a long preamble. This prevents the system from
being compatible with legacy IEEE802.11 systems operating at speeds of 1 and 2 Mbps.
IAPP (Inter-Access Point Protocol): When the terminal using IEEE 802.11 wireless LAN is
roaming between access points, this protocol helps assist the transfer between access points
and assists with load balancing.
Protection: Conducive to the slower 11 b/g wireless clients. A complex variety of modes
can successfully connect to the 11n wireless network. The default is "Disabled."
Aggregation: Enhances the local area network to ensure the correct destination of the packet
mechanism.
Short GL: Can help to achieve high throughput, but it will affect backwards compatibility
and system security.
RF Output Power: If your wireless clients are placed close to your router, you can reduce the
transmit power to reduce interference with nearby systems and enhance security.

17
Note: The Advanced settings are part of the advanced wireless parameters, default values
are recommended unless you understand their use.
4.3.3 Security
Security settings. You can select the encryption method (WEP, WPA, WPA2).
SSID: Select the SSID, for which you want to set the security method.
Encryption method: Sets the encryption mode for the corresponding SSID. You may choose
from the following options:
1 no encryption mode
2.WEP mode.
3.WPA mode.
4.WPA2 mode.
5.WPA-Mixed mode
802.11x Authentication: Enabling authentication allows for RADUIS setup.
o
RADIUS IP Address
o
RADIUS Port
o
RADIUS Password
4.3.4 Access Control
Provides wireless policy access settings to allow or deny access to devices placed in a MAC
address list.

18
Control Mode: Provides the ability to allow or deny access to each MAC address added to a
list.
MAC address: Allows individual MAC addresses to be added to the list with the associated
control mode.
Comment: A comment may be added to each MAC address entry in the list.
4.3.5 WDS
Wireless Distribution System allows multiple IEEE 802.11 network Access Points to interconnect
with each other. It allows a wireless network to be extended without adding additional hard
wired connections between access points. This allows for a scalable wireless network providing
greater transmission range and coverage.

19
Enable WDS: Enables WDS function.
MAC Address: The MAC address of each Access Point you with to add to the network must
be entered individually to this list.
Data Rate: Sets the transmission speed.
Comment: Adding strategy to the current logo.
4.3.6 WPS
WPS (Wi-Fi Protected Setup) is a Wi-Fi Alliance security standard and was introduced to simplify
encrypted setup of 802.11 wireless network devices. A WPS push-button is provided on each
WPS enabled device. The user can add one or more WPS devices to a wireless network by
simply pressing the WPS button on the router and then on the wireless device to be added to the
network. This process will exchange information between the router and the wireless device to
link them together and also sets up a secure link between them.

20
Disable WPS: Allows the WPS function to be turned on and off.
WPS Status: Displays the current status of the WPS function including: SSID, authentication,
encryption type, the AP's PIN code and other information.
PBC mode: PBC (Push Button Configuration) mode can be initiated in two ways, you can
directly press the WPS push-button on the hardware, or select it within the software by
selecting “Start PBC”. Once you have activated the WPS push-button on the router, simply
push the WPS push button the wireless client to automatically connect to wireless AP.
Client PIN: Some devices such as a wireless access card or other wireless client may require
the AP to have a copy of its PIN to provide secure access. The menu provides an option to
enter a PIN code and click “Start PIN”. The WPS will begin to send signals to the client for
whom the PIN was entered and the client will automatically connect to the wireless AP.
4.3.7 Site Survey
Performing a site survey displays a list of wireless connected to the wireless AP (router). The
survey includes information for each connected device including: SSID, BSSID (MAC address),
Channel, Type of operation, Encryption type and Signal Strength.
Refresh Scan: Runs a scan for all devices within range of the AP (router) and provides
information on each of them.
Connect: Allows manual connection to a particular wireless client or IBSS chosen from the
Site Survey list.
4.4 WAN Setting
[SA1]
4.4.1 Basic
This menu provides parameter settings for the router WAN port. In most cases the WAN port
connects to a DSL modem, cable modem, or other form of internet service device. Information
for these settings are usually provided by your internet service provider.
Table of contents
Other ReadyNet Wireless Router manuals

ReadyNet
ReadyNet LTE520 User manual

ReadyNet
ReadyNet WRT150N User manual

ReadyNet
ReadyNet WRT-500 User manual

ReadyNet
ReadyNet QX300 Installation and user guide

ReadyNet
ReadyNet LTE500 User manual

ReadyNet
ReadyNet AC1200M User manual

ReadyNet
ReadyNet LTE520 User manual

ReadyNet
ReadyNet LTE520 User manual

ReadyNet
ReadyNet WR300NQ User manual

ReadyNet
ReadyNet WRT-500 User manual
Popular Wireless Router manuals by other brands

Zonet
Zonet ZSR1114WE Quick installation guide

TRENDnet
TRENDnet TEW-830MDR user guide

ZyXEL Communications
ZyXEL Communications NBG-318S - V3.60 user guide

Draytek
Draytek VigorIPPBX 3510 Series user guide

SMC Networks
SMC Networks Barricade SMC7908VoWBRA Configuration guide

Buffalo
Buffalo AIRSTATION WBR-G54 Quick setup guide