Recordio 802 User manual

EE
E IJ':'
et irl
EVa
RECORDIO
moDEt 802
o
o
4
o
(J
rt
E
GENERAL INFORMATION
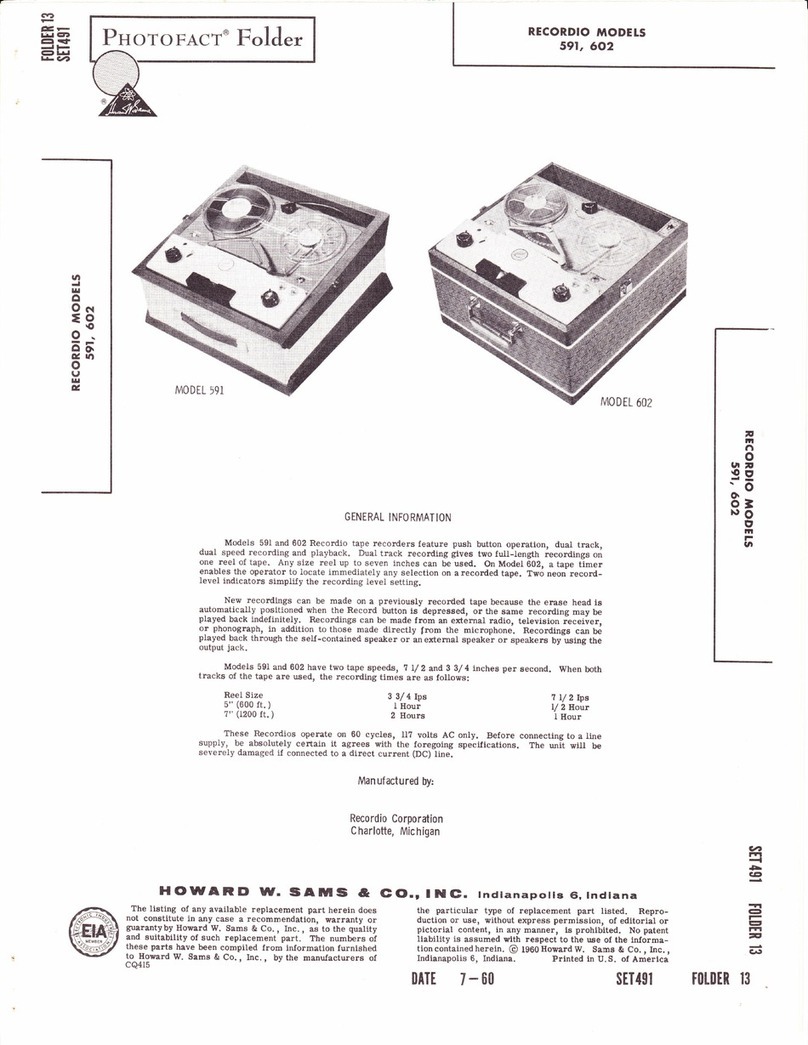
The Recordio Model R-802 is a dual track monaural tape recorder and player, and in
addition, will play two-track or four-track prerecorded stereophonic tapes.
The R-802 isequippedwith a quarter-track head, a 3-watt amplifj.er into which a stereo-
phonic preamplifier is incorporated, and two 4-inch speakers.
No additional amplilication is necessary when using the stereophonie preamplifier to
operate an external amplifier. The Model SA-801, also covered in this manual, contains
speakers and a power amplifier that matches the R-802 tape recorder amplilier. The SA-80I
is designed specifically for use with the R-802 for stereophonic playback.
This Recordio features pushbutton control for each tape transport mode. These modes
are: Rewind, Record, Stop, Play, andFastForward.
Double-track recording is used, giving two full-length recordings on a reel of tape. Any
size reel up to ? inches can be used.
A neon record Ievel indicator simplilies the record level setting. New recordings can
be made on previously recorded tape since the erase head is automatically positioned when the
RECORD button is pressed. Monaural recordings can be made from a radio, television re-
ceiver, or phonograph, in addition to those made directly from the microphone.
This recorder has twotape speeds, 7.50-inches per second, and 3. ?5-inches per second
Using both tracks of the tape, the recording times are as follows:
Reel Size
5" reel (600 ft. )
7" reel 0200 ft. )
HOWARD W. lsAIf,S &
The liating of any available replacement part herein does
not constitute in any case a recommendation, warranty or
guarantyby Howard W. Sarns & Co. , Inc. , as to the quality
and euitability of such replacement part. The numbers of
these parts have been compiled from lnformation furnished
to Howard W. Sams & Co. , Inc. , by the manufacturers of
cQ469
?.50" Speed
l/2 hour
I hour
the particular type of replacement part listed. Repro-
duction or use, without express permission, of edttorial or
pictorial content, in any manner, le prohibited. No patent
Itability ie assumed wlth reepect to the uee of the lnforma-
tioncontainedherein. @ tOOt llowardW. Sams & Co., Inc.,
3. ?5" Speed
I hour
2 hours
The Recordio R-802 is designed to operate on 60-cycle, ll5-volts, AC supply only.
DAMAGE WILL RESULT IF CONNECTTON IS MADE TO A DTRECT CURRENT (DC) LrNE.
Man ufactured By:
Recordio Corporation
Charlotte, Michigan
{E (o.r I N G, lndianapolls 6, lndlana
Caa
l'Ft
-l
etr
etl
-l
e
E
t-l
-t
Indianapolis 6, Indiana.
DATI 10 - 6l
Printed ln U.S. of Amerlca
sET 551 totDER ll
t*
H8
FV
o9
so
\<

FIG. i TOP V IEW OF MICHANISM WITH ESCUTCHEON REMOVED
FUNCTIONS OF CONTROLS & PUSHBUTTONS
VOlUme be indexe4 or previously recorded selections can be
Iocated with great accuracy.
Clockwise rotation of this control turns the
Recordio "on" and regulates the volume for both the RgWind BUttOn
recording and playback oplerations' This buttonis used totransfer tape rapidryf rom
TOne the take-up reel (right) to the supply reel (left).
Clockwise rotation of this control increases the RgCOfd BUttOn
treble response. Also, when turned clockwise, the
speakers are mutedwhen the recorder is in the Re- When depressed, the recorder will begin re-
cord mode. Complete counterclockwise rotation of cording signals fed to the tape.
this control provides a means to monitor recordings' NoTE: The Record Lock must be turned before
Speed the Record Button can be depressed-
The speed control knob should point to ?.50 or StOp BUttOn
3. ?5 according to the speed desired. This Recordio
has two tape speeds, 7.5O-inches per second and Thisbuttonis usedto stop tapetravel afterbeing
3.?5-inches per second. In so far as quality of re- in either the play, Record, Forward, or Rewind
cording-reproduction is concerned, speed is an im- modes. Itis also asafety feature andmust be pressed
portant faetor. The higher the speed, generally, the down when the reeorder is not in use.
greater will be the fidelity.
CAUTI0N: Do not turn the speed control knob Play Button
unless the STOF button is depressed. This button starts the recorder and plays back
any recording that is on the tape.
Tape lndicator
set the Tape Indicator to zero by turning the Forward Button
knurled reset knob when starting to record or play Thisbutton is usedtotransfer taperapidly from
back a reel of tape. ff the reading is notedat various the suppty reel (left) to the take-up reel (right).
points in the tape travel, new program selections can
Page 2

OPERATING
Preparing for Operation
l. Remove the AC power cord, reel of tape, empty
reel, and the mierophone from the rear storage
compartment.
2. Depress the Stop button.
3. Plug the AC eord into a convenient wall recep-
tacle of the proper rating.
4. Place the Speed knob in the 3. ?5 or ?.50 posi-
tion.
CAUTI0N: Donotturn Speedcontrotknobunless
Stop button is depressed.
When the Forward or Reverse buttons are de-
pressed, the Record and Play buttons are locked so
they cannot be pressed down, with the possibility of
spilling tape. The buttons should always be pressed
down firmly until they latch. The Stop button must be
depressed before changing functions or speeds of the
recorder.
IMP0RTANT: Always depress the Stop button
when the Recorder is not in use.
Threading the Tape
1. Place a reel of tape on the supply pan (left) mak-
ing sure the reel slots catch the protrusions of
the pan.
2. Place an empty reel, the same size or larger,
on the take-up pan (right). Again make certain
the reel slots catch the protrusions of the pan.
3. Release theStop button bypressing lightly onany
one of the other buttons so that all buttons are
in the release position. This releases the tape
brakes, simplifying tape threading.
4. Unwind about l4-inches of tape from the supply
reel. HoId a section of tape straight with both
hands and insert tape in tape slot making sure
the dull coated side faces rear oi machine.
5. Insert the free end of the tape into one of the
slots in the hub of the empty reel and turn it a
few turns to secure the tape to the reel.
Recording f rom Microphone
l. Turn the On-Off -Volume control to the right
until a cliek is heard and allow sufficient time
for the Redi-Lite to glow.
2. Insert the mierophone plug into the Microphone
input jack.
3. Move the record lock (38) downward with the left
hand. This releases the safety lock which pre-
vents accidental erasure.
4. Depress the Record button, while holding the
record loek (38) down rvith the left hand, until
it latches.
5. Adjust the volume control until the record level
indicator just flashes while speaking into the
mierophone.
I NSTRU CTI ONS
NOTE: The tone control is disconnected when
in the record position.
Recording from Radio, Television, or Phonograph
l. To record from a radio or television receiver,
connect a patch cord with two alligator clips on
one end across the voice coil of the radio or
television speaker. Plug the other end into the
monaural input jack.
2. To record from a phonograph, plug the phono
plug into ttre monaural input jack.
3. Proceed as in "Recording from Microphone".
Speed Change Knob
The arrow on the knob should point to 7. b0 or
3.75, according to the speed desired.
CAUTI0N: Donotoperate thespeed changeknob
while the unit is running. The stop button
must be depressed first before changing
speeds.
To Use Second Track
l. When all of the tape has been wound onto the
take-up reel, depress the stop button.
2. Remove the take-up reel from ttre right take-up
spindle and replaee it rpith the empty reel.
3. Place the full reel of tape on the left supply
spindle.
4. Thread the tape.
5. Proceed with the recording.
Playing Recordings
l. Turn the recorder on with the On-Off -Volume
control knob.
2. Thread the tape.
3. Set the speed change knob (10) to the speed at
which the recording was made.
4. Depress the play button.
5. Adjust t}re volume and tone controls to the de-
sired listening level.
Fast Forward or Reverse
When acertain portionof thetape is tobe played
over, it is not necessary to rewind the entire tape.
The tape will advance or reverse at a rapid speed to
the desired place by depressing the forward or reverse
button.
Tape Timer
Ifyou wishto playback acertain recording, note
the reading on the timer seale when the reeording is
being made or heard" Rewind or advance the tape to
the number on the scale and then depress the stop
button. Depress the play button and the desired re-
E*
H8
Fn
o9
3o
O
t-
I
rfl
n
Page 3

F IG. 2 BOTTOM V I EW OF MEC HAN I SM
cording will be played back.
When startinga newreel of tape, reset thetimer
pointer to I'O?' byrotating the reset knob. By starting
at "O't on all tapes, the number location can be cata-
logued for each recording on any reel.
Erasing Recorded Material
The erase head is automatically positioned when
the record button is depressed, erasing any previous
recording before a new one is made. Tapes may be
erased without putting new material on the tapes by
depressing the record button and turning the volume
control to its minimum position. One track is erased
at a time. To erase the second track, reverse the
reels and repeat the foregoing operation.
To Use Recorder as a Public Address System
Plug the microphone into the microphone input
jack. Turn the monitor switch to the left. T\rrn the
Or-Off-Volume control to the On position. Depress
the Reeord button and talk into the microphone.
CAUTI0N: When usingas a public addresssys-
tem, keep the mierophone away from the
loud.speakers asfar as possible to prevent
feedback.
To Edit and Splice Tape
NOTE: Since it is impossible to edit and splice
one track without affecting the other, t€-
cordings which are to be edited should be
limited to one traek only.
1. Tape may be edited by cutting outunwanted por-
tions or by joining selections into another se-
quence. Announcements may be insertedbetween
selections, etc. Unused sections can be spliced
togetler for re-use.
Page 4
2. For best results, cut the tape at a slight diag-
onal, join ends together with splicing tape on
theglossy side andtrim off anyexcessive width.
To Play Quarter-Track Stereophonic Tape
1. Thread the tape.
2. Connect the Stereo output jack to the input jack
or terminals of an external amplifier.
3. Depress the play button and adjust the volume
and tone controls of the recorder and external
amplifier to the desired listeninglevel andequal
volume.
4. When the reel is completely played, reverse the
reelsl rethread the tape, and proceed as above.
To Play Stereophonic Records
l. Plug the stereo turntable output leads. into the
monaural -stereo input jacks.
2. Make certain the stop button is depressed.
3. Plug the external amplifier into the stereo out-
put jack.
4. Turn the Or-Off-Volume eontrols to the On
position.
5. Adjust thevolume and tone controls so they will
be equal from each unit with the turntable run-
ning.

FIG.3 BOTTOM VIEW OF MECHANISM WITH DRIVI MOUNTING PLATE ASS'Y REMOVED
DISASSEMBLY
Removing the Recorder from the Case
l. Remove the front escutcheon ( ).
2. Remove two screws on the top front and two
screws from the rear of the recorder.
3. Lift recorder up and disconnect the speaker
lead,s.
4. Lift the recorder out of its case.
5. Reverse theforegoing procedure toreassemble.
To Remove the Amplif ier f rom Tape Transport
l. Unplug the head lead^s.
2. Remove the microphone and external speaker
jacks.
3. Remove the lead^s from the input and stereo
jacks.
4. Unsolder the motor lead^s.
5. Disconnect the record switeh linkage.
6. Remove two serews from each side of the am-
plifier and lift amplifier from tape transport.
Foreign matter should be cleaned from under
the plastic pushbuttons oecasionally. The pressure
roller (41), recording head (48), and tape guide posts
(44) and (56), should be cleaned occasionally with a
7. Reverse the foregoing procedure to reassemble.
To Remove SA-801 Amplif ier f rom Case
l. Remove the screw, holding the line cord, in the
storage compartment.
2. Remove six screws f rom the top of the control
board
3. Lift the amplifier from the case.
4. Reverse theforegoing procedure to reassemble.
To Remove SA-801 Amplif ier f rom Control Board
l. Remove two screws from the input jack.
2. Remove the external speaker jack.
3. Unsolder the Redi-Lite leaG.
4. Removetwo hex nutsholding the amplifier tothe
control board.
5. Lift amplifier away from control board.
6. Reversethe foregoing procedure toreassemble.
tn
H8
rV
o9
3o
CLEAN ING
soft cloth and alcohol to remove the tape residue .?l
O
g
7
Page 5

FIG.4 TOP VIEW OF DRIVE MOUNTING PLATE ASSEMBLY
LU BRI CATI ON
All rotating parts are provided with oilite bear- sliding levers and lubricate with a drop of good grade
ings and are lubricated before leaving the factory. If motor oil.
the recorder is disassembled for repair, clean all
ADJUSTMENTS
ReCord-Play Head for minimum pressure against the tape.
t. Remove the rear escutcheon (15) and the front 4. Depress the stop button after the adjustments
escutcheon (4). are made.
2. Thread. analignment tape ora good prerecorded EfaSe Hgad
tape on the recorder. 1. Remove the rear escutcheon and check to see if
3. Adjust the controls as described under "Playing the erase head (5a) is parallel with the tape.
Reeordings ". 2. Checkto see if thetop edge of thetape coincides
4. Adjust screw (aT) to the right or left until the with the top end of the diigonal stot (lunction of
maximum high frequencies are obtained. long diagonal slot and short vertical stoQ.
Pressurg Pad 3. To adjust the tape level, loosen set screw (bb)
r. Remove rront escutcheon (4). ii$rilf::,t3:f#iffi* post (56) up or down'
2. Depressthe Play buttonbut do not turnrecorder Bfakg ShOe
on. l. The brake shoes on brake spring (?g) should
3. Use a pencil type postal scale atthe end of the clear the drums by approximitety-t1g"with the
padand check the amount of pressure necessary pushbuttons in the up position.
topull the padaway fromthe tape. The required
pressure should be L 3/ 4 oz. !L/ 4 oz. 2. Depress the stop button and observe the brake
shoes. They must contact the drums atthe same
(a) Adjust the record head pressure pad with time and with equal pressure.
the locked adjustment screw (36). 3. To adjust the brake shoes, bend the brake slide
(b) Adjust the guide post pressure pad by bend- plate assembly
ingthe pressure padspring. It must be adjusted
Page 6

TROUBLE CHART
Symptom Cause Remedy
No drive in record or play-
back. Idler tension spring (106) loose
or broken and not holding the
idler wheel (66) in engagement
with the motor pulley (85) and
flywheel (62).
Idler slide plate (6?) binding on
slide bushing (87) preventing
idler wheel (66) from sliding
forward.
l. Replace idler tension spring(106).
2. Check for burrs on the idler slide
plate (6?) and slide bushing (8?).
Check to see i.f the idler slide
plate (6?) is bent.
t.
2.
No fast forward or reverse.
2,
l. Idler lever tension spring (75)
loose or broken and not actu-
ating idler lever (8i).
Idler drive belt (83) not properly
connected-
Replace idlerlever tension spring
(?5).
Make sure the idler drive belt (83)
is in the grooves of the pulleys.
I.
2.
No record- l. Pressure padnotadjusted prop-
erly.
2. Record head (48) loose on its
mounting.
3. Tape not threaded properly.
4. Defective Reeord-Play head
(48).
See "Pressure Pad Adjustment".
Tighten and adjust as described
under''Record-Play Head".
Make certain the dull side of the
tape faces the head"
Replace head (48).
l.
2.
3.
4.
Pushbuttons fail tolatch into
position. l. Lock plate spring (33) loose or
broken. l. Replace lock plate spring (33) so
lock plate will be held against the
hinge bracket (31).
Does not erase. I. Spring (35) loose or broken. 1. Replace spring (35) so the erase
head is pulled forward to engage
the tape.
3=
H8
FF
@9
3o
MECHANICAL PARTS LIST
I
2
3
4
5
6
7
I
I
l0
ll
L2
l3
L4
l5
t6
L7
l8
l9
20
2L
22
23
24
25
c-r3.318
c -13 -254 -15
E -r3 -295-10
5? -lC -606 -6
B-31. 351
4B-2213 -l
E -r3. 445 -r
c-r3.253-?
73-2254-6
5?-6C -620-l
5? -4C -405-5
B-32.302-2
D-13.292-2
35.85r
5? -rc -618-l
B-19.975-2
B-13.258-8
B-33.412
73-2241-148F
B-r9-881
B-19. 868
B-31. 334
B-19.892
B-35.1045-l
B-33.446
B-19. 858
B-19.876-l
B-3r. 337
B-r9. 859
B-r9. 870
B-31-343
B-31. 361
57-i6B-613-0
B-35. ?66
B-33.4r8-2
B-28.163
B-33.404*
B-28. 163
5? -3439-0
B-32. 309
B-3i.360
8-36.254
B-19.989
B-19.1564
5?-16B-613-0
Reel Pan & ShaJt Ass'y.
Shim Washers
On-Off -Volume and Tone Control
Knob
Front Escutcheon
#6-32 x 3/ 8" 8.H.M.S. Phil.
Stl. Screw
Reel Drive Spring
Tape Guide Post
Hex Nut, 3/ 8-32 xL/ 2
Baseplate
Speed Shift Knob
Felt Washer
#6-32 x I L/ 4 R. H. M. S. Phillips
#4-40-5/ 16 O. H. M. S. Phillips
Timer Knob
Rear Escutcheon
Timer Shaft & Indicator Ass'y.
#6-32 x I l/ B Philips R. H. M. S.
Rear Escuteheon Plate
Pushbuttons (ehck)
Push-On-Stud Nut
Flat Washer
Playback Actuating Lever
Record Slide Plate
Pressure Pad
Pressure Pad Spring
'Tt
o
r
E7
tn
v
26
27
28
29
30
3l
32
33
34
35
36
37
38
39
40
4L*
42
43
44
45
46
47
48
49
50
5l
52
Playbaek Slide Plate Ass'y.
Spacer
Pushbutton Retainer Bracket
Pushbutton Lever
Pushbutton Return Spring
Hinge Bracket for Pushbutton
Locking Plate for Pushbuttons
Lock Plate Spring
Screw
Erase Head Tension Spring
#6-32 x 3/ I R. H. M. s.
Record Actuating Lever Ass'y.
Record Lock
"E" Retaining Ring
Linen Washer
*Pressure Roller
Linen Washer
#6-32 x 3rl16 Bristol Hd.SetScrew
Tape Guide Post (Right)
Fiber Washer
Pineh Roller Tension Spring
Record Head Adjusting Screw
Play-Record Head
Play-Record Head Mtg. Bracket
PIay-Record Head Shim
Play-Record Head Mtg. Screw
Erase Head Mormting Screw
Page 7

F IG. 5 A IX PLODED V I EW OF PARTS A BOVE BASE PLATE
Page 8

en
H8
FF
sct
3o
'T1
o
1-
E7
rfl
n
l-r
f-l
?
O
@
qJ
OO
o@
OW
I
I
I
I
vr
I
I
A
\t
A PHOTOFACT'EXPLODED' VIEW
oHowrrd \7. Srnr & Co.,lnc. l96l
FIG.5 B EXPLODED VIEW OF PARTS BELOW BASE PLATE
Page 9

Descrlption
53
54
55
56
5?
58
59
60
6r
62
63
64
65
66*
6?
68
69
?0
7L
72
73
74
75
76
77
?8
73 -2233 -5
c -35. 756 -1
5 7- 3439 -0
B-32. 300
48-410-t
B-32. 336
c-19. 1565-r
B-19. 849
B-28. 163
13.257-r
5?-3698-0
c-35. 1050-i
57 -36 98 -0
*B-33.408
B-19.838
B-19.976-r
D-35. 1054-2
48-409-t
D-36.153
B-35.1046
B-31. 339
B-31.338
B-19. 906
B-31. 335
Lockwasher
Erase Head
#6-32 x3/L6 Bristol Hd. Set
Screw
Tape Guide Post (Left)
#6-32 Nut, Steel
Tape Guide Post Spacer
Pressure Roller Plate Ass'y.
Record Lock Tension Spring
Linen Washer
Flywheel
#8-32 x 3/ L6 Bristot Hd. Set
Screw
Brake Drim & Bushing Ass'y.
#8-32 x 3/ L6 Bristol Hd. Set
Screw
*Rubber Bonded Idler Wheel
Idler Slide Plate
Angle Bracket for Mounting
Drive Ass'y.
Drive Mounting Plate Ass'y.
Flat Washer
Hex Head Eiastic Stop Nut
Motor, Round Type
Fan
Shift Plate Ass'y.
Idler Lever Tension Spring
Brake Return Spring
Record Interlock
Brake Pad, FeIt
79
80
8l
82
83
84
85
86
8?
88
89
90
9l
92
93
94
95
96
97
98
99
r00
101
102
103
104
r05
106
107
B-35.1070-r
B-32.275
B-35. r05r
B-32. 367
B-28. r81
B-33.418-2
B-32.288
57-3698-0
B-32.264
B-19. 1431-r
B-31.327
B-19. 8?7
57 -3698-0
B-19. 873
B-32.275
B-33.405
73-2254-3
B-33. 418-2
B-33.407-r
B-32.293
B-19.961
B-31.333
B-33.1i8
B-33.445
B-28.175
B-19. 862
B-3i. 324
B-28. 194-2
Brake Spring Ass'y.
#8-32 H. H. Shoulder Screw
Idler Lever Ass'y.
Idler Drive Sheave
Idler Drive Belt
"E" Retaining Ring
Motor Pulley
8-32 x 3/tG Bristol Head Set
Screw
Idler Slide Bushing
Idler Throw-Out Lever
Idler Lift Compression Spring
Switch Lever
Set Screw
Sub-Idler Plate
#8-32 H. H. Shoulder Screw
Sub Idler Wheel
Felt Washer
Flat Washer
"E " Retaining Ring
Retaining Ring
Speed Control. Shaft
Speed Control Shaft DetentSpring
Switch Arm Link
Spacer
Gear Train
Counter Belt
Drive Mounting Plate Bracket
Idler Tension Spring
Shock Mount
MECHAN ICAL PARTS LIST ( CON'T. }
Pressure Roller WALSCO Part No. 1457
Rubber Bonded Idler Wheel WALSCO Part No. 1430
EZg0 ECC83 ECC83
MODEL R.802 CHASSIS TOP VIEW
)l<
*
Page I 0

MODEL R-8 O 2 CHASS IS BOTTOM V IEW-RES ISTOR & INDUCTOR IDENT.
MODEL R.802 CHASSIS BOTTOM VIEW.CAPACITOR & MISC. IDENT.
En
s8
-V
o9
3o
o
g
7
Page I I

F
o
z
c
ti
^s-
^ iE-H
.9 EF"
6 *E.e
s i Eg
ii AI'h
o ; hd ;
A E3:B
o o< 6{
c trHko
9o
az
HF
o<
ad
&
't
- -9F-i
T -+.:'l3 3
;:;H=lf
E'8,1 SBs
z
FE
-- 9
t !90k
# #;:E
F* : >>>>
o
z'
o
o
z
:
o
-Z
F< X
!2
6<
F
o
3z
,tf;
o
d
oi
4E
Oc
o
d
U
2
o
2
:^ F
o
z
f
a
l
F
q<
A<
o
I
o
D
s
d,
tu
=
E
o
vl
z
4
o;
ciz
E.
9<
qe
qo
o
z
F
9s
F<
oo
tsE R
<G)
@
{: F
F
6
o
z
c,
=
u,
o
trl
z
rrl
I
d,
ttt
=
o
A
c,
ll,
E
4
o
t!
vt
z
4
I
e,
an
o
u
J
g
'=
E
vtE
Ea
9s
la 3;
23,;_
o ":
-\.
r-=
Is
l.z
c,s
9=
ta
ut
o
";
E
c
F{
5
E
j
o
z
r'/'
4
o
=
.L)
g
+CL
f<
*e
to
agl
sx
O
6
!
s
o
a
z
vt
c,
o
=
|.)
L
|J
(J
o
&
(J
IIJ
lll
a
z
l-
la
-
J
la
l-
c
o
1-
I
llt
J
Lt
(\l
o
€
I
c,
J
lrI
o
O-
=H
:)
v,
o
4
z
o
U
I
E
z
A
€
F
o
zO
v
3t
EF
JL
,i<
tsz
=5
o
td
o
xz
Ef E
g
6
J
Odd6$6@F6OOdNos
NNNdNNN
&&&dddd&cdddddd
s-or--9=I9E99!=9
&E&&&&&ddedddd d d
F
o
z
z
o
F
I
z
A= Y o
ts.f Ci ;
6 vZ !!-d
g h- iq
! ;g EE
> AF >E
62
=5
- ci d ']d
$ ds #sE&
-' ! r<L l3-
F O@{ O@H O
a zaa25tu2
90
bt $ s-qg-q-
6 ! r o! r;<
o zFozFoF
o
z
F
SN
EJ?
i ^P *9j'
F lF,i l;,9
s 6EsbR{ O
< e6<h6az
<d
<z
z3
Ii C- -C-sC
A €rir96trir
A z !4.Azg t z
9z
o<
d
oo
NN
66
ooo
o
z
F
;
aotE6t60E
E600do@60
E, J raosrco<e
dcd
oz E*sE;;;qEEEF;ilE ;$ $;-;;
FsE******sge*sr *E Eiil**
oz
i: s*- * x 5 r -
+:6 : _ 6 d : d
;tBi;+?5{;$i?$* ;* e;B:;
oE>EEaaErqu(,otrra(, ra(J iirc>trrq
o.
z'
;3
== = - o
359 5 o P S B
{qqqqqqflqqq:q+l +; $?1qq
aEEggggBgggggge 0HsEEE33
Jd .- 4/-- * e - 5
gEH*FI:EiqrqIqF 3F H3ffii
)o)
<.
lia
S::3:re
N-iN'i?
ONOOA
E eqq+ qq$qT+$
I x88E *tt*8*x EH
AO
o.,!
o!
<A
qg6 $ i o < R o
ooo o 9^ o o o 6
*;Eca*A;e*re*x* BE ;;;*F
c:aadrqqjAtrFjAtrad. inE tidAiitri
6&
rc
o
z-o
Pp o o
96**$O*
Y-o 6 o b *
r<b
r : 6 s6 Fo ;
6000r rooor+Fo- r,
oFNooooFoXo-oNo I oO I ddodd
. .$ ,= ,= .N .6 . ,6N .6 .-.
frt s-osoo9.!1999:9ERFSR*RFR
()OOOOOOOOUOOOOOOOOUOOOOO
F
o
zzzz
r'j
(rz
*k ,.1<<
FFh
od
=z
{p
tt
oP
F Sii
k-q
= EA
tsFFI
o.
i= ;iF6
aoo
EFFT
ivt
55:
s-
EEo
EtrC
otra
6s
8i
<a
3qo
d XE
qEd
<AA
o
oo
n:, z
OF
q< oo
o
t<
I: loo*El-
ooo
=
z
o
I
F
E
A
dd
*?a
o- >-6
O Oo
o a,l
H HH
* <a
! kr
q <o
I 99
ovoo
JOJJ
PAGE 12

o8
ao
4t
8H
H3
lZ'
c)
t
v
6-
F
><
lrJ tr,
(-)
d,
-
OE
U': o
st
o
ro
-(-)
F=
att ;
=
iHR Ha
\z
sr@
@F:
c{
?6zY
=oe96
=(l,
</4lt' 5.(6)E
o \-./ o
o
cv)
<\
o
o
\o
-l
o
o
IJ
Eo@
@E
)z
o
6J
oE *
c\Eo
cvE-
o
(vt
c{
E@
o-J
E-E*
z?trH
e=s-
Z*HS
od
E
E
o
C>
F.
sl
@
o-
=
JH
zf
e=
Z*
v
(t).
@
<t
o
B
*e;
{vx
o
O.
N
tlt
@
I
/A
el
alE
d\E
H@
z
o
F
F
o
:c
6u
' 3^
z va
o: tf
ftt d,
o9 rt
ql ur<
H sd !I
; Ee X:
F Zz z_9
5_ <i E
<4 >A vl
6; uil Eg
*9 2- 2=
rd h6 o>
=? 4z =d
4> rl9a
EE ,9 ;7
f g 8- 6U
JFl
!ll< t"rO &
A> az
o
J
l+,
a
J
o
E
o
(J
t4J
d,
=
o
J
6-
s==
tz!a )
-{.4 s
=H3
oa 9a
<dr
>o,,
rrOE
EHr
ii:rzrt>
_o<
--; cts o_
6q)<
<<(-)
@:
t\
x
6l/A
d-i- I N r
E: g/
+ (v)-
xi€ ,
T(J
I
ul
e
o
ra
s
o
'62:
-gn
clr
o
F
a
€
@i<i
o
o
@
t\
\o
e
_{
=5
ao
e(J
E
F
=
lrJ
J.
C)
v1
Nr
o
oo
I
E,
J
u.l
a
o
=
F
ul
v
(-)
o
v)
E
lr,
z.
:t
F
=
e
358
;99
ttt
F
F
=^
^d.
Xe
ro
oE
3a
FU
dJ
t'
c)
q).(!
C.E
i! Eao g
EE 9€E -i:
=: - P A_c: R
E; E EggEE
crL_(J<Eu
98-5-elnEE
-e9=-e
-c EX C- J 6=
j--EE '= nE'fi i
IE n;E;:;
*= iE= E E E
E-Oa-O_-O
eEr FE ?H'c
g! IE€;E
=
EE€€:E5i
sFEEg: EE
e se i i.!s e
HH5€5E !=
-i cti -i < tri .c;
tr
l!
-
ttt
zG
o9
Fri
<l
F
o_i
zu
!t
6-
e.E
<,;
2;
(=
Fa
qry o
FT
io
tr
o
F
o
A.
a
c5
z.
o
l!
,E
ld
c)
z
F
t/t
a
lrJ
E
gl
o)
E
i9x
tll,'
=*
oI
iH',,
@
rL
@* 3
@
!n
EEe
:o
N
€
E*@
lo \z
ila o
srn
(9
z
o
fi
&
LTJ
9e
sb
ut7 u
-2.
tJt Z.
Hg
!9 rzr
33
FL
o_
z.+
8=
a
-r$
l-
l>^
!<!z
IJ (J
to- .<
!AE
iEr
ItrlJ
-rE -
=
o-
=
C)
=
d-
z
E,
l4i
2
=
F
&,
lrl .
-F
LO_
=c)
=H
c
o
N
I
c=
= c\r
<t
I
I
\z
o
o
rn
€)
o-
F
tlt
=
Jg
o:
n
o
?
lHt''
A
\9/
7z.
=
o
I
=6
u4-
F
< t/,
JO
o- a-
t
oa
E,E
- oo
J (J(J
U l4l
) eE
:a
cf
6
\o
N
x
c{
5
€
L,
I
llr
A
\y
q@
o-L)
=2
icn
d<
o-6
tO O.
it'
I
tEl
EE
FV
og
3o
-Tr
o
l-
E:,
rrt
n
F....r
L-t
Page 13

r6i)
fu-IT= AF AMP
:.1.5V
10 meg
LIST FOR ALTERNATE
APPLICATION
@ ecra2/6Bwg
@@
4tK .di
@
.. a4\ 168y
tr=lrt EXT SPKR JACK
235V
SOURCE
170V
SOU RCE
50 mfd
OUTPUT
rovlz is
;@
VOLUME
I meg
TAP @ 5OOK
.005 @
l"
*.oz
lo
fu.,o"
:
@
@@
1W
RE
270 a
235V
----l I
I
t
E SEE PARTS
VALUE OR
tTov 235V
RECT
Il7VAC - 25 WATTS
1I THIS READING WILL VARY DEPENDING UPON THE
CONDITION OF THE ELECTROLYTIC IN THE CIRCUIT.
t MEASURED FROM PIN 7 OF V7.
NC NO CONNECTION
A PHOTOFACT STANDARD NOTATION SCHEMATIC
oHoward W' Sams & Co', lnc. 1961
MODEL SA-8OI SCHEMATIC
EZg0/6X4
t 230K
@ ezeorcx+
2loyac i:rffi @
i+ I 'Ifl,"
@
]UOK
MODEL SA-8 O I CHASS IS BOTTOM V IEW
Page L4

3
lrt
I
r
o
l-
I
g
la
|n
I
I
I
E
o
@
I
|a
J
EI
o
o
-
E*
P8
FF
oP
so
at
o
F
E
lll
n
d
I
E;
q)
e
.3
o
q
.E
q)
!o
q
q
o)
t/t E
g,=
A
Yg
l-o
vt-
-L
(no
lll r'
. eE
J -(\r
i -\-
r
sB
iE
:5
h=
ff
o
o
d
tr
E
o
k
o
g
o
IA
o
o
r/t
-l
o
4
F
z
o
L'
.i
N;
{,t
@o
$<d
.!J
.6tIE
+ts
$r Vl
t1€ e,
;E O
5tr F
'6e
Eh U
3i
.fi C
8#
9E€ 9
Ho F
h si o
iE; lrJ
:8E x
; e:i
ii, d l!
H d<
do .
93r
Eo9
dtro
;o:
a8E
o95
j.i I
ild6
H b€
F>c
e s;,
F H=
;;E
-o
5Fb
iNli
o oE
oo
22+
an
c,
o
E
I
A
(J
I
F
o
4,
F
I
ttt
tlt
F
la
-
-l
tn
l-
c,
g
a
l-
(\,
t{ vt
Jsr
Et6 D
E
o
€I
UI
rl
ll|
a
o
=
ECL82
at,
q
F
o
z
z
o
F
J
J
F
rt,
z
o!
!U
z+
rx
o-
i 90
o oo
> AF
8;
=F
:i- q-^ o
+ T(H tr
.! s l$r
F oo< o
> z>?z
UC;
d7
tF
0e
h<
VA
X-:i
E ,g E,g
o ? t6q
d >.=d>.
F
<C;
61
Op
dr
ss
EV
-l +R
E 6-i I O
F I EF r
$ (rBsa
d
<;
ez
2z
q4
U
oo
r: d- d
r.:oiFt
a zvnz
o
Op
E<
N
JJ
NO
NN
dci
lt
()(J
o
z
F
d
tn
F
F
>rlN ilN
F4
rrL
tt, z
g<
d
-b!vd.9v*
90 cdlfo cd
HO,q [email protected]
JnmhNa
Fz * mo$oo
d,d
F
o
F
z
u
=
q
U
A
U
x
Hd
Oz
SE
4<
qL
XaX;iq
AQA6Q
ttttt
sMvvg
66n@@
>l
62
==
^O--OO
++++fx
FqcqFqrqQo
8e
uF
Eq
o
ocm-o9
ooooo'i
TfTTf":
AnAAAci
ooooo6
QOO()Oic;
-le
Eu
7=
l6
)"
6
NONNN<
cD-QcAaa
@<@@@@
E<Qmraq
>)r>.>lF
ococ0coco0
?a
<-
F*
=e
gs
oN60do
OOOOOO
N@NN6$
lltrrt
naoaaa
ONQQOQ
5i
9r
u<
<e
66
NONNO
OOOOO
ttttt
oaona
AAAAA
olQoc0ra
rt
v
d
{
U
e
o
z
F
d6@
NONNO<
oooooo
fri -NoS @@
oo6000
o(Joouo
F
F
z
U
{
q
u
A
aJ7
u
F
o
zNN
oo oo
oo oo
zz zz
gc;
o-
JE
4<
6L
E PP
'i I!
at)rr
J <<
F< E{ F{
oci
=z
{p
4&
rs
@@
NN
0l
@o
NN
tt
aa
F< F.
'ae
==
@@
NN
OO
FF
6
TE
Bti
lec
djv2
AaE
8e3
@D
NN
tt
@@
NN
ctr
trq
oo
5i
83
<c
oo
@@
NN
ntr
AO.
oci
dz
dF
oy
Odt
EI
&
I
N
@
I
C)
Fooo
ooo@@
OOONN
4
URRo--
==@NNat<
{:
uj
IL Sao-o
N NO
o oo
t
2
J
t/l
z.
O
rll
!
F
E.
i
CJ
E
F
(-)
u
J
U
J
d.
l!
z.
Lrl
(9
)
!q
@
N
@
,1
a
td
)
o
q)
cn
O
b0
c
F
o
F
z
u
:
U
(J
a
4o
rI
r
B
A
o$ @6r
&& fr&fr
F
o
F
z
u
{
u
U
)
4
q
e
PAGE 15

F
o
o
z
4,
=
!o
f
E
a-
-
tr
o
I
l-
3e
J u'r
''=
hi
4
cE
F:5
(.,;
Elt
d3
FF
o
€I
Ut
J
lrt
a
o
-
x
U
o
z
Y
F
o
F
z
:
az
{-
-oi NN
az
d.
()<
F
:
oE>
!
a:
PZ AA
J
o.
f
o
I
o
)
d.
lll
E
4
o
(n
z
F
o
zE
F
A
3
F
o
z
=
o
F<
E2
6<
F
o
gz
6<
o
d
az
od
a
z
o
:
:A I<
PAGE T6
Table of contents
Other Recordio Voice Recorder manuals