Step 1 Step 2 Step 3
A
B
C
A B C D E F
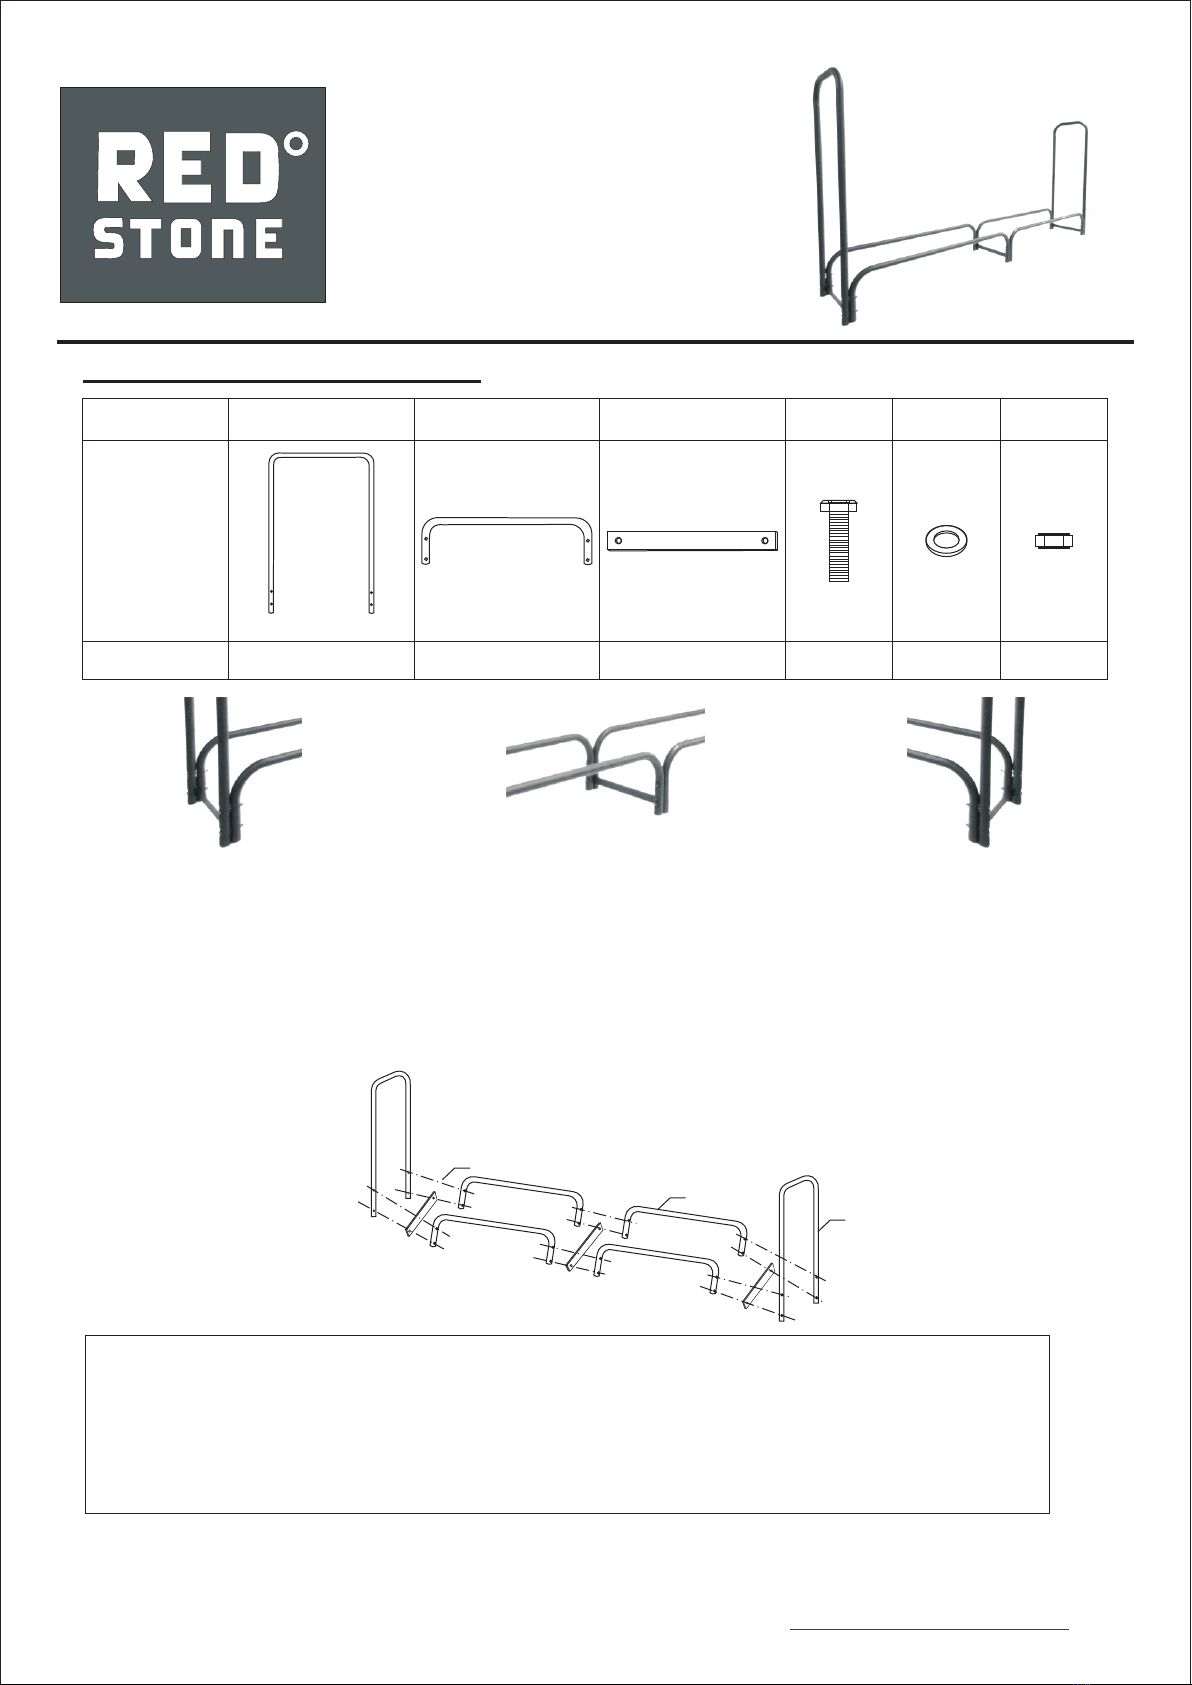
Part
Picture
Quantity 2 4 3 12 12 12
T
M
LOG RACK 8FT
SKU 3910123
WARNING
CARE AND MAINTENANCE
Do not allow children to play with or around log rack.
Use a soft cloth to wipe the rack.
Store in a clean, dry place when not in use.
Distributed by:
Tractor Supply Company
200 Powell Place, Brentwood, TN 37027
For customer service department call: 1-888-376-9601
MADE IN CHINA
www.Tractorsupply.com
PARTS LIST
1) C o n nect t h e l e ft rac k s t and (A)
wi t h t h e left b o t t om sup p o rt(B) a n d
th e B a r (C), b y i n sert i n g screw s ( D )
fr o m e a ch sid e , t h roug h p r edril l e d
ho l e s i n the le f t r a ck sta n d ( A),
th r o u gh pre d r i lled h o l es in the
ba r ( C ), int o p r e dril l e d holes i n t h e
en d s o f t he lef t b o t tom su p p orts( B ) .
an d s e c ure wi t h s p acer s ( E ) and
nu t s ( F).
1) C o n nect t h e l e ft bot t o m
su p p o rt(B ) w i t h the ri g h t botto m
su p p o rt(B ) a n d t he Bar ( C ),by
in s e r ting s c r e ws (D) f r o m each si d e ,
th r o u gh pre d r i lled h o l es in the e n d s
of t h e l e ft bot t o m s uppo r t (B),
th r o u gh pre d r i lled h o l es in the
ba r ( C ), int o p r e dril l e d holes i n t h e
en d s o f t he rig h t b o ttom
su p p o rts( B ) . a nd sec u r e with
sp a c e rs (E) a n d n u ts(F ) .
1)Connect the right bottom
su p p o rt(B ) w i t h the ri g h t rack st a n d
(A ) a n d t he Bar ( C ) ,by in s e rting
sc r e w s (D) fr o m e a ch sid e , t hroug h
pr e d r ille d h o l es in th e r i ght rac k
st a n d ( A), th r o u gh pre d r illed h o l es
in t h e b a r(C) , i n t o pred r i lled ho l e s
in t h e e n ds of th e r i g ht bot t o m
su p p o rts( B ) . a nd sec u r e with
sp a c e rs (E) a n d n u ts(F ) . T ighte n
wi t h s c rewd r i v er and w r e nch.
Ra ck S ta nd Bo tt om S up port Ba r Sc re w Sp acer Nuts


