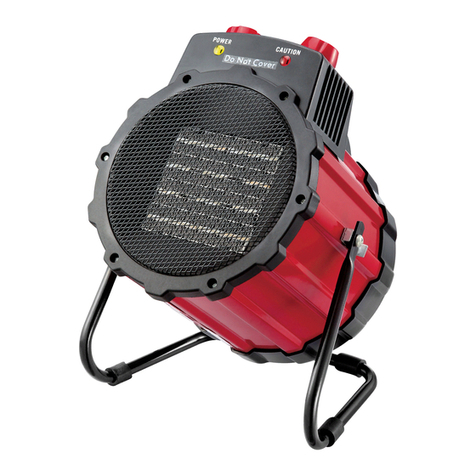
Page 1 (cover) Page 2 (inside)
Page 3 (inside) Page 4 (back) Black border shows
page size and should
not print
Black border shows
page size and should
not print
11.0"
8.50"
SKU# 1304652
Save These Instructions
IMPORTANT INSTRUCTIONS:
When using electrical appliances, basic precautions should
always be followed to reduce the risk of fire, electric shock
INTENDED USE:
This product is intended for indoor residential and office use
only, not for industrial or other commercial application. Use
only with electrical wiring that is in good working order and
that meets applicable codes and ordinances. This heater
must be plugged in to a 120V AC,15 Amp(or larger) circuit.
Do not plug anything additional into the same circuit. lf you
have any questions whether your wiring is adequate,consult
a qualified electrician. Risk of fire, overheating, malfunction,
property damage, injury or even death may result if not
adhered to.
Use your heater-fan only with a working smoke detector
located in the vicinity of your heater/fan.
While using your heater/fan, you should follow the IMPOR-
TANT INSTRUCTIONS listed below. As part of those
instructions, we have used the word“WARNING”to
indicatethelevelofhazard:WARNINGindicatesahazard
which, if not avoided, could result in injury or death.
and injury to persons, including the following:
●Read all the instructions before using this heater/fan.
●This heater/fan is hot when in use. To avoid burns, do not
let bare skin touch hot surfaces. Use provided handle
when moving this heater. Keep combustible materials,
such as furniture, pillows,bedding, papers, clothes and
curtains at least 3 feet (0.9 meters) from the front of the
heater-fan and keep them away from the sides and rear.
●Do not use heater unattended. Use of extreme caution is
necessary when any heater is used by or near children
invalids, disabled persons or pets.
●Do not operate the heater with a damaged power cord or
after the heater malfunctions, has been dropped or
damaged in any manner. Return heater to authorized
service facility for examination, electrical or mechanical
adjustment or repair.
●Do not use heater outdoors.
●Use your heater only in dry environments. This heater is
not intended for use in a bathroom, laundry area, or
similar locations, or near sinks, washing machines, swim-
ming pools or other sources of water. Never locate heater
where it may fall into a bathtub or other water container.
Do not use in damp environments such as flooded
basements.
●Do not place the heater on a small, unlevel, uneven or any
surface which might allow heater to tip or fall.
●For proper operation, heater should be placed on a
smooth, non-combustible surface. Do not place on rugs,
carpet, vinyl flooring or other plastic surfaces. Not for use
outdoors or in wet areas.
WARNING:ELECTRICAL SHOCK HAZARD
Do not use with damaged cord or plug. Use with adequate
electrical system that is up to code.
The supply cord has a polarized plug.As a safety feature this
Do not operate any heater with a damaged cord or plug or
after heater malfunctions, has been dropped or damaged in
any manner. Do not operate heater with a broken heating
plug will fit in a polarized outlet only one way. To prevent
electric shock, match wide blade of plug to wide slot, fully
insert plug. lf the plug does not fit contact a qualified electri-
cian.
element or ceramic cone or any visual imperfections. For
repairs covered under warranty, see warranty statement. For
all other repairs contact Tractor Supply Co. by telephone for
information and assistance.
PET OWNERS NOTE:
Thehealth ofbirds andsome smallpets areextremely sensi-
tiveto thefumesgiven offduring theinitial use ofmany appli-
ances.Although these fumes are not harmful to humans, it is
recommended that this heater not be used around birds and
small pets during its initial use until the manufacturing corro-
sion coatings burn off.
USAGE:
HEATER OPERATION:
The heater/fan may be operated by the controls located on
the heater/fan (see Fig. 1) or by your remote control (see
Fig. 2).
1. Carefully remove the heater/fan from the plastic bag and
the carton.
2. Place the heater/fan on a firm level surface.
3. Plug the cord into a 120V electrical outlet.Abeep sound
and a red light will come on indicating that there is power
to the unit. The heater/fan is ready to use.The red light
will remain on until the heater/fan is unplugged from the
electrical outlet.
4. Turn the heater/fan ON by pressing the POWER button
on the control panel (Fig.1). The unit will display the
current room temperature, automatically go into FAN
MODE and blow cool air.
5. Press the MODE' button once to enter the LOW HEAT
MODE.
6. Press the MODE' button a second time to enter the HIGH
HEAT MODE.
7. Press the MODE' button a third time to enterADJUSTA
temperature can be set using the (+)TEMP and (-)TEMP
BLE HEAT MODE. In this mode the desired room
buttons.(See Fig.1)
8. To turn the heater/fan off, press the POWER button.
NOTE:
When the unit is powered off on the control
panel, the fan may continue to run for a while to cool off
the ceramic elements and dispense any retained heat.
The unit will shut off automatically.
OSCILLATING FUNCTION:
The Oscillating function will work in any mode.
1. Press the OSC.' button to oscillate the heater/fan from left
to right at a 90° angle. The indicator symbol “ ” will display
on the LCD screen.
2. To turn the oscillation off, press the OSC.' button again.
Fig.1
TIMER FUNCTION:
The Timer function will work in any mode. The Timer func-
tion allows you to set the length of operation from 1 to 8
hours. Each time the ‘TIMER’button is pressed the length of
operation will increase 1 hour. The duration time that is set
for will be displayed on the LCD screen in hour increments
TOTURN THETIMER FUNCTION OFF: Press the ‘TIM-
ER’button continuously until the LCD display has a blank
screen.
NOTE:
The timer function is not an excuse to leave the
heater/fan unattended.
THERMOSTAT INSTRUCTIONS:
1. Press the MODE button three times to enterADJUSTABLE
HEAT MODE.
2. To set the desired room temperature, press the ‘(+)TEMP’
or‘(-) TEMP’buttons until optimal temperature is
reached.
3. When the room temperature reaches 3 degrees above
the set temperature, the heater/fan automatically shuts
off.
4. When the room temperature drops 1 degree below the set
temperature, the heater/fan automatically turns on.
NOTE:
It is normal for the heater/fan unit to cycle ON and
OFF as it maintains the set temperature.
SAFETY FEATURES:
1.Athermal overload protector is built in to prevent overheat-
ing.
2. When an overheat temperature is reached, the Heater/fan
will automatically shut off. It will only resume operation
when the user resets the unit by unplugging the heater for
10 minutes to allow it to cool. Plug the heater in and
resume use.
REMOTE CONTROL:
1. Install two“AAA” batteries into remote control shown in
Fig2.
2.All functions performed with remote control work
identically to the manual controls.
3. Remote control should be aimed at the digital display to
be received by the heater/fan.
NOTE:
Batteries not included.
MAINTENANCE:
WARNING:
ALWAYS UNPLUG THE CORD BEFORE
MOVING OR SERVING.DO NOT IMMERSE HEATER/FAN
IN WATER!
CLEANING:
IMPORTANT! DO NOT IMMERSE HEAT-
ER/FAN IN WATER!
Clean the Heater/fan grill with the
vacuum brush attachment on your vacuum cleaner. This will
remove lint and dirt from inside the heater/fan.
DO NOT
REMOVE THE HEATER/FAN GRILL.
ATTEMPT TO TAKE APART THE HEATER/FAN. DO NOT
Clean the body of the
Heater/fan with a soft cloth.
CAUTION:
Do not use gasoline, benzene, paint thinner,
harsh cleaners, etc. as they will damage the heater/fan.
NEVER USE ALCOHOL OR SOLVENTS.
STORAGE:
Store the heater/fan with these instructions in
the original carton in a cool, dry place.
ENVIRONMENT:
Donotdispose of electricalappliances asunsortedmunicipal
hazardoussubstances can leakinto the groundwaterand get
If electrical appliances are disposed on landfills or
government for information regarding the collection systems
waste, use separate collection facilities.Contact your local
available. dumps,
into the food chain, damaging your health and well-being.
When replacing old appliances with new ones, the retailer
may be legally obligated to take back your old appliance for
disposal free of charge.
WARNING:
Do not mix old and new batteries. Do not mix alkaline,
standard (carbon-zinc), or rechargeable (nickel-cadmium)
batteries.
Do not dispose of batteries in fire. Batteries may explode or
leak.
LIMITED WARRANTY
Thisunit is guaranteedtothe original retailpurchaseragainst
defects in quality or workmanship for a period of one year
from the date of original purchase. lf this unit fails because of
amanufacturingdefectwithin30 days ofpurchase, returnthe
unit, with your receipt to the retailer.After 30 days, but within
the warranty period, if the unit was purchased within the
continentalUnitedStates, call1-888-376-9601. Ifthe unitwas
purchased outside the continental United States, return the
unit to the place of purchase. This warranty does not cover
damagecausedby misuse, abuse,over heatingoralteration.
Repairs made by anyone other than Tractor Supply Co. are
not covered in this warranty.Tractor Supply Co.will not be
implied warranties, including the warranties of merchantabili-
held liable for any losses due to neglectful operation. All
ty and of fitness of purpose, if applicable, are hereby limited
●This heater is not designed as a primary heat source.
●Always plug heaters directly into a wall outlet/receptacle.
Never use with an extension cord or relocatable power tap
(outlet/power strip).Always unplug heater when not in
use.
●Do not run power cord under carpeting. Do not cover cord
with throw rugs, runners or similar coverings.Arrange cord
away from traffic area where it will not be tripped over.
●To disconnect heater, turn controls off then remove plug
from outlet.
●Do not insert or allow foreign objects to enter any
ventilation or exhaust opening as this may cause an
electric shock or fire or damage the heater.
●To prevent a possible fire, do not block air intakes or
exhaust in any manner. Do not use on soft surfaces like a
bed, where openings may become blocked.
●Aheater has hot and arcing or sparking parts inside. Do
not use it in areas where gasoline, paint or flammable
liquids are used or stored.
SAVE THESE INSTRUCTIONS
● Use this heater only as described in this manual. Any
other use not recommended by the manufacturer may
cause fire, electric shock or injury to persons or property.
:
WARNING:
SHOCK HAZARD
may fall into a bathtub or other water container. Do not use
heater outdoors. Do not use in damp environments such as
Use yourheater onlyin dryenvironments. Thisheater isnot
intended for use in a bathroom, laundry area, or similar
locations, or near sinks, washing machines, swimming
pools other sources of water. Never locate heater where it
flooded basements.
WARNING:HOT SURFACES
Do not touch body of heater when in use. This heater is hot
when in use, to avoid burns, do not let bare skin touch hot
surfaces. lf provided, use handles when moving this heater.
WARNING:FIRE HAZARD
Heater has hot and arcing or sparking parts inside. Do not
use near combustible materials or flammable gases or
sources of heat. DO NOT USE in areas where gasoline,
paint or flammable materials are used or stored. Keep com-
bustible materials such as furniture, pillows, bedding,
papers, clothes and curtains at least 3 feet (0.9 m) from the
front of the heater and keep them away from the sides and
rear. To prevent a possible fire, do not block air intakes or
exhaust in any manner. Do not use on soft surfaces, like a
bed,where openingsmay become blocked.Do notinsert or
allow foreign objects to enter any ventilation or exhaust
opening as this may cause an electric shock, fire, or
damage the heater.
216mm
280mm
Oscillating
Ceramic Heater
with Thermostat
1 2
3 4
Features:
• Digital thermostat with ambient temperature setting
•Auto-off timer
• Four settings:
fan, low heat (750w), high heat (1500w),adjustable thermostat
• Stable base with safety tip-over switch
• Safety overheat cut-off protection
•90°oscillatio
• Power indicator light, backlit LCD screen
n
• Remote control
• Modern stylish two-tone design
• 120VA.C., 60Hz, 12.5A, 5120 BTU
Fig.2
TROUBLESHOOTING:
PROBLEM SOLUTIONPROBABLE CAUSE
Heater is not plugged
into a 120V polarized-
outlet/receptacle.
Breaker/fuse has
been tripped
Heater will
not power
on.
Room temperature has
been warmed up to
thermostat setting.
The fan only function
is on.
Adrop of oil fell on the
heating coil during the
manufacturing process.
lt will quickly evaporate
and should not occur
again.
Ensure room in which heater is
situated is well ventilated.
Remove the combustible
materials preventing air intake
into the heater.
Check and ensure
there are no
combustible materials
within 3' /1 m of the
heater.
The heater is
creating a
burning
smell.
At this setting, the unit will
circulate the air but produce no
heat.
To resume heating, adjust
thermostat to a higher setting.
Ensure unit is in OFF position.
Plug in unit and attempt to turn
on again.
Please check your electrical box
to confirm the breaker has not
been blown. This may occur if the
unit is sharing a receptacle with
another high power consuming
appliance. Ensure unit is in OFF
position. Plug in unit and attempt
to turn on again.Attempt to plug
unit into another independent
output in the house.
The power-
indicator light
is illuminated,
but no heat
disperses
from the unit.


