>6red-winches.com
sales@red-winches.com | +44 (0)1460 297 355
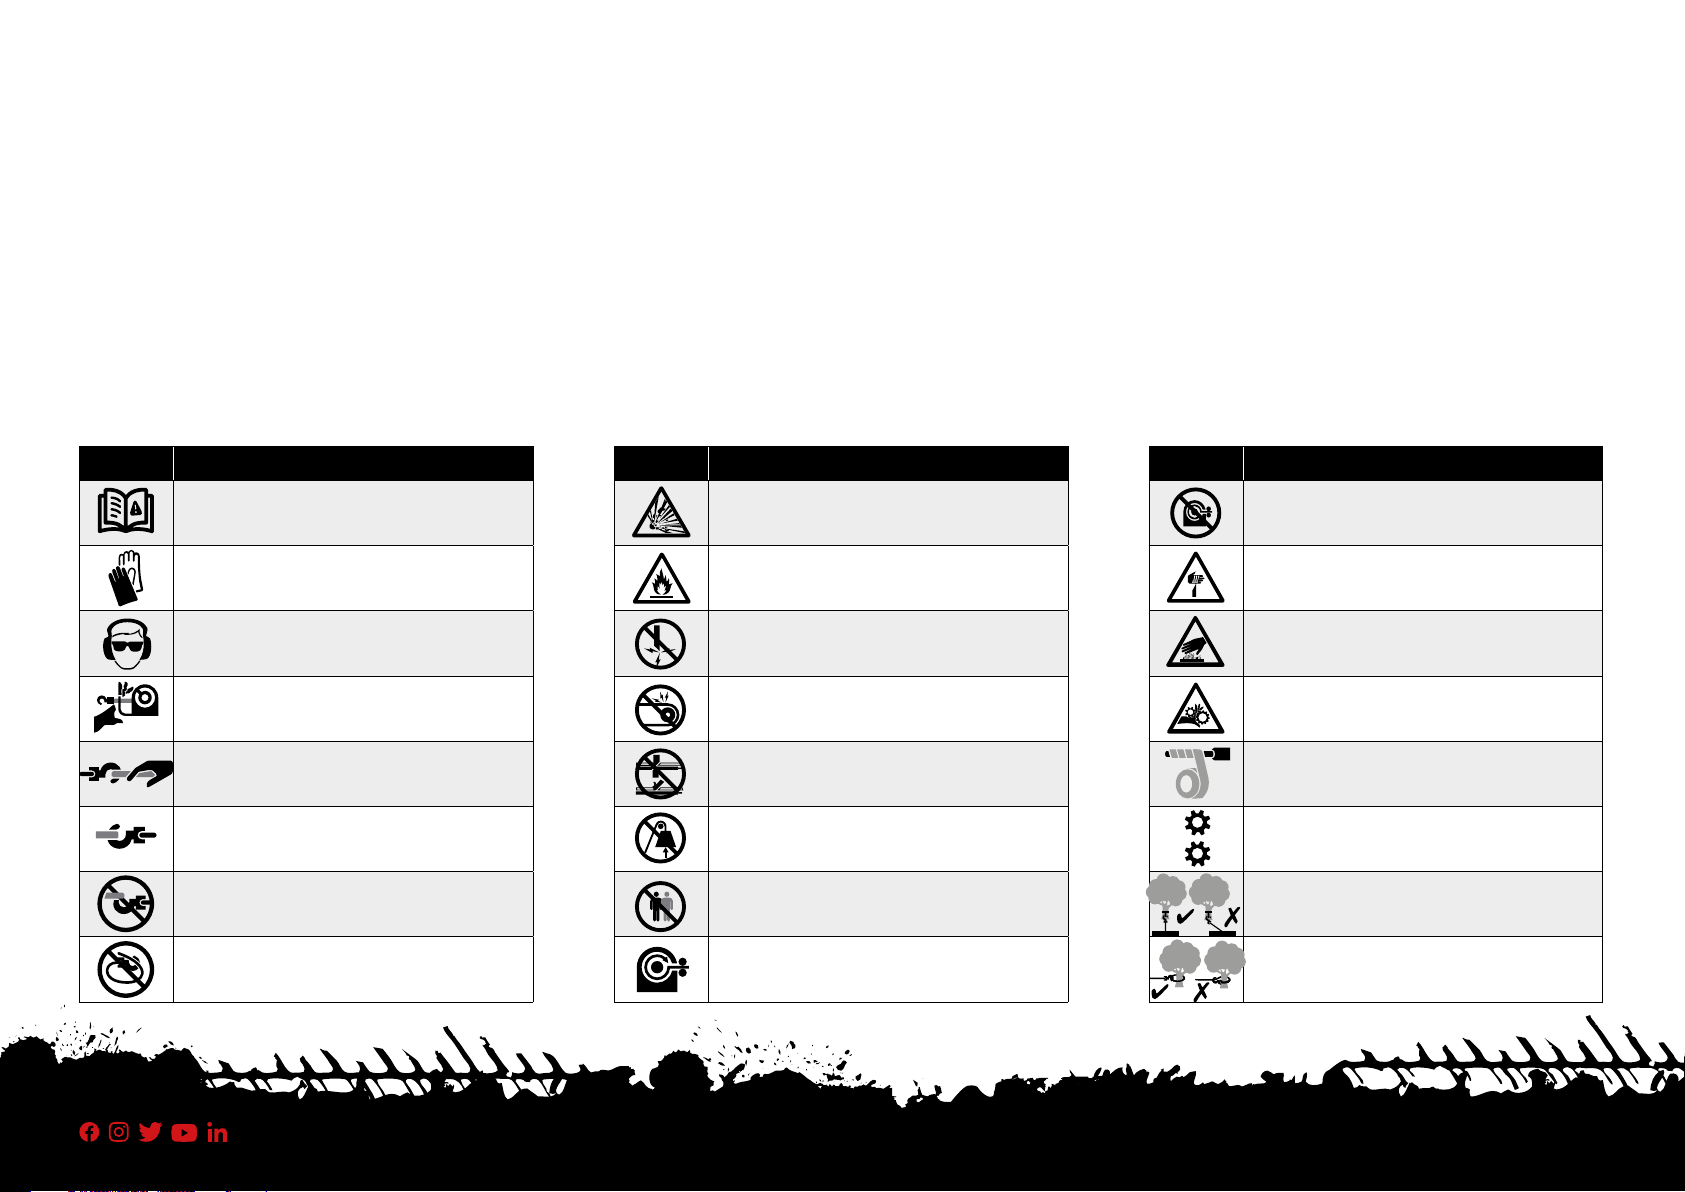
>WARNING >WARNING
>Moving Parts Entanglement Hazard
Failure to observe these instructions could lead to serious injury or death.
Winching Safety:
• Always Know Your Winch. Take time to fully read the Instructions
in Order to understand your winch and its operations.
• Never exceed winch or winch rope rated capacity. Double line
using a snatch block to reduce winch load.
• Always wear heavy leather or approved gloves when handling
winch rope.
• Never use winch or winch rope for towing. Shock loads can
damage, overload and break rope.
• Never use a winch to secure a load.
• Never operate this winch when under the influence of drugs,
alcohol or medication
• Never operate this winch if you are under 16 years of age.
Installation Safety:
• Always choose a mounting location that is suciently strong to
withstand the maximum pulling capacity of your winch.
• Always use class 8.8 metric( grade 5) or better fasteners
• Never weld mounting bolts.
• Always use factory approved mounting hardware, components,
and accessories.
• Never use bolts that are too long.
• Always confirm required bolt length to ensure proper thread
engagement.
• Always complete the winch installation and hook attachment
before installing the wiring.
• Always keep hands clear of winch rope, hook loop, hook and
fairlead opening during installation, operation, and when
spooling in or out.
• Always position fairlead slot so rope does not rub on it during
normal straight line recovery operations.
• Always prestretch rope and respool under load before use.
Tightly wound rope reduces chances of ‘binding’, which can
damage the rope.
>Moving Parts Entanglement Hazard
Failure to observe these instructions could lead to serious injury or death.
General Safety:
• Always inspect winch rope, hook, and slings before operating
winch. Frayed, kinked or damaged winch rope must be replaced
immediately. Damaged components must be replaced before
operation. Protect parts from damage.
• Always remove any element or obstacle that may interfere with
safe operation of the winch.
• Always be certain the anchor you select will withstand the load
and the strap or chain will not slip.
• Always use supplied hook or spliced loop whenever spooling
winch rope in or out, during installation and during operation.
• Always require operators and bystanders to be aware of vehicle
and or load.
• Always be aware of stability of vehicle and load during winching,
keep others away. Alert all bystanders of an unstable condition.
• Always unspool as much winch rope as possible when rigging.
Double line or pick distant anchor point.
• Always take time to use appropriate rigging techniques for a
winch pull.
• Never touch winch rope or hook while someone else is at the
control switch or during winching operation.
• Never engage or disengage freespool lever if winch is under
load, the rope line is securing an object, winch rope is in tension
or drum is moving.
• Never touch winch rope or hook while under tension or
under load.
• Always stand clear of winch rope and load and keep others away
while winching.
• Never use vehicle to pull load on winch rope. Combined load or
shock load can damage, over load and break rope and winch.
• Never wrap winch rope back onto itself. Use a choker chain or
tree trunk protector on the anchor.
• Never use remote when vehicle is not in line of sight of operator.
• Never pair more than one winch and one remote
together at the same time.
>Warnings and Cautions
As you read these instructions, you will see WARNINGS,
CAUTIONS, NOTICES and NOTES.
Each message has a specific Purpose. WARNINGS are safety
messages that indicate a potentially hazardous situation, which, if
not avoided could result in serious injury or death. CAUTIONS are
safety messages that indicate a potentially hazardous situation,
which, if not avoided, could result in minor or moderate injury.
A CAUTION may also be used to alert against unsafe practice.
CAUTIONS and WARNINGS identify the hazard, indicate how to
avoid the hazard, and advise of the probable consequence of not
avoiding the hazard. NOTICES are messages to avoid property
damage. NOTES are additional information to help you complete a
procedure. PLEASE WORK SAFELY!
>EMC Regulation
This device complies EMC regulations. Operation is subject to the
following two conditions:
• This device may not cause harmful interference.
• This device must accept any interference received, including
interference that may cause undesired operation.
This equipment has been tested and found to comply. See
seperate CE certificate. These approvals are designed to provide
reasonable protection against harmful interference in a residential
installation. This equipment generates, uses and can radiate radio
frequency energy, and if not installed and used in accordance
with the instructions, may cause harmful interference to radio
communications. However, there is no guarantee that interference
will not occur in a particular installation. If this equipment does
cause harmful interference to radio or television reception, which
can be determined by turning the equipment o and on, the user is
encouraged to try to correct the interference by one or more of the
following measures:
• Reorient or relocate the receiving antenna (if installed)
• Increase the separation between the equipment and receiver.
• Connect the equipment into an outlet on a circuit dierent from
that to which the receiver is connected.
• Consult the dealer or an experienced radio/TV technician for help.