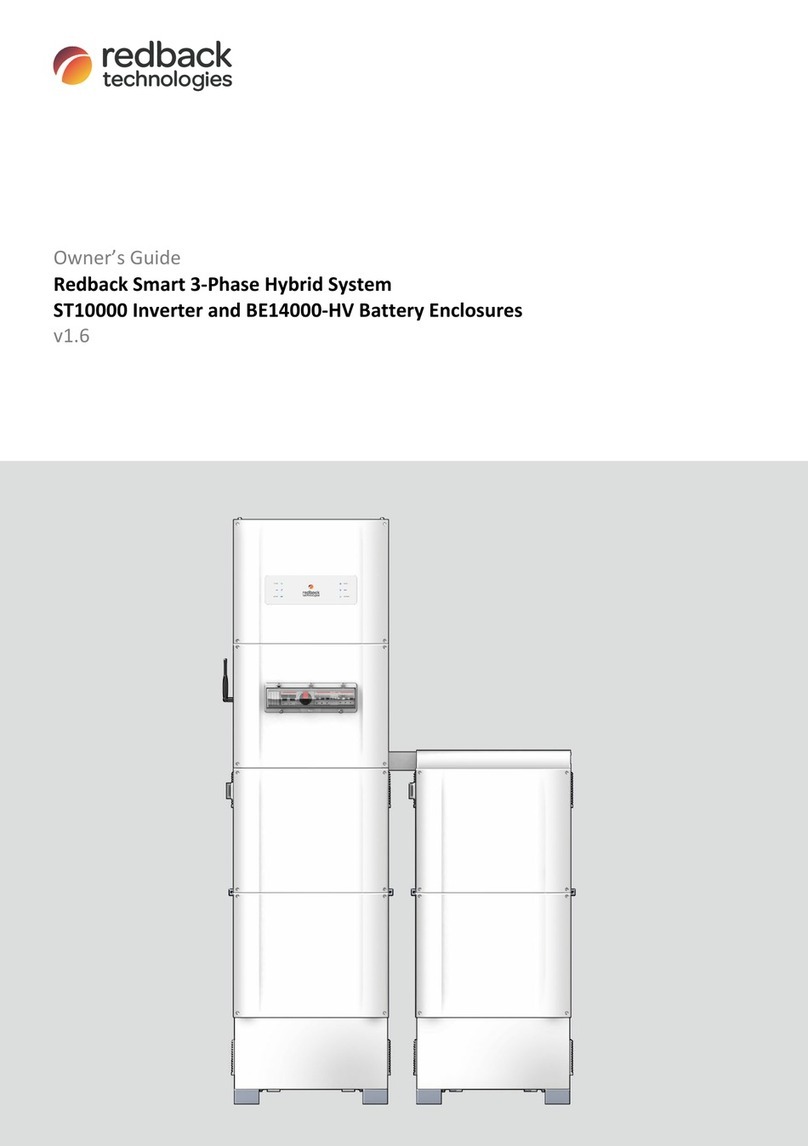
Redback SH5000 User manual

Owner’s Guide
Redback Smart Hybrid System
SH5000
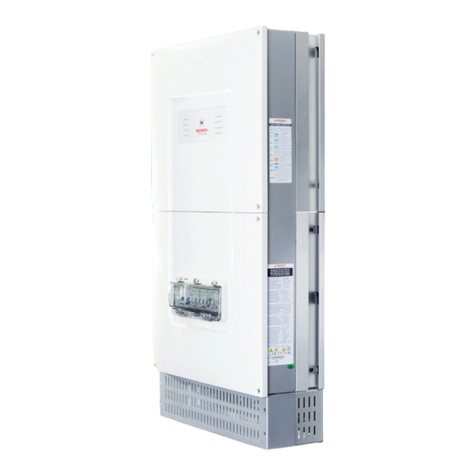
Inverter
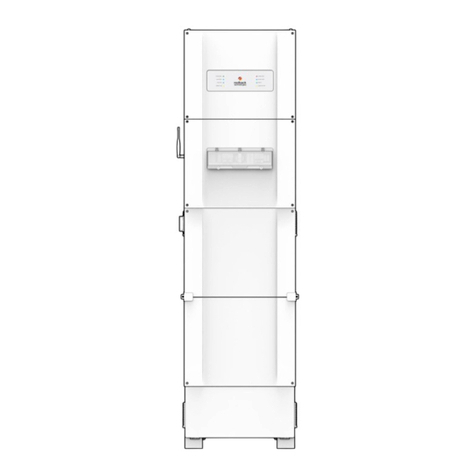
BE13200 or BE14000 Battery Enclosure
V3.8

HISTORY
VERSION
ISSUED
COMMENTS
1.0
01-Jun-17
First release
2.0
07-Sep-17
Updated
3.0
16-Jul-19
Updates & corrections; Re-formatted
3.1
19-Aug-19
Backup troubleshooting added; terminology standardized.
3.2
12-Jun-20
Update to 2-Pole Battery System DC isolator
3.3
10-Jul-20
Include BE14000 with on-cabinet Battery Isolator
3.4
13-Sep-21
Updated; rebranded
3.5
19-Dec-21
Spec table updated
3.6
04-Mar-22
Wi-Fi compatibility update
3.7
11-Mar-22
Spec table updated: Improved MPPT range. Dual Enclosure references added.
3.8
11-May-22
P11,12 Warning regarding warranty being affected by keeping the system offline.
P24 Added Earth Fault Alarm information.
CONTACT INFORMATION
Phone:
1300 240 182
International phone:
+61 7 3180 2325
Address:
Building 1015, 80-120 Meiers Rd, Indooroopilly QLD 4068, Australia
Email:
customersupport@redbacktech.com
Website:
redbacktech.com
NOTICE OF COPYRIGHT
O
wner’s Guide Redback Smart Hybrid System ©2021 Redback Technologies.
All Rights Reserved. This work is copyright, apart from any use permitted under the Copyright Act 1968. N
o part may be
reproduced by any process, nor may any other exclusive right be exercised without the permission of Redback Technologies
Limited.
PRIVACY NOTICE
Redback will use the
personal information provided to us only for warranty purposes. Without this information we will not be
able to process your warranty claim. If you require further information about our privacy policy, please visit our website at
redbacktech.com.
340-00326-03

Redback Technologies
Owner’s Guide – Redback Smart Hybrid System - v3.8 3
Contents
Welcome.................................................................................................................................................5
Introduction ............................................................................................................................................5
Other resources.......................................................................................................................................5
Transfer of ownership .............................................................................................................................5
Features and benefits of your Redback system.........................................................................................7
System description ..................................................................................................................................8
6.1 Major components and dimensions .....................................................................................................8
6.2 Status Panel LEDS..................................................................................................................................9
6.3 BoS switchgear......................................................................................................................................9
6.4 EMS LEDs ..............................................................................................................................................9
6.5 Batteries and Battery Enclosure..........................................................................................................10
6.6 Backup circuit (optional) .....................................................................................................................11
System limitations .................................................................................................................................11
Getting the best from your system.........................................................................................................12
8.1 Keep your system in good condition...................................................................................................12
8.2 Monitor performance .........................................................................................................................13
8.2.1MYRedback app ....................................................................................................................13
8.2.2 Redback portal ......................................................................................................................13
8.3 Getting the best from your batteries ..................................................................................................14
8.4 Getting the best from your relays.......................................................................................................14
8.5 Getting the best from your backup circuit ..........................................................................................15
Inverter operation .................................................................................................................................16
9.1 Locking up the batteries .....................................................................................................................16
9.2 Inverter – Changing bypass modes .....................................................................................................16
9.3 Shutdown procedure ..........................................................................................................................17
9.4 Inverter restart ...................................................................................................................................18
9.5 EMS restart .........................................................................................................................................19
Inverter operating modes ......................................................................................................................20
10.1 Auto mode ..........................................................................................................................................20

4Owner’s Guide – Redback Smart Hybrid System – v 3.8
10.2 Standby mode.....................................................................................................................................20
10.3 Charge battery mode ..........................................................................................................................20
10.4 Discharge battery mode......................................................................................................................21
10.5 Backup mode ......................................................................................................................................21
Onboarding the inverter ........................................................................................................................22
11.1 Ethernet..............................................................................................................................................22
11.2 Bluetooth Low Energy (BLE)................................................................................................................22
Troubleshooting ....................................................................................................................................23
12.1 Backup circuits have no power ...........................................................................................................23
12.2 Inverter unexpected shutdown...........................................................................................................23
12.3 Internet connection problems ............................................................................................................24
12.4 Earth fault alarm .................................................................................................................................24
12.5 Inverter Status LEDs............................................................................................................................25
12.6 EMS Status LEDs..................................................................................................................................27
12.7 SM3000 Smart Meter diagnostics.......................................................................................................29
Maintenance .........................................................................................................................................30
13.1 Schedule .............................................................................................................................................30
13.2 Cleaning the Battery Enclosure fan filters...........................................................................................31
Specifications ........................................................................................................................................32
Redback installation details ...................................................................................................................35

Redback Technologies
Owner’s Guide – Redback Smart Hybrid System - v3.8 5
Welcome
Congratulations on purchasing your new Redback SH5000 Smart Hybrid Inverter and BE13200 or BE14000 Battery Enclosure.
Our products are designed in Australia, manufactured to our high quality-standards, and will provide years of service.
The system’s goal is to maximise the use of your self-generated solar energy while minimizing the amount of energy consumed
from the grid.
This guide describes the features, use and maintenance of your Redback SH5000 Inverter and optional Battery Enclosures.
Introduction
Your Redback inverter and software coordinate one or two solar arrays, battery storage, grid supply and your home, including
one backup circuit and up to four relay-controlled devices.
The energy produced by the solar array is automatically directed to the battery, your home and/or the utility grid for the
highest performance and best economic return.
The backup functionality enables users to have continued supply of electricity to the backup circuit in the event of a utility
power outage.
The MYRedback app and Redback portal provide a comprehensive view of the energy consumed or generated by your home,
providing the information required to fine-tune your system settings or optimise your energy usage patterns.
Other resources
SOURCE
COMMENT
LINK
Homeowner’s guide
This document in pdf format
redback.link/shog
Redback Document Library
Password required
redback.link/docs
Transfer of ownership
If a Redback system is already installed in your new home, welcome to the Redback family. To get the best from your Redback
system, and to receive important notifications from your system, you need to setup an account using a valid email address. You
can then access the system using the Redback app or portal, see how the system is working for you, and gain insights to help
maximise your consumption of self-generated energy.
When we setup your account, we’ll also arrange for remaining warranty to be transferred to your name and we can answer any
questions you may have about your system.
To get started, contact the Redback Customer Support Team. We’re available Monday to Friday, 8am-4pm, AEST. That’s
Brisbane time. We’ll need some proof of ownership too, so be ready for that.
In Australia: 1300 240 182
In New Zealand: +61 7 3180 2325
Email: customersupport@redbacktech.com

Introduction
6Owner’s Guide – Redback Smart Hybrid System – v 3.8
Important safety instructions – please read
This document contains important safety instructions for products produced by Redback Technologies. Please read all the
instructions and cautionary markings on the product and on any accessories or additional equipment included in the
installation. Failure to follow these instructions could result in severe shock or possible electrocution. Always use extreme
caution to prevent accidents.
SYMBOL
DEFINITION
WARNING: LETHAL VOLTAGE INSIDE
Do not remove
inverter or battery enclosure covers unless qualified to do so or have been instructed to do so by
Redback Technologies technical
support personnel.
Do not perform any servicing other than that specified in the maintenance instructions.
Solar arrays may be energised even in low ambient light.
DANGER.
Risk of electrical shock. Proceed with caution.
WARNING: Burn Hazard.
External and internal parts may be hot. Do not remove covers during operation or touch any internal parts.
CAUTION: Hazard to Equipment
Only use components or accessories recomm
ended or sold by Redback Technologies or its authorised agents.
Handle all parts with care and follow
the instructions provided.
WARNING: Fire hazard
Do not keep combustible or flammable materials in the same room as the equipment. The Redback Smart Hy
brid
System
contains relays and switches which are not ignition protected.
Do not allow storage of any item inside the
inverter, or any items inside the battery enclosure other than
batteries.
Ensure clearance requirements are strictly enforced. Keep all v
ents clear of obstructions that can prevent proper
air flow around, or through, the unit.
DELAY.
Wait specified time e.g., 10 minutes.
This symbol indicates the information provided is important for the correct operation and or maintenance of the
equipment. Failure to follow the recommendations may result in annulment of the product warranty.
IMPORTANT
Only use the battery types recommended by Redback Technologies. Follow the battery manufacturer’s
recommendations for installation and maintenan
ce.
Insulate batteries appropriately against freezing temperatures. A discharged battery will freeze more easily than a
charged one.
Remote or automatic generator control systems: disable the starting circuit and/or disconnect the generator from
its starting battery while performing maintenance.

Redback Technologies
Owner’s Guide – Redback Smart Hybrid System - v3.8 7
Features and benefits of your Redback system
SYSTEM FEATURE
BENEFIT
REQUIREMENT
Internet connected
Inverter monitoring and management using the
MYRedback app or Redback portal.
Remote viewing of inverter status.
Permanent internet connection
using your
Wi-Fi or ethernet based
home network.
MYRedback app and
Redback portal
Monitor your home energy performance in real time,
including up to 3-phases of grid consumption, using
high quality, detailed charts.
See your true usage patterns and tune your energy
consumption, storage, export, and backup plan
accordingly.
Share system access with family, tenants etc.
Permanent internet connection
using your
Wi-Fi or ethernet based
home
network.
All-in-one design
Neat appearance; Easy to keep clean.
Status panel
Colour coded LEDs to aid diagnostics.
EMS
The Energy Management System (EMS) is the inverter’s
internal Control Board.
Internet connection for occasional
software updates.
Switchgear hatch
Convenient control of solar and battery connections.
Ability to bypass inverter backup without affecting
house or backup circuits.
EMS LEDs aid diagnostics.
Low maintenance
Homeowners can complete essential annual
maintenance. A service call is not required.
Basic mechanical skills and tools.
Supports multiple batteries
Improved management and consumption of self-
generated energy. Start small, then extend the storage
capacity to suit your actual usage patterns.
Ask your installer for advice on
upgrading your system storage.
Backup functionality
Some devices remain available during a grid outage if
solar power or battery are available.
Optional backup circuit required
and active; Battery is required.
Relay control
Up to four relay-switched house circuits or devices can
be timer controlled using the Redback app or portal.
Relay connected circuits.
#3 and #4 relays are optional
extras.
Grid power quality
monitoring
The inverter can self-protect from poor quality grid
power and recover when quality improves.
Internal overload protection
The inverter will self-protect if it detects excessive heat
or excessive internal currents.
Battery Management
System
Batteries self-monitor to manage heat, State of Charge
(SoC), and charge and discharge rates, to extend
battery life.
Critical setting protection
Critical system settings may only be changed by
electrically qualified personnel.
Solar array ground fault and
insulation monitoring
Electrical safety for all parts of your system.

Introduction
8Owner’s Guide – Redback Smart Hybrid System – v 3.8
System description
6.1 Major components and dimensions
# PART NAME # PART NAME
1.
Wall Mounting Frame
14.
Wi-Fi antenna
2.
Inverter Heatsink Fins
15.
Energy Management System (EMS)
3.
Inverter Status Panel
16.
EMS Status LEDs
4.
Inverter BoS Front Cover
17.
Battery System DC Isolator (2P or 4P)
5.
BoS Switchgear Hatch
18.
PV Array DC Isolator
6.
Battery Enclosure Upper Front Cover
19.
Backup Power Meter
7.
Enclosure Middle Front Cover*
20.
Grid Interactive Power Meter
8.
Enclosure Lower Front Cover
21.
Backup AC Isolator
9.
Enclosure Kick Panel**
22.
Bypass Switch
10.
Enclosure Air Inlets (Filter cover)
23.
Inverter AC Isolator
11.
Enclosure Padlock Hoop
24.
Relays #1 and #2
12.
Battery Enclosure Isolator Cover**
25.
Battery Enclosure Isolator Switch*
13.
Enclosure Extractor Fans (Filter cover)
*Fitted to BE13200 only **Fitted to BE14000 only.

Redback Technologies
Owner’s Guide – Redback Smart Hybrid System - v3.8 9
6.2 Status Panel LEDS
6.3 BoS switchgear
6.4 EMS LEDs
In 2018, the EMS LED labelling was updated: the unused 4G LED was repurposed for Bluetooth notification, and the Wi-Fi LED
was renamed to Network. There were no other changes to the EMS.
In this document “Network LED” means the Network LED or the Wi-Fi LED, and “Bluetooth LED” means the Bluetooth LED or
the 4G LED. Your inverter and software work the same regardless of the labels.

Introduction
10 Owner’s Guide – Redback Smart Hybrid System – v3.8
6.5 Batteries and Battery Enclosure
Your Redback system has a storage capacity of up to 23.6kWh using one or two
BE13200 enclosures and up to 28kWh using BE14000 enclosures. Each enclosure holds
up to four batteries—depending on battery model—and a second enclosure is always
required for five or more batteries.
The allowable battery combinations and resultant storage capacity is shown below (in KWh).
Number of US3000 batteries @3.55kWh each
Using BE13200s
Using BE14000 Enclosures
0
1
2
3
4
0
1
2
3
4
5
6
7
8
Number of
US2000X
batteries @
2.4kWh each
(5 or more
require two
enclosures)
0
0
7.10
10.65
14.20
0
7.10
10.65
14.20
17.75
21.30
24.85
28.40
1
5.95
9.50
13.05
16.60
5.95
9.50
13.05
16.60
20.15
23.70
27.25
2
4.80
8.35
11.90
15.45
19.00
4.80
8.35
11.90
15.45
19.00
22.55
26.10
3
7.20
10.75
14.30
17.85
21.40
7.20
10.75
14.30
17.85
21.40
24.95
4
9.60
13.15
16.70
20.25
23.80
9.60
13.15
16.70
20.25
23.80
5
12.00
15.55
19.10
22.65
12.00
15.55
19.10
22.65
6
14.40
17.95
21.50
14.40
17.95
21.50
7
16.80
20.35
16.80
20.3
8
19.20
19.20
Usable capacity is typically 90% of total capacity Battery installations must include a minimum of two batteries of any listed model
Insufficient space in enclosure for this combination.
X
Pylontech US2000 or US2000Plus
Pylontech batteries use an integrated Battery Management System (BMS) to manage ultimate charge and discharge rates
(protecting the batteries from heat damage) and inform the Smart Hybrid System of status. The BMS also protects the batteries
from total discharge, assisting system reliability and longevity.
Your installer may identify batteries as Master, 1, 2, 3 etc up to 8. This refers to the position of individual batteries in the BMS
chain of command, where the first connected battery is the Master, which controls subsequent batteries.
The battery identity may also indicate the physical position of the battery within the enclosure, though this is an installer
preference. The diagram below indicates the BMS battery naming convention and recommended battery locations.
TWO BATTERIES
THREE BATTERIES*
FOUR BATTERIES*
5TH TO 8TH BATTERIES*
*Only one US3000 per shelf in BE13200. **Any combination of US2000, US2000 Plus, US3000 permitted in BE14000. ***If used, one of the
US3000 batteries must be the Master battery, in the 1
st
enclosure.
NOTE: US3000C batteries
are not supported.

Redback Technologies
Owner’s Guide – Redback Smart Hybrid System - v3.8 11
6.6 Backup circuit (optional)
The SH5000 can directly control and power one circuit, known as the backup circuit. This feature is used to extend the run time
of a small number of low power or occasional use devices that you have prioritised for use during a power outage.
•During a grid outage, the SH5000 powers the backup circuit from batteries and or solar.
•If grid supply is available, the inverter chooses the power source from solar, batteries or grid.
Adding a backup circuit to your home requires planning to maximise the benefits of your investment. A new, dedicated circuit
will give a better result than re-purposing an existing circuit. Your system designer can help you specify an affordable system
that balances cost and performance, based on your expected usage patterns and your backup expectations i.e. what you expect
to run, and for how long.
Loads on the backup circuit must be carefully selected to extend the backup power availability, noting:
•Battery storage capacity and availability.
•Inverter power delivery limitations.
oUp to 4600W continuous.
oUp to 6900W for up to 10 seconds.
•Inverter behaviour during overload events.
•Inverter behaviour during high temperature events.
oAbove 45°C ambient, power output is reduced.
oAbove 60°C, the inverter will shut down.
A battery is required for best performance. Solar-only power is not satisfactory—backup load and solar power are variable and
unpredictable—when backup load exceeds the available solar power the inverter will automatically shut down and restart.
To ensure some backup, a portion of the battery storage can be reserved, powering the backup circuit until the battery reaches
the minimum State of Charge (SoC). The size of the reserve can be varied according to your needs e.g., more for backup means
less for daily use. See Section 8.3.
System limitations
Your Redback SH5000 Smart Hybrid Inverter and Battery Enclosures are not suitable for:
•Batteries other than Pylontech US2000 or US3000.
•Off-Grid installations (the grid is intentionally disconnected).
Lithium-ion batteries have a finite number of charge/discharge
cycles available. Off-grid installations cycle more frequently,
reducing battery life.
•Locations without internet access: the system can operate off-line
but is unable to send you fault notifications. You will be unable to
review consumption or performance; make informed decisions about system settings or consumption patterns;
change settings; or remote control the system. You may also affect your warranty coverage if the system is offline for
extended periods
•Prediction of your energy bills. The Redback meters are not Utility Grade: they provide a good indication of energy
consumption; however, readings may vary slightly from the Network meters used for billing.
•Use with generators.
•Use with 5Ghz Wi-Fi networks.
WARNING! This equipment is
NOT intended for use with life
support equipment or other
medi
cal equipment or devices.

Introduction
12 Owner’s Guide – Redback Smart Hybrid System – v3.8
Getting the best from your system
Your Redback system is designed to operate autonomously – the level of interaction is up to you.
A set-and-forget approach will work fine, and occasional maintenance is all that is required.
Alternatively, you can dive deep into your data and make informed decisions to optimise your system and maximise the return
on your investment.
Either way, the first step to getting the best from your system is to look after it.
8.1 Keep your system in good condition
Keeping your system in good condition maintains efficiency, increases longevity, and helps us help you, if the need arises. There
are three key items requiring your attention.
Cooling
Your system uses fresh air to cool the inverter and batteries. If your
system becomes too hot its efficiency decreases, and it may even shut
down.
There must always be 150mm of clear space beside and above your
system. Ensure no items are left near the base of the system or placed on
top of the inverter, as vents will be obstructed.
The system must not be enclosed i.e., do not build a cabinet around it.
Maintenance
Complete the annual maintenance items in Section 13. In very dusty
conditions you may need to clean the filters more frequently.
Internet connection
Data is required to get the best out of your inverter. A permanent internet
connection enables the inverter to send data to the Redback cloud, where
the MYRedback app or Redback portal present helpful charts, enabling you
understand your system’s performance. Your installer or Redback can also
use the data to diagnose problems or suggest improvements to settings,
based on your actual usage.
•Note: Your inverter will continue to function without an internet connection, but you will be unable to receive any
fault notifications, no data will exist for the period of disconnection, and remote support will be limited. You may also
affect your warranty coverage if the system is offline for extended periods

Redback Technologies
Owner’s Guide – Redback Smart Hybrid System - v3.8 13
8.2 Monitor performance
Redback offers two choices for monitoring the energy performance of your household.
8.2.1 MYREDBACK APP
MYRedback provides a simple, up-to-date view of what’s happening at your place – it’s great for
quickly checking the energy flow at home. MYRedback is available from your app store, for
Android 7 or higher, or iOS 12.1 or higher. Use the app to:
•Check your home energy usage.
•Reconnect your system to the internet.
•Review your system performance - but you will need to contact your installer if
changes are required.
8.2.2 REDBACK PORTAL
The Redback portal portal.redbacktech.com offers all the features of the MYRedback app plus a comprehensive history of your
systems performance, much greater detail about your system, and direct access to support documents.
DASHBOARD
The dashboard view provides an overview of your system:
•Energy consumption trends
•Power demand
•Power being bought or exported
•Power from solar
•Power to/from batteries
•Stored energy
If nothing else, you should view the Renewable Energy Meter regularly; it
shows the system’s impact on your energy consumption during the past 7,
30 or 90 days. If it falls below 60%, it’s worth reviewing your usage habits or
your system size and settings.

Introduction
14 Owner’s Guide – Redback Smart Hybrid System – v3.8
8.3 Getting the best from your batteries
Your batteries will do a great job of looking after themselves, with no intervention required if they have the correct State of
Charge (SoC) settings for your needs.
SETTING NAME
COMMENT
Minimum SoC %*
In day-to-day use, your batteries may discharge
down to this % of total capacity.
Minimum SoC
Offgrid %
*
This is the deep discharge limit- it protects the
battery from damage due to over-discharge
during a
backup event i.e. during a blackout.
*State of Charge: The battery manufacturer will specify the lowest acceptable value.
Backup Reserve
Your system configuration and backup requirements will determine your
settings, which create the Battery Usage Plan, as shown right.
The Backup Reserve is the energy withheld for use by the backup circuit
during a grid outage event.
Backup Reserve = (Minimum SoC – Minimum SoC Offgrid) %
The Backup Reserve is a balancing act: A large reserve increases the backup
run-time when needed but may decrease the everyday use of self-
generated energy.
Put another way, it’s blackout security v. energy cost.
Think about your own needs, then ask your installer to adjust the Minimum
SoC according to your priorities.
8.4 Getting the best from your relays
Your inverter can control up to four relays- usually used to turn specific equipment ON or OFF remotely, or ON and OFF
according to a once-off or daily schedules. The objective is to move power usage into daylight hours, after batteries have
charged, and when excess solar power is being exported or not used at all. Typical applications are pool or water tank pumps,
and hot water systems.
To use this feature, ask an electrician to install a dedicated, relay-controlled circuit for the equipment.
The schedules are created in the Redback portal, under the CONTROL tab. Multiple daily events are permitted excepting that
they may not overlap and must start and finish on the same day. Manual control is also possible, using the ON and OFF controls.
Frequent deep discharging will shorten
the life of your battery. If you
experience frequent blackouts in your
area, ask your installer to set the Minimum SoC
higher than usual. This extends your backup
run-time and reduces the number of deep
discharge events.

Redback Technologies
Owner’s Guide – Redback Smart Hybrid System - v3.8 15
8.5 Getting the best from your backup circuit
Your SH5000 inverter includes one backup circuit activated during a grid
outage and powered by the system batteries and or solar. The inverter
can provide power to the backup circuit if:
•Power is available from batteries or solar, and
•Total household, continuous power demand is less than
4600W, and
•Total power demand is less than the power available from
batteries and solar.
Generally, you should connect and use the minimum number of devices at any one time.
Only essential or low consumption devices or appliances should be connected to the backup circuit. Devices that require high
currents should not be connected as they may trip the inverter or rapidly discharge the batteries. The table below lists the
suitability of common devices.
The inverter can fulfil demand of 6900W for up to 10 seconds: this is useful for devices that have high starting power, but low
power demand when running.
The inverter will reduce power output above 45°C ambient and shut down above 60°C.
If the system battery reaches minimum SoC during a grid outage the inverter will attempt to fulfil the backup circuit demand
from solar- if demand exceeds available solar power the inverter will shut down automatically. Solar is unpredictable—it varies
with cloud cover—so this situation is best managed by minimizing devices in use.
SUITABLE
NOT SUITABLE
Refrigerators and freezers
Critical Medical Devices
Fans
Air conditioners & heaters
Small, occasional use, plug-in appliances e.g.
microwaves, kettles, toasters
Ovens & cooktops
TVs, radios
Home theatres and Projectors
Computers, tablets, routers
Hot water systems
Telephones
Spas, saunas, pool pumps
Household tank water pumps
Battery chargers & corded Power tools
Low-energy LED or CCFL lighting
Incandescent or high-power lighting
AVOID INVERTER SHUTDOWNS! The total
power load matters: simultaneously
running a kettle, toaster, microwave, large fridge,
TV and a few lights can easily exceed the allowable
power delivery, and an inverter shutdown will
occur.
Solution: Minimise devices in use.

Troubleshooting
16 Owner’s Guide – Redback Smart Hybrid System – v3.8
Inverter operation
Your SH5000 inverter has sophisticated software controls available in the MYRedback app or the Redback portal, however there
are some physical controls or functions at the unit.
9.1 Locking up the batteries
Secure the battery enclosure to:
•Prevent unauthorised access to the batteries and
cabling.
•Discourage battery theft.
The enclosure is secured by trapping the front covers: clamps
at either side are padlocked in position, restricting access to
front cover fasteners, and resisting forcing of the covers.
Note: The security clamps will discourage a casual or
opportunistic intruder but will not stop a determined thief.
9.2 Inverter – Changing bypass modes
The Bypass switch controls the power to the BACKUP AC isolator and the EMS. Its
primary use is to manually connect the backup circuit directly to grid supply, when
required.
POSITION
FUNCTION
COMMENTS
Up
Power to the backup
circuit is from the grid
supply only.
The inverter no longer
controls the backup circuit.
This mode ensures grid supply to the backup circuit if the
inverter is not available or not operating reliably.
If grid supply is lost the inverter will not supply the backup
circuit.
Middle
Backup circuit and EMS are
isolated (depowered).
Used to restart the EMS.
No power is sent to the backup circuit.
Down
Power to the backup
circuit is supplied and
managed by the inverter,
from any source.
This is the recommended operational mode.
If grid supply is lost the inverter will continue to supply the
backup circuit from the batteries and PV- the entire system will
shut down when the batteries reach the minimum SoC.

Redback Technologies
Owner’s Guide – Redback Smart Hybrid System - v3.8 17
9.3 Shutdown procedure
Occasionally, it may be necessary to shut down the inverter interrupting all inverter functions, noting that PV, battery, and grid
supplies remain energised to the isolators.

Troubleshooting
18 Owner’s Guide – Redback Smart Hybrid System – v3.8
9.4 Inverter restart
Occasionally, it may be necessary to cold boot the inverter, to restart all software. A restart briefly interrupts all inverter
functions, noting that PV, battery, and grid supplies remain energised to the isolators.

Redback Technologies
Owner’s Guide – Redback Smart Hybrid System - v3.8 19
9.5 EMS restart
Occasionally, it may be necessary to restart the EMS software. A restart will reboot the EMS, without needing to restart the
whole inverter, noting that the backup circuit will be briefly interrupted.
DO NOT restart unless instructed to do so by Redback support staff.
STEP
PROCEDURE
COMMENT/ILLUSTRATION
Open the BoS switchgear hatch.
Identify the three-position Bypass switch. Note the position of the
switch.
☐Up ☐Down
Note: The switch is usually returned to the original position during
restart.
Set the Bypass switch to the middle position (OFF).
Wait 5 seconds.
Return the Bypass switch to its original position (if noted)
otherwise place in the DOWN position. The EMS will restart in
approximately 10 minutes, indicated by the EMS LEDs stabilising
to:
POWER
Green; ON
HEARTBEAT
Red; FLASHING
INVERTER
Blue; ON
BATTERY
Blue; ON (if batteries are connected)
NETWORK
Blue; ON (if Network is OK)
BLUETOOTH
Blue; FLASHING (for extra 30 minutes, then
OFF)

Troubleshooting
20 Owner’s Guide – Redback Smart Hybrid System – v3.8
Inverter operating modes
The inverter operating modes are summarised below. Select modes using the Redback app or portal.
10.1 Auto mode
AUTO is the default operating mode, maximising
consumption of self-generated and stored energy. If the
inverter mode has been changed, AUTO can be
reselected from the Redback portal.
If AC loads (House) exceeds solar generation, energy
sources are prioritised as follows:
1. Solar
2. Battery
3. Grid
If solar production exceeds AC loads, destinations for
self-generated energy are prioritised as follows:
1. AC Loads
2. Battery (storage)
3. Grid (if enabled)
10.2 Standby mode
STANDBY mode is invoked automatically when no solar
or battery energy is available. The SH5000 directs grid
power directly to the AC Loads thereby minimising
energy losses in the inverter e.g. heat.
The SH5000 automatically reverts to the previous mode
of operation when solar or battery energy is available.
10.3 Charge battery mode
CHARGE mode may be used to prepare for a severe
weather event, and prioritises charging the battery at
the nominated rate, from the grid.
Any available solar will supplement the grid charging up
to a maximum charge rate of 4.6kW.
AC Loads are fulfilled by the grid.
Other manuals for SH5000
1
This manual suits for next models
2
Table of contents
Other Redback Inverter manuals
Popular Inverter manuals by other brands

Growatt
Growatt SPF 3000TL user manual

LIVOLTEK
LIVOLTEK Hyper Series operating manual

Energy
Energy zeroCO2 large RHI-3P5K-HVES-5G Operation manual

Ingeteam
Ingeteam INGECON SUN STORAGE 1Play Installation and configuration

Grape Solar
Grape Solar GS-540-KIT-BT installation guide

Tronic
Tronic 86620 operating instructions

Danfoss
Danfoss Holip HLP-C+ Series instructions

Schwarzbeck
Schwarzbeck IGUF 2910 S manual

Mastervolt
Mastervolt WHISPER 6 ULTRA user manual

ABB
ABB ACS880-107 Hardware manual

Agilent Technologies
Agilent Technologies E4412A Operating and service guide

Toshiba
Toshiba TOSVERT-130H Instruction and maintenance manual