SPK-6
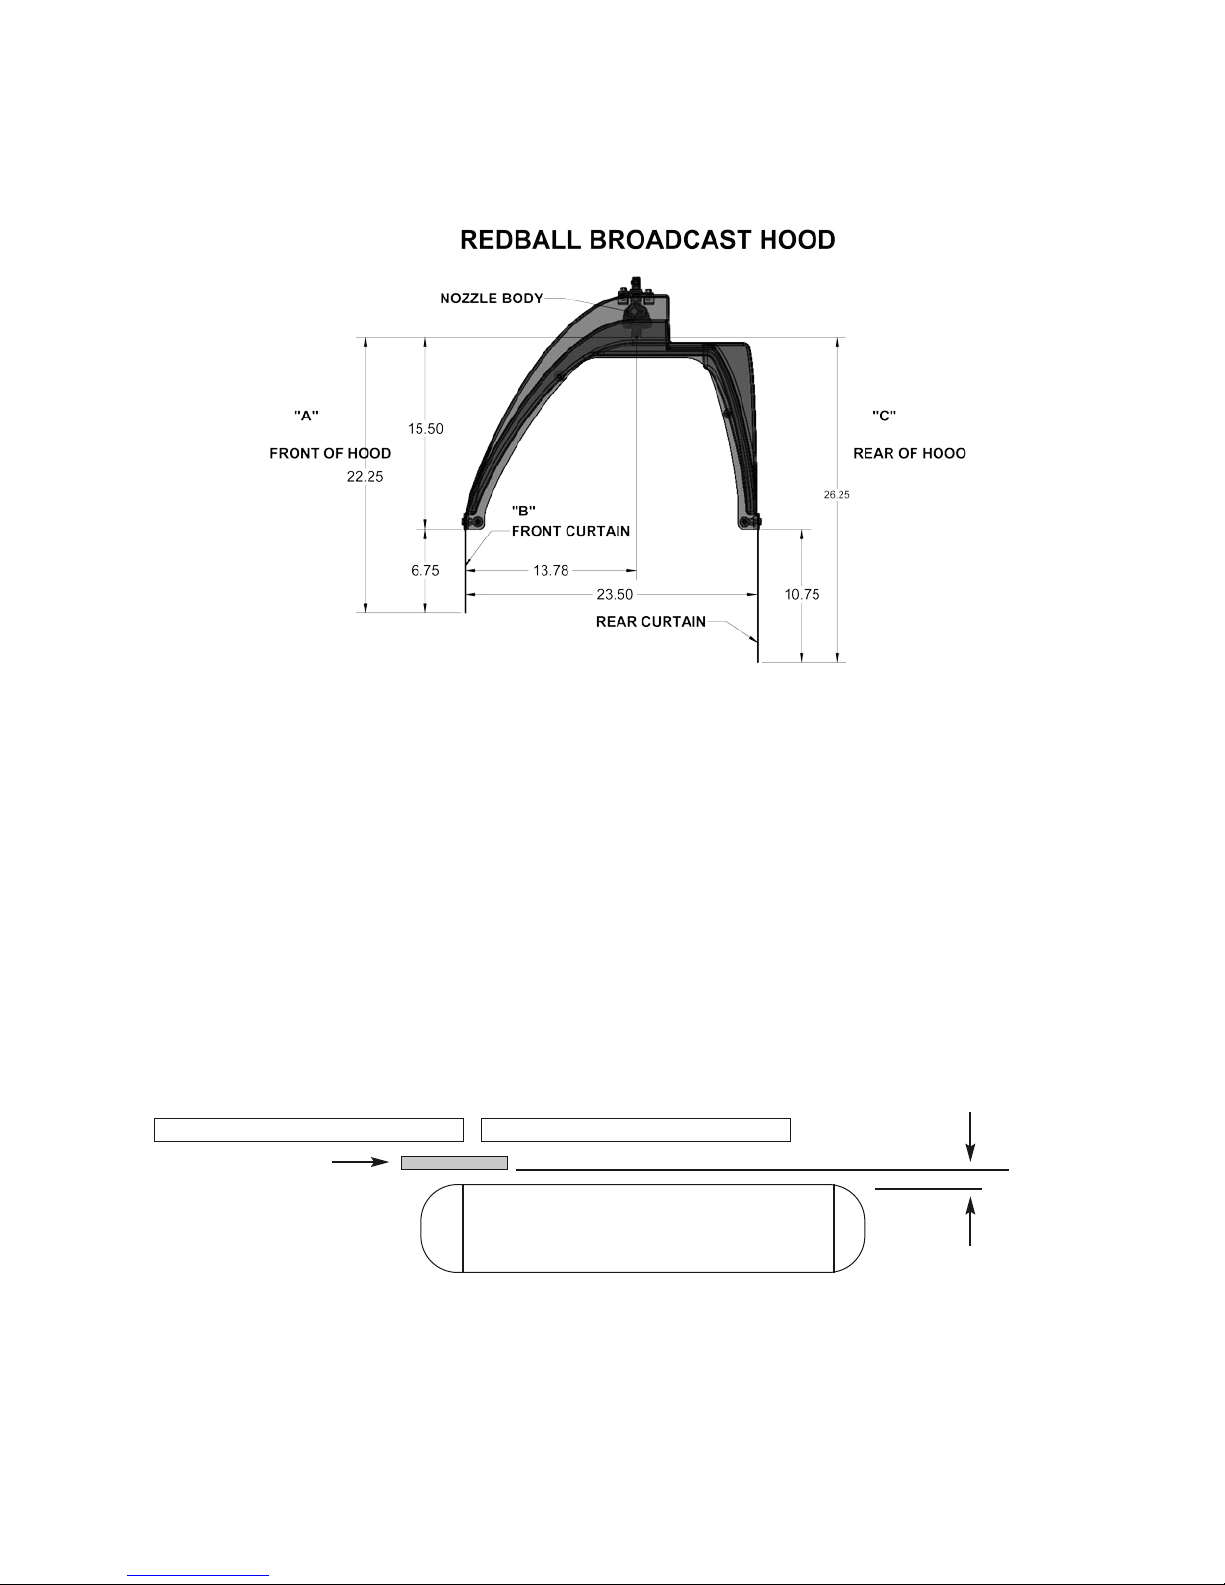
Broadcast Hooded Retrofit Kit
2205 Hall Ave. | Benson, MN 56215 | Phone: 877-332-2551 or 320-843-1700
www.willmarfab.com |
Read and follow chemical label directions. Follow state and local spray regulations. The Redball®and WF®marks are registered
trademark of Willmar Fabrication, LLC. WF-2019-56 Rev. 1 | 1/9/19
Tools Needed:
7/16'' socket•
1/2'' socket•
Tape measure•
Flat head screwdriver•
Congratulations on the purchase of your SPK-6 Broadcast Hooded Retrofit Kit. To assure maximum
performance of your retrofit kit, it’s recommended that you thoroughly follow these assembly instructions.
Proper installation and maintenance are essential for safety, to maintain performance, and to maximize the
life of the unit.
Important:
For best spray drift control and coverage it’s recommended to run the front wind curtain of the hood
touching the crop canopy or the intended spray target.
Always check spray patterns prior to spraying.
For questions, please call Willmar Fab toll free at 877-332-2551.
Willmar Fabrication, LLC reserves the right to make product improvements to the equipment at any time. It shall not be obligated
to make such changes to machines already in service.
The owner, manager and/or operator is responsible for safe, accurate operation and maintenance of the SPK-6 Broadcast Hooded
Retrofit Kit.
It is the owner’s responsibility to:
Fulfill all warranty obligations so as not to void the warranties. Verify the unit is warranty registered•
prior to making any warranty claims. The warranty section at the back of this manual outlines the
warranty policy of Willmar Fabrication, LLC.
Abuse or modifications to the sprayer system that change the performance other than original•
factory specifications void the warranty.
Broadcast Hooded Retrofit Kit - 10'