TABLE OF CONTENTS
1.
INTRODUCTION ............................................................................................................................................................................................. 3
2.
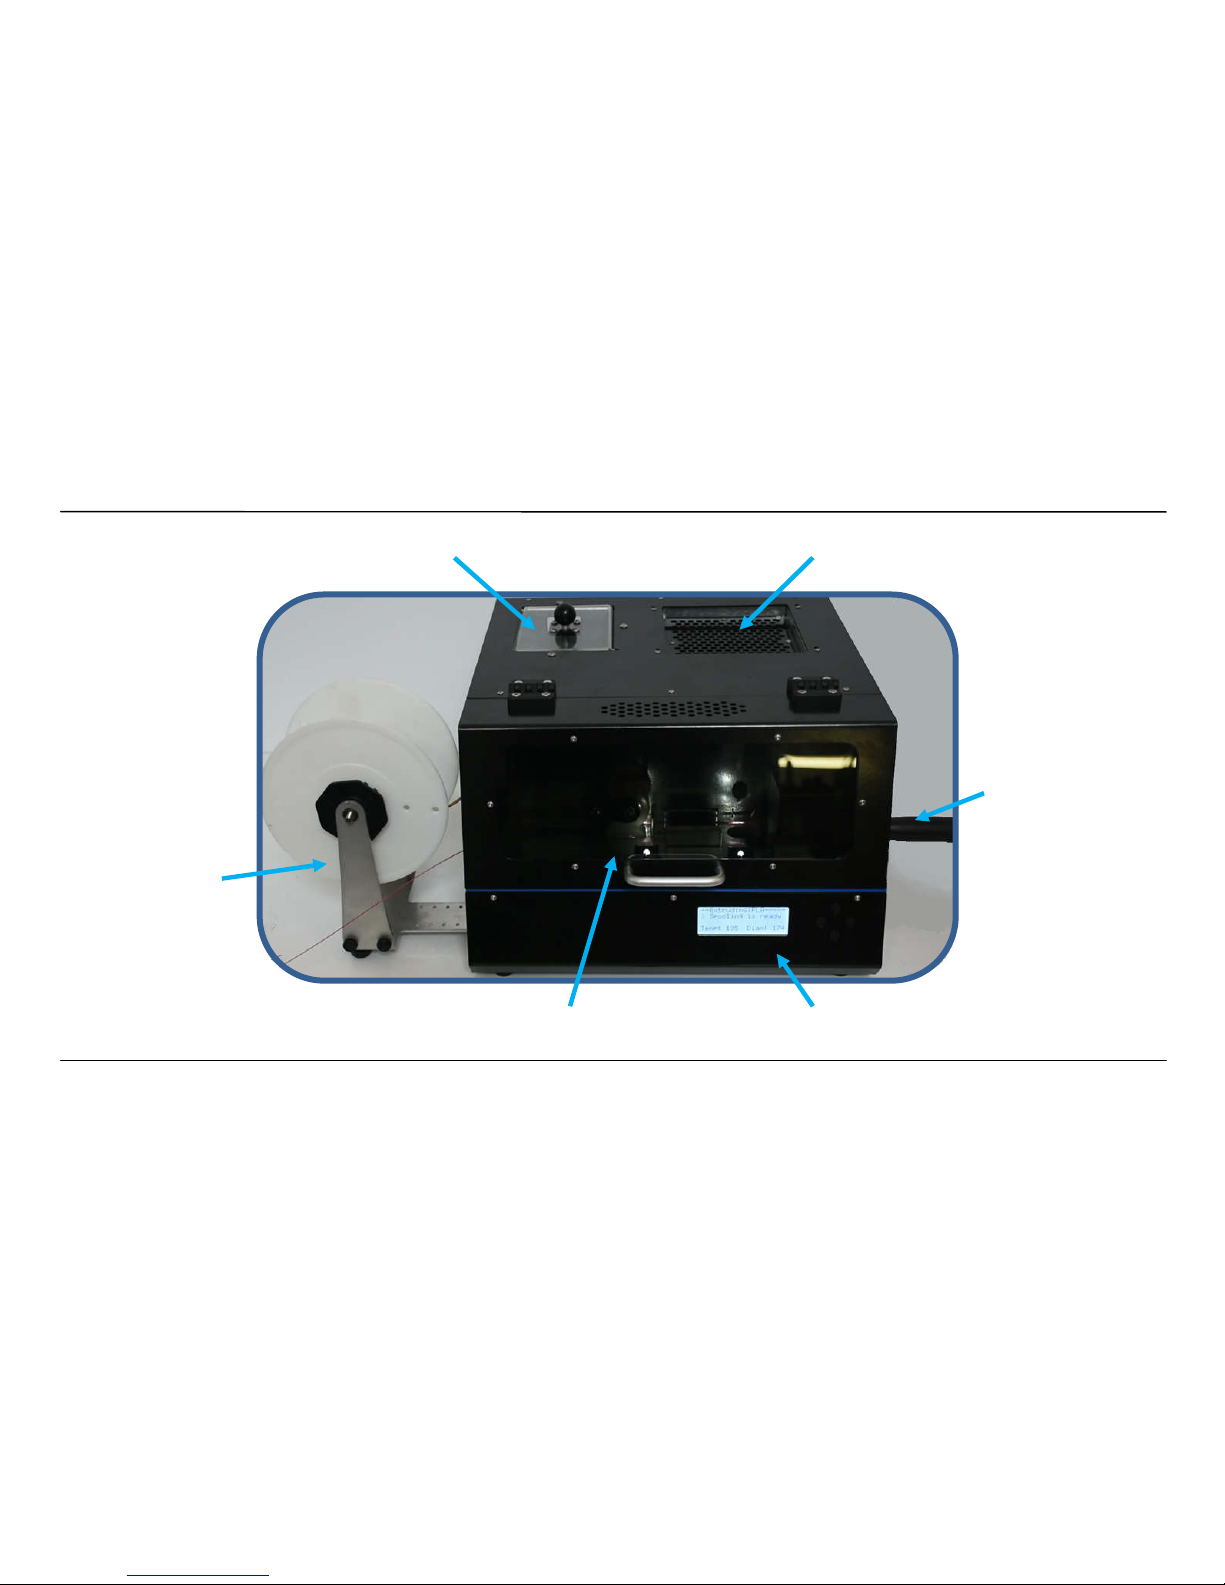
PROTOCYCLER LAYOUT ............................................................................................................................................................................. 3
3.
IMPORTANT LIMITATIONS ....................................................................................................................................................................... 2
3.1.
P
ULLER
W
HEELS
S
QUISHING
............................................................................................................................................................... 2
3.2.
C
OLORED
VS
T
RANSPARENT
P
LASTIC
.................................................................................................................................................... 2
3.3.
D
RY
VS
W
ET
P
LASTIC
........................................................................................................................................................................ 3
3.4.
R
EGRIND
S
IZE
&
E
XTRUDING
R
ECYCLED
P
LASTIC
..................................................................................................................................... 4
3.5.
A
MBIENT
T
EMPERATURE
.................................................................................................................................................................... 4
4.
EXTRUSION ..................................................................................................................................................................................................... 5
4.1.
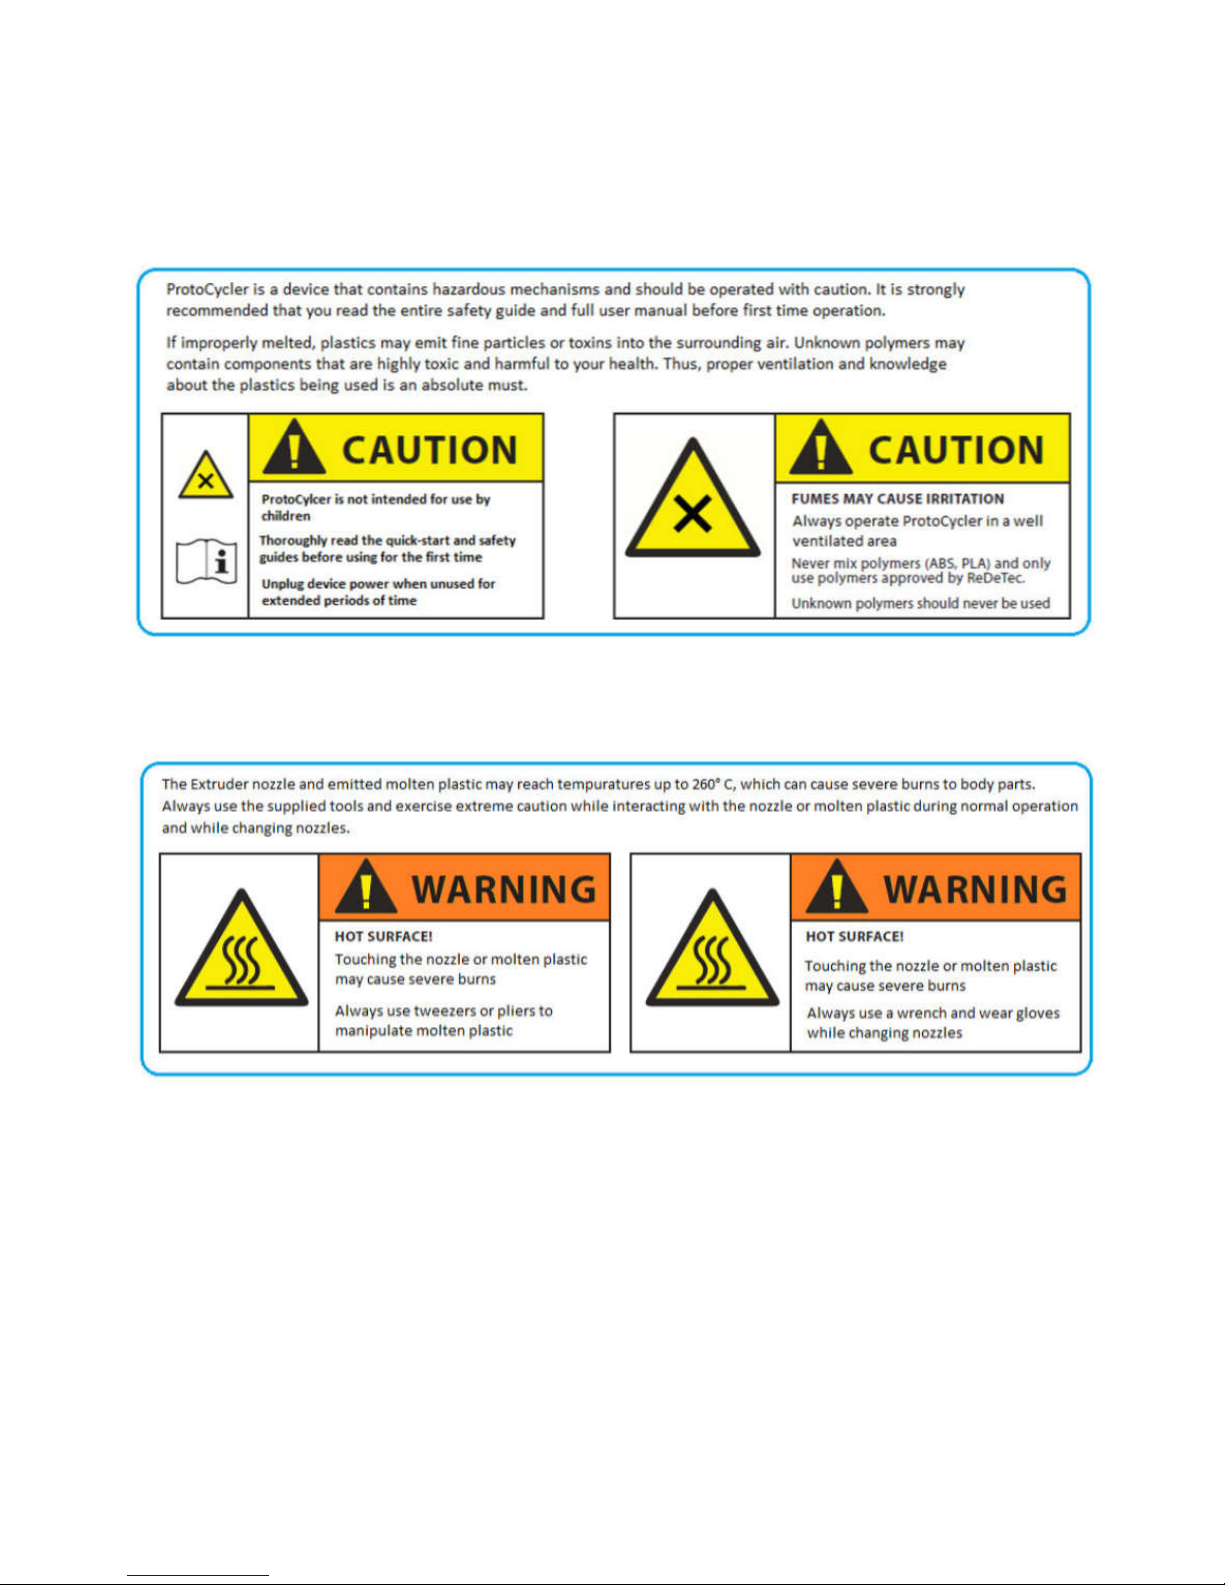
S
AFETY
O
VERVIEW
............................................................................................................................................................................ 5
4.2.
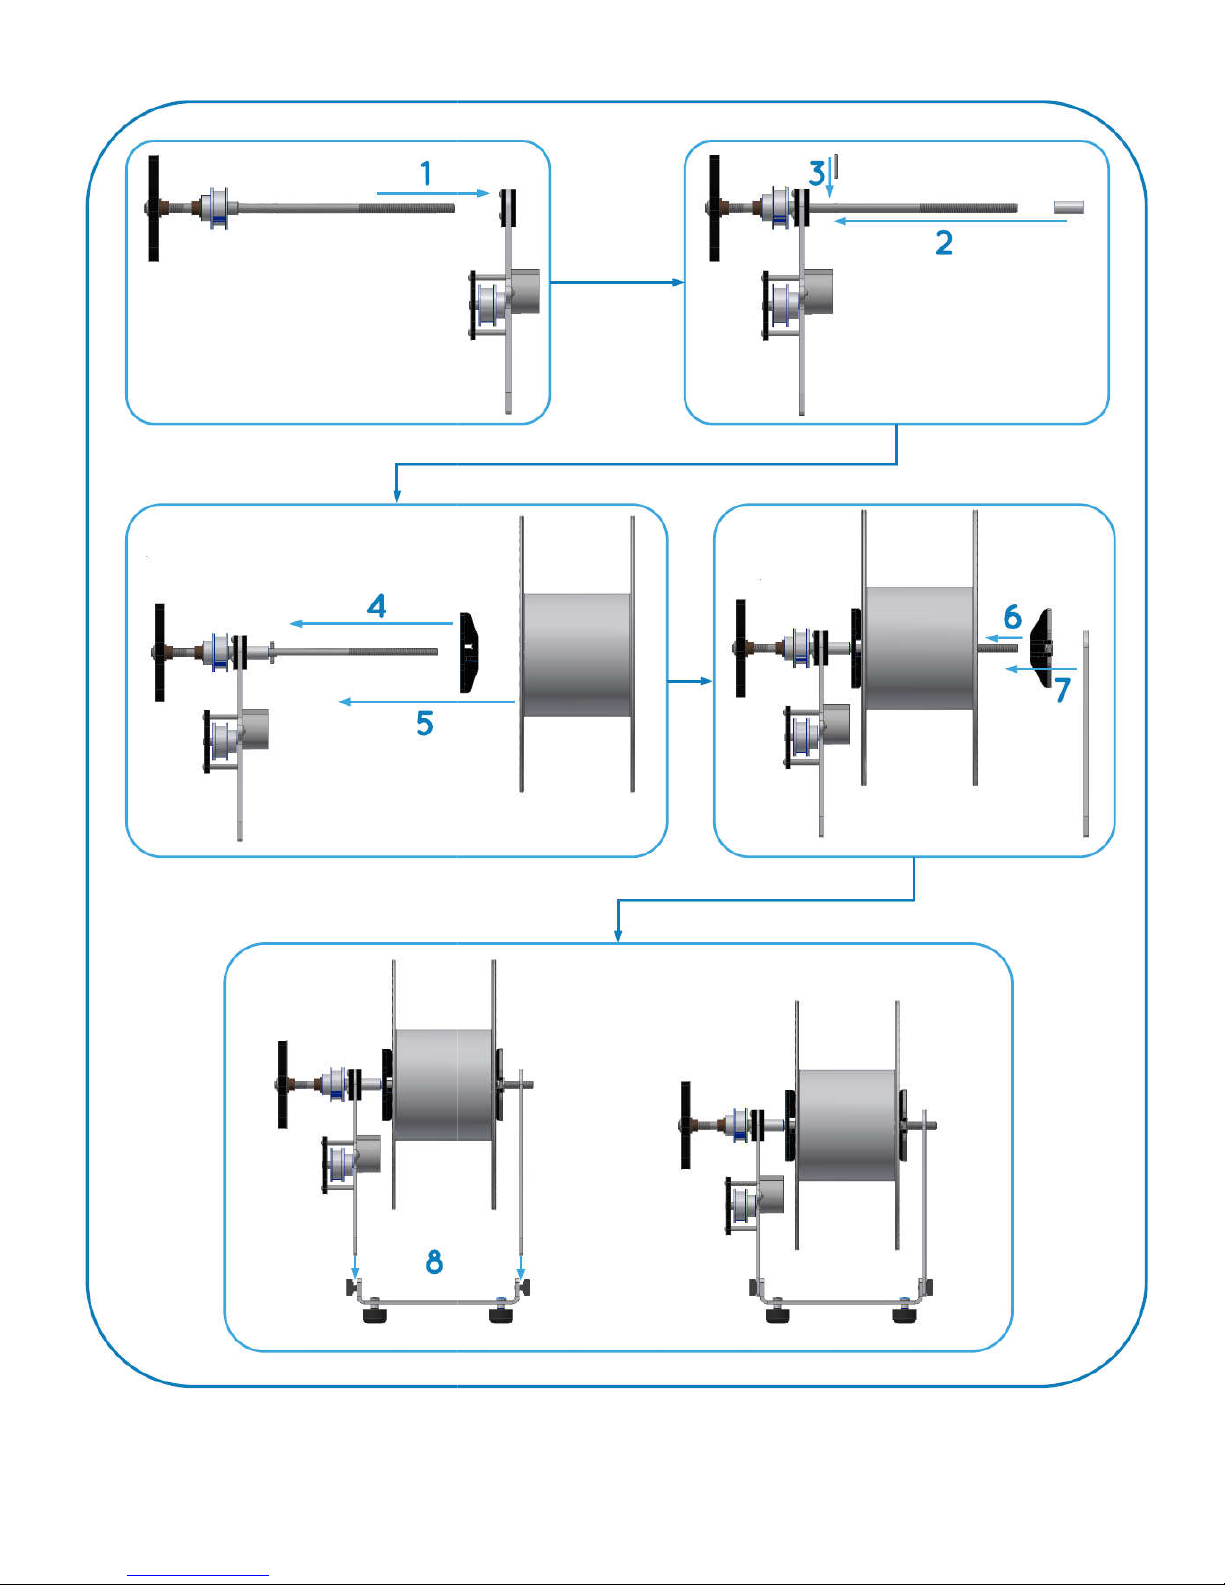
S
POOLER
S
ETUP
............................................................................................................................................................................... 6
4.3.
A
UTOMATIC
E
XTRUSION
.................................................................................................................................................................... 8
4.4.
S
POOLER
C
LUTCH
T
ENSION
A
DJUSTMENT
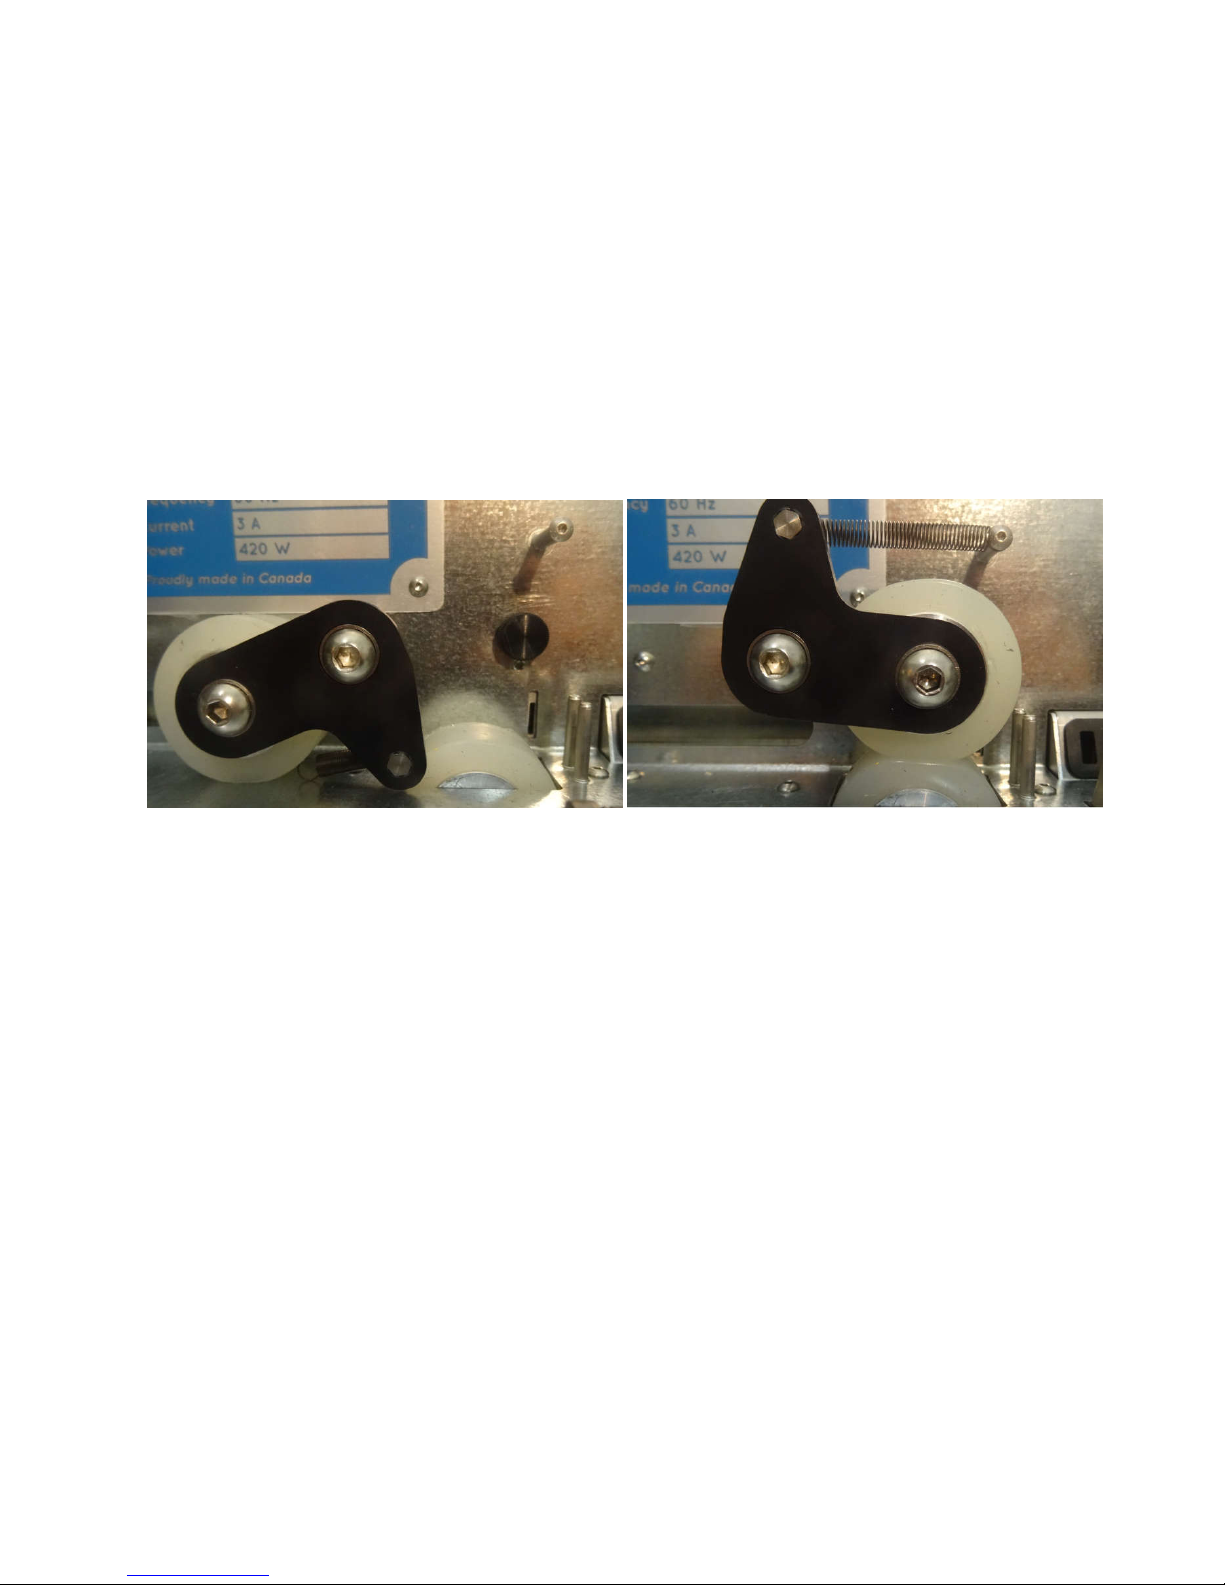
............................................................................................................................................ 10
4.5.
M
ANUAL
E
XTRUSION
(A
DVANCED
) .................................................................................................................................................... 10
4.6.
E
XTRUDER
N
OZZLE
R
EMOVAL
/
R
EPLACEMENT
..................................................................................................................................... 14
5.
GRINDER OPERATION ............................................................................................................................................................................... 15
5.1.
S
AFETY
O
VERVIEW
.......................................................................................................................................................................... 15
5.2.
F
IRST
T
IME
S
ETUP
........................................................................................................................................................................... 15
5.3.
O
PERATION
................................................................................................................................................................................... 15
5.4.
S
ORTING
G
ROUND
M
ATERIAL
........................................................................................................................................................... 16
6.
TROUBLESHOOTING .................................................................................................................................................................................. 16