REDGUM Brand RG4204 User manual

0. redgumbrand.com.au
SOFT BRAKE SEAT WALKER
RG4204
April 2018
USER MANUAL
Please read and keep these instructions

1. redgumbrand.com.au
CONTENTS
2. INTRODUCTION –INTENDED USE
3. PRODUCT OVERVIEW –FEATURES / SPECIFICATIONS
4. ASSEMBLY –UNPACK and INSPECT SUPPLIED PARTS
5. ASSEMBLY –UNFOLD FRAME
6. ASSEMBLY –INSTALL BAG
7. ASSEMBLY –INSTALL HANDLES
8. ASSEMBLY –INSTALL HANDLES (continued)
9. ASSEMBLY –INSTALL PADDED BACKREST
10. OPERATION –HAND BRAKES
11. OPERATION –BRAKE ADJUSTMENT
12. OPERATION –FOLDING for transit or storage
13. PRODUCT CARE –INSPECTIONS /MAINTENANCE / CLEANING
14. WARRANTY

2. redgumbrand.com.au
INTRODUCTION
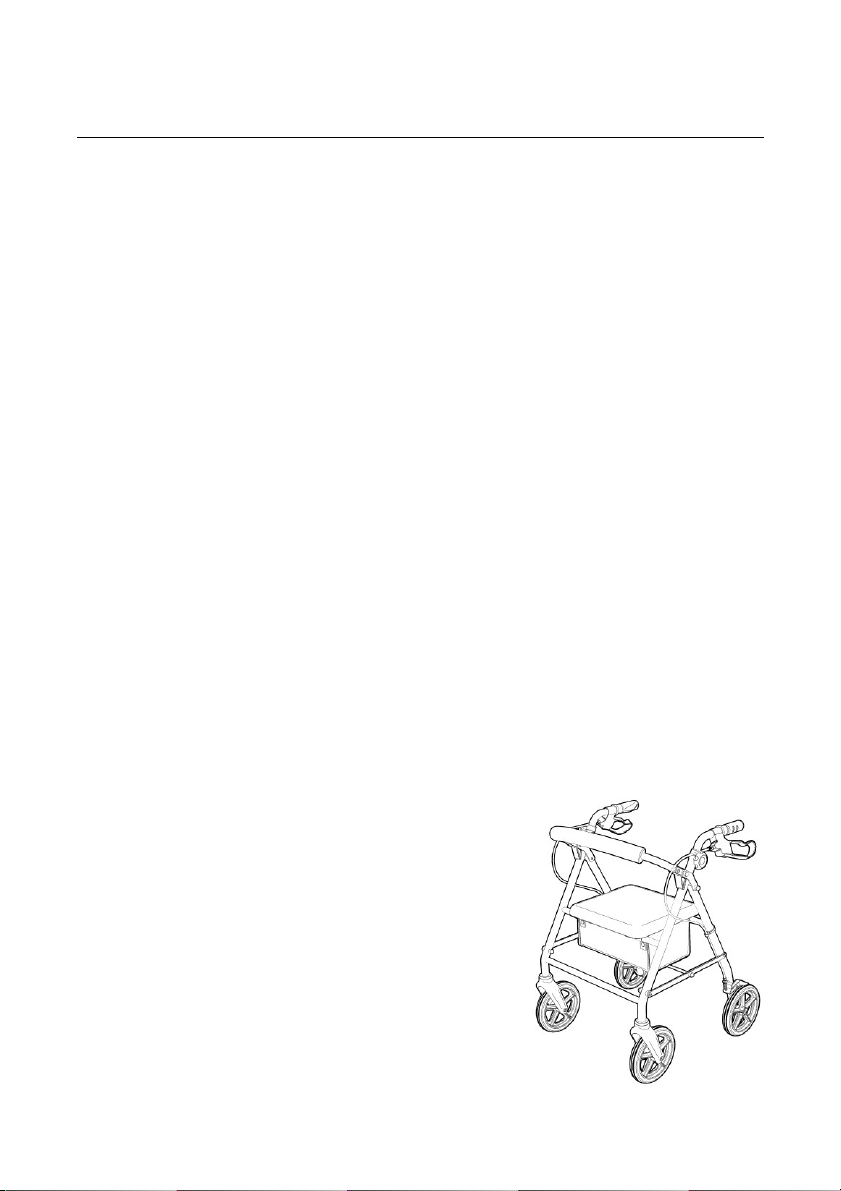
Thank you for purchasing this quality REDGUM Brand product.
If you have any issues or questions about the Soft Brake Seat Walker
please contact your supplier or REDGUM Brand direct:
T: +61 8 9248 4180
F: +61 8 9248 9452
E: sales@redgumbrand.com.au
A: 1 Business Way, Malaga Western Australia 6090
INTENDED USE
Only use your Seat Walker for the purpose for which it intended, which is as an aid
to walking. It is intended your Seat Walker is only used on standard pavements or at
home. It should not be used on rough terrain or pot-holed surfaces. The use of your
Seat Walker on these surfaces can seriously compromise your safety and may
damage your Seat Walker beyond repair.
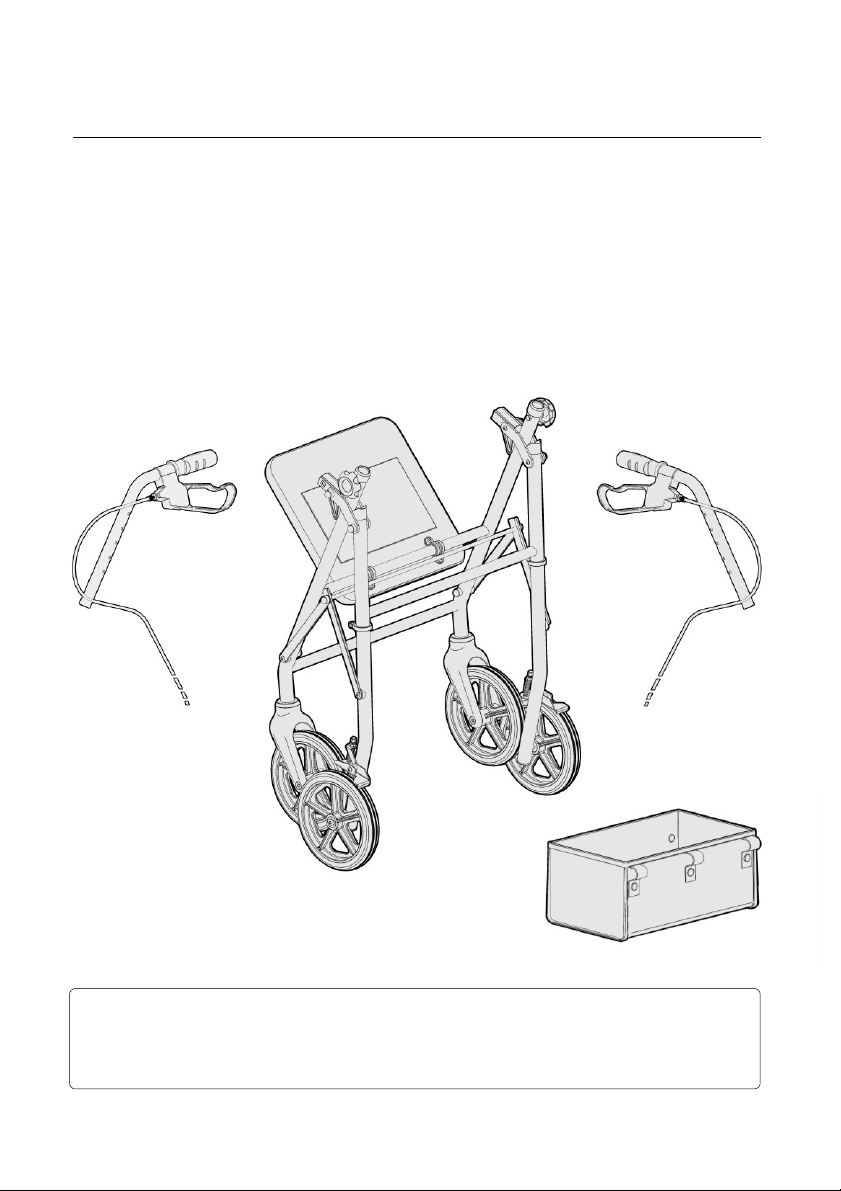
Your Soft Brake Seat Walker has been designed to assist you when walking and
carrying small items of shopping using the bag provided. The bag was designed
specifically to fit your Seat Walker, please only use the bag supplied.
Do not use or combine bags and/ or baskets from other manufacturers.
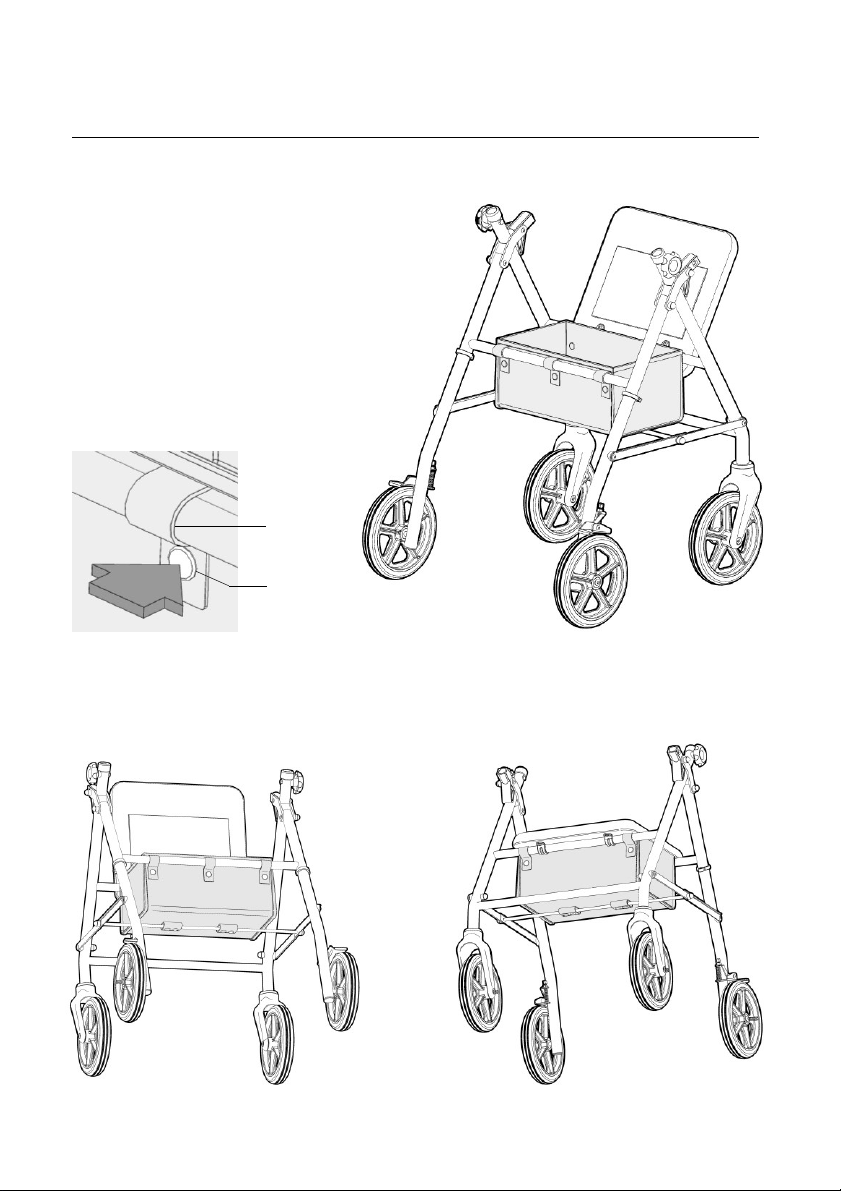
The Seat Walker is designed to be used both inside and outside the home.
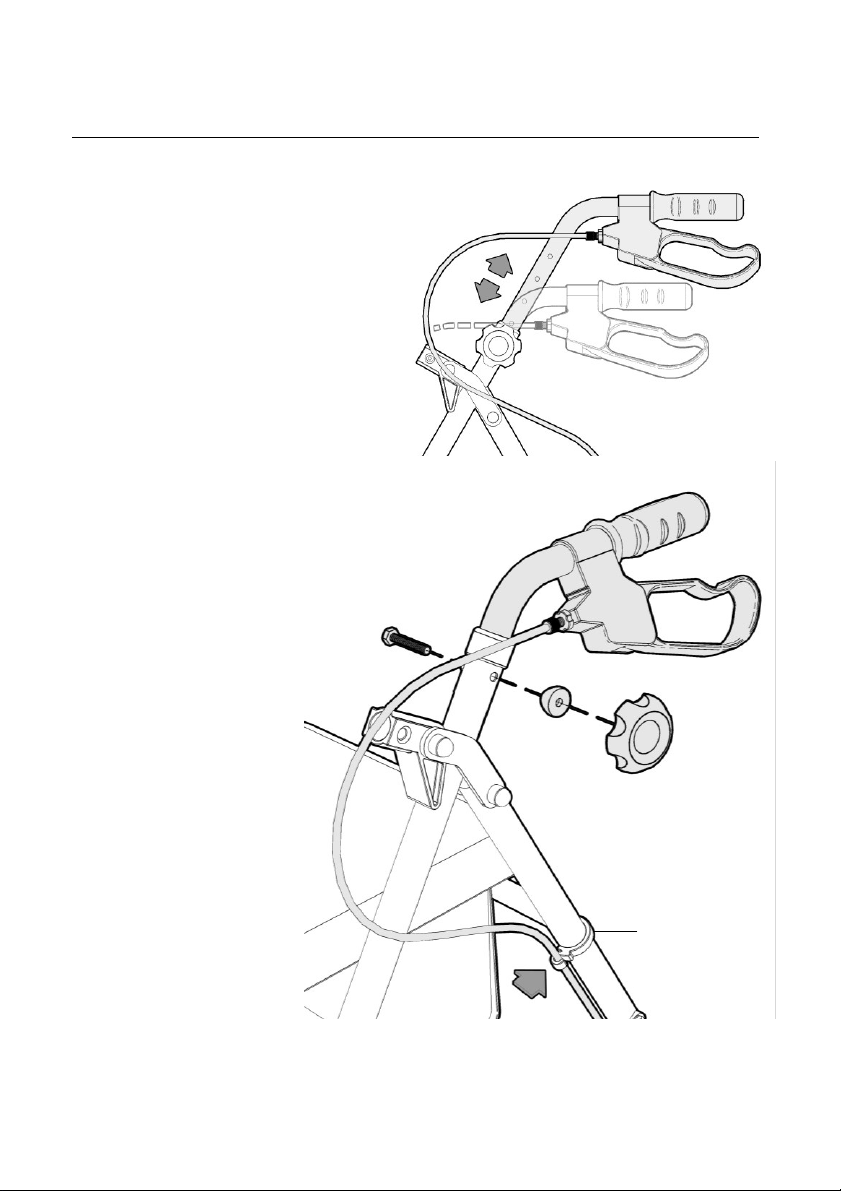
IMPORTANT NOTE
This equipment MUST be assembled
by a competent person.
Maximum User Weight: 136kg
Exceeding the weight limit could
cause damage to the product and
could put the user at risk.

3. redgumbrand.com.au
PRODUCT OVERVIEW
FEATURES
Strong lightweight construction
User friendly Loop Brakes with soft brake lock
Height adjustable Handles
Ergonomic Handgrips to reduce pressure
Comfortable Padded Seat
Padded Backrest
Simple brake cable adjustment
Large diameter wheels for excellent mobility
Flat free tyres
Swivelling front wheels
Folds up for transit or storage
SPECIFICATIONS
Overall Width: 580mm
Depth Unfolded: 635mm
Depth Folded: 220mm (with handles removed)
Overall Height: 820mm (handles at lowest setting)
Handle Height: 820 - 920mm (5 settings)
Seat: 350mm W x 320mm D
Seat Height: 540mm (from floor to top of seat)
Wheel Diameter: Ø200mm
Weight: 7.7kg
Maximum User Weight: 136kg
Please contact REDGUM Brand if you would like any further information
on your Soft Brake Seat Walker.

4. redgumbrand.com.au
ASSEMBLY
UNPACK and INSPECT SUPPLIED PARTS
Carefully remove all packaging.
(Avoid using any knives or other sharp instruments to open the packaging as this
may damage the surface of the product)
Ensure you have been supplied with the following parts:
- Handles
(1 left / 1 Right)
- Frame
- Bag
IMPORTANT NOTE
Check the product for any visible damage. If you see any damage or suspect a
fault, DO NOT USE YOUR PRODUCT and contact your supplier for support.

5. redgumbrand.com.au
ASSEMBLY
UNFOLD FRAME
Ensure the Padded Seat is in the up position.
Open out the Seat Walker frame by pushing
down on the cross tubes as shown.
Ensure that your Seat Walker is fully extended
and that the side locking levers are straight
and level.
Seat
Locking Levers

6. redgumbrand.com.au
ASSEMBLY
INSTALL BAG (If required)
Your Seat Walker is supplied with a bag.
To fit the bag to the Walker, raise the seat
and position the bag onto the frame as shown.
To hold the bag in place, wrap the loops
around the frame and then the fix them
in place. Close each press stud by
pressing the circular discs together.
Ensure that ALL THE LOOPS are attached to locate the bag onto the frame.
There are 3 loops at the rear, 2 loops at the front (either side of the padded seat)
and 2 loops on the underside.
Press Stud
Loop

7. redgumbrand.com.au
ASSEMBLY
INSTALL HANDLES
Undo the handwheel and remove the
saddle washer and bolt from the frame.
IMPORTANT NOTE
The handles are left and right handed and need
to be put on the correct side of the frame.
Please ensure that the brake lever is facing outwards.
Carefully insert the handle into the frame
as shown.
Handwheel
Bolt
Saddle
Washer
Brake lever facing outwards
Top view

8. redgumbrand.com.au
ASSEMBLY
INSTALL HANDLES (continued)
Position the handle at the required height.
(There are 5 height settings)
Insert the bolt through the hexagonal
hole in the frame and pass through
the hole in the handle tube, place
the saddle washer over the end of
the bolt, with the curved side facing
the tube. Fix the screw in place with
the handwheel.
Make sure that the handwheel
is tightened sufficiently so that
the brake tubes will not move
accidentally when in use.
Clip the brake cable into
the plastic clip located on
the frame just below the
cross tube.
Repeat this installation process to the other handle, making sure both handles are
at the same height.
Brake Cable Clip

9. redgumbrand.com.au
ASSEMBLY
INSTALL PADDED BACKREST
Line up the tubes on the
padded backrest with the
pivot brackets on the frame.
IMPORTANT NOTE
Push the tubes into the pivot brackets until you hear 2 audible “CLICKS”.
These clicking sounds are made when the push pin on each tube had located
properly and locked into the pivot brackets.

10.redgumbrand.com.au
OPERATION
HAND BRAKES
Your Seat Walker has closed loop
hand brakes on both handles.
IMPORTANT NOTE
Both hand brakes should be used simultaneously to ensure your Seat Walker stops
as required and you are in control.
To STOP, gently pull upwards
on both brakes simultaneously.
This will slow down and stop
your Seat Walker.
Release both brakes to
allow the Seat Walker
to become mobile again.
The brakes on your Seat Walker
also have a park option.
To engage the park option, push
downwards on both brakes
simultaneously. Push the brakes
down until you hear 2 audible clicks.
These clicking sounds are made
when the brakes have locked into
the park position.
To unlock, simply pull the brakes up.
You will hear a click as the ‘park lock’
disengages.

11.redgumbrand.com.au
OPERATION
BRAKE ADJUSTMENT
Your Seat Walker brake system
will require periodic adjustment.
Should the brakes need adjusting
they can be tightened by unlocking
Nut A and then unscrewing
(anti-clockwise) Nut B.
When the brake arm has a 3mm
clearance then Nut A should be
retightened.
When adjusted the brakes should work in both normal braking and in parking mode.
If needed then Nut B can be turned further anti-clockwise, which will tighten the
brake cable more.
If the brake handles are fully adjusted and more
tightening is required, carefully release the locking
screws using an Allen key. Adjust the cable to both
brakes until the brake arms evenly clear the wheels
by approx. 3 mm.
Retighten the locking screw.
Check the park brakes by
pushing down on the brake
handles, ensuring that both
brakes lock in the park position.
Lift the two ‘braked’ wheels off
the ground and spin to ensure
they turn freely. If either of the
braked wheels rubs onto the
brake arm, please check for
obstructions and repeat the
brake adjustment procedure above.
Nut A
Nut B
Nut B
Nut A

12.redgumbrand.com.au
OPERATION
FOLDING for transit or storage
Your Seat Walker can be folded up
to reduce the amount of room it takes up
when being transported or stored.
Rotate the padded seat up for access.
If the bag is not fitted, pull up on the
centre rod as shown.
If the bag is fitted, pull up on the handle
at the bottom of the bag.
As you pull up, the frame will start to
come together.
Rotate up the padded backrest if required.

13.redgumbrand.com.au
PRODUCT CARE
INSPECTIONS / MAINTENANCE
We suggest that you check your Seat Walker visually at frequent intervals for signs
of damage or wear prior to use.
Monthly Checks - Please check all aspects of your Seat Walker. However, pay
particular attention to the following areas:
Side Locking levers –Ensure folding mechanism is locking as required.
Brakes - Ensure brakes are correctly adjusted with 3mm between tyre and brake.
Wheels –Ensure all wheels move freely and are without obstruction.
Overall check that no components are loose.
Withdraw your Seat Walker immediately if you suspect damage or any
other fault. If in any doubt, please do not issue or use, but immediately
contact your supplier for service support.
REDGUM Brand recommend that you should have your Seat Walker serviced every
three months or less if used by, or issued to, various users. Servicing should be
carried out at an approved service technician or by REDGUM Brand directly.
Do not fit any parts or accessories to your Seat Walker that are manufactured by
another company. To do so will void your warranty and may seriously compromise
your safety.
CLEANING
Clean your Rollator using a non-abrasive cleaner or
mild detergent with a soft cloth. Abrasive cleaners
e.g. AJAX and / or abrasive cleaning pads could
seriously damage the product beyond repair and
should not be used. Always ensure that you wipe
dry the equipment after cleaning. Wipe off all
surfaces with a dry cloth and use a water dispersing
agent such as WD40 on all metal joints.

14.redgumbrand.com.au
WARRANTY
Your REDGUM Brand Soft Brake Seat Walker is covered by a 12 Month Warranty
from the date of purchase.
If the product has any manufacturing faults during this period contact the place of
purchase for assessment. Failures as a result of accidental damage, misuse,
modification or wear and tear are not covered by this warranty.
Our goods come with guarantees that cannot be excluded under the Australian
Consumer Law. You are entitled to a replacement part for a major failure and for
compensation for any other reasonably foreseeable loss or damage. You are entitled
to have the goods repaired or replaced if the goods fail to be of acceptable quality
and failure does not amount to major failure.
If you have any issues
or questions about your
Soft Brake Seat Walker
please contact your supplier
or REDGUM Brand direct on:
T: +61 8 9248 4180
F: +61 8 9248 9452
E: sales@redgumbrand.com.au
A: 1 Business Way, Malaga
Western Australia 6090
Please store this User Manual
in the pocket provided on the
underside of the padded seat
for future reference.

15.redgumbrand.com.au
Proudly Australian Owned and Operated
Table of contents
Popular Mobility Aid manuals by other brands

SystemRoMedic
SystemRoMedic FlexiMove 3012 user manual

Invacare
Invacare 6291E Adult Assembly, installation and operating instructions

Graham Field
Graham Field LUMEX 6130 manual

Tec-Innovation
Tec-Innovation InnoMake v.1 user manual

Drive DeVilbiss Healthcare
Drive DeVilbiss Healthcare NIMBO Instructions for use

Queenstone
Queenstone 07B owner's manual

NRS Healthcare
NRS Healthcare 2 in 1 Rollator and Transit Chair M58203 User instructions

Harmar Mobility
Harmar Mobility AL690 Installation and owner's manual

Invacare
Invacare 6264P Assembly, installation and operating instructions

Guardian
Guardian MDS86850ES8 User Instructions & Warranty

Rifton
Rifton Stander S410 product manual

DHG
DHG VENDLET V5S manual