LIMITED WARRANTY
1. The manufacturer warrantees this hose reel against defects in material and craftsmanship,
for a period of 24 months from date of purchase, but not including hose and O-ring parts.
2. Manufacturer’s liability is limited to replacement or repair of defective material within the
warranty period, when returned freight prepaid to the distributor or their designated service
depot.
3. The warranty does not cover damage caused by accident, misuse or faulty installation.
4. The reel must be installed and maintained in compliance with the instructions.
TROUBLE SHOOTING
E3
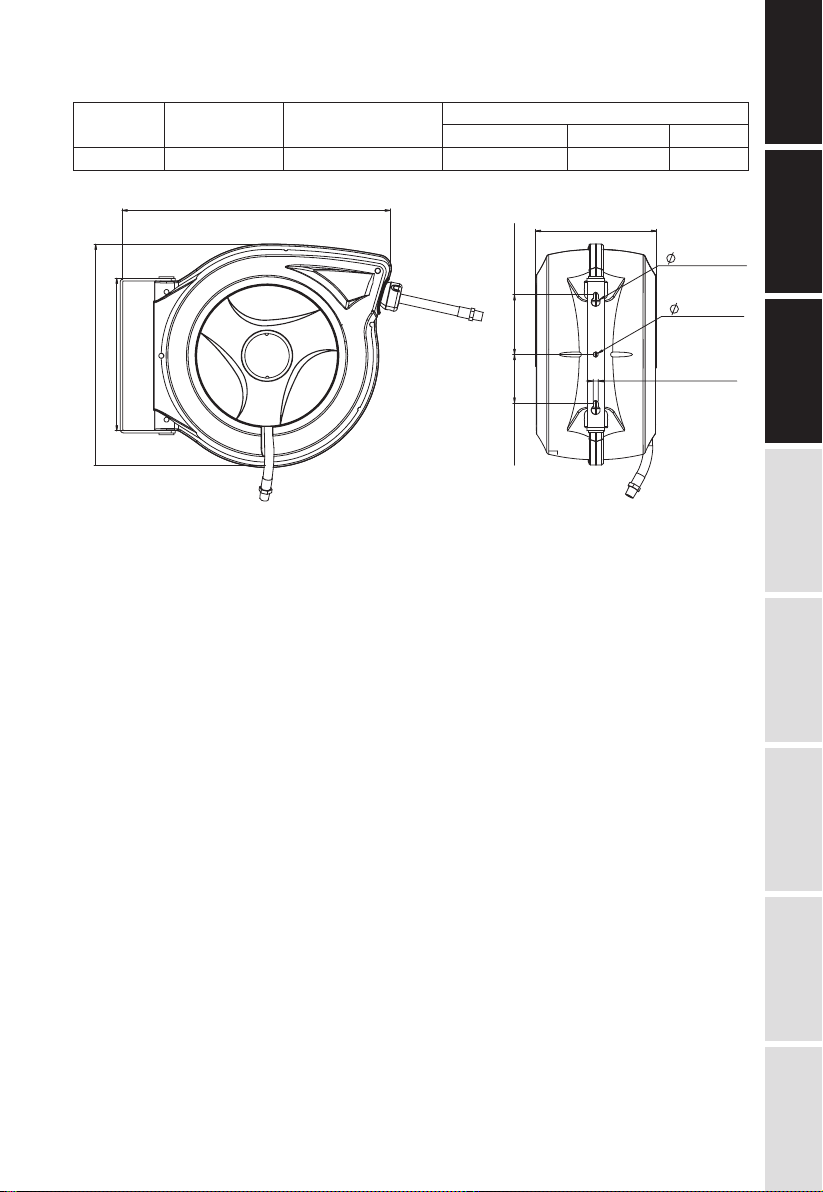
TECHNICAL
DETAILS
SAFETY
PRECAUTIONS
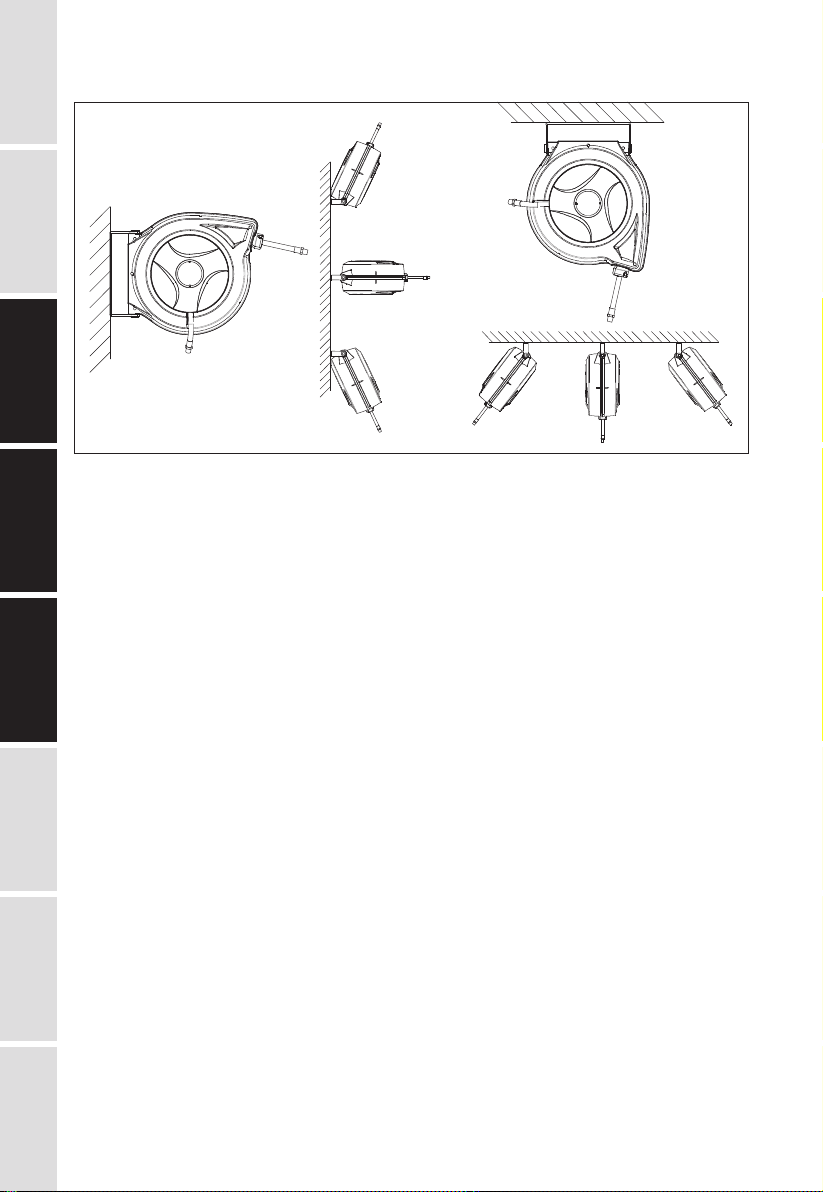
INSTALLATIONOPERATIONMAINTENANCE
LIMITED
WARRANTY
EXPLODED AND
PARTS LIST
TROUBLE
SHOOTING
Problem(s)
Fluid path (plumbing
and/or Swivel) is leaking
or damaged
Hose witll not fully
retract
Hose will not retract
at all
Reel will not latch
Fluid leaks from swivel
Swivel assembly in not
moving freely or locking
up
Possible Cause
a) Maximum pressue rating
for reel has been exceeded
b) Application is not compatible
with plumbing and/or swivel
seal materials.
a) Outlet nozzle, gun or tool is
too heavy.
b) Spring is fatigued.
c) Field installed hose is too long.
Spring has lost all tension or
has possibly broken
a) Incorrect operation
b) Dog spring or locking cam is
broken or worn
a) Swivel seals are damaged
or worn
b) Inlet hose is not flexible
Inlet hose is not flexible causing
side force on swivel
Corrective Action
a) Replace or repair damaged
components. Consult factory.
Check maximum pressure
rating of reel.
b) Contact factory to determine
chemical compatibility or
environmental issues(i.e.
temperature rating).
a) Add spring tension. See
"Spring Tension Adjustment".
b) Add spring tension. See
"Spring Tension Adjustment".
Replace Spring Canister if
required.
c) Call local distributor for correct
specified hose length.
Reinstall Spring Tension
a) To latch the reel, pull out the
hose and allow it to retract
after hearing the first second
or third "click".
b) Replace dog spring or locking
cam.
Replace swivel seals. See
"Swivel Seal Replacement".
Caution: Be sure leak is not at
Hose Fitting!
Properly tighten inlet hose. Hand
tighten fitting, plus 1/2 turn with
wrench.