Rehab and Mobility Products RM199 Programming manual

Aluminium 4-Wheeled
Rollator/Transporter Chair
RM199 Rollator
Usage and Maintenance Instrucons
This file is available to view and download as a PDF at
www.rehabandmobility.com.au Sight impaired customers
can use a free PDF Reader (such as adobe.com/reader) to
zoom in and increase the text size for improved readability.

N.B. This equipment must be installed by a competent person.
BEFORE USE
• Carefully remove all packaging. Avoid using any knives or other sharp instruments
as this may damage the surface of the product.
• Check the product for any visible damage. If you see any damage or suspect a
fault, do not use your product, but contact your supplier for support.
INTENDED USE
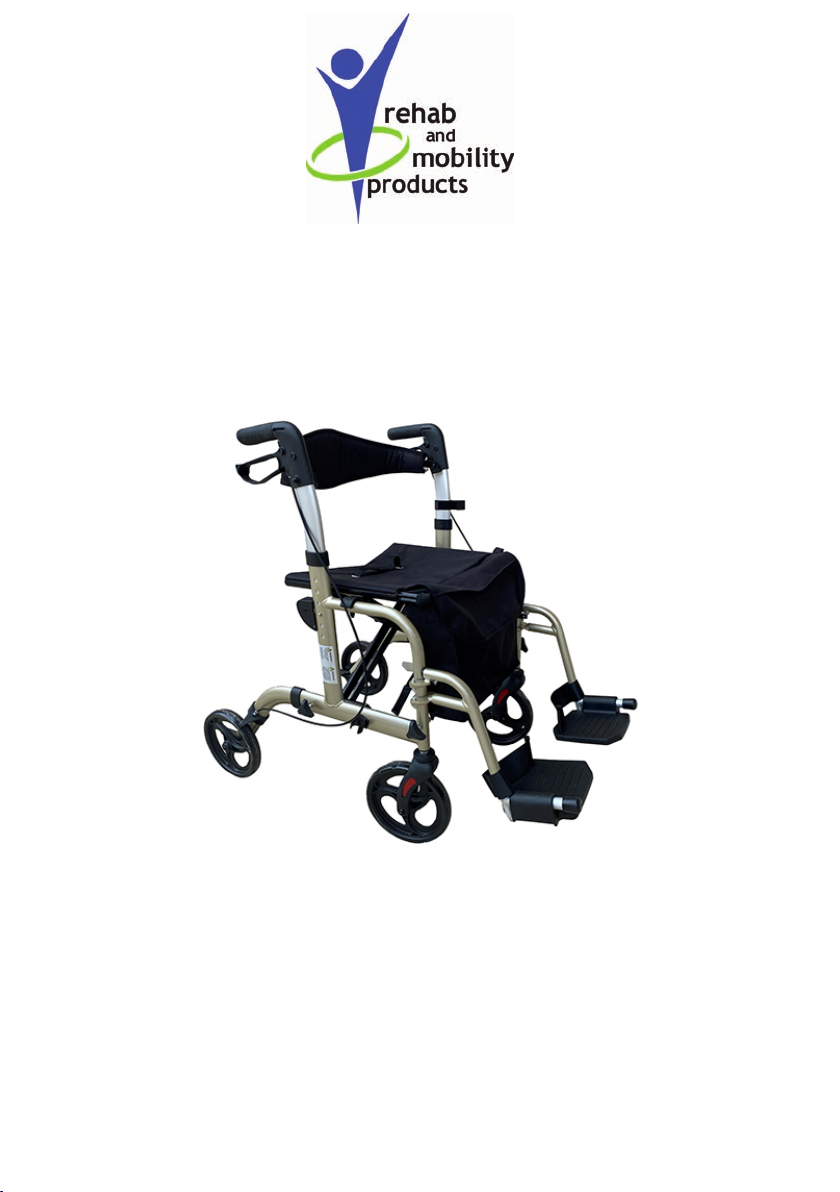
Your RM Rollator/Occassional Transport Chair has been designed to assist you
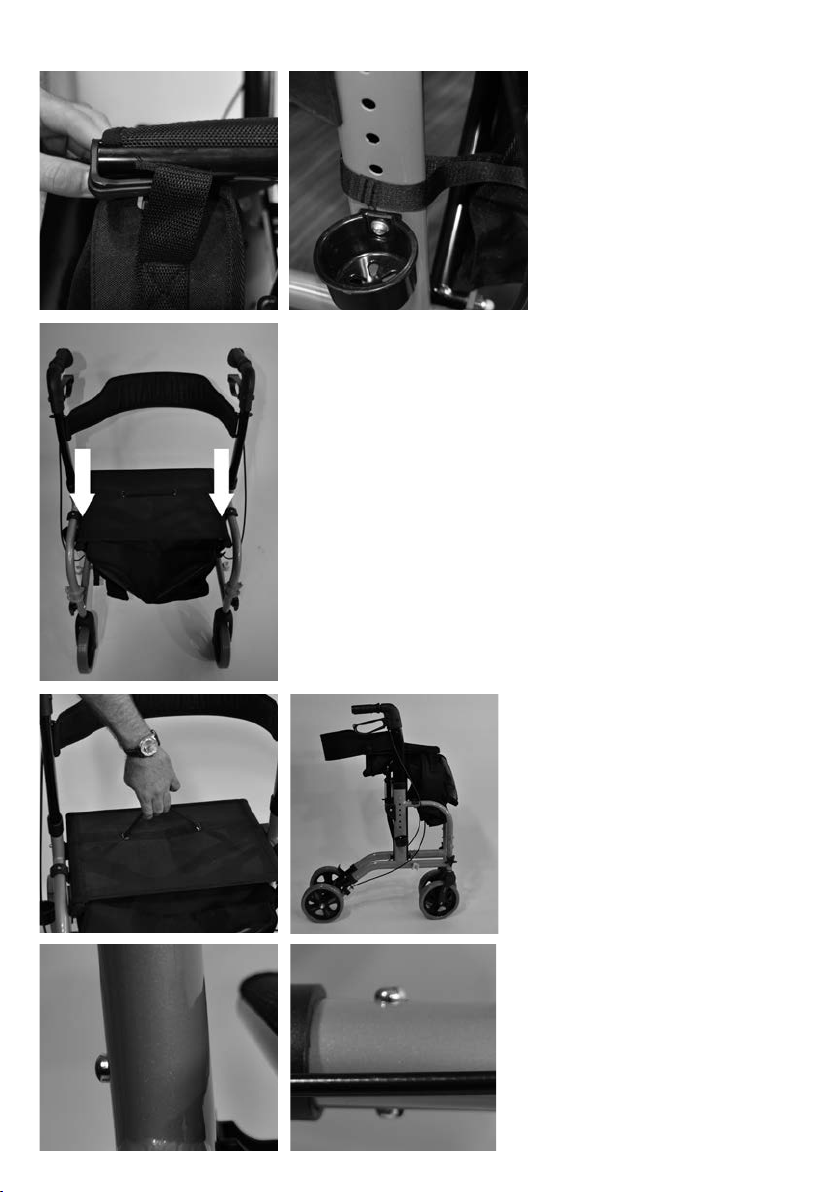
when walking and carrying small items of shopping using the bag provided. The
bag was designed specifically to fit your rollator, please only use the bag supplied
for your RM Rollator. Do not use or combine bags and/ or baskets from other
manufacturers. The item can also be used as a travel chair.
When not in use, you can simply fold the RM Rollator/Occassional Transport Chair
and store away until you require it next. The RM range of rollators are designed to
be used both inside and outside the home.
IMPORTANT INFORMATION
The information given in this instruction booklet must not be taken as forming part of
or establishing any contractual or other commitment by Rehab and Mobility
Wholesalers or its agents or its subsidiaries and no warranty or representation
concerning the information is given. Please exercise common sense and do not take
any unnecessary risks when using this product; as the user you must accept liability
for safety when using the product. Please do not hesitate to contact the person who
issued this product to you or the manufacturer (detailed below) if you have any
queries concerning the assembly/use of your product.
FEATURES
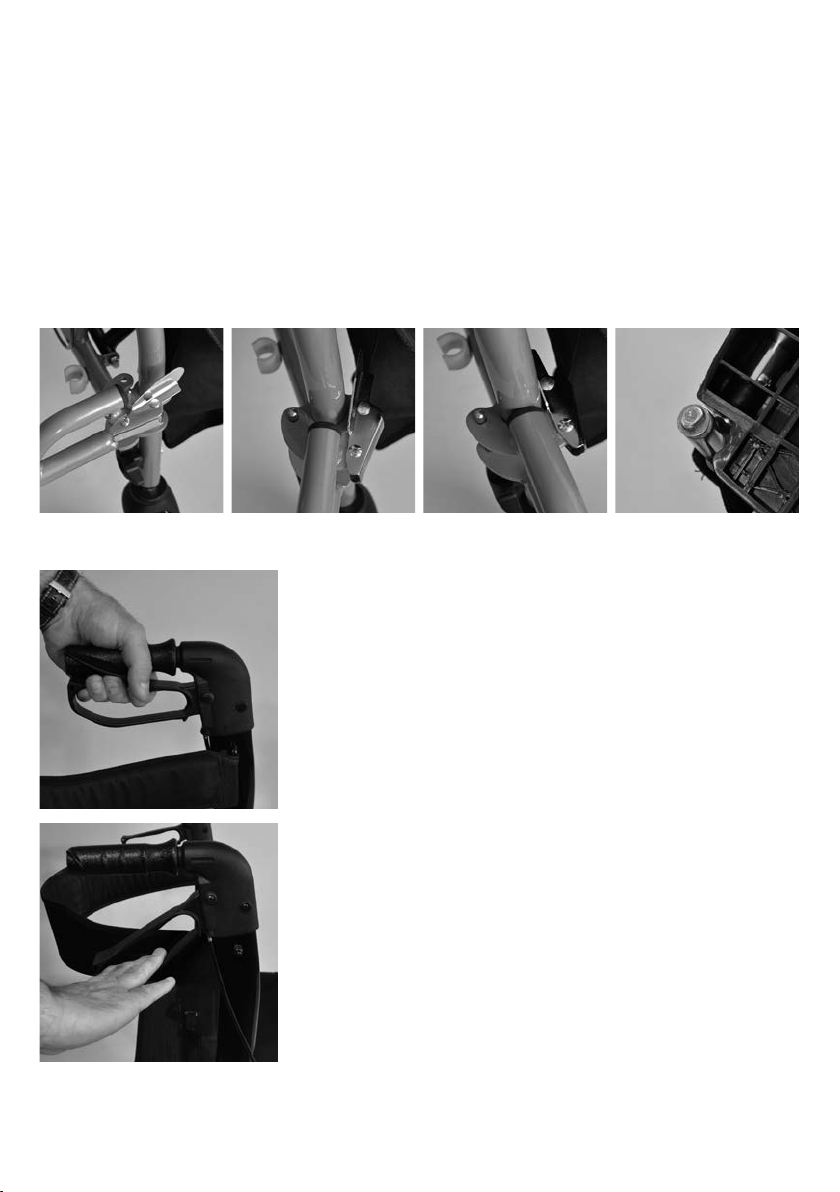
• User friendly loop brakes with lock
• Simple brake cable adjustment
• Soft plastic solid wheels
• Swivelling front wheels
• Folding locking mechanism
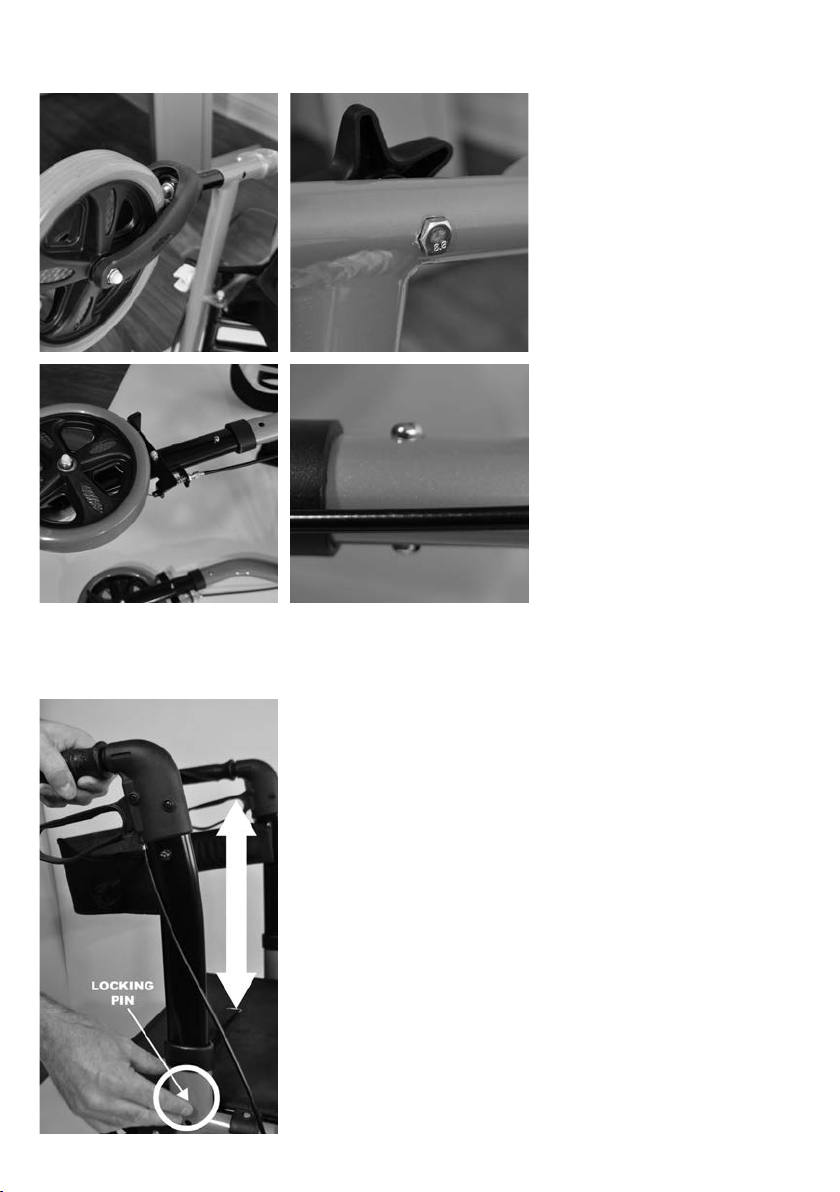
• Height adjustable
• Ergonomic handgrips to reduce pressure
• Walking Stick holder
• Adjustable footrests
SPECIFICATION
Overall Depth (mm)........................... 740
Width Unfolded (mm) ....................... 630
Width Folded (mm) ........................... 280
Handle Height (mm)................... 850-970
Seat WxD (mm) ........................ 460x250
Front Wheel (mm) ............................. 203
Rear Wheel (mm) .............................. 203
Net Weight (kg) ...........9.7(inc. footrests)
Do not exceed the weight limit stated - doing so could put the user at risk.
RM199GD
RM199R
Gold Aluminium Rollator
Red Aluminium Rollator
RM199B Blue Aluminium Rollator
110kg weight limit
110kg weight limit
110kg weight limit

ASSEMBLY INSTRUCTIONS
Carefully remove all packaging, including the cardboard tubes covering the knurled
tube part of the brake assembly. Check the product thoroughly for damage or
obvious faults.
Handgrip
Brake Lever
Height Adjustable Handles
Footrests
Backrest
Seat
Height Adjusting
Button
Cane Holders
Front Wheel
Rear Wheel
If you suspect the unit to faulty, please do not use, but contact
your supplier immediately for service. Photo is indicative of
product and some minor changes may apply.

Footrests
Step 1:
Install front wheel into
receptacle located on the
front of the frame (see fig. 1)
Thread bolt through holes
on rollator frame, attach star
head clamp knob and
tighten (see fig. 2) Repeat
step 1 to attach the second
front wheel
Step 2:
Install rear wheel into
receptacle located on the
rear of the frame whilst
pressing the locking pin (see
fig. 3) The locking pin will
pop up when the wheel is
securely in place (see fig.
4) Repeat step 2 to attach
second rear wheel.
When attaching the rear wheels make sure that the wheels are on the outside
of the frame and that the brake linkage is on the underside.
Step 3:
Attach the handles by depressing the locking pin on the
base of the handle assembly and sliding into the
recaptacle on the main frame. Repeat on the other side.
When attaching the handle assembly make sure that
the handle is facing towards the rear wheels. The
ergonomic fin on the handgrip should be facing in.
Adjust the height level of the handles to suit different
users. Press the locking pin on the main frame and pull
the handgrip upwards or downwards. As the handle
moves, release the buttons. This automatically locks in
the next possible height. Repeat this process until the
desired height is reached. Make sure both handles are
locked at the same level (see fig. 5)
ASSEMBLY INSTRUCTIONS (continued)
fig. 1
fig. 3
fig. 2
fig. 4
fig. 5

Step 4:
Slide the canvas tabs of
the shopping bag onto the
hooks located on the sides
of the chair (see fig. 6) Use
the longer ‘hook and loop’
canvas straps to attach the
bag to the uprights of the
main frame (see fig. 7)
Step 5:
Unfold the rollator by pressing down on both sides of the
seat frame (see fig. 8)
IMPORTANT
Before use ensure all locking
pins are fully engaged as per
fig. 11 & 12
Step 6:
To fold, pull the seat upwards
via the black handle on the seat
plate (see fig. 9) The Rollator
can now be folded (see fig. 10)
ASSEMBLY INSTRUCTIONS (continued)
fig. 6 fig. 7
fig. 8
fig. 9
fig. 10
fig. 11
fig. 12
fig. 17

Step 7:
To fit the footrests align the holes in the footrest brackets with the lugs on the front
legs and lower into position (see fig. 13) Swing the footrests inward to lock them
(see fig. 14)
When you hear the spring loaded catch click, the footrests are locked (see fig.15)
Step 8:
To adjust the height of the footrests, loosen the nut on the base of the footrests, set
required height and re-tighten the nut (see fig. 16)
1. To stop, gently apply a gripping pressure to both
brakes simultaneously (see fig. 17), this will slow down
and stop your Rollator.
2. The brakes on your Rollator have a park option
(see fig. 18). To operate the park option, push
downwards on both brakes simultaneously. You will feel
the brake make a very slight click. Your brakes are now
in the ‘lock’ position.
3. To unlock, simply pull up the brake again, you will
hear a slight click as the ‘park’ disengages.
ASSEMBLY INSTRUCTIONS (continued)
OPERATING THE BRAKES
See next page for Brake Adjustment
fig. 13
fig. 17
fig. 18
fig. 14 fig. 15 fig. 16

REISSUE
If you reissue or are about to reissue this product, please thoroughly check all
components for their safety.
This includes:
• Bent or damaged tubes or cracks at the tube joints.
• Loose or worn horseshoe clips
• Elongated adjustment holes.
• Loose handles.
• Loose or worn Wheels and wheel fasteners (where fitted)
• Smooth, worn or split ferrules (rubber tips).
Replace all worn, missing or damaged parts where necessary. If in any doubt,
please do not issue or use, but immediately contact your supplier for service
support.
CARE AND MAINTENANCE & YOUR OBLIGATION
1. Only use your RM Rollator for the purpose for which it intended, which is as an aid
to walking. It is intended your Rollator is only used on standard pavements or at
home. It should not be used on rough terrain or pot-holed surfaces. The use of your
Rollator on these surfaces can seriously compromise your safety and may damage
your Rollator beyond repair.
BRAKE ADJUSTMENT
Your RM Rollator brake system will
require periodic adjustment.
To adjust the brakes loosen Nut B and
then screw/unscrew Nut A. When
adjusted re-tighten Nut B. If further
adjustment is required then loosen the
Locking Screw and then using a pair of
pliers pull the cable down by
approximately a millimetre. Re-tighten
Locking Screw. The brakes can then be
adjusted further by loosening Nut B and
screwing/unscrewing Nut A as before
(see fig. 19)
BRAKE CABLES
It is important that when the walker is
assembled the cable ties proved are
used to fasten the brake cables to the
frame so that they do not obstruct the
user or get caught in other parts of the
walker.
fig. 19

CARE AND MAINTENANCE & YOUR OBLIGATION (continued)
2. Keep your RM Rollator clean by wiping down with a damp cloth with a mild
detergent. Do not under any circumstances use an abrasive or solvent based
cleaner, as this will seriously damage the Rollator and void your warranty.
3. Wipe off all surfaces with a dry cloth and use a water dispersing agent such as
WD40 on all metal joints.
4. Check that all wheels and the folding mechanism function correctly and that all
wheels move freely. Pay particular attention to the front wheels, ensuring that they
rotate freely and without obstruction and that they are attached securely to the
frame.
5. Monthly Checks - check that all locking pins are properly secure (fig 11 & 12).
Check that no components are loose. Check the adjustment to your brakes (fig 19).
Check castors.
6. Do not fit any parts or accessories to your RM Rollator manufactured by another
company. To do so will annul your warranty and may seriously compromise your
safety.
7. We suggest that you check your RM Rollator visually every day. However we
recommend that you should have your Rollator serviced every three months or less
if used by, or issued to, various users.
CLEANING
Clean your Rollator using a non-abrasive cleaner or mild detergent with a soft cloth.
Abrasive cleaners and/ or abrasive cleaning pads may seriously damage the product
beyond repair and should not be used. Always ensure that you wipe dry the
equipment after cleaning.
MAINTENANCE
Please make a safety check of the product at regular intervals or if you have any
concerns.
WARRANTY
This product carries a 12 month warranty from the date of purchase against
manufacturing defects. Misuse or Damage is not covered. This warranty does not
affect your statutory rights.
Withdraw your RM Rollator immediately if any of the wheels become
difficult to turn or do not feel securely attached to the frame or if you
suspect damage or any other fault.
Imported and Distributed by
Rehab and Mobility Wholesalers
Telephone: 1300 368 085 • Fax: 07 3009 9912
Web: www.rehabandmobility.com.au Email: [email protected]
This manual suits for next models
3
Table of contents
Other Rehab and Mobility Products Mobility Aid manuals