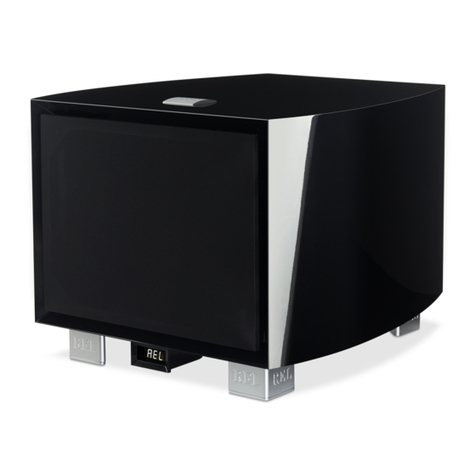
REL Acoustics Habitat1 User manual


REL Acouscs Limited
North Road, Bridgend industrial Estate . Bridgend, CF31 3TP . United Kingdom
Telephone: +44 (0)1 656 768 777 . Fax: +44 (0) 1 656 766 093
Web: www.rel.net

Operang Instrucons for the
Habitat1
Sub-Bass
Systems


2
Important Safeguards
1 Read all of these instrucons.
2 Save these instrucons for future use.
3 Heed all warnings.
4 Follow all instrucons.
5 Unplug from the wall socket before cleaning. Clean only with polish and micro ber cloth.
6 Keep away from water or other liquids. Do not rest drinks, vases or other liquid-lled items on the unit.
7 Do not place on a stand or table. It may fall causing injury to a child or adult and damage to the unit.
8 Do not install near any heat sources such as radiators, heat registers, stoves or other apparatus
(including ampliers) that produce heat.
9 The unit should only be operated from the power source indicated on the panel of the amplier.
10 Do not defeat the safety purpose of the grounding-type plug. A grounding type plug has two blades
and a third grounding prong. The third prong is provided for your safety. If the provided plug does not t
into your outlet, consult and electrician for replacement of the obsolete outlet.
11 Only use the power cord supplied.
12 Do not allow anything to rest on the power cord. Posion the power cord such that it cannot be walked on.
13 For added protecon during a lightning storm, or when not in use for long periods of me, unplug the
unit from the wall socket.
14 Do not aempt to service the unit yourself, as removing the amplier may expose you to dangerous
voltages. Refer all servicing to your dealer.
15 Unplug the unit from the wall socket and refer servicing to your dealer under the following condions
a When the power cord or plug is damaged.
b If liquid has been spilled onto the unit.
c If the unit does not operate properly by following the operang instrucons.
d If the unit has been dropped or damaged.
e When the unit exhibits a drasc change in performance.

3
Warning
This item is heavy. To avoid risk of injury, take care when handling.
Design Safety
This apparatus is supplied with a detachable mains cord. For 220V operaon a 1.6A fuse is ed in the
socket, for 120V operaon a 3.16A fuse is ed. Should the fuse need to be replaced use a similar rated
fuse approved to ASTA or BSI 362 standards. Do not use without the fuse cover in place. Replacement fuse
covers are available from your distributor.
Important Informaon
The lightning ash with arrowhead symbol within an equilateral triangle is intended to alert the user to
the presence of un-insulated dangerous voltage within the product’s enclosure that may be of sucient
magnitude to constute a risk of electric shock to persons.
The exclamaon point within an equilateral triangle is intended to alert the user to the presence of important
operang and maintenance (servicing) instrucons in the literature accompanying the appliance.
FCC STATEMENT
This device complies with Part 15 of the FCC Rules. Operaon is subject to the following two condions:
(1) This device may not cause harmful interference, and
(2) This device must accept any interference received, including interference that may cause undesired operaon.
NOTE: This equipment has been tested and found to comply with the limits for a Class B digital Device, pursuant to Part 15 of the FCC Rules.
These limits are designed to provide reasonable protecon against harmful interference in a residenal installaon.
This equipment generates, uses and can radiate radio frequency energy and, if not installed and used in accordance with the
instrucons, may cause harmful interference to radio communicaons. However, there is no guarantee that the interference will not
occur in a parcular installaon. If this equipment does cause harmful interference to radio or television recepon, which can be
determined by turning the equipment o and on, the user is encouraged to try and correct the interference by one or more of the
following measures:
Reorient or relocate the receiving antenna.
Increase the separaon between the equipment and receiver.
Connect the equipment into an outlet on a circuit dierent from that to which the receiver is connected.
Consult the dealer or an experienced radio/TV technician for help.

4
I Welcome to REL ......................................................................................................................................... 4
II Intro to Habitat1 ........................................................................................................................................ 6
III Habitat1 Connecon Legend ..................................................................................................................... 7
IV Connecvity and Funconality.................................................................................................................. 9
V Connecng Up ........................................................................................................................................... 9
VI Pairing...................................................................................................................................................... 15
VII REL Set Up Made Simple ......................................................................................................................... 16
VIII Mounng................................................................................................................................................. 23
IX Technical ................................................................................................................................................. 38
X Specicaons .......................................................................................................................................... 39
Congratulaons on your purchase of a Habitat1, the latest concept in ultra high-quality low bass for your
environment. Your Habitat.
Understanding the Customer’s Habitat:
REL’s designers began with the understanding that more and more people are enjoying music, but in less
tradional consumpon formats. Today’s sophiscated consumer is as likely to enjoy music from a variety of
sources that simply did not exist a decade ago. From streaming high resoluon music les stored on a NAS
drive, to listening to the world’s music oerings -via internet radio, a variety of internet-based streaming
audio, as well as compact disc and analog sources such as vinyl records, consumers expect more funconality
and exibility from their music reproducon systems than at any me in history. Similarly, when they watch
any video entertainment, the same plethora of choices for how to obtain source material applies.
All these format delivery modes have one thing in common. Every source, whether music or video-based
benets from the inclusion of a REL sub bass system. Most of these new digital delivery formats suer from
severely compressed sound that is anemic and thin, a situaon immediately improved by adding in a REL.
Table of Contents
Welcome to the REL Family

5
Environmental Bass™:
Moreover, our clients are not merely experiencing music, lm and television-based entertainment via
mulple new formats, they are choosing to use their environments in ways that beer support their busy
lifestyles. From sophiscated urban lo-dwellers, to suburban families leading busy lives raising children
while on-the-go, to lm lovers who wish to watch what they want, when they want we all are demanding
more from our environment. So we created a product that takes (acouscal) advantage of the physics of
ones’ environment, while blending quietly into the environment of the room, like a trusted servant.
Wireless:
Once our team achieved the requisite high standards for performance we demand of all REL subwoofers,
we turned our aenon to connecvity methods. We asked consumers and industry professionals for
input, and almost universally, the feedback was a request for wireless connecvity that matched the sonic
performance of Habitat1.
In order to achieve high quality wireless, the REL team found a new chipset remarkable for its speed and
lack of delay. Building on this foundaon our engineering team took to the task of creang Longbow™, REL’s
latest delivery method. Longbow™’s wireless system uses a proprietary security codec that ensures excepon-
al protecon of the signal, while using zero digital compression—the bane of convenonal wireless systems.
This results in a dynamic, ultra wide bandwidth sound with almost zero delay. Praccally speaking, Habitat1
equipped with Longbow™ can be connected to very high end hard-wired systems with none of the delay
issues that plague garden variety wireless systems. Addionally, the REL team was able to maintain all of the
HIGH LEVEL and reference theater connecvity via wireless protocol. Yet another breakthrough for REL!
This is the backdrop against which REL conceived, rened and has delivered Habitat1. An ultra-high
performance subwoofer system that serves up the perfect recipe of sophiscated, thin, wall-mounted (or
near-wall, if mounng Habitat1 is simply impossible), deep bass with style and sophiscaon via a proprietary
wireless link we call Longbow™. Habitat1 works for you, the customer. REL’s customer. It oers looks that
support virtually every design idiom, from modern to tradional and everything in between; and it does so
while making remarkable bass. We hope you enjoy this addion to your lifestyle, your Habitat!
6
Introducon to the Design of Habitat1
Habitat1 Sub-Bass System
Many or most loudspeakers emphasize the mid-bass. This is the range from 50 to 90 Hz. We at REL believe
this is an incomplete approach and that loudspeakers need to be extended in the lower frequencies for
true full range reproducon. All of our designs are true Sub-Bass Systems, meaning they are designed to
reproduce very low frequencies (below 30 Hz) that are felt rather than heard. This is because we understand
that music is full-range, as are sound eects on movies, and we intend for our products to reproduce all of
these sounds, not just a narrow band.
Habitat1 is equipped to allow you to take full advantage of Dolby Digital AC3, DTS, MPEG 2 and any other
digital sound format that includes a dedicated Low Frequency Eects (LFE) channel.
The dedicated LFE input meets the tough specicaon laid down for digital 3/2.1 channels, usually known
as 5.1. The output is nominally at from 35 Hz – 90 Hz. It has a dedicated input level control which enables
users to set the LFE level independently of the processor. This is important because not all processors oer
control over this signicant parameter. The LFE channel is frequently output at 10 dB higher levels than the
other channels.
The Habitat1 also has a high-level (speaker level) input with dedicated input level control. Uniquely, both
the speaker level and the LFE input can be used simultaneously. This means you may set it up for the best
possible 2-channel performance sound with your CDs or other stereo signals and instantly revert to using
the Sub-Bass System as the dedicated LFE component when watching movies. This is a feature of real benet
if you wish to play music in stereo mode in the purist audiophile way and also in REL Theater Reference
mode with no switching necessary. By connecng BOTH High Level and .1 concurrently and seng your
processor to “Large” or “Full Range”, the best possible performance will be obtained. Consult the owner’s
manual of your loudspeakers or consult with your dealer before seng to large as a few speakers cannot
handle the bass that is then directed through to the main speakers.

7
REL Habitat1 Panel Connecon Legend
REL Longbow™ Transmier
1 Power Adapter Socket: DC input socket that accepts a detachable power adapter.
2 HIGH-LEVEL INPUT (Neutrik® Speakon® Socket): Use to connect HIGH-LEVEL to the main front amplier
speaker terminals.
3 LOW-LEVEL INPUT: Used to connect LOW-LEVEL to the output of a preamplier, integrated amplier or
receiver ONLY when HIGH-LEVEL INPUT cannot be properly connected. (For home cinema, use.1/LFE INPUT).
4 .1/LFE INPUT: Used to connect to the .1/LFE output from a 5.1 amplier of processor. Should be used in
conjuncon with REL HIGH-LEVEL connecon for the ulmate theater experience.
5 Pair Switch: Used to pair REL Longbow™ transmier with Habitat1 cabinet.
REL Habitat1 Control Panel
6 Volume Control for HI/LOW INPUT: Use to adjust output when using either HIGH-LEVEL or LOW-LEVEL
input. Do not use both simultaneously.
7 Volume Control for .1/LFE INPUT: Use to adjust output level when using .1/LFE input from a 5.1 amplier
or processor.
8 Crossover Control: Used to select crossover frequency. Variable between 30Hz and 120Hz.
2
1
3 4 5
8
9
76 10

8
9 Pair Switch: Used to pair Habitat1 cabinet with REL Longbow™ transmier.
10 Phase Switch: Used to set phase 0-180 degrees.
REL Habitat1 Back Panel
11 .1/LFE INPUT: Used to connect to the .1/LFE output from a 5.1 amplier of processor. Should be used in
conjuncon with REL HIGH-LEVEL connecon for the ulmate theater experience.
12 LOW-LEVEL INPUT: Used to connect LOW-LEVEL to the output of a preamplier, integrated amplier or
receiver ONLY when HIGH-LEVEL INPUT cannot be properly connected. (For home cinema, use.1/LFE INPUT).
13 HIGH-LEVEL INPUT (Neutrik® Speakon® Socket): Use to connect HIGH-LEVEL to the main front amplier
speaker terminals.
14 Power ON/OFF Switch: Use to turn unit on or o.
15 IEC Mains Socket: Fused mains (AC) input socket that accepts a detachable power cord.
15
14
13
1211

9
The Habitat1 is intended to be used with a REL Longbow™ transmier which is supplied with each of these
subwoofers. Both the Habitat1 subwoofer cabinet and the Longbow™ transmier will require AC power
from a wall plug. There is an AC cable supplied for the subwoofer cabinet and a power adapter cable supplied
for the transmier. The design intent here is to nd the perfect place for the Habitat1 on a wall with the
Longbow™ transmier located remotely without long cables needed to connect an audio signal.
We have designed the Habitat1 with connecons on the back of the cabinet for users that wish to connect
audio directly. In this case the transmier will not be necessary and the user will have to contact the REL
dealer for a 34’ 10” (10 meter) cable with a right angle Neutrik Speakon connector to t between the cabinet
and wall.
It is not possible to use the Longbow™ wireless connecon and a direct connecon simultaneously.
Always switch your system o before disconnecng any wires.
ALWAYS connect using the REL HIGH-LEVEL input, unless your system simply cannot accommodate this.
While rare, a few esoteric systems, such as those that deliver a pure digital signal to acve speakers,
preclude this possibility. To increase the versality of connecng up, the Habitat1 has three separate inputs:
A Neutrik Speakon socket and two phono sockets. This is to facilitate use with both two-channel stereo
systems and AV surround sound systems.
The HIGH-LEVEL, unbalanced, dual-channel (stereo) input is via a Neutrik Speakon connector which is
connected to the power amplier’s le and right channel speaker terminals. This has the advantage of
ensuring that the REL receives exactly the same signal as the main speakers. This means that the character
of the bass from the main system is carried forward into the sub-bass. This is a very important point and
ensures far superior system integraon of the sub-bass with the main system.
The LOW-LEVEL input is via a phono jack that connects to either the .1/LFE output of a home cinema
amplier/processor or to the output of a stereo preamplier.
HIGH-LEVEL and .1/LFE inputs can be used simultaneously. The benets are two-fold when used with a
home cinema system. The .1 Input reproduces the .1/LFE channel and the HIGH-LEVEL connecon underpins
the main front speakers. The main front speakers should be set to the “large” opon on the processor.
See “Home Cinema Applicaons” for more informaon.
Connecng Up

10
Connecng to the Power Amplier Using the Speakon HIGH-LEVEL INPUT
To engage the Neutrik Speakon plug, insert fully into socket and rotate clockwise unl locked.
To remove the Neutrik Speakon plug, grip body of plug, place thumb on chrome lever, move lever backwards,
rotate plug anclockwise quarter turn and withdraw.
The HIGH-LEVEL input is designed to accept the stereo (two-channel) signals from the speaker terminals of
your receiver, integrated amplier or basic amplier. This has the advantage of ensuring that your subwoofer
receives exactly the same signal as the main speakers, which means that the character of the bass from the
main system is carried forward into the Sub-Bass System. This is a very important point and together with
REL’s Natural RollO™ circuitry, ensures far superior system integraon of the Sub-Bass System with the
main system.
HIGH-LEVEL INPUT: Connecons should be made to the same binding post on main amplier as the main
speakers. Red to amplier main right speaker red terminal, yellow to amplier main le speaker red terminal
and black to amplier main speaker black terminal, right or le but not both. Plug the Neutrik Speakon plug
into the HIGH-LEVEL Speakon socket. Note: This connecon does not draw power from the power amplier
and, yes, your REL is a powered sub bass system. However, by deriving its signal from the main power
amplier, beer sound quality is achieved.
.1/LFE INPUT: This requires a phono-to-phono cable and is a dedicated true .1 channel. This circuit therefore
eliminates the normal Natural RollO™ Crossover and passes the .1 LOW-LEVEL signal through with only the
required 120Hz fourth-order lter.
LOW-LEVEL INPUT: This single channel phono input allows for convenonal connecon to a preamplier
and should be used in the rare event that a HIGH-LEVEL connecon proves incompable. Plug one end of
a single phono-phono cable into the LOW-LEVEL input jack of the REL and the other end into either the
le or right channel output of your preamplier. Because much sub-50Hz bass informaon is mono, there
is lile need to connect both le and right channels. Should your system require this style of connecon –
HIGH-LEVEL is preferred – addional performance is available by purchasing a second, matching REL and
running each as separate stereo subs.

11
These connecons can be made on the Habitat1 through the REL Longbow™ transmier, or direct to the
back panel of the cabinet. In the case of connecng directly, only the subwoofer cabinet will need power.
Using input connecons to both the REL Longbow™ transmier and direct to the Habitat1 back panel are
not permied.
PHASE SWITCH: Used to set phase
Posion 0 / HIGH-LEVEL, LOW-LEVEL or LFE – 0 degrees phase
Posion 180 / HIGH-LEVEL, LOW-LEVEL or LFE – 180 degrees phase
PHASE SELECTION AFFECTS BOTH HIGH- AND LOW-LEVEL INPUTS: Crossover is always engaged for
HIGH-LEVEL INPUT. The .1/LFE signal does not pass through the crossover circuit.
Making Connecons
It is helpful to know that you will almost always connect the REL to the input on the rear panel labeled
“HIGH-LEVEL INPUT.” This connecon is made to the REL Longbow™ transmier using the supplied 6’ 6”
(2 meter) cable, the bare leads of which connect to the speaker output terminals of the power amplier.
The easy and foolproof connecon at the REL is done with a Neutrik Speakon connector. The purpose of
connecng to the speaker output terminals is one of the unique secrets of REL’s success. By connecng to
the high-level input on the REL from the amplier, you build forward the sonic signature of your main
system, including the tonal balance and ming cues of the enre electronics chain. In this way, the REL is
fed the exact signal that is fed to the main speakers. If the user prefers to connect the high level directly
to the Habitat1 subwoofer, please contact your dealer for a REL 34’ 10” (10 meter) cable with a right angle
Neutrik Speakon connector (PN NL4FRX) to t between the cabinet and the wall.
Connecng
HIGH-LEVEL connecon, using the enclosed cable with the Neutrik Speakon connector, is always the rst
choice. This connecon can be made without aecng the performance of the amplier because the REL’s
amplier input impedance is 150,000 ohms, in eect not producing any addional demand whatsoever on
the rest of your system.

12
• The standard HIGH-LEVEL hook up procedure is: aach the red wire to the amplier’s right posive speaker
output terminal; aach the yellow wire to the amplier’s le posive speaker output terminal; aach
the black wire to whichever of the amplier’s ground output terminals is convenient; plug the Speakon
connector into the Longbow™ wireless transmier’s HIGH-LEVEL input. Use the Longbow™ for wireless
connecon. Use the HIGH-LEVEL input on the rear of the Habitat1 for direct wired connecon. You must
choose either wireless or direct wired as these two inputs cannot be used simultaneously.
• For dierenal (i.e. fully balanced) ampliers using one REL, simply use the standard connecng scheme
with the excepon of connecng the black wire to chassis ground (i.e. a metal bolt or screw, preferably
not painted or anodized, on the chassis of the power amp or receiver), not to a negave speaker terminal,
and then connecng into the HIGH-LEVEL input on the Longbow™ wireless transmier. Please contact
your dealer should there be any quesons concerning this or any other hookup procedure.
NOTE: The Habitat1 is equipped with internal circuitry to allow seamless connecon to Class-D (digital) main
ampliers. If connecng to a Class-D amplier, follow the above connecon procedure for dierenal ampliers.

13
• If connecng two RELs in a stereo conguraon, connect the black wire of each REL to the negave speaker
terminal of the corresponding amplier channel; twist together the red and yellow wires of each REL
separately and connect each pair to the posive speaker terminal of the corresponding amplier channel.
• If connecng a single REL as a dedicated center channel sub, connect the black wire of the REL to the
negave center channel speaker terminal; twist together the red and yellow wires and connect this pair
to the posive center channel speaker terminal.

14
• If connecng a REL as a dedicated rear channel sub, connect the black wire of the REL to either the le
rear or right rear negave speaker terminal; connect the yellow wire to the le rear posive speaker
terminal; connect the red wire to the right rear posive speaker terminal.
LOW-LEVEL connecon (via phono connector) is always an opon if HIGH-LEVEL connecon is not possible.
When connecng to the LOW-LEVEL inputs in a system in which HIGH-LEVEL connecon is not possible,
such as if using internally-amplied speakers, connect a single phono cable between the LOW-LEVEL input
jack of the Longbow™ wireless transmier and either the le or right channel output of your preamplier.
Because virtually all sub-50Hz bass informaon is mono, there is no need to connect both le and right
channels.
When connecng to a home cinema system where a .1/LFE channel output is present, connect a single
phono cable between the sub output of the processor/receiver and the .1/LFE input jack on the Longbow™
wireless transmier.
REL Theater Reference™ Home Cinema Applicaons
For Dolby Digital AC3 or other 5.1 theater systems, once the standard set-up for two-channel outlined
above is complete, the LFE output from the processor or receiver should be connected to the .1/LFE input
and appropriate volume adjustments made using the .1/LFE LEVEL control. For this conguraon, you must
set the processor to the “large” or “full range” seng for the le and right speakers in order for the REL to
receive the bass signal via the high-level cable. In this conguraon, the REL provides support for both the
le and right speakers for two-channel listening, and support for the LFE when movies are playing. Most
processors will allow you to defeat the subwoofer output when listening in the two-channel mode. The
eect of this set-up is one of greatly increased dynamics in the mid-bass range, no bass bloat, and a greater
degree of space and ming from the special audio eects.

Pairing
15
Now that the Longbow™ wireless transmier is connected to you amplier (ideally using the High Level
cable), unpack the Habitat1 subwoofer and place on a clean sheet or towel to protect nish.
Each Habitat1 comes pre-paired with its REL Longbow™ transmier box. If the units need to be re-paired, or
you would like to add more Habitat1 subs to the system, there are a few easy steps to follow.
REL Habitat1 wireless sub bass systems come paired to a single transmier out of the box. In the event that
the sub and transmier becomes un-paired, the owner must follow the procedure below to repair.
1 Make sure that the transmier AC to DC wall plug supply is connected to an AC outlet, and that
the barrel connector is connected to the transmier. A blue LED on the front of the transmier
will indicate the unit is on by blinking in the standby paern which is one ash per second.
2 Make sure that the sub is plugged into an AC outlet using the supplied AC cable and that the sub
is turned on. Power switch is located on the rear panel.
3 Exercise the momentary “Pair” switch on the transmier located on its control face. This will
make the transmier look for a new sub. Note that the LED ash paern will change to two
blinks per second.
4 Next exercise the momentary “Pair” switch on the sub located on the control panel.
5 At this point the sub and transmier should nd each other and pair together. This will be indicated
by the blue LEDs on both the transmier and control panel staying lit (no ashing).
The REL Habitat1 wireless sub bass system can pair up to four subwoofers using one transmier. To pair more
than one sub to a single transmier, follow the instrucons above and repeat for each subwoofer added.
When using two transmiers with two independent systems in proximity to each other
(within the same house):
1 Follow the pairing instrucons above for the rst system.
2 Turn o the rst transmier by unplugging it.
3 Follow the pairing instrucons above for the second system.
4 Turn the transmier on for the rst system back on.

16
Each Habitat1 will come out of the box independently paired to its own Longbow™ transmier and will
not have issues with “cross talk.” However, if there is a problem, repairing each Habitat1 for independent
operaon should eliminate cross talk.
Status LED Indicator
Paired Connuously on
Searching Blinks twice per second
Standby Blinks once per second
Now that you have the Long Bow transmier box connected to your amplier and wirelessly paired to
Habitat1, it is me to choose a locaon and dial in Habitat1 for your specic room. Note, this secon will
help guide you in selecng the best locaon and choosing the basic sengs for Habitat1, but will not discuss
installaon. The installaon process will be discussed in detail in the next secon.
Before You Begin
1 Habitat1 is unlike any other REL sub bass system and therefore requires special consideraons for
placement. Habitat1 is designed to be mounted on the wall and will take advantage of the enre wall
to help generate deep bass pressurizaon.
2 Habitat1 can be mounted to masonry or sheetrock walls. For sheetrock walls, it is NECESSARY that
Habitat1 is anchored/screwed into studs in order to properly support long term use. The specialized
brackets developed just for Habitat1 require mounng BOTH upper and lower right side screws into a
stud as well as the upper bracket’s le side. The lower bracket comes supplied with an insert that must
be GLUED and screwed into the wall. If one chooses not to use glue, expect rales to develop.
3 Studs are structural members behind the surface of modern walls. There are generally two types of studs:
wood or metal (typically aluminum). Usually there is a sheet of pre-manufactured building material, oen
referred to as sheetrock or gypsum rock, layered over the top of studs.
REL Set-Up Made Simple

17
4 If you do not know where the studs in your wall are located use a “studnder” (an inexpensive electronic
tool that uses electronic pulses to locate denser objects, like studs, behind the sheetrock).
5 If your wall is constructed out of a dierent material that does not use sheetrock and studs see number
6 and 7 in the below Seng Up secon for more details. You may have a wider selecon of locaons
for installaon.
6 Next we will discuss selecng the best locaon and proper sengs for Habitat1. Remember, Habitat1
MUST be mounted to studs so you will have to nd a balance between the best placement and the
nearest wall stud.
Seng Up
Part I will discuss how to select the best locaon for Habitat1:
Always set the Habitat1 on a clean sheet or towel to protect the nish.
1 Start by installing bracket A and bracket B to Habitat1 using supplied screws.
By having this bracket installed it will allow you to approximate the correct distance from the wall the
Habitat1 will sit when installed and therefore allow for accurate listening tests.
2 The Process: To begin the set-up process, choose a piece of music that has a repeve bass line that
is very low in frequency. We suggest track four from the soundtrack to Sneakers (Columbia CK 53146).
This has a repeve bass drum throughout that gives you plenty of me to move the woofer around,
but more importantly, the venue was quite large for this recording, and therefore it has a very deep and
large-scale bass signature. This type of track is perfect for the set-up process and should be played at the
Top Bracket
Boom Bracket
21 mm
Flat Head
Screws (x5)
Table of contents
Other REL Acoustics Subwoofer manuals

REL Acoustics
REL Acoustics S/2 User manual

REL Acoustics
REL Acoustics Gibraltar Series User manual

REL Acoustics
REL Acoustics T/i Series User manual

REL Acoustics
REL Acoustics G1 Mk II User manual

REL Acoustics
REL Acoustics Q Series User manual

REL Acoustics
REL Acoustics G1 User manual

REL Acoustics
REL Acoustics T1 User manual

REL Acoustics
REL Acoustics 212/SE User manual

REL Acoustics
REL Acoustics R-205 User manual

REL Acoustics
REL Acoustics Serie R User manual