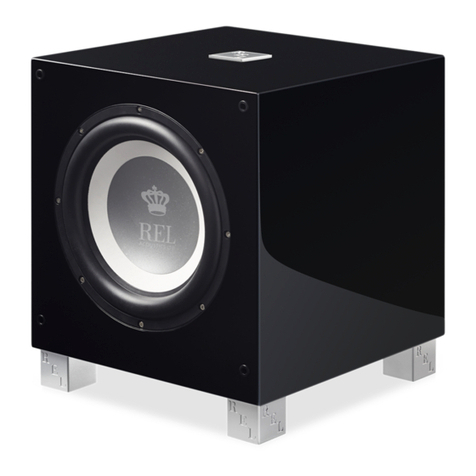
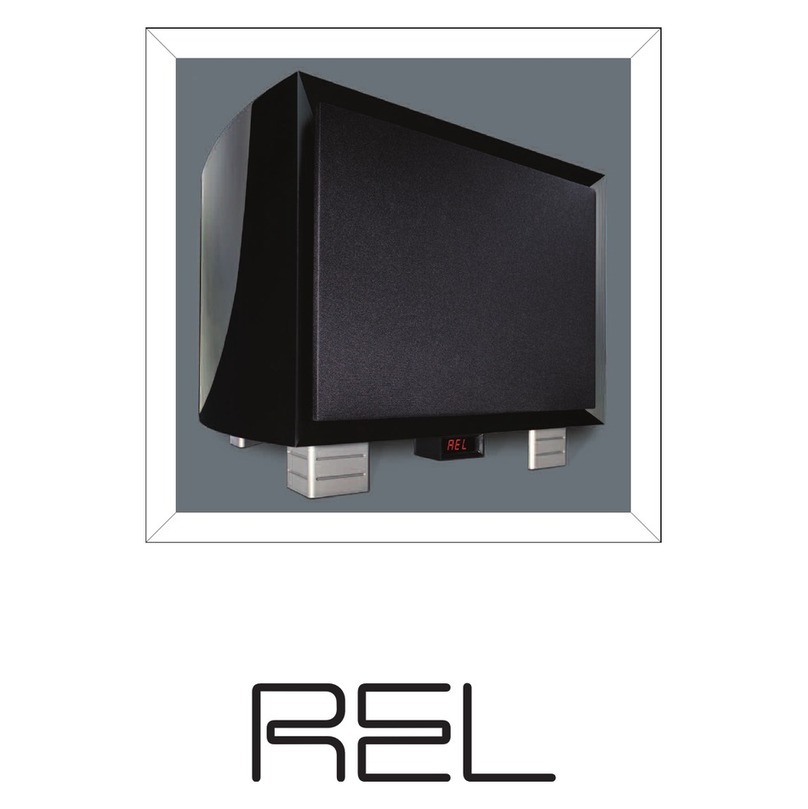
REL Acoustics T-9 User manual

Operang Instrucons for the
Ser e T
Sub-Bass
Systems

1
1 Read all of these instrucons.
2 Save these instrucons for future use.
3 Unplug from the wall socket before cleaning.
4 Do not use near water.
5 Do not place on a stand or table; it may fall causing injury to a child or adult, and damage to the unit.
6 The unit should only be operated from the power source indicated on the panel of the amplifier.
7 Only use the power cord supplied.
8 Do not allow anything to rest on the power cord. Posion the power cord such that it cannot be walked on.
9 For added protecon during a lightning storm, or when not in use for long periods of me, unplug it
from the wall socket.
10 Never spill any kind of liquid on the unit.
11 Do not aempt to service the unit yourself, as removing the amplifier may expose you to dangerous
voltages. Refer all servicing to your dealer.
12 Unplug the unit from the wall socket and refer servicing to your dealer under the following condions:
a When the power cord or plug is damaged.
b If liquid has been spilled onto the unit.
c If the unit does not operate properly by following the operang instrucons.
d If the unit has been dropped and damaged.
e When the unit exhibits a drasc change in performance.
Warn ng
This item is heavy. To avoid risk of injury, take care when handling.
Des gn Safety
This apparatus is supplied with a detachable mains cord. For 230V operaon a 1.6A/T5, 2A/T7, 3.15A/T9
fuse is fied in the socket. For 115V operaon a 3.15A/T5, 4A/T7, 6.3A/T9 fuse is fied. Should the fuse
need to be replaced use a similar rated fuse approved to ASTA or BSI 362 standards. Do not use without the
fuse cover in place. Replacement fuse covers are available from your distributor.
Important Safeguards

2
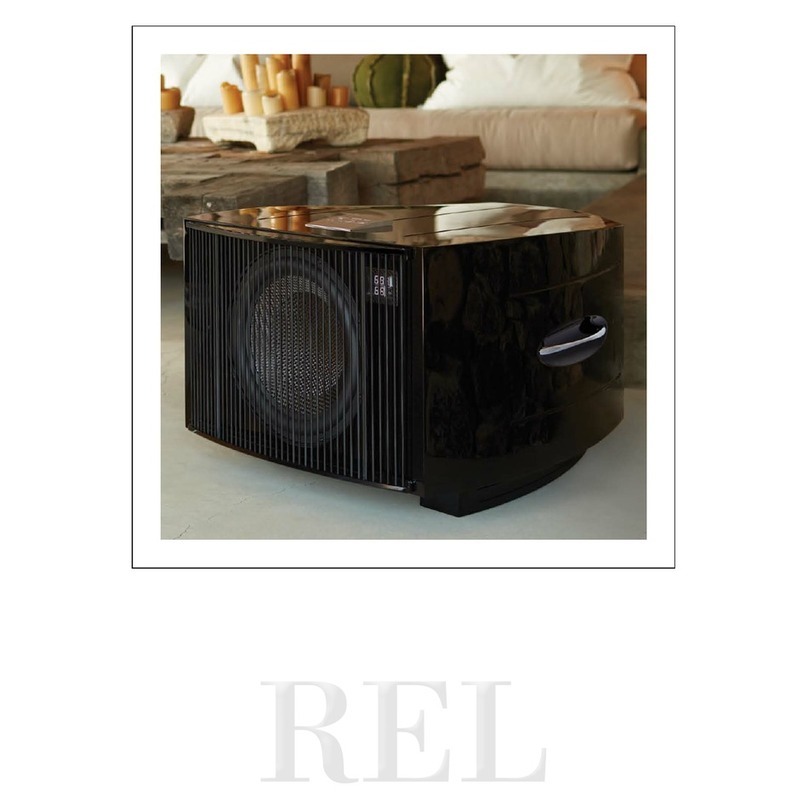
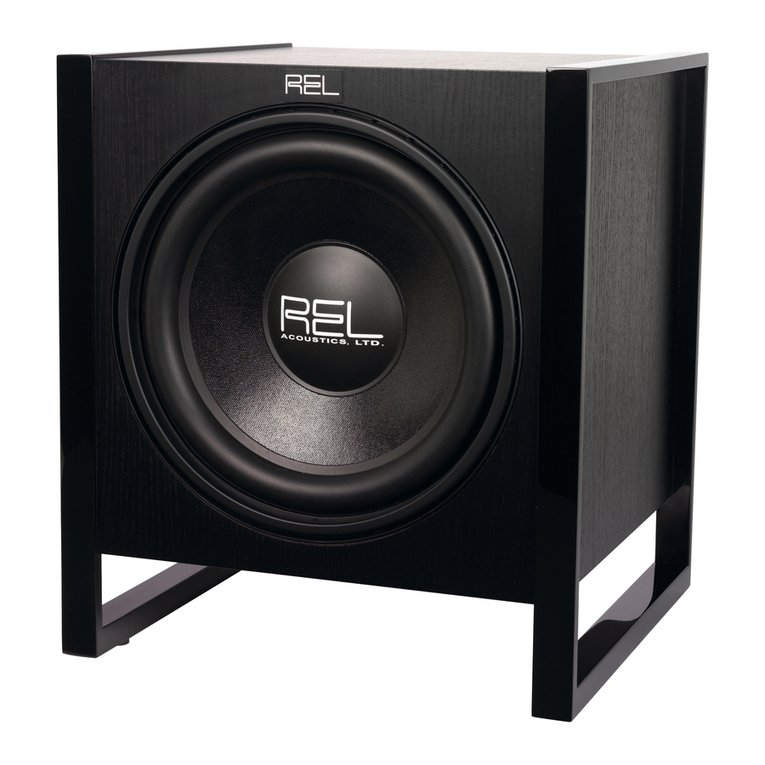
Thank you for buying a REL Serie T Sub-Bass System. The Serie T is the result of a state-of-the-art collaboraon
between our American design and engineering team and our Brish producon team.
Serie T is conceived as the most cost effecve high end product we know how to build. We have spared
none of the materials and finishing techniques our larger designs are noted for. Many compeng products
are clearly the result of cost engineering, however, Serie T is a pure high end product in design and execuon.
If, like many, you are surprised and delighted by the quality and “suddenness” of bass as rendered by Serie T,
know that this is the result of a careful, painstaking iterave process of the sort that so rarely makes it into
producon at anything like these prices.
Many of the sonic virtues – speed, warmth and slam – embodied in Serie T are the direct result of
mechanical and acousc advancements. In parcular, we have ulized damping and resonance control
approaches more familiar to fine acousc instrument manufacturers incorporang bracing that is highly
unusual in this applicaon. The bracing is carefully wedged into shallow channels in the side and top wall
material which beer couples the energy control of these panels. Addionally, the aluminium feet are
milled from solid billet and weigh an incredible amount. We thoroughly tested and were able to clearly
discern the benefit of having a solid, high mass exit path for deleterious vibraon; vibraon that would
otherwise slow and blur the clarity of bass lines. Make a structure inert and quieter and more of the
music emerges.
A brief word about the styling, fit, and finish. Each Serie T receives nine coats of lacquer, all of which require
hand sanding. The final coat is then turned by hand on a large, industrial rouging wheel using jewelry buffing
compound. Finally, the deep, wet gloss is achieved by hand polishing using micro fibre cloth and expensive
aermarket waxes. All exposed bolts used to aach the rear panel to the Serie T cabinet are polished T-304
stainless steel allen head designs. This extra cost is undergone to ensure that even in humid markets RELs
will not oxidize or degrade in appearance. Each badge is milled from solid billet aluminium and is a full
2.5mm thick even though we choose to only reveal 1mm above the surface of the cabinet. Much like the
underlying quality of all RELs, more lies beneath the surface than is evident to the eye.
Welcome to the REL Fam ly
3
Overv ew:
Ser e T Sub-Bass Systems
Many or most loudspeakers emphasize the mid-bass. This is the range from 50 to 90 Hz. We at REL believe
this is an incomplete approach and that loudspeakers need to be extended in the lower frequencies for true
full range reproducon. All of our designs are true Sub-Bass Systems, meaning they are designed to reproduce
very low frequencies (below 30 Hz) that are felt rather than heard. This is because we understand that music
is full-range, as are sound effects on movies, and we intend for our products to reproduce all of these
sounds, not just a narrow band.
Serie T is equipped to allow you to take full advantage of Dolby Digital AC3, DTS, MPEG 2 and any other
digital sound format that includes a dedicated Low Frequency Effects (LFE) channel.
The dedicated LFE input meets the tough specificaon laid down for digital 3/2.1 channels, usually known
as 5.1. The output is nominally at from 35 Hz – 90 Hz. It has a dedicated input level control which enables
users to set the LFE level independently of the processor. This is important because not all processors offer
control over this significant parameter. The LFE channel is frequently output at 10 dB higher levels than the
other channels.
The Serie T models also have high-level (speaker level) inputs with dedicated input level control. Uniquely,
both the speaker level and the LFE input can be used simultaneously. This means you may set it up for the
best possible 2-channel performance sound with your CDs or other stereo signals and instantly revert to
using the Sub-Bass System as the dedicated LFE component when watching movies. This is a feature of
real benefit if you wish to play music in stereo mode in the purist audiophile way and also in REL Theater
Reference mode with no switching necessary. By connecng BOTH High Level and .1 concurrently and
seng your processor to “Large” or Full Range, the best possible performance will be obtained. Consult
the owner’s manual of your loudspeakers or consult with your dealer before seng to large as a few
speakers cannot handle the bass that is then directed through to the main speakers.

4
REL Ser e T Rear Panel Connecon Legend
1
2
3
4
5
6
7
8
9

5
1 Volume Control for .1/LFE INPUT: Use to adjust output level when using .1/LFE input from a 5.1 amplifier
or processor.
2 Volume Control for HI/LOW INPUT: Use to adjust output when using either HIGH-LEVEL or LOW-LEVEL
input. Do not use both simultaneously.
3 Crossover: Used to select crossover frequency. Variable between 30Hz and 120Hz.
4 .1/LFE INPUT: Used to connect to the .1/LFE output from a 5.1 amplifier of processor. Should be used in
conjuncon with REL HIGH-LEVEL connecon for the ulmate theater experience.
5 LOW-LEVEL INPUT: Used to connect LOWLEVEL to the output of a preamplifier, integrated amplifier
or receiver ONLY when HIGHLEVEL INPUT cannot be properly connected. (For home cinema, use
.1/LFE INPUT).
6 Phase: Used to set phase 0-180 degrees.
7 HIGH-LEVEL INPUT (Neutrik® Speakon® Socket): Use to connect HIGHLEVEL to the main front
amplifier speaker terminals.
8 Power ON/OFF Switch: Use to turn unit on or off.
9 IEC Mains Socket: Fused mains (AC) input socket that accepts a detachable power cord.

6
Always switch off your system before disconnecng any wires.
ALWAYS connect using the REL HIGHLEVEL input, unless your system simply cannot accommodate this.
While rare, a few esoteric systems, such as those that deliver a pure digital signal to acve speakers preclude
this possibility. To increase the versality of connecng up, the Serie T models have three separate inputs. A
Neutrik Speakon socket and two phono sockets. This is to facilitate use with both two-channel stereo systems
and AV surround sound systems.
The HIGHLEVEL, unbalanced, dual-channel (stereo) input is via a Neutrik Speakon connector which is connected
to the power amplifier’s le and right channel speaker terminals. This has the advantage of ensuring that the
REL receives exactly the same signal as the main speakers. This means that the character of the bass from the
main system is carried forward into the sub-bass. This is a very important point and together with the REL’s
Acve Bass Controller (ABC) ensures far superior system integraon of the sub-bass with the main system.
The LOWLEVEL input is via a phono jack that connects to either the .1/LFE output of a home cinema
amplifier/processor or to the output of a stereo preamplifier.
HIGH-LEVEL and .1/LFE inputs can be used simultaneously. The benefits are two-fold when used with a
home cinema system. The .1 Input reproduces the .1/LFE channel and the HIGHLEVEL connecon underpins
the main front speakers. The main front speakers should be set to the ‘large’ opon on the processor. See
“Home Cinema Applicaons” for more informaon.
Connecting to the Power Amplifier Using the Speakon HIGH LEVEL INPUT
To engage the Neutrik Speakon plug, insert fully into socket and rotate clockwise unl locked.
To remove the Neutrik Speakon plug, grip body of plug, place thumb on chrome lever, move lever backwards,
rotate plug anclockwise quarter turn and withdraw.
The HIGHLEVEL input is designed to accept the stereo (two-channel) signals from the speaker terminals of
your receiver, integrated amplifier or basic amplifier. This has the advantage of ensuring that your subwoofer
receives exactly the same signal as the main speakers, which means that the character of the bass from the
Connecng Up

7
main system is carried forward into the Sub-Bass System. This is a very important point and together with
REL’s Natural RollOff™ circuitry, ensures far superior system integraon of the Sub-Bass System with the
main system.
HIGHLEVEL INPUT: Connecons should be made to the same binding post on main amplifier as the main
speakers. Red to amplifier main right speaker red terminal, yellow to amplifier main le speaker red terminal
and black to amplifier main speaker black terminal, right or le but not both. Plug the Neutrik Speakon plug
into the HIGHLEVEL Speakon socket. Note: This connecon does not draw power from the power amplifier
and, yes, your REL is a powered sub bass system. However, by deriving its signal from the main power
amplifier, beer sound quality is achieved.
.1 INPUT: This requires a phono-to-phono cable and is a dedicated true .1 channel. This circuit therefore
eliminates the normal Natural RollOff™ Crossover and passes the .1 LOWLEVEL signal through with only the
required 120Hz fourth-order filter.
LOWLEVEL INPUT: This single channel phono input allows for convenonal connecon to a preamplifier
and should be used in the rare event that a HIGHLEVEL connecon proves incompable. Plug one end of
a single phono-phono cable into the LOW-LEVEL input jack of the REL and the other end into either the le
or right channel output of your preamplifier. Because much sub-35Hz bass informaon is mono, there is
lile need to connect both le and right channels. Should your system require this style of connecon –
HIGHLEVEL is preferred – addional performance is available by purchasing a second, matching REL and
running each as separate stereo subs.
PHASE SWITCH – Used to set phase
Posion 0 / HIGHLEVEL, LOWLEVEL or LFE: 0 degrees phase
Posion 180 / HIGHLEVEL, LOWLEVEL or LFE: 180 degrees phase
PHASE SELECTION AFFECTS BOTH HIGH- AND LOW-LEVEL INPUTS
Crossover is always engaged for HIGHLEVEL INPUT. The .1/LFE signal does not pass through the
crossover circuit.

8
REL products are not tradional subwoofers, but are true Sub-Bass Systems. A REL is designed to augment
the performance of “full range” speaker systems in order to provide, in certain cases, linear response below
12 Hz. Therefore, for the moment, set aside everything you’ve been taught about subwoofers and how they
are integrated into a stereo or home cinema system. REL Sub-Bass Systems set-up and posioning differs
from convenonal subwoofers. A REL will take advantage of physics and room acouscs to provide deep
pressurizaon as no tradional subwoofer can. It is important that you bring to the set-up process a willingness
to do things a lile differently in order to obtain these superior results. The end result of your labours will
be an uerly seamless integraon of true deep bass to a sound system, regardless of the main speakers’ low
bass capability.
Basic set-up should take no more than ten to fieen minutes to accomplish once connected.
Before You Beg n
1 It is helpful to know that you will almost always connect the REL to the input on the rear panel labeled
“HIGH-LEVEL INPUT.” This connecon is made using the supplied 34’, 10” (10 meters) cable, the bare
leads of which connect to the speaker output terminals of the power amplifier. The easy and foolproof
connecon at the REL is done with a Neutrik Speakon connector. The purpose of connecng to the
speaker output terminals is one of the unique secrets of REL’s success. By connecng to the high-level
input on the REL from the amplifier, you build forward the sonic signature of your main system, including
the tonal balance and ming cues of the enre electronics chain. In this way, the REL is fed the exact
signal that is fed to the main speakers.
2 When possible, the REL should be placed in one of the corners behind the speakers. Remember, we are
dealing with true LOW bass pressurizaon with RELs. Low bass pressurizaon below 40Hz is best derived
from corner placement, where the most linear and efficient low bass can be produced.
Connecng and Seng Up
HIGHLEVEL connecon, using the enclosed cable with the Neutrik Speakon connector, is always the first
choice. This connecon can be made without affecng the performance of the amplifier because the REL’s
amplifier input impedance is 150,000 ohms, in effect not producing any addional demand whatsoever on
the rest of your system.
REL Set-Up Made S mple

9
• The standard HIGHLEVEL hook up procedure is: aach the red wire to the amplifier’s right posive
speaker output terminal; aach the yellow wire to the amplifier’s le posive speaker output terminal;
aach the black wire to whichever of the amplifier’s ground output terminals is convenient; plug the
Speakon connector into the Sub-Bass System’s HIGHLEVEL input.
• For differenal (i.e. fully balanced) amplifiers using one REL, simply use the standard connecng scheme
with the excepon of connecng the black wire to chassis ground (i.e. a metal bolt or screw, preferably
not painted or anodized, on the chassis of the power amp or receiver), not to a negave speaker terminal,
and then connecng into the HIGH-LEVEL input on the REL. Please contact your dealer should there be
any quesons concerning this or any other hookup procedure.
NOTE: The Serie T model are equipped with internal circuitry to allow eamle connec"on to Cla -D
(digital) main amplifier . If connec"ng to a Cla -D amplifier, follow the above connec"on procedure for
differen"al amplifier .
+ L – + R –
Amplifier Main Speaker O tp ts
Yellow
Black Red
S pplied Ne trik Speakon HIGH-LEVEL Interconnect
HIGH-LEVEL Inp t Release Lever
+ L – + R –
Yellow
Red
Black
Chassis Screw
S pplied Ne trik Speakon HIGH-LEVEL Interconnect
+
Amplifier Main Speaker O tp ts

• If connecng two RELs in a stereo configuraon, connect the black wire of each REL to the negave speaker
terminal of the corresponding amplifier channel; twist together the red and yellow wires of each REL
separately and connect each pair to the posive speaker terminal of the corresponding amplifier channel.
• If connecng a single REL as a dedicated center channel sub, connect the black wire of the REL to the
negave center channel speaker terminal; twist together the red and yellow wires and connect this pair
to the posive center channel speaker terminal.
10
+ L – + R –
Yellow
Red Black
Yellow
Red
Black
LeftS b RightS b
Spplied Ne trik Speakon HIGH-LEVEL Interconnect S pplied Ne trik Speakon HIGH-LEVEL Interconnect
Amplifier Main Speaker O tp ts
+ C –
Yellow
Red Black
S pplied Ne trik Speakon HIGH-LEVEL Interconnect
Amplifier Main Speaker O tp ts

11
• If connecng a REL as a dedicated rear channel sub, connect the black wire of the REL to either the
le rear or right rear negave speaker terminal; connect the yellow wire to the le rear posive speaker
terminal; connect the red wire to the right rear posive speaker terminal.
LOWLEVEL connecon (via phono connector) is always an opon if HIGHLEVEL connecon is not possible.
When connecng to the LOWLEVEL inputs in a system in which HIGHLEVEL connecon is not possible,
such as if using internally-amplified speakers, connect a single phono cable between the LOW-LEVEL input
jack of the REL and either the le or right channel output of your preamplifier. Because virtually all sub-35Hz
bass informaon is mono, there is no need to connect both le and right channels.
When connecng to a home cinema system where an .1/LFE channel output is present, connect a single
phono cable between the sub output of the processor/receiver and the .1/LFE input jack on the REL.
Pos on ng: The opmal posion for a REL is in one of the corners behind the main speakers. This posion
provides 9 dB of acousc amplificaon and allows for the most linear true low bass wave launch, owing to
the ability to tune the REL to the longest distance in the room in order to produce the longest, therefore
lowest, bass waves.
The Process: To begin the set-up process, choose a piece of music that has a repeve bass line that is
very low in frequency. We suggest track four from the soundtrack to Sneaker (Columbia CK 53146). This has
a repeve bass drum throughout that gives you plenty of me to move the woofer around, but more
importantly, the venue was quite large for this recording, and therefore it has a very deep and large-scale
bass signature. This type of track is perfect for the set-up process and should be played at the highest
reasonable level expected for system playback.
+ RL – + RR –
Yellow
Black Red
S pplied Ne trik Speakon HIGH-LEVEL Interconnect
Amplifier Main Speaker O tp ts

12
Working with a partner, one in the listening posion and one at the REL manipulang the controls, is the
most effecve and efficient way to set up the REL. If working alone, the inial steps in the set-up can be very
effecvely carried out from the locaon of the REL. Trying to ignore all other music in the track, listen for
the bass drum and its effect on the listening room.
Phase Or entaon: Once in the corner phase can be adjusted. This may be the single most crical step, and
because it really is quite simple, it is oen over-thought. Keep in mind; the right phase is whichever posion
is the loudest or fullest. While playing music with true low bass, adjust the crossover to a point where the
REL and the speaker are sure to share frequencies (about halfway up, or at 12 o’clock on the crossover
control, or slightly higher for smaller speakers). At this point turn the HI/LOW LEVEL control up so that both
the REL and speaker are roughly equal in volume and then switch, using the phase switch, from “0” to “180”
phase posions. Again, whichever posion is loudest or fullest is the correct posion. That is, when the
posion is working in harmony with your main speakers, reinforcing bass, not cancelling it.
Placement: The next step is to determine precisely how far from the corner the sub should be placed
to achieve the most efficient output, as well as the lowest frequency extension. With the REL fully into the
corner, and poinng straight out along the diagonal coming out of the corner, connuing to play the music,
slowly pull the REL from the corner on the diagonal, equidistant from both side and rear wall. At a certain
point (somemes a maer of only a few inches, in rare cases a foot or more) the REL will audibly go lower,
play louder, and, if it truly locks on to the room and is fully pressurizing it, the air around the REL will seem
to be energized, stop right there! This is the correct posion from the corner for the REL.
Crossover and Level Sengs: To determine the crossover point, take the volume of the REL (using the
HI/LOW LEVEL control) all the way down, and put the crossover to 30 Hz. At this point, bring the REL’s volume
back up slowly to the point where you have achieved a subtle balance, i.e. the point at which you can hear
the REL even with the main speakers playing. Now, bring the crossover point up unl it is obviously too
high; at this point bring it down to the appropriate lower seng. For all intents and purposes, this is the
correct crossover point. Once this stage has been reached, subtle changes to volume and crossover can be
accomplished to provide the last bit of complete and seamless integraon. With that, set-up is complete.

13
H nt: There may be a tendency to et the cro over point too high and the volume of the Sub-Ba Sy tem
too low when fir t learning how to integrate a REL with the y tem, the fear being one of overwhelming the
main peaker with ba . But in doing o, the re ul"ng et-up will be lacking in ba depth and dynamic .
The proper cro over point and volume e#ng will increa e overall dynamic , allow for extended ba
frequencie , and improve ound tage proper"e . Note, volume mu t be adju ted in conjunc"on with cro over
change . In general, when elec"ng a lower cro over point, more volume may need to be applied.
For Dolby Digital AC3 or other 5.1 theater systems, once the standard set-up for two-channel outlined
above is complete, the LFE output from the processor or receiver should be connected to the .1/LFE input
and appropriate volume adjustments made using the .1/LFE LEVEL control. For this configuraon, you must
set the processor to the “large” or “full range” seng for the le and right speakers in order for the REL to
receive the bass signal via the high-level cable. In this configuraon, the REL provides support for both the
le and right speakers for two-channel listening, and support for the LFE when movies are playing. Most
processors will allow you to defeat the subwoofer output when listening in the two-channel mode. The
effect of this set-up is one of greatly increased dynamics in the mid-bass range, no bass bloat, and a greater
degree of space and ming from the special audio effects.
While slightly more complicated than the basic REL Theater Reference scheme, use of three RELs produces a
number of noteworthy benefits and proves the most cost effecve method of achieving professional Dolby 5.1
standard bass performance. REL Theater Reference 3D Bass™ produces true full range performance from
the three primary zones of reproducon in theater sound resulng in a far more natural and immersive
experience than ANY single sub can produce.
1 The main L/R speakers should be connected to the primary REL using REL Theater Reference connecon.
This unit forms the foundaon of your theater system’s performance and so should be perfectly
matched to one’s main speakers.
REL Theater Reference 3D Bass™
REL Theater Reference™ Home C nema Appl caons

14
2 In the rear corner (ideally that which is opposite the primary sub), connect a second REL to the rear
speakers using REL Theater Reference connecvity. The purpose of the rear channel REL is to ensure
proper front-to-rear balance and weight; too oen virtually ALL the power and weight in a theater
comes from the front and it produces unnatural weighng as well as hot spots. By placing a rear REL
diagonally opposite, bass transects the room on a tangent and has the effect of greatly smoothing
overall in-room response of your RELs. This unit need not be a duplicate of your primary REL, instead
it should match well with your surround speakers.
3 Connect to the center channel a third REL using ONLY the HIGHLEVEL connecon. This may be easily
accomplished by connecng directly to the connecon terminals on the rear of the center channel
speaker. To do so, first twist the red and yellow leads together and connect to the posive terminal,
then connect the remaining black lead to the negave (black) terminal on the rear of the speaker. The
purpose of the third “center” REL is to ensure the center channel can keep up with the scale, weight
and dynamics the main system now has. Locaon should be anywhere from the opposite corner of the
front wall to somewhere in the middle of the front wall, listen for best integraon with the center
channel speaker. Some people prefer to use the REL as an actual pediment or stand for their center
channel, the choice is yours. Again, this unit need NOT be an exact duplicate of the primary REL but
should be chosen for its acousc ability to mate seamlessly with your center channel.
First, carefully set-up and dial in the primary REL, then move to the rear REL and balance this against the main
REL. Care must be taken to ensure phase is idencal on both RELs as accidentally reversing phase of one relave
to the other will result in a dramac reducon in bass output. Finally, carefully dial in the performance of
the center channel sub. Hint: To make this easier, once the primary REL has been dialed in, unplug it using
the Speakon connecon from the system and dial in the rear, followed by the center channel REL.
Genuine scklers for perfecon find it easiest to tune in secons. For example, connect ONLY the L/R mains
and the primary REL. Next, tune ONLY the rear surrounds and the rear REL. Finally, listen to and tune ONLY
the center channel with the center REL.

15
When you have accomplished this task, plug all three units in and re-check your gain sengs as the
cumulave effect of hooking all three up will usually result in, temporarily, excessive output. Work carefully
and methodically to reduce the sengs on primary, then rear, and finally center channel RELs and in a few
minutes balance should be restored. However, the net result of all your tuning will be a sound that uerly
immerses the theater owner in a rich natural wash of bass that suffuses the room effortlessly, rather than
what is oen experienced as too loud a bass balance pushing uncomfortably at the listener.
Runn ng In
Care taken over running in will be rewarded by many years of pleasurable use. Both the electronics and the
drive unit will benefit from an inial period of carefully controlled use. Possible damage may be sustained
by running in the unit at too high a volume seng over an extended period. On the other hand, by taking a
lile care over this inial period, about 24 hours of actual use, a longer life with an eventual higher potenal
performance is assured.
Care and Pol sh ng
The cabinets are best maintained by using a light automove spray-on wax and a micro fiber cloth. (We use
a spray-on made by a company called Griot’s Garage™. While this may not be available in all markets, you
can use a similar product.) Take care not to spray the aluminum badges. Do not place objects, such as drinks
on top of your REL Serie T. Never use a dry cloth on this finish.
Techn cal
Serie T uses a very fast, gentle and transparent filter intended to allow excellent impulse response and a
natural sound. We refer to this circuit as Natural Rolloff™. Most subs use slow, very steep filters that lend
an unnatural, machine-like quality to the sound. The Serie T power amplifiers are convenonal Class A/B
linear power supply amplifiers – unusual at this price as most designs use a simple Class D amp. These
designs feature robust, high current power supplies and are bulletproof. Our priority is for the most reliable
circuit we know and we have logged millions of hours of playing me with a resultant failure rate that is the
envy of the industry. The drivers are simple, rugged, relavely light, and yet offer excellent self-damping so
we are beer able to reproduce the nuance of music and preserve the explosiveness of transients. Finally,
the cabinets, apart from being physically beauful, are like finely tuned instruments that are largely responsible
for the sonic virtue with which Serie T is imbued.

16
Power Sav ng Effic ency
All REL Sub-Bass Systems are designed for maximum power efficiency, both when passing a signal through
to its resultant output sound into the room and also when silent.
REL circuitry allows for “power starvaon” operaon under no signal condions. This means that when there
is a gap in the signal the REL is instantly at maximum power saving efficiency, yet remains at maximum
readiness to respond immediately to a sudden transient signal (such as an explosion in a movie) even aer
a long quiet period and regardless of level.
It is not necessary to switch your Serie T off between listening sessions – it will not significantly shorten its
life by leaving it switched on. On the other hand, it will not harm sound quality if it is always switched off. It
is perfectly safe to leave your Serie T on under all normal domesc circumstances as it is fully protected by
internal fuses and an external mains fuse in the fuse holder of the mains input socket. There is a spare
inside this holder.

17
T-9
Type: Passive Radiator, front-firing passive radiator, down-firing acve woofer
Acve Drive Unit: 10in., 254 mm long-throw, steel chassis
Passive Radiator: 10in., 254 mm
Lower Frequency Response: 28 Hz at -6 dB in room
Input Connectors: Hi Level Neutrik Speakon, Lo Level single phono, LFE phono
Input Impedance: High Level: 150k, Low Level: 10k, .1/LFE: 10k ohms
Gain Control Range: 80 dB
Power Output: 300 Was (RMS)
Phase Switch: Yes, 0 or 180 degrees
Amplifier Type: Class AB
Protecon System
Fully Electronic SET-SAFE: Yes
D.C. Fault: Yes
Output Short: Yes
Mains Input Voltage: 220-240 volts, 110-120 volts for certain markets
Fuses: 3.15 Amp semi delay 230 volts operaon,
6.3 Amp semi delay 115 volts operaon
Dimensions (WHD): 13 x 14.75 x 14.75 in., (330 x 374.6 x 374.6 mm)
Including Feet and Rear Panel Controls
Net Weight: 39 lbs. (17.7 kg)
Finish: Gloss Piano Black or White Lacquer
Supplied Accessories
Mains Lead: Yes
Neutrik Speakon Interconnect: Yes (10 Meters Nominal)
Users Manual: Yes
Spec ficaons

18
T-7
Type: Passive Radiator, front-firing passive radiator, down-firing acve woofer
Acve Drive Unit: 8in., 200 mm long-throw, steel chassis
Passive Radiator: 10in., 254 mm
Lower Frequency Response: 30 Hz at -6 dB in room
Input Connectors: Hi Level Neutrik Speakon, Lo Level single phono, LFE phono
Input Impedance: High Level: 150k, Low Level: 10k, .1/LFE: 10k ohms
Gain Control Range: 80 dB
Power Output: 200 Was (RMS)
Phase Switch: Yes, 0 or 180 degrees
Amplifier Type: Class AB
Protecon System
Fully Electronic SET-SAFE: Yes
D.C. Fault: Yes
Output Short: Yes
Mains Input Voltage: 220-240 volts, 110-120 volts for certain markets
Fuses: 2 Amp semi delay 230 volts operaon,
4 Amp semi delay 115 volts operaon
Dimensions (WHD): 12 x 13.75 x 13.75 in., (305 x 349.2 x 349.2 mm)
Including Feet and Rear Panel Controls
Net Weight: 230V: 31 lbs. (14.1 kg) 115V: 34 lbs. (15.4 kg)
Finish: Gloss Piano Black or White Lacquer
Supplied Accessories
Mains Lead: Yes
Neutrik Speakon Interconnect: Yes (10 Meters Nominal)
Users Manual: Yes

19
T-5
Type: Closed Box, down-firing acve woofer
Acve Drive Unit: 8in., 200 mm long-throw, steel chassis
Lower Frequency Response: 32 Hz at -6 dB in room
Input Connectors: Hi Level Neutrik Speakon, Lo Level single phono, LFE phono
Input Impedance: High Level: 150k, Low Level: 10k, .1/LFE: 10k ohms
Gain Control Range: 80 dB
Power Output: 125 Was (RMS)
Phase Switch: Yes, 0 or 180 degrees
Amplifier Type: Class AB
Protecon System
Fully Electronic SET-SAFE: Yes
D.C. Fault: Yes
Output Short: Yes
Mains Input Voltage: 220-240 volts, 110-120 volts for certain markets
Fuses: 1.6 Amp semi delay 230 volts operaon,
3.15 Amp semi delay 115 volts operaon
Dimensions (WHD): 10.5 x 11.75 x 11.75 in., (266.7 x 298.4 x 298.4 mm)
Including Feet and Rear Panel Controls
Net Weight: 26 lbs. (11.7 kg)
Finish: Gloss Piano Black or White Lacquer
Supplied Accessories
Mains Lead: Yes
Neutrik Speakon Interconnect: Yes (10 Meters Nominal)
Users Manual: Yes
In the intere t of product improvement, REL Acou "c Limited re erve the right to alter the e pecifica"on without no"ce.
This manual suits for next models
2
Table of contents
Other REL Acoustics Subwoofer manuals

REL Acoustics
REL Acoustics Serie R User manual

REL Acoustics
REL Acoustics No. 25 User manual

REL Acoustics
REL Acoustics Q Series User manual

REL Acoustics
REL Acoustics G1 User manual

REL Acoustics
REL Acoustics T1 User manual

REL Acoustics
REL Acoustics Gibraltar Series User manual

REL Acoustics
REL Acoustics 212/SE User manual

REL Acoustics
REL Acoustics R-205 User manual

REL Acoustics
REL Acoustics S/2 User manual

REL Acoustics
REL Acoustics G1 Mk II User manual