191679
SAFETY PRECAUTIONS
Always disconnectpowertothe dispenserbeforeservicing orcleaning.
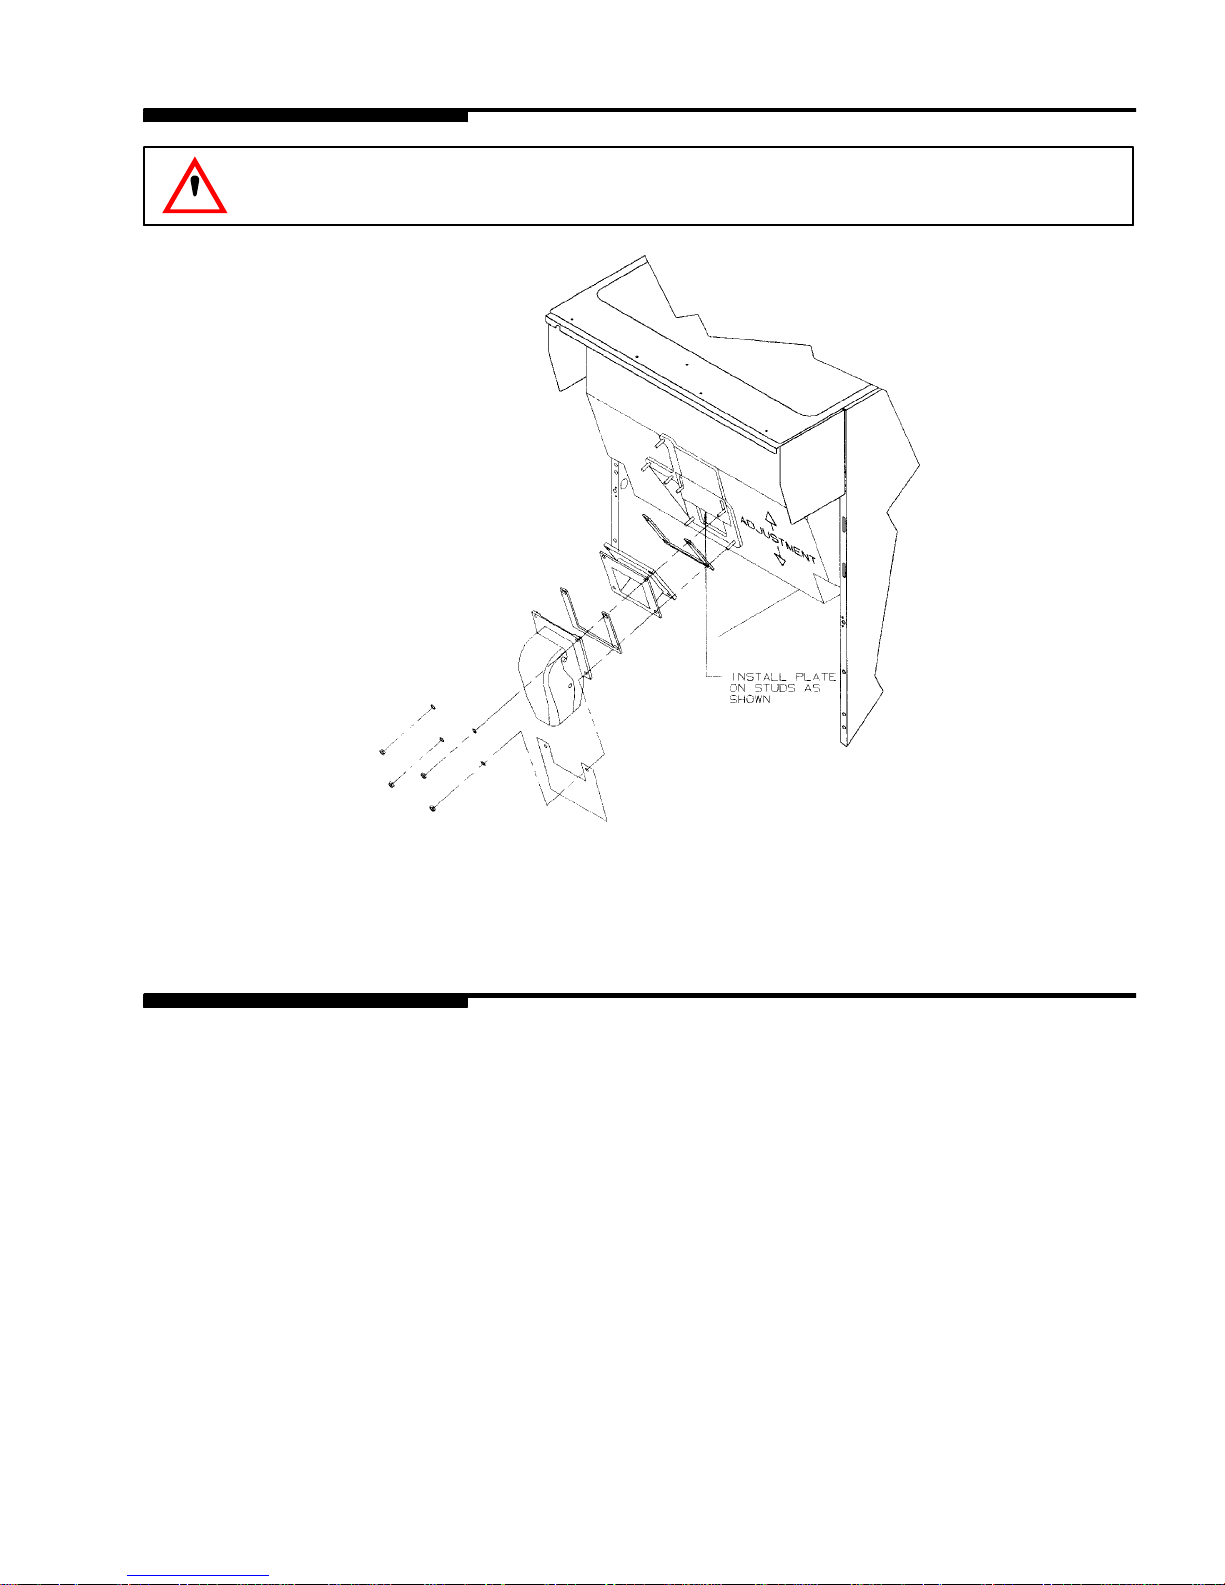
Neverplace handsinside ofhopperorgate area withoutdisconnecting powertothe dispenser.Agitator rotation
occursautomaticallywhen the dispenserisenergized!
Thisice dispenserhasbeen specificallydesigned to provide protection againstpersonal injuryand eliminates
contamination ofice.Toinsurecontinued protection and sanitation,observethe following
ALWAYS be surethe removablelidisproperlyinstalled to preventunautho-
rized access tothe hopperinteriorand possiblecontamination ofice.
ALWAYS be surethe upperand lowerfrontpanelsaresecurelyfastened.
ALWAYS keep area around the dispenserclean oficecubes.
CAUTION:Dispensercannotbeusedwithcrushed orflakedice.
Use ofbaggedice which has frozenintolarge chunks canvoidwarranty.Thedispenser
agitatorisnotdesignedto be anice crusher.Use oflarge chunks ofice which“jamup”
insidethehopperwill cause failureof the agitator motorand damagetothehopper. Ifbaggedice
isused, itmustbe carefully and completelybrokenintosmall, cube-sized pieces beforefilling into
thedispenserhopper.
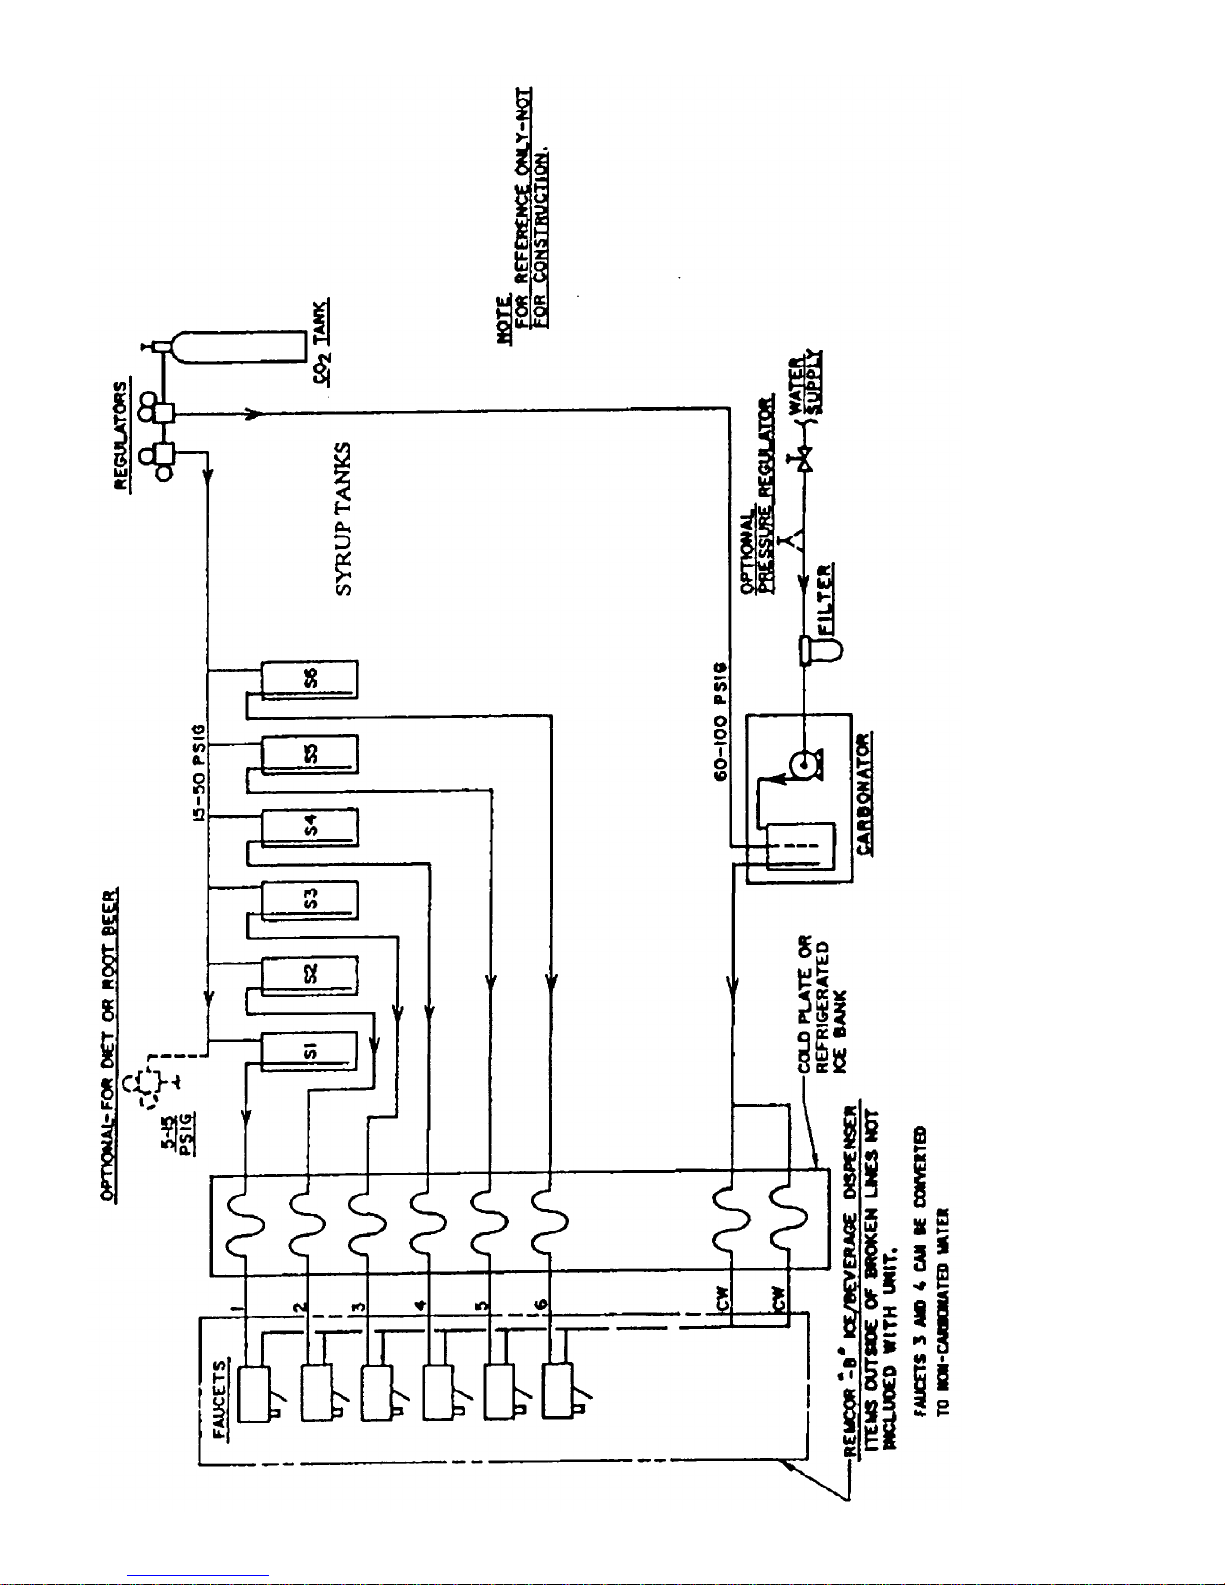
GENERALDESCRIPTION
The Remcor“DB”seriesofice dispensers solveyourice and beverage service needsinasanitary,spacesav-
ing,economical way.Designed tobemanuallyfilled withicefromanyremoteicemaking source, these
dispenserswill dispensecubes(up 1-1/4”insize),cubeletsand hard-chipped orcracked ice.
“B”modelsalsocontain beverage faucetsand mustbe supplied withcold product fromanyremotecold plate or
refrigerated soda factory.
“BC”unitsinclude bothfaucetsand cold platesand are designed tobesupplied direct fromsyrup tanks and car-
bonator,with no additionalcooling required.
Table 1.Specifications
Model:DB200SDB220SDB275S
IceStorage:200 lbs.220 lbs.275 lbs.
MaximumNumberofFaucetsAvailable:N/AN/AN/A
Built-inColdPlate:NoNoNo
Dimension:30Wx30Dx33H30Wx30Dx36H30Wx30Dx40H
Model:DB200S-BDB220S-BDB275S-B
IceStorage:200 lbs.220 lbs.275 lbs.
MaximumNumberofFaucetsAvailable:10 10 10
Built-inColdPlate:NoNoNo
Dimension:30Wx30Dx33H30Wx30Dx36H30Wx30Dx40H
Model:DB200S-BC DB220S-BC DB275S-BC
IceStorage:200 lbs.220 lbs.275 lbs.
MaximumNumberofFaucetsAvailable:10 10 10
Built-inColdPlate:YesYesYes
Dimension:30Wx30Dx33H30Wx30Dx36H30Wx30Dx40H
Electrical(forall models)120V,1ph., 5.5Amps
DrainConnection 7/8ID Hose


 User manual")