W
e appreciate your recent purchase of
clean underwater.
If you have any questions,
IMPORTANT CAUTIONS and WARNINGS
Discontinue charging if battery or charger gets hot.
Do not dispose of battery in fire.
is dropped or damaged, discontinue use
and remove battery to a safe, non
location
Do not allow metallic objects such as coins, tools,
jewelry, etc to touch battery contacts
Remora SOLO is
We perform e tensive factory tests to insure that your Remora is properly sealed and operates
correctly before shipment. You can help to keep your machine running and in top shape.
hard surface, do not use submerged.
Do not disassemble or modify Remora
Remove battery when not in use.
than 20 feet
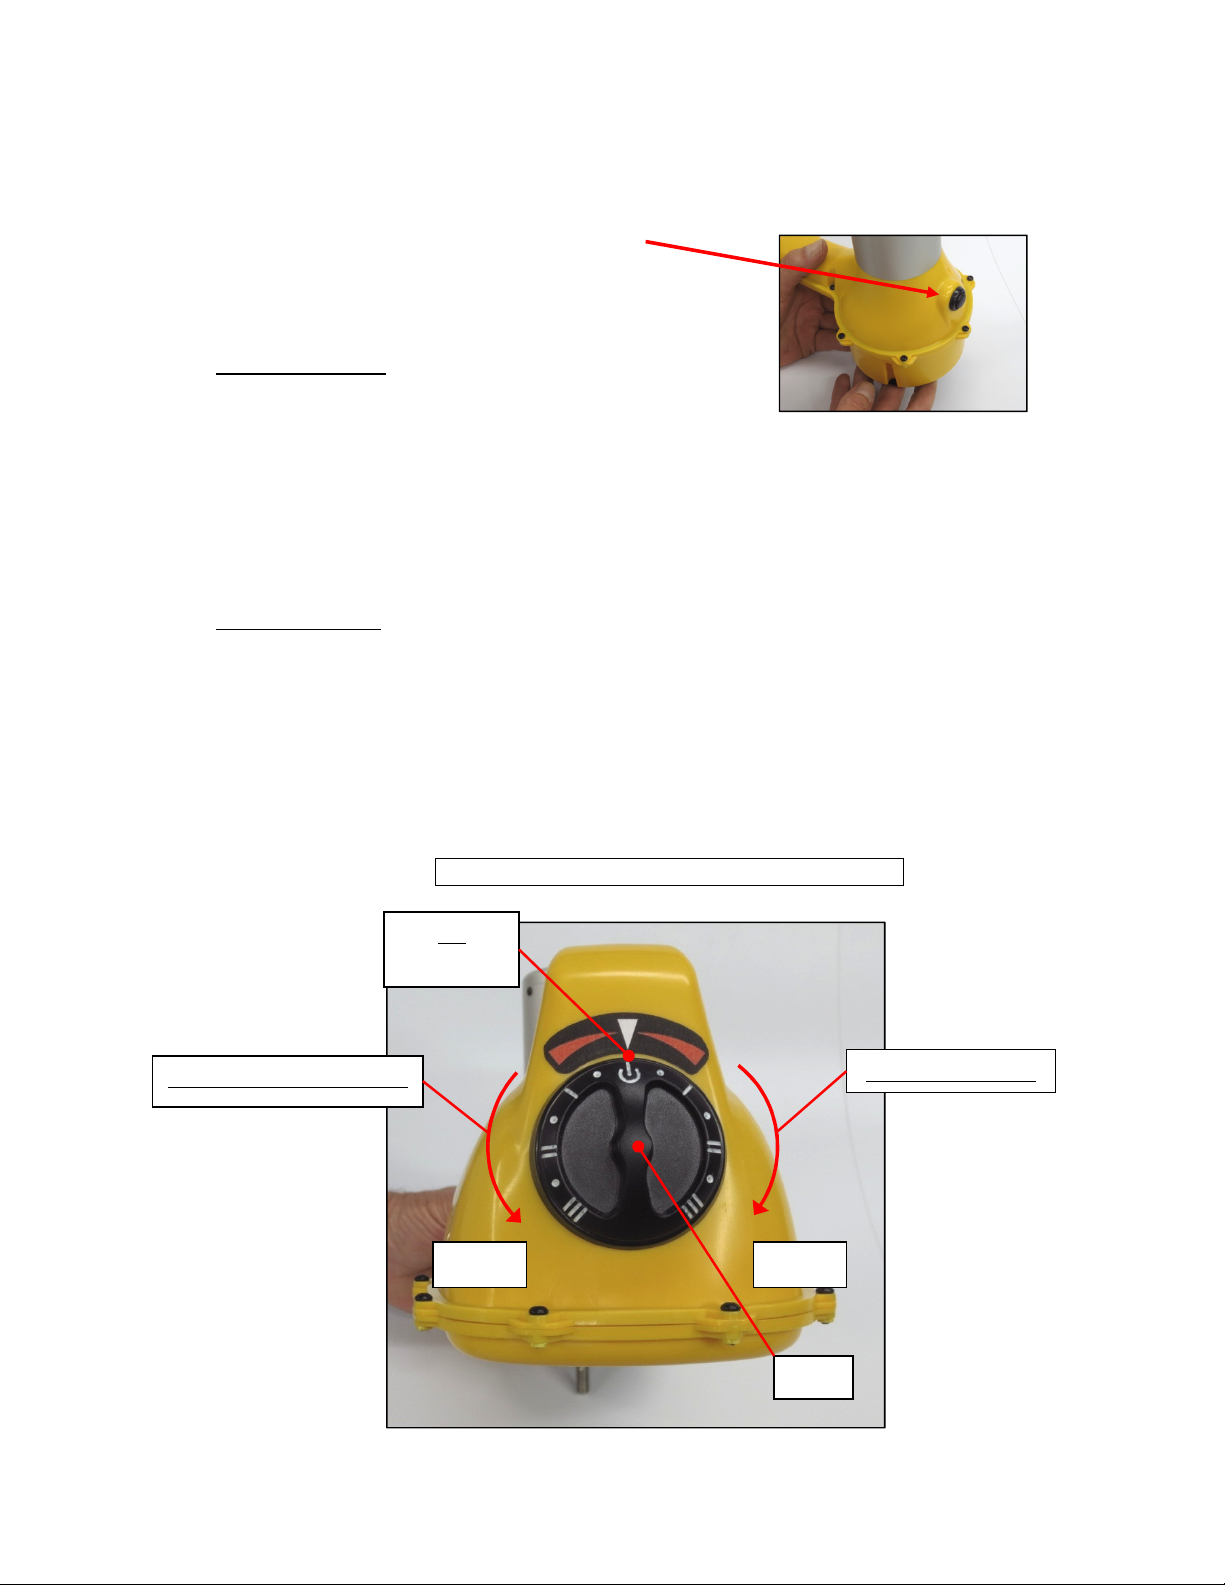
Verify that the battery is securely clipped and
firmly seated before use
Do not run Remora SOLO at high speed without
water cooling for periods greater than 5 minutes
Always return VSD to “0” when handling Remora
e appreciate your recent purchase of
Remora SO O. This game-
changing tool will change the way you
issues or comments
please don’t hesitate to contact us at
(805)201-6301
IMPORTANT CAUTIONS and WARNINGS
Caution
!
SOLO
Do not disassemble or modify the battery.
Discontinue charging if battery or charger gets hot.
Keep batteries away from heat or fire.
Do not dispose of battery in fire.
Do not store batteries near flammable materials.
is dropped or damaged, discontinue use
and remove battery to a safe, non
-flammable
Do not immerse battery in liquid unless it is firmly
secured into the Remora Unit.
waterproof
unless inserted into Remora.
Do not allow metallic objects such as coins, tools,
jewelry, etc to touch battery contacts
Make sure that the battery is dry and the contacts
are clean and dry prior to charging or use
Caution!
and needs to stay
We perform e tensive factory tests to insure that your Remora is properly sealed and operates
correctly before shipment. You can help to keep your machine running and in top shape.
hard surface, do not use submerged.
with fresh water after each
day’s use.
Do not disassemble or modify Remora
Remove battery when not in use.
maintenance actions described in
this manual
Keep Remora and batteries out of direct sunlight for
e tended periods
Verify that the battery is securely clipped and
surface before inserting battery.
Do not run Remora SOLO at high speed without
water cooling for periods greater than 5 minutes
Don’t store Remora SOLO at temperatures e ceeding
100
o
F,
keep it out of the back of your car
days.
Always return VSD to “0” when handling Remora
Page 1 of 15
changing tool will change the way you
please don’t hesitate to contact us at
IMPORTANT CAUTIONS and WARNINGS
Do not disassemble or modify the battery.
Keep batteries away from heat or fire.
Do not store batteries near flammable materials.
Do not immerse battery in liquid unless it is firmly
secured into the Remora Unit.
The battery is not
unless inserted into Remora.
Make sure that the battery is dry and the contacts
are clean and dry prior to charging or use
aterproof!
We perform e tensive factory tests to insure that your Remora is properly sealed and operates
correctly before shipment. You can help to keep your machine running and in top shape.
with fresh water after each
maintenance actions described in
Keep Remora and batteries out of direct sunlight for
surface before inserting battery.
Don’t store Remora SOLO at temperatures e ceeding
keep it out of the back of your car
on sunny