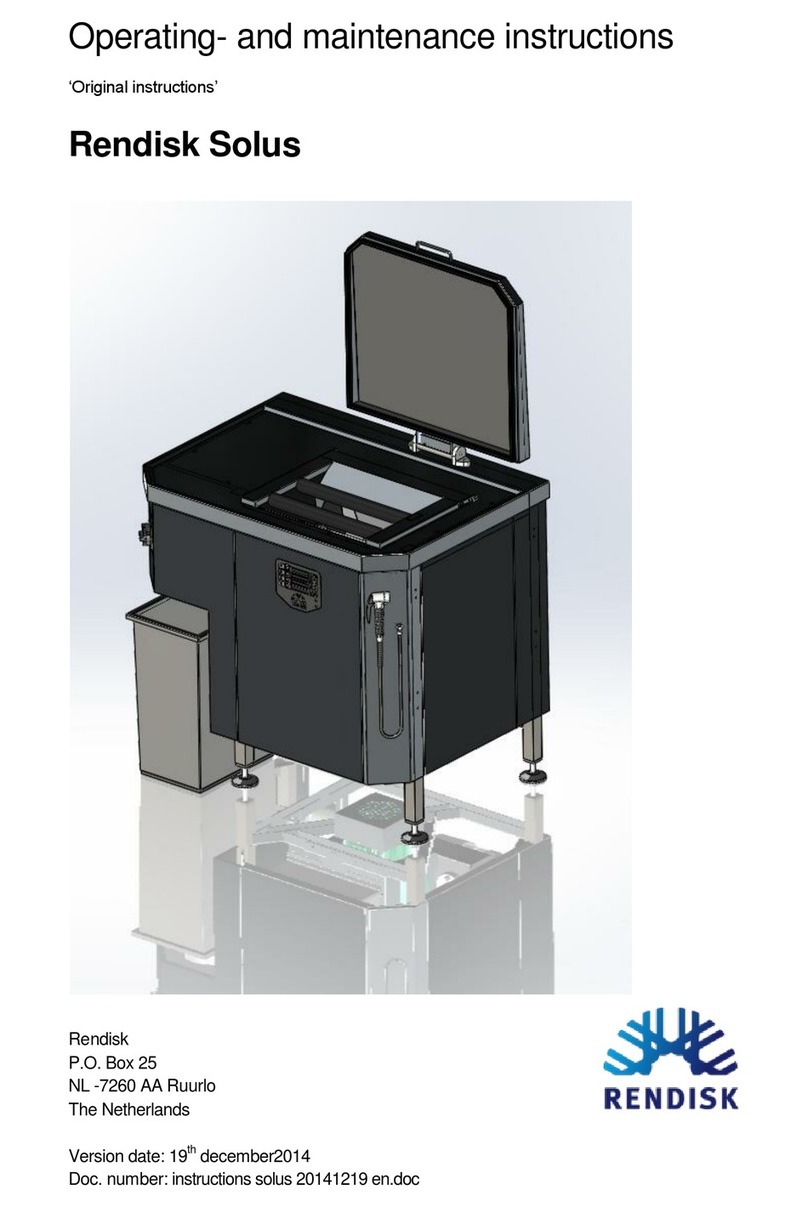
Rendisk Solus Manual

Operating- and maintenance instructions
‘Original instructions’
Rendisk Solus
Rendisk
P.O. Box 25
NL -7260 AA Ruurlo
The Netherlands
Version date: 5th December 2013
Doc. number: Instructions_Solus v20131205

OPERATING- AND MAINTENANCE INSTRUCTIONS
RENDISK SOLUS
DOC. NO. : INSTRUCTIONS_SOLUS V20131205 :
2
DATE : 5 DECEMBER 2013
Change log
Date
By
Decription
2013-12-5
FvdL
First issue

OPERATING- AND MAINTENANCE INSTRUCTIONS
RENDISK SOLUS
DOC. NO. : INSTRUCTIONS_SOLUS V20131205 :
3
DATE : 5 DECEMBER 2013
Table of contents
CHANGE LOG .......................................................................................................................................................................1-2
CHAPTER 1 INTRODUCTION ................................................................................................................................................1-6
1.1 WARNING....................................................................................................................................................................... 1-6
1.2 OBJECTIVE AND TARGET GROUP OF THIS MANUAL.................................................................................................................. 1-6
1.3 RELATED DOCUMENTS....................................................................................................................................................... 1-6
1.4 MANUFACTURER.............................................................................................................................................................. 1-6
1.5 COPYRIGHT...................................................................................................................................................................... 1-6
1.6 LIABILITY ......................................................................................................................................................................... 1-7
1.7 INTENDED USE.................................................................................................................................................................. 1-7
1.8 MACHINE IDENTIFICATION ................................................................................................................................................. 1-7
1.9 WARRANTY ..................................................................................................................................................................... 1-7
CHAPTER 2 SAFETY RULES ...................................................................................................................................................2-8
2.1 SAFETY AND PRECAUTION SYMBOLS..................................................................................................................................... 2-8
2.2 OPERATORS..................................................................................................................................................................... 2-8
2.3 MAINTENANCE ENGINEER.................................................................................................................................................. 2-8
2.4 SAFETY INSTRUCTIONS....................................................................................................................................................... 2-9
2.5 POSITIONING OF THE UNITS ................................................................................................................................................ 2-9
2.6 SAFETY PRECAUTIONS........................................................................................................................................................ 2-9
2.7 HYGIENE ....................................................................................................................................................................... 2-10
2.8 NOISE...........................................................................................................................................................................2-10
2.9 WASTEWATER ...............................................................................................................................................................2-10
2.10 PERSONAL PROTECTIVE EQUIPMENT ..................................................................................................................................2-10
CHAPTER 3 MACHINE DESCRIPTION .................................................................................................................................3-11
3.1 PURPOSE OF THE UNIT.....................................................................................................................................................3-11
3.2 TECHNICAL SPECIFICATION................................................................................................................................................3-11
3.3 SOLUS MAIN COMPONENTS..............................................................................................................................................3-12
3.3.1 Food waste intake ............................................................................................................................................3-13
3.3.2 Main parts front side........................................................................................................................................3-14
3.3.3 Main parts back side ........................................................................................................................................3-15
3.3.4 Main parts left side...........................................................................................................................................3-16
CHAPTER 4 MODES OF OPERATION ..................................................................................................................................4-17
4.1 PRIOR KNOWLEDGE ........................................................................................................................................................4-17
4.2 PRECAUTIONS ................................................................................................................................................................4-17
4.3 CONTROLS.....................................................................................................................................................................4-17
4.3.1 Main switch ......................................................................................................................................................4-17
4.3.2 Control panel ....................................................................................................................................................4-18
4.4 NORMAL OPERATION MODE.............................................................................................................................................4-18
4.4.1 Start-up .............................................................................................................................................................4-18
4.4.2 Loading food waste intake...............................................................................................................................4-18
4.4.3 Batch cycle ........................................................................................................................................................ 4-20

OPERATING- AND MAINTENANCE INSTRUCTIONS
RENDISK SOLUS
DOC. NO. : INSTRUCTIONS_SOLUS V20131205 :
4
DATE : 5 DECEMBER 2013
4.4.4 Continuous cycle...............................................................................................................................................4-20
4.4.5 Heavy duty mode (Optional)............................................................................................................................4-20
4.4.6 Cleaning cycle ...................................................................................................................................................4-20
4.4.7 Jam release grinder of Solus ............................................................................................................................4-20
4.4.8 Shut down.........................................................................................................................................................4-21
4.4.9 Cleaning food waste chute...............................................................................................................................4-21
4.4.10 Activate service mode ......................................................................................................................................4-21
4.4.11 Deactivate service mode..................................................................................................................................4-22
4.5 PROGRAM MODE ...........................................................................................................................................................4-23
4.5.1 Adjusting batch cycle time in normal mode (Led L1 on).................................................................................4-23
4.5.2 Adjusting fresh water quantity in normal mode (Led L2 on)..........................................................................4-23
4.5.3 Adjusting batch cycle time in Heavy duty mode (Led L3 on)..........................................................................4-24
4.5.4 Adjusting fresh water quantity in Heavy duty mode (Led L4 on)...................................................................4-24
CHAPTER 5 INSTALLATION.................................................................................................................................................5-25
5.1 SAFETY.......................................................................................................................................................................... 5-25
5.2 INSTALLATION REQUIREMENTS..........................................................................................................................................5-25
5.3 MECHANICAL INSTALLATION.............................................................................................................................................5-25
5.4 ELECTRICAL INSTALLATION................................................................................................................................................5-25
5.5 FIRST START UP TEST .......................................................................................................................................................5-25
CHAPTER 6 REPAIRS AND MAINTENANCE ........................................................................................................................6-27
6.1 GENERAL....................................................................................................................................................................... 6-27
6.1.1 Maintenance interval on installed parts .........................................................................................................6-27
6.2 ACCESS FRONT ...............................................................................................................................................................6-28
6.3 ACCESS BACK SIDE FREE STANDING UNIT ............................................................................................................................. 6-30
6.4 SPARE PARTS LIST............................................................................................................................................................ 6-30
CHAPTER 7 STORAGE AND TRANSPORT ...........................................................................................................................7-31
7.1 STORAGE.......................................................................................................................................................................7-31
7.2 TRANSPORT...................................................................................................................................................................7-31
CHAPTER 8 DISMANTLING AND SCRAPPING ....................................................................................................................8-32
8.1 ENVIRONMENTAL PROTECTION .........................................................................................................................................8-32
8.2 OIL,OILY WASTE AND GREASES .........................................................................................................................................8-32
8.3 PLASTICS .......................................................................................................................................................................8-32
8.4 METALS ........................................................................................................................................................................8-32
8.5 ELECTRICAL AND ELECTRONIC WASTE .................................................................................................................................8-32
APPENDIX I MALFUNCTION LIST ..................................................................................................................................8-33
APPENDIX II CE IIA DECLARATION.................................................................................................................................8-34
APPENDIX III MAINTENANCE AND REPAIR GRINDER................................................................................................8-35
APPENDIX IV SPARE PARTS LIST .................................................................................................................................8-38

OPERATING- AND MAINTENANCE INSTRUCTIONS
RENDISK SOLUS
DOC. NO. : INSTRUCTIONS_SOLUS V20131205 :
5
DATE : 5 DECEMBER 2013
Table of figures
Figure 1 Machine identification plate (example).................................................................................1-7
Figure 2 Overview Solus with separate pumpand dewater unit.....................................................3-11
Figure 3 Solus....................................................................................................................................3-12
Figure 4 Top side (intake) Solus (Grill in Closed (Left) and Open (right) position) ........................3-13
Figure 5 Main components Front side..............................................................................................3-14
Figure 6 Main components back side...............................................................................................3-15
Figure 7 Mainparts left side Solus....................................................................................................3-16
Figure 8 Control panel drop unit .......................................................................................................4-18
Figure 9 maximum fill level................................................................................................................4-19
Figure 10 Materials that can (not) be processed with Solus...........................................................4-19
Figure 11 Jam release wrench..........................................................................................................4-21
Figure 12 Disassembling front panel................................................................................................4-22
Figure 13 Electrical cabinet...............................................................................................................4-22
Figure 14 Control panel.....................................................................................................................4-23
Figure 15 Clockwise rotating grinder...............................................................................................5-26
Figure 16 Exploded viewSolus ........................................................................................................6-29
Figure 17 Example CEIIA declaration..............................................................................................8-34
Figure 18 Jam release wrench..........................................................................................................8-35
Figure 19 Exploded viewgrinder......................................................................................................8-36

OPERATING- AND MAINTENANCE INSTRUCTIONS
RENDISK SOLUS
DOC. NO. : INSTRUCTIONS_SOLUS V20131205 :
6
DATE : 5 DECEMBER 2013
Chapter 1 Introduction
This chapter provides basic information on the Rendisk Solus unit and the corresponding operating and
maintenance instructions.
1.1 Warning
Read these instructions carefullybefore you start the Solus. Onlythen is maximum safety ensured.
Operation of and maintenance on the Solus may onlybe carried out by qualified and authorised
personal.
1.2 Objective and target group of this manual
These Operating and maintenance instructions are intended to provide operators and maintenance
engineers with information about using and maintaining the machine.
Where Chapter 1 (Introduction) to Chapter 4 is important for operators, all chapters are relevant to
maintenance engineers.
1.3 Related documents
Next to above operation and maintenance instructions the following documents are part of the overall
documentation:
Electro-technical drawings.
CE-2A certification (Appendix II ).
1.4 Manufacturer
RendiskBV
Spoorstraat 62
NL –7261 AG Ruurlo
P.O. Box 25
NL - 7260 AA Ruurlo
The Netherlands
Phone: +31 573 - 458 455
Fax: +31 573 - 458 399
e-mail: info@rendisk.com
Internet: www.rendisk.com
1.5 Copyright
Copyright © 2013 Rendisk BV. All rights reserved.
No part of this publication may be reproduced, stored in a retrieval system or transmitted, in any form or
byany means, electronic, mechanical, photocopying, recording or otherwise, without the prior
permission of the manufacturer.

OPERATING- AND MAINTENANCE INSTRUCTIONS
RENDISK SOLUS
DOC. NO. : INSTRUCTIONS_SOLUS V20131205 :
7
DATE : 5 DECEMBER 2013
1.6 Liability
Rendisk accepts no liability for unsafe situations, accidents and/or damage resulting from any of the
following points:
Ignoring warnings or instructions stated on the machine or in these Operating and maintenance
instructions.
Using the machine for other applications or under other conditions than stated in these
Operating and maintenance instructions.
Making changes to the machine of any kind. This also includes using other replacement parts
and changing the machine's internal control program.
Insufficient maintenance.
Rendisk cannot be held liable for consequential damage or loss such as damage to products,
interruptions of the business operations,and any loss of production etc. following machine malfunctions.
Warning: Any modifications to the unit will cause the invalidation of the CE certification.
Hazardous situations may arise.
1.7 Intended use
The Solus is used for organic kitchen waste disposal. Paper, glass, plastics and metal cannot be
processed in the system.
1.8 Machine identification
A machine identification plate has been applied.
Figure 1 Machine identification plate (example)
1.9 Warranty
For the warrantyregulations please refer to the customer contract.

OPERATING- AND MAINTENANCE INSTRUCTIONS
RENDISK SOLUS
DOC. NO. : INSTRUCTIONS_SOLUS V20131205 :
8
DATE : 5 DECEMBER 2013
Chapter 2 Safety rules
This chapter provides information on general safety rules. Read this chapter carefully before starting up
the unit or before you carryout maintenance work.
2.1 Safety and precaution symbols
This chapter provides information on general safety rules. Read this chapter carefully before starting up
the unit or before you carryout maintenance work.
Tip:
A suggestion to facilitate an easier or more suitable execution of a task.
Watch out:
Points to possible problems.
! Caution:
Damage to the unit or the product may result if the instructions are not carefully executed.
Warning:
Danger of serious injury of the operator or damage to the unit if the instructions are not
carefully executed.
Warning:
Danger due electrical shock
Warning:
Danger for pinch risk
2.2 Operators
The Rendisk Solus mayonly be operated by qualified and trained personnel.
Warning:
The safety rules listed in this document must be obeyed. If you violate them unacceptable risks
may result.
The operators must be aware of the relevant chapters of the operating and maintenance instructions
(Chapter 1 to Chapter 4).
2.3 Maintenance engineer
All maintenance and modification activities on the unit may only be carried out by personnel instructed
and trained accordingly. Please contact Rendisk for more information.
Warning:
The safety rules listed in this document must be obeyed. If you violate them unacceptable risks
may result.

OPERATING- AND MAINTENANCE INSTRUCTIONS
RENDISK SOLUS
DOC. NO. : INSTRUCTIONS_SOLUS V20131205 :
9
DATE : 5 DECEMBER 2013
The maintenance engineer must be fully aware of the complete contents of the operating and
maintenance instructions.
Warning:
Any modifications to the unit will cause the invalidation of the CE certification. Hazardous
situations may arise.
2.4 Safety instructions
The machine meets the basic health and safetyrequirements of the relevant directives of the European
Union. Improper or careless use can lead to dangerous situations.
Be aware of dangerous situations!
Please observe the following general safety instructions:
Connect the machine in accordance with the basic health and safetyrequirements of the
relevant European directives.
Exercise caution with loose hair and clothing.
Keep your hands away from dangerous zones.
Never power up the machine if people are in contact with it.
Electrical isolate the machine before carrying out maintenance work on the machine.
Faultysafety equipmentmust be replaced before the machine is used in production.
The machine must be maintained in accordance with the instructions found in chapter 6
Changes to the machine must not be implemented without the prior consent of the
manufacturer.
The safety equipment of the machine must be checked weeklyfor correct operation.
Do not remove or cover any labels on the machine
The unit is suitable for indoor use only.
2.5 Positioning of the units
Position the installation in such a waythat the pathway for the operator and the service engineer is
sufficiently wide. These pathways must not be obstructed by equipment which can cause dangerous
situations for the personnel; this is important with respect to escape routes.
2.6 Safety precautions
The following primaryprecautions features are integrated:
All units have a main switch to turn off all energy to the unit to stop the process at once.
The main switch on each unit can be locked out in case of maintenance to prevent uncontrolled
start of the units.
The Solus is equipped with a safety grid and lid which prevents access to the rotating parts of
the food waste grinder.
A safetycontact prevents the Solus to start in case the grid has been removed.
The rotaryblade stops automaticallyif the safety grid is removed during operation.
The unit is delivered with a CE-2A certificate.
There are rotating parts at the outlet of the dewater unit. To prevent access to these rotating
parts the collection bin must be in place. Therefore the unit has a bin detection. If the bin is not
in place the unit will not start. If the bin is removed during operating, the machine will stop
instantly.

OPERATING- AND MAINTENANCE INSTRUCTIONS
RENDISK SOLUS
DOC. NO. : INSTRUCTIONS_SOLUS V20131205 :
10
DATE : 5 DECEMBER 2013
2.7 Hygiene
Good hygiene is very important. Please adhere to the following rules as guideline:
Clean the waste station at least once a day.
Use cleaning and disinfecting agents to ensure an optimum result (cleaning agent should not
affect Stainless steel 304, NBR or EPDM components of the drop unit).
Cleaning procedures of the Solus should be integrated in the existing hygiene plan of the site.
The Solus has a cleaning cycle option to clean internal wet parts and piping. We recommend using this
option at least once a day to prevent buildup of fogs and oils. You can contact Rendisk for additional
solutions to keep the machine in a proper condition.
! The operator always remains responsible for good hygiene.
2.8 Noise
The A-weighted equivalent continuous noise level on the workstations is below 80 dB (A) during normal
operation. Higher noise levels may occur at the installation site due to local conditions. In this case, the
employer is obligated to provide operating personnel with appropriate protective equipment.
2.9 Wastewater
The system dewaters the food waste. The waste water can be drained to the sewer. Check local
regulations for additional grease trap or other requirements.
2.10 Personal protective equipment
For normal operation (waste station) weadvise the operatorto wearfollowing personal protection:
Hand protection for hygiene (one way gloves)
Protective clothing against water
Safetyshoes. Be aware of slippery floor.
Ear protection in case noise levelincreases above 80dB.
For cleaning and maintenance:
Hand protection for hygiene (one way gloves) in case of working at food waste contact parts.
Protective clothing against water
Safetyshoes. Be aware of slippery floor.

OPERATING- AND MAINTENANCE INSTRUCTIONS
RENDISK SOLUS
DOC. NO. : INSTRUCTIONS_SOLUS V20131205 :
11
DATE : 5 DECEMBER 2013
Chapter 3 Machine description
This chapter gives general information about the Solus
3.1 Purpose of the unit
The unit is designed for the dispose of food waste (organic material only) in a hygienic and ergonomic
way at the source (restaurant or kitchen) with a minimum of logistics and handling of personnel to the
waste storage room.
3.2 Technical specification
The Solus is a standalone unit which reduces the volume of the loaded foodwaste on the spot. The food
waste is loaded on the grid where it falls through. Below the grid is a grinder which reduces the size of
the particles in the food waste. From here the food waste is pumped to a dewater unit where the water
is separated from the solid parts. The water is partly rececycled and the solids are collected in a bin.
The system consist the following parts:
Figure 2 Overview Solus with separate pump and dewater unit

OPERATING- AND MAINTENANCE INSTRUCTIONS
RENDISK SOLUS
DOC. NO. : INSTRUCTIONS_SOLUS V20131205 :
12
DATE : 5 DECEMBER 2013
3.3 Solus main components
After opening the cover (2), the waste can be dropped into the waste inlet and safety grid (1). The waste
falls on the grinder. After closing the safetygrid and cover the cycle can be started bypressing the start
button on the control panel (5). Some water willbe added to the food waste (3). The food waste will be
grinded and transported to the dewater unit. The hand shower can be used for cleaning the station (6).
1. Waste inlet and safety grid
2. Sound isolated lid
3. Water nozzle
4. Main switch (lockable)
5. Control panel
6. Hand shower
7. Solid waste storage bin
Figure 3 Solus

OPERATING- AND MAINTENANCE INSTRUCTIONS
RENDISK SOLUS
DOC. NO. : INSTRUCTIONS_SOLUS V20131205 :
13
DATE : 5 DECEMBER 2013
3.3.1 Food waste intake
The maximum intake for each cycle is 16 liters. If more waste is added the water will float through the
overflow opening (1). The food waste inlet is covered with a safetygrid (2) which prevents a human arm
to reach into the grinder (5). On the safetygrid there are hit bars (3) to easy emptya plate (only one
hand needed). The grid also functions as a guide for the food waste to slide along the optional magnet
(4) which is situated at the far inside of the food waste inlet. This magnet will hold cutlery (metal) to
prevent the system against damage. There is a safety sensor (reed contact) (7) which detects if the
safetygrid is closed before starting a cycle.
1. Overflow
2. Safetygrid
3. Hit bar
4. Magnet (optional)
5. Grinder opening
6. Spray nozzle
7. Safetysensor (under table top and in safetygrid (or lid))
Warning:
Never reach into a working drop unit, this may result in severe injury!
Figure 4 Top side (intake) Solus (Grill in Closed (Left) and Open (right) position)

OPERATING- AND MAINTENANCE INSTRUCTIONS
RENDISK SOLUS
DOC. NO. : INSTRUCTIONS_SOLUS V20131205 :
14
DATE : 5 DECEMBER 2013
3.3.2 Main parts front side
For maintenance and failure analyses the main components are described in the figure below:
1. Main switch
2. Dewater unit outlet
3. Solid food waste bin
4. Safetysensor
5. Control panel
6. Hand shower
7. Electrical cabinet
8. Cold and warm water supply
Figure 5 Main components Front side

OPERATING- AND MAINTENANCE INSTRUCTIONS
RENDISK SOLUS
DOC. NO. : INSTRUCTIONS_SOLUS V20131205 :
15
DATE : 5 DECEMBER 2013
3.3.3 Main parts back side
For maintenance and failure analyses the main components are described in the figure below:
1. Overflow
2. Magnet (optional)
3. Cold and warm water supply valves
4. Grinder
5. Recycle water pump
6. Dewater unit
7. Recycle water buffer
Figure 6 Main components back side

OPERATING- AND MAINTENANCE INSTRUCTIONS
RENDISK SOLUS
DOC. NO. : INSTRUCTIONS_SOLUS V20131205 :
16
DATE : 5 DECEMBER 2013
3.3.4 Main parts left side
For maintenance and failure analyses the main components are described in the figure below:
1. Grinded food waste transport pipe
2. Solid food waste outlet
3. Dewater unit
4. Bin detector
5. Water outlet dewater unit
6. Recycle water pipe (to pump)
7. Waste water outlet to sewage
Figure 7 Mainparts left side Solus

OPERATING- AND MAINTENANCE INSTRUCTIONS
RENDISK SOLUS
DOC. NO. : INSTRUCTIONS_SOLUS V20131205 :
17
DATE : 5 DECEMBER 2013
Chapter 4 Modes of operation
4.1 Prior knowledge
The operator must be aware of the operation of the Solus (described in
Chapter 3) and must be able to work safely with the Solus, as described in Chapter 2.
4.2 Precautions
Always check the following points before starting the machine
Before switching on and starting the Solus, the following actions must be carried out:
Remove all foreign objects from the machine.
Check that all safety provisions are in place.
Check that allsafetyprovisionswork properly.
Check that all doors and covers are present and closed and a collection bin is placed.
Check water supply and pressure.
Check power connection and PE.
Check piping for leakage.
4.3 Controls
The Solus has the following controls:
Main switch.
Control panel.
4.3.1 Main switch
The units is equipped with a main switch. In case of maintenance this can be locked. This switch can
also be used as emergency stop to stop all running cycles.

OPERATING- AND MAINTENANCE INSTRUCTIONS
RENDISK SOLUS
DOC. NO. : INSTRUCTIONS_SOLUS V20131205 :
18
DATE : 5 DECEMBER 2013
4.3.2 Control panel
At the frontside of the solus you can find the control panel. In Figure 8 is the control panel explained.
Figure 8 Control panel drop unit
4.4 Normal operation mode
4.4.1 Start-up
1. Turn on the main power switch on the Solus. The system automatically starts up in normal
operation mode.
The status of the system can be checked on the control panel.
2. Check the collecting bin and replace/empty if necessary.
3. The system is ready for use.
4.4.2 Loading food waste intake
Do not throw cutlery, plastic, glass, rope or any other garbage that is not food waste (organic)
into the drop unit. This can damage the system and will reduce the lifetime.
Do not throw coffee grounds or frying fat/oil into the drop unit. This can lead to blockade of the
piping or dewater unit.
Do not overload the Solus.
Do not throw food waste with a temperature above 60°C in the drop unit.
The following actions have to be carried out to process the food waste correctly:
1. Remove cutlery, plastic, coffee grounds or any other waste that is not food waste (organic) from
the trash.

OPERATING- AND MAINTENANCE INSTRUCTIONS
RENDISK SOLUS
DOC. NO. : INSTRUCTIONS_SOLUS V20131205 :
19
DATE : 5 DECEMBER 2013
2. Open the lid.
3. Throw the food waste into the chute.
Figure 9 maximum fill level
4. Close the safety grid (and the cover)
5. Start the cycle.
Figure 10 Materials that can (not) be processed with Solus

OPERATING- AND MAINTENANCE INSTRUCTIONS
RENDISK SOLUS
DOC. NO. : INSTRUCTIONS_SOLUS V20131205 :
20
DATE : 5 DECEMBER 2013
4.4.3 Batch cycle
If the push button ‘Batch cycle’ (Switch 1 in Figure 8) is pressed once the Solus will start a batch to
emptythe food waste intake (max 16 liters). The led will indicate that the cycle is running. If the button is
pressed once during the batch, the Solus will stop the running cycle instantly and return to standby
mode.
4.4.4 Continuous cycle
If the push button ‘Continuous cycle’ (Switch 2 in Figure 8) is pressed once the Solus will start a batch to
emptythe food waste intake continuously during a maximum of 10 minutes. The led will indicate that the
cycle is running. If the button is pressed once during the batch, the Solus will stop the running cycle
instantly and return to standbymode.
4.4.5 Heavy duty mode (Optional)
This option can be switched on and off (if installed) by pressing the button ‘Heavy duty’ once (Switch 3
in Figure 8). This option will change the settings of the Solus to handle more rough and hard organic
materials like bones.
4.4.6 Cleaning cycle
If the push button ‘Cleaning cycle’ (Switch 4 in Figure 8) is pressed once the Solus will start a batch to
clean the food waste intake and piping during 3 minutes. The led will indicate that the cycle is running. If
the button is pressed once during the batch, the Solus will stop the running cycle instantly and return to
standby mode.
4.4.7 Jam release grinder of Solus
In case the grinder of the drop unit reduces speed, stops or does not start:
Disconnect electrical power supply (main switch).
Use protective gloves. Remove any non-grindable object from grinding chamber.
Open safety grid
Place jam release wrench on centre nut so that a shredder grinding blade fits in the recess of
wrench (see Figure 11)
Rotate the wrench backwards andforwards untilthe shredder rotates freely in both directions. If
needed extend the bar on the wrench. Hit the bar with a hammer.
Other manuals for Solus
1
This manual suits for next models
1
Table of contents
Other Rendisk Commercial Food Equipment manuals
Popular Commercial Food Equipment manuals by other brands

Alto-Shaam
Alto-Shaam 1000-BQ2/48 Operation and care manual

Goldmedal
Goldmedal DESIGNER Series instruction manual

B.Pro
B.Pro B.PROTHERM BPT 820 EB Translation of the original operating instructions

B. Braun
B. Braun GT300 Instructions for use/Technical description

BaByliss PRO
BaByliss PRO FLASH FX668E manual

CHEFOOK
CHEFOOK AS.003 Operating instructions and maintenance