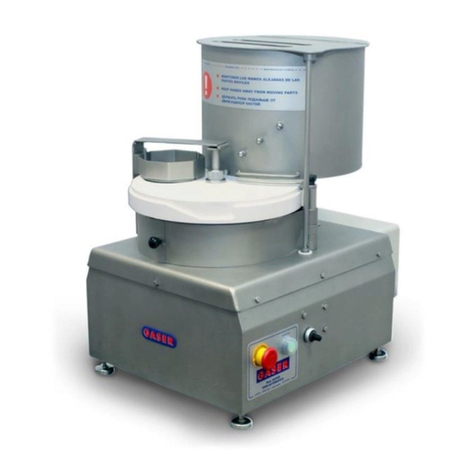
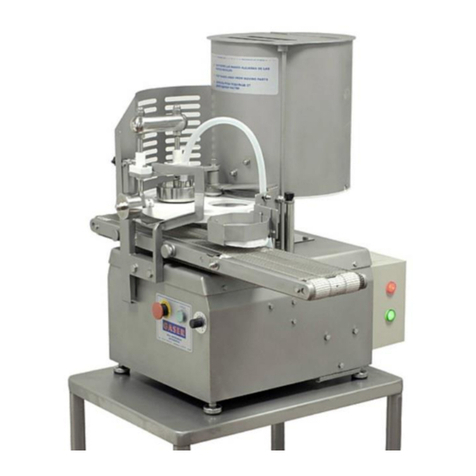
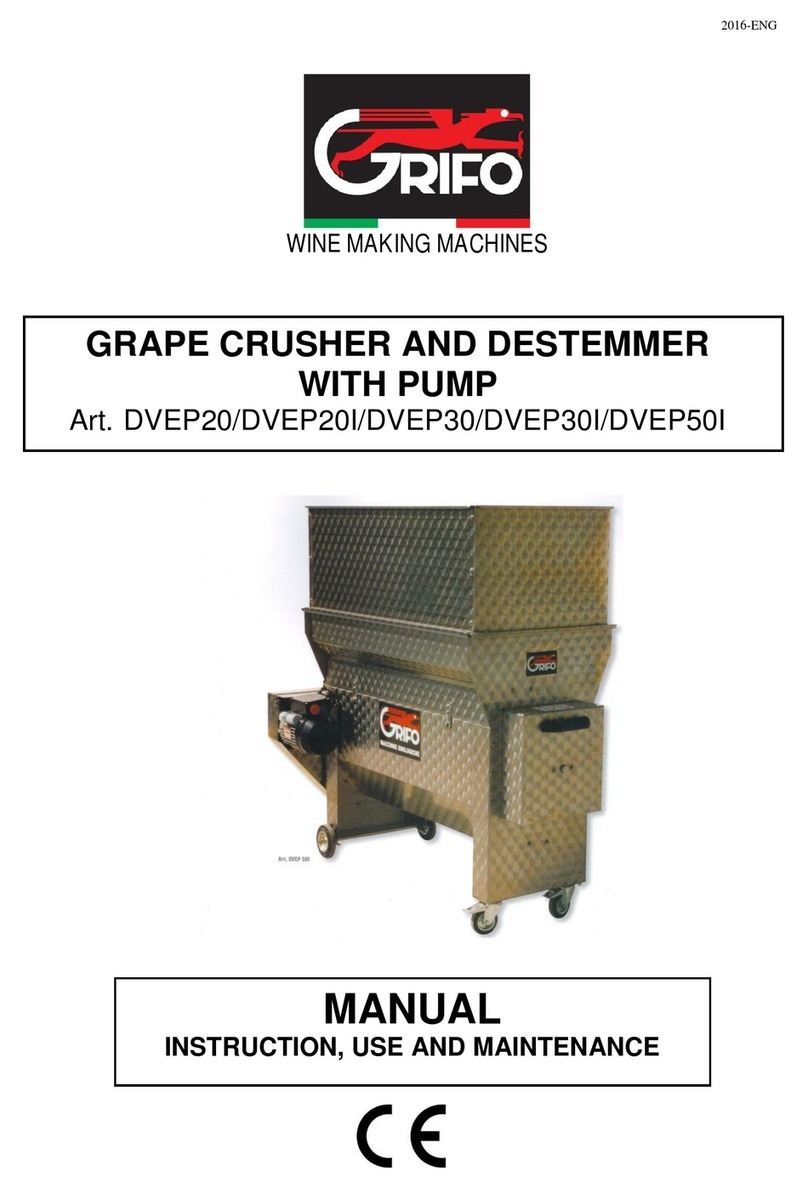
GASER S-1100 User manual

INDEX
1. INDUSTRIAS GASER...............................................................................................4
2. EC DECLARATION OF CONFORMITY...................................................................5
3. HYGIENE CERTIFICATE..........................................................................................6
4. INTRODUCTION.......................................................................................................7
4.1 Sa ety..................................................................................................................7
4.2 Hygiene...............................................................................................................7
5. TECHNICAL SPECIFICATIONS...............................................................................8
6. RECEIPT AND START-UP.......................................................................................9
6.1 Receipt................................................................................................................9
6.2 Start-up................................................................................................................9
6.3 Notes.................................................................................................................11
7. CLEANING..............................................................................................................12
8. MAINTENANCE......................................................................................................15
9. TROUBLESHOOTING............................................................................................16
10. GENERAL DISASSEMBLY...................................................................................18
10.1 Overview.........................................................................................................18
10.2 Meat entry assembly.......................................................................................23
10.3 Detail o press mechanism..............................................................................24
10.4 Press lever assembly......................................................................................25
10.5 Centre base plate assembly............................................................................26
10.6 Blade assembly...............................................................................................27
10.7 Press assembly overview................................................................................28
10.8, Paper press assembly....................................................................................29
10.9 Tabletop clamp assembly...............................................................................30
-2-

1. INDUSTRIAS GASER
Since its oundation in 1969, INDUSTRIAS GASER has specialised in manu acturing a range o
stainless-steel machinery or the meat industry.
Since 1985 we have constantly developed technology or GASER-brand hamburger- orming
machines, developing a distinctive system based on a SIMPLER, MORE EFFECTIVE AND MORE
ECONOMICAL TECHNIQUE.
In the 1990s, INDUSTRIAS GASER expanded into markets in various countries around the world, and
not just in the hamburger sector.
We are aware that our work would be o no value without the trust o our existing clients and partners
or the interest shown by those who wish to join them.
We thank them all.
INDUSTRIAS GASER GASER EUROPA
Salt, Girona, SPAIN L’viv, UKRAINE
INDUSTRIAS GASER Ctra, Bescanó, 15, Pol. Torre Mirona 17190 Salt (Girona) - Spain
Tel. 34 972 23 65 72 | Fax 34 972 23 63 66 | Whatsapp: (34) 679 49 65 06
email: [email protected]
GASER EUROPA вул.Б.Лепкого,1 81160 смт.Щирець Пустомитівский р-н Львівська область
Украіна - Ukraine
Tel. 38 (03230) 67251/84
Fax 38 (03230) 67191
email: [email protected]
For more in ormation about the company and its products: www.gaser.com
-3-

. EC DECLARATION OF CONFORMITY
We declare under our responsibility that the ollowing machine:
Brand: GASER
Model: S1100
Serial no.
Year o construction:
is in con ormity with the ollowing regulations
UNE-EN ISO 12100:2012
UNE-EN ISO 14120:2016
UNE-EN ISO 14121-1:2008
UNE-EN ISO 13849-1:2008/AC:2009
It is orbidden to make any change or modi ication to the machine without the prior written permission
o our technical department. Use o the machine in these conditions could cause accidents, in which
case INDUSTRIAS GASER S.L. accepts no liability or the improper use o the machine.
Salt,
CARLOS GARGANTA SERRAMITJA
TECHNICAL DIRECTOR INDUSTRIAS GASER S.L.
-4-

3. HYGIENE CERTIFICATE
We declare the machine:
Brand: GASER
Model: S1100
Serial no.
Year o construction:
is in con ormity with the ollowing regulations
Regulation (EC) 1935/2004, materials and articles in contact with ood, repealing Directives
80/590/EEC and 89/109/EEC.
This means that all o the types o steel and plastic rom which the machine is constructed and which
are in contact with the meat comply with the hygiene rules and regulations in orce.
* Plastic material: polyethylene terephthalate (PETP), white, density 1.37 g/cm3,
Manu actured in accordance with DIN 50014.
* Stainless steel: AISI 304, manu actured in accordance with European regulations EN-10088,
Chemical composition: C≤0.07% Si≤0.75% Mn≤2% Cr=18-19% Ni = 8-10 %
AISI 316, manu actured in accordance with European regulations EN-10088,
Chemical composition: C≤0.03% Si≤1% Mn≤2% Cr=18.5-16.5% Ni=13-10%
Mo=2.5-2%
Salt,
CARLOS GARGANTA SERRAMITJA
TECHNICAL DIRECTOR INDUSTRIAS GASER S.L.
-5-

4. INTRODUCTION
Be ore using or handling the machine, you must read this manual care ully.
The instructions in this document are, whenever possible, accompanied by illustrations to help with
understanding o how to start, use and clean the machine.
This manual is subject to amendment.
4.1 Safety
It is orbidden to make any change or modi ication to the machine without the prior written permission
o our technical department. Use o the machine in these conditions could cause accidents, in which
case INDUSTRIAS GASER S.L. accepts no liability or improper use o the machine.
The machine has been designed or use with ood products and must be used in the way described in
this manual. Any use other than the speci ied one will involve risk or the user and or the machine.
INDUSTRIAS GASER S.L. accepts no liability either or damage to the machine or personal injury or
injury to third parties that this use might cause.
4. Hygiene
All o the materials used in the manu acture o the machine and which come into contact with ood
comply with Regulation 1935/2004. Consequently, the machine has the CE mark.
It is not recommended to use detergents containing chlorine, any o its derivatives or any other product
that could damage the construction materials o the machine.
-6-

5. TECHNICAL SPECIFICATIONS
1. The machine attaches to any iller (30 mm external diameter outlet).
2. It automatically places cellophane sheets on both sides, which it cuts to the same shape as
the patty.
3. It produces round 108 mm patties or oval 122 × 90 mm ones as requested.
4. It can be mounted on its supporting table or on a normal tabletop depending on what is
ordered.
5. It produces 20 to 40 patties/minute (depending on speed o the iller and the operator’s skill).
6. Patty weight rom 60 to 130 grams (thickness can be adjusted by turning a screw).
7. It uses reels o cellophane sheet.
8. No electricity supply is required.
9. Easy cleaning.
10. Measurements 600 × 200 × 450 mm
11. Weight 18 kg.
12. Made rom stainless steel.
-7-

6. RECEIPT AND START-UP
6.1 Receipt
When you receive the machine, you must irst check that it is in per ect conditions, without any
damage, dents or knocks.
I there is any problem, we advise you noti y the distributor or INDUSTRIAS GASER S.L. directly.
6. Start-up
1. These machines essentially comprise 6 parts: support or base, chassis, press mechanism, eed,
blade or die and protective devices.
2. It is important that when you start to make patties the machine is completely clean, to ensure its
correct unctioning.
3. The most appropriate mixtures are those that a ter being prepared or mixed are kept in the
conservation chamber or several hours at temperatures between 0 and 4 ºC.
4. Thread the two cellophane sheets through until they protrude beyond the end o the blade (No. 4,
blade assembly), ensuring that they run without rubbing and anti-clockwise. Check that the spools (No.
1, overview) are not trapped between the rubber grips.
Photo 1, Fitting spools
-8-

5. Load the iller with the mixture to be used, packing it down slightly, to ensure that there are no large
air pockets in the mixture.
6. The mixture out low unnel must be the 30 mm outside diameter one.
7. The machine’s meat entry tube (No. 3, meat entry assembly) is attached to the iller orming a 90º
angle whenever possible, so that the controls or each hand can easily be accessed rom the same
position.
8. The eed tube clamps (No. 4, meat entry assembly) must be irmly tightened by hand (tools are not
needed). I these come loose during operation, the iller must be stopped and any grease cleaned rom
the interior o the tube in the area where it is in contact with the unnel (No. 3, meat entry assembly), i
this is not done, it will come out again as soon as there is any pressure is used.
9. The iller lever is ixed; there should never be anyone pulling on this lever. The mixture exit velocity
is controlled using the regulator included on all illers.
10. Press with the minimum orce required to ensure that the patty comes out well ormed and just at
the moment when the mixture and the cellophane reach the end o the blade (No. 4, blade assembly),
never be ore.
11. Do not keep the blade (No. 4, blade assembly) down as this could cause a build-up o mixture at
the entrance to it.
12. Raise the lever (No. 1, press lever assembly) almost to the top o its travel and do not start
lowering it until the moment o pressing.
13. For the patties to be o a particular weight, set the iller running at a normal working speed. Then,
rom the second patty to come out o the machine, weigh groups o two or three and adjust the amount
o mixture that comes out o the eed (No. 16, overview) and maintain the same speed during all o the
emptying o the iller.
14. I the machine is stopped or several minutes with mixture protruding rom the eeder (No. 16,
overview), the cellophane will tend to stick to the baseplate owing to the grease and damp, so be ore
restarting, li t the paper and the mixture with your hand to ensure that it slides downwards.
-9-

15. To avoid accidents, these machines are designed or single person operation, operating the press
lever (No. 1, press lever assembly) with the le t hand and with the right collecting the patties.
6.3 Notes
1. The cellophane sheet must be the correct type or this machine, be in good condition and be kept
away rom damp and abrupt temperature changes. To ensure this is the case, keep it in a dry place
inside plastic bags, as originally supplied.
2. The good operation o GASER machines cannot be guaranteed i spools are used (No. 1, overview)
that are not the originals.
3. It is important that the illers eeding GASER machines have a steady and uni orm mixture out low
at any speed.
4. GASER machines can be attached to any continuous iller.
5. I the cellophane on one o the spools runs out without the operator realising or, or whatever
reason, a patty is pressed without cellophane, it will stick to the machine. It must be removed and the
parts that have become dirty must be cleaned.
Cellophane o cuts must also be removed when too many build alongside the blade (No. 4, blade
assembly).
6. To reload the iller when the mixture in it has run out, remove the unnel, lower the plunger and re ill
with mixture. It must be put in until the mixture reaches the out low. Then connect the unnel so that
there are no air pockets between the mixture in the tube and the mixture that has been put inside the
iller.
7. When the machine is in use, the transparent ront guard (No. 7, overview) must be lowered to
prevent people rom putting their hands under the orming blade.
-10-

7. CLEANING
1. When all o the mixture has been inished, stop the iller, cut away any mixture that protrudes rom
the eeder (No. 16, overview), remove the cellophane, use ull pressure on the iller and draw back the
piston until it draws in all o the mixture that is inside the eed tube (meat entry assembly). A ter this,
disconnect the plastic tube (No. 3 meat entry assembly) rom the iller and disassemble the mixture
eeder (No. 16, overview) with the two knobs (No. 17, overview) that secure it, cleaning it with hot
water i possible.
Photo 2, Removing knobs Photo 3, Mixture eeder removal
2. The next step involves removing the cellophane spools (No.1, overview). To do this, the O-rings that
grip them must be removed irst (No. 18, overview). The cellophane sheet must be the correct type or
this machine, be in good condition and be kept away rom damp and abrupt temperature changes. To
ensure this is the case, keep it in a dry place inside plastic bags, as originally supplied.
Photo 4, Removing cellophane spools
-11-

3. A ter this, dismantle the central part o the base by loosening the knurled nuts (No. 8, overview) and
extracting the two positioning spindles (No. 9, overview).
Photo 5, Cleaning base plate 1 Photo 6, Cleaning base plate 2 Photo 7, Cleaning base plate 3
4. Next, disassemble the compression plate rom the inside o the blade (press assembly overview).
First the blade must be lowered (No. 4, blade assembly), then unhook the spring (No. 7, blade
assembly) and dismount the plate (press assembly overview). During this stage in cleaning, it is
important to ensure that these parts do not receive any blows that could damage them. Wash them
with water and detergent. The compression plate (press assembly overview) must be washed in cold
water to avoid damage to the rubber bands o the ejector.
Photo 8, Cleaning compression plate 1 Photo 9, Cleaning compression plate 2 Photo 10, Cleaning compression plate 3
-12-

Once these parts have been disassembled, the rest o the machine can be cleaned using a brush or
low-pressure water.
Photo 8, General cleaning
6. To reassemble the machine, repeat the process described above in reverse order.
-13-

8. MAINTENANCE
1. As one o the blade is one o the most important parts o the machine (No. 4, blade assembly), its
teeth must be kept in good condition. In other words, they should not be bent and there should not be
burrs on any teeth owing to improper use. I this happens, it must be immediately recti ied by
straightening and iling any damaged teeth.
2. I it is necessary to disassemble the blade (No. 4, blade assembly) or possible repair or sharpening,
this must be done by a pro essional, disassembling all o the blade assembly (do not disassemble the
guides unless it is vital (No. 8, blade assembly)). Once it has been repaired and reassembled, it is vital
to ensure that when the blade is lowered, it is completely centred on the slot on the plate (No. 2,
central base plate assembly).
3. Lubricate (with oil) the blade guides (No. 8, blade assembly), the rod (No. 3 and No. 4, press
assembly overview), and press joints (press mechanism detail) when necessary. Also put a drop o oil
in the central hole o the spool carrier plates (No.1, overview) i needed (the oil must be suitable or
ood-grade use).
4. Periodically check the condition o the springs (No. 7, detail press mechanism and No. 7 blade
assembly).
5. Periodically check the general condition o the machine.
-14-

9. TROUBLESHOOTING
A) IT IS NOT POSSIBLE TO CONTROL WHEN THE PATTY HAS TO BE PRESSED:
1. Filler out low speed is too ast.
2. Mixture leaves iller at an irregular speed.
B) THE MIXTURE DOES NOT SLIDE PROPERLY THROUGH THE MACHINE:
1. The areas it passes through are dirty.
2. The cellophane has been damaged by damp.
3. The mixture is too so t and the patties being made are too thin.
4. One o the two spools (No. 1, overview) is trapped by the rubber grips, rubs somewhere or is not
properly positioned.
C) AFTER BEING FORMED, THE PATTIES STICK AND DO NOT DROP:
1. They are being pressed too irmly.
2. They are being pressed too soon.
3. The mixture is too rozen.
4. One o the teeth on the blade (No. 4, blade assembly) is bent.
5. The cellophane is not suitable or the machine ( or round patties the paper must be 105 mm wide;
or oval ones 91 mm).
D) THE CELLOPHANE IS NOT CUTTING PROPERLY:
1. There are teeth on the blade (No. 4, blade assembly) that are bent or have burrs.
2. The blade needs sharpening.
E) THE PATTIES COME OUT WITH A MARK ACROSS THEM:
1. The ejector (press assembly overview) that ejects the patty does not work smoothly.
2. There is accumulated grease on the inside axle o the ejector and so it is hard to move.
F) THE OPERATING LEVER IS STIFF:
1. Lack o oil (lubrication).
2. Dry grease has accumulated on the guides (No. 8, blade assembly).
G) THE PATTIES COME OUT WITH DIFFERENT WEIGHTS:
1. Some are being cut shorter than normal.
2. The speed o the iller varies constantly (the aster it runs, the more the patties weigh).
3. They must be weighed a ter the irst two and with the machine working normally. I used correctly,
the maximum variation will be 2 g.
-15-

H) THE CELLOPHANE DOES NOT EASILY COME AWAY FROM THE PATTY (this happens
because the paper lacks humidity).
1. You must wait at least ½ hour a ter making them.
2. The cellophane has not taken humidity rom the meat or various reasons (too cold, drying out in the
chamber, dried out by draughts, etc.).
I) SEVERAL OF THESE ANOMALIES OCCUR:
This might require an expert to inspect the machine. These machines are designed to work with any
type o mixture and at any temperature so long as they are well regulated and they are appropriately
used.
-16-

10. GENERAL DISASSEMBLY
10.1 Overview
Number Description Reference Units
1 CELLOPHANE SPOOL PL91S*
PL105S**
2
2 REAR COVER S1100/S1200 0016080 1
3 CHASSIS S1100 11010100 1
4 GUARD S1100/S1200 00160100 1
5 BRAND STICKER S-1100 PA0230S1100 1
6 SUPPORTING TABLE S1100/1200 (OPTIONAL) 13010000 1
7 FRONT GUARD S1100/S1200 00160200 1
8 KNURLED NUTS SUPPORT. CENTRAL PLATE 00100200 2
9 CENTRAL PLATE SUPPORT PIN 00100300 2
10 OVAL CENTRAL PLATE SUPPORT
ROUND CENTRAL PLATE SUPPORT
00100100-O2
00100100-R
1
1
11 OVAL LOWER CELLOPHANE GUIDE
ROUND LOWER CELLOPHANE GUIDE
00090100-O
00090100-R
2
2
12 OVAL SPOOL HOLDER AXLE
ROUND SPOOL HOLDER AXLE
00050100-O
00050100-R
2
2
13 OVAL FEEDER COLUMN
ROUND FEEDER COLUMN
00040100-O
00040100-R
2
2
14 OVAL PAPER ROLLER SPINDLE
ROUND PAPER ROLLER SPINDLE
00050200-O
00050200-R
2
2
15 OVAL PAPER ROLLER
ROUND PAPER ROLLER
00050300-O
00050300-R
2
2
16 OVAL MANUAL FEED
ROUND MANUAL FEED
00030100-O
00030100-R
1
1
17 FIXING KNOB M-8 00040200 2
18 O-RING EPDM 70 SHA D-10x3 SI060901003 6
19 TABLE-LEG FOOT MANUAL MACHINES SI022603001.5N 4
20 MACHINE SUPPORT BRACKET 13010200 1
*PL91S or oval patties
**PL105S or standard round patties
-17-

Diagram 1, Standard overview
-18-

Diagram 2, Overview with optional table
-19-

10. Meat entry assembly
Re . 00550000
Number Description Reference Units
1 MEAT ENTRY ELBOW 00110100 1
2 O-RING D35Xd2 SI060903502 1
3 MEAT ENTRY TUBE 00110300 1
4 ENTRY TUBE CLAMP 00110200 2
Diagram 3, Meat entry assembly
-20-
Table of contents
Other GASER Commercial Food Equipment manuals
Popular Commercial Food Equipment manuals by other brands

APW Wyott
APW Wyott Radiant Black FDB-18 Installation and operating instructions
GILES
GILES Chester Fried CF 400 Operation and service manual
Lotus
Lotus LIBR.ISTR.CWK110E Installation and operating instructions

Royal Catering
Royal Catering RCPM-01 user manual
Henny Penny
Henny Penny LOV3 quick reference
HURAKAN
HURAKAN HKN PRC2GNG Operation manual

