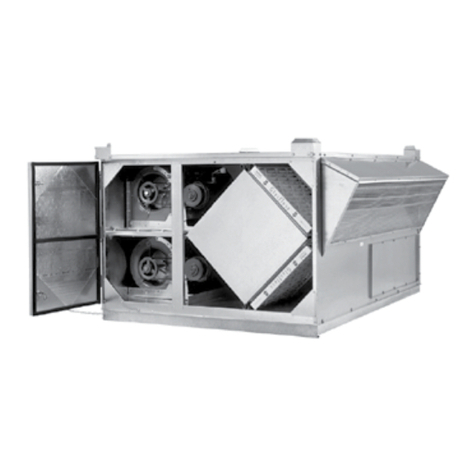
RenewAire PA ERV Series User manual

PA6X shown
PA6X
PA8X
PA9X
PA12
PA SERIES ERV
Installation, Operation and Maintenance Manual

1.800.627.44992
PA-Series
ERV
RISK OF FIRE, ELECTRIC SHOCK, OR INJURY.
OBSERVE ALL CODES AND THE FOLLOWING:
1. Before servicing or cleaning the unit, switch power off at
system disconnect switch or service panel and lock-out/
tag-out to prevent power from being switched on acciden-
tally. More than one disconnect switch may be required to
de-energize the system for servicing.
2. This installation manual shows the suggested installation
method. Additional measures may be required by local
codes and standards.
3. Installation work and electrical wiring must be done by
qualified professional(s) in accordance with all applicable
codes, standards, and licensing requirements.
4. Any structural alterations necessary for installation must
comply with all applicable building, health, and safety code
requirements.
5. Electrical equipment connected to this unit must be properly
grounded.
6. Sufficient air is needed for proper combustion and exhaust-
ing of gases through the flue (chimney) of fuel burning
equipment that might be installed in the area affected by
this equipment. If this unit is exhausting air from a space in
which chimney-vented fuel burning equipment is located,
take steps to assure that combustion air supply require-
ments of applicable codes and standards.
7. Use the unit only in the manner intended by the manufac-
turer. If you have questions, contact the manufacturer.
8. This unit is intended for general ventilating only. Do not use
to exhaust hazardous or explosive materials and vapors. Do
not connect this unit to range hoods, fume hoods, or collec-
tion systems for toxics.
9. This unit must be properly ducted to the outdoors. Outside
air inlets must not be located where air may be contami-
nated, for example by vehicle or appliance exhausts.
WARNING
Maximum Differential Pressure
The maximum pressure differential between the two air-
streams shound not exceed 4 inches (H2O).
CAUTION
Filters must be used or the energy exchanger core will become
blocked by dust and the unit will not do its job. In extreme
cases components may be damaged.
CAUTION
Do Not Wash the Energy Exchange Core.
Keep it away from water or fire to avoid damaging it. Always
handle the core carefully.
CAUTION
Danger of carbon monoxide poisoning! Outside air intake
should be 10' (minimum) away from sources of carbon mon-
oxide or other toxic gases such as chimneys, furnace, or water
heater exhausts.
Do not locate outside air intake where vehicles may be ser-
viced or left idling. Do not locate the outside air intake inside
an enclosed space.
WARNING
Danger of Damage Due to Condensation in or on Ducts to
Outside.
Both ducts connecting the unit to the outside must be insulated
with sealed vapor barriers inside and out to prevent condensa-
tion and/or freezing inside the insulation or on the duct surface.
CAUTION

31.800.627.4499
PA-Series ERV
SAVE THIS MANUAL
UNIT INFORMATION
Record information as shown below.
In the unlikely event that factory assistance is ever required, information located on the unit
label will be needed.
Locate the RenewAire unit label found on the outside of the unit.
NOTE: This information is for purposes of identifying the unit-specific option data from the
Option Code.
SO#: 068571
JO#: 39425-0000
Option Code: PA-9XJIN9--------------KN
This space left blank intentionally.
Serial Number:
MODEL/MODELE:
Patent # 5,660,228
Energy Recovery Ventilator
Label No:
134200_000
PA9XIN
J19 4988
UNIT INFORMATION
UNIT LABEL (TYPICAL)
P -- -- -- -A -J - -- --
OPTION CODE:
SERIAL NUMBER:
SO #:
OWNER INFORMATION
NOTE: This page
is to be completed
by the installing
contractor. The completed
document is to be turned
over to the owner after
start-up.
N
9

1.800.627.44994
RENEWAIRE.COM 1.800.627.4499
12
SPECIFICATIONS & DIMENSIONS
Specifications may be subject to change without notice.
INDOOR UNIT
Unlimited Modular Panels SPECIFICATIONS
Ventilation Type:
Static plate, heat and humidity transfer
Standard Features:
Insulated sheet metal panels easily slide into
receivers to enclose stacks of energy exchange
cores using unique patented design, US Patent
5,660,228
Individual PA-Series units can be joined together to
provide unlimited airflow capacities for larger air
handling systems.
Blower not included and must be specified to meet
job requirements.
Insulation:
One inch, high density, FSK faced, fiberglass
Options:
Knockdown
Assembled on structural forklift base
Accessories:
Filters - MERV 13, 2" (shipped loose)
Description PA6X PA8X PA9X PA12X
Typical Airflow
Range CFM 1,500-6,600 2,000-8,800 2,250-9,900 3,000-13,200
AHRI 1060
Certified Core
Six
L125-G5
Eight
L125-G5
Nine
L125-G5
Twelve
L125-G5
Unit Dimensions
& Weight
73 1/2" L x 37 1/4" W
x 66 1/4" H
522-565 lbs.
73 1/2" L x 37 1/4" W
x 86" H
650-700 lbs.
109 1/2" L x 37 1/4" W
x 66 1/4" H
740-910 lbs.
109 1/2" L x 37 1/4" W
x 86" H
936-1,000 lbs.
Max. Shipping
Dimensions &
Weight (on pallet,
assembled only)
96" L x 47" W x 75" H
700 lbs.
96" L x 47" W x 92" H
850 lbs.
124" L x 48" W x 75" H
1,100 lbs.
124" L x 48" W x 95" H
1,200 lbs.
Filters MERV 8:
20" x 20" x 2" Total qty. 12 Total qty. 16 Total qty. 18 Total qty. 24
CORE PERFORMANCE
At AHRI 1060 standard conditions. See all AHRI certified ratings at www.ahrinet.org.
ThermalPerformanceRatingsG52015.2.xlsx 6Cores(IOM)
30%
50%
70%
90%
1000 2000 3000 4000 5000 6000 7000
Effectiveness (%)
Airflow (CFM)
PA6X
ThermalPerformanceRatingsG52015.2.xlsx 8Cores(IOM)
30%
50%
70%
90%
2000 4000 6000 8000
Effectiveness (%)
Airflow (CFM)
PA8X
ThermalPerformanceRatingsG52015.2.xlsx 12Cores(IOM)
30%
50%
70%
90%
3000 6000 9000 12000 15000
Effectiveness(%)
Airflow(CFM)
PA12X
ThermalPerformanceRatingsG52015.2.xlsx 9Cores(IOM)
30%
50%
70%
90%
1500 3500 5500 7500 9500
Effectiveness(%)
Airflow(CFM)
PA9X
Pseries_Statics_Catalog_2016MAR.xlsx Catalog Chart
0.0
0.5
1.0
1.5
2.0
2.5
0 3000 6000 9000 12000
Static Pressure
Drop (in.w.g.)
Airflow (CFM)
AIRFLOW PERFORMANCE
Note: Airflow performance includes effect of clean, standard filter supplied with unit.
CA‐RTFlowRatingsAnalysis.xlsx Chart
0.0
0.5
1.0
1.5
2.0
0 1000 2000 3000 4000
Static Presure
Drop (in.w.g)
Airflow (CFM)
SERIESPA Energy Recovery Module
Download specification at:
renewaire.com/specifications
PA-SERIES
59 3/4" Case
66 1/8" Overall
28" Typ.
5"
34 3/8" Typ.
22 1/2" Minimum
Service Area
71 5/8" Minimum
Service Area
FRONT VIEW
35" Case
37 1/4" Overall
LEFT VIEW
73 1/8" Case
73 3/8" Overall
TOP VIEW
Filters to be placed on the
upstream side of the cores,
depending on airflow
arrangement chosen.
Filters are 2" X 20" X 20"
pleated disposable.
2
Performance Derating:
Airflow Arrangements 3 & 4 result in lower energy transfer.
Reduce sensible effectiveness by 2 percentage points.
Reduce total effectiveness by 1 percentage point.
Arrangement 3 Arrangement 4
Arrangement 1 Arrangement 2
AVAILABLE AIRFLOW
ARRANGEMENTS
(SIDE VIEW)
2
1
1
2
2
12
1
1
2
2
1
1
2
1
2
Model: PA6X
Drawing Type: Unit Dimension
Version: AUG18
ABBREVIATION
EA: Exhaust Air to outside
OA: Outside Air intake
RA: Room Air to be exhausted
FA: Fresh Air to inside
INSTALLATION ORIENTATION
Unit must be installed in orientation
shown.
NOTE:
1. UNLESS OTHERWISE SPECIFIED,
DIMENSIONS ARE ROUNDED TO THE
NEAREST EIGHTH OF AN INCH.
2. SPECIFICATIONS MAY BE SUBJECT
TO CHANGE WITHOUT NOTICE.
PA6X Energy Recovery Module
AIRFLOW CONFIGURATION
Available as shown:
UNIT MOUNTING & APPLICATION
Must be mounted as shown. RA/EA airstream can
be switched with OA/FA airstream. Knockdown can
be field assembled for multiple duct configurations.
Multiple cabinets can be aligned for unlimited airflow.
EA/FA
EA/FA
RA/OA RA/OA
PAIN
1
EA/FA
EA/FA
RA/OA
RA/OA
PAIN
2
EA/FA
EA/FA
RA/OA
RA/OA
PAIN
3
EA/FA
EA/FA
RA/OA
RA/OA
PAIN
4

51.800.627.4499
FOR THE MOST COMPLETE AND CURRENT INFORMATION VISIT RENEWAIRE.COM 13
SPECIFICATIONS & DIMENSIONS
Specifications may be subject to change without notice.
INDOOR UNIT
Unlimited Modular Panels SPECIFICATIONS
Ventilation Type:
Static plate, heat and humidity transfer
Standard Features:
Insulated sheet metal panels easily slide into
receivers to enclose stacks of energy exchange
cores using unique patented design, US Patent
5,660,228
Individual PA-Series units can be joined together to
provide unlimited airflow capacities for larger air
handling systems.
Blower not included and must be specified to meet
job requirements.
Insulation:
One inch, high density, FSK faced, fiberglass
Options:
Knockdown
Assembled on structural forklift base
Accessories:
Filters - MERV 13, 2" (shipped loose)
Description PA6X PA8X PA9X PA12X
Typical Airflow
Range CFM 1,500-6,600 2,000-8,800 2,250-9,900 3,000-13,200
AHRI 1060
Certified Core
Six
L125-G5
Eight
L125-G5
Nine
L125-G5
Twelve
L125-G5
Unit Dimensions
& Weight
73 1/2" L x 37 1/4" W
x 66 1/4" H
522-565 lbs.
73 1/2" L x 37 1/4" W
x 86" H
650-700 lbs.
109 1/2" L x 37 1/4" W
x 66 1/4" H
740-910 lbs.
109 1/2" L x 37 1/4" W
x 86" H
936-1,000 lbs.
Max. Shipping
Dimensions &
Weight (on pallet,
assembled only)
96" L x 47" W x 75" H
700 lbs.
96" L x 47" W x 92" H
850 lbs.
124" L x 48" W x 75" H
1,100 lbs.
124" L x 48" W x 95" H
1,200 lbs.
Filters MERV 8:
20" x 20" x 2" Total qty. 12 Total qty. 16 Total qty. 18 Total qty. 24
CORE PERFORMANCE
At AHRI 1060 standard conditions. See all AHRI certified ratings at www.ahrinet.org.
ThermalPerformanceRatingsG52015.2.xlsx 6Cores(IOM)
30%
50%
70%
90%
1000 2000 3000 4000 5000 6000 7000
Effectiveness (%)
Airflow (CFM)
PA6X
ThermalPerformanceRatingsG52015.2.xlsx 8Cores(IOM)
30%
50%
70%
90%
2000 4000 6000 8000
Effectiveness (%)
Airflow (CFM)
PA8X
ThermalPerformanceRatingsG52015.2.xlsx 12Cores(IOM)
30%
50%
70%
90%
3000 6000 9000 12000 15000
Effectiveness(%)
Airflow(CFM)
PA12X
ThermalPerformanceRatingsG52015.2.xlsx 9Cores(IOM)
30%
50%
70%
90%
1500 3500 5500 7500 9500
Effectiveness(%)
Airflow(CFM)
PA9X
Pseries_Statics_Catalog_2016MAR.xlsx Catalog Chart
0.0
0.5
1.0
1.5
2.0
2.5
0 3000 6000 9000 12000
Static Pressure
Drop (in.w.g.)
Airflow (CFM)
AIRFLOW PERFORMANCE
Note: Airflow performance includes effect of clean, standard filter supplied with unit.
CA‐RTFlowRatingsAnalysis.xlsx Chart
0.0
0.5
1.0
1.5
2.0
0 1000 2000 3000 4000
Static Presure
Drop (in.w.g)
Airflow (CFM)
SERIESPA Energy Recovery Module
Download specification at:
renewaire.com/specifications
PA-SERIES
59 3/4" Case
66 1/8" Overall
28" Typ.
5"
34 3/8" Typ.
22 1/2" Minimum
Service Area
71 5/8" Minimum
Service Area
FRONT VIEW
35" Case
37 1/4" Overall
LEFT VIEW
73 1/8" Case
73 3/8" Overall
TOP VIEW
Filters to be placed on the
upstream side of the cores,
depending on airflow
arrangement chosen.
Filters are 2" X 20" X 20"
pleated disposable.
2
Performance Derating:
Airflow Arrangements 3 & 4 result in lower energy transfer.
Reduce sensible effectiveness by 2 percentage points.
Reduce total effectiveness by 1 percentage point.
Arrangement 3 Arrangement 4
Arrangement 1 Arrangement 2
AVAILABLE AIRFLOW
ARRANGEMENTS
(SIDE VIEW)
2
1
1
2
2
12
1
1
2
2
1
1
2
1
2
Model: PA6X
Drawing Type: Unit Dimension
Version: AUG18
ABBREVIATION
EA: Exhaust Air to outside
OA: Outside Air intake
RA: Room Air to be exhausted
FA: Fresh Air to inside
INSTALLATION ORIENTATION
Unit must be installed in orientation
shown.
NOTE:
1. UNLESS OTHERWISE SPECIFIED,
DIMENSIONS ARE ROUNDED TO THE
NEAREST EIGHTH OF AN INCH.
2. SPECIFICATIONS MAY BE SUBJECT
TO CHANGE WITHOUT NOTICE.
PA6X Energy Recovery Module
AIRFLOW CONFIGURATION
Available as shown:
UNIT MOUNTING & APPLICATION
Must be mounted as shown. RA/EA airstream can
be switched with OA/FA airstream. Knockdown can
be field assembled for multiple duct configurations.
Multiple cabinets can be aligned for unlimited airflow.
EA/FA
EA/FA
RA/OA RA/OA
PAIN
1
EA/FA
EA/FA
RA/OA
RA/OA
PAIN
2
EA/FA
EA/FA
RA/OA
RA/OA
PAIN
3
EA/FA
EA/FA
RA/OA
RA/OA
PAIN
4

1.800.627.44996
RENEWAIRE.COM 1.800.627.4499
14
SPECIFICATIONS & DIMENSIONS
PA8X Energy Recovery Module
Arrangement 2Arrangement 1
Arrangement 4Arrangement 3
1
1
1
1
1
1
2
1
1
2
2
2 22
22
5"
37" Typ.
45 1/8" Typ.
79 1/2" Case
85 7/8" Overall
22 1/2" Minimum
Service Area
71 5/8" Minimum
Service Area
FRONT VIEW
35" Case
37 1/4" Overall
LEFT VIEW
73 1/8" Case
73 3/8" Overall
TOP VIEW
Filters to be placed on the
upstream side of the cores,
depending on airflow
arrangement chosen.
Filters are 2" X 20" X 20"
pleated disposable.
Performance Derating:
Airflow Arrangements 3 & 4 result in lower energy transfer.
Reduce sensible effectiveness by 2 percentage points.
Reduce total effectiveness by 1 percentage point.
AVAILABLE AIRFLOW
ARRANGEMENTS
(SIDE VIEW)
Model: PA8X
Drawing Type: Unit Dimension
Version: AUG18
ABBREVIATION
EA: Exhaust Air to outside
OA: Outside Air intake
RA: Room Air to be exhausted
FA: Fresh Air to inside
INSTALLATION ORIENTATION
Unit must be installed in orientation
shown.
NOTE:
1. UNLESS OTHERWISE SPECIFIED,
DIMENSIONS ARE ROUNDED TO THE
NEAREST EIGHTH OF AN INCH.
2. SPECIFICATIONS MAY BE SUBJECT
TO CHANGE WITHOUT NOTICE.
AIRFLOW CONFIGURATION
Available as shown:
UNIT MOUNTING & APPLICATION
Must be mounted as shown. RA/EA airstream can
be switched with OA/FA airstream. Knockdown can
be field assembled for multiple duct configurations.
Multiple cabinets can be aligned for unlimited airflow.
EA/FA
EA/FA
RA/OA RA/OA
PAIN
1
EA/FA
EA/FA
RA/OA
RA/OA
PAIN
2
EA/FA
EA/FA
RA/OA
RA/OA
PAIN
3
EA/FA
EA/FA
RA/OA
RA/OA
PAIN
4
PA-SERIES
2
1
1
2
1
2 2
1
2
1
2
1
2
1
1
2
Arrangement 3 Arrangement 4
Arrangement 1 Arrangement 2
5"
28" Typ.
34 3/8" Typ.
59 3/4" Case
66 1/8" Overall
31 1/8"
Minimum
Service
Area
107 3/4" Minimum
Service Area
FRONT VIEW
35" Case
37 1/4"
Overall
LEFT VIEW
109 1/4" Case
109 3/8" Overall
TOP VIEW
Filters to be placed on the
upstream side of the cores,
depending on airflow
arrangement chosen.
Filters are 2" X 20" X 20"
pleated disposable.
AVAILABLE AIRFLOW
ARRANGEMENTS
(SIDE VIEW)
Performance Derating:
Airflow Arrangements 3 & 4 result in lower energy transfer.
Reduce sensible effectiveness by 2 percentage points.
Reduce total effectiveness by 1 percentage point.
Model: PA9X
Drawing Type: Unit Dimension
Version: AUG18
ABBREVIATION
EA: Exhaust Air to outside
OA: Outside Air intake
RA: Room Air to be exhausted
FA: Fresh Air to inside
INSTALLATION ORIENTATION
Unit must be installed in orientation
shown.
NOTE:
1. UNLESS OTHERWISE SPECIFIED,
DIMENSIONS ARE ROUNDED TO THE
NEAREST EIGHTH OF AN INCH.
2. SPECIFICATIONS MAY BE SUBJECT
TO CHANGE WITHOUT NOTICE.
PA9X Energy Recovery Module
AIRFLOW CONFIGURATION
Available as shown:
UNIT MOUNTING & APPLICATION
Must be mounted as shown. RA/EA airstream can
be switched with OA/FA airstream. Knockdown can
be field assembled for multiple duct configurations.
Multiple cabinets can be aligned for unlimited airflow.
EA/FA
EA/FA
RA/OA RA/OA
PAIN
1
EA/FA
EA/FA
RA/OA
RA/OA
PAIN
2
EA/FA
EA/FA
RA/OA
RA/OA
PAIN
3
EA/FA
EA/FA
RA/OA
RA/OA
PAIN
4

71.800.627.4499
FOR THE MOST COMPLETE AND CURRENT INFORMATION VISIT RENEWAIRE.COM 15
SPECIFICATIONS & DIMENSIONS
PA8X Energy Recovery Module
Arrangement 2Arrangement 1
Arrangement 4Arrangement 3
1
1
1
1
1
1
2
1
1
2
2
2 22
22
5"
37" Typ.
45 1/8" Typ.
79 1/2" Case
85 7/8" Overall
22 1/2" Minimum
Service Area
71 5/8" Minimum
Service Area
FRONT VIEW
35" Case
37 1/4" Overall
LEFT VIEW
73 1/8" Case
73 3/8" Overall
TOP VIEW
Filters to be placed on the
upstream side of the cores,
depending on airflow
arrangement chosen.
Filters are 2" X 20" X 20"
pleated disposable.
Performance Derating:
Airflow Arrangements 3 & 4 result in lower energy transfer.
Reduce sensible effectiveness by 2 percentage points.
Reduce total effectiveness by 1 percentage point.
AVAILABLE AIRFLOW
ARRANGEMENTS
(SIDE VIEW)
Model: PA8X
Drawing Type: Unit Dimension
Version: AUG18
ABBREVIATION
EA: Exhaust Air to outside
OA: Outside Air intake
RA: Room Air to be exhausted
FA: Fresh Air to inside
INSTALLATION ORIENTATION
Unit must be installed in orientation
shown.
NOTE:
1. UNLESS OTHERWISE SPECIFIED,
DIMENSIONS ARE ROUNDED TO THE
NEAREST EIGHTH OF AN INCH.
2. SPECIFICATIONS MAY BE SUBJECT
TO CHANGE WITHOUT NOTICE.
AIRFLOW CONFIGURATION
Available as shown:
UNIT MOUNTING & APPLICATION
Must be mounted as shown. RA/EA airstream can
be switched with OA/FA airstream. Knockdown can
be field assembled for multiple duct configurations.
Multiple cabinets can be aligned for unlimited airflow.
EA/FA
EA/FA
RA/OA RA/OA
PAIN
1
EA/FA
EA/FA
RA/OA
RA/OA
PAIN
2
EA/FA
EA/FA
RA/OA
RA/OA
PAIN
3
EA/FA
EA/FA
RA/OA
RA/OA
PAIN
4
PA-SERIES
2
1
1
2
1
2 2
1
2
1
2
1
2
1
1
2
Arrangement 3 Arrangement 4
Arrangement 1 Arrangement 2
5"
28" Typ.
34 3/8" Typ.
59 3/4" Case
66 1/8" Overall
31 1/8"
Minimum
Service
Area
107 3/4" Minimum
Service Area
FRONT VIEW
35" Case
37 1/4"
Overall
LEFT VIEW
109 1/4" Case
109 3/8" Overall
TOP VIEW
Filters to be placed on the
upstream side of the cores,
depending on airflow
arrangement chosen.
Filters are 2" X 20" X 20"
pleated disposable.
AVAILABLE AIRFLOW
ARRANGEMENTS
(SIDE VIEW)
Performance Derating:
Airflow Arrangements 3 & 4 result in lower energy transfer.
Reduce sensible effectiveness by 2 percentage points.
Reduce total effectiveness by 1 percentage point.
Model: PA9X
Drawing Type: Unit Dimension
Version: AUG18
ABBREVIATION
EA: Exhaust Air to outside
OA: Outside Air intake
RA: Room Air to be exhausted
FA: Fresh Air to inside
INSTALLATION ORIENTATION
Unit must be installed in orientation
shown.
NOTE:
1. UNLESS OTHERWISE SPECIFIED,
DIMENSIONS ARE ROUNDED TO THE
NEAREST EIGHTH OF AN INCH.
2. SPECIFICATIONS MAY BE SUBJECT
TO CHANGE WITHOUT NOTICE.
PA9X
Energy Recovery Module
AIRFLOW CONFIGURATION
Available as shown:
UNIT MOUNTING & APPLICATION
Must be mounted as shown. RA/EA airstream can
be switched with OA/FA airstream. Knockdown can
be field assembled for multiple duct configurations.
Multiple cabinets can be aligned for unlimited airflow.
EA/FA
EA/FA
RA/OA RA/OA
PAIN
1
EA/FA
EA/FA
RA/OA
RA/OA
PAIN
2
EA/FA
EA/FA
RA/OA
RA/OA
PAIN
3
EA/FA
EA/FA
RA/OA
RA/OA
PAIN
4

1.800.627.44998
RENEWAIRE.COM 1.800.627.4499
16
SPECIFICATIONS & DIMENSIONS
2
1
2
1
2
1
2
1
1
2
2
1
2
1
1
2
Arrangement 3 Arrangement 4
Arrangement 1 Arrangement 2
5"
45 1/8" Typ.
36 7/8"
Typ.
79 1/2" Case
85 7/8" Overall
22 1/2"
Minimum
Service
Area
107 3/4" Minimum
Service Area
FRONT VIEW
35" Case
37 1/4"
Overall
LEFT VIEW
109 1/4" Case
109 3/8" Overall
TOP VIEW
Filters to be placed on the
upstream side of the cores,
depending on airflow
arrangement chosen.
Filters are 2" X 20" X 20"
pleated disposable.
AVAILABLE AIRFLOW
ARRANGEMENTS
(SIDE VIEW)
Performance Derating:
Airflow Arrangements 3 & 4 result in lower energy transfer.
Reduce sensible effectiveness by 2 percentage points.
Reduce total effectiveness by 1 percentage point.
Model: PA12X
Drawing Type: Unit Dimension
Version: AUG18
ABBREVIATION
EA: Exhaust Air to outside
OA: Outside Air intake
RA: Room Air to be exhausted
FA: Fresh Air to inside
INSTALLATION ORIENTATION
Unit must be installed in orientation
shown.
NOTE:
1. UNLESS OTHERWISE SPECIFIED,
DIMENSIONS ARE ROUNDED TO THE
NEAREST EIGHTH OF AN INCH.
2. SPECIFICATIONS MAY BE SUBJECT
TO CHANGE WITHOUT NOTICE.
PA12X
Energy Recovery Module
UNIT MOUNTING & APPLICATION
Must be mounted as shown. RA/EA airstream can
be switched with OA/FA airstream. Knockdown can
be field assembled for multiple duct configurations.
Multiple cabinets can be aligned for unlimited airflow.
AIRFLOW CONFIGURATION
Available as shown:
EA/FA
EA/FA
RA/OA RA/OA
PAIN
1
EA/FA
EA/FA
RA/OA
RA/OA
PAIN
2
EA/FA
EA/FA
RA/OA
RA/OA
PAIN
3
EA/FA
EA/FA
RA/OA
RA/OA
PAIN
4
THIS PAGE IS INTENTIONALLY LEFT BLANK.

91.800.627.4499
PA-Series ERV
1.0 OVERVIEW 11
1.1 PA-SERIES INSTALLER INFORMATION .................. 11
1.2 SYSTEM DESIGN—GENERAL ................................11
1.2.1 Function ........................................................................... 11
1.2.2 For Indoor Use Only .......................................................... 11
1.2.3 Locate to Minimize Duct Length ........................................ 11
1.2.4 Provide Service Access..................................................... 11
1.2.5 Specify and Provide Blowers ............................................. 11
1.2.6 Provide System Shut-off Means for Saftey......................... 11
1.2.7 Four Ducts are Required ................................................... 12
1.2.8 Special Considerations for Outside Air and Exhaust Air Ducts
................................................................................................. 12
1.2.9 Select the Airflow Path Configuration ................................ 12
1.2.10 Design the Plenums......................................................... 12
1.3 SYSTEM DESIGN—BLOWER DESIGN ISSUES.........12
1.3.1 Push-Push Blower Layout.................................................. 12
1.3.2 Pull-Pull Blower Layout ..................................................... 12
1.3.3 OA Push–EA Pull Blower Layout ........................................14
1.4 SYSTEM DESIGN—BLOWER SIZING ......................15
1.4.1 Blower Sizing .................................................................... 15
1.4.2 Blower Inlet and Outlet Conditions..................................... 15
1.5 SYSTEM DESIGN—STATIC PRESSURE DIFFERENTIAL
..................................................................................16
1.5.1 Determining Average Static Pressure Difference ................ 16
1.5.2 Evaluating Leakage Volumes .............................................16
1.5.3 Comparison of Leakage Volume and EATR Ratings............. 17
2.0 INSTALLATION 17
2.1 AIRSTREAM AND FILTER ARRANGEMENTS.............17
2.2 ASSEMBLY ...........................................................20
2.2.1 Tools Required..................................................................20
2.2.2 Parts Lists........................................................................20
2.2.3 Stack Energy Recovery Cores ...........................................22
2.2.4 Install End Panels .............................................................23
2.2.5 Square Up and Connect Cores, Center Spacer, and Ends....25
2.2.6 Assemble Twinned Filter Rack(s).......................................26
2.2.7 Install Filter Racks ............................................................26
2.2.8 Install Side Panels ............................................................28
2.2.9 Install Top Duct Flange .....................................................29
2.2.10 Install End Cross Bars .....................................................30
2.2.11 Install Duct Flanges.........................................................31
2.2.12 Install Top Cross Bar(s)....................................................32
2.2.13 Screw Side Panels to Core Stacks and Filter Racks..........33
2.2.14 Install Doors ...................................................................34
2.2.15 Final Caulking and Check-out..........................................34
2.3 FORKLIFT INFORMATION.......................................35
3.0 OPERATION 36
3.1 BASIC FUNCTION OF PA-SERIES ERV ....................36
3.2 CHECKING OPERATION OF THE PA-SERIES ............36
3.2.1 Airflow .............................................................................36
3.2.2 Energy Exchange..............................................................36
3.2.3 Operating Controls............................................................36
3.2.4 Continuous Operation .......................................................36
3.2.5 Operation in Extreme Cold Weather...................................36
4.0 MAINTENANCE 37
4.1 CHANGING THE FILTERS .......................................37
4.2 CLEAN THE ENERGY EXCHANGE CORES ................37
4.3 FILTER SPECIFICATIONS .......................................37
5.0 FACTORY ASSISTANCE .......................... 38
TABLE OF CONTENTS

1.800.627.449910
PA-Series
ERV
TABLE OF CONTENTS
TABLE OF ILLUSTRATIONS
Figure 1.3.0 Push-Push Blower Layout—Recommended ................................................................... 13
Figure 1.3.1 Pull-Pull Blower Layout—Recommended ....................................................................... 13
Figure 1.3.2 OA Push–EA Pull Blower Layout (can be used with caution)............................................ 14
Figure 1.3.3 RA Push–FA Pull Blower Layout, Not Recommended ...................................................... 14
Figure 1.4.0 Pressure Drop through PA-Series Units .......................................................................... 15
Figure 1.5.0 Leakage Volumes .......................................................................................................... 16
Figure 2.1.0 Arrangements 1 and 3 (Opposite-Side Entries) ............................................................... 18
Figure 2.1.1 Arrangements 2 and 4 (Same-Side Entries) .................................................................... 19
Figure 2.2.0 Place Base....................................................................................................................22
Figure 2.2.1 Place First Energy Recovery Core................................................................................... 22
Figure 2.2.2 Check Core Placement .................................................................................................. 22
Figure 2.2.3 Place Center Spacer......................................................................................................22
Figure 2.2.4 Place Second Energy Recovery Core.............................................................................. 23
Figure 2.2.5 Place S-Slips on End Flanges ........................................................................................ 24
Figure 2.2.6 Install End Panels.......................................................................................................... 24
Figure 2.2.7 Core Stacks and End Panels must be Plumb and Level ................................................... 25
Figure 2.2.8 Parts of Twinned Filter Racks (Top View) .......................................................................26
Figure 2.2.9 Assemble Twinned Filter Racks .....................................................................................26
Figure 2.2.10 Place Twinned Filter Racks Against Energy Recovery Cores (Two-Stack Units) .............. 27
Figure 2.2.11 Place Single Filter Racks Against Appropriate Core Stack Faces.................................... 27
Figure 2.2.12 Alignment of Filter Rack Flanges and Core Stacks ........................................................27
Figure 2.2.13 Place Large Side Panels............................................................................................... 28
Figure 2.2.14 Side Panel Fit .............................................................................................................. 28
Figure 2.2.15 Place Small Side Panels...............................................................................................29
Figure 2.2.16 Install Top Duct Flange ................................................................................................ 29
Figure 2.2.17 Intersection of Core Stacks, Filter Racks, and Top Duct Flange .....................................30
Figure 2.2.18 End Cross Bar Installation............................................................................................ 30
Figure 2.2.19 Install L-Duct Channels ................................................................................................ 31
Figure 2.2.20 Install Side Duct Flanges............................................................................................. 31
Figure 2.2.21 Install U-Duct Channel ................................................................................................ 32
Figure 2.2.22 Center Top Cross Bar Between Core Stacks .................................................................32
Figure 2.2.23 Locations for Screws...................................................................................................33
Figure 2.2.24 Install Doors ...............................................................................................................34
Figure 2.2.25 Locations for Final Caulking ........................................................................................ 34
Figure 4.3.0 Initial Resistance of Supplied Filters .............................................................................. 38

111.800.627.4499
PA-Series ERV
1.0 OVERVIEW
1.1 PA-SERIES INSTALLER INFORMATION
The PA-Series Energy Recovery Ventilators (ERVs) are available either factory-assembled or
knocked-down for on-site assembly.
If the unit is received pre-assembled, please be sure to:
ureview the Forklift Information section;
ureview the Warnings and Cautions at the front of the manual.
If you are assembling the unit please be sure to:
ureview the Warnings and Cautions at the front of the manual;
usee the Airflow Direction and Filters Locations sections before starting;
ureview the Forlift Information section.
Throughout the assembly instructions, we refer to the “two-stack” and “three-stack” models,
and also to “three-high” and “four-high” models.
PA6X: Two-stack, three high
PA8X: Two-stack, four-high
PA9X: Three-stack, three-high
PA12X: Three-stack, four-high
1.2 SYSTEM DESIGN—GENERAL
1.2.1 Function
The patented RewAire PA-Series ERVs (Covered by US Patent 5,660,228) are used to transfer
energy from exhaust air leaving a building, into fresh air being brought in from the outside for
ventilation. By recovering energy from the exhaust airstream, the benefits of ventilation can be
enjoyed without the full energy cost to condition the outside air.
1.2.2 For Indoor Use Only
The unit is designed for installation in a sheltered location, out of the weather.
1.2.3 Locate to Minimize Duct Length
The ideal location for the unit is:
ucentral to the inside duct runs;
uclose to both the exhaust duct (to the outside) and the fresh air duct (from the outside).
1.2.4 Provide Service Access
The top of the unit must be accessible for cleaning and filter replacement. See dimension
drawing at the front of the manual.
1.2.5 Specify and Provide Blowers
The PA-Series ERVs do not include blowers. Therefore, two blowers must be installed as part of
the system. Several ducts must also be installed. See Blower Design Issues section below.
1.2.6 Provide System Shut-off Means for Safety
Provide a nearby disconnect switch so service people can shutoff the blowers connected to the
system when changing filters.
OVERVIEW

1.800.627.449912
PA-Series
ERV
1.2.7 Four Ducts are Required
uOutside Air Duct handles Supply Air entering the ERV.
uFresh Air Duct handles Supply Air leaving the ERV.
uReturn Air Duct handles Exhaust Air entering the ERV.
uExhaust Air Duct carries the Exhaust Air from the ERV to the outside of the building.
1.2.8 Special Considerations for Outside Air and Exhaust Air Ducts
Proper location and construction of these ducts are critical to the safety and proper function
of the sytem. The exhaust outlet and outside air inlet on the outside of the building should be
separated to avoid cross-contamination.
NOTE: Some
jurisdictions may
allow less separa-
tion, or may require more.
Check with your local code
officials. Danger of carbon monoxide poisoning! Outside air intake should be 10' (minimum) away from
sources of carbon monoxide or other toxic gases such as chimneys, furnace, or water heater
exhausts.
Do not locate outside air intake where vehicles may be serviced or left idling. Do not locate the
outside air intake inside an enclosed space.
WARNING
NOTE: The exhaust
outlet should not
dump air into an
enclosed space or
any other structure. The
inlets and outlets should
be screened against
insects and vermin and
shielded from the weather
to prevent the entry of rain
or snow.
Danger of Damage Due to Condensation in or on Ducts to Outside.
Both ducts connecting the unit to the outside must be insulated with sealed vapor barriers inside
and out to prevent condensation and/or freezing inside the insulation or on the duct surface.
CAUTION
1.2.9 Select the Airflow Path Configuration
Four basic airflow configurations are possible with the PA-Series. See Airstream and Filter
Arrangements section on pages 18–19.
Some airflow arrangements result in lower energy-recovery performace and require derating.
CAUTION
1.2.10 Design the Plenums
Duct plenums will be required, equal to the face width of the PA unit. See dimension drawing
at the begining of the manual. In some cases the plenums may reduce to the size of the unit
inlet openings. Design the plenums for low velocity to minimize pressure drop and achieve good
airflow distribution into the unit.
1.3 SYSTEM DESIGN—BLOWER DESIGN ISSUES
1.3.1 Blower Location
Two blowers will be required: one for the air to be exhausted from the building, another for the
fresh air to be brought into the building. See Figures 1.3.0–1.3.3 on the following pages.
SYSTEM DESIGN

131.800.627.4499
PA-Series ERV
SYSTEM DESIGN
FIGURE 1.3.0 PUSH-PUSH BLOWER LAYOUT—RECOMMENDED
1.3.2 Push-Push and Pull-Pull Blower Layouts
These are the recommended blower layouts for virtually every application. In “Push-Push”
applications, both blowers push into the ERV, see Figure 1.3.0. In “Pull-Pull” applications, both
pull from the ERV, see Figure 1.3.1. These layouts minimize leakage between the airstreams due
to pressure differences.
FIGURE 1.3.1 PULL-PULL BLOWER LAYOUT—RECOMMENDED
INSULATE THESE
DUCTS AND BLOWER
INSULATE THESE
DUCTS AND BLOWER

1.800.627.449914
PA-Series
ERV
SYSTEM DESIGN
FIGURE 1.3.2 OA PUSH–EA PULL BLOWER LAYOUT
(CAN BE USED WITH CAUTIONS)
1.3.3 OA Push–EA Pull Blower Layouts
This blower layout, Figure 1.3.2, causes the supply airstream to be at a much higher static
pressure than the exhaust airstream. This may result in air leakage, which must be evaluated in
the design process. A benefit of this layout is that both blowers are isolated from the building’s
duct system by the ERV, which provides some acoustic attenuation.
The designer should always evaluate static pressure differentials between the airstreams if this
layout is used. See section 1.5 Static Pressure Differentials on page 16.
FIGURE 1.3.3 RA PUSH–FA PULL BLOWER LAYOUT,
NOT RECOMMENDED
INSULATE
THESE
DUCTS AND
BLOWERS

151.800.627.4499
PA-Series ERV
1.4 SYSTEM DESIGN—BLOWER SIZING
1.4.1 Blower Sizing
See Figure 1.4.0 below for pressure drop through the PA ERVs. The chart does not include
allowances for inlet/outlet plenums, which are not included with the unit. The chart includes
pressure drop through clean filters.
In general, ventilation systems with energy-recovery components use blowers operating at
relatively high static pressure. Thus, parts of the duct system will be at higher-than-ordinary
static pressures, and greater duct leakage may result.
It is good practice to select blowers and motors that can be operated at higher total static
pressures than required by the nominal design. This provides a solution in the event that total
system pressure drop is higher than expected. Note that this means proper system balancing
and commissioning becomes even more important, in order to prevent operation at higher-than-
requried airflows.
FIGURE 1.4.0 PRESSURE DROP THROUGH PA-SERIES UNITS
1.4.2 Blower Inlet and Outlet Conditions
As in all applications of blowers in air-handling systems, imporper duct design at the inlet and
outlet of the blower can greatly reduce blower performace compared to its published ratings.
Complete guidelines on blower applications are beyond the scope of this document. The most
basic guidlines are:
AT THE BLOWER OUTLET:
uDesign a gradual transition to the final duct size.
uIncluded angle between the transition elements should not exceed 7˚.
uTransition length shoul be at least 2.5 times the equivalent duct diameters of the blower
outlet.
AT THE BLOWER INLET:
uDesign for no bends in the duct for at least 5 equivalent duct diameters of the blower inlet.
uIf a transition is needed at the duct connection to the blower, included angle between the
transition elements should not exceed 15˚.
Maximum Differential Pres-
sure
The maximum pressure
differential between the
two airstreams shound not
exceed 4 inches (H2O).
CAUTION
SYSTEM DESIGN

1.800.627.449916
PA-Series
ERV
INSTALLATION
NOTE: The leakage
volume is shown
here as a function
strictly of static pressure
differenece, not overall
airflow volume.
1.5 SYSTEM DESIGN—STATIC PRESSURE DIFFERENTIAL
Strong static pressure differences can result in air leakage from one airstream to the other
within the energy-recovery assembly.
When the Average Static Pressure Difference between the two airstreams is greater than 1",
you may need to account for leakage airflow in your blower selection.
1.5.1 Determining Average Static Pressure Difference
1. Lay out the design of the system specifying ducts, blowers, and all other components that
create static pressure differences.
2. Determine the static pressure conditions at the inlet and outlets of the ERV.
3. Calculate the Average Static Pressure Difference using the following formula:
Average Static Pressure Difference = [(SPoa + SPfa)/2] - [(SPra + SPea)/2]
where:
SPoa is the static pressure at the outside air inlet to the cabinet;
SPfa is the static pressure at the fresh air outlet from the cabinet;
SPra is the static pressure at the return air inlet to the cabinet;
SPea is the static pressure at the exhaust air outlet from the cabinet.
1.5.2 Evaluating Leakage Volume
Determine leakage volume from Figure 1.5.0 below. Leakage will be from the airstream at
higher static pressure to the airstream at lower static pressure.
In Push-Push and Pull-Pull blower layouts, leakage volume is almost always negligible. It should
be considered in other blower layouts and may require adjustment of the designed blower
operation points.
FIGURE 1.5.0 LEAKAGE VOLUMES

171.800.627.4499
PA-Series ERV
2.0 INSTALLATION
2.1 AIRSTREAM AND FILTER ARRANGEMENTS
INSTALLATION
Read and understand this section before beginning assembly!
CAUTION
This ERV can be assembling in many different configurations. Only one of them is correct for
your job! Check your ductwork design, then determine which Assembly Arrangement to use.
1. Determine the Airflow Paths for your job.
The two airstreams are the SUPPLY (air from the outside) and the RETURN (air from the
conditioned space).
If Supply and Return enter the exchanger on OPPOSITE sides, use Arrangements 1 or 3,
Figure 2.1.0.
If Supply and Return enter the exchanger on the SAME side, use Arrangements 2 or 4, Figure
2.1.1.
If the airstreams enter the exchanger low, and leave the exchanger high (or the other way
around), this is called “cross airflow”. Use Arrangements 1 or 2.
If one airstream enters the exchanger high and leaves high and the other enters low
and leaves low, this is called “parallel airflow”. Use Arrangements 3 or 4. This airflow
configuration requires a performance derate.
2. Determine the resulting FILTER CONFIGURATION for your job.
Remember that the filters must be installed to cover the inlet faces of the core stacks.
NOTE: Deter-
mine how many
“twinned filters”
you will need to
assemble for your job.
1.5.3 Comparison of Leakage Volume and EATR Ratings
Leakage volumes presented here are application ratings for the complete PA-Series energy-
recovery unit. EATR is a certified rating point used in ARI’s 1060 program for the energy-
recovery component in the PA-Series unit. The two are related but not identical.
EATR, or Exhaust Air Transfer Ratio, is leakage through the component only, expressed as a
ratio of fresh air volume.
The driving force for leakage in the PA-Series ERV is pressure differential between the two
airstreams, which is not directly a function of airflow volume. Leakage occurs at a low rate in
the component itself, as verified by our ARI ratings, and also at about the same volume in the
case. Thus, the leakage volumes presented here are both easier to apply and more accurate
when considering the entire system.

1.800.627.449918
PA-Series
ERV
INSTALLATION
Derate performance if using
Parallel Airflow
(Arrangements 3 and 4).
Reduce sensible
effectiveness by 2 percent-
age points.
Reduce total effectiveness
by 1 percentage point.
CAUTION
#1#2
#2#1
#1 #1
#2 #2
End View
Front Views
"ARRANGEMENT 1"
OPPOSITE-SIDE ENTRIES
CROSS AIRFLOWS
End View
#1
#1
Views
Top
#2
#1
#2
#1 #1
#2 #2
#2
#2 #2
#1 #1
#1 #1
#2 #2
#1 #1
#2#2
Back Views
REQUIRES (2)
TWINNED FILTERS.
REQUIRES (2)
TWINNED FILTERS &
(2) SINGLE FILTERS.
REQUIRES (2)
TWINNED FILTERS.
REQUIRES (2)
TWINNED FILTERS &
(2) SINGLE FILTERS.
"ARRANGEMENT 3"
OPPOSITE-SIDE ENTRIES
PARALLEL AIRFLOWS
DERATE PERFORMANCE
#2
#1#2
#1
#2
Views
Top
#1
Back Views
Front Views
OPENING
NOTE: FILTERS COVER
THE INLET FACES OF
THE CORES.
NOTE: FILTERS COVER
THE INLET FACES OF
THE CORES.
#1
IN
#1
IN
#2
IN
#2
OUT
#1
IN
#2
OUT
#2
OUT
#2
OUT
#1
OUT
#1
OUT
#1
IN
#1
IN
#1
IN
#2
OUT
#2
OUT
#2
OUT
#2
OUT
#1
OUT
#1
OUT
#1
OUT
#1
OUT
#2
IN
#2
IN
#2
IN
#1
OUT
#1
OUT
#2
IN
#2
IN
SIDE PANEL
FIGURE 2.1.0 ARRANGEMENTS 1 AND 3 (OPPOSITE-SIDE ENTRIES)

191.800.627.4499
PA-Series ERV
INSTALLATION
End View
#1
#1
#2
#1
#1 #1
#2 #2
#2 #2
#1#1
#2#2
#1 #1
#2
#2
End View
Top
Views
REQUIRES (1)
TWINNED FILTER & (2)
SINGLE FILTERS.
#1#2 #2
#2#1 #1
#1
REQUIRES (2)
TWINNED FILTERS &
(2) SINGLE FILTERS.
#2
#2
#1#1 #2
#2 #1
#2
#1
#1
#2
REQUIRES (1)
TWINNED FILTER & (2)
SINGLE FILTERS.
REQUIRES (2)
TWINNED FILTERS &
(2) SINGLE FILTERS.
"ARRANGEMENT 2"
SAME-SIDE ENTRIES
CROSS AIRFLOWS
"ARRANGEMENT 4"
SAME-SIDE ENTRIES
PARALLEL AIRFLOWS
DERATE PERFORMANCE
Views
Top
Back Views
Front Views
Back Views
Front Views
OPENING
SIDE PANEL
NOTE: FILTERS COVER
THE INLET FACES OF
THE CORES.
NOTE: FILTERS COVER
THE INLET FACES OF
THE CORES.
#1
IN
#2
IN
#1
IN
#1
IN
#2
IN
#2
IN
#2
IN
#1
OUT
#1
OUT
#2
OUT
#2
OUT
#1
OUT
#2
OUT
#1
OUT
#2
OUT
#2
OUT
#2
OUT
#1
OUT
#1
OUT
#1
OUT
#1
OUT
#1
IN
#1
IN
#1
IN
#2
IN
#2
IN
#2
IN
#2
IN
FIGURE 2.1.1 ARRANGEMENTS 2 AND 4 (SAME-SIDE ENTRIES)
Derate performance if using
Parallel Airflow
(Arrangements 3 and 4).
Reduce sensible
effectiveness by 2 percent-
age points.
Reduce total effectiveness
by 1 percentage point.
CAUTION

1.800.627.449920
PA-Series
ERV
INSTALLATION
PARTS LIST FOR PA-6X
Quantity Part
Number Description
2100030 Door
6100040 S-Slip 59"
1104199 Filter Removal Hook
1101006 Top Cross Bar
8140771 Side Duct Flange
2101015 Filter Rack Flange
4140775 End Panel
2101031 Top Duct Flange
2101033 U-Duct Flange
2101034 L-Duct Flange
2101038 End Cross Bar
2101060 Filter Spacer
2101072 Left Hand Filter Rack
2101074 Right Hand Filter Rack
1134722 Silicone Caulk
120 104832 #8 x 1/2" combo screw
40 135336 #12 x 3/4" screw
6Energy Recovery Core
1136078 Literature Bag
2140773 Full Width Side Panel
4140598 Half Width Side Panel
1135827 Core Center Spacer
1142070 Base
2.2 ASSEMBLY
2.2.1 Tools Required
uCordless Driver/Drill with the following bits:
Nut Driver 5/16"
#2 Philips or Square Driver
1/8" Drill Bit
uTape Measure
u1/8" Allen Wrench
uCaulk Gun
uRubber Mallet
2.2.2 Parts Lists
PARTS LIST FOR PA-8X
Quantity Part
Number Description
2100030 Door
6100040 S-Slip 79"
1104198 Filter Removal Hook
1101006 Top Cross Bar
8140778 Side Duct Flange
2101041 Filter Rack Flange
4140777 End Panel
2101031 Top Duct Flange
2138067 U-Duct Flange
2101034 L-Duct Flange
2101038 End Cross Bar
2101044 Filter Spacer
2101076 Left Hand Filter Rack
2101078 Right Hand Filter Rack
1134722 Silicone Caulk
130 104832 #8 x 1/2" combo screw
50 135336 #12 x 3/4" screw
8Energy Recovery Core
1136078 Literature Bag
2140770 Full Width Side Panel
4140768 Half Width Side Panel
1135828 Core Center Spacer
1142070 Base
This manual suits for next models
4
Table of contents
Other RenewAire Test Equipment manuals