manuals.online logo
Brands
  1. Home
  2. •
  3. Brands
  4. •
  5. Reonix Automation
  6. •
  7. Security System
  8. •
  9. Reonix Automation R2A+ User manual

Reonix Automation R2A+ User manual

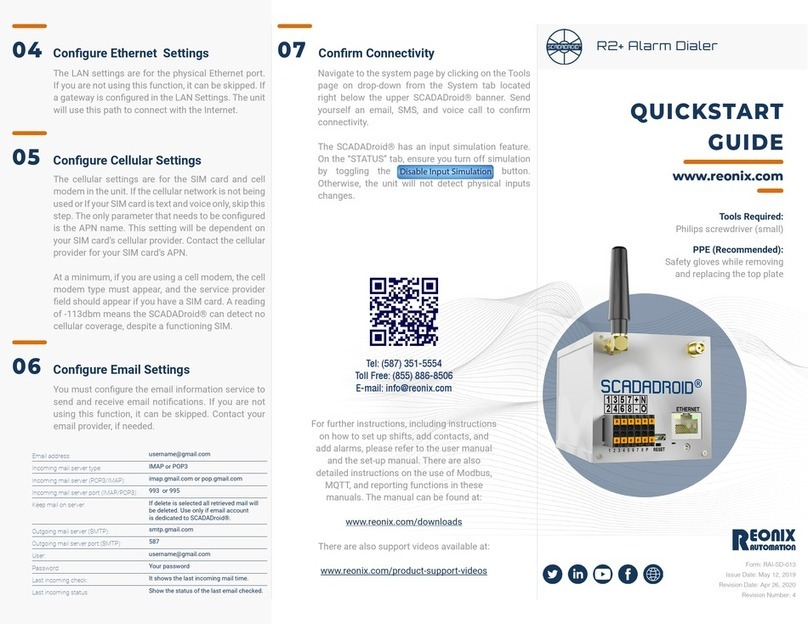
R2A+ Alarm Dialer
QUICKSTART
GUIDE
Tools Required:
Philips screwdriver (small)
PPE (Recommended):
Safety gloves while removing
and replacing the top plate
www.reonix.com
Form: RAI-SD-013
Issue Date: May 12, 2019
Revision Date: Apr 26, 2020
Revision Number: 4
Congure Ethernet Settings
Congure Email Settings
04
06
Conrm Connectivity
07
Congure Cellular Settings
05
The LAN settings are for the physical Ethernet port.
If you are not using this function, it can be skipped. If
a gateway is congured in the LAN Settings. The unit
will use this path to connect with the Internet.
You must congure the email information service to
send and receive email notications. If you are not
using this function, it can be skipped. Contact your
email provider, if needed.
Navigate to the system page by clicking on the Tools
page on drop-down from the System tab located
right below the upper SCADADroid® banner. Send
yourself an email, SMS, and voice call to conrm
connectivity.
The SCADADroid® has an input simulation feature.
On the “STATUS” tab, ensure you turn off simulation
by toggling the Disable Input Simulation button.
Otherwise, the unit will not detect physical inputs
changes.
The cellular settings are for the SIM card and cell
modem in the unit. If the cellular network is not being
used or If your SIM card is text and voice only, skip this
step. The only parameter that needs to be congured
is the APN name. This setting will be dependent on
your SIM card’s cellular provider. Contact the cellular
provider for your SIM card’s APN.
At a minimum, if you are using a cell modem, the cell
modem type must appear, and the service provider
eld should appear if you have a SIM card. A reading
of -113dbm means the SCADADroid® can detect no
cellular coverage, despite a functioning SIM.
Disable Input Simulation
For further instructions, including instructions
on how to set up shifts, add contacts, and
add alarms, please refer to the user manual
and the set-up manual. There are also
detailed instructions on the use of Modbus,
MQTT, and reporting functions in these
manuals. The manual can be found at:
www.reonix.com/downloads
There are also support videos available at:
www.reonix.com/product-support-videos
Tel: (587) 351-5554
Toll Free: (855) 886-8506
E-mail: [email protected]
Email address: [email protected]
Incoming mail server type: IMAP or POP3
Incoming mail server (POP3/IMAP): imap.gmail.com or pop.gmail.com
Incoming mail server port (IMAP/POP3): 993 or 995
Keep mail on server: If delete is selected all retrieved mail will
be deleted. Use only if email account
is dedicated to SCADADroid®.
Outgoing mail server (SMTP): smtp.gmail.com
Outgoing mail server port (SMTP): 587
User: [email protected]
Password: Your password
Last incoming check: It shows the last incoming mail time.
Last incoming status: Show the status of the last email checked.
1 2
3 4
5 6
DIN rail where the module is installed has to be bonded to ground.
Do not use 192.168.1.15 as your IP address.
1 2
Install SIM Card
01
Connect to the Unit
Connect Power and Peripherals
Steps to assign static IP:
02
03
If the unit will rely entirely or partially on the cellular
network for its connectivity, the SIM card should be
installed rst. Please refer to Initial Physical Setup
on the SCADADroid® Setup Manual for detailed
instructions on this conguration. When returning
the Top Plate, match the interlock-channels correctly.
Ensure that the SIM card is locked in place by sliding
the tray horizontally before returning the Top Plate.
Connect the Ethernet cable for setup from the
SCADADroid®to a PC. It is necessary to set up a
static IP address on your computer (to change the
computer IP Address see Page D).
Using any web browser on the connected computer
enter in the URL: “192.168.1.15” and press enter. A
warning will appear that the website might not be
secure, but it is safe to proceed, as the interface
is fully encrypted. A password dialog box should
appear. The default Username and Password
is admin and password, respectively. If the web
interface does not appear, your computer may not
be on the same subnet as the unit.
At a minimum, the unit needs a power source (12-
30 VDC, 1 amp) and an Ethernet connection between
the unit and a computer for initial setup (RJ45 port
with straight-through cable)
The user must connect the digital inputs rst,
followed by power terminated at the 12 - position
wiring connector.
For Windows:
1. Type network and sharing into the search box in
the Start Menu and select Network and Sharing
Center.
2. Then when the Network and Sharing Center
opens, click on Change adapter settings.
3. Right-click on your local adapter and select
Properties.
4. In the Local Area Connection Properties window
highlight Internet Protocol Version 4 (TCP/IPv4)
then click the Properties button (See Fig. 1).
5. Now select the radio button “Use the following
IP address” and type an IP on the same range
of the SCADADroid® (192.168.1.XXX), Subnet
mask 255.255.255.0 (See Fig. 2), click OK.
2FF Mini SIM required:
(25mmx15mm)
For MacOS:
1. Go to “System Preferences”, then “Network”,
then “LAN”, then “Congure IPv4” pulldown,
select “Manually”
2. Enter new IP address 192.168.1.xxx, subnet
255.255.255.0; then click “Apply”
A + Analog Source
Analog Source
+
-
+
-
A -
B +
B -

Other Reonix Automation Security System manuals

Reonix Automation R2+ User manual

Reonix Automation

Reonix Automation R2+ User manual

Reonix Automation SCADADroid R2 User manual

Reonix Automation

Reonix Automation SCADADroid R2 User manual

Popular Security System manuals by other brands

Pima N-406 user manual

Pima

Pima N-406 user manual

Ezviz A1 quick start guide

Ezviz

Ezviz A1 quick start guide

Silent Alert UM3A-2212-EU MK XI quick start guide

Silent Alert

Silent Alert UM3A-2212-EU MK XI quick start guide

SICK deTec4 Core operating instructions

SICK

SICK deTec4 Core operating instructions

Protect America Peacekeeper owner's manual

Protect America

Protect America Peacekeeper owner's manual

Bosch Security System user guide

Bosch

Bosch Security System user guide

Honeywell VISTA-32FBPT Quick guide to user functions

Honeywell

Honeywell VISTA-32FBPT Quick guide to user functions

STI SS2 6 Series quick start guide

STI

STI SS2 6 Series quick start guide

Inner Range Concept 2000 user manual

Inner Range

Inner Range Concept 2000 user manual

Se-Kure Controls MicroMini SK-4841 instructions

Se-Kure Controls

Se-Kure Controls MicroMini SK-4841 instructions

teko astra-10 Operation manuals

teko

teko astra-10 Operation manuals

resqme Defendme instructions

resqme

resqme Defendme instructions

jablotron Profi user manual

jablotron

jablotron Profi user manual

Fireco Deafgard operating guide

Fireco

Fireco Deafgard operating guide

Ropam elektronik OptimaGSM Series installation guide

Ropam elektronik

Ropam elektronik OptimaGSM Series installation guide

Hills VSD1 installation guide

Hills

Hills VSD1 installation guide

Stahl YL60 Series operating instructions

Stahl

Stahl YL60 Series operating instructions

GE 45235 user manual

GE

GE 45235 user manual

manuals.online logo
manuals.online logoBrands
  • About & Mission
  • Contact us
  • Privacy Policy
  • Terms and Conditions

Copyright 2025 Manuals.Online. All Rights Reserved.