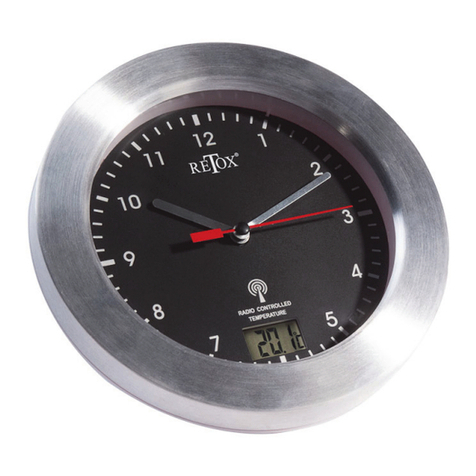
RETOX 83 22 11 User manual

Spritzwassergeschütze Badezimmeruhr
Artikel Nr. 83 22 11
Splash proof Bathroom Clock
Article No. 83 22 11
Bedienungsanleitung
Instruction Manual
RE
O
X
®

II
Dear Customers
Instruction manuals provide valuable hints for using your new
device. They enable you to use all functions, and they help you
avoid misunderstandings and prevent damage.
Please take the time to read this manual carefully and keep it for
future reference.
Bedienungsanleitungen enthalten wichtige Hinweise für den
Umgang mit Ihrem neuen Gerät. Sie ermöglichen Ihnen, alle
Funktionen zu nutzen, und sie helfen Ihnen, Missverständnisse
zu vermeiden und Schäden vorzubeugen.
Bitte nehmen Sie sich die Zeit, diese Bedienungsanleitung in
Ruhe durchzulesen und bewahren Sie diese für späteres Nach-
lesen gut auf.
Sehr
g
eehrte Damen und Herren

III
Übersicht
|
Overview
7
8
9
13
14
10
11
12
1 5
32 4 6

IV
1 Batteriefach Battery Compartment
2 Signal-Empfangstaste Signal Receiving Key
3 Einstelltaste Set Key
4 Rücksetztaste/Neustart Reset Key
5 Hoch-Taste Up Key
6 Runter-Taste Down Key
7 Aufhängeöse Hanging Hole
8 Saugnäpfe Suction Cups
9 Tischaufsteller Table Stand
10 Uhrzeit Time
11 Datum Date
12 Umgebungstemperatur Ambient Temperature
13 Empfangssymbol Reception Indicator
14 Wochentag Weekday
Übersicht
|
Overview

1
Table of Contents
Inhaltsverzeichnis
Sicherheitshinweise..........................................................Seite 2
Informationen über den DCF 77-Sender..........................Seite 3
Batterie einsetzen/ersetzen..............................................Seite 3
Inbetriebnahme und Bedienung der Funkuhr ..................Seite 4
Temperaturanzeige ..........................................................Seite 5
Aufstellmöglichkeiten........................................................Seite 5
Fehlerbehebung ...............................................................Seite 6
Reinigung und Lagerung..................................................Seite 7
Technische Daten ............................................................Seite 8
Safety Notes.....................................................................Page 9
Information on the DCF77 Time Signal............................Page 10
Inserting/replacing the Battery .........................................Page 10
Operating the radio controlled Clock................................Page 11
Temperature Display ........................................................Page 12
Setup Options...................................................................Page 12
Troubleshooting................................................................Page 13
Cleaning and Storing........................................................Page 14
Technical Data..................................................................Page 14

2
Sicherheitshinweise
Beachten Sie bitte zur Vermeidung von Fehlfunktionen
und Schäden folgende Hinweise:
Diese Bedienungsanleitung gehört zu diesem Produkt. Sie
enthält wichtige Hinweise zur Inbetriebnahme und Handhabung.
Bitte legen Sie die Bedienungsanleitung dem Produkt bei, wenn
Sie es an Dritte weitergeben!
Lassen Sie Verpackungsmaterial nicht achtlos herumliegen. Es
kann zu einem gefährlichen Spielzeug für Kinder werden.
Halten Sie die Uhr von Kindern fern. Die Uhr ist kein Spielzeug.
Nehmen Sie die Batterie aus der Uhr, wenn Sie diese für
längere Zeit nicht benutzen wollen.
Batterien dürfen nicht geladen, nicht auseinander genommen,
ins Feuer geworfen oder kurzgeschlossen werden.
Mischen Sie Batterien nicht mit Akkus. Verwenden Sie nur
Batterien bzw. Akkus gleichen Typs.
Setzen Sie die Uhr nicht direktem Sonnenlicht, Verschmutzun-
gen, starker Hitze, heißen Lichtquellen oder starken Magnetfel-
dern aus.
Die Uhr ist spritzwassergeschützt (IP24). Tauchen Sie die Uhr
jedoch nicht in Wasser oder in andere Flüssigkeiten.
Zerlegen Sie die Uhr nicht und unternehmen Sie keine Repara-
turversuche. Das Gerät enthält keine durch Sie instand zu set-
zenden Teile.
Batterien und Akkus gehören nicht in
den Hausmüll.
Sie können sie kostenlos an uns zurück-
senden oder bei örtlichen Geschäften
oder Batteriesammelstellen abgeben.

3
Benutzun
g
Informationen über die Funksteuerung von Uhren
durch den DCF 77-Sender
Funkuhren werden durch kodierte Funksignale gesteuert und
bekommen Ihre Zeitinformation aus der Cäsium-Atomuhr der
Physikalisch-Technischen Bundesanstalt in Braunschweig. Das
Signal wird vom Sender in Mainflingen kodiert und ausgesendet.
Solche Cäsium-Atomuhren haben eine Genauigkeit von
+/- 1 Sekunde in 1 Million Jahren.
Der Sender besitzt eine Reichweite von ca. 2000 km und sendet mit
einer Langwellenfrequenz von 77,5 kHz. Wenn sich die Uhr außer-
halb der Reichweite des Senders befindet, schaltet sie automatisch
in den Quarzbetrieb um. Sobald sich die Uhr wieder im Empfangs-
bereich befindet, stellt sie sich automatisch wieder entsprechend auf
die Zeitinformation des DCF 77-Funksignals ein.
DCF 77 setzt sich wie folgt zusammen D für Deutschland, dem C
als Kennzeichen eines Langwellensenders, dem F wegen der Nähe
zu Frankfurt (Mainflingen liegt in der Nähe von Frankfurt) und die 77
für die Sendefrequenz.
Batterie einsetzen/ersetzen
Drehen Sie die Gehäuserückseite gegen den Uhrzeigersinn von
der Uhr ab.
Drücken Sie die Lasche der Batteriefachklappe zusammen und
öffnen Sie das Batteriefach.
Setzen Sie eine neue Batterie des Typs LR6 (AA) in das
Batteriefach ein. Beachten Sie die Polarität der Batterie. Die
Polarität ist im Batteriefach gekennzeichnet. Wir empfehlen die
Verwendung von Alkaline Batterien.
Schließen Sie das Batteriefach wieder mit der Lasche.
Setzen Sie die Gehäuserückseite wieder auf die Uhr und drehen
Sie die Gehäuserückseite im Uhrzeigersinn fest. Wenden Sie

4
Benutzun
g
dabei keine Gewalt an und achten Sie dabei auf den richtigen
Sitz der Gummidichtung.
Tauschen Sie die Batterie gegen eine neue Batterie des gleichen
Typs, wenn die Anzeigen im Display schwächer werden oder die
Uhr ungenau läuft.
Inbetriebnahme und Bedienung der Uhr
Nachdem die Batterie eingesetzt wurde, startet die Uhr automa-
tisch mit der Initialisierung. Die Uhrzeit steht auf 0 Uhr und die
Funkuhr geht in den Empfangsmodus. Während des Empfang-
vorganges stellen Sie die Uhr nicht an verschiedenen Orten auf,
sondern warten Sie, bis der Vorgang beendet ist. Das Empfangs-
symbol (13) blinkt während des Empfangsversuchs. Nach
einigen Minuten sind Uhrzeit und Datum automatisch eingestellt.
Drücken Sie kurz die Signal-Empfangstaste (2), um den Uhrzeit-
Empfangsabruf manuell zu starten. Das Empfangssymbol
(13) blinkt während des Empfangsversuchs. Nachdem das Signal
erfolgreich empfangen wurde, sind Uhrzeit und Datum automa-
tisch eingestellt. Es kann einige Minuten dauern, bis das Signal
empfangen wird und die Uhr gestellt ist. Drücken Sie für drei
Sekunden die Signal-Empfangstaste, um den Empfangsabruf
vorzeitig zu stoppen.
Falls kein Funksignal empfangen wird, können Sie die Uhrzeit
auch manuell einstellen. Drücken Sie die Einstelltaste (3) für
ca. drei Sekunden, um den Einstellmodus zu aktivieren. Die
12/24-Stundenanzeige blinkt nun. Verwenden Sie die Hoch- und
Runtertasten (5) und (6) zur Einstellung des blinkenden Wertes.
Verwenden Sie die Einstelltaste (3) zur Bestätigung der Eingabe
und zum Wechseln zur nächsten Einstellung. Die Einstellreihen-
folge ist dabei wie folgt: 12/24-Stundenformat, Zeitzone, Stunde,
Minute, Jahr, Monat, Tag, Sprache. Nach Bestätigung der Einga-
be für die Sprache ist der Einstellmodus beendet.

5
Benutzun
g
Hinweise:
Die Uhrzeit wird nach dem nächsten erfolgreichen Funkempfang
automatisch eingestellt.
Wird im Einstellmodus für 30 Sekunden keine Taste betätigt, wird
der Einstellmodus automatisch beendet.
Halten Sie die Hoch- oder Runtertaste gedrückt, um einen
blinkenden Wert schneller zu verändern.
Die Länderkürzel bei der Spracheinstellung:
EN: Englisch
GE: Deutsch
DA: Dänisch
SP: Spanisch
DU: Holländisch
FR: Französisch
IT: Italienisch
Temperaturanzeige
Auf der Temperaturanzeige (12) wird nach dem Einsetzen der
Batterie die momentane Umgebungstemperatur angezeigt (-9 °C
bis +50 °C).
Verwenden Sie die Runtertaste (6), um die Temperatureinheit
zwischen °C und °F umzuschalten.
Aufstellmöglichkeiten
Verwenden Sie die Aufhängeöse (7), um die Uhr an einem Nagel
oder an einer Schraube aufzuhängen.
Verwenden Sie die vier Saugnäpfe (8), um die Uhr an einer
glatten Oberfläche anzuheften. Stellen Sie sicher, dass der Un-
tergrund glatt, sauber und fettfrei ist. Stellen Sie außerdem si-

6
Benutzun
g
BA
cher, dass die Saugnäpfe sauber sind. Befeuchten Sie diese
vorher ggf. etwas.
Verwenden Sie den in der Gehäuserückseite (Bild A) unterge-
brachten Aufsteller (9), um die Uhr auf einem Tisch o.ä. aufzu-
stellen. Stecken Sie den Aufsteller dazu in die Vorrichtung an der
Unterseite der Rückseite der Uhr (Bild B).
Der Aufsteller befindet sich in der Gehäuserückseite.
Fehlerbehebung
Sollte sich die Uhr bei einem Uhrzeit-Empfangsabruf nicht automa-
tisch auf die korrekte Zeit stellen, überprüfen Sie folgende Punke
auf mögliche Störquellen.
Überprüfen Sie, ob die Batterie richtig eingelegt ist.
Überprüfen Sie, ob die Batterie volle Kapazität hat.
Überprüfen Sie, ob die Funkuhr mit dem eingebauten Funkuhr-
werk mehr als 2 m entfernt von Geräten, wie Fernseher, Monito-
ren, Telefonanlagen, Maschinen mit HF Streufelder oder nicht
funkentstörten Haushaltsgeräten aufgestellt ist.
Bewegen Sie die Funkuhr nicht während des Empfangs. Warten
Sie bis der Empfangvorgang beendet ist und stellen Sie die Uhr
nach einem fehlgeschlagenen Empfang (nach ca. 10 Minuten) an
einer anderen Stelle auf. Nehmen Sie die Batterie aus dem Bat-
teriefach, warten Sie eine Minute und versuchen Sie einen Neu-

7
Benutzun
g
start.
Bedenken Sie, dass der Empfang des Funksignals durch örtliche
Gegebenheiten, wie Berge oder Gebäudekonstruktionen (Metall
oder Beton) gestört werden kann. Positionieren Sie die Funkuhr
am besten in Fensternähe.
Um die Uhr neu zu initialisieren und danach einen Uhrzeit-
Empfangsabruf zu starten, drücken Sie mit einem dünnen, nicht
spitzen Gegenstand (z.B. Büroklammer) auf die Rücksetztaste
(4). Der Ablauf ist nun derselbe, wie nach einem Batteriewechsel.
Reinigung und Lagerung
Reinigen Sie das Gehäuse nur mit einem leicht befeuchteten
Tuch. Benutzen Sie keine Chemikalien oder Scheuermittel, um
die Oberflächen nicht zu beschädigen.
Ersetzen Sie die Batterie, sobald die Uhrzeit falsch angezeigt
wird oder die Temperaturanzeige schwächer wird.
Nehmen Sie die Batterie aus der Uhr, wenn Sie diese für
längere Zeit nicht benutzen wollen.
Lagern Sie die Uhr im Innenbereich an einem trockenen, vor
Staub, Schmutz und extremen Temperaturen geschützten Ort.
Lagern Sie die Uhr außerhalb der Reichweite von Kindern.

8
Benutzun
g
Technische Daten
* wenn kein Empfang des DCF-Signals möglich ist
Empfangsfrequenz 77,500 kHz
Max. Gangabweichung * ± 60 Sek./Monat
Genauigkeit Thermometer ± 1,5 °C
Abmessungen Ø: ca. 17,5 cm
Gewicht ohne Batterie Ca. 370 g
Batterie Funkuhrwerk 1x LR6 (AA)
Temperaturanzeige -9 °C bis +50 °C
Schutzgrad IP24

9
Safet
y
Notes
Please note the following safety notes to avoid malfunc-
tions, damage or physical injury:
This manual belongs to the product. It contains important notes
on operating the unit. Please pass it on along with the unit if it is
handed over to a third party!
Dispose of the packaging materials carefully; the plastic bags
may become a deadly toy for children.
Keep the clock out of the reach of children. It is not a toy.
If you do not plan to use the clock for some time, remove the
battery.
Do not disassemble, burn, or short-circuit batteries and do not
attempt to recharge non-rechargeable batteries.
Do not mix rechargeable batteries and non-rechargeable
batteries and use only batteries of the same type.
Do not expose the unit to direct sunlight, dirt, high temperature,
strong light or strong magnetic fields.
The clock is splash proof (IP24). Although do not immerse the
clock in water or any other liquids.
Do not disassemble the unit or attempt to repair it yourself. It
does not contain parts serviceable by you. In the case of ques-
tions or problems, turn to our customer support.
Batteries and rechargeable batteries
do not belong in household garbage.
For battery disposal, please check with
your local council.

10
Introduction
Information on the DCF77 Time Signal
This radio controlled clock picks up the time information from the
Caesium Atomic Clock at the Physikalisch-Technische Bundesan-
stalt at Braunschweig/Germany. Such Caesium Atomic Clocks have
an accuracy of +/- 1 second in 1 million years. The signal is coded
and transmitted from the station at Mainflingen.
The station has an effective range of about 2000 km and broadcasts
on a frequency of 77.5 kHz. If the clock is unable to pick up the
signal, it automatically switches to quartz mode. When the clock
picks up the DCF77 signal, it readjusts itself.
DCF77 stands for D for Deutschland (Germany), C as indicator
for a long wave signal, F for Frankfurt (Mainflingen is close to
Frankfurt), and 77 for the frequency.
Inserting/replacing the Battery
Twist the rear part of the housing counter clockwise from the
clock.
Depress the latch of the battery compartment lid and open the
battery compartment.
Insert a new battery of the type LR6 (AA) into the battery com-
partment. Pay attention to the proper polarity of the battery. The
polarity is printed inside the battery compartment. Preferably use
alkaline batteries for proper function.
Close the battery compartment with the lid.
Re-install the rear part of the housing and twist it clockwise to
fasten it. Do not use force when removing or installing the rear
part of the housing. Pay attention that the rubber sealing ring sits
properly in place.
Replace the battery with a new battery of the same type if the
display gets weaker or if the clock runs imprecisely.

11
O
p
eratin
g
Operating the radio controlled Clock
After inserting the battery, the clock automatically will start the
initializing procedure. The display is set to zero and the clock
starts receiving the transmitted time signal. Do not reposition the
clock during this reception and setup process. During the recep-
tion process, the reception indicator (13) flashes on the dis-
play. A few minutes later the current time and date are shown on
the display.
Briefly press the signal receiving key (2) to manually enable the
signal reception mode. The reception indicator (13) flashes
on the display. A few minutes later when the reception process is
finished, the current time and date are shown on the display.
Press and hold the signal receiving key for 3 seconds to termi-
nate this process prematurely.
If no signal can be received, the time can be setup manually.
Press the set key (3) for three seconds to enter the setup mode.
The 12/24 hour display flashes. Use the up and down keys (5)
and (6) to setup the flashing digit. Use the set key (3) for confir-
mation and to skip to the next item in the following sequence:
12/24 hour format, time zone, hours, minutes, year, month, day,
language. After confirming the language, the setup mode is fin-
ished.
Notes:
The time will be adjusted automatically when the time signal is
received at a later time.
If no key is pressed for 30 seconds during setup, the setup mode
automatically will be quit.
Keep the up or down key pressed to change the flashing value
more rapidly.
The country codes during language setup:
EN: English
GE: German

12
O
p
eratin
g
BA
DA: Danish
SP: Spanish
DU: Dutch
FR: French
IT: Italian
Temperature Display
After installing the battery the current ambient temperature (-9 °C
to +50 °C) is shown on the temperature display (12).
Use the down down key (6) to toggle the temperature unit
between °C and °F.
Setup Options
Use the hanging hole (7) to hang the clock on a nail or screw.
Use the four suction cups (8) to stick the clock to almost any flat
surface. Ensure the surface is flat, clean and free from fat. Also
ensure that the suction cups are clean. Moisten the suction cups
a little bit before you stick the clock to the surface.
Use the table stand (9) which is initially placed inside the rear
part of the housing (figure A) to put the clock to a table top or
similar. To do so insert the table stand into the corresponding
recess at the bottom of the rear side of the clock (figure B).
You will find the table stand (9) inside the rear part of the housing.

13
O
p
eratin
g
Troubleshooting
If the clock does not show the proper time after a signal reception
process, check the following points for possible sources of interfer-
ence.
Check if the battery is inserted properly.
Check if the battery’s capacity is sufficient.
Check, if the radio controlled clock is placed at least 2 meters
away from appliances such as TV-sets, monitors, telephone-sets,
machines with HF stray fields or household appliances that are
not interference-free.
During reception process do not reposition the radio controlled
clock but wait until the radio reception is finished. After approx.
10 minutes, if there is still no reception, reposition the clock. Re-
move the battery from the clock and wait approx. 1 minute before
reinserting the battery again and starting a new initialisation.
Please note, that reception of the time signal can be disturbed by
local features such as mountains or man-made structures (metal
or concrete). Preferably place the radio controlled clock close to
windows.
Use a thin, not too pointy object (e.g. a paper clip) to press the
RESET key (4) to reset the clock and to start a new initializing
procedure.

14
Cleanin
g
and Storin
g
Cleaning and Storing
Clean the housing of the clock only with a lightly moistened cloth.
Do not use chemicals or abrasives in order not to damage the
surfaces.
Replace the battery if faulty readings are displayed or tempera-
tures are not clearly visible anymore.
Remove the battery from the unit if you do not use it for a long
period of time.
Store the clock indoors in a dry place that is protected from dust,
dirt and extreme temperatures.
Store the unit out of reach of children.
Technical Data
* if reception of the DFC time code signal is not possible
DCF Receiving Frequency 77.500 kHz
Accuracy of the Clock* ± 60 Sec./Month
Accuracy of the Thermometer ± 1.5 °C
Dimensions Ø: 17.5 cm
Weight without Battery Approx. 370 g
Battery radio controlled Move-
ment
1x LR6 (AA)
Temperature Display -9 °C to +50 °C
Degree of Protection IP24

Consi
g
nes de sécurité
15
Les instructions suivantes se rapportent spécifiquement à ce produit.
Il contient des informations importantes sur le fonctionnement et la
manipulation. Veuillez remettre les instructions d'utilisation du produit
si vous le transmettez à d'autres personnes!
Ne laissez pas les matériaux d'emballage traîner. Les sacs en
plastique, etc. ne sont pas des jouets pour les enfants et peuvent être
dangereux.
Maintenir l'horloge la portée des enfants. L'horloge n'est pas un jouet.
Retirez les piles de l'horloge lorsque vous cessez de l'utiliser pendant
de longues périodes de temps.
Les piles ne doivent pas être pris à part, jeté dans un feu ou court-
circuitée.
Ne mélangez pas les piles avec des piles rechargeables. Utilisez
seulement de piles ou des batteries rechargeables du même type.
Ne mettez pas l'appareil à l'écart des rayons du soleil, la saleté, la
chaleur extrême, lumières chaudes, ou des champs magnétiques
puissants.
L'horloge est anti-éclaboussure (IP24). Trempez l'horloge, mais pas
sous l'eau ou d'autres liquides.
Ne démontez l'appareil et n'essayez pas de le réparer. Le dispositif
ne contient aucune pièce à rechange en cas de réparation. Si vous
avez des questions ou des problèmes, veuillez contacter notre ser-
vice à la clientèle.
S'il vous plaît noter afin d'éviter des dysfonctionnements,
des dommages et des effets néfastes sur la santé les
informations suivantes:
Batteries n'appartiennent pas à la pou-
belle.
Vous pouvez le charger de nouveau à nous
Envoyer ou livrer dans les magasins locaux
ou des points de collecte des piles.

16
Informazioni sulla sicurezza
Queste istruzioni per l’uso riguardano questo prodotto. Contengono
importanti informazioni per la messa in funzione e l’utilizzo. Si prega
di allegare le istruzioni per l’uso al prodotto, quando viene affidato a
terzi.
Non lasciare il materiale d’imballaggio incustodito in giro. Sacchi di
plastica ecc. possono diventare giocattoli pericolosi per bambini.
Tenere l'orologio lontano dalla portata dei bambini. L'orologio non è
un giocattolo.
Se non si utilizza l'apparecchio per più tempo, rimuovere le batterie.
Le batterie non devono essere smontati, gettato nel fuoco o in
cortocircuito.
Non mischiare batterie con batterie ricaricabili. Usare solo batterie
ricaricabili o batterie dello stesso tipo.
Non mettere l'orologio lontano da luce solare diretta, sporcizia-gene,
ad alte temperature, luci calde, o di forti campi magnetici.
L'orologio è spruzzi d'acqua (IP24). Immergere l'orologio, ma non in
acqua o altri liquidi.
Non smontare mai il banco da lavoro o cercare di riparlo. L’attrezzo non
contiene nessun pezzo che può essere riparato o sostituito da parte
sua. Per problemi o domande contattate il nostro servizio clienti.
Si prega di notare in modo da evitare malfunzionamenti,
danni e effetti negativi sulla salute seguenti informazioni:
Le batterie non appartengono nella
spazzatura.
È possibile caricarla di nuovo a noi
inviare o consegnare nei negozi locali o
punti di raccolta delle pile.
Table of contents
Languages:
Other RETOX Clock manuals
Popular Clock manuals by other brands

Kera
Kera SELENA HY-4 Series manual

Inova Solutions
Inova Solutions OnTime 4-Digit Digital Clocks Installation and user guide

VISIOMED
VISIOMED VM-D31 DODODOO instruction manual

Acroprint
Acroprint ES700 brochure

La Crosse Technology
La Crosse Technology C86279V3 quick start guide

Brainstorm Electronics
Brainstorm Electronics DXD/PTP Operation manual