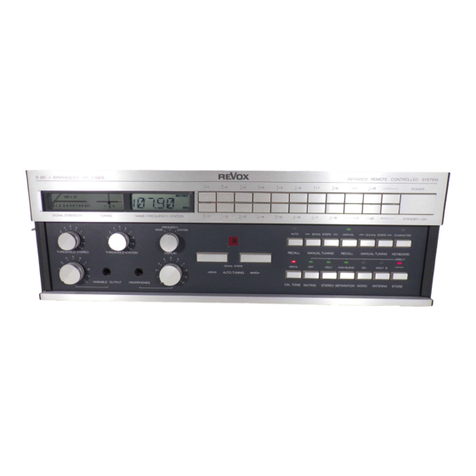
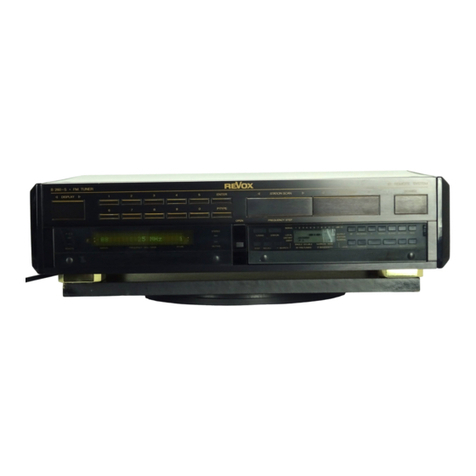
Revox B260 User manual

REVOX”
|
|
B
260
FM
-
Tuner
Operating
Instructions
OUT
FF
NOOR
yon
eB
me
seins
FREQUENCY
MHz
+NAME

Vorsicht:
Attention:
Warning:
Attenzione:
Precaucion:
Waarschuwing:
Advarsel:
Huomio:
Forsiktig:
Varning:
Das
Gerat
ist
in
ausgeschaltetem
Zustand
(STANDBY)
nicht
von
der
Stromzufiihrung
getrennt.
Cet
appareil
n'est
pas
séparé
du
réseau
lorsqu’il
est
déclenché
(STANDBY).
This
unit
is
not
separated
from
the
mains
supply
when
switched
off
(STANDBY).
Questo
apparecchio
non
é@
separato
dalla
rete
quando
I'interruttore
é
spento
(STANDBY).
Este
aparato
no
esta
separado
de
la
red
cuando
esta
apagado
(STANDBY).
In
uitgeschakelde
toestand
(STANDBY)
is
het
apparaat
niet
gescheiden
van
de
netspanning.
Apparaten
er
ogsaa
hvis
lukket
(STANDBY)
under
strgm.
Huolimatta
siita,
etta
virta
on
katkaistu
laitteesta
(STANDBY),
sita
ei
ole
eristetty
sahkésta.
Selvom
strgmmen
ikke
er
pa
i
apparatet
(STANDBY),
sa
er
det
ikke
skilt
fra
stram.
Oaktat
om
str6émmen
ar
avbruten
i
apparaten
(STANDBY),
sa
ar
den
nda
kopplad
med
strém.

ENGLISH

IMPORTANT
SECTION
1
SECTION
2
SECTION
3
SECTION
4
SECTION
5
Operating
Instructions
REVOX
B260-E
-
FM
Tuner
For
the
sake
of
clarity
these
operating
instructions
have
been
sub-
divided
into
the
following
five
Sections:
Installation
procedure
Contains
the
basic
information
for
operating
the
tuner.
Main
keypad
Explains
all
main
functions
of
the
tuner.
Auxiliary
keypad
(behind
hinged
cover)
Explains
all
auxiliary
and
special
functions
that
are
not
described
in
Section
2,
such
as
TUNING,
ANTENNA,
BLEND,
LEVEL.
Technical
appendix
Contains
useful
information
concerning
the
operation
of
thetuner,
error
messages
and
corresponding
corrective
action,
as
well
as
technical
data
and
dimensions.
List
of
keypad
functions
Contains
a
quick-reference
operating
guide
for
experienced
and
professional
users
and
a
summary
of
all
keypad
functions.
Synoptical
diagram
At
the
end
of
this
handbook
you
will
find
a
foldout
page
with
a
Quick-Reference
diagram
on
which
all
the
operator
controls
nave
been
assigned
an
index
number.
These
numbers
agree
exactly
with
the
bracketed
numbers
in
the
text.

WARRANTY
PACKING
MATERIAL
Protect
your
tuner
from
exposure
to
excessive
heat
and
moisture.
Please
note
that
the
warranty
is
only
valid
within
the
country
in
which
the
equipment
has
been
sold.
The
warranty
becomes
null
and
void
if
unauthorized
modifications
or
unprofessional
repairs
are
made.
Warranty
cards
for
products
sold
in
Switzerland
and
Austria
are
issued
directly
by
the
authorized
dealer.
Warranty
cards
for
REVOX
products
sold
in
France
are
located
inside
the
packing.
This
card
must
be
completely
filled
out
and
signed
by
your
autho-
rized
REVOX
dealer.
A
special
warranty
request
card
is
included
with
all
REVOX
pro-
ducts
sold
within
the
Federal
Republic
of
Germany,
USA,
and
major
other
countries.
This
card
is
either
located
inside
the
pack-
ing
or
ina
plastic
pouch
on
the
outside
of
the
packing.
Should
this
card
be
missing,
please
consult
your
REVOX
dealer
or
your
nati-
onal
REVOX
distributor.
Please
retain
the
original
packing
material
for
reuse
in
case
your
unit
ever
needs
to
be
transported.
The
packing
in
which
you
re-
ceived
it
has
been
especially
designed
to
protect
your
valuable
equipment
from
mechanical
shock
in
transit.

Table
of
contents
SECTION
1
Installation
Start
up
SECTION
2
Main
keypad
SECTION
3
Auxiliary
keypad
SECTION
4
Fault
sources
Technical
appendix
SECTION
5
List
of
keypad
functions
Accessories
included
Setting
up
the
tuner
Safety
rules
AC
Line
voltage
Connections
Power
on
Summary
of
the
functions
Reading
out
the
station
memory
Reading
out
the
program
identification
Hinged
cover
Station
selection
Automatic
station
scanning
Manual
station
selection
Copying
the
station
memory
Modifying
the
reception
parameters
Entering
the
station
abbreviations
Adjustments:
-
Output
level
-
Station
level
Troubleshooting
IR
remote
control
REVOX
B208
SCOPE
outputs
Interesting
facts
about
RDS
Technical
data
Tuner
drawing
Quick-reference
description
of
all
functions
Indexed
Quick-reference
diagram
Audio
circuit
diagram
Oon
o1ol1gi
aa
a
a
CON
OW
22
24
25
26
oF
29
31
33
37

SECTION
1
ReVOX
eos
|
1
I
[_]
7
Accessories
included,
a
paaees
Installation
setting
up
the
tuner
=
Accessories
included
The
tuner
is
fitted
with
a
fixed
power
cable
and
a
plug
of
the
type
used
in
your
country,
If
the
contents
are
incorrect,
please
consult
your
dealer.
Set
up
your
tuner
in
a
position
where
there
is
a
clearance
of
at
least
10mm
(inch)
from
other
equipment,
walls
and
furniture.
Setting
up
the
tuner
Safety
precautions
Connect
the
tuner
to
the
AC
outlet
only
by
means
of
the
fitted
power
cable.
Always
keep
the
tuner
in
dry
condition.
Itis
ex-
tremely
hazardous
to
operate
it
in
moist
con-
ae
(bathroom,
laundry
room,
basement,
etc.
The
tuner
is
not
disconnected
from
the
AC
power
source
when
it
is
switched
off
(stand-
by).
Certain
components
inside
the
unit
are
al-
ways
energized
with
line
voltage!
The
tuner
is
designed
to
be
operated
in
a
hori-
zontal
position.
In
case
of
amalfunction
or
a
defect,immedia-
tely
disconnect
the
power
plug
and
have
the
tuner
checked
out
by
an
authorized
REVOX
dealer.

Start-up
Line
voltage,
connection,
power
on
RevOx
ao
oonecea
a]
—
gommao
ie]
Checking
the
line
voltage
Connecting
the
antenna
Connecting
the
outputs
Power
on
Make
sure
that
the
voltage
rating
imprinted
below
the
power
inlet
corresponds
to
your
local
line
voltage.
The
tuner
can
be
altered
to
a
different
line
vol-
tage
but
this
work
should
be
performed
by
your
dealer.
You
can
connect
two
antennas
(A
[33]
and
B
{34])
with
75
Ohm
coaxial
cables
to
your
tun-
er.
Both
sockets
have
identical
functions.
If
you
have
access
to
a
local
cable
network,
connect
the
antenna
socket
A
[35]
tothe
an-
tenna
outlet
by
means
of
commercially
avail-
able
antenna
cable.
In
addition
you
can
con-
nect
an
external
antenna
or
a
room
antenna
to
the
other
socket
B
[34]
so
that
programs
can
be
received
that
are
not
transmitted
via
the
network.
The
ideal
site
for
external
or
room
antennas
can
be
determined
by
experimenting.
The
audio
(signal)
outputs
AUDIO
L/R
[35]
are
to
be
connected
to
the
TUNER
inputs
of
your
amplifier
(REVOX
B250-S).
Do
not
confuse
the
left-hand
(L)
and
right-hand
(R)
channels.
Press
the
POWER
[1]
key
on
the
front
panel
to
switch
on
the
FM
tuner.
The
station
memory
that
was
active
when
the
tuner
was
previously
switched
off
is
automatically
reactivaied.
When
you
press
the
POWER
[1]
key
again,
the
tuner
switches
off
(standby).
When
the
tuner
is
switched
off
but
si
fl
con-
nected
to
the
AC
power
source,
it
operates
in
standby
mode
which
means
that
it
can
be
conveniently
switched
on
and
off
by
means
of
the
REVOX
B208
iR
remote
control
from
your
listening
position.
The
power
consumption
in
standby
is
negligible
(approx.
5
W).

SECTION
2
7
[=l=y=toT=l=y
=)
=
H
22
genomes
9
ee
ee
2
Main
keypad
Summary
of
functions
STATION
SCAN
[8]
When
you
press
the
STATION
SCAN
[3]
key
the
next
of
the
60
station
memories
is
read
out
in
ascending
(>)
or
descending
(<)
order.
When
you
hold
down
this
key
continuously,
each
station
stored
in
the
memories
can
be
——___
briefly
heard.
pommoo
Station
memories
with
the
program
identifica-
tion
0
(P-TYPE
0)
will
be
skipped.
P-TYPE
SCAN
[2]
The
P-TYPE
SCAN
[2]
key
reads
outthe
next
of
the
60
station
memories
with
identical
pro-
gram
identification
(P-TYPE)
in
ascending
(>)
or
descending
(<)
sequence.
When
you
hold
down
this
key
continuously,
each
station
with
identical
program
identifica-
tion
will
be
briefly
heard.
A
program
ID
number
from
0
to
9
can
be
assigned
to
any
station
memory.
ENTER
[6
nae.
With
the
ENTER
[6]
key
you
can
switch
on
the
(6)
———
i
[J]
tuner
and
automatically
reactivate
the
pre-
Tess
5
sesess
Doa0aeS
viously
heard
station
or
a
specific
station
me-
ep
a
ree
In
the
latter
case
you
should
enter
thenumber
of
the
memory
(1
to
60)
by
means
of
the
nu-
Seen
meric
keys
[7]
before
you
press
the
ENTER
[6]
ommmcorc
key.
P-TYPE
[5]
When
you
press
the
P-TYPE
[5]
key,
he
tuner
activates
the
mode
for
entering
the
program
identification
(P-TYPE).
After
this
key
has
been
pressed,
you
can
enter
the
desired
program
type
(0
to
9)
by
neans
of
the
numeric
keys
[7].
When
you
subsiquently
press
the
ENTER
[6]
key,
the
next
higner
sta-
tion
memory
with
matching
programiclentifi-
cation
is
activated.

(s-7]
oco0ngaD
o0d@m00
Main
keypad
Summary
of
functions
<DISPLAY>
[8]
With
the
<DISPLAY>
[8]
key
you
can
page
through
the
display
modes
in
ascending
(>}
or
descending
sequence
(<).
The
following
three
display
modes
can
be
selected:
a)
Displaying
the
received
frequency
b)
Displaying
the
station
abbreviation
c)
Displaying
the
received
frequency
and
the
station
abbreviation
The
number
of
the
selected
station
memory
and
the
program
identification
(P-TYPE)
are
displayed.

Main
keypad
Reading
out
the
station
memories
A
station
memory
can
be
read
out
directly
by
entering
the
corresponding
memory
number.
With
the
numeric
keys
[7]
enter
the
number
of
the
desired
station
memory.
For
stations
1
to
9
only
asingle
digit
needs
to
be
entered,
i.e.
the
leading
zero
is
not
necessary.
When
you
enter
station
number
0,
the
internal
calibration
tone
generator
will
be
activated.
The
number
of
the
previously
active
station
re-
mains
on
the
display
[11].
@
Press
numeric
input
@
Press
ENTER
[6]
key
The
selected
station
memory
is
readout
when
SS
you
press
the
ENTER
[6]
key.
ie}

eoo0con
sommon0
Main
keypad
Reading
out
the
program
identification
A
station
memory
can
be
read
out
by
entering
the
program
identification
(P-TYPE).
REVvOx
Sooo
|
fe
|
es
|
es
|
es
|
ree
|
ee
on
ooR0000
ooo
a)
[io
oO
——————————————————
a
@
Press
P-TYPE
[5]
The
tuner
expects
you
to
enter
a
program
number
(0
to
9).
Only
the
flashing
cursor
in
the
position
of
the
program
identification
is
visible
on
the
display
[11].
eVox
aera
eS
f
masees
|
esses
|
woven
|
wrurss
|
came
J
ossoe
J
ao0nnsco
S22
e00@m00
po
of
@
Press
numeric
input
key
[7]
Enter
the
desired
program
identification
by
means
of
the
numeric
keys
[7].
REVOX
SeSsocs
——
ee
(ej
conco09
|
|ece
Ses
sees
|
a
@
Press
ENTER
[6]
When
you
press
the
ENTER
[6]
key,
the
next
higher
station
memory
with
matching
pro-
gram
identification
will
be
read
out.
You
can
select
the
next
station
memory
with
matching
program
identification
by
pressing
the
P~TYPE
SCAN
[2]
key.
10

SECTION
3
Auxiliary
keypad
Hinged
cover,
station
selection
Hinged
cover
The
tinted
acrylic
glass
cover
of
the
second
(
SSsss=7T
i
C_]
keypad
can
be
opened
by
pressing
the
OPEN
DODODSS
[4]
key.
The
LC
display
[19]
becomes
illumi-
[|
5
fee
(
sesses||
noted.
———————
To
close
the
cover
simply
push
it
up
so
that
it
=e
locks
in
place.
The
illumination
of
the
LC
dis-
memes
play
switches
off
and
any
input
on
the
auxili-
ary
keypad
that
has
not
yet
been
terminated
tS)
aoe
=]
with
STORE
[31]
will
be
cancelled
and
the
prior
status
restored.
The
selected
tuning
mode
(TUNING
[14] key}
is
cancelled,
the
unit
switches
to
tuning
mode,
i.e.
the
previously
active
station
memory
is
reactivated.
TUNING
{1
4]
[essa
|
onoo00onD
The
TUNING
[14]
key
activates
the
manual
[ee
23]
oommoo
tuning
mode
for
entering
or
searching
station
frequencies.
The
display
[11]
shows
only
the
frequency,
and
in
place
of
the
station
number
the
frequency
step
width
is
shown
in
kHz.
At
the
same
time
the
functions
of
the
keys
[2]
and
[3]
of
the
main
keypad
are
changed
in
accordance
with
their
lower
designation
to
Ene
[2]
and
FREQUENCY
STEP
The
manual
tuning
mode
is
acknowledged
on
the
display
[19]
by
the
word
DIRECT.
This
function
can
be
cancelled
by
pressing
the
STATION
[18]
key
or
by
closing
the
hinged
IRARBRCRSRRREREER
cover.
LOCAL
I
4
—
8S)
8
N+
DIRECT
OUTPUT
,
DISTANT
ANTENNA
STATION
IDENT
vA
NOMINAL
SINGLE
DOUBLE
NARROW
WIDE
RF
PRE-TUNING
iF
BANDWIDTH
The
station
memories
of
the
tuner
are
loaded
with
test
frequencies
used
for
final
inspection
before
the
unit
leaves
the
factory.
These
fre-
quencies
are
unlikely
to
agree
with
the
local
station
frequencies.
The
tuner
should,
therefore,
be
repro-
grammed
for
the
local
frequencies
asfollows.
Station
selection
Known
frequencies
Enter
the
station
frequencies
that
your
know
from
program
guides
or
frequency
schedules
as
described
under
MANUAL
‘TATION
SELECTION.
Unknown
frequencies
cac4d
(a)
ooo0000
After
you
have
programmed
the
kmown
fre-
ooo
oom
moo
quencies,
proceed
according
to
the
Section
AUTOMATIC
STATION
SELECTION
ind
store
each
station
by
pressing
AUTO
[29]
hatis
re-
ceivable
with
the
DISTANT
[17]
keyor
essed.
Then
write
down
the
frequencies
of
the
-worth-
wile
stations
or
rearrange
the
assigin
ent
of
the
station
memories
directly
by
copying
them
into
other
memories
(refer
toS
ection:
COPYING
THE
STATION
MEMORIE$)..

Auxiliary
keypad
Station
selection
Modifying
the
reception
parameters
12
As
the
last
step
you
can
store
the
reception
conditions
for
each
station
as
described
in
the
Section:
MODIFYING
THE
RECEPTION
PARA-
METERS.

REVOX,
Sooo
Lt
jC
ocMcSoaros3
Auxiliary
keypad
Automatic
station
selection
@
Press
TUNING
[14]
key
Cac
oOo0o00000
The
TUNING
[14]
key
activates
the
mode
for
ooo
=,
oomomoo
searching
station
frequencies.
The
display
[11]
shows
only
the
frequency
and
in
place
of
the
station
number
the
step
frequency
width
{channel
pattern)
in
kHz
is
indicated.
The
functions
of
keys
[2]
and
[3]
of
the
main
keypad
are
changed
to
AUTOTUNING
[2]
and
FREQUENCY
STEP
[3]
in
accordance
with
the
lower
designation.
The
tuning
mode
is
acknowledged
on
the
LC
display
[19]
by
the
message
DIRECT.
oooecenD
S22ere
SIGNAL
1
2
3 4
5 6
7
8 9
10
Ti
dBf-10
WRRSHORERA
RRC
RE
LOCAL
I<
—H@>
&
@GE+
DIRECT
OUTPUT
DISTANT
ANTENNA
STATION
IDENT
VA
Vv
NOMINAL
SINGLE
DOUBLE
NARROW
WIDE
RF
PRETUNING
§F
BANDWIDTH
@
Press
AUTOTUNING
[2]
key
A
brief
touch
of
the
AUTOTUNING
[2]
key
in
tuning
mode
activates
the
station
scan
in
the
specified
direction
(>=
higher
frequencies,
<=
lower
frequencies).
During
the
scan
the
audio
is
muted
as
indicated
by
the
MUTING
LED
[12]
next
to
the
display
[11].
When
a
station
with
adequate
signal
strength
has
been
found
(bargraph
onLC
display
[19]),
the
search
stops.
The
frequency
is
shown
on
the
display
[11].
If
a
stereo
broadcastis
being
received,
the
STEREO
[13]
LED
lights
up.
EY
opo0ean
|
|see
CI)
seeeee
[lols]
SES
———————_————e
@
Press
STORE
[31]
[on
|
om)
Cc)
ononoo0o0ng
This
step
prepares
the
store
function
for
the
oopmmoea
tuned
frequency.
The
station
number
flashes
on
the
display
[11].
@
Press
numeric
input
keys
[7]
The
number
of
the
desired
station
memory
in
f—l
|
can
be
entered
via
the
numeric
keys[7].
ae
mae
|
[=folaloln
tal)
|
ooumooao
ooo
oO
ie]
@
Press
ENTER
[6]
The
tuned
frequency
and
the
recepti
para-
meters
are
stored
in
the
specified
staicon
me-
mory.

Auxiliary
keypad
Automatic
station
selection
@
AUTO
[29]
key
coo.
oo0000c00
ooo
a
ocommoo
RECALL
[16]
m4
o000000
oa
=)
nomooo
14
In
place
of
the
last
three
input
steps
(STORE,
numeric
keys,
ENTER)
you
can
simply
press
the
AUTO
[29]
key.
The
frequency
and
the
re-
ception
parameters
will
automatically
be
stored
in
the
next
vacant
station
memory
or
the
next
station
memory
with
program
identi-
fication
0.
After
the
tuned
frequency
has
been
manually
altered
with
AUTOTUNING
or
FREQUENCY
STEP.
you
can
recall
from
the
station
memory
the
frequency
of
the
last
station
you
have
lis-
tened
to
by
pressing
RECALL
[16].

Auxiliary
keypad
@
Press
TUNING
[14]
key
@
Press
numeric
keys
[7]
@
Press
ENTER
[6]
key
@
Press
STORE
[31]
key
@
Press
numeric
keys
[7]
@
Press
ENTER
[6]
key
@
AUTO
[29]
key
Manual
station
selection
Ec
CJ
oooo00o0
ooo
oomOoo
evox
mmooos
ooo
nevox
i
rere
L
1d
{_]
oo
oo0nDnna
a
ee
Fos
—
ee}
|
i
|
o
ie}
rvox
Sa
ee ee
fc
|
come
|
eee
|
ee
|
cee
|
eee
oo
ooo000no
Ces
see
ee
[|
9
o
coco
t=—"4]
oOoooonoo
ooo
oocmoo
When
the
station
frequency
is
known
(from
program
guides
or
frequency
schedules),
the
frequency
can
be
set
directly
by
means
of
the
numeric
input
keys
[7].
The
TUNING
[14]
key
activates
the
mode
for
searching
station
frequencies.
The
display
[11]
shows
only
the
frequency
and
the
step
width.
Enter
the
desired
frequency
by
means
of
the
numeric
keys
[7].
The
microprocessor
checks
instantly
that
the
entered
value
falls
within
the
available
FM
fre-
quency
band
and
rejects
incorrect
entries.
In
the
event
of
an
error,
an
asterisk
(*)
appears
onthe
display
[11]
which
means
that
the
entry
must
be
repeated
with
valid
digits.
The
entered
frequency
is
set
and
the
station
becomes
audible.
After
any
corrections
of
the
reception
parameters
(see
modification
of
re-
ception
parameters),
the
entered
frequency
can
be
saved
in
a
station
memory.
This
is
the
preparatory
step
for
storing
the
fre-
quency.
The
station
frequency
flashes
on
the
display
[11].
Enter
the
number
of
the
station
memory
by
means
of
the
numeric
keys
[7].
The
frequency
and
the
reception
parameters
are
stored
in
the
specified
station
memory.
Instead
of
performing
the
last
three
input
steps
(STORE,
numeric
keys
and
ENTER)
you
can
simply
press
the
AUTO
[29]
key.
The
fre-
quency
and
the
reception
parameters
vill
au-
tomatically
be
stored
in
the
next
vacantstation
memory
or
the
next
station
memory
with
pro-
gram
identification
0.
15

Auxiliary
keypad
Manual
station
selection
FREQUENCY
STEP
[3]
SINGLE
OOUBLE
NARROW
WIDE
RF
PRE-TUNING
iF
BANDWIDTH
STEP
[15]
oct
o000000
a00
ee)
commana
Note:
SINGLE
DOUBLE
NARROW
WIDE
RF
PRE-TUNING
iF
BANDWIDTH
16
You
can
increase
(>)
or
decrease
(<)
the
tun-
ing
frequencies
in
steps
according
to
the
se-
lected
channel
pattern
(10kHz/50kHz)
by
pressing
the
STEP
[15]
key.
In
this
way
you
can
receive
stations
that
broadcast
on
a
fre-
quency
that
is
outside
the
50kHz
channel
pattern.
The
tuner
can
be
tuned
exactly
to
the
station
frequency
with
the
aid
of
the
center
channel
indicator
on
the
LC
display
[19].
Tuning
is
cor-
rect
when
the
two
symbols
+
and
-
are
simul-
taneously
visible.
If
only
one
of
these
sym
bols
is
displayed,
the
tuned
frequency
should
be
shifted
in
the
direction
of
the
arrow.
If
you
are
tuning
to
a
station
that
does
not
broadcast
on
a
frequency
of
the
50
kHz
chan-
nel
pattern,
you
can
press
the
STEP[15]
key
to
switch
the
step
width
to
10
kHz
(channel
pat-
tern
=
frequency
spacing
in
kHz
of
the
indivi-
dual
stations).
Press
this
key
again
to
switch
back
to
the
50
kHz
channel
pattern.
The
selected
channel
pattern
is
shown
on
the
display
[11]
in
place
of
the
station
number.
In
AUTOTUNING
mode
the
tuner
always
scans
in
the
50kHz
channel
pattern,
even
when
the
10
kHz
step
width
has
been
selected.
For
stations
that
broadcast
on
a
frequency
outside
this
channel
pattern,
the
frequency
at
which
the
scan
stops
will
be
off
center.
You
can
manually
tune
this
frequency
by
pressing
the
FREQUENCY
STEP
[3]
key
until
the
indica-
tor
on
the
LC
display
[19]
signals
that
center-
channel
tuning
has
been
achieved.

Auxiliary
keypad
Copying
station
memories
‘REVaX
@
Press
numeric
keys
[7]
and
ENTER
[6]
Ee
-~
ORFS
-
4
@
Press
STORE
[31]
key
@
Press
numeric
keys
[7]
baad
cacao
—
OoOnooooono
ooo
oom
mooo
o
@
Press
ENTER
[6]
key
The
procedure
for
copying
the
complete
con-
tents
of
a
station
memory
(frequency,
station
abbreviation,
program
identification,
and
re-
ception
parameters)
is
very
simple.
This
recalls
the
memory
to
be
copied.
This
is
a
preparatory
step
for
the
store
opera-
tion.
Enter
the
memory
location
into
which
the
in-
formation
is
to
be
copied.
Caution:
The
old
content
of
this
memory
will
be
lost
be-
cause
it
is
overwritten
by
the
new
information
to
be
copied.
The
selected
station
memory
is
overwritten
with
the
data
of
the
other
memory.Both
me-
mories
now
contain
identical
data.
17

Auxiliary
keypad
Modifying
the
reception
parameters
SEARCH
[17]
ANTENNA
[22]
RF
[20]
IF
[24]
18
Caco
a
ooooo0n0
Ooo
oocaMa00
SIGNAL
1
2
3 4
5
6
7
8 9
10
11
GBf-10
IRBSRERBRSEORERER
I
LOCAL
~RG>
§
8+
DIRECT
OUTPUT
DISTANT
§
<
ANTENNA
STATION
IDENT
I
<
AY
v
NOMINAL
SINGLE
DOUBLE
NARROW
WIDE
RF
PRE-TUNING
(F
BANDWIDTH
cacy
a
oooo00no
ooo
Oocmomoo
SIGNAL
1
2 3
4
5 6
7
B
9
10
11
dBf-10
EGESRBRRERRREES
—
UD
8
@BH+
DIRECT
SINGLE
DOUBLE
NARROW
WIDE
RF
PRE-TUNING
IF
BANDWIDTH
Caco
Oooonoo0o000
ooo
C4
oOomoOao
SIGNAL
1
2
3 4 5 6
7
8
9
10
11
dBF-10
IESREUSSSEREEOEE
LOCAL
J
<
—S8®
8
€88+
DIRECT
DISTANT
ANTENNA
(DENT
VA
v
SINGLE
DOUBLE
NARROW
WIDE
RF
PRETUNING
IF
BANDWIDTH
SIGNAL
12
3 4
5 6
7
8
9
10
11
GBf+10
ISGRSDURSESESRERE
t
LOCAL
§
<4
—8E®
E
88+
DIRECT
OUTPUT
DISTANT
ANTENNA
STATION
IDENT
AY
v
NOMINAL
SINGLE
DOUBLE
NARROW
WIDE
RF
PRE-TUNING
iF
BANDWIDTH
cacao
Cc.
oOooo0oo00oo
ooo
oomoao00
SIGNAL
12
3
4
5 6
7
8B
9
10
11
dBf+10
iRGGESRBOMNARREEE
I
LOCAL
§
<4
—8&>
BF
Gaa+
DIRECT
OUTPUT
DISTANT
ANTENNA
STATION
IDENT
A
Y¥
v
v
NOMINAL
SINGLE
DOUBLE
NARROW
WIDE
RF
PRETUNING
IF
BANDWIDTH
In
tuning
mode
(TUNING
[14]
key
pressed},
you
can
switch
between
local
and
distant
muting
thresholds
by
pressing
the
SEARCH
[17]
key.
In
the
LOCAL
position
(indicated
by
an
arrow
on
the
display),
the
search
threshold
is
100
pV
which
means
that
only
strong
stations
will
be
selected.
In
the
DISTANT
position
the
search
threshold
is
4uV
so
that
also
weak,
distant
transmitters
will
be
selected.
The
third
position,
IDENT,
can
only
be
activat-
ed
in
conjunction
with
the
RDS
option
and
enables
you
to
search
based
on
matching
sta-
tion
identification.
With
the
ANTENNA
[22]
key
you
can
switch
between
the
two
antenna
inputs
A
and
B.
The
currently
active
antenna
input
is
identified
on
the
LC
display
[19]
by
the
corresponding
let-
ter.
With
the
RF
[20]
key
you
can
change
the
RF
selection
(RF
PRE-TUNING)
between
SINGLE
and
DOUBLE.
Two
arrows
on
the
LC
display
[19]
signal
the
corresponding
selection.
Normally
the
tuner
is
operated
in
SINGLE
mode
because
it
ensures
maximum
sensitiv-
ity
of
the
antenna
input.
For
better
selection
of
strong
stations
without
interference
from
adjacent
channels,
re
aio
reduces
the
antenna
sensitivity
by
4
cB.
With
the
IF
[24]
key
you
can
change
the
IF
BANDWIDTH
between
WIDE
and
NARROW.
Two
arrows
on
the
LC
display
[19]
signal
the
corresponding
bandwidth.
Normally
the
tuner
is
operated
in
WIDE
mode
(150
kHz
bandwidth)
because
it
ensures
mini-
mal
harmonic
distortion.
For
better
adjacent
channel
selectivity
the
NARROW
(110
kHz
bandwidth)
setting
can
be
used.
Other manuals for B260
1
Table of contents
Other Revox Tuner manuals