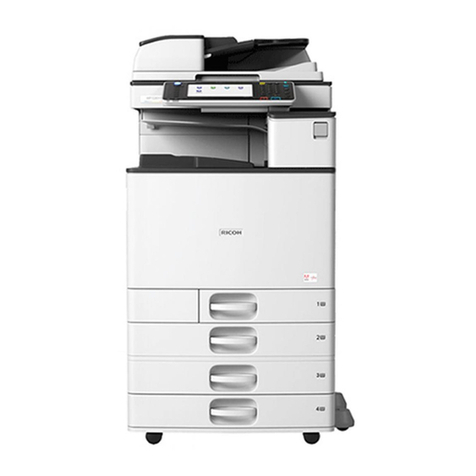
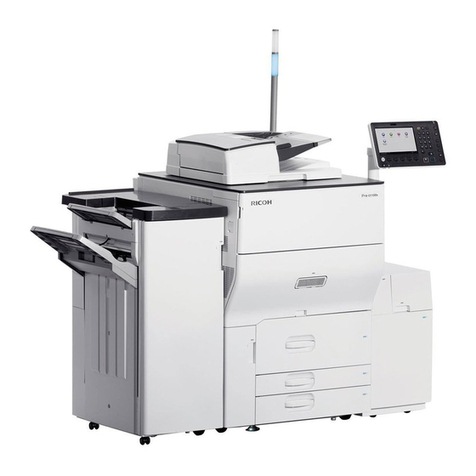
Ricoh Pro C5300 Series User instructions

CIP Training
Pro C5300 series
Adjustment Settings
for Operators


Pro C5300 series
CIP Training
Adjustment Settings for Operators
CIP Training C7200 series
Adjustment Settings for Operators
This section explains Adjustment Settings for Operators and how to specify them.
How to Use the [Adjustment Settings for
Operators] Screen
This section explains how to use the Adjustment Settings for Operators.
1. Adjustment items
Adjustment items are displayed in this area. When you select an item, its configuration screen will
then open.
2. [To Print Screen]
Press this key to display the print screen. You can use this screen to view the changes you have made.
3. [Exit]
Press this key to close the Adjustment Settings for Operators menu.
209
•All items in Adjustment Settings for Operators appear regardless of which of the machine's
optional components are installed. If you change the settings of options that are not installed, the
changes will have no effect.

Pro C5300 series
CIP Training
Adjustment Settings for Operators
CIP Training C7200 series
Adjustment Settings for Operators
Opening Adjustment Settings for Operators
1. After completing the settings, press [Back] twice.
2. Press [Exit] to close the Adjustment Settings for Operators screen.
Features of the Displayed Items and Setting Operations
The following operations are available for each adjustment item:
•Value setting
•Item setting
•Executing
•Display only
1. Press [Adjustment Settings for Operators] on the Home screen.
6. Adjustment Settings for Operators
Closing Adjustment Settings for Operators
Value setting
Press [+] to increase the value, or [-] to
decrease. You can also use the number keys
to enter numbers.
Select [OK] to apply the new setting.

Pro C5300 series
CIP Training
Adjustment Settings for Operators
CIP Training C7200 series
Adjustment Settings for Operators
Item setting
Select the item you require.
Select [OK] to apply the new setting.
Executing
Press [OK] to perform a selected function.
Display Only
You can check the setting of the selected
item.

Pro C5300 series
CIP Training
Adjustment Settings for Operators
CIP Training C7200 series
Adjustment Settings for Operators
Printing with Adjusted Settings
To print with the settings you have adjusted, be sure to select the paper tray and paper size to
which the settings apply.
•Settings adjustable for each paper tray
•Settings adjustable for each paper size
Settings adjustable for each paper tray
•These are settings adjustable for each paper tray.
•Print jobs are processed with the adjusted settings when printing from a tray with the
applied settings.
Settings adjustable for each paper size
•These are settings adjustable for each paper size.
•Print jobs are processed with the adjusted settings when printing with a paper size that has
the applied settings.
•For details about selecting the paper tray and paper size for printing, see the manuals
for the related functions.

Pro C5300 series
CIP Training
Adjustment Settings for Operators
CIP Training C7200 series
Adjustment Settings for Operators
Menu Items and Function
All items in Adjustment Settings for Operators appear regardless of which of the machine's
optional components are installed. If you change the settings of options that are not installed, the
changes will have no effect.
02: Machine: Image Quality
0209: Photoconductor Special Mode
Increase the amount of lubricant applied to the photoconductor.
If you continuously print images that consume a lot of toner, white spots may appear because of a
lack of lubricant. If this happens, you can prevent the spots by selecting [On].
In Special Mode, the replacement cycle of the cleaning unit for the PCU is shorter because of the
increased amount of lubricant that is applied.
0210: Smooth Fusing Belt
Remove vertical and horizontal lines from the printouts.
Vertical or horizontal lines may appear when printing on paper that is larger than the paper used
immediately before it.
In such case, press [OK] to cause a roller to press on the fusing belt and prevent vertical and
horizontal lines. Select [For Belt Scratches] if vertical or horizontal lines appear on the edges of the
paper. Select [For Uneven Gloss (Short Time)] if there are patches of uneven glossiness.
Setting Items Selection Default Value
Black
Cyan
Magenta
Yellow
Off
On
Off
Setting Items Selection
For Belt Scratches
For Uneven Gloss (Short Time)
Press [OK].

Pro C5300 series
CIP Training
Adjustment Settings for Operators
CIP Training C7200 series
Adjustment Settings for Operators
0214: Fusing Ability by Feed Speed
Specify whether or not to automatically execute [For Uneven Gloss (Short Time)] for smooth fusing
belt.
Setting Items Selection Default Value
Control Method Off
Auto
Off
0211: Fusing Ability by Feed Speed
Increase fusing performance.
Fusing quality may vary depending on the ambient temperature, paper being used, and
configuration of options. If this happens, select [Thick Paper Priority] to increase the fusing quality
by decreasing the printing speed.
Setting Items Selection Default Value
Feed Speed Mode Standard
Thick Paper Priority
Standard

CIP Training Pro C5300 series
Adjustment Settings for Operators
CIP Training C7200 series
Adjustment Settings for Operators
0303: Criteria for Paper Weight
The machine may fail to correctly detect the weight of the paper loaded in the paper tray. This
may happen even if you have specified the correct paper weight in [Tray Paper Settings].
If this happens, you can adjust the machine so the printing conditions are suitable by inputting a
numerical value (um) for the thickness of the paper.
03: Machine: Paper Feed/ Output
Setting Items Default
Value
Max.
Value
Min.
Value Step Unit
Tray: Paper Weight 2 89 999 0 1 um
Tray: Paper Weight 3 104 999 0 1 um
Tray: Paper Weight 4 123 999 0 1 um
Tray: Paper Weight 5 149 999 0 1 um
Tray: Paper Weight 6 171 999 0 1 um
Tray: Paper Weight 7 235 999 0 1 um
Tray: Paper Weight 8 274 999 0 1 um
Tray: Paper Weight 9 317 999 0 1 um
Bypass Tray: Paper Weight 2 89 999 0 1 um
Bypass Tray: Paper Weight 3 104 999 0 1 um
Bypass Tray: Paper Weight 4 123 999 0 1 um
Bypass Tray: Paper Weight 5 149 999 0 1 um
Bypass Tray: Paper Weight 6 171 999 0 1 um
Bypass Tray: Paper Weight 7 235 999 0 1 um
Bypass Tray: Paper Weight 8 274 999 0 1 um
Bypass Tray: Paper Weight 9 317 999 0 1 um
LCT Connection Unit: Paper Weight 2 89 999 0 1 um
LCT Connection Unit: Paper Weight 3 104 999 0 1 um

CIP Training Pro C5300 series
Adjustment Settings for Operators
CIP Training C7200 series
Adjustment Settings for Operators
Setting
Items
Default
Value
Max.
Value
Min
.
Value Step Unit
LCT Connection Unit: Paper Weight 4 123 999 0 1 um
LCT Connection Unit: Paper Weight 5 149 999 0 1 um
LCT Connection Unit: Paper Weight 6 171 999 0 1 um
LCT Connection Unit: Paper Weight 7 235 999 0 1 um
LCT Connection Unit: Paper Weight 8 274 999 0 1 um
LCT Connection Unit: Paper Weight 9 317 999 0 1 um
0308: Connection Unit: Registration Gate Home Position
Adjust optimum value to increase the accuracy of Skew Correction depending on paper
weight. If the image is highly skewed, adjust the value to [+] direction for thin paper, [-]
direction for thick paper.
Setting
Items
Max.
Value
Min
.
Value Step Unit
Paper Weight 1
Paper Weight 2
Paper Weight 3
Paper Weight 4
Paper Weight 5
Paper Weight 6
Paper Weight 7
Paper Weight 8
Paper Weight 9
9 -8 1 None

CIP Training Pro C5300 series
Adjustment Settings for Operators
CIP Training C7200 series
Adjustment Settings for Operators
0509: Execute Developer Refreshing
The machine uses degraded toner in the development unit and adds new toner from the toner
bottle. Refresh the toner for print jobs if:
• Background is dirty
• White spots appear
• Density is uneven
• Black parts are faded
05: Machine: Maintenance
Setting Items Values
All Colors
Cyan, Magenta,
Yellow Black
Cyan
Magenta
Yellow
Press [OK].
0512: Back Up / Restore Custom Paper Data
Back up and restore custom paper profiles.
With [Back Up Custom Paper Settings], custom paper profiles registered under the [Edit Custom
Paper] setting can be backed up to the SD card inserted in the side of the control panel.
With [Restore Custom Paper Settings], custom paper profiles backed up with [Back Up Custom
Paper Settings] can be restored.
Setting Items Remarks
Temperature
Humidity
Value display only.
0511: Temperature / Humidity outside the Machine
Display the external temperature and humidity.
Report this information if your service representative requests it.
Setting Items Selection
Back Up Custom Paper Settings
Restore Custom Paper Settings
Press [OK].

Pro C5300 series
CIP Training
Adjustment Settings for Operators
CIP Training C7200 series
Adjustment Settings for Operators
0513: Switch Print Screen
Set the function displayed when pressing [To Print Screen].
Setting Item Values Deault Value
Print Screen Copier
Printer
Copier
0701: Punch Position: With Feed
Adjust the horizontal position of the punch holes when using Finisher SR5090 or Booklet
Finisher SR5100.
Press [ + ] to move the position toward the top edge (left) relative to the paper feed direction,
or [ - ] to move it toward the bottom edge (right).
07: Finishing: Finisher
Paper feed direction
2 Holes Top
2 Holes Left
CVK008
Setting Items Default
Value
Max.
Value
Min.
Value Step Unit
2 Holes Type JP / EU
3 Holes Type US
4 Holes Type EU
4 Holes Type NE
2 Holes Type US
1 Hole Type JP
0.0 2.0 -2.0 0.5 mm

Pro C5300 series
CIP Training
Adjustment Settings for Operators
CIP Training C7200 series
Adjustment Settings for Operators
0702: Punch Position: Across Feed
Adjust the vertical position of the punch holes when using Finisher SR5090 or Booklet Finisher
SR5100. Press [ + ] to move the position forward (up), or [ - ] to move it backward (down).
Paper feed direction
2 Holes Top
2 Holes Left
CVK007
Setting Items Default
Value
Max.
Value
Min.
Value Step Unit
2 Holes Type JP / EU 3
Holes Type US
4 Holes Type EU
4 Holes Type NE
2 Holes Type US
1 Hole Type JP
0.0 2.0 -2.0 0.4 mm
0703: Staple Position
Adjust the vertical position of the staples when using Finisher SR5090 or Booklet Finisher
SR5100. Press [ + ] to move the position forward (up), or [ - ] to move it backward (down).
Paper feed direction
Bottom
Top
CVK009

Pro C5300 series
CIP Training
Adjustment Settings for Operators
CIP Training C7200 series
Adjustment Settings for Operators
0704: Staple Position for Booklet
Adjust the horizontal position of the booklet staples when using Booklet Finisher SR5100.
Press [ + ] to move the position right (across horizontally-spreading pages), or press [ - ] to move
it left.
Paper feed direction
CVK010
Setting Items Default
Value
Max.
Value
Min.
Value Step Unit
A3
B4 JIS
A4
A4
B5 JIS
B5 JIS
11 × 17
81/2 × 14
81/2 × 132/5
81/2 × 11
81/2 × 11
8K
16K
16K
Other Paper Sizes
0.0 1.0 -1.0 0.5 mm

Pro C5300 series
CIP Training
Adjustment Settings for Operators
CIP Training C7200 series
Adjustment Settings for Operators
Setting Items Default
Value
Max.
Value
Min.
Value Step Unit
A3 0.0 3.0 -3.0 0.2 mm
B4 JIS 0.0 3.0 -3.0 0.2 mm
A4 0.0 3.0 -3.0 0.2 mm
B5 JIS 0.0 3.0 -3.0 0.2 mm
12 × 18 0.0 1.8 -1.8 0.2 mm
11 × 17 0.0 3.0 -3.0 0.2 mm
81/2 × 14 0.0 3.0 -3.0 0.2 mm
81/2 × 132/50.0 3.0 -3.0 0.2 mm
81/2 × 11 0.0 3.0 -3.0 0.2 mm
8K 0.0 3.0 -3.0 0.2 mm
Other Paper Sizes 0.0 1.8 -1.8 0.2 mm
0705: Folding Position for Booklet
Adjust the horizontal position of the folding when using Booklet Finisher SR5100.
Press [ + ] to move the position right (across horizontally-spreading pages), or press [ - ] to move
it left.
Folding position
Paper feed direction
CVK011

Pro C5300 series
CIP Training
Adjustment Settings for Operators
CIP Training C7200 series
Adjustment Settings for Operators
Setting Items Default
Value
Max.
Value
Min.
Value Step Unit
A3
B4 JIS
A4
B5 JIS
12 × 18
11 × 17
81/2 × 14
81/2 × 132/5
81/2 × 11
8K
Other Paper Sizes
0.0 3.0 -3.0 0.2 mm
Setting Items Default
Value
Max.
Value
Min.
Value Step Unit
A3 : 1-5 sheet(s)
A3 : 6-10 sheets
A3 : 16 sheets or more
B4 : 1-5 sheet(s)
B4 : 6-10 sheets
B4 : 11-15 sheets
B4 : 16 sheets or more
A4 : 1-5 sheet(s)
A4 : 6-10 sheets
A4 : 11-15 sheets
A4 : 16 sheets or more
B5 : 1-5 sheet(s)
B5 : 6-10 sheets
B5 : 11-15 sheets
B5 : 16 sheets or more
0.0 3.0 -3.0 0.2 mm

Pro C5300 series
CIP Training
Adjustment Settings for Operators
CIP Training C7200 series
Adjustment Settings for Operators
0706: Folding Speed for Booklet
Specify the folding speed for booklets when using the Booklet Finisher SR5100.
You can adjust the paper folding strength by changing the folding speed for booklet folding.
By decreasing the folding speed, you can increase the paper folding strength.
Setting Items Selection Default Value
A3
B4 JIS
A4
B5 JIS
12 × 18
11 × 17
81/2 × 14
81/2 × 132/5
81/2 × 11
8K
Other Paper Sizes
High
Middle
Low
High
0801: Staple Position: Across Feed 1
Adjust the vertical position of the staple (applied at an edge) when using Finisher SR5110 or
Booklet Finisher SR5120.
Press [ + ] to move the stapling position away from the side edge of the sheet or [ - ] to move
it toward the edge.
Leading
edge
Paper feed direction
Trailing
edge
DFZ001

Pro C5300 series
CIP Training
Adjustment Settings for Operators
CIP Training C7200 series
Adjustment Settings for Operators
0802: Staple Position: Across Feed 2
Adjust the vertical position of the staples (dual) when using Finisher SR5110 or Booklet Finisher
SR5120.
Press [ + ] to move the two stapling positions away from the center and each other or [ - ] to move
them toward each other.
Leading
edge
Trailing
edge
Paper feed direction
DFZ002
Setting Items Default
Value
Max.
Value
Min.
Value Step Unit
A3 0 115 -14.5 0.1 mm
B4 JIS 0 75 -14.5 0.1 mm
A4 0 115 -14.5 0.1 mm
A4 0 28 -14.5 0.1 mm
B5 JIS 0 75 -14.5 0.1 mm
B5 JIS 0 0 -14.5 0.1 mm
11 × 17 0 98 -14.5 0.1 mm
81/2 × 14 0 34 -14.5 0.1 mm
81/2 × 132/50 34 -14.5 0.1 mm
81/2 × 11 0 98 -14.5 0.1 mm
81/2 × 11 0 34 -14.5 0.1 mm
8K 0 85 -14.5 0.1 mm
16K 0 85 -14.5 0.1 mm
16K 0 12 -14.5 0.1 mm
Other Paper Sizes 0 115 -14.5 0.1 mm

Pro C5300 series
CIP Training
Adjustment Settings for Operators
CIP Training C7200 series
Adjustment Settings for Operators
0803: Staple Position: With Feed
Adjust the horizontal position of the staples when using Finisher SR5110 or Booklet Finisher SR5120.
Press [ + ] to move the stapling position away from the trailing edge of the sheet or [ - ] to move it
toward the edge.
edge
Paper feed direction
TrailingLeading
edge
DFZ003
Setting Items Default
Value
Max.
Value
Min.
Value Step Unit
A3
B4 JIS
A4
A4
B5 JIS
B5 JIS
11 × 17
81/2 × 14
81/2 × 132/5
81/2 × 11
81/2 × 11
8K
16K
16K
Other Paper Sizes
0 2 -2 0.1 mm

Pro C5300 series
CIP Training
Adjustment Settings for Operators
CIP Training C7200 series
Adjustment Settings for Operators
0813: Punch Position: Across Feed
Adjust the vertical position of the punch holes when using Finisher SR5110 or Booklet Finisher
SR5120. Press [ + ] to move the position forward (up), or [ - ] to move it backward (down).
Paper feed direction
2 Holes Top
2 Holes Left
CVK007
Setting Items Default
Value
Max.
Value
Min.
Value Step Unit
2 Holes Type JP / EU
3 Holes Type US
4 Holes Type EU
4 Holes Type NE
2 Holes Type US
0.0 2.0 -2.0 0.5 mm
0814: Punch Position: With Feed
Adjust the horizontal position of the punch holes when using Finisher SR5110 or Booklet
Finisher SR5120.
Press [ + ] to move the position toward the top edge (left) relative to the paper feed direction,
or [ - ] to move it toward the bottom edge (right).
Paper feed direction
2 Holes Top
2 Holes Left
CVK008
Other manuals for Pro C5300 Series
1
Table of contents
Other Ricoh All In One Printer manuals
Ricoh
Ricoh A-G1 User manual

Ricoh
Ricoh SP 203SF User manual

Ricoh
Ricoh Aficio MP 5500 User manual

Ricoh
Ricoh SP 3600SF User manual

Ricoh
Ricoh G157 User manual

Ricoh
Ricoh Aficio 220 User manual

Ricoh
Ricoh DSm415 User manual

Ricoh
Ricoh Mira-PJ1 Quick start guide

Ricoh
Ricoh MP 5054 Series User manual

Ricoh
Ricoh Aficio AP3200 User manual

Ricoh
Ricoh Aficio MP 201F User manual

Ricoh
Ricoh Provence-P2W User manual

Ricoh
Ricoh Aficio MPC1500 User manual

Ricoh
Ricoh 2020D - Aficio B/W Laser Service manual
Ricoh
Ricoh SP 320SFN User manual

Ricoh
Ricoh M 2700 User manual

Ricoh
Ricoh C6055 User manual

Ricoh
Ricoh MP 2553 Manual

Ricoh
Ricoh C280 User manual

Ricoh
Ricoh 5100WD User manual