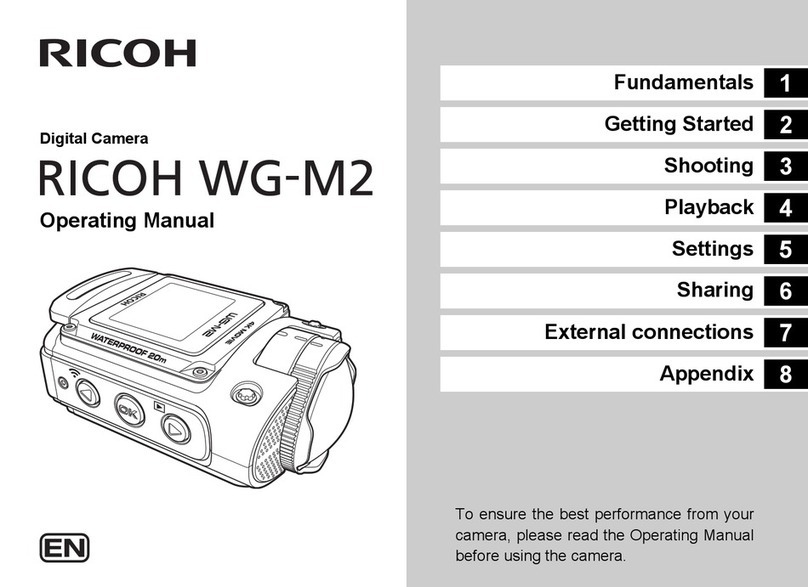
Ricoh WG-M2 Guide

Start Guide
Thank you for purchasing the RICOH WG-M2
digital camera.
This Start Guide provides information on how to
get your RICOH WG-M2 ready for use and its
basic operations. To ensure proper operation,
please read this Start Guide before using the
camera.
For details on how to use the various shooting
methods and settings, please refer to the
Operating Manual (PDF) posted on our website.
Refer to p.39 for details on the Operating Manual.
Digital Camera

List of accessories
Rechargeable lithium-ion battery
D-LI68
Power adapter
D-PA164
USB cable
I-USB157
Start Guide
Regarding Waterproof Design
Lens protector
O-LP1631
Underwater lens protector
O-LP1632
• The lens protector O-LP1631 is attached at delivery.
• To maintain the waterproof and dustproof performance, be sure to keep the lens protector on.

1
Names of parts ......................................................3
LCD screen display ..............................................5
Screen display of playback mode .......................6
About the button functions .................................7
In shooting mode ........................................................... 7
In playback mode ........................................................... 8
Attaching and removing the lens protector ....... 9
How to remove the lens protector .................................. 9
How to attach the lens protector .................................. 10
Installing a memory card and battery ............... 10
Charging the battery ..........................................12
Turning the camera on and off ..........................13
To turn the camera on ................................................. 13
To turn the camera off ................................................. 13
Initial settings .....................................................13
Language settings ....................................................... 13
Date adjustment ........................................................... 14
Settings menu list ...............................................15
TList of shooting modes ............................................ 15
sList of shooting settings ........................................... 16
xList of general settings ............................................ 17
Shooting mode settings .....................................18
Setting the camera functions ............................19
Shooting movies and still images ..................... 20
Playing back movies and still images ..............20
Deleting movies and still images ......................22
Connecting the camera and a communication
device ..................................................................22
Preparing the camera .................................................. 23
Setting communication devices (for Android) .............. 23
Setting communication devices (for iOS) ..................... 24
Main Specifications ............................................25
Using your camera safely ..................................29
Care to be taken during handling .....................30
Regarding waterproof, dustproof, and
shockproof design .............................................32
Precautions before using the camera in the water ....... 32
Precautions when using the camera in the water ........ 33
Precautions after using the camera in the water .......... 33
WARRANTY POLICY ..........................................35
Information on the Operating Manual ...............39
Table of contents
2
There is a possibility that the illustrations and the screen display
in this manual are different from the actual ones.
Regarding copyrights
Images taken with this camera that are for anything other
than personal enjoyment cannot be used without permission
according to the rights as specified in the Copyright Act.
Please take care, as there are cases where limitations are
placed on taking pictures even for personal enjoyment
during demonstrations, performances or of items on display.
Images taken with the purpose of obtaining copyrights also
cannot be used outside the scope of use of the copyright as
laid out in the Copyright Act, and care should be taken here
also.
To users of this camera
• Do not use or store this camera in the vicinity of equipment
that generates strong electromagnetic radiation or
magnetic fields. Strong static charges or the magnetic
fields produced by equipment such as radio transmitters
could interfere with the display, damage the stored data,
or affect the camera’s internal circuitry and cause camera
misoperation.
• The liquid crystal panel used for the display is
manufactured using extremely high precision technology.
Although the level of functioning pixels is 99.99% or better,
you should be aware that 0.01% or fewer of the pixels may
not illuminate or may illuminate when they should not.
However, this has no effect on the recorded image.
• In this manual, the generic term “computer(s)” refers to
either a Windows PC or a Macintosh.
• In this manual, the term “battery(ies)” refers to any type of
batteries used for this camera and its accessories.

3
Names of parts
1Strap lug
2LCD screen
3Power lamp
4Alignment points
5Lens protector
6Microphone
7Playback button/direction button (upper)
8OK button
9Wi-Fi button/direction button (lower)
1
9
4
6
2
7
53
8

4
0Video recording button/shutter button
aPower button/delete button
bMENU button
cBattery/card cover
dRelease latch
eLock lever
fPositioning hole
gTripod socket
hSpeaker
iLens protector lock
jHDMI terminal
kMicroSD card slot
lUSB terminal
mBattery lock lever
0
h
g
f
a b
i
c
d
e
jk l
m

5
tMemo
• Depending on the shooting mode, some information may not be displayed.
• Some icons will disappear if no button is pressed for four seconds. All icons will reappear if you press the button.
LCD screen display
1Shooting mode 9Recorded Pixels
2Image Effect Modes 10 EV Compensation
3Angle of View 11 LCD Orientation
4Movie SR 12 Battery level indicator
5Internal memory/memory card display 13 White Balance
6Remaining recordable time/image storage capacity 14 Sensitivity
7Icon while recording movies (blinks while recording movies) 15 Vibration
8Recorded Pixels (Movie) 16 Quality Level (Movie)
2
3
4
5
6
7
56:00
18
9
10
11
12
13
14
15
16

6
tMemo
• The [Power Saving] function is not available in playback mode.
Screen display of playback mode
1Recorded Pixels (Movie) 5Zis displayed when playing back movies shot in [Extended Movie Recording].
2Recorded Pixels 6Internal memory/memory card display
3Playback mode display 7Battery level indicator
4Image number/total number of images 8Guide display (movie)
9Guide display (still image)
1/1234
1
2
3
4
6
7
8
9
5

7
–: Button operations (short push) disabled
tMemo
• If [Power Saving] is set, the LCD screen automatically turns off, to reduce battery consumption, if no camera operations are
performed during a specified period of time. Pressing the button turns it back on.
About the button functions
In shooting mode
Buttons Name While in the settings menu
display
While in the shooting screen
display While recording
Power button/delete
button
–––
Press and hold: turns the power off
OK button Confirms a selection Displays hidden icons –
Menu button Cancels the setting Displays the settings menu –
Playback button /direction
button (upper) Changes the menu Displays the playback
screen –
Wi-Fi button/direction
button (lower)
Changes the menu
–
–
Press and hold: enables/
disables the Wi-Fi function
Video recording button/
shutter button
Displays the shooting
screen Shoots movies/still images Stops recording

8
In playback mode
Buttons Name While in the playback
screen display
When playing back a movie
During playback While temporarily stopped
Power button/delete
button
Deletes the image –
Press and hold: turns the power off
OK button
Starts movie playback
(unavailable during still
image display)
Temporarily stops playback Restarts playback
Menu button Displays the [Edit Functions]
screen Stops playback
Playback button /direction
button (upper) Displays the previous image
– Reverses frames
Press and hold: fast-
reverses
Press and hold: returns to
the first frame
Wi-Fi button/direction
button (lower)
Displays the next image
– Advances frames
Press and hold: plays back
in fast-forward
Press and hold: advances to
the last frame
Video recording button/
shutter button Displays the shooting screen

9
The camera comes with two types of lens protectors. To
maintain the waterproof and dustproof performance, be sure to
keep the lens protector on.
Lens protector O-LP1631
Use for regular shooting.
Underwater lens protector
O-LP1632
Use for underwater shooting.
tMemo
• Use the appropriate lens protector for each shooting.
• When shooting underwater, the angle of view is narrower
than the regular shooting.
1While pressing on the lens
protector lock on the back
of the camera in the
direction of arrow 1,
rotate the ring of the lens
protector in the direction
of arrow 2.
2You can remove the lens
protector when the
alignment points for the
lens protector form a
straight line.
Attaching and removing the lens
protector
How to remove the lens protector
2
1

10
1While pressing on the lens
protector lock on the back
of the camera in the
direction of arrow 1, align
the alignment points on
the camera and the lens
protector and slide it in.
2Rotate the lens protector in
the direction of arrow 2
until it clicks.
uCaution
• Condensation may form inside the lens protector if the
camera is subjected to rapid temperature changes, such as
when moving from the cold outdoors (low temperature
environment) into a warm room (high temperature
environment). Remove the lens protector and wipe it all off
with a dry, lint-free cloth, and then put the lens protector back
on.
1Slide the lock lever in the
direction of 1and release
the lock.
Slide the release latch in
the direction of 2and
open the battery/card
cover.
2Confirm the positive and
negative terminals of the
battery. While pressing the
battery lock lever outward
using the side of the
battery, insert the battery
correctly.
How to attach the lens protector
2
1
Installing a memory card and
battery
1
2

11
3While the camera is turned
off, slowly insert the
memory card into the
microSD card slot in the
direction of the arrow.
4Close the battery/card cover.
Close the battery/card cover until it clicks.
Next, move the lock lever to the left side and lock the
release latch.
uCaution
• Do not apply excessive force when opening and closing the
battery/card cover because the waterproof seal may peel off.
If the seal is not in the correct position, the camera will not be
waterproof.
• If the battery/card cover is not locked securely, water, sand,
or dirt may get into the camera.
• This camera uses a specifically designed D-LI68
rechargeable lithium-ion battery. Use of any other type of
battery may damage the camera and cause malfunctions.
• Insert the battery correctly. If the battery is not inserted
correctly, it may cause malfunctions.
• When storing the battery for more than 6 months, charge the
battery for 30 minutes using the power adapter and store the
battery separately. Be sure to recharge the battery every 6 to
12 months. Storing the battery below room temperature is
ideal. Avoid storing it in high temperatures.
• The date and time may be reset to the default settings if the
camera is left without the battery for a long time.
• Be careful as the camera or the battery may become hot
when the camera is used continuously for a long period of
time.
• Allow the camera to dry completely before changing the
battery or memory card. Avoid changing the battery or
memory card where the camera is likely to get wet or dirty,
and make sure that your hands are dry.
• Be sure to use this camera to format (initialize) a memory
card that is unused or has been previously used on other
cameras or digital devices. Refer to the Operating Manual
(PDF) (p.39) for instructions on formatting cards.
• Make sure that the camera is turned off before inserting or
removing the battery or memory card.
tMemo
• The camera does not come with a memory card. You must
purchase one separately. (Use a microSD card of Speed
Class 10 or higher. For dmovies set to z, use a microSDXC
card of UHS-I Speed Class 3.)
• To remove the memory card, first open the battery/card
cover. Press the card in lightly with your finger until the card
pops out, then pull it straight out.

12
Connect the supplied power adapter (D-PA164) to the camera
and charge the battery before using the camera for the first time
or if you have not used it for a long time.
1While the camera is turned off, connect the USB
cable to the camera's USB terminal and the
power adapter.
2Plug the power adapter into the power outlet to
start charging.
The power lamp blinks while charging.
When charging is finished, the power lamp turns off.
uCaution
• Do not use the supplied power adapter (D-PA164) for any
other purpose than that of connecting to this camera and
charging the designated battery. Doing otherwise may cause
a connected device to be damaged or overheated.
• The battery has reached the end of its service life when it
starts to run down soon after being charged. Replace it with a
new battery.
• If the power lamp does not light even if the camera is
connected to a power outlet, the battery is faulty. Replace it
with a new battery.
tMemo
• Charging time is a maximum of about 130 minutes (this may
vary depending on ambient temperature and charging
conditions). Charge the battery in a range from 0°C to 40°C
(32°F to 104°F).
• Battery performance may deteriorate as temperature
decreases. When using the camera in cold regions, we
recommend carrying a spare battery in your pocket to keep it
warm. Battery performance will recover when the
temperature returns to normal.
• Be sure to take a spare battery with you when traveling
abroad or to a cold region, or if you intend to take a lot of
pictures.
Charging the battery

13
Press and hold the button to turn the camera on.
The first time you turn the camera on, the [Language/u]
screen appears. (p.13)
Press and hold the button to turn the camera off.
tMemo
• When [Auto Power Off] is on, the camera is turned off
automatically if no button operations are done for three
minutes.
Do the initial settings to use your camera for the first time after
purchasing it.
1Turn the camera on.
The [Language/u]
screen appears.
2Press the button or
the button. Select
the desired language
and press the
button.
[Initial Setting] screen
appears after you have set
the language.
3Press the button or the button. Select
[Settings complete] and press the button.
The [Date Adjustment] screen appears.
Next, set the date and time.
Turning the camera on and off
To turn the camera on
To turn the camera off
Initial settings
Language settings
Français
English
İ࡞ࢊ
Language
ུࢊ
OK
English
İ࡞ࢊ
Language
Initial Setting
Settings complete

14
1Press the button or the button. Select the
date display style and press the button.
Choose from [mm/dd/yy], [dd/mm/yy] or [yy/mm/dd].
2Press the button or the button. Select [24
h] (24-hour clock) or [12h] (12-hour clock) and
press the button.
3Press the button or the button. Set
"month" and press the button.
The set up procedure differs depending on the display style
set in step 1.
4Set the date, year and time in the same way as in
step 3.
The frame moves to [Settings complete].
5Press the button.
The initial settings are
complete and the shooting
screen appears.
uCaution
• You can shoot pictures while doing the initial settings by
pressing the button, but the settings you have made so
far are canceled. In this case, the initial setting screen
reappears the next time you turn the camera on.
tMemo
• To change the language, date, or time you have setup, refer
to the Operating Manual (PDF). (p.39)
Date adjustment
Date Adjustment
mm/dd/yy
OK
10 : 30
12h
AM
Settings complete
Cancel
201603/03 /

15
This list shows the items that can be set on the settings menu screen and their details.
You can set the shooting mode for movies and still images.
Settings menu list
TList of shooting modes
Item Details Default setting
Still Image You can shoot still images.
Movie
Underwater Still Image You can shoot still images underwater to capture the blueness of the sea.
Burst Shooting You can shoot still images continuously while the shutter button is
pressed.
Movie You can shoot movies.
Underwater Movie You can shoot movies underwater to capture the blueness of the sea.
Time-Lapse Movie You can shoot movies at 30, 60, or 150 times the speed.
Extended Movie Recording You can shoot movies continuously, while movie files are created for
each set recording time, until stopped manually.
High Speed Movie You can shoot movies of high frame rate (120 fps) and play them back in
slow motion.

16
You can set the functions for shooting movies and still images. Some functions may not be available or may not function fully
depending on the selected [Rec. Mode].
sList of shooting settings
Item Details Default setting
Image Effect Modes You can change image enhancements, such as tone, and shoot. n(Bright)
EV Compensation You can adjust the brightness of the whole image being shot. 5(±0.0)
White Balance You can match the lighting conditions during shooting and adjust the
color. s(Auto)
AE Metering You can set the area of the screen where the brightness is metered to
determine the exposure.
a(Multi-segment
metering)
Sensitivity You can set the ISO sensitivity. k(Auto)
Angle of View You can set the angle of view for shooting. b(Wide)
LCD Orientation You can set the orientation of the camera depending on its alignment
when it is mounted. 1(0°)
Recorded Pixels You can set the recorded pixels for still images. n(3264 x 2448)
Recorded Pixels (Movie) You can set the recorded pixels (combination of number of pixels and
frame rate) for movies. d(3840 x 2160)
Quality Level (Movie) You can set the quality level of the movie. Y(Fine)
Movie SR You can set whether or not to use shake reduction for movies. r(Off)
Wind Suppression You can set whether or not to reduce the sound of wind while shooting
movies. X(On)

17
You can set the general settings for the camera.
xList of general settings
Item Details Default setting
Sound You can set the volume of operation sounds and playback sounds, as
well as the sounds for the shutter and operations.
Operation
Volume 2
Playback
Volume 2
Operation
Sound 1
Shutter Sound 1
Date Adjustment You can set the date and time.
Date Format
(date)
According to
initial setting
Date Format
(time) 24h
Language/WYou can set the language displayed in messages and on menus. According to initial setting
USB Connection You can set the way to connect the camera to a computer using the USB
cable. MSC
Wi-Fi You can set whether to enable or disable the Wi-Fi function. You can also
display or reset communication information in Wi-Fi mode. Action Mode Off
Brightness Level You can set the brightness of the LCD screen. 3
Power Saving You can set the time it takes until the camera enters Power Saving mode. 15 sec.
Auto Power Off You can set whether or not to automatically turn off the camera when
there are no operations for a fixed time. On
Reset You can return the camera's settings to the factory settings. Cancel
Delete All You can delete all saved movies and still images. Cancel
Format You can format the internal memory or memory card. Cancel
Vibration You can set whether or not to use the vibration function. On
Certifications You can display the certifications for the wireless LAN. -

18
You can set the shooting mode for movies and still images.
1Press the button on the shooting screen.
The settings menu is displayed.
2Press the button or
the button. Select
T[Rec. Mode] and
press the button.
The [Rec. Mode] screen
appears.
See “List of shooting
modes” (p.15) for the
shooting modes that can be selected.
3Press the button or
the button. Select
the shooting mode
and press the
button.
This brings you back to the
shooting screen.
If you selected [Time-Lapse
Movie] or [Extended Movie
Recording], proceed to step
4.
4For [Time-Lapse Movie], select the speed. For
[Extended Movie Recording], select the
recording time. Press the button.
tMemo
• The current settings for the [Rec. Mode] are saved even when
the camera is turned off.
• By pressing the button while doing settings, you return to
the previous screen with the existing settings.
• The available recording time for [Extended Movie Recording]
differs depending on the [Recorded Pixels (Movie)] (p.16).
For details, refer to the Operating Manual (PDF). (p.39)
Shooting mode settings
Rec. Mode
OK
Movie
OK
Shooting mode Icon Details
Time-Lapse Movie
cYou can shoot movies at 30
times the speed.
CYou can shoot movies at 60
times the speed.
BYou can shoot movies at
150 times the speed.
Extended Movie
Recording
ESet the recording time to 5
minutes.
DSet the recording time to 10
minutes.
eSet the recording time to 25
minutes.
Other manuals for WG-M2
1
Table of contents
Other Ricoh Digital Camera manuals

Ricoh
Ricoh Caplio 500G wide User manual

Ricoh
Ricoh Caplio G3 User manual

Ricoh
Ricoh Aficio G700 Use and care manual

Ricoh
Ricoh Aficio 120 User manual

Ricoh
Ricoh R8 User manual

Ricoh
Ricoh GX200 VF KIT User manual

Ricoh
Ricoh RDC-2 User manual

Ricoh
Ricoh Caplio 500SE User manual

Ricoh
Ricoh RDC-6000 User manual

Ricoh
Ricoh Caplio GX100 User manual

Ricoh
Ricoh Caplio RR660 User manual

Ricoh
Ricoh Caplio 500SE User manual

Ricoh
Ricoh RDC-300Z series User manual

Ricoh
Ricoh SLX 500 User manual

Ricoh
Ricoh Caplio RR-1 User manual

Ricoh
Ricoh gr digital III User manual

Ricoh
Ricoh Caplio R 3 User manual

Ricoh
Ricoh Pentax K-70 User manual

Ricoh
Ricoh Caplio G3S User manual

Ricoh
Ricoh G800 User manual