manuals.online logo
Brands
  1. Home
  2. •
  3. Brands
  4. •
  5. Riello
  6. •
  7. Heating System
  8. •
  9. Riello 20116460 User manual

Riello 20116460 User manual

HELIOTERM INVERTER
Doc-0055395 Rev. 0
1
34
2
IT
1. Avvertenze preliminari
Questa istruzione è parte integrante del libretto
dell’apparecchio sul quale viene installato il KIT. A tale
libretto si rimanda per le AVVERTENZE GENERALI e per le
REGOLE FONDAMENTALI DI SICUREZZA.
KIT PANNELLO DI COPERTURA POSTERIORE
2. Versioni
Codici
20116460
Kit pannello di copertura posteriore bianco per mod. 11
20116461
Kit pannello di copertura posteriore bianco per mod. 21
20116462
Kit pannello di copertura posteriore bianco per mod. 33
20116463
Kit pannello di copertura posteriore bianco per mod. 40
20116464
Kit pannello di copertura posteriore bianco per mod. 46
4013461
Kit pannello di copertura posteriore argento per mod. 11
4013463
Kit pannello di copertura posteriore argento per mod. 21
4013465
Kit pannello di copertura posteriore argento per mod. 33
4013467
Kit pannello di copertura posteriore argento per mod. 40
4013469
Kit pannello di copertura posteriore argento per mod. 46
20116467 Kit pannello di copertura posteriore Design Inverter S 6
20116470 Kit pannello di copertura posteriore Design Inverter S 11
20116472 Kit pannello di copertura posteriore Design Inverter S 17
20116473 Kit pannello di copertura posteriore Design Inverter S 23
20116474 Kit pannello di copertura posteriore Design Inverter S 32
In alcune parti del libretto sono utilizzati i simboli:
ATTENZIONE= per azioni che richiedono particolare
cautela ed adeguata preparazione.
VIETATO= per azioni che non devono essere
assolutamente eseguite.
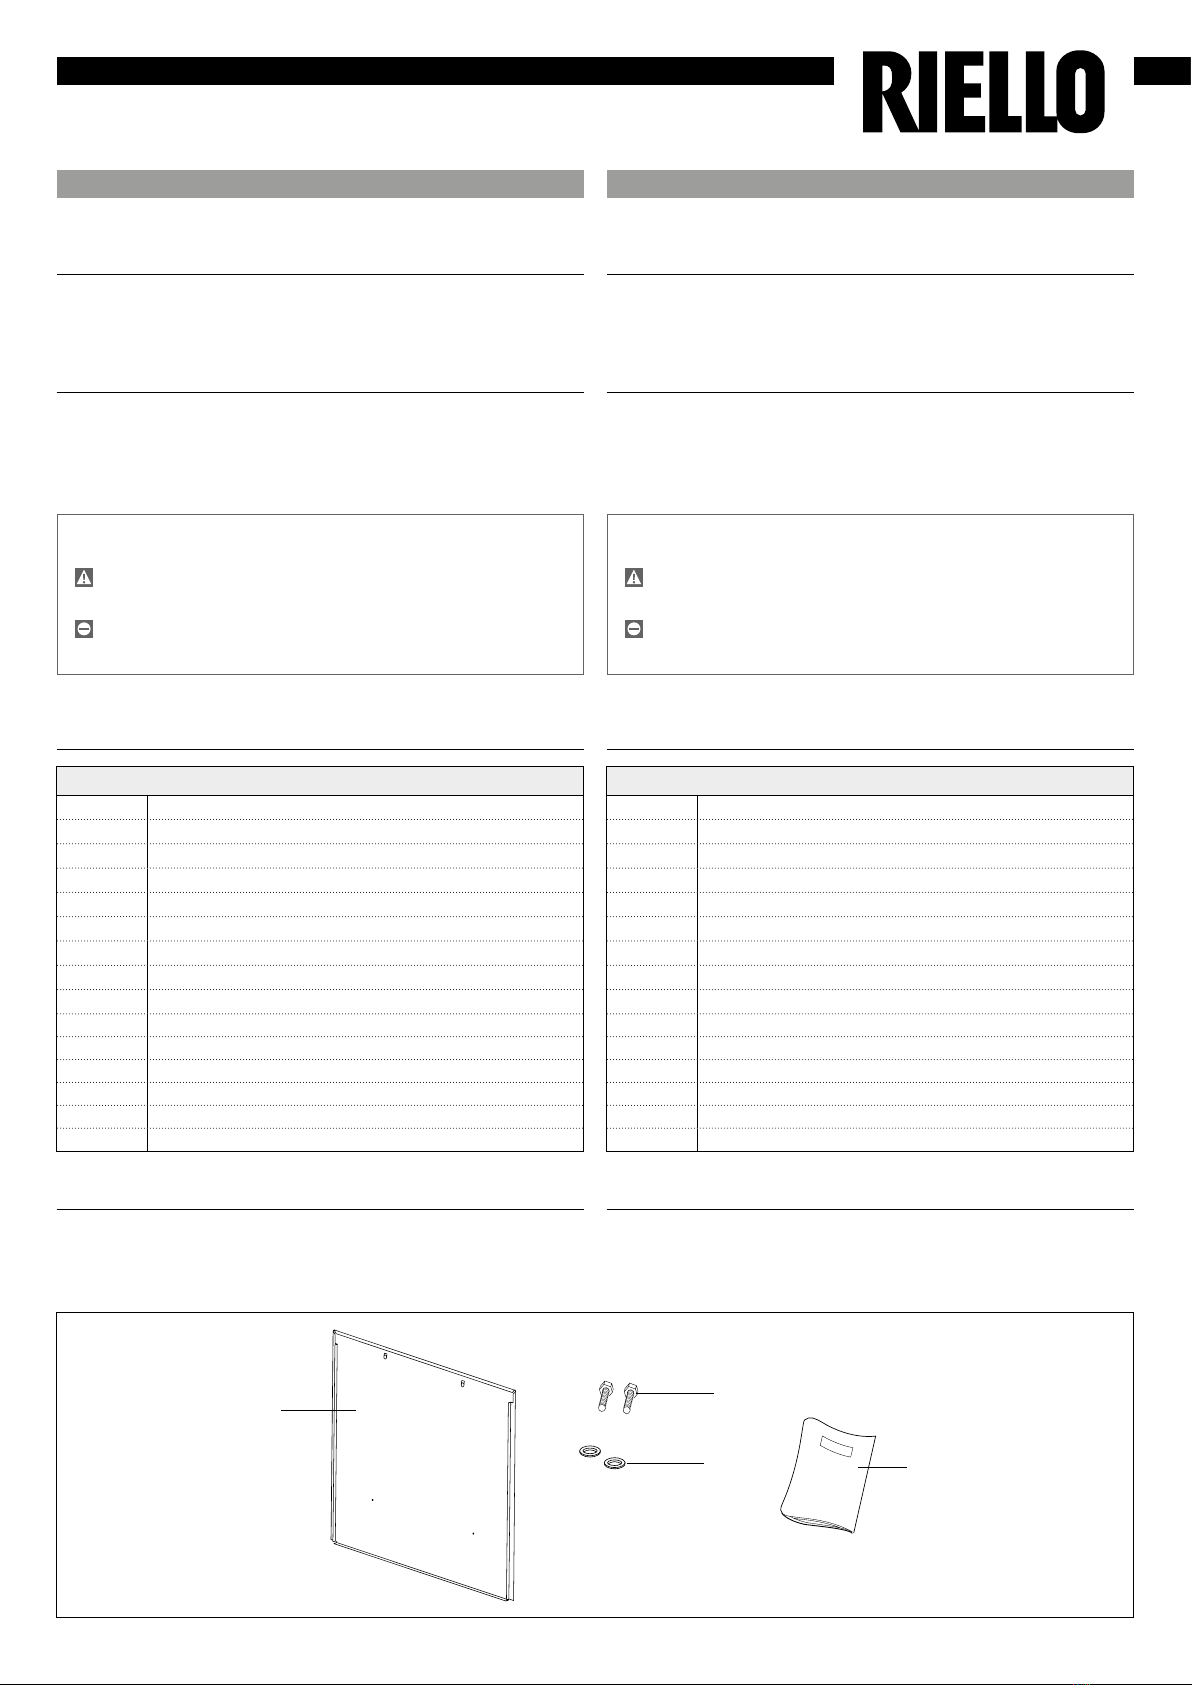
3. Composizione del kit
1 Lamiera posteriore 1
2 Viti di fissaggio 2
3 Rondelle 2
4 Istruzioni per il montaggio 1
EN
1. Preliminary instructions
This instruction booklet is an integral part of the manual
of the device on which you install the kit. In that manual,
please refer to the WARNINGS and the BASIC SAFETY RULES.
REAR COVER KIT
2. Versions
Codes
20116460
White rear cover kit for mod. 11
20116461
White rear cover kit for mod. 21
20116462
White rear cover kit for mod. 33
20116463
White rear cover kit for mod. 40
20116464
White rear cover kit for mod. 46
4013461
Silver rear cover kit for mod. 11
4013463
Silver rear cover kit for mod. 21
4013465
Silver rear cover kit for mod. 33
4013467
Silver rear cover kit for mod. 40
4013469
Silver rear cover kit for mod. 46
20116467 Silver rear cover kit for Design Inverter S 6
20116470 Silver rear cover kit for Design Inverter S 11
20116472 Silver rear cover kit for Design Inverter S 17
20116473 Silver rear cover kit for Design Inverter S 23
20116474 Silver rear cover kit for Design Inverter S 32
The following symbols are used in this publication:
WARNING = actions requiring special care and
appropriate training.
DO NOT = actions that MUST ON NO ACCOUNT be
carried out.
3. Kit composition
1 Rear cover 1
2 Fixing screws 2
3 Washers 2
4 Assembly Instructions 1
HELIOTERM INVERTER
Doc-0055395 Rev. 0
A C C
B
RIELLO S.p.A. - 37045 Legnago (VR)
tel. +39 0442 630111 - fax +39 0442 22378
www.riello.it
IT
A pannello posteriore
B parte superiore
C viti
Il pannello di copertura posteriore deve essere installato
in abbinamento al KIT STAFFA PER FISSAGGIO A PAVIMENTO.
Utilizzare il pannello di chiusura posteriore quando lo
schienale dell’apparecchio è in vista (esempio di fronte
ad una vetrina).
Appoggiare la macchina con il pannello frontale su
un piano orizzontale, prestando attenzione a non
danneggiarlo;
svitare le due viti posteriori di fissaggio staffe in
corrispondenza dei fori di fissaggio del pannello;
posizionare il pannello posteriore sul retro della
macchina;
incastrare il pannello sulla parte superiore della
struttura;
fissare il pannello con le due viti precedentemente
smontate.
4. Montaggio kit pannello di copertura
posteriore
Poiché l’Azienda è costantemente impegnata nel continuo perfezionamento di tutta la sua produzione, le
caratteristiche estetiche e dimensionali, i dati tecnici, gli equipaggiamenti e gli accessori, possono essere soggetti
a variazione.
EN
A rear panel
B the top of the structure
C screws
The rear closure panel must be installed together with the
GROUND ANCHOR FEET KIT.
Use the rear closing panel when the back of the device is
in view (for example, in front of a window).
Rest the machine with the front panel on a flat surface,
taking care not to damage it;
unscrew the two rear bracket fixing screws in
correspondence with the fixing holes on the panel;
position the rear panel on the back of the machine;
clip the panel onto the top of the back of the structure;
fix the panel with the two screws previously loosened.
4. Mounting rear closing panel
As the manufacturer is constantly improving its products, the aesthetic or dimensional features, the technical data,
the equipment and accessories indicated could be subject to variations.

This manual suits for next models

14

Other Riello Heating System manuals

Riello 20083501 User manual

Riello

Riello 20083501 User manual

Riello 20083502 User manual

Riello

Riello 20083502 User manual

Riello FASTECH 24 KI Operation and installation manual

Riello

Riello FASTECH 24 KI Operation and installation manual

Riello 20083503 User manual

Riello

Riello 20083503 User manual

Popular Heating System manuals by other brands

Aereco DXR Installation and use

Aereco

Aereco DXR Installation and use

Conel CLEAR FILL operating instructions

Conel

Conel CLEAR FILL operating instructions

Daikin ALTHERMA Installer's reference guide

Daikin

Daikin ALTHERMA Installer's reference guide

aoyue 853A quick start guide

aoyue

aoyue 853A quick start guide

Innova HRC 08 Instructions for installation, use and maintenance manual

Innova

Innova HRC 08 Instructions for installation, use and maintenance manual

nuair NU2200 OPERATING, MAINTAINING & INSTALLING INSTRUCTIONS

nuair

nuair NU2200 OPERATING, MAINTAINING & INSTALLING INSTRUCTIONS

HDG Compact 99 user manual

HDG

HDG Compact 99 user manual

EC POWER XRGI 15 installation guide

EC POWER

EC POWER XRGI 15 installation guide

Aqua-Hot 375D Service manual

Aqua-Hot

Aqua-Hot 375D Service manual

Vallox DIGIT2 SE VKL Instructions for use and maintenance

Vallox

Vallox DIGIT2 SE VKL Instructions for use and maintenance

Robur CALDARIA CONDENSING 100 Installation and use instructions

Robur

Robur CALDARIA CONDENSING 100 Installation and use instructions

NEXGEN IMPULSE 100L Operations manual & parts list

NEXGEN

NEXGEN IMPULSE 100L Operations manual & parts list

Salda RIS 400HW 3.0 Technical data

Salda

Salda RIS 400HW 3.0 Technical data

Roberts Gorden CoRayVac B-2 instructions

Roberts Gorden

Roberts Gorden CoRayVac B-2 instructions

Myson MPE 222 quick guide

Myson

Myson MPE 222 quick guide

aldes VEX600 installation instructions

aldes

aldes VEX600 installation instructions

Viessmann AC-Box Installation and service instructions for contractors

Viessmann

Viessmann AC-Box Installation and service instructions for contractors

Roberts Gorden CoRayVac CRV-B-2 Design manual

Roberts Gorden

Roberts Gorden CoRayVac CRV-B-2 Design manual

manuals.online logo
manuals.online logoBrands
  • About & Mission
  • Contact us
  • Privacy Policy
  • Terms and Conditions

Copyright 2025 Manuals.Online. All Rights Reserved.