Ringler RI 100 W2G Installation instructions

Ringler GmbH
73550 Waldstetten [Germany] Fax +49 (0)7171-94 888-28 www.ringler-gmbh.de
Fon +49(0)7171-94888-0
Translation of the Original Operating Manual
RI 100 W2G / W2E
GERMANY
2015-12-10
GBR

2/50
Copyright
Copyright by
Ringler GmbH
Robert-Bosch-Straße 4-8
73550 Waldstetten
GERMANY

3/50
1Safety Instructions.................................................................................................................................7
1.1 Terms................................................................................................................................................. 7
1.1.1 Operation....................................................................................................................................... 7
1.1.2 Maintenance .................................................................................................................................. 7
1.1.3 Qualified Staff ................................................................................................................................ 7
1.2 Symbols............................................................................................................................................. 7
1.3 General safety information................................................................................................................. 9
2Delivery, internal transportation, unpacking.....................................................................................10
2.1 Delivery............................................................................................................................................ 10
2.2 Internal transport.............................................................................................................................. 10
2.2.1 Dimensions and weight................................................................................................................ 10
2.3 Unpacking........................................................................................................................................ 10
2.4 Packaging material.......................................................................................................................... 10
2.5 Storage conditions........................................................................................................................... 11
2.5.1 Information for storage................................................................................................................. 11
3Appliance description..........................................................................................................................12
3.1 Intended Use ................................................................................................................................... 12
3.1.1 Dust class "L"............................................................................................................................... 12
3.2 Non-Intended Use............................................................................................................................ 12
3.2.1 Dust class "L"............................................................................................................................... 12
4Layout and function.............................................................................................................................13
4.1 Main dimensions.............................................................................................................................. 13
4.2 Technical Data RI 100..................................................................................................................... 13
4.3 Technical Data................................................................................................................................. 13
5Main components.................................................................................................................................14
5.1 RI 100-W components..................................................................................................................... 14
5.2 Functional description of the chip suction plant............................................................................... 14
6Initiation.................................................................................................................................................15
6.1 Initial operation of the chip............................................................................................................... 15
7Operation...............................................................................................................................................16
7.1 Operation......................................................................................................................................... 16
7.1.1 Two-stage switch......................................................................................................................... 16
7.2 Suction process ............................................................................................................................... 16
7.3 Emptying the collecting tank............................................................................................................ 17
7.3.1 Preparations for emptying the collecting tank.............................................................................. 17
7.3.2 Manual drainage types RI 030 and RI 100.................................................................................. 17
7.3.3 Emptying liquids........................................................................................................................... 18
7.4 Level indicator on control pipe (ENG-003026) ................................................................................ 18
7.5 Handling notes................................................................................................................................. 19
7.5.1 Suction insert with baffle plate..................................................................................................... 19
7.5.2 Suction insert with baffle plate and perforated basket................................................................. 19
7.6 Electrical overfill safety device for liquids (optional)........................................................................ 20
7.6.1 Electrical overfill safety device, AC version................................................................................. 20
7.7 Barrel pump with standpipe (B_6631001-Z) (optional)................................................................... 21
7.7.1 Technical data for the barrel pump.............................................................................................. 21
7.7.2 Pumping out during the suction procedure.................................................................................. 21

4/50
7.7.3 Pumping out after the suction procedure..................................................................................... 21
7.8 Safety instructions for the barrel pump............................................................................................ 21
8Troubleshooting and fault elimination...............................................................................................22
8.1 Safety instructions ........................................................................................................................... 22
8.2 Initial fault elimination measures ..................................................................................................... 22
9Maintenance/Repair..............................................................................................................................23
9.1 Maintenance regulations.................................................................................................................. 23
9.2 Maintenance intervals table............................................................................................................. 24
9.3 Cleaning........................................................................................................................................... 24
9.4 Disassembly of the suction turbine.................................................................................................. 25
9.4.1 Changing the carbon brushes...................................................................................................... 25
9.5 Disassembly of the bag-type filter ................................................................................................... 26
9.6 Circuit diagram for AC drive units.................................................................................................... 27
9.6.1 Circuit diagram for W1G / W1E / W1E-N / W1E-T, single-motor version.................................. 27
9.6.2 Circuit diagram for W2G / W2G-N / W2G-T / W2E, twin-motor version..................................... 27
9.7 Warnings on the suction device....................................................................................................... 28
9.7.1 Warning sign for devices in class "L"........................................................................................... 28
9.7.2 Type sign ..................................................................................................................................... 28
9.8 Wear parts list.................................................................................................................................. 29
10 Decommissioning, storage .................................................................................................................30
11 Disposal.................................................................................................................................................31
12 Spare Parts List ....................................................................................................................................32
12.1 Industrial suction unit type RI 100-W............................................................................................... 32
12.1.1 Industrial suction unit type RI 100-W....................................................................................... 32
12.2 Exploded Drive unit W2G / W2E (3400228-X-ZB)........................................................................... 33
12.2.1 Parts list Drive unit W2G / W2E (3400228-X-ZB)................................................................... 34
12.3 Exploded fan EKO 86/2.................................................................................................................. 35
12.3.1 Parts list fan EKO 86/2 ............................................................................................................ 35
12.4 Exploded fan EKO 87/3.................................................................................................................. 36
12.4.1 Parts list fan EKO 87/3 ............................................................................................................ 36
12.5 Exploded two-stage switch with cable set W2G / W2E / W3G........................................................ 37
12.5.1 Exploded two-stage switch with cable set W2G / W2E / W3G................................................ 37
12.6 Drawing for collecting tank type RI 100 (2101005) ......................................................................... 38
12.6.1 List of spare parts for collecting tank type RI 100 (2101005).................................................. 38
12.7 List of spare parts for collecting tank type RI 100 (2101024).......................................................... 39
12.7.1 List of spare parts for collecting tank type RI 100 (2101024).................................................. 39
12.8 Emptying hose for div. types (2601004-X-Z)................................................................................... 40
12.8.1 Spare parts list Emptying hose for div. types (2601004-X-Z)................................................. 40
12.9 Undercarriage Type RI 100 (B_1201020-X-Z) ................................................................................ 41
12.9.1 Table for undercarriage type RI 100 (B_1201020-X-Z)........................................................... 41
12.10 Spare parts list/drawing Spring latch with foot Pedal (2241009)................................................. 42
12.10.1 Spare parts list/drawing Spring latch with foot Pedal (2241009)............................................. 42
12.11 Spare Parts List Suction hose DN 40, all Types (2600484-Z).................................................... 43
12.11.1 Spare Parts List Suction hose DN 40, all Types (2600484-Z)................................................ 43
12.12 Spare Parts List Suction hose DN 50, all Types (2600398-Z).................................................... 44
12.12.1 Spare Parts List Suction hose DN 50, all Types (2600398-Z)................................................ 44

5/50
12.13 Spare parts list float insert for container ø517 (2700178-Z)........................................................ 45
12.13.1 Spare parts list float insert for container ø517 (2700178-Z).................................................... 45
12.14 Spare parts list, baffle plate, float insert, perforated basket for container ø517 (6701000 ......... 46
12.14.1 Spare parts list, baffle plate, float insert, perforated basket for container ø517 (6701000) .... 46
12.15 Possible combinations of different inserts for the swarf extractor ø517...................................... 46
12.16 Spare part drawing for the Barrel Pump (2630211-X-ZB)........................................................... 47
12.16.1 Spare Part List for the Barrel Pump (2630211-X-ZB).............................................................. 47
12.17 Float type switch V2A float alternating current (B_0630180-ZC)................................................ 48
12.17.1 Spare parts list float type switch V2A float alternating current (B_0630180-ZC) .................... 48
12.18 Accessories List........................................................................................................................... 49
13 EEC-Declaration of Conformity...........................................................................................................50

Safety Instructions
6/50
Pos: 1.1 /1 Grundlege nde Sicherheitshin weise/Kapitelüb erschrift 1 Angaben zur Sic herheit @ 0\mod_1261 472663260_131 .docx @ 973 @ 1 @ 1

Safety Instructions
7/50
1 Safety Instructions
Pos: 1.2 /1 Grundlege nde Sicherheitshin weise/Kapitelüberschrif t 2B egriffe @ 0\ mod_1261472746 655_131.docx @ 980 @ 2 @ 1
1.1 Terms
Pos: 1.3 /1 Grundlege nde Sicherheitshi nweise/Begriffe-Betri eb @ 0\mod_126 1486420512_131.do cx @1 040 @ 3 @ 1
1.1.1 Operation
includes installation, initiation (placing at disposal for usage), operation (handling, connection,
disconnection, etc.)
Pos: 1.4 /1 Grundlege nde Sicherheitshin weise/Begriffe-Inst andhaltung @ 0\mo d_126148670478 3_131.docx @ 1046 @ 3 @ 1
1.1.2 Maintenance
includes control and attendance (inspections, revisions), maintenance and repair (detection of errors
and their elimination).
Pos: 1.5/ 1 Grundlegende Sicher heitshinweise/Begriff e-qu alifiziertes Personal @ 0\mod_1 261486829253_1 31.docx @ 1052 @ 3@ 1
1.1.3 Qualified Staff
are employees authorised by the person responsible for the security of the installation to carry out
the operations required in each case and who are able to recognise and avoid possible dangers by
reason of their training, experience and instructions as well as their knowledge of relevant norms,
prescriptions, accident-prevention rules and working conditions.
Pos: 1.6 /1 Grundlege nde Sicherheitshin weise/Kapitelüb erschrift 2 Symbole @ 0\mo d_12614731677 32_131.docx @ 987 @ 2 @ 1
1.2 Symbols
Pos: 1.7 /1 Grundlege nde Sicherheitshin weise/Signalwort-F eld"Hi nweis" @ 0\ mod_126140496043 9_131.docx @ 905 @ @ 1
NOTICE
Pos: 1.8/ 1 Grundlegende Sicher heitshinweise/Text zu Hinweiss ymbol @ 0\mod_1261 477345812_131.doc x@ 1014 @ @ 1
Denotes information that does not relate to personal injuries.
This information contains additional directions or general hints.
Pos: 1.9 /1 Grundlege nde Sicherheitshin weise/Signalwort-F eld" Vorsicht" @ 0\mo d_126140489817 1_131.docx @ 899 @ @ 1
CAUTION
Pos: 1.10 /1 Grundleg endeSi cherheitshinw eise/Text zu Vorsichtss ymbol @ 0\mod_ 1261475623349_ 131.docx @ 1000 @ @ 1
Dangerous situation, which could result in minor to moderate injury if it is not avoided.
This information must be regarded strictly to avoid damages to the installation or environment!
Pos: 1.11 /1 Grundleg endeSi cherheitshinw eise/Signalwort-F eld" Warnung" @ 0\ mod_1261404807 286_131.docx @ 893 @ @ 1
WARNING
Pos: 1.12 /1 Grundleg endeSi cherheitshinw eise/Text zu Warns ymbol, Allgemein @ 0\ mod_1261475434 612_131.doc x@ 99 4@ @1
Dangerous situation, which could result in serious injury or death if it is not avoided.
Pos: 1.13 /1 Grundleg endeSi cherheitshinw eise/Signalwort-Fel d" Gefahr" @ 0\mod_126140 4709797_131.doc x@ 887 @ @ 1
DANGER
Pos: 1.14 /1 Grundleg endeSi cherheitshinw eise/Text zu Gefahr ensymbol @ 0\mod _1261477187354_1 31.docx @ 1007 @ @ 1
Dangerous situation, which will definitely result in serious injury or death if it is not avoided.
Pos: 1.15 /1 Grundleg endeSi cherheitshinw eise/Hinweis Bedeutu ng der Betriebsanl eitung @ 0\mod_12 61470697948_131 .docx @ 960 @ @ 1
Significance of the Operating Manual
This Operating Manual is part of the supplied product.
The Operating Manual remains valid throughout the product's lifetime, provided that no
technical changes are made.
If the product is sold, the Operating Manual must be handed over to the next owner or user.
Pos: 1.16 /1 Grundleg endeSi cherheitshinw eise/Hinweis Lese symbol @ 0\mod_12 61405473678_13 1.docx @ 911 @ @ 1
This information must be read before first commissioning.
Pos: 1.17 /1 Grundleg endeSi cherheitshinw eise/Hinweis WARNUNG - Vor Ben utzung der Maschine @ 4\ mod_135850004 6626_131.doc x@ 37492 @ @ 1
WARNING - Read the instructions before using the machine
Pos: 1.18 /1 Grundleg endeSi cherheitshinw eise/Hinweis CE-Zeic hen @ 0\mod_1 261407630923_131. docx @ 953 @ @ 1
CE marking
The CE marking means "Communautés Européennes". It is the external symbol which states
that a product fulfils the requirements imposed on the manufacturer by the European

Safety Instructions
8/50
Community.
Pos: 1.19 /1 Grundleg endeSi cherheitshinw eise/Hinweis Sicher heitsschuhe @ 0\mo d_126140651 6446_131.docx @ 925 @ @ 1
Only use with safety shoes (acc. to EN ISO 20345)
Pos: 1.20 /1 Grundleg endeSi cherheitshinw eise/Hinweis Arbeits handschuhe @ 0\ mod_1261407294 655_131.docx @ 932 @ @ 1
Only use with work gloves
Pos: 1.21 /1 Grundleg endeSi cherheitshinw eise/Hinweis Ate mschutz @ 4\mod_13 58754071540_13 1.docx @ 37562 @ @ 1
Respiratory protection (EN 149:2001)
Pos: 1.22 /1 Grundleg endeSi cherheitshinw eise/Hinweis Schutz kleidung benutze n@ 4 \mod_135884 9045279_131.doc x@ 37727 @ @ 1
Use protective clothing (acc. to EN 13982-1)
Pos: 1.23 /1 Grundleg endeSi cherheitshinw eise/Hinweis Schutz brille benutzen @ 4\ mod_13588670 32229_131.doc x@ 37 738 @ @ 1
Use protective glasses (acc. to DIN EN 166 1349-BT)
Pos: 1.24 /1 Grundleg endeSi cherheitshinw eise/Hinweis Netzst ecker ziehen @ 0\m od_126140739 2098_131.docx @ 939 @ @ 1
Before starting work remove the plug from the wall socket!
Pos: 1.25 /1 Grundleg endeSi cherheitshinw eise/Hinweis Vor Begin n der Arbeiten freischalt en@ 4\mo d_1362652119939 _131.docx @ 415 45@ @ 1
Disconnect before starting work
Pos: 1.26 /1 Grundleg endeSi cherheitshinw eise/Hinweis ele ktrische Spannung @ 0 \mod_1261407 628039_131.docx @ 9 46@ @ 1
While operating electrical machines, certain parts of them are inevitable alive dangerously or
under mechanical stress.
Pos: 1.27 /1 Grundleg endeSi cherheitshinw eise/Warnung vor H andverletzungen @ 4 \mod_1361977 699198_131.doc x@ 4 0751 @ @ 1
Hand injury warning sign!
Pos: 1.28 /1 Grundleg endeSi cherheitshin weise/Hinweis Rec yclingsymbol @ 0\ mod_126148983523 9_131.docx @ 1060 @ @ 1
Recycling symbol
This information must be observed in order to preserve the environment!
Pos: 2/ 0 Allgemeines/Seit enumbruch @ 0\ mod_12652720 07940_0.docx @ 2191 @ @ 1

Safety Instructions
9/50
Pos: 3.1 /1 Grundlege nde Sicherheitshin weise/Sicherheitsinf ormationen Wechsels trom-Geräte/Üb erschrift: Allgem eine Sicherheitsinfor mationen @ 0\mod _1269504752362 _131.docx @ 3486 @ 2 @ 1
1.3 General safety information
Pos: 3.2 /1 Grundlege nde Sicherheitshi nweise/Signalwort-F eld" Warnung" @ 0\m od_12614048072 86_131.docx @ 893 @ @ 1
WARNING
Pos: 3.3/ 1 Grundlegende Sicher heitshinweise/Hinweis ele ktrischeS pannung @ 0\mod_1 261407628039_13 1.docx@ 9 46@ @ 1
While operating electrical machines, certain parts of them are inevitable alive dangerously or
under mechanical stress.
Pos: 3.4 /1 Grundlege nde Sicherheitshin weise/Sicherheitsinf ormationen Wechsels trom-Geräte/A ufgrund ihrer funktion ellb edingten elektrisc hen @ 0\mod_12695 04589175_131. docx@ 3480 @ @ 1
Due to their electrical and mechanical functional properties, machines can cause severe injuries
and damage to property. This particularly applies in the event of incorrect use, operation or
maintenance, or in the event of unauthorized interventions!
Pos: 3.5 /1 Grundlege nde Sicherheitshin weise/Sicherheitsinf ormationen Wechsels trom-Geräte/All e elektrischen un d mechanischen Tätig keiten@ 4 \mod_1361 281988815_131.d ocx @ 39784 @ @ 1
All electrical work must be performed by a qualified electrician. All mechanical work must be carried
out according to instructions (see Maintenance / Repair). The device may be operated only by
qualified personnel who have read and understood the operating instructions.
Pos: 3.6 /1 Grundlege nde Sicherheitshin weise/Sicherheitsi nformationen Wec hselstrom-Geräte/V or dem Gebrauch muss di e Bedienperson mit Infor mationen,... @ 4\mo d_136128438 8040_131.docx @ 397 94@ @ 1
The operator must be provided with information, instructions and training on the materials to be
absorbed, including a secure procedure for removal of the absorbed material, before use.
Pos: 3.7 /1 Grundlege nde Sicherheitshin weise/Sicherheitsinf ormationen Wechsels trom-Geräte/All eH inweise und Ang aben auf den Maschinen müssen beacht etw erden @ 0\mod_12 69504980970_1 31.docx @ 3498 @ @ 1
All notes and data on the machines must be observed!
Pos: 3.8 /1 Grundlege nde Sicherheitshin weise/Sicherheitsinf ormationen Wechsels trom-Geräte/Di e einwandfreie und sich ereN utzung dieser Ma schine setzt @ 0\mo d_126950505024 0_131.docx @ 3504 @ @1
Faultless and safe use of this machine includes correct transport and storage, as well as operation
in accordance with regulations and careful maintenance!
Pos: 3.9 /1 Grundlege nde Sicherheitshin weise/Sicherheitsi nformationen Wec hselstrom-Geräte/Di eses Gerät ist nicht dafür b estimmt....... @ 4\mo d_136128495724 2_131.docx @ 39812 @ @ 1
This device is not intended for being used by persons (including) with limited physical, sensory or
mental skills or lack of experience and/or lack of knowledge except if they are supervised by a
person responsible for their safety or were instructed in how to use the device by this person.
Children should be supervised to ensure that they do not play with the device.
Pos: 3.10 /1 Grundlegend eSich erheitshinweise/D erB etrieb des Gerätsi st nur auf bisz u 10°g eneigtem Untergr und mit ausreichender Tragfä higkeit z @ 6\mod_14018 94237321_131.doc x@ 604 27@ @ 1
•Operation of the device is only permitted on underground sloping no more than 10° and with
sufficient load-bearing capacity.
Pos: 3.11 /1 Grundleg endeSi cherheitshinw eise/Signalwort-F eld" Vorsicht" @ 0\m od_12614048981 71_131.docx @ 899 @ @ 1
CAUTION
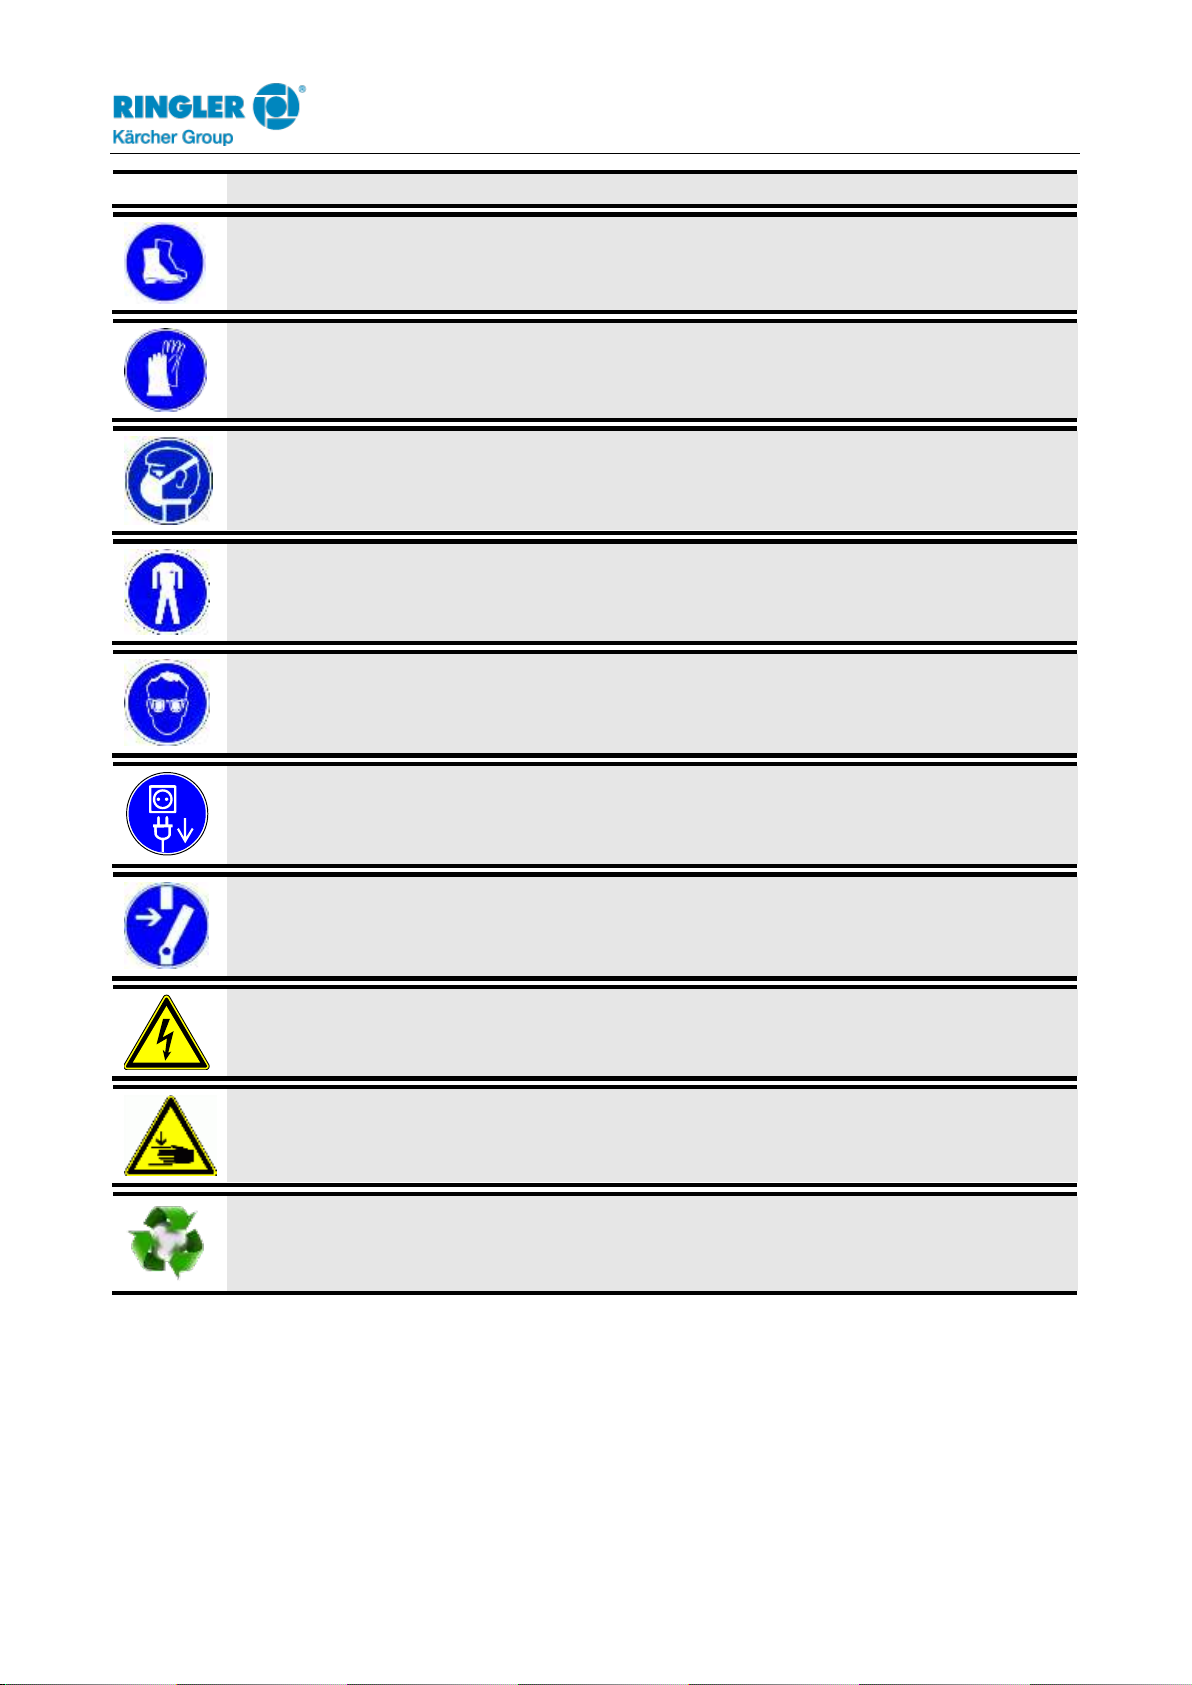
Pos: 3.12 /1 Grundleg endeSi cherheitshinw eise/Hinweis Sicher heitsschuhe @ 0\mo d_126140651 6446_131.docx @ 925 @ @ 1
Only use with safety shoes (acc. to EN ISO 20345)
Pos: 3.13 /6 Inbetriebnah me/Gliedmaßen hera usziehen @ 6\ mod_1401955740 123_131.docx @ 6048 4@ @ 1
•Do not place any limbs between parts to be joined during assembly of the machine parts. When
moving the parts, pull limbs from tightening spaces in time.
Pos: 3.14 /6 Inbetriebnah me/Spänesaug er/Netzanschlussl eitungen überprüfe n@ 0 \mod_1269 349980705_131.doc x@ 3197 @ @ 1
•Make sure that the power supply cord is not damaged by being run over, crushed, tugged etc..
Stop the industrial vacuum cleaner immediately if necessary!
•The power supply cord must be regularly inspected for signs of damage or ageing!
•Connectors of power supply cords must at least be splash-proof!
Pos: 3.15 /6 Inbetriebnah me/Spänesaug er/Die Inbetriebnah me ohne Filter oder einem besc hädigten Filter ist nicht z ulässig @ 0\mod_ 1269350986591_1 31.docx @ 3227 @ @ 1
•Starting without a filter or with a damaged filter is not allowed
Pos: 3.16 /1 Grundleg endeSi cherheitshinw eise/Sicherheitsi nformationen Wechselstr om-Geräte/D as Sauggerät darf nicht betriebe n werden, wenn an Verschlüss en@ 0\mod _1269505708187_1 31.docx @ 3510 @ @ 1
The suction device must not be operated if wear is detected on fasteners or mounting brackets.
Please arrange for a service immediately, or send the industrial vacuum cleaner for repair to:
Pos: 3.17 /1 Grundleg endeSi cherheitshinw eise/Sicherheitsi nformationen Wechselstr om-Geräte/ Service Adressse Ri ngler @ 0\mod_1269 505846364_13 1.docx@ 3516 @ @ 1
Ringler GmbH
Abt. Service
Robert-Bosch-Straße 4-8
73550 Waldstetten
Tel: ++49-7171-94888-23
Pos: 4.1/ 2 Verpackung, Transport, Lager ung/Anlieferung, inn erbetrieblicher Transport, Auspac ken@ 0 \mod_1261397 580765_131.docx @ 840 @ 1 @ 1

Delivery, internal transportation, unpacking
10/50
2 Delivery, internal transportation, unpacking
Pos: 4.2/ 2 Verpackung, Transport, Lager ung/Anlieferung @ 0\m od_1261401230055_ 131.docx @ 853 @ 2@ 1
2.1 Delivery
Unload the scope of delivery on level ground with sufficiently sized industrial trucks.
Pos: 4.3/ 2 Verpackung, Transport, Lager ung/Innerbetrie blicherTr ansport @ 0\mod_1261 401337747_131.d ocx@ 860 @ 2 @ 1
2.2 Internal transport
Transport scope of supply to the site of setup secured against movement or tipping with a sufficiently sized
industrial truck.
Pos: 4.4 /2 Verpac kung,Tr ansport, Lagerung/Ü berschrift: Abmess ungen und Gewicht @ 0 \mod_1269507 946238_131.docx @ 3 536 @ 3 @ 1
2.2.1 Dimensions and weight
Pos: 4.5/ 2 Verpackung, Transp ort,L agerung/Tabelle: Abm essungen und Gewicht RI 100-W @ 0 \mod_127243371 0946_131.docx @ 4393 @ @ 1
Packing
L (mm)
910
B (mm)
830
H (mm)
1600
Weight incl. packing
(kg)
90
Pos: 4.6/ 2 Verpackung, Transport, Lager ung/Auspacken @ 0\mo d_1261401340912_ 131.docx @ 867 @ 2@ 1
2.3 Unpacking
Make sure that no components are left in the packaging.
Scope of delivery: -Suction device
-Technical Manual
Pos: 4.7/ 2 Verpackung, Transport, Lager ung/Verpackungs material @ 0\mod_126140 1408372_131.doc x@ 874 @ 2 @ 1
2.4 Packaging material
The packaging materials must be disposed of in accordance with the valid legal requirements.
Correct disposal of this product (electrical waste) (applicable in the countries of the European Union
and other European countries with a separate collection system)
The identification on the product and on the associated literature states that it must not be disposed of
along with normal domestic waste at the end of its service life. Please dispose of this device
separately from other waste, in order to prevent damage to the environment or to human health
through uncontrolled waste disposal. Please recycle this device, in order to promote sustainable re-
use of material resources. Private users should contact the dealer from whom they purchased the
product or the competent authorities, in order to find out how they can recycle the device in an
environmentally-
friendly manner. Commercial users should contact their supplier. This product must not be disposed of
along with other commercial waste.
Pos: 4.8/ 1 Grundlegende Sicher heitshinweise/Hin weisRec yclingsymbol @ 0\mod_ 1261489835239_131. docx @ 1060@ @ 1
Recycling symbol
This information must be observed in order to preserve the environment!
Pos: 5.1/ 2 Verpackung, Transport, Lager ung/Lagerbedingu ngen,H inweis zur Lagerung @ 0\mod _1263472277994 _131.docx @ 1350 @ 23@ 1

Delivery, internal transportation, unpacking
11/50
2.5 Storage conditions
2.5.1 Information for storage
Should the industrial exhauster not be operated for a longer period of time, so it has to be stored in
dry, dust and vibrationless rooms.
Temperature T: -10…+40°C
Humidity: max. 85%
Pos: 6.1 /3 Beschreibung d erM aschine, Verwen dung/Gerätebesc hreibung-Übersc hrift @ 0\mod_12 61493001970_131.d ocx @ 1076 @ 1 @ 1

Appliance description
12/50
3 Appliance description
Pos: 6.2 /3 Beschreibung d erM aschine, Verwen dung/Überschrif t: Bestimmungsge mäße Verwendung @ 1\ mod_13351817 14405_131.doc x@ 11500 @ 2 @ 1
3.1 Intended Use
Pos: 6.3 /1 Grundlege nde Sicherheitshin weise/Signalwort-F eld"Hi nweis" @ 0\ mod_126140496043 9_131.docx @ 905 @ @ 1
NOTICE
Pos: 6.4 /3 Beschreibung d erM aschine, Ver wendung/Gerät, das in b etriebsbereitem Zusta nd ausgeliefert (Nass für mobile Geräte) @ 4 \mod_1360571 564880_131.doc x@ 39432 @ @ 1
•This device, which has been delivered ready for operation, is designed as a wet and dry vacuum
cleaner for commercial and industrial applications e.g. in hotels, schools, hospitals, factories,
shops, offices and rent transactions. It is particularly suitable for vacuuming up chips, granulate, silt
and non-flammable liquids.
Pos: 6.5/ 3 Beschreibung der Maschi ne, Verwendung/Bei Sc haum- oderF lüssigkeitsaus tritts ofort abschalten! @ 0\mod _1269510877136 _131.docx @ 3568 @ @ 1
•Switch off immediately if foam or liquid escapes!
Pos: 6.6/ 3 Beschreibung der Maschi ne, Verwendung/Die M aschine darf nur betrieben werden, wenn alle Filter richtig einge setzt und unbeschädigt sind @ 4\ mod_1361286688 952_131.docx @ 39834 @ @ 1
The machine may only be operated when all filters installed correctly and undamaged.
Pos: 6.7.1 /3 Beschreibung der Maschi ne, VerwendungÜberschri ft:S taubklasse "L" @ 2\mod_13 45207106541_131. docx@ 20 618 @ 3@ 1
3.1.1 Dust class "L"
Observe warning sign on the device!
Pos: 6.7.2 /3 Beschreibung der Maschi ne, VerwendungGe eignetf ürtr ockene, gesundheitsg efährliche, nicht brennbar e Stäube nach Staubklass e L@ 2\ mod_1344406097 881_131.docx @ 20190 @ @ 1
•The device is suitable for dusts hazardous to health and not flammable with workplace
limit >1mg/m³ according to dust class L (max. permeability <1%) according to DIN EN
60335-2-69 Annex AA:2010.
Pos: 6.8/ 3 Beschreibung der Maschine, Ver wendung/Überschrif t:Nic htb estimmungsgemäß eVer wendung @ 1\mod_1335 941486446_131.doc x@ 1 2040@ 2 @ 1
3.2 Non-Intended Use
Pos: 6.9 /1 Grundlege nde Sicherheitshin weise/Signalwort-F eld"Hi nweis" @ 0\ mod_126140496043 9_131.docx @ 905 @ @ 1
NOTICE
Pos: 6.10 /3 Beschreibung der Maschine, V erwendung/Pers onen- und Sachsc häden, nicht besti mmungsgemäße Ver wendung @ 4\mod_ 136197461142 4_131.docx @ 40732 @ @ 1
For all personal injuries and material damages, which are caused by a not -asdirected-
use, the operator and not the manufacturer of the machine is
responsible for !
Pos: 6.11 /3 Beschreibung der Maschine, V erwendung/Eins atzi m Freien nicht gestattet! @ 6\mod _1402927556366 _131.docx @ 61608 @ @ 1
•May not be used outdoors!
Pos: 6.12 /1 Grundleg endeSi cherheitshinw eise/Signalwort-F eld" Warnung" @ 0\ mod_1261404807 286_131.docx @ 893 @ @ 1
WARNING
Pos: 6.13 /3 Beschreibung der Maschine, V erwendung/Nic htge eignet für brennbare Stä ube @ 4\mod_ 1361865721690_ 131.docx @ 40592 @ @ 1
•This device is not suitable for taking up and extracting combustible dusts.
Pos: 6.14 /3 Beschreibung der Maschine, V erwendung/Nic htge eignet für brennbare Flü ssigkeiten @ 4\m od_136057351 9166_131.docx @ 394 43@ @ 1
•This device is not suitable for taking up and extracting flammable liquids (flammable, highly
flammable, highly flammable hazardous substances according to Directive 67/548/EEC)
(Flash Point under 55°C) as well as mixtures of combustible dusts with flammable liquids.
Pos: 6.15 /3 Beschreibung der Maschine, V erwendung/Nic hti n explosionsgefähr detenR äumen zugel assen! @ 0\mod_1 269511242762_131. docx @ 3587 @ @ 1
•The vacuum cleaner is not approved for operation in potentially explosive areas!
Pos: 6.16 /1 Grundleg endeSi cherheitshin weise/Signalwort-F eld" Gefahr" @ 0\mo d_126140470979 7_131.docx @ 887 @ @ 1
DANGER
Pos: 6.17 /3 Beschreibung der Maschine, V erwendung/Bei nich t bestimmungsge mäßer Verwendung b esteht Explosions- u ndBr andgefahr @ 1\ mod_133594159471 7_131.docx @ 12048 @ @ 1
•With improper use may cause explosion and fire!
Pos: 6.18.1 /3 Beschreibung der Maschin e,V erwendungÜbersc hrift: Staubklasse "L" @ 2\mod_1 345207106541_131.d ocx@ 2 0618@ 3 @ 1
3.2.1 Dust class "L"
Observe warning sign on the device!
Pos: 6.18.2 /3 Beschreibung der Masc hine, VerwendungNi chtg eeignet für Staubklass eM und H @ 2\mo d_1345205305674_ 131.docx @ 20609 @ @ 1
•The device is not suitable for dust class Mand H.
Pos: 6.18.3 /3 Beschrei bung derM aschine, Ver wendung/Nicht geeign et für krebserreg ende Gefahrstoffe g emäß GefStoffV, TRGS @ 8 \mod_142410011 5484_131.doc x@ 78 470 @ @ 1
•The device is not suitable for carcinogenic hazardous substances purs. to GefStoffV §10,
TRGS 905 or TRGS 906.
Pos: 6.18.4 /3 Beschrei bung derM aschine, V erwendungNicht ge eignetf ür Asbest @ 2\ mod_134484222280 5_131.docx @ 20352 @ @ 1
•The device is not suitable for asbestos pursuant to TRGS 519.
Pos: 7.1 /4 Aufbau und Funktio n, Technische Date n/Aufbau und Fun ktion@ 0\mod_ 1263203845612_ 131.docx @ 1120 @ 1 @ 1

Layout and function
13/50
4 Layout and function
Pos: 7.2 /4 Aufbau und Funktio n, Technische Date n/Überschrift: Haupt maße @ 1\mod _1288959443995_1 31.docx @ 6980 @ 2 @ 1
4.1 Main dimensions
Pos: 7.3 /4 Aufbau und Funktio n, Technische Date n/Ringler Industries auger und fahrbare Entst auber werden in b etriebsbereitem Zust and ausgeliefert. @ 1\ mod_12889595241 59_131.docx @ 698 7 @ @ 1
Ringler industrial vacuum cleaners and mobile dust collectors are delivered in operational condition
Pos: 7.4 /4 Aufbau und Funktio n, Technische Date n/RI/Zeichnung RI 1 00H auptmaße @ 0\mo d_12724417639 92_0.docx @ 4400 @ @ 1
Pos: 7.5 /4 Aufbau und Funktio n, Technische Date n/RI/neue Technisc heD aten/Technisch eD aten RI 100 @ 8\mod_ 1424944662171 _131.docx @ 81119 @ 2 @ 1
4.2 Technical Data RI 100
Motor
W2E
W2G
Weight
58kg
57kg
Sound pressure level LpA
according IEC 60704-2-1
72dB(A)
71dB(A)
Uncertainty KpA
2dB(A)
2dB(A)
Protection class
I
Ambient temperature
-15°C to +40°C
Intake temperature medium
max. +40°C
Installation altitude
max. 1000m over NN
Pos: 7.6 /4 Aufbau und Funktio n, Technische Date n/RI/neue Technisc heD aten/Technisch eD aten W2E/W2G @ 8\ mod_14241804 04385_131.docx @ 7 8671 @ 2 @ 1
4.3 Technical Data
W2E
W2G
Output
2,6kW
2,0kW
Frequency
50Hz
50Hz
Hedging
16A
16A
Voltage/
Power intake
220-240V / 11,8A
220-240V / 9,0A
Pressure
23kPa/230mbar
22kPa/220mbar
Air displacement
volume
430m³/h
360m³/h
Protection type
IPX 4
IPX 4
Pos: 8.1/ 5 Anlagenbeschrei bung, Bedienungs- und Anz eigeelemente, Betriebs arten/Hauptkompo nenten, Kapitelüberschrift @ 0\ mod_126338734 9738_131.docx @ 1276 @ 1 @ 1

Main components
14/50
5 Main components
Pos: 8.2/ 5 Anlagenbeschrei bung, Bedienungs- und Anz eigeelemente, Betriebs arten/RI/Überschrif t:Be standteile RI 100-W @ 0\mod _1272442281618_1 31.docx @ 4419 @ 2@ 1
5.1 RI 100-W components
Pos: 8.3 /5 Anlagenbesc hreibung, Bedienu ngs- und Anzeigeele mente, Betriebsart en/RI/Zeichnung Ha uptbestandteile RI 10 0@ 3 \mod_1350461 169015_0.doc x@ 317 92 @ @ 1
Pos: 8.4 /5 Anlagenbesc hreibung, Bedienu ngs- und Anzeigeele mente, Betriebsart en/RI/Tabelle zu Zeich nungH auptkomp onentenR I 030/RI100 @ 0 \mod_126952412 7409_131.docx @ 362 6@ @ 1
A
ON / OFF switch
B
Drive unit
C
Rotatable clamping lever
D
Baffle plate
E
Sliding handle
F
Level control and discharge tube
G
Collecting tank
H
Engagement tab with locking pin
I
Undercarriage
J
Perforated basket
K
Mechanical float insert, special accessory
L
Nozzle
M
Suction tube
Pos: 8.5 /5 Anlagenbesc hreibung, Bedienu ngs- und Anzeigeele mente, Betriebsart en/RI/Funktions Besc hreibung Spänesa uger@ 0\mod _1269525916722_ 131.docx @ 3652 @ 2 @ 1
5.2 Functional description of the chip suction plant
A vacuum is generated in the collecting tank by means of suction turbines in the drive unit. The raw air
is sucked in through the nozzle and the suction tube. Coarser particles fall out of the air current into
the collecting tank or perforated basket. The baffle plate prevents damage to the bag-type filter on the
drive unit. Smaller particles and dust are collected on the surface of the filter material as they pass
through the bag-type filter. The resulting clean air is blown back into the work area via the suction
turbines and the sound-damping exhaust air tube.
The cooling air for the suction turbines is drawn into the air intakes on the hood and flows along the
motor. This heated air is discharged back into the work area again through various air gaps on the
hood.
Pos: 9.1/ 6I nbetriebnahme/Inb etriebnahme, Kapitelü berschrift @ 0\mod_126348 1987997_131.doc x@ 136 2@ 1 @ 1

Initiation
15/50
6 Initiation
Pos: 9.2 /1 Grundlege nde Sicherheitshi nweise/Hinweis Sich erheitsschuhe @ 0\ mod_1261406516 446_131.docx @ 925 @ @ 1
Only use with safety shoes (acc. to EN ISO 20345)
Pos: 9.3/ 6I nbetriebnahme/S pänesauger/Überschrif t: Erstinbetriebnahme @ 0\m od_126934923363 1_131.docx @ 3176 @ 2 @ 1
6.1 Initial operation of the chip
Pos: 9.4 /1 Grundlege nde Sicherheitshin weise/Signalwort-F eld" Vorsicht" @ 0\mo d_126140489817 1_131.docx @ 899 @ @ 1
CAUTION
Pos: 9.5/ 6I nbetriebnahme/S pänesauger/Dieser Ringler Ind ustriesauger darf nur mit Sicherh eitsschuhen bedient werden @ 0\ mod_1269350891518_1 31.docx @ 3221 @ @ 1
This Ringler industrial vacuum cleaner may only be operated when wearing safety shoes
Pos: 9.6 /6I nbetriebnahm e/Spänesauger/N etzanschlussleit ungen überprüfen @ 0\mod_12 69349980705_13 1.docx @ 3197 @ @ 1
•Make sure that the power supply cord is not damaged by being run over, crushed, tugged etc..
Stop the industrial vacuum cleaner immediately if necessary!
•The power supply cord must be regularly inspected for signs of damage or ageing!
•Connectors of power supply cords must at least be splash-proof!
Pos: 9.7 /6I nbetriebnahm e/Verantwortung B etreiber Installation Sc hutzeinrichtung Tre nnung Anschlussph asen @ 6\mod_ 1401953418877_13 1.docx @ 60458 @ @ 1
•The operator shall be responsible for installation of protective equipment that will recognise a short-
circuit in case of fault and isolate all connection phases.
Pos: 9.8/ 6I nbetriebnahme/S pänesauger/Die ma x.Sic herungsstromstär kedarf 16 Anic htü berschreiten. @ 2\ mod_134615371839 0_131.docx @ 21458 @ @ 1
The max. fuse current of the supply cable must not exceed 16 A slow-blow.
Pos: 9.9 /6I nbetriebnahm e/Spänesauger/Di e Betriebsbedingu ngens timmen mit den Schild angaben @ 0\ mod_1269350197 077_131.docx @ 3203 @ @ 1
•The operating conditions must match the data on the plate and the supplied documentation, if
applicable.
Pos: 9.10 /6 Inbetriebnah me/Spänesaug er/Zweimotorige Ausf ührungen dürfen nur betri eben werden @ 0\ mod_1269350426 634_131.doc x@ 32 15@ @ 1
Twin-motor versions may only be operated with both suction turbines are switched on.
Pos: 9.11 /6 Inbetriebnah me/Spänesaug er/Bei der Entleerung d esRi ngler Industries augers mit dem Kran oder @ 0\ mod_126935 0343296_131.doc x@ 3209 @ @ 1
Standing in the work area is forbidden when emptying the Ringler industrial vacuum cleaner by
means of crane or stacker truck!
Pos: 9.12 /6 Inbetriebnah me/Spänesaug er/Die Inbetriebnah me ohne Filter oder einem besc hädigten Filter ist nicht z ulässig @ 0\mod_ 1269350986591_1 31.docx @ 3227 @ @ 1
•Starting without a filter or with a damaged filter is not allowed
Pos: 9.13 /6 Inbetriebnah me/Spänesaug er/Vor der ersten Inbetrieb nahme prüfen, ob Fuß pedal richtig eingerastet ist. @ 10\m od_14339229129 82_131.docx @ 97030 @ @ 1
Before first commissioning, check whether the Foot Pedal has latched properly.
Pos: 9.14 /1 Grundleg endeSi cherheitshinw eise/Signalwort-F eld" Hinweis" @ 0\m od_12614049604 39_131.docx @ 905 @ @ 1
NOTICE
Pos: 9.15 /6 Inbetriebnah me/Spänesaug er/Der Industriesaug eris t ordnungsgem äß montiert, @ 0\mod_1 269351204934_ 131.docx @ 3239 @ @ 1
•The industrial vacuum cleaner must be correctly installed, with all necessary lines and tubes
connected.
Pos: 9.16 /6 Inbetriebnah me/Spänesaug er/Die Kühlluftführ ungist nicht be einträchtigt @ 0\mod_1 269351426579 _131.docx @ 3245 @ @ 1
•The cooling air duct must be fully functional, the cooling effect must also not be impaired by soiling
of the cooling surfaces.
Pos: 9.17 /6 Inbetriebnah me/Spänesaug er/Kontrollieren, ob Pr allblech und e vent. Siebkorb richtig eing elegtsi nd. @ 0\mod_12 69351613267_1 31.docx @ 3257 @ @ 1
Check that baffle plate and perforated basket, if applicable, are correctly inserted.
Pos: 9.18 /6 Inbetriebnah me/Spänesaug er/Gewünschte Abs augdüse in Stec kkonus amH andgriff des Absa ugschlauches ei nsetzen. @ 0\mod _1269351562967 _131.docx @ 3251 @ @ 1
•Insert desired suction nozzle into the plug-in cone on the handle of the suction tube.
Pos: 9.19 /6 Inbetriebnah me/Spänesaug er/Zentrischen Sitz der A ntriebseinheit auf B ehälter kontrollieren. @ 0\mod_12 69351676324_131.d ocx @ 3263 @ @ 1
•Check that the drive unit is centrally located on the tank.
Pos: 9.20 /6 Inbetriebnah me/Spänesaug er/Antriebseinheit d urch 180-Grad Dreh ung der Klemmgriffe verrieg eln. @ 0\mod_1 269351748189_131. docx @ 3269 @ @ 1
Lock the drive unit by turning the clamping levers 180 degrees.
Pos: 9.21 /6 Inbetriebnah me/Spänesaug er/Netzstecker einstec ken @ 3\mod_ 1353317852290_13 1.docx @ 34512 @ @ 1
Put in power plug
Pos: 9.22 /6 Inbetriebnah me/Spänesa uger/Industriesaug er mit dem an der Antriebseinh eit befindlichen Ein/Au sschalter in Betrieb setze n @ 0\mod_126 9351880561_13 1.docx@ 3281 @ @ 1
Start up the industrial vacuum cleaner with the on/off switch located on the drive unit.
Pos: 10.1 /7 Betrieb, Be dienung/Betrieb, Bedie nung, Kapitelübersc hrift @ 0\mod_12 63539997200_13 1.docx @ 1414 @ 1 @ 1

Operation
16/50
7 Operation
Pos: 10.2 /7 Betrieb, Be dienung/Betrieb, Übersc hrift 1.1 @ 0\mod_ 1263544263702_ 131.docx @ 1432 @ 2 @ 1
7.1 Operation
Pos: 10.3 /1 Grundleg endeSi cherheitshinw eise/Signalwort-F eld" Vorsicht" @ 0\m od_12614048981 71_131.docx @ 899 @ @ 1
CAUTION
Pos: 10.4 /7 Betrieb, Be dienungGerät nur mit akti vierten Feststellbre msena ktivieren @ 6\m od_140197169 4391_131.docx @ 605 11@ @ 1
•Only operate the device with the parking brakes activated.
•Only move the device at walking speed. Act with care. In case of sloping paths, bring in a second
person to help.
Pos: 10.5 /7 Betrieb, Be dienung/Spänesa uger/Zwei-Stufen Sc halter Wechselstrom ( W2G/W2E) @ 0\ mod_126935306727 1_131.docx @ 3299 @ 3@ 1
7.1.1 Two-stage switch
0= Motors off 1= Motor 1 on 2= Motors 1 and 2 on
Pos: 10.6 /6 Inbetriebnah me/Spänesaug er/Zweimotorige Ausf ührungen dürfen nur betri eben werden @ 0\ mod_1269350426 634_131.doc x@ 32 15@ @ 1
Twin-motor versions may only be operated with both suction turbines are switched on.
Pos: 10.7.1 /7 Betrieb, Be dienung/Spänesaug er/Überschrift A bsaugvorgang @ 0\ mod_1269355638 357_131.docx @ 3324 @ 2 @ 1
7.2 Suction process
Pos: 10.7.2 /1 Grundleg ende Sicherheits hinweise/Signalw ort-Feld "Hinweis" @ 0\ mod_1261404960 439_131.doc x@ 90 5 @ @ 1
NOTICE
Pos: 10.7.3 /7 Betrieb, Be dienung/Spänesaug er/Beim Saugen vo nFl üssigkeiten nur halb einta uchen, um genügen d Luft mitzuförder n@ 0 \mod_1269355 003866_131.doc x@ 3312 @ @ 1
•When vacuuming up liquids only immerse halfway, so that sufficient air is absorbed
Pos: 10.7.4 /7 Betrieb, Be dienung/Spänesaug er/Beim Saugen vo n Stäuben nur halb eintauch en, umg enügend Luft mitzufördern @ 4 \mod_13583 20668235_131.docx @ 3 7423 @ @ 1
•When vacuuming up dust only immerse halfway, so that sufficient air is absorbed
Pos: 10.7.5 /6 Inbetri ebnahme/Spänesa uger/Gewünschte A bsaugdüse in Stec kkonus amH andgriff des Absa ugschlauches ei nsetzen. @ 0\ mod_1269351562 967_131.docx @ 3251 @ @ 1
•Insert desired suction nozzle into the plug-in cone on the handle of the suction tube.
Pos: 10.7.6 /7 Betrieb, Be dienung/Spänesaug er/Skizze Saugdüse f alsch-richtig @ 0\ mod_126935611 3020_0.doc x@ 3336 @ @ 1
Pos: 10.7.7 /7 Betrieb, Be dienung/Spänesaug er/Düse nicht mit der g anzenFl äche aufsetzen @ 0\ mod_1269 355889461_131.d ocx @ 3330 @ @ 1
Do not immerse the entire area of the nozzle!
Hold the nozzle diagonally to the suction surface,
so that both air and liquid are absorbed
Pos: 10.8 /0Allg emeines/Seit enumbruch @ 0\mod_1265 272007940_0.doc x@ 219 1@ @ 1

Operation
17/50
Pos: 10.9.1 /7 Betrieb, Be dienung/Spänesaug er/Überschrift: Entl eeren des Sammel behälters @ 0\mo d_126935807060 5_131.docx @ 3348 @ 2 @ 1
7.3 Emptying the collecting tank
Pos: 10.9.2 /1 Grundlegend eSich erheitshinweise/Sig nalwort-Feld "Vorsicht" @ 0\m od_1261404898171 _131.docx @ 899@ @ 1
CAUTION
Pos: 10.9.3 /7 Betrieb, Be dienung/Spänesaug er/Vor dem Abneh men der Antriebseinh eit,d enM otor ausschalte n und denN etzstec kerzie hen! @ 0\mod_126 9358198766_1 31.docx @ 3354 @ @ 1
Before removing the drive unit, switch off the motor and remove the mains plug!
Pos: 10.9.4 /1 Grundleg ende Sicherheitshin weise/Hinweis Netzst ecker ziehen @ 0\ mod_12614073920 98_131.doc x@ 93 9 @ @ 1
Before starting work remove the plug from the wall socket!
Pos: 10.9.5 /7 Betrieb, Bedienung/ Spänesauger/Vorb ereitungen zur Entleeru ngdes S ammelbehälters (RI 20/ RI 30/ RI 80/ RI 100) @ 3\m od_1351072884122 _131.docx @ 32548 @ 3 @ 1
7.3.1 Preparations for emptying the collecting tank
Lock swivel casters
Remove suction tube
Remove drive unit
Remove baffle plate from collecting tank
Remove perforated basket from collecting tank and empty
Pos: 10.9.6 /7 Betrieb, Be dienung/Spänesaug er/Handentleer ung Typen RI 030 und RI 10 0@ 0 \mod_1272447 269766_131.doc x@ 4494 @ 3 @ 1
7.3.2 Manual drainage types RI 030 and RI 100
Release lock with foot,
Take hold of collecting tank by both handles and tip it over the pivot point.
Pos: 10.9.7 /1 Grundlegend eSich erheitshinweise/Sig nalwort-Feld "Vorsicht" @ 0\m od_1261404898171 _131.docx @ 899@ @ 1
CAUTION
Pos: 10.9.8 /7 Betrieb, Bedienung/ Spänesauger/Bei fes tsitzendem Schmutz be achten,( Typen RI 030/ RI 100) @ 0\mod_1 272447617671_131. docx @ 4500@ @ 1
In the event of persistent dirt, lease note that it can suddenly come away during the tipping process, causing
the tank to lurch forwards.
Pos: 10.9.9 /7 Betrieb, Be dienung/Spänesaug er/Skizze, Bilder Entl eerung Typen RI 030 un dRI 1 00@ 0\mo d_127244863417 3_0.docx @ 4520 @ @ 1
Pos: 10.9.10 /0 Allge meines/Seitenumbru ch @ 0\mod_126 5272007940_0.doc x@ 2 191 @ @ 1

Operation
18/50
Pos: 10.9.11 /7 Betrieb, Bedienu ng/Spänesauger/E ntleerung von Flüssigkeiten RI 20/ RI 30/ RI 80/ RI 100 @ 3\ mod_13510726000 34_131.docx @ 32537 @ 3 @ 1
7.3.3 Emptying liquids
Remove perforated basket manually.
Drain liquids by means of the level control and discharge tube!
Pos: 10.9.12 /7 Betrieb, Bedienu ng/Spänesauger/Skizz eE ntleerschlauch @ 0\mod _1269502210155_0.d ocx @ 3458@ @ 1
Pos: 10.9.13 /7 Betrieb, B edienung/Spänesa uger/Füllstandsa nzeige am Kontrollschl auch @ 0\mod_ 1269446376801_13 1.docx @ 3426 @ 2 @ 1
7.4 Level indicator on control pipe (ENG-003026)
Label: Max. liquid filling level
Pos: 10.10 /0 Allgem eines/Seitenumbruch @ 0\mod_ 1265272007940_ 0.docx @ 2191 @ @ 1

Operation
19/50
Pos: 10.11 /7 Betrieb, B edienung/Spänes auger/Überschrift: Ha ndhabungshinweis e @ 0\mod_12 69499438343_131.d ocx @ 3452 @ 2 @ 1
7.5 Handling notes
Pos: 10.12 /7 Betrieb, B edienung/Spänes auger/Absaugeins atzmi t Prallblech @ 3\ mod_135055837724 1_131.docx @ 321 93@ 3 @ 1
7.5.1 Suction insert with baffle plate
for materials such as wet chips, liquids, sludge, granulate and small quantities of dust.
Position of the baffle plate (A)
Pos: 10.13 /7 Betrieb, B edienung/Spänes auger/Absaugeins atz mit Prallblech und Sie bkorb @ 3\mod_13 50559913378_13 1.docx @ 32292 @ 3 @ 1
7.5.2 Suction insert with baffle plate and perforated basket
for materials such as small quantities of wet chips and liquids
A = Baffle plate
B = Perforated basket
C = Position of small baffle plate in relation to baffle plate
The small baffle plate must fit closely! Reposition on the tube if necessary.
Pos: 10.14 /0 Allgem eines/Seitenumbruch @ 0\mod_ 1265272007940_ 0.docx @ 2191 @ @ 1

Operation
20/50
Pos: 10.15.1 /7 Betrieb, Bedienung /Sonder-Zubeh örÜberschrift: Elektrisch eÜ berfüllsicherung für F lüssigkeiten @ 0\ mod_12723545461 12_131.doc x@ 4236 @ 2 @ 1
7.6 Electrical overfill safety device for liquids (optional)
Pos: 10.15.2 /7 Betrieb, Bedienu ng/Sonder-Zubeh örÜberschrift: Elektrische Üb erfüllsicherung Wechselstro mausführung @ 0\mod_12 72354663412_13 1.docx@ 4 242 @ 3@ 1
7.6.1 Electrical overfill safety device, AC version
Pos: 10.15.3 /7 Betrieb, B edienung/Sonder -ZubehörSkizz e Elektrische Überfüllsic herung Wechselstro m @ 0\mod_127 2354333936_0.docx @ 4 230 @ @ 1
Pos: 10.15.4 /7 Betrieb, Bedienu ng/Sonder-Zubeh örBeschreibung vorgehensw eiseÜ berfüllsicherung Wec hselstrom @ 0\mod_12723 54774714_131.docx @ 42 48@ @ 1
Insert float switch (1) into reception tube (2), (mount O-rings)
Insert drive unit connector (3) into the control socket (4)
Insert control connector (5) into socket
After automatic switch-off of the suction turbines by the float switch, empty the tank.
Then press the acknowledge key (6) on the control, in order to activate the control.
Pos: 10.15.5 /1 Grun dlegende Sicherheitshi nweise/Signal wort-Feld "Hinweis" @ 0\mod_12 61404960439_131.doc x@ 905 @ @ 1
NOTICE
Pos: 10.15.6 /7 Betrieb, B edienung/Sonder -ZubehörHin weistext: Überfüllsich erung regelmäßig auf Fun ktion überprüfen @ 0\ mod_12723553197 64_131.doc x@ 4254 @ @ 1
Regularly check the functioning of the electrical overfill safety device; it must be possible to move the
V2A float ball up and down easily on the guide tube!
Pos: 10.16 /0 Allgem eines/Seitenumbruch @ 0\mod_ 1265272007940_ 0.docx @ 2191 @ @ 1
This manual suits for next models
1
Table of contents
Other Ringler Vacuum Cleaner manuals