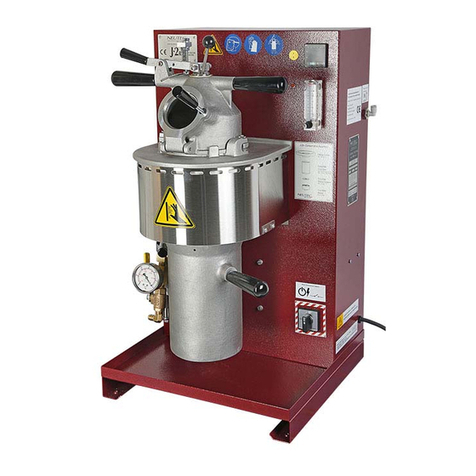
Rio Grande 705-020/00 User manual

7500 Bluewater Road NW
Albuquerque, NM 87121 USA
Rio Grande: 800.545.6566
www.riogrande.com
6" Centrifugal
Casting Machine
#705-020/00

Page 2 Parts Diagram 800.545.6566
6" Centrifugal Casting Machine
4
5
6
7
9
8
3
1
2
10
11
1Base 7Wood handle
2Spring locker bar 8Casting arm
3Main shaft 9Weights
4Flask cradle holding arms 10 Set-screw for crucible holder
5Crucible holder 11 Flask cradles
6Hold-down nut
Maximum flask diameter: 4"
Maximum flask length: 6"
Shipping weight: 25 lbs. (11.4 kgs.)

1. Attach the base (1) to your benchtop
or workstation using four screws.
2. Unscrew the hold-down nut (6) and
remove the casting arm.
3. Tighten the set-screw (10) from the
bottom of the casting arm directly into
the crucible cradle.This scew holds the
crucible cradle and casting arm.The
crucible holder should still move freely
(as needed).
4. Place the casting arm (8) on the base.
Initial Set-Up for the Casting Machine
5. Tighten the hold-down nut (6) to
secure the arm to the base.
6. Place the crucible on the crucible
holder (5).
1
6
10
8
6
5
www.riogrande.com Initial Set-Up Page 3

Preparing for Casting
1. Loosen the hold-down nut (6) to free
the arm from the base for balancing.
2. Place your invested flask on the
appropriate flask cradle (4).
3. Fill the crucible with the appropriate
amount of metal.
4. Adjust the counterweights (9) until
the arm is balanced.
5. Tighten the hold-down nut (6). 6. Remove the flask.
6
4
9
6
Page 4 Preparing for Casting 800.545.6566
The weight of the flask and the counterbalance weights must be balanced before casting.

1. Use the wood handle (7) to turn the
casting arm clockwise 3−3½ turns.
2. Pull the spring locker bar (2) up to
stop the casting arm (8).
4. Use a torch to melt the metal.3. Fill the crucible with the appropriate
amount of metal for the flask.
Casting
5. Place the flask on the flask cradle (4).
Be sure the holes of the crucible and
flask hole line up exactly. You will
need to use the cradle sized for
the diameter of the flask you will
be casting (see Casting Usage, page 7).
6. Push the crucible forward to the flask
using high-temperature gloves or flask
tongs. Use extreme caution: crucible is
very hot.
7
2
8
4
www.riogrande.com Casting Page 5

7. Place the casting arm at a 90º angle
(as shown).
8. Heat the metal until it is ready
for casting.
Casting (continued)
11. Wait for the casting arm to completely
stop spinning, then pull the crucible
back from the flask. Use tongs (or gloves,
as shown), as the crucible is still very hot.
12. Remove the flask from the unit with
tongs and follow the appropriate
cooling and quenching procedures for
your metal.
9. Hold the wood handle (7) and turn
the casting arm counter-clockwise to
allow the spring locker bar (2) to drop.
10. Quickly release the wooden handle
and remove your hand and torch
simultaneously to start the centrifugal
motion.
90°
7
Down
Page 6 Casting 800.545.6566

The unit is supplied with one 3" and one 3½" flask cradle. The casting
arm itself is designed to hold a 4" flask cradle (see top right). For 4"
diameter flasks, place the flask between the side pins on the casting
arm, without a cradle.
Important:
Verify that the alignment
of the ask and crucible
holes is correct, both
vertically and horizontally,
to ensure a clean and safe
pour.
Safety Information
1. Always wear safety glasses, high-temperature gloves and a safety or high-temperature
apron when operating this equipment.
2. Do not put your hands into the machine before it has completely stopped.
3. The crucible and flask are extremely hot; use extreme caution when working on or around
this equipment.
4. During torch melting, pay close attention to your surroundings and ensure others
are aware of the heat and motion of this equipment.
5. Use a casting shell to protect you and your surroundings in case of an accidental spill.
Problem Possible causes Remedy
You turn the casting arm clockwise
more than three turns, but the unit
will not spin properly.
The spring is broken. Replace with a new spring
(see parts list).
The screw that holds the spring is
broken.
Replace with a new piece of the spring
and stabilize it with the screw
(see parts list).
During casting, the casting arm
seems loose or wobbly , or the
unit makes a great deal of noise.
The four hold-down screws are loose. Tighten the screws.
The casting arm is not balanced. See “Preparing for Casting”
on page 4 to re-balance.
The bearing is broken. Replace with a new bearing
(see parts list).
You spin the casting arm clockwise
more than three turns, but the
spring is loose.
The metal ball stabilizing the spring is
loose.
Contact the Rio Grande
repairs team at 800.545.6566.
The tip of the spring is broken. Replace with a new spring
(see parts list).
Cradle Usage
Troubleshooting
No cradle necessary
Flask cradle (11)
www.riogrande.com Safety & Troubleshooting Page 7

Part Manufacturer’s
Part Number
1(2) Screw ⁄" YSC-093
2Wood ball handle 0146-041
3Hand knob liner 0146-041-1
4Spring washer ½" YSW-007
5Weight center adjustable
screw-locking nut YNU-014-A
6Weight center
adjustable screw 0146-052
7Weight 0146-037
8Weight 0146-038
9Hold-down nut 0146-034
10 Crucible cradle 0146-030
11 Flask cradle holding arms 0146-029
12 Flask holding plate 0146-001
13 Set-screw for crucible cradle 0146-007
14 Casting arm 0146-031
15 Rubber head for spring
locker bar 0146-035
16 Spring locker bar 0146-036
17 Cover lid 0146-013
18 Ball bearing (#6201) 0146-014
19 Spring locker pin 0146-010
20 Main shaft 0146-015
21 Spring wire 0146-017
22 Steel ball 0146-016
23 Shaft holder 0146-018
24 Spring clamp bolt 0146-048
25 Heavy-duty spring 0146-019
26 Spring plate 0146-021
27 Set-screw 0146-022
28 Base 0146-024
29 Ball bearing (#6202ZZ) 0146-025
30 Bearing cover 0146-026
31 3" ask cradle 0146-039
32 3½" ask cradle 0146-040
Replacement Parts List
Page 8 Parts List 800.545.6566
©2005 The Bell Group, Inc. All Rights reserved. 705-020.indd 0305mh
30
29
28
26
27
24 25
22
21
19
20
18
17
16
15
12
13
14
98 7
6
10
11
3
5
4
2
1
32
31
23
Table of contents
Other Rio Grande Test Equipment manuals