Riotoro CR280 MINI User manual

RIOTORO CR280
Installation Guide


Welcome to RIOTORO
Thank you for purchasing the RIOTORO CR280.
The CR280 chassis squeezes raw computing power into in a cool, quite and elegant PC that
compliments any office while occupying minimal little desk space. The CR280 achieves this by
combining mini-ITX motherboard support with ample space for full-size graphics cards and power
supplies for true desktop PC performance.
Note
This manual is a guide for RIOTORO’s computer cases. For instructions on installing the motherboard
and other components, please refer to their documentation.
Included Hardware
1. 8x small thumbscrews
For 2.5” drives
2. 2x spare thumbscrews
For case side panels
3. 4x large thumbscrews
For power supply
4. 4x small Philips head screws
For motherboard
5. 8x sets of screws with grommets
For optional fans
6. 4x long screws
For optional cooling radiators
7. 6x nylon ties
For tying cables
1
2
3
4
5
6
7
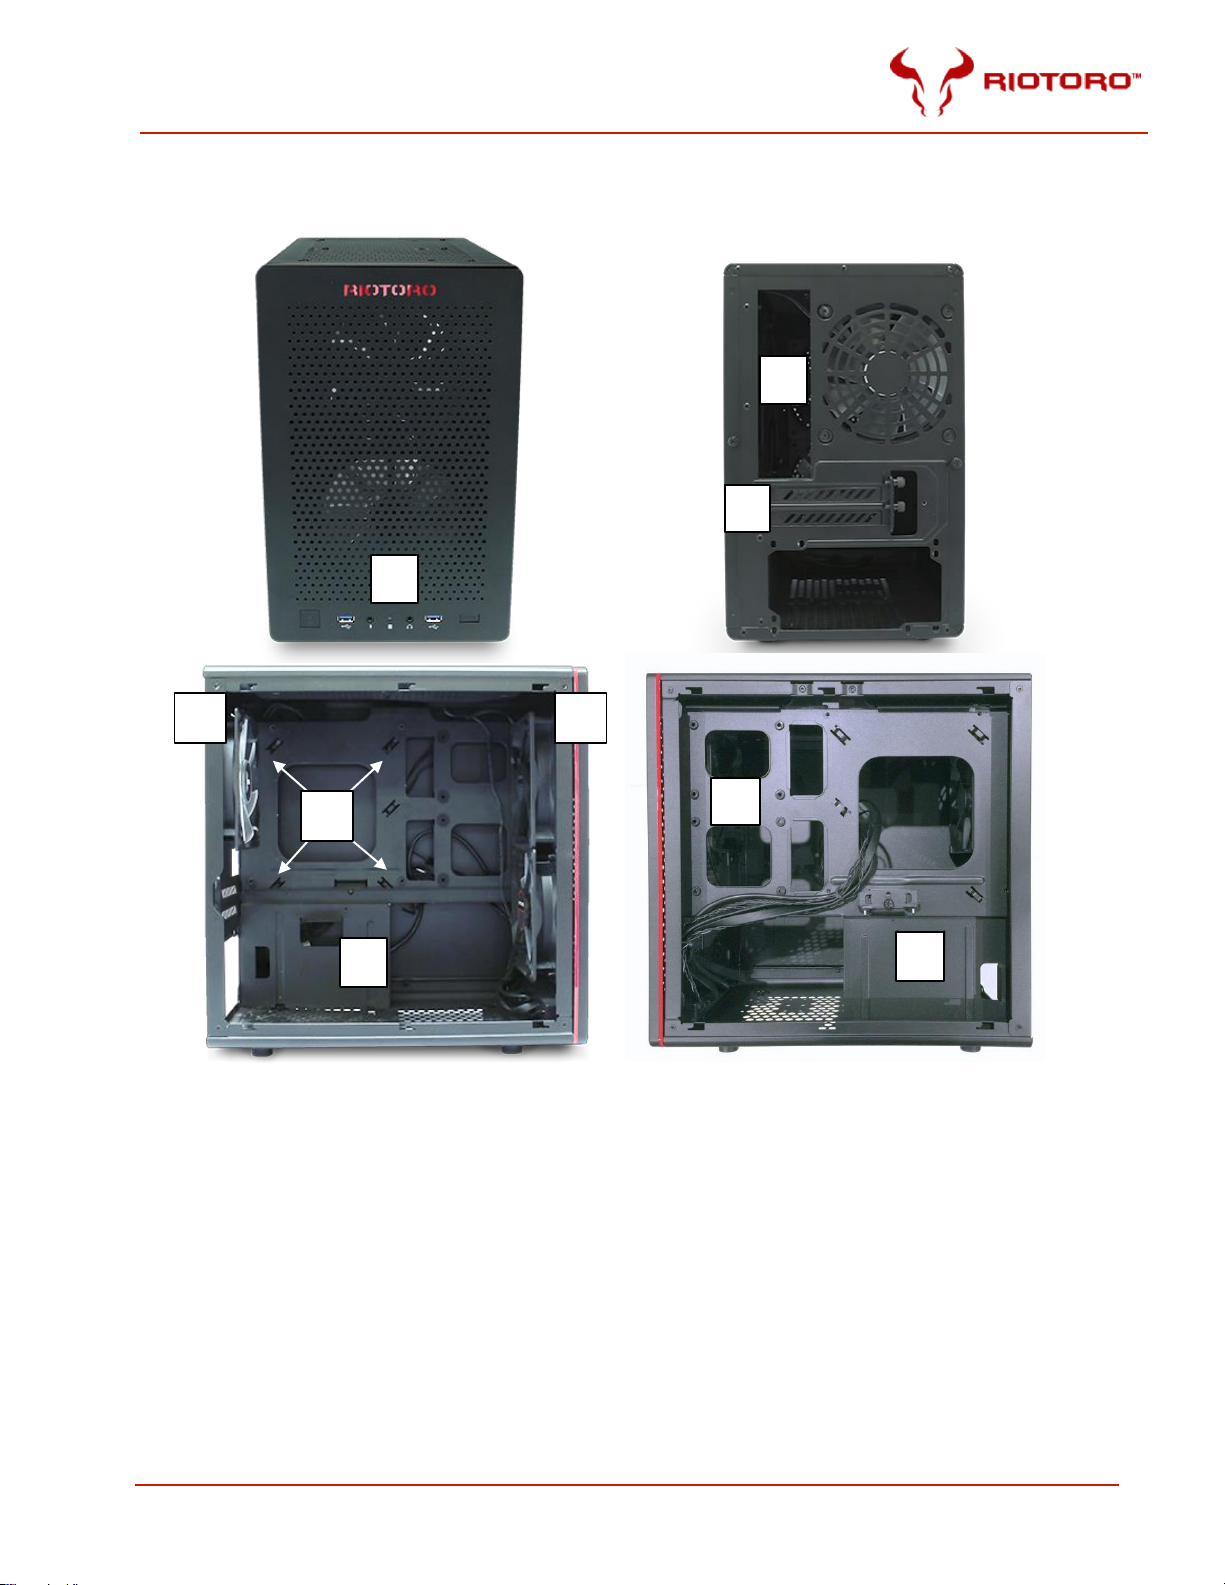
Key Installation Points
1
2
3
4
5
4
6
5
8
7
1) Front panel
-USB 3.0 ports
-Microphone jack
-Headphone jacks
-Power switch
-Reset switch
-Power LED
-Hard Disk Drive LED
2) I/O panel cutout
3) PCI-E expansion slots
4) Fans and fan/rad mounts
5) Motherboard mount points
6) Power supply bay
7) 2.5”drive mount
8) 2.5”tool-less drive mounts

Before You Begin
Please take the following precautions:
Handle all PC components and cards with care.
Hold cards and processors by their edges to avoid damaging components.
To avoid damaging components by electrostatic discharge, periodically ground yourself by
touching an unpainted metal surface or by using a wrist grounding strap.
Before connecting cables, make sure the connectors are correctly aligned.
Consult the documentation of your motherboard and other components for specific installation
instructions and troubleshooting.
When routing cables…
Route and bundle PSU and case cables to reduce clutter for a cleaner look and to improve
airflow. The case is designed with cable pass-through cutouts throughout and space to conceal
cables under the right side panel (as seen from the front). Use the provided nylon zip ties to
hold the cables in place.
Remove the case side panels
Put the case upright on a stable, flat surface with rear facing you. Remove the thumbscrews from both
side panels and store them in a safe place. Remove each panel by slide the the panel toward the rear.
Install the motherboard
The CR280 is compatible with mini-ITX motherboards enabling you to build a high-performance
compact PC. Let’s install one.
1. Install the CPU, CPU cooler and memory on the motherboard.
Refer to your CPU and motherboard documentation how to mount the CPU and its cooler on
your motherboard. If you are using a liquid CPU cooler you may find it easier to install it after
the motherboard is installed in the case.
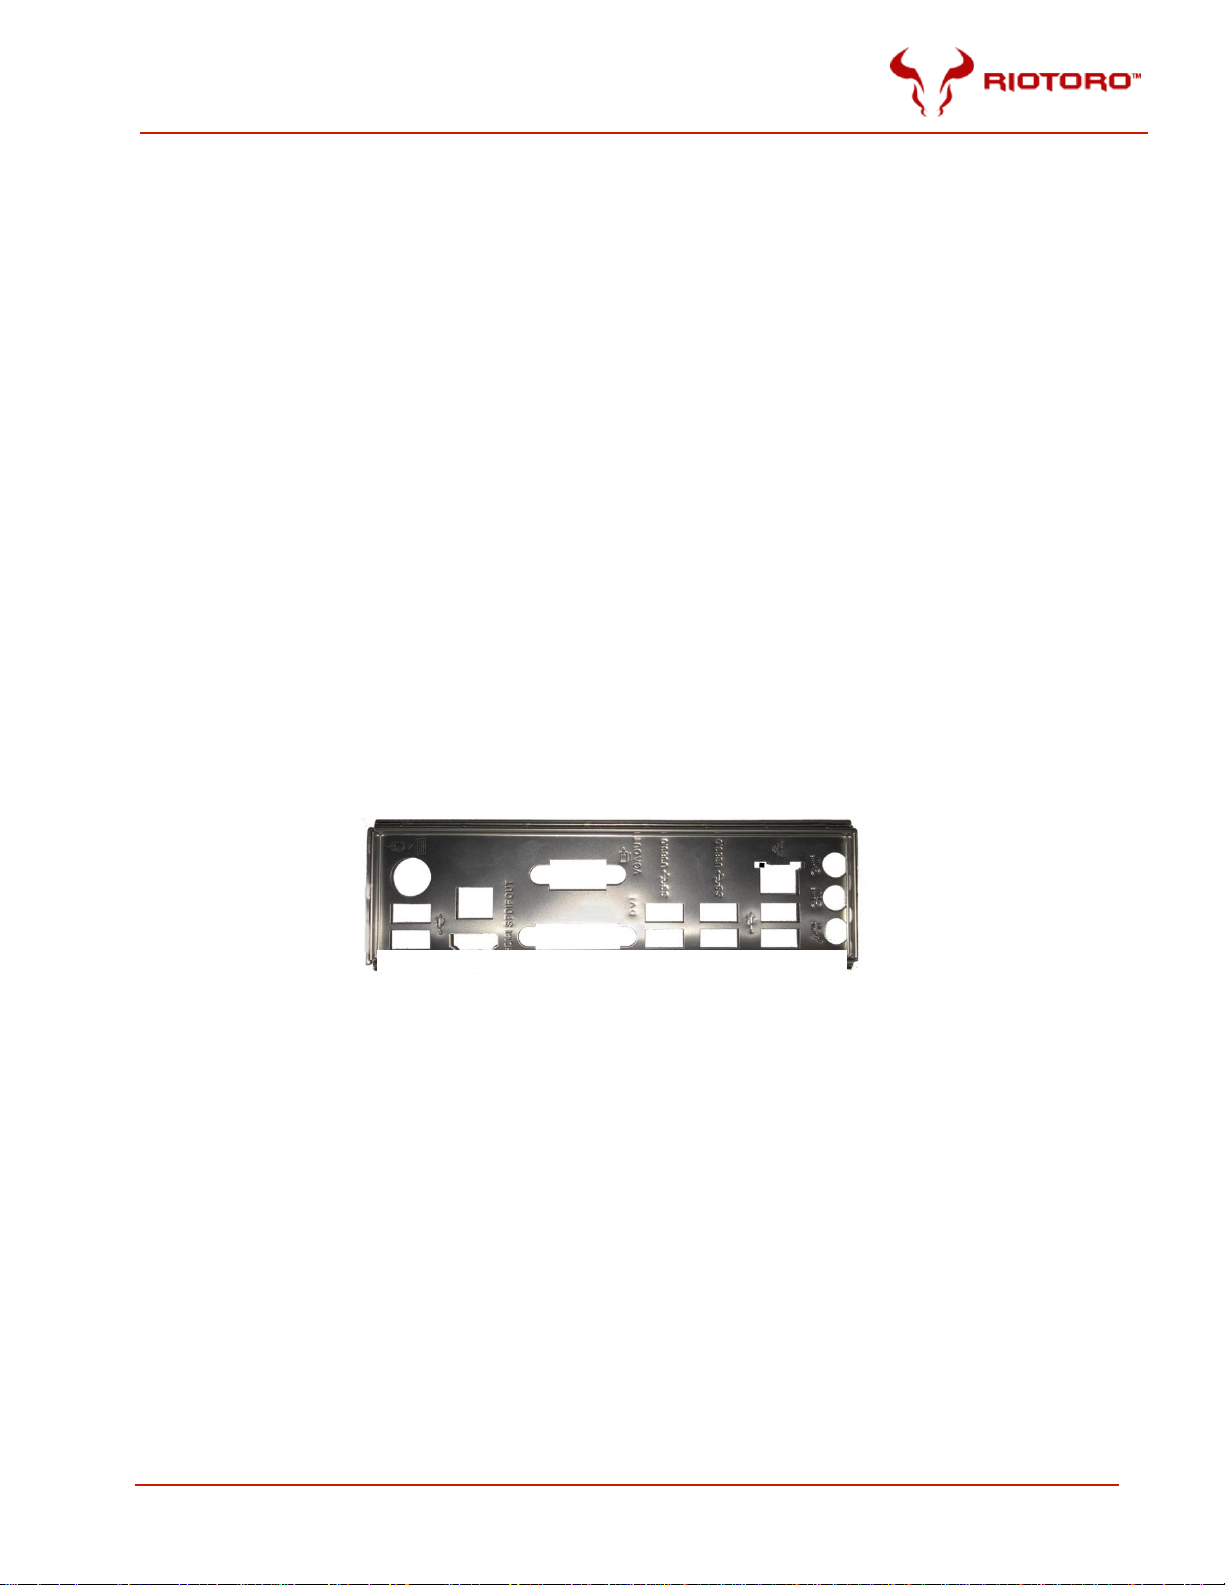
2. Install the I/O panel.
Your motherboard should have come with a standard I/O panel that shields and exposes the
rear motherboard connectors out of the back of the case. From inside, snap the I/O panel into
the cutout in the rear of the case.
3. Attach the motherboard to the case.
The CR280 comes with four mounting standoffs for a mini-ITX motherboards. Slide the
motherboard into the I/O panel and then align the motherboards screw holes with the case
standoff. Attach the motherboard to the standoffs with the provided motherboard
thumbscrews.
Figure 1 Example I/O panel

Install Hard Drives and SSDs
The CR280 has one 3.5” drive bays and two 2.5” drive bays. These bays are located in the compartment
under the motherboard.
To install a 3.5” hard drive
The 3.5” hard drive will be held in place by two pins on the side of the case and by pins a retaining bracket.
1. Remove the thumbscrew and retaining bracket. Take note of the pin locations under the lip of
the case.
2. With the circuit board facing up, align the holes on the side od the drive with the case pins.
Then carefully slide the drive into position.
3. Align the retaining bracket pins with the holes on the other side of the drive. Slide the bracket
back in place and tighten the thumbscrew.
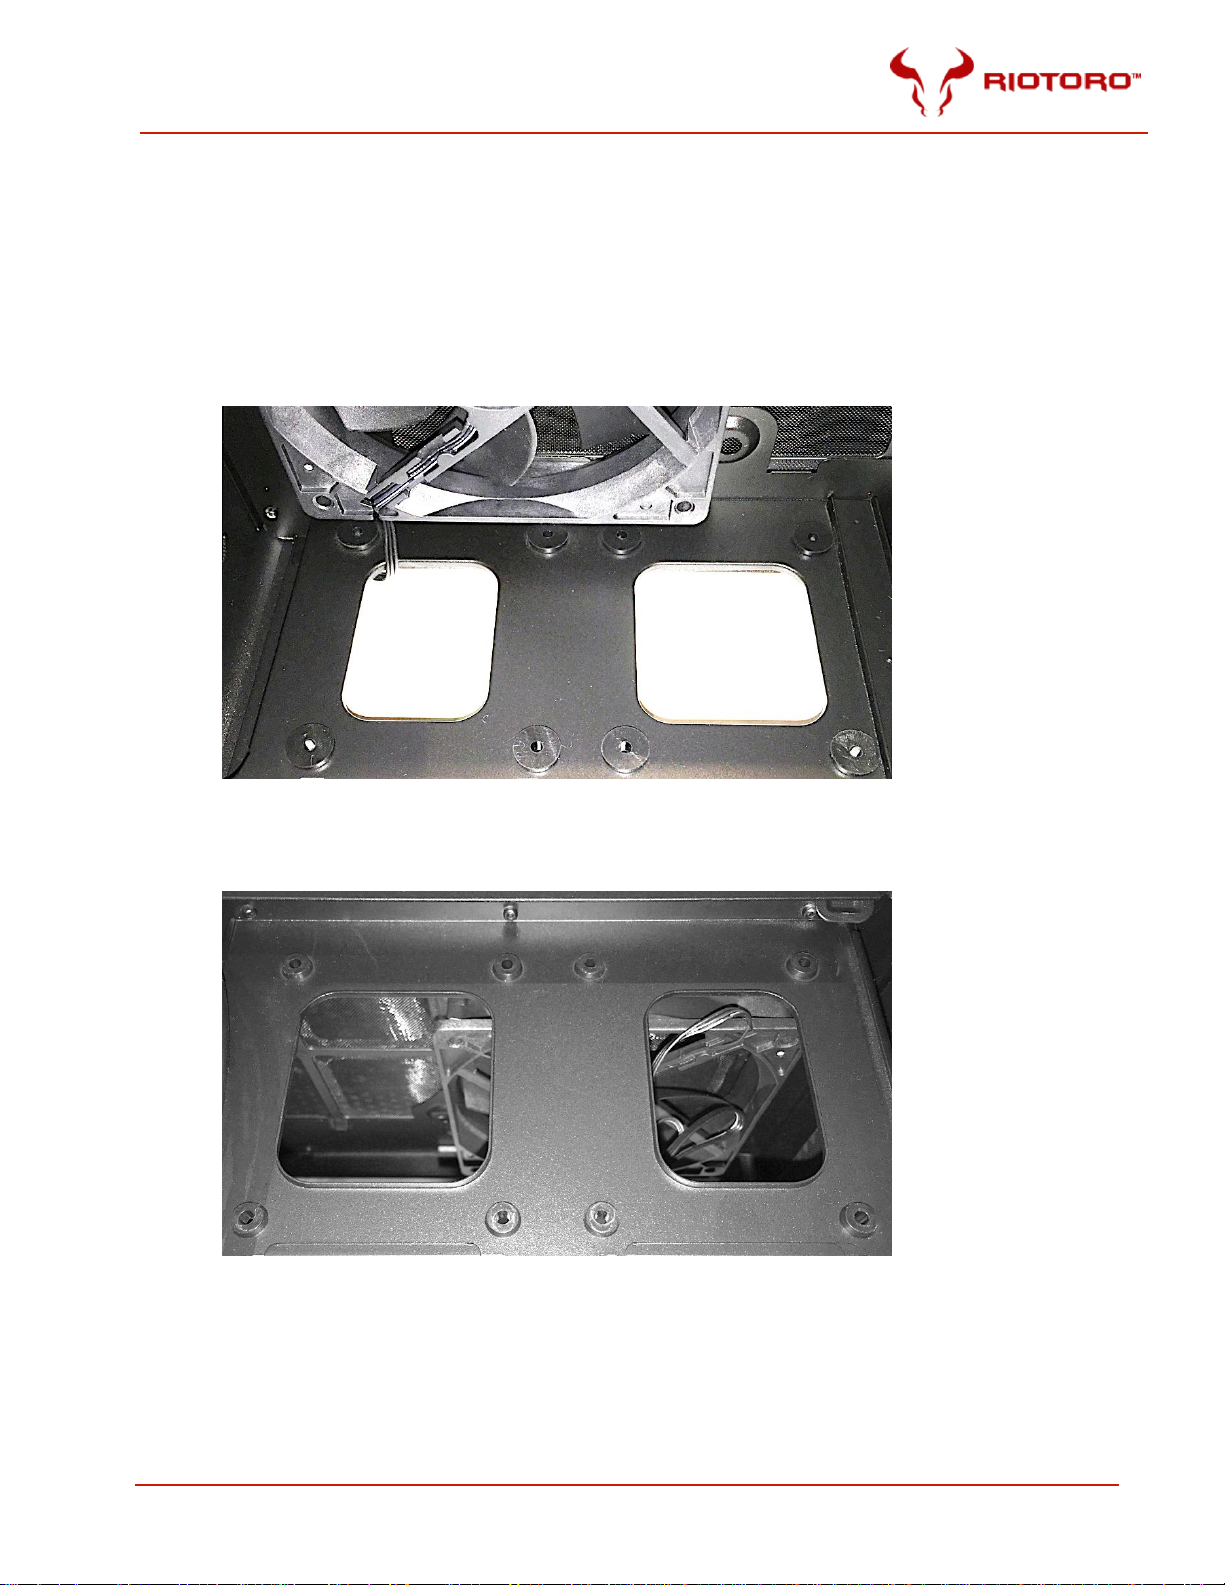
To install drives into the 2.5” mounts
The CR280 case has two mounts for 2.5” drives such as solid state drives (SSD). The mounts are two sets of four
screw standoffs.
To mount a 2.5 drive:
1. In the motherboard compartment of the case, place the 2.5”drive on one set of drive
standoffs. This may require sliding the drive under the case front fan.
2. From other side of the case, screw the drives in place with the provided Philips screws.
Attach Cables
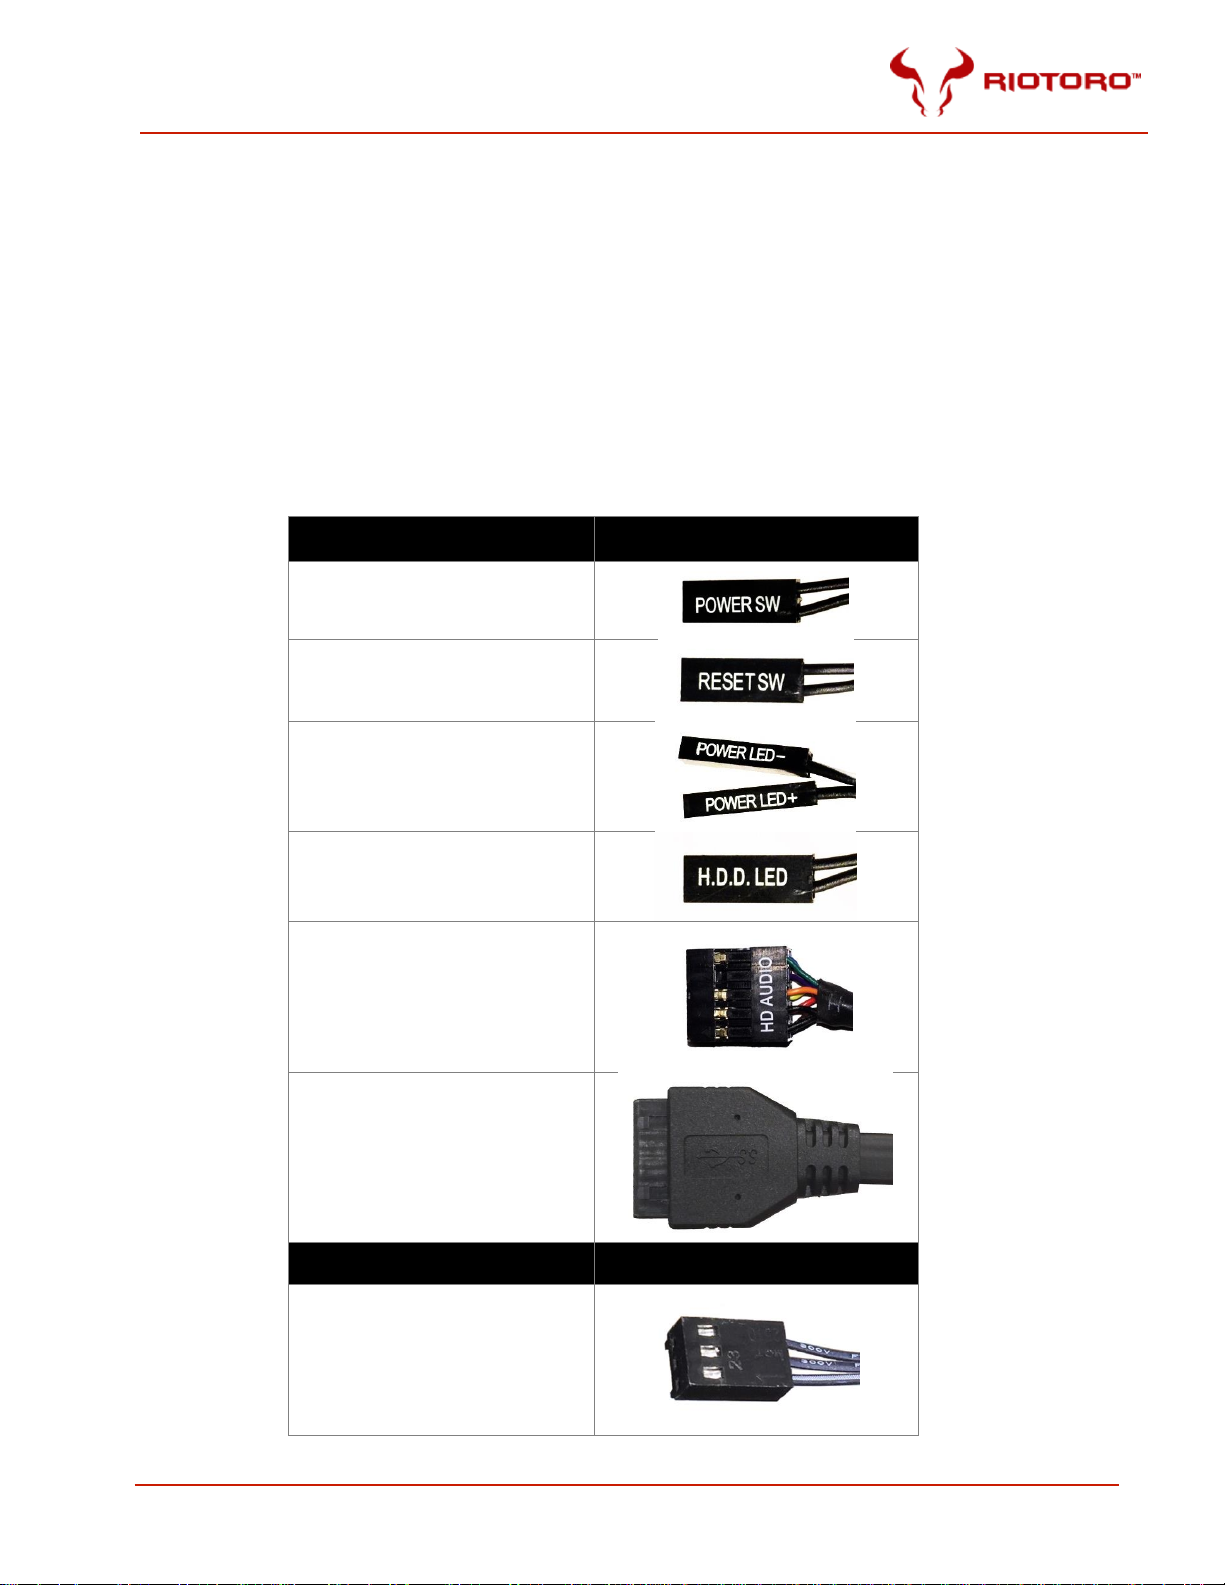
Connect the Front Panel Switches and LEDs
The CR280 front panel switches, LEDs, and USB ports have wire leads that need to be attached to
header pins the motherboard. Refer to your motherboard manual to locate the proper motherboard
header pins and attach the cable connectors listed below.
Note: The LED leads are marked positive (+) or negative (–) and must be connected to the
corresponding pins on the motherboard. The orientation of the switch connectors does not matter.
Front Panel
Cable Connector
Power switch
Reset switch
Power LED
(+) and (-)
Hard Disk Drive LED
(+) and (-)
HD Audio
(mic and headphone)
USB 3.0 ports
(1 cable for 2 ports)
Cooling Fans
Connector
Fans (2)

Attach the case fan cables
The CR280 comes with two 120mm PWM fans—a front intake fan and a rear exhaust fan.
1. Connect the 4-pin connector of each fan to a 4-pin PWM fan header on your motherboard.
Refer to your motherboard manual for more information.
Note: The CR280 includes mounts for two more 120mm fans –one in the lower front and one in the
rear. The fans can be removed to make room for a 240mm liquid cooling radiator. Screws and rubber
grommets are provided to allow you to add optional fans and radiators.
Install the Power Supply
The power supply unit (PSU) drive bay is located on the bottom of the case.
1. Slide the PSU in the case PSU bay with the fan facing the case bottom. Push the power supply
to the rear
2. Align the PSU and case mounting holes and attach the power supply to the case with the
provided PSU thumbscrews.
3. Connect the relevant PSU cables to your motherboard and drives.

Specifications
Motherboard support
Mini-ITX
Drive bays
- 1x 3.5”
- 3x 2.5”
Front panel I/O
- 2x USB 3.0 ports
- 1x Headphone out
- 1x Microphone in
Expansion slots
2
Fans
Fans included
- 1x 120mm front intake
- 1x 120mm rear exhaust
Fan radiator mount points
- 2x 120mm or 1x 240mm front
- 2x 120mm or 1x 240mm front
Fan/radiator mount points
120mm (front)
PSU support
Standard ATX
Max. GPU length
290mm dual-slot
Materials
Steel and plastic
Dimensions
13” (H) x 8” (W) x 12.6” (D)
330mm (H) x 204mm (W) x 320mm
(D)

RIOTORO
Technical Support and Customer Service
US & Canada
1-888- 270-7090
customerservic[email protected]
Sales
© Copyright 2016 RIOTORO. All rights reserved.
All trademarks are the property of their respective owners. Reproduction in whole or part without written permission is prohibited.
Other manuals for CR280 MINI
2
Table of contents
Other Riotoro Computer Accessories manuals


